Is there anything that truly captures the cozy, comforting essence of fall more perfectly than a warm, spiced donut? The crisp air, the colorful leaves, and the unmistakable aroma of cinnamon and apples baking simply define the season. Furthermore, that nostalgic feeling is exactly what we crave, and today, we are bringing that magic straight to your kitchen. Consequently, we are skipping the messy fryer for a simpler, healthier method. Ultimately, these easy Baked Apple Cider Donuts will fill your home with an incredible fragrance and deliver all the flavor you love without any of the fuss.
So, what exactly are Baked Apple Cider Donuts? Essentially, they are a tender, cake-style donut that we prepare entirely in the oven. Instead of frying, we bake the batter in a special pan, which results in a treat that feels indulgent but is considerably lighter. The star ingredient, reduced apple cider, packs a powerful punch of autumnal apple flavor into every single bite. Moreover, we coat these warm delights in a simple cinnamon-sugar mixture that creates a delightful crunch with each mouthful. This recipe matters because it transforms a classic fairground favorite into an achievable, everyday snack that you can feel good about sharing with your family. It perfectly fits our blog’s mission to deliver incredibly delicious, approachable recipes that actually work. For instance, if you adore apple flavors, you must try our ultimate Apple Crisp, which offers another fantastic way to enjoy the season’s best fruit. This recipe for Baked Apple Cider Donuts follows that same ethos of simple, satisfying comfort food. Additionally, it uses common pantry staples and a straightforward process, making it an ideal project for a relaxing weekend morning. The entire experience, from reducing the cider to enjoying the final product, is a rewarding ritual that celebrates the best of fall baking.
Why I Love This Recipe
This recipe for Baked Apple Cider Donuts holds a special place in my heart because it reminds me of annual family trips to the orchard. We would always bring home a gallon of fresh cider, and my grandmother would use some of it to make her version of these donuts. Her kitchen would smell like heaven, and we kids would hover by the oven, waiting impatiently for the first batch. My version honors her tradition but simplifies the process significantly, making it accessible for any home baker. I love that I can now recreate those cherished memories and that warm, spiced flavor for my own children on a random Tuesday, proving that you do not need a special occasion to enjoy a little piece of autumnal joy. For another simple baking project, our Easy Pumpkin Bread is a fantastic companion to these donuts during the fall season.
Health and Nutrition
Why it’s good for your body
These baked apple cider donuts offer a more nutritious twist on a classic treat. First, the baking process itself significantly reduces the fat content compared to traditional frying. Consequently, you enjoy a deliciously moist pastry without the heavy grease. Moreover, apple cider, the star ingredient, provides a natural sweetness and a powerful dose of antioxidants. These compounds actively fight oxidative stress in your body.
Additionally, apples contribute beneficial soluble fiber, which supports healthy digestion and helps maintain stable blood sugar levels. Furthermore, warm spices like cinnamon and nutmeg do more than just add flavor; they also possess anti-inflammatory properties. Enjoying a baked apple cider donut means you are treating yourself to real fruit and spices. Ultimately, this recipe transforms a simple indulgence into a snack that actively contributes to your well-being with every wholesome bite.
How it fits in a healthy lifestyle
These baked apple cider donuts perfectly align with a balanced approach to eating. You can mindfully enjoy them as a satisfying afternoon treat or a fun weekend breakfast without derailing your health goals. Because we bake them instead of fry, they naturally fit into a heart-smart diet. For anyone exploring gluten-free options, you can easily substitute your favorite 1:1 gluten-free flour blend to make this recipe work for you.
Pairing a donut with a source of protein, like a handful of almonds or a glass of milk, can make it an even more sustaining snack. Remember, the key is balance and enjoying the foods you love. If you are looking for more ways to incorporate wholesome ingredients into your baking, explore our guide to healthy baking substitutions. For another fantastic baked treat that uses fruit for natural sweetness, try our popular whole wheat banana bread.
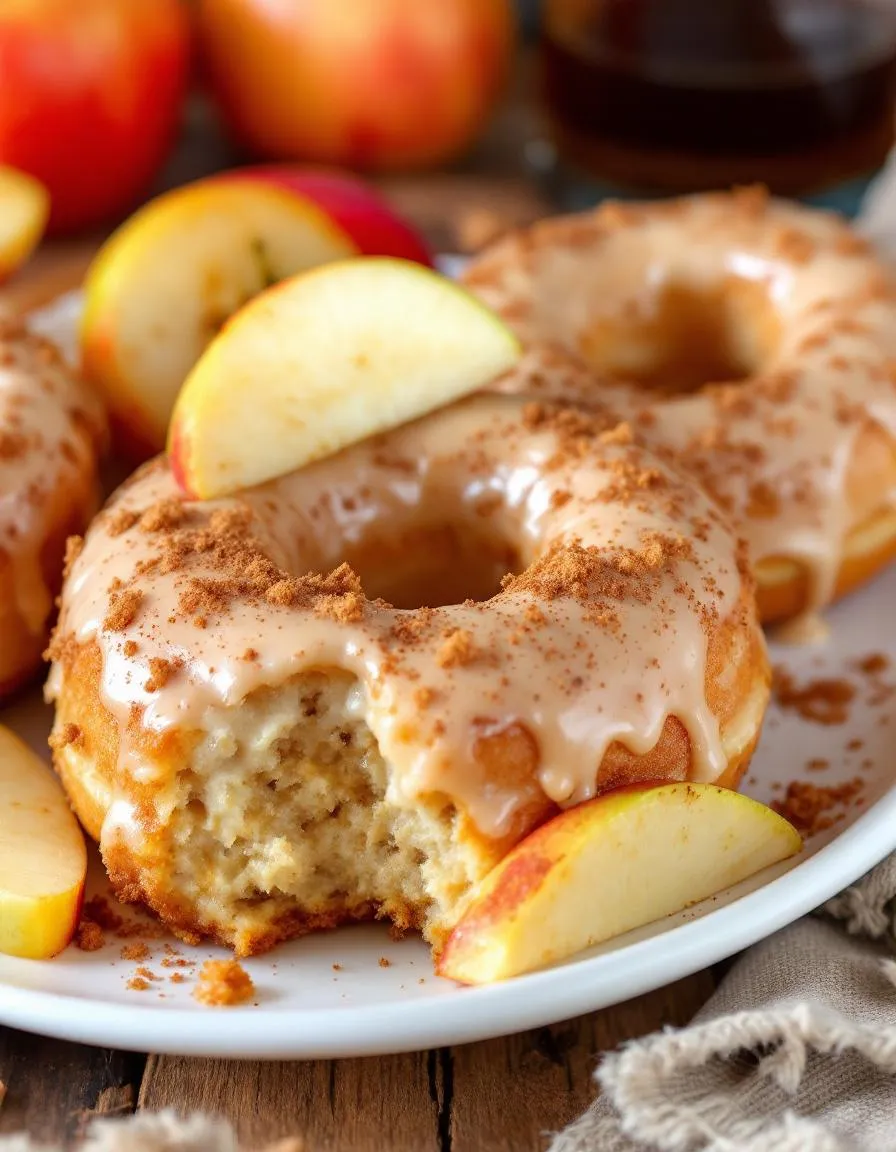
Warm, spiced donuts baked to perfection with reduced apple cider for a cozy fall treat.
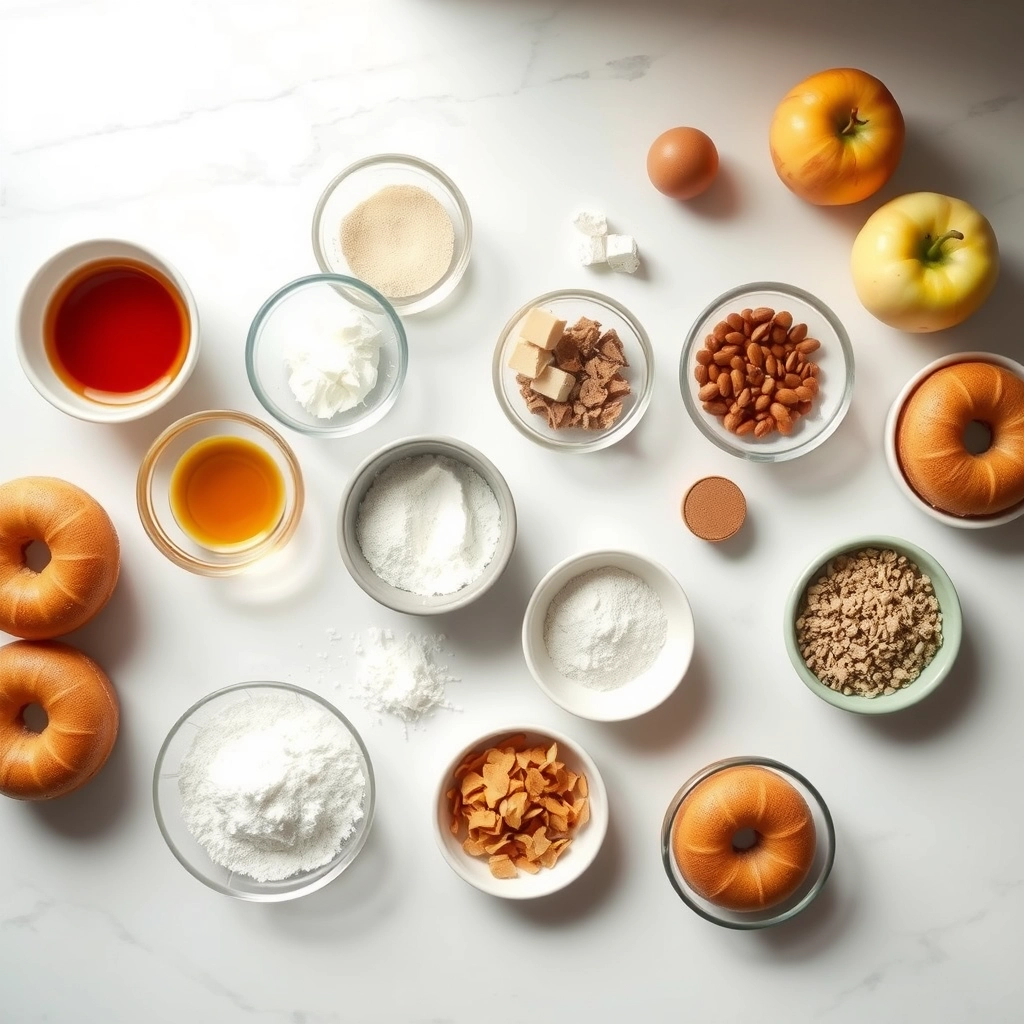
Ingredients
Scale
For the Crust:
2 cups all-purpose flour
1 1/2 teaspoons baking powder
1 1/2 teaspoons cinnamon
1/2 teaspoon nutmeg
1/4 teaspoon salt
1/2 cup apple cider, reduced to 1/4 cup
1/2 cup milk
2 tablespoons unsalted butter, melted
1/2 cup granulated sugar
1/4 cup brown sugar
1 large egg
1 teaspoon vanilla extract
Instructions
1. Prepare the Crust:
Preheat oven to 350°F (175°C). Grease a donut pan.
Whisk together flour, baking powder, cinnamon, nutmeg, and salt in a bowl.
In another bowl, mix reduced apple cider, milk, melted butter, sugars, egg, and vanilla.
Combine wet and dry ingredients, stirring until just mixed. Spoon batter into donut pan.
Bake for 10-12 minutes until a toothpick comes out clean. Cool slightly before glazing.
Notes
You can customize the seasonings to taste.
How to Prepare This Dish
Steps and time-saving tips
First, preheat your oven and generously grease your donut pan. This simple step ensures your Baked Apple Cider Donuts release perfectly every single time. Meanwhile, reduce your apple cider in a small saucepan. Let it simmer until it becomes a slightly syrupy, concentrated version of itself; this intensifies the flavor dramatically. In a large bowl, whisk together the flour, baking powder, spices, and salt. In a separate bowl, vigorously whisk the eggs, both sugars, and melted butter until the mixture looks pale and smooth. Now, gently fold the reduced cider and the wet ingredients into the dry ones. Remember, do not overmix! A few lumps in the batter are perfectly fine and will yield a tender crumb. Carefully spoon the batter into the prepared pan, filling each cavity about two-thirds full. For a truly time-saving tip, use a piping bag or a sturdy zip-top bag with a corner snipped off; this method is far cleaner and much faster than using spoons. Bake the donuts until they spring back lightly when touched. Finally, let them cool slightly before dipping them in that irresistible cinnamon-sugar coating.
Mistakes I’ve made and learned from
I have absolutely overmixed this batter in a rush, and it taught me a tough lesson. The result was a batch of tough, dense Baked Apple Cider Donuts that nobody wanted to eat. Now, I mix by hand and stop the second the flour disappears. Another classic error of mine was skipping the cider reduction step. Using straight cider creates a wet batter that bakes up gummy instead of cakey and light. Reducing it is non-negotiable for authentic flavor and texture, a lesson I learned from perfecting my apple cake recipe. Finally, I used to dunk my piping hot donuts in melted butter and sugar, which created a sad, soggy mess. Letting them cool for just five minutes on a wire rack makes all the difference, allowing for a crisp, sugary shell that sticks beautifully, much like the technique I use for my cinnamon sugar muffins. Learn from my errors for perfect donuts on your first try!
Every autumn, orchards across New England transform into bustling hubs, and the scent of these spiced cakes absolutely defines the season. Farmers often fry their donuts fresh for customers, but many home bakers prefer a simpler, less messy method. Consequently, the baked version we love today was born. My family, for instance, always makes a pilgrimage to our local farm stand. We pick apples, sip cold cider, and then rush home to recreate that iconic flavor in our own oven.
Different regions put their own spin on this classic treat. In Pennsylvania Dutch country, for example, bakers might add a hearty sprinkle of crushed peanuts for extra crunch. Meanwhile, some Midwestern versions often incorporate a tangy buttermilk glaze, balancing the sweetness beautifully. No matter the variation, the goal remains the same: to capture the cozy, spiced essence of fall in every single bite. Ultimately, a batch of warm Baked Apple Cider Donuts feels like a hug on a crisp day.
ays-cooking">How it fits in today’s cooking
This recipe absolutely thrives in modern kitchens because it merges nostalgia with our current desire for simpler, homestyle baking. Furthermore, it has become a non-negotiable part of many family Halloween and Thanksgiving breakfast traditions. Today’s cooks brilliantly adapt the recipe to fit various dietary needs, easily creating gluten-free or vegan Baked Apple Cider Donuts without losing any of that classic charm.
Moreover, these donuts perfectly complement a contemporary brunch spread. They pair wonderfully with a cup of hot coffee or a glass of cold milk, making them a hit with both kids and adults. For another fantastic baked treat that captures a different seasonal flavor, you must try these Pumpkin Chocolate Chip Muffins. Ultimately, this recipe’s enduring appeal lies in its powerful ability to evoke cherished memories while simultaneously fitting seamlessly into our current routines. If you are looking for more inspiration to use your fresh-picked apples, this incredible Apple Cinnamon Bread is an absolute must-make.
Taste and Texture
What makes it delicious
These Baked Apple Cider Donuts deliver a wonderfully warm and cozy experience. First, you smell the fragrant blend of cinnamon and nutmeg, which perfectly complements the sweet, tangy aroma of reduced apple cider. Consequently, each bite feels incredibly soft and tender, almost melting in your mouth with a moist, cake-like crumb. The flavor is a delightful harmony of sweet brown sugar and tart apple, creating a deeply autumnal taste. Ultimately, the subtle spice notes and rich apple essence make these Baked Apple Cider Donuts an irresistible treat.
r">Boosting the flavor
You can easily elevate your donuts with a few creative twists. For example, try rolling the warm donuts in a cinnamon-sugar blend that includes a pinch of cardamom for an exotic kick. Alternatively, a simple drizzle of salted caramel sauce adds a delicious buttery richness that pairs beautifully with the apple. Furthermore, consider serving them alongside a glass of spiced mulled apple cider for the ultimate fall flavor experience. Finally, a dollop of vanilla bean whipped cream turns them into an elegant dessert.
Tips for Success
Best practices for results
First, always properly reduce your apple cider to a syrup for the most intense flavor in your Baked Apple Cider Donuts. Furthermore, make sure you do not overmix the batter; simply stir until the ingredients are just combined for a tender crumb. For best results, use a piping bag or a sturdy plastic bag with the corner snipped off to neatly fill the donut pan. Finally, let the donuts cool in the pan for just five minutes before transferring them to a wire rack to prevent steaming.
>Mistakes to avoid
Avoid overfilling the donut cavities, as the batter will rise and then lose its classic ring shape. Consequently, aim to fill each cavity only two-thirds full for the perfect form. Many bakers also forget to properly grease the pan, which leads to frustrating breakage. Therefore, use a non-stick spray or brush with melted butter to guarantee a clean release every time, just like with our favorite muffin recipe. Moreover, do not skip the step of dusting them with cinnamon sugar while they are still slightly warm so the topping sticks perfectly, a technique we also use for our Cinnamon Sugar Puffs.
Serving and Pairing Suggestions
How to serve this dish
Present your Baked Apple Cider Donuts warm for the ultimate cozy experience. For a beautiful brunch spread, arrange them on a rustic wooden board or a vintage cake stand. Meanwhile, dust them with a final snowfall of cinnamon sugar right before serving. These donuts truly shine during autumn holidays and crisp weekend mornings. Furthermore, a simple garnish of thinly sliced apple or a cinnamon stick beside each plate adds a lovely festive touch.
Always serve these Baked Apple Cider Donuts with plenty of napkins. Ultimately, their delightful aroma will gather everyone in the kitchen, so be ready to share.
h-it">What goes well with it
A hot mug of coffee makes the perfect companion for Baked Apple Cider Donuts. Specifically, the robust bitterness of the brew beautifully cuts through the sweet, spiced notes of the donut. Alternatively, a cold glass of milk offers a classic, comforting pairing that everyone loves.
For a truly decadent treat, consider serving them with a side of vanilla ice cream. Consequently, you create an easy and impressive dessert. Similarly, a dollop of our creamy Homemade Cinnamon Whipped Cream takes them to another level. Finally, for a complete autumn brunch, pair these donuts with a savory option like our Savory Breakfast Muffins to balance the meal perfectly.
math-faq-block">
What is the best way to store baked apple cider donuts?
Store your baked apple cider donuts in an airtight container at room temperature for up to 2 days. For longer storage, freeze them for up to 3 months; just thaw at room temperature and warm slightly before serving to restore that fresh-baked texture.
Can I make baked apple cider donuts without a donut pan?
Yes, you can make baked apple cider donuts without a specialized pan. Simply spoon the batter into a greased muffin tin, filling each cup about halfway, to create delicious “donut muffins” that have all the same warm, spiced flavor.
How do you reduce the apple cider for donuts?
To reduce apple cider, simply simmer 2 to 3 cups of cider in a saucepan over medium heat for 20-30 minutes, until it reduces down to about ½ cup of a thick, syrupy liquid. This concentrated cider is the key to packing intense apple flavor into every bite of your baked apple cider donuts.
ank-math-faq-item">
Why are my baked donuts dry?
Dry baked donuts are often caused by overmixing the batter, which develops too much gluten, or by overbaking. To ensure moist baked apple cider donuts, mix the batter just until combined and check for doneness a minute or two before the recipe’s suggested bake time.
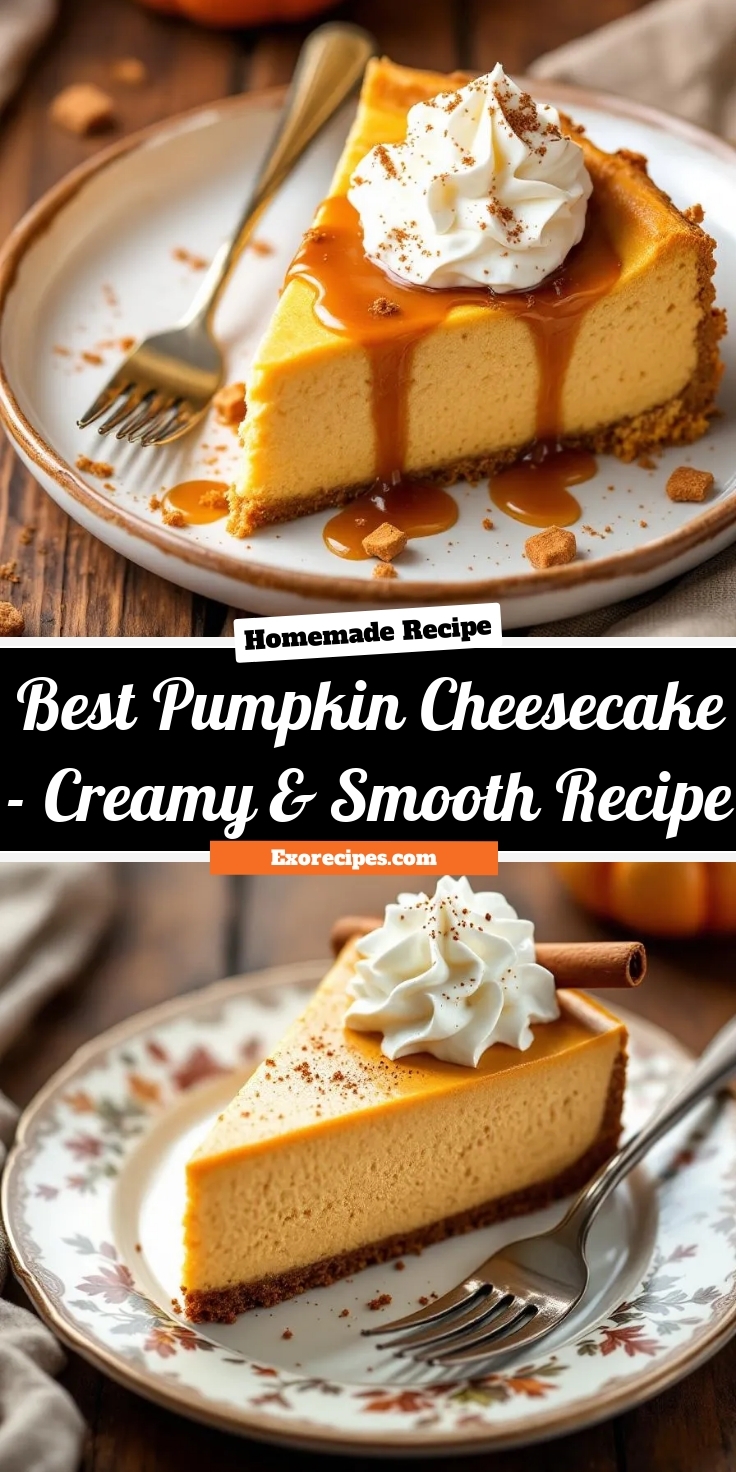
Best Pumpkin Cheesecake – Creamy & Smooth Recipe
Introduction
Is there anything more comforting than the warm, spiced aroma of pumpkin and cinnamon filling your kitchen? Honestly, this scent alone signals the arrival of cozy sweaters, vibrant leaves, and cherished gatherings. Furthermore, it promises one of the most decadent desserts of the season: a perfectly creamy, spiced Pumpkin Cheesecake. This iconic treat beautifully marries the rich, tangy flavor of classic cheesecake with the soul-warming essence of autumn, creating a show-stopping finale for any holiday meal or a simply wonderful weekend indulgence.
So what exactly defines a great Pumpkin Cheesecake? Essentially, it is a velvety smooth cheesecake batter that weaves together rich cream cheese, warm autumn spices like cinnamon, nutmeg, and ginger, and of course, the star ingredient: pure pumpkin puree. This combination bakes into an incredibly lush and firm yet creamy texture that simply melts in your mouth. Importantly, this dessert holds a special place on our holiday tables, often serving as a beloved alternative to or alongside the traditional pumpkin pie. Its importance goes beyond mere taste; it becomes the centerpiece of memory-making, from Thanksgiving feasts to casual Friendsgiving potlucks. Consequently, mastering this recipe means you bring a piece of heartfelt, homemade joy to every occasion. Moreover, this recipe perfectly fits the tone of our blog, which celebrates from-scratch cooking that feels both approachable and elevated. For instance, if you adore classic desserts, you might also love our guide to creating the ultimate Classic New York Cheesecake. Ultimately, we believe that baking should be a joyful and rewarding experience, and this Pumpkin Cheesecake delivers exactly that with every single blissful bite. Additionally, the process of creating this dessert is surprisingly straightforward, especially when you begin with a no-fuss Graham Cracker Crust.
Why I Love This Recipe
This particular Pumpkin Cheesecake recipe holds a very special place in my heart because it is the one my grandmother always made. I vividly remember standing on a stool in her kitchen, carefully sprinkling the spice blend into the mixing bowl while she told me stories. Now, every time I bake it, the familiar scent transports me right back to those warm, happy moments. Ultimately, it represents more than just a dessert; it is a tangible connection to family, tradition, and the simple, profound joy of sharing something made with love.
Health and Nutrition
Why it’s good for your body
Pumpkin Cheesecake offers some surprisingly wholesome benefits. For instance, pumpkin puree provides a powerful dose of vitamin A, which actively supports healthy vision and a strong immune system. Moreover, this delicious dessert contains valuable antioxidants like beta-carotene that help protect your cells from damage. Consequently, enjoying a slice means you are giving your body essential nutrients.
Additionally, spices like cinnamon and nutmeg do more than just add warmth and flavor. In fact, they possess natural anti-inflammatory properties that can contribute to overall wellness. Therefore, each bite of Pumpkin Cheesecake delivers more than just incredible taste. Furthermore, the eggs and dairy in the recipe offer a good source of protein and calcium for maintaining muscle and bone health. Ultimately, this makes your treat a more nourishing choice compared to many other desserts.
How it fits in a healthy lifestyle
You can absolutely enjoy Pumpkin Cheesecake as part of a balanced diet. Think of it as a celebratory food rather than an everyday indulgence. Savoring a reasonable portion allows you to satisfy your sweet tooth without derailing your nutritional goals. For those with specific dietary needs, you can easily adapt the recipe to be gluten-free by using a nut-based crust or to be lower in sugar with natural sweeteners.
Pairing your dessert with a healthy lifestyle is all about balance. If you are looking for more wholesome dessert ideas that fit into your wellness plan, explore our guide to healthy dessert alternatives. Remember, the key is mindful eating. Planning your meals and understanding portions makes room for treats. For more tips on incorporating your favorite foods into a balanced routine, check out our advice on smart meal planning.
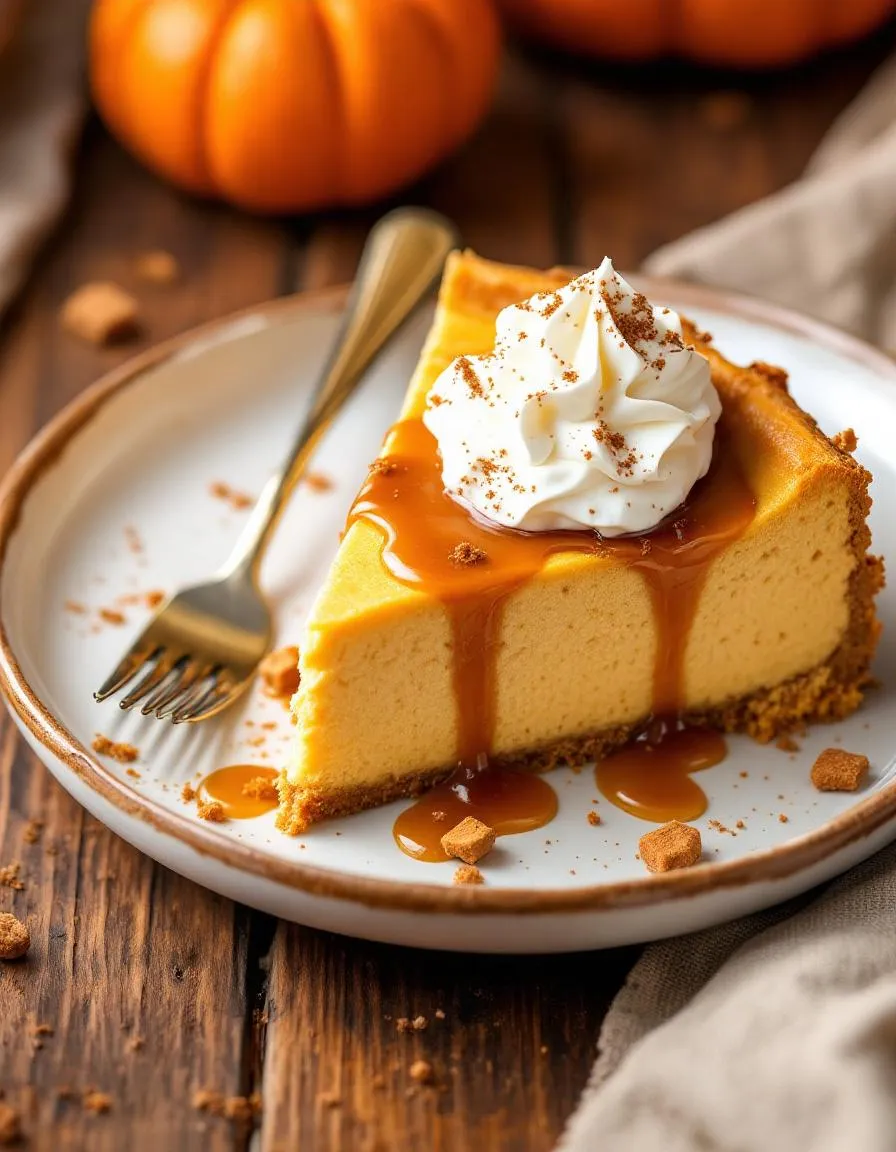
A creamy, spiced pumpkin cheesecake with a graham cracker crust, perfect for autumn gatherings.
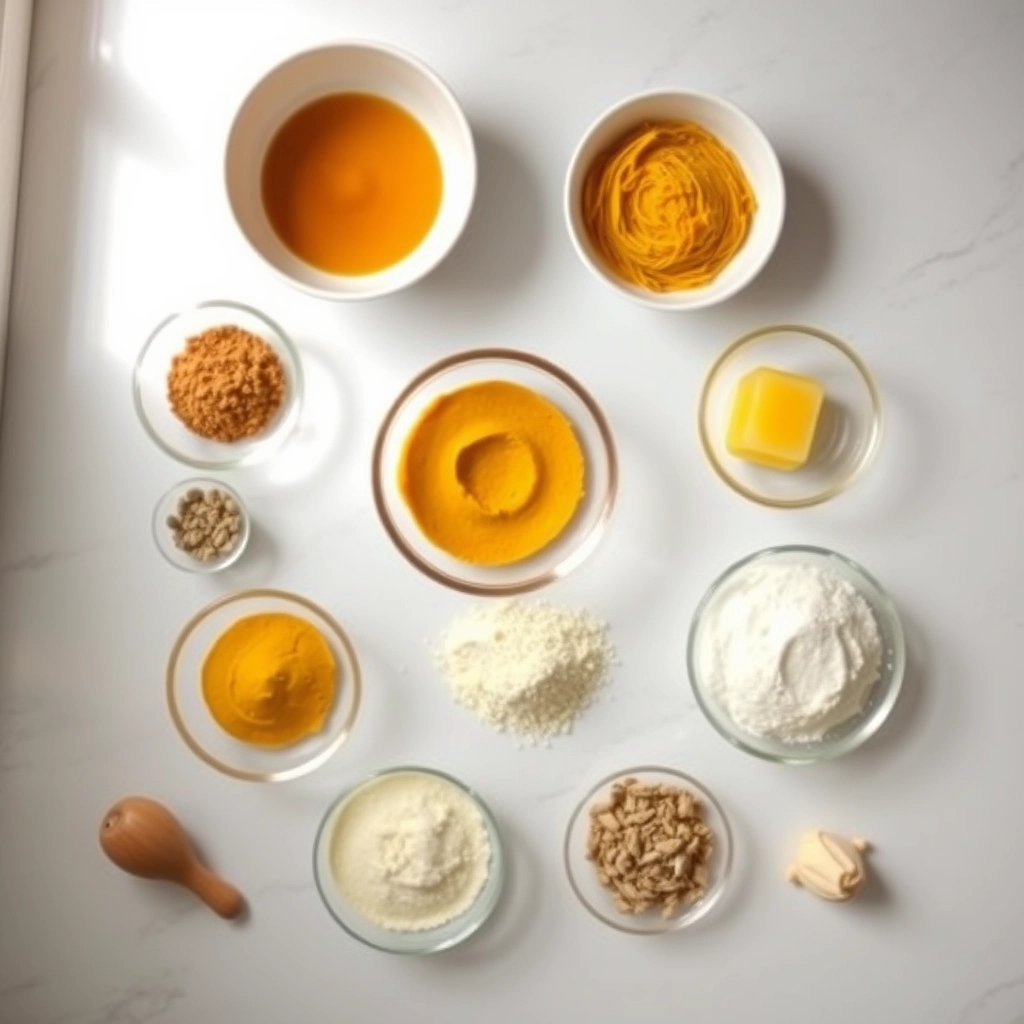
Ingredients
Scale
For the Crust:
1 1/2 cups graham cracker crumbs
1/4 cup granulated sugar
1/2 cup unsalted butter, melted
24 oz cream cheese, softened
3/4 cup granulated sugar
1/4 cup brown sugar
1 cup canned pumpkin puree
3 large eggs
1 tsp vanilla extract
1 tsp ground cinnamon
1/2 tsp ground ginger
1/4 tsp ground nutmeg
1/4 tsp ground cloves
Instructions
1. Prepare the Crust:
Preheat oven to 325°F (165°C). Combine graham cracker crumbs, 1/4 cup sugar, and melted butter. Press into a 9-inch springform pan.
In a large bowl, beat cream cheese, granulated sugar, and brown sugar until smooth. Mix in pumpkin puree.
Add eggs one at a time, then mix in vanilla, cinnamon, ginger, nutmeg, and cloves until well combined.
Pour filling over crust. Bake for 55-60 minutes until center is set. Cool completely, then refrigerate for at least 4 hours before serving.
Notes
You can customize the seasonings to taste.
How to Prepare This Dish
Steps and time-saving tips
First, gather all your ingredients to make the process smooth and efficient. For the crust, simply combine graham cracker crumbs, melted butter, and a pinch of sugar in a bowl. Firmly press this mixture into the bottom of your springform pan, then pop it in the freezer for ten minutes to set. Meanwhile, beat the cream cheese until it becomes perfectly smooth and creamy. Gradually add the sugar, and then incorporate the eggs one at a time. Next, whisk in the pumpkin puree, spices, and a splash of vanilla until everything is beautifully combined. However, avoid overmixing the batter once you add the eggs to prevent too much air from getting in. Carefully pour the filling over your chilled crust and gently tap the pan on the counter to release any air bubbles. Finally, bake your Pumpkin Cheesecake in a water bath for even, crack-free cooking. Let it cool completely on a wire rack before you chill it for several hours, preferably overnight. This patience truly rewards you with the ideal texture and flavor.
Mistakes I’ve made and learned from
I learned the importance of room temperature ingredients the hard way. One time, I used cold cream cheese straight from the fridge, and my Pumpkin Cheesecake filling turned out lumpy no matter how long I mixed it. Now, I always set everything out at least an hour before I start. Another common error I made was overbaking, which resulted in a dry, cracked top instead of that signature creamy custard texture. I finally invested in an oven thermometer and learned to trust the jiggle test—the center should have a slight wobble when you gently shake the pan. For more detailed guidance on achieving that perfect bake, my post on common baking mistakes covers this in depth. Also, rushing the cooling process led to a soggy crust, so now I practice patience. If you’re looking for the perfect pairing to complete your dessert spread, my fall dessert recipes offer some fantastic inspiration.
Pumpkin Cheesecake tells a beautiful story of cultural fusion. Essentially, it marries the classic New York-style cheesecake with the quintessential American harvest ingredient: pumpkin. Immigrants brought their cherished cheesecake traditions from Europe in the late 19th and early 20th centuries. Meanwhile, pumpkin pie had already cemented its status as a Thanksgiving staple. Eventually, a clever baker decided to combine the two, creating a richer, creamier alternative to the traditional pie.
Different regions put their own spin on this dessert. For example, in the South, you might find a version with a pecan shortbread crust and a generous dash of bourbon. Conversely, some Midwestern families swear by adding a layer of sweetened sour cream on top. My own grandmother always stirred in a handful of toasted pecans for extra crunch. Globally, the concept adapts beautifully. In Australia, they might use a native wattleseed for spice, while bakers in Japan often create stunningly elegant individual servings.
Ultimately, every famil
y seems to have their own secret for the perfect Pumpkin Cheesecake.
How it fits in today’s cooking
Today, this dessert absolutely thrives as a modern holiday classic. It bridges generations, offering a delicious twist on tradition that feels both familiar and exciting. Furthermore, contemporary home cooks continuously find new ways to enjoy it. For instance, many now create stunning mini cheesecakes for easier serving at large gatherings.
Its relevance extends beyond Thanksgiving, too. Actually, it has become a beloved symbol of autumn comfort cooking. People eagerly await pumpkin season to bake this treat. Modern adaptations also cater to various dietary needs, using alternatives like gluten-free graham crackers or lactose-free cream cheese. Moreover, its make-ahead nature perfectly suits our busy lifestyles. You can prepare a show-stopping dessert days before your event. For those seeking the ultimate experience, mastering a water bath cheesecake method ensures that famously smooth, crack-free surface. This Pumpkin Cheesecake securely holds its place at our tables, blending cherished memory-making with contemporary convenience.
>Taste and Texture
What makes it delicious
This Pumpkin Cheesecake delivers a velvety smooth and luxuriously creamy texture that melts on your tongue. Each bite releases a warm, fragrant aroma of cinnamon, nutmeg, and ginger, which perfectly complements the rich, tangy cream cheese base. Furthermore, the earthy sweetness of real pumpkin puree creates a deeply comforting flavor. Ultimately, the classic graham cracker crust provides a sweet, crisp contrast to the lush filling, making every forkful a perfect balance.
Boosting the flavor
For an instant upgrade, consider adding a generous dollop of homemade whipped cream on top. Alternatively, a drizzle of salted caramel sauce introduces a wonderful sweet-and-salty complexity that enhances the warm spices. You can also amplify the cozy aroma by adding a pinch of freshly ground cardamom to your cheesecake batter. For more inspiration on complementary toppings, explore our guide to the perfect whipped cream. Moreover, serving a slice alongside a warm drink creates a delightful pairing; discover some ideal options in our collection of coffee recipes.
Tips for Success
Best practices for results
First, always bring your cream cheese to room temperature for a completely smooth and lump-free filling. Furthermore, use canned pure pumpkin puree instead of pumpkin pie filling for the best flavor. Be sure to mix your ingredients on low speed to prevent too much air from incorporating into the batter. Consequently, you will avoid cracks in your beautiful Pumpkin Cheesecake. Finally, allow the cheesecake to cool gradually in the turned-off oven to prevent it from falling.
Mistakes to avoid
Avoid overbaking, as this is the primary cause of a dry and cracked texture. Instead, look for the edges to be set while the center still has a slight jiggle. Moreover, do not skip the water bath, as it provides essential gentle and even heat. For more guidance, our detailed guide on how to prevent cracks in cheesecake covers this crucial step. Additionally, never open the oven door during the first half of baking, since a sudden temperature drop can make the cake fall. If you are unsure about your oven’s accuracy, you can always check out our tips on how to tell when cheesecake is done without any guesswork.
Serving and Pairing Suggestions
How to serve this dish
For a stunning presentation, serve your Pumpkin Cheesecake chilled. Furthermore, garnish each slice with a generous swirl of fresh whipped cream. A sprinkle of cinnamon or a drizzle of warm caramel sauce also adds a beautiful and delicious touch. This Pumpkin Cheesecake truly shines as the centerpiece of any holiday dessert table. Alternatively, you can make individual servings in small jars for a charming and convenient option at a brunch gathering.
h-it">What goes well with it
A hot cup of coffee perfectly cuts through the rich, creamy texture of this Pumpkin Cheesecake. For a decadent dessert pairing, consider serving it alongside a scoop of our Homemade Vanilla Ice Cream. The classic vanilla flavor beautifully highlights the warm pumpkin spices. Additionally, a small glass of dessert wine, like a late-harvest Riesling, offers a lovely sweet complement. If you enjoy baking seasonal treats, this Pumpkin Cheesecake would also pair wonderfully with our popular Apple Crisp for a fantastic fall dessert spread.
Why did my pumpkin cheesecake crack?
Cracking usually happens from overmixing the batter, which incorporates too much air, or from a drastic temperature change causing the custard to contract quickly. To prevent a cracked pumpkin cheesecake, avoid overbeating after adding the eggs and let it cool gradually in the oven with the door slightly ajar.
ank-math-faq-item">
How do you know when pumpkin cheesecake is done?
The best test is the jiggle test; the edges should look set but the center (about a 3-inch circle) should have a slight, gentle jiggle when you lightly shake the pan. The internal temperature should also read around 150°F (65°C) on an instant-read thermometer for a perfectly baked pumpkin cheesecake.
Does pumpkin cheesecake need to be refrigerated?
Yes, absolutely. Due to its dairy and egg content, pumpkin cheesecake must be refrigerated. Always chill it for at least 4 hours, though overnight is best, to allow it to set properly and develop its full flavor. Keep it covered in the refrigerator until you are ready to serve.
Can you freeze pumpkin cheesecake?
Yes, you can freeze pumpkin cheesecake for up to 2-3 months. For best results, freeze the whole cheesecake or individual slices uncovered until solid, then wrap them tightly in plastic wrap and aluminum foil to prevent freezer burn. Thaw it overnight in the refrigerator before serving.
div>
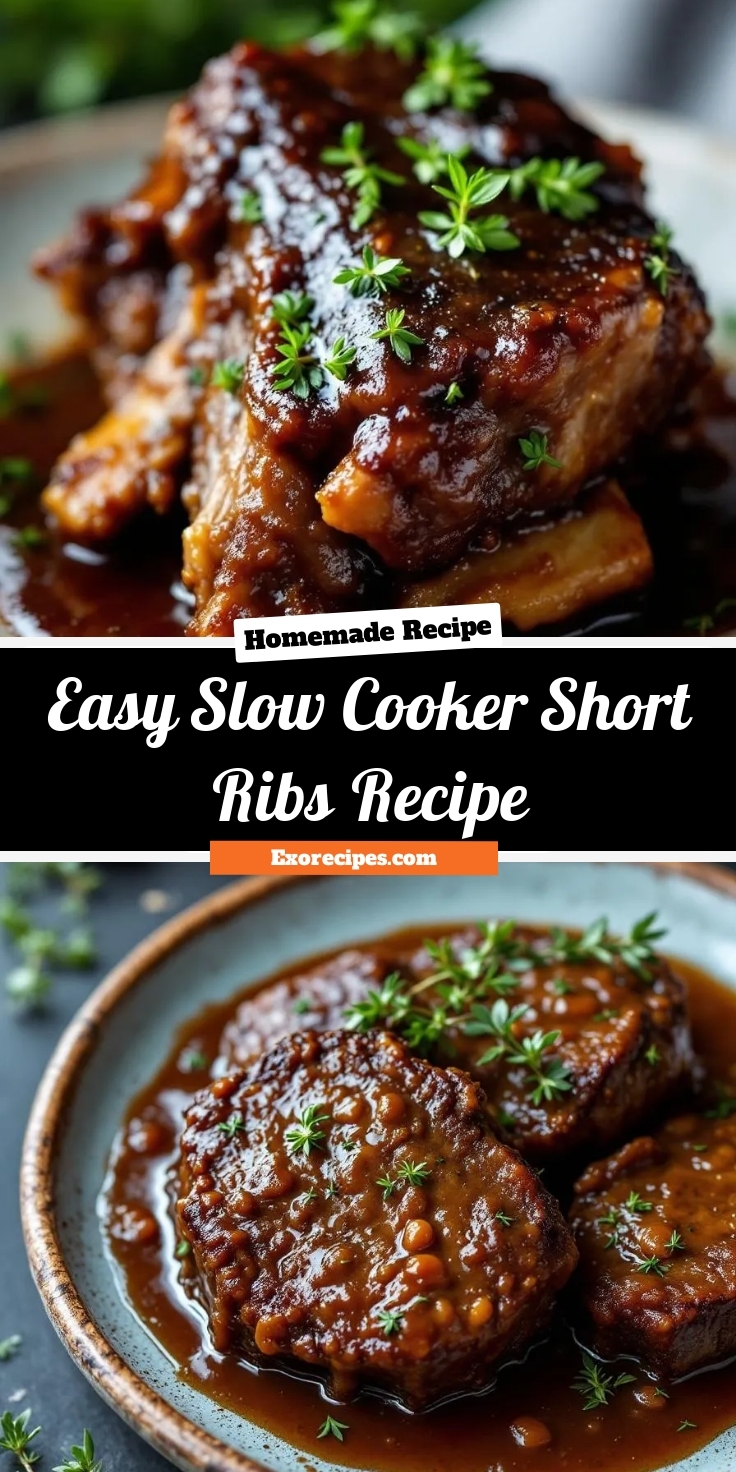
Easy Slow Cooker Short Ribs Recipe
Introduction
There is something incredibly comforting about walking into a home filled with the rich, savory aroma of a meal that has been simmering all day. It promises warmth, comfort, and a dinner that will bring everyone to the table without any fuss. If you crave that feeling but need a solution that fits into your busy schedule, then you absolutely need to try these incredible SLOW COOKER SHORT RIBS. This recipe delivers restaurant-quality flavor with minimal effort, transforming simple ingredients into a truly spectacular dish.
So what exactly are SLOW COOKER SHORT RIBS? Fundamentally, this dish features beef short ribs, which are a fantastically flavorful cut from the rib section of the cow. We then braise them low and slow in your crockpot with a deeply savory liquid until the meat becomes impossibly tender and literally falls off the bone. This cooking method matters because it effortlessly breaks down the tough connective tissues, resulting in melt-in-your-mouth beef without requiring any advanced culinary skills. Furthermore, this recipe perfectly fits our blog’s tone of delivering approachable, family-friendly meals that actually work. For instance, if you love easy, set-it-and-forget-it dinners, you might also enjoy our popular Slow Cooker Pork Chops. Ultimately, the magic of SLOW COOKER SHORT RIBS lies in its simplicity and profound depth of flavor, making it an ideal centerpiece for both weeknight dinners and special occasions. Moreover, the hands-off nature of the slow cooker means you can achieve a gourmet result while focusing on other things, like whipping up a side of our Creamy Garlic Mashed Potatoes to serve underneath those glorious ribs and rich gravy.
Why I Love This Recipe
This recipe for SLOW COOKER SHORT RIBS holds a special place in my heart because it truly saved dinnertime during a particularly chaotic period. I remember preparing it on a hectic Monday morning, and the entire day felt less stressful knowing a fantastic meal was waiting for us. Finally, when we sat down to eat, the rich, hearty flavors and the way the meat just shredded with a fork created a moment of pure comfort and connection for my family. That experience solidified it as my go-to recipe for delivering both incredible taste and priceless peace of mind.
Health and Nutrition
Why it’s good for your body
Slow cooker short ribs deliver a powerful nutritional punch. First and foremost, they provide an excellent source of high-quality protein which is absolutely essential for building and repairing muscle tissue. Furthermore, this particular cut of beef is rich in vital minerals like iron and zinc; consequently, these nutrients support a healthy immune system and improve your energy levels by helping transport oxygen throughout your body.
Additionally, the slow cooking process itself unlocks incredible benefits. As the ribs simmer for hours, the collagen and connective tissues break down completely; as a result, they release gelatin into the broth. This process not only creates that famously fall-off-the-bone texture but also provides compounds that support joint health and gut integrity. Moreover, you can easily pack your pot with vegetables like carrots and onions, which then infuse the dish with extra vitamins and fiber.
Ultimately, a well-prepared batch of slow cooker short ribs offers a deeply satisfying and nutrient-dense meal. Therefore, it effectively fuels your body with long-lasting energy and supports overall wellness from the inside out.
How it fits in a healthy lifestyle
This dish fits beautifully into a balanced and mindful eating plan. For anyone focusing on a high-protein diet or looking to manage their weight, slow cooker short ribs provide immense satisfaction that helps curb cravings and keeps you feeling full for hours. You can easily tailor the recipe to suit specific needs, such as using a gluten-free tamari instead of soy sauce or adjusting the salt content for a more heart-healthy approach.
Pairing your short ribs with a side of steamed greens or a light, refreshing salad creates a perfectly rounded plate. This practice of balancing richer proteins with vegetables is a cornerstone of sustainable healthy eating. For more inspiration on building wholesome meals, explore our guide on easy weekly meal prep ideas. Remember, enjoying hearty, comforting food like this is all about portion control and the company it keeps on your plate. If you are exploring different protein options to keep your diet varied, you might also enjoy our tips for cooking the perfect lean chicken breast.
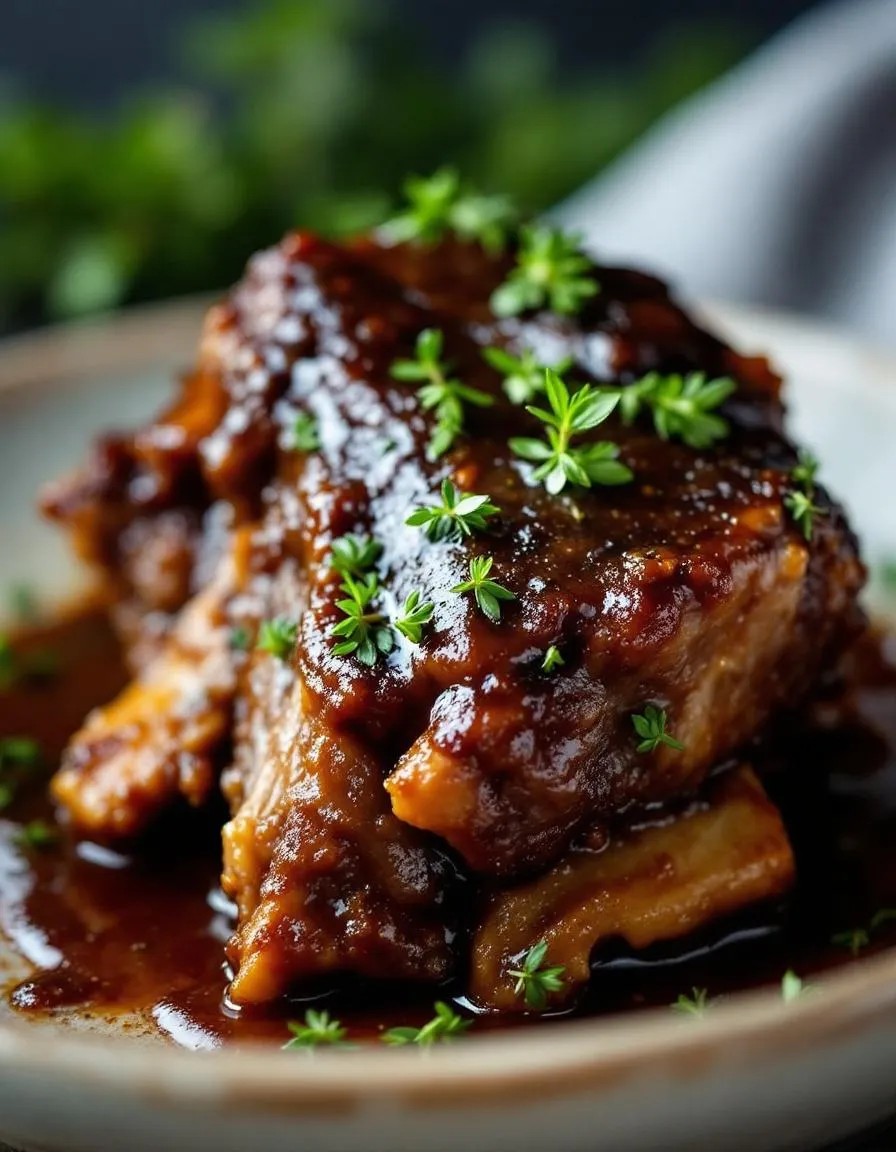
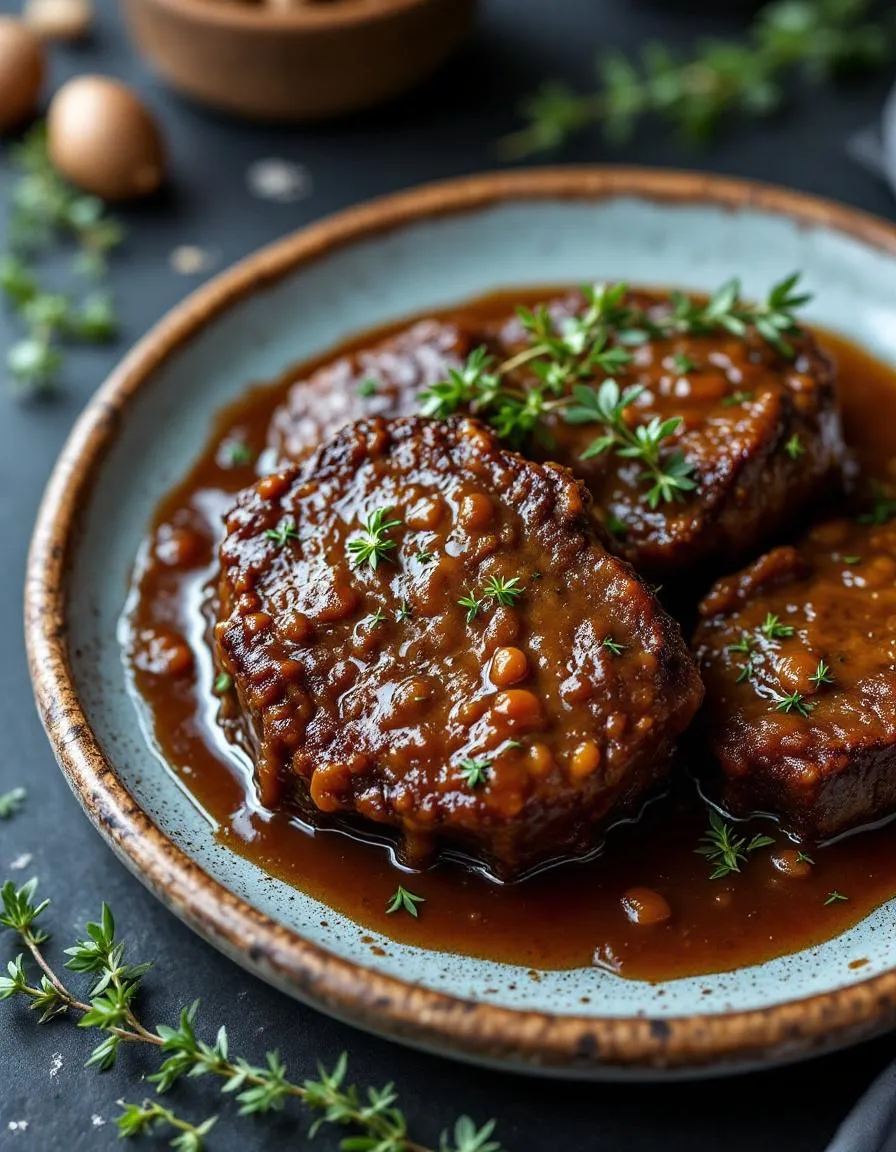
Tender, fall-off-the-bone beef short ribs cooked low and slow in a rich, savory sauce.
Ingredients
Scale
For the Crust:
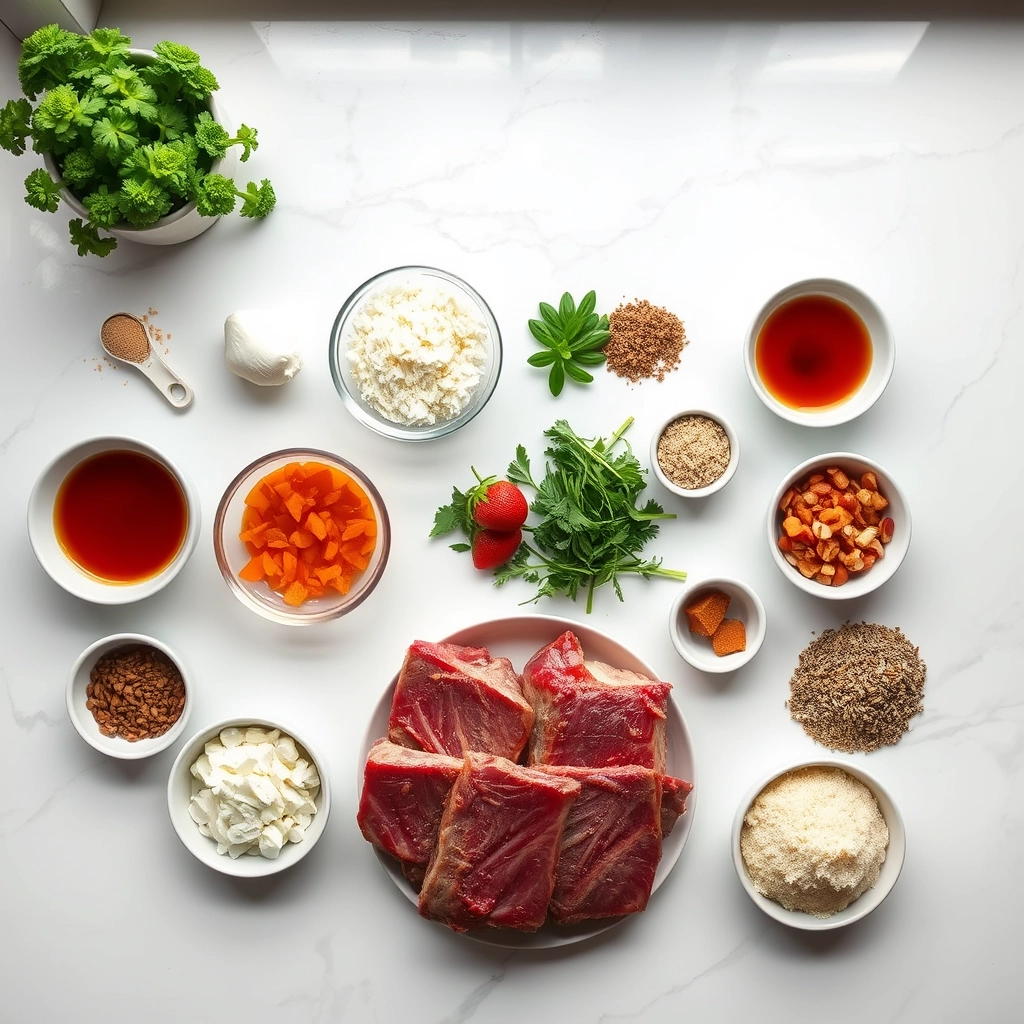
3 lbs beef short ribs
1 tbsp olive oil
1 large onion, chopped
3 cloves garlic, minced
1 cup beef broth
1/2 cup red wine
2 tbsp tomato paste
1 tbsp Worcestershire sauce
1 tsp dried thyme
1 tsp smoked paprika
Salt and black pepper to taste
2 tbsp cornstarch (optional, for thickening)
Instructions
1. Prepare the Crust:
Season short ribs generously with salt and pepper.
Heat olive oil in a skillet over medium-high heat. Sear short ribs on all sides until browned, about 3-4 minutes per side. Transfer to slow cooker.
In the same skillet, sauté onion and garlic until softened, about 3 minutes. Add to slow cooker.
Whisk together beef broth, red wine, tomato paste, Worcestershire sauce, thyme, and smoked paprika. Pour over short ribs.
Cover and cook on low for 8 hours or high for 4-5 hours, until meat is tender.
Optional: For thicker sauce, mix cornstarch with 2 tbsp cold water, stir into slow cooker, and cook on high for 15 minutes.
Notes
You can customize the seasonings to taste.
s-dish">How to Prepare This Dish
Steps and time-saving tips
First, generously season your SLOW COOKER SHORT RIBS with salt and pepper on all sides. Meanwhile, heat a tablespoon of oil in a large skillet over medium-high heat. Then, carefully sear the ribs until they develop a beautiful, deep brown crust; this crucial step builds an incredible flavor foundation. Next, transfer the ribs to your slow cooker. Now, use the same skillet to sauté your chopped onions, carrots, and garlic until they just begin to soften. After that, pour in your red wine to deglaze the pan, scraping up all those delicious browned bits. Furthermore, let the wine reduce by half before adding your tomato paste and broth, then give it a good whisk. Simply pour this rich liquid over the short ribs in the cooker, ensuring they are mostly submerged. Finally, set your slow cooker to low for 8 hours and walk away. For a time-saving tip, you can complete the searing and sautéing steps the night before; just store everything in the cooker insert in the fridge. When you’re ready, simply place the cold insert into the base and start cooking. The long, slow braise will transform these tough cuts into the most tender, fall-off-the-bone SLOW COOKER SHORT RIBS you’ve ever tasted.
Mistakes I’ve made and learned from
I learned the hard way that skipping the sear is the biggest mistake you can make with SLOW COOKER SHORT RIBS. I once thought I could save time by tossing everything in raw, but the result was a pale, greasy, and frankly bland dish that lacked the deep, savory notes we all crave. Now, I never skip building that flavorful fond in the pan. Another lesson was about fat; I didn’t trim enough excess fat from the ribs once, leading to an overly greasy sauce. Now, I take a minute to trim them well and I always use my favorite method for de-fatting sauces before serving. It makes a world of difference. Also, choosing the right cut is vital for success. Initially, I was confused about which beef cuts to use for braising, but this guide on selecting the best beef cuts for braising cleared everything up and ensured my SLOW COOKER SHORT RIBS turned out perfectly tender every single time.
n-and-variations">Cultural Connection and Variations
Where this recipe comes from
My grandmother always said that good food takes time, a philosophy that her slow cooker short ribs embodied perfectly. Originally, braised short ribs were a staple in many European cuisines, from the wine-rich daubes of France to the hearty beer-based stews of Belgium. Families would simmer them for hours in a heavy pot on the stove, transforming a tough cut into something magical. Meanwhile, in Korea, chefs braise galbi jjim with soy sauce, ginger, and asian pear, creating a sweet and savory masterpiece. This global love affair highlights how every culture embraces low and slow cooking to develop deep, comforting flavors.
In my home, however, we make our version with a generous glug of red wine and a bundle of fresh herbs from the garden. The beauty of this dish truly lies in its adaptability. Some cooks add a touch of coffee for depth, while others stir in miso paste for an umami bomb. Essentially, the method remains the same, but the soul of the dish changes with each cook. Preparing these slow cooker short ribs always feels like connecting to a worldwide tradition of patience and care around the family table.
How it fits in today’s cooking
Today, this classic dish fits seamlessly into our busy lives. The modern slow cooker does all the work for us, allowing the rich flavors to develop while we tackle our day. Consequently, these ribs have become a go-to for effortless weekend feasts and cozy weeknight dinners alike. They offer the ultimate comfort food experience without the constant supervision.
Furthermore, many home
cooks now love to pair this hearty main with lighter sides. For instance, a crisp, refreshing salad perfectly balances the richness of the meat. You can find fantastic inspiration for such pairings in our collection of easy salad recipes. Ultimately, this adaptability makes slow cooker short ribs a perennial favorite. They are a centerpiece for holiday gatherings but also simple enough for a regular Tuesday. And for a truly unforgettable meal, serve them alongside a slice of our famous moist banana bread for a surprising and delightful contrast of flavors.
Taste and Texture
What makes it delicious
These slow cooker short ribs deliver an incredibly rich and savory experience. First, the deep, beefy flavor melts in your mouth after the long, slow braise. Meanwhile, the red wine and aromatics like garlic create a fragrant, complex sauce that fills your kitchen. Consequently, each bite feels luxuriously tender and falls apart with minimal effort. Ultimately, the finished dish boasts a perfect balance of hearty umami and subtle sweetness from the tomatoes. You will absolutely love these succulent slow cooker short ribs.
Boosting the flavor
For an extra flavor boost, consider searing the ribs until they develop a dark crust before they go into the slow cooker. Alternatively, stir a tablespoon of miso paste into the braising liquid to amplify the savory umami notes. Afterwards, finish your plate with a bright, acidic contrast like a quick pickled onion relish. Furthermore, a side of creamy mashed potatoes perfectly soaks up the incredible sauce. Similarly, our recipe for Creamy Garlic Mashed Potatoes creates the ultimate comfort food pairing. Finally, a sprinkle of fresh gremolata or a dash of our Chili Garlic Oil right before serving adds a wonderful fresh and spicy kick.
First, always sear your SLOW COOKER SHORT RIBS thoroughly to build a rich, deep flavor foundation. Additionally, trim any large pieces of excess fat from the ribs beforehand for a more balanced final dish. Furthermore, arrange your vegetables like carrots and onions at the bottom of the pot to act as a natural rack. Finally, let the finished ribs rest for ten minutes before serving so the juices can redistribute properly.
Mistakes to avoid
A common error is overfilling the slow cooker, which prevents even cooking and creates a soupy sauce; consequently, always ensure the liquid level stays about halfway up the ingredients. Moreover, lifting the lid too often during cooking significantly drops the internal temperature and adds to your cooking time. For more guidance on managing heat and liquid, explore our tips on slow cooker basics. Another frequent mistake is using a cut that is too lean, which can result in dry meat; therefore, choose well-marbled short ribs for the most tender outcome. If you are unsure about selecting the right cut, our guide on choosing beef cuts offers excellent advice.
g-suggestions">Serving and Pairing Suggestions
How to serve this dish
For a truly memorable meal, serve these slow cooker short ribs directly from the pot at the table. Consequently, your guests will adore the incredible aroma. Furthermore, spoon the rich, glossy sauce generously over the top of each portion. Finally, garnish with a sprinkle of fresh chopped parsley or chives for a vibrant color contrast.
These short ribs make a fantastic centerpiece for a cozy dinner party or a holiday gathering. Alternatively, you can shred the tender meat for an incredible sandwich filling. Ultimately, this dish promises to impress everyone with its deep, comforting flavors.
What goes well with it
First, a side of creamy mashed potatoes perfectly soaks up the luxurious sauce from your slow cooker short ribs. Similarly, a crisp, tangy side salad provides a refreshing counterpoint to the rich meat. For a complete comfort food experience, consider serving it with our classic creamy garlic mashed potatoes.
Moreover, a full-bodied
red wine like a Cabernet Sauvignon beautifully complements the hearty flavors. Alternatively, a dark ale also makes a superb pairing. For a delightful vegetable side, our roasted balsamic brussels sprouts add a wonderful caramelized note that enhances the entire meal.
Do you have to brown short ribs before slow cooking?
While not strictly mandatory, browning short ribs before slow cooking is highly recommended. Searing creates a flavorful crust through the Maillard reaction, which adds a rich, deep flavor to the entire dish. This extra step significantly enhances the overall taste of your slow cooker short ribs.
ank-math-faq-item">
How long does it take for short ribs to get tender in a slow cooker?
For fall-off-the-bone tenderness, cook short ribs on the LOW setting for 7-8 hours. Cooking on HIGH will take about 4-5 hours, but the low and slow method yields the most tender and juicy results for these slow cooker short ribs.
What is the best liquid to cook short ribs in?
A combination of beef broth and red wine, like a Cabernet Sauvignon or Merlot, creates an excellent braising liquid. The broth provides a savory base while the wine adds acidity and complexity, breaking down the connective tissue for incredibly tender slow cooker short ribs.
Should short ribs be submerged in liquid in a slow cooker?
You do not need to fully submerge the short ribs. The slow cooker generates steam that helps cook the meat, so the liquid should come about halfway up the sides of the ribs. This method allows them to braise rather than boil, preserving their texture and flavor.
div>
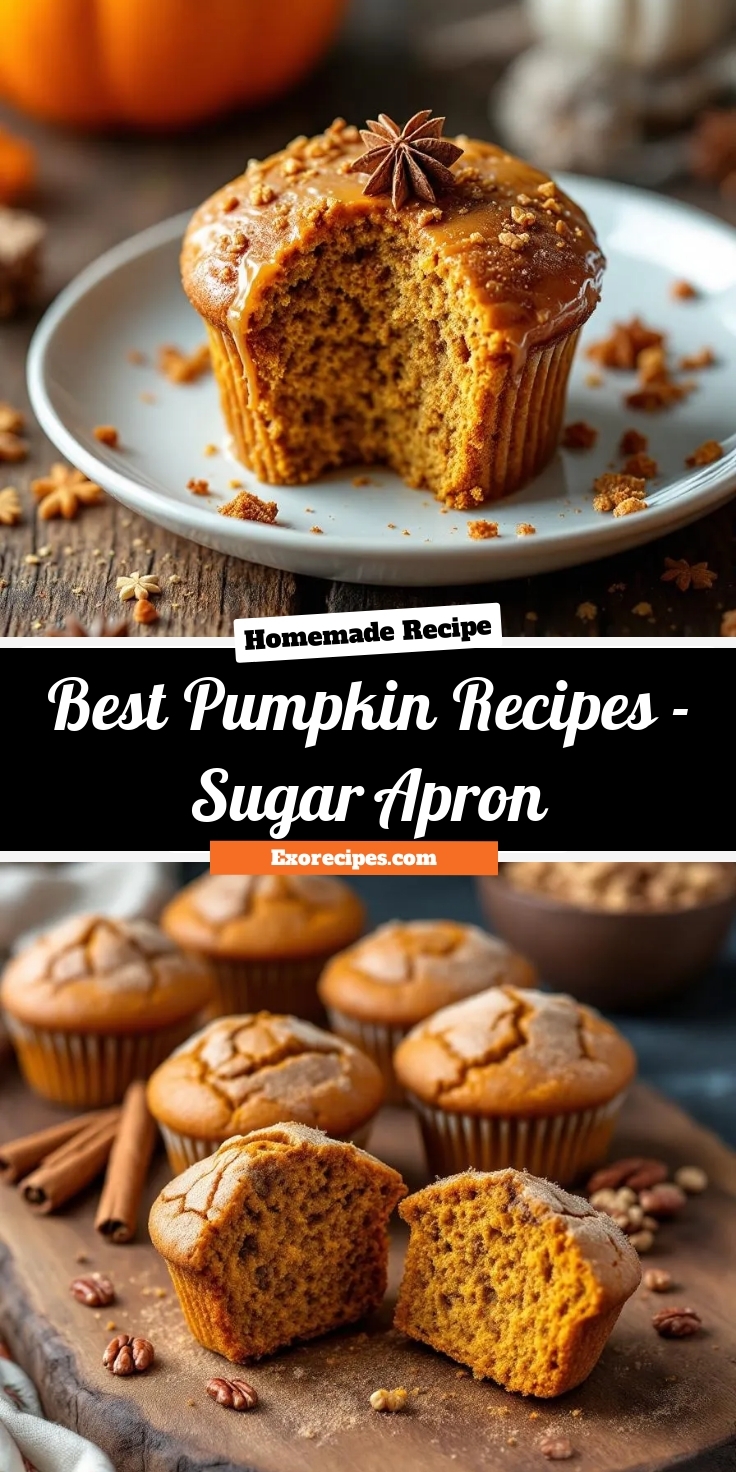
Best Pumpkin Recipes – Sugar Apron
Introduction
Is there anything more comforting than the warm, spiced aroma of pumpkin baking? It instantly wraps you in a cozy blanket of nostalgia, promising a taste of pure autumn joy. For many of us, this feeling defines the season, and finding that perfect, go-to pumpkin recipe feels like discovering a hidden treasure. That is precisely why I am so thrilled to share this incredible find from the Pumpkin Archives – Sugar Apron with you today. This recipe is not just another dessert; it is a heartfelt experience, a guaranteed way to bring that magical fall feeling right into your kitchen.
So, what exactly is the Pumpkin Archives – Sugar Apron? Essentially, it is my personal, cherished collection of the very best pumpkin recipes that have stood the test of time. I meticulously test and perfect each one to ensure they deliver exceptional flavor and foolproof results every single time. This archive matters because it cuts through the noise. You will not find complicated, fussy recipes here. Instead, you will discover reliable, crowd-pleasing favorites that truly work, from decadent pies to moist loaves and everything in between. This approach fits our blog’s tone perfectly, as we always strive to share recipes that build confidence and create wonderful memories around food. It is all about making baking accessible and deeply satisfying. For instance, if you adore classic flavors, you must explore our ultimate collection of homemade apple pie recipes that share this same philosophy. Furthermore, this method of curating and perfecting classics mirrors the care we put into all our bakes, much like our guide on how to make a sourdough starter, which demystifies another baking art form.
Why I Love This Recipe
I love this particular recipe from the Pumpkin Archives – Sugar Apron because it was the first one I ever perfected for my family. It reminds me of my daughter’s first Halloween, when I wanted to make something special from scratch. The cake turned out so moist and warmly spiced that it immediately became our required treat for every crisp fall evening thereafter. Consequently, it represents more than just a list of ingredients; it holds years of happy moments and satisfied smiles around our kitchen table. Ultimately, that personal connection and guaranteed success is what I truly want to pass on to you.
Health and Nutrition
Why it’s good for your body
Pumpkin Archives – Sugar Apron delivers a powerful nutritional punch that your body will truly appreciate. First and foremost, pumpkin serves as a fantastic source of beta-carotene, which your body then converts into immune-boosting Vitamin A. Consequently, enjoying this dish actively supports healthy vision and a strong immune system.
Furthermore, this recipe provides a substantial amount of dietary fiber. As a result, it promotes excellent digestive health and helps you feel fuller for longer, which can be a great ally in managing your weight. Additionally, the warming spices often paired with pumpkin, like cinnamon, offer their own anti-inflammatory benefits.
Moreover, Pumpkin Archives – Sugar Apron incorporates wholesome ingredients that work together for your wellness. For example, it often uses whole food components that contribute essential vitamins and minerals. Therefore, you are not just eating a delicious treat; you are also actively nourishing your body from the inside out. Ultimately, this makes Pumpkin Archives – Sugar Apron a smart and satisfying choice for your health.
How it fits in a healthy lifestyle
This recipe seamlessly fits into a balanced and mindful eating plan. It works wonderfully as a satisfying dessert that doesn’t derail your goals or as a cozy snack that provides lasting energy. If you follow a vegetarian diet, you can easily enjoy Pumpkin Archives – Sugar Apron as a staple treat.
For those watching their sugar intake, you can often adapt the sweetness level to your preference without sacrificing any flavor. Pairing a slice with a source of protein, like a handful of nuts or a scoop of Greek yogurt, makes it an even more complete and satisfying meal. Exploring other nutritious vegetarian ideas can help you build a full day of healthy eating around this centerpiece.
Remember, a healthy lifestyle is all about balance and enjoyment. This dish proves that you do not have to choose between delicious and nutritious. For more inspiration on creating wholesome meals that everyone will love, check out these easy family-friendly dinners.
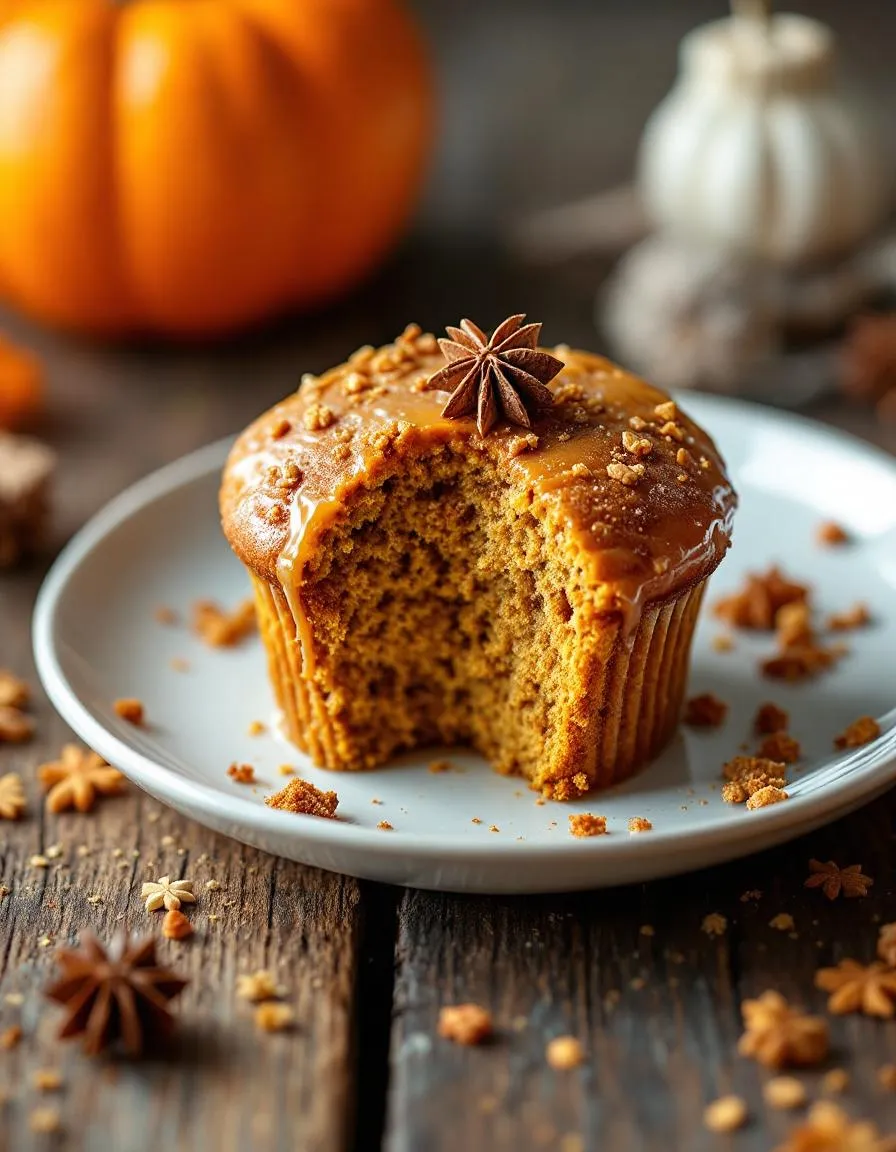
Moist and flavorful pumpkin muffins with warm spices, perfect for autumn mornings or holiday gatherings.
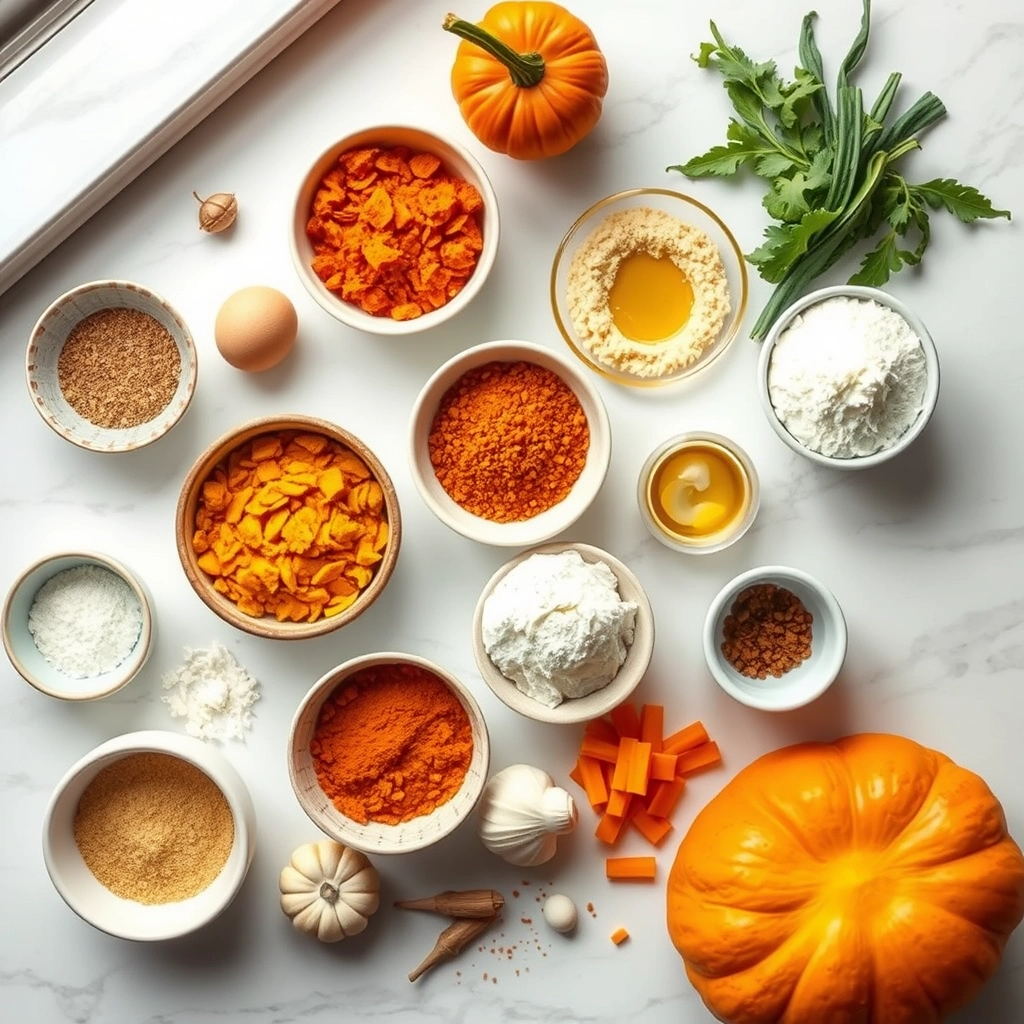
Ingredients
Scale
For the Crust:
1 cup canned pumpkin puree
2 large eggs
1/2 cup vegetable oil
1/3 cup milk
1 1/2 cups all-purpose flour
1 cup granulated sugar
1 tsp baking powder
1/2 tsp baking soda
1 tsp ground cinnamon
1/2 tsp ground nutmeg
1/4 tsp ground cloves
1/4 tsp salt
Instructions
1. Prepare the Crust:
Preheat oven to 375°F (190°C) and line a muffin tin with paper liners.
In a large bowl, whisk together pumpkin puree, eggs, oil, and milk until smooth.
In another bowl, combine flour, sugar, baking powder, baking soda, spices, and salt.
Gradually fold dry ingredients into wet ingredients until just combined; do not overmix.
Divide batter evenly among muffin cups, filling each about 3/4 full.
Bake for 20-25 minutes or until a toothpick inserted comes out clean. Cool before serving.
Notes
You can customize the seasonings to taste.
How to Prepare This Dish
Steps and time-saving tips
First, gather all your ingredients for the Pumpkin Archives – Sugar Apron. This simple prep step saves you from frantic searches mid-recipe. Preheat your oven now to ensure it reaches the perfect temperature. Next, whisk your dry ingredients together in a large bowl. In a separate bowl, vigorously combine the wet ingredients, including the pumpkin puree, until the mixture is completely smooth. Gradually fold the dry mix into the wet ingredients; however, avoid overmixing to keep your final product tender. Meanwhile, grease your baking pan thoroughly to prevent any sticking issues. Pour the batter into the prepared pan and use a spatula to spread it evenly into the corners. Finally, place it in the center of your preheated oven for the most consistent heat. While it bakes, you can easily prepare any accompanying glazes or toppings. Let the baked good cool completely before slicing; this patience guarantees clean, beautiful pieces. Furthermore, always use a serrated knife for a pristine cut.
Mistakes I’ve made and learned from
I once rushed the cooling process for my Pumpkin Archives – Sugar Apron, which resulted in a crumbly mess that no amount of frosting could hide. I learned the hard way that allowing it to set completely is non-negotiable for the perfect texture. Another common error was overpacking my measuring cup with flour, leading to a dense and dry outcome. Now, I always spoon and level my flour for a light and airy bake. If your spices have been sitting in the cabinet for a while, they likely have lost their potency. Forgetting to check this was a mistake I made once, resulting in a bland flavor. I now make a habit of refreshing my stock every fall season. For more tips on getting your measurements just right, check out my guide on baking measurements. And if you’re looking for the perfect frosting to pair with your creation, my cream cheese frosting recipe is a guaranteed winner.
Pumpkin Archives – Sugar Apron feels like a warm hug from autumn itself. My grandmother first shared this recipe with me, her handwritten card splattered with cinnamon and love. She always made it the day after we picked pumpkins at the local patch. Interestingly, cultures around the world celebrate the pumpkin in vastly different ways. For instance, in Italy, they often stuff pumpkins with creamy risotto and cheese. Meanwhile, Australian bakers might add a handful of sultanas for a chewy, sweet twist. My family’s version, the Pumpkin Archives – Sugar Apron, leans into classic American spice. However, we sometimes add a crunchy pecan streusel topping for special occasions. Ultimately, this dish connects us to harvest traditions that span generations and continents. Every family, of course, adds its own signature touch to create a beloved classic.
How it fits in today’s cooking
Pumpkin Archives – Sugar Apron remains a staple because it perfectly captures the essence of fall. Modern cooks absolutely adore its versatility for both holidays and simple weeknight desserts. Furthermore, it fits beautifully into today’s cooking routines as a make-ahead marvel. You can easily bake it and then simply warm individual slices for a quick treat. Many bakers now also experiment with gluten-free flour blends to suit dietary needs. This recipe pairs wonderfully with a cup of coffee for an afternoon pick-me-up. For another fantastic seasonal baking idea, consider trying these perfect pumpkin cupcakes. They also love serving it as a stunning finale to a hearty dinner. If you need a showstopping centerpiece for your holiday table, this decadent chocolate cake is another brilliant option. Consequently, this timeless recipe continues to create new memories in kitchens today.
>Taste and Texture
What makes it delicious
Pumpkin Archives – Sugar Apron delivers a wonderfully warm and spiced flavor profile. Each bite feels incredibly moist and tender, practically melting in your mouth. Furthermore, the rich pumpkin flavor shines through, beautifully complemented by fragrant cinnamon and a hint of nutmeg. The texture is supremely soft and dense, similar to a classic pound cake but with a delightful autumn twist. Ultimately, the Pumpkin Archives – Sugar Apron offers a cozy, comforting experience that smells as heavenly as it tastes.
Boosting the flavor
You can easily elevate your dessert with a few creative additions. For instance, a simple cream cheese frosting adds a tangy, creamy contrast that pairs perfectly with the warm spices. Alternatively, a sprinkle of toasted pecans introduces a satisfying crunch. Consider serving it warm with a scoop of vanilla ice cream for a fantastic contrast in temperatures. Moreover, a drizzle of our salted caramel sauce enhances the pumpkin notes with its buttery depth. For another inspiring pairing, explore our guide to the perfect cream cheese frosting to find your ideal match.
Tips for Success
Best practices for results
Always chill your dough for at least an hour before rolling it out, as this prevents the cookies from spreading too thin. Furthermore, use parchment paper on your baking sheets for the best texture and easy cleanup. Make sure you measure your flour correctly by spooning it into the cup and leveling it off; this simple step avoids dense cookies. For the most flavorful Pumpkin Archives – Sugar Apron, use pure pumpkin puree and fresh spices. Finally, allow the cookies to cool completely on the baking sheet before you decorate them.
Mistakes to avoid
A common error is using melted butter, which results in a greasy dough that spreads excessively. Instead, ensure your butter is properly creamed at room temperature for the ideal cookie structure. Additionally, do not overmix the dough once you add the dry ingredients, as this develops too much gluten and leads to a tough cookie. If your cookies often turn out flat, check that your baking powder is still active; meanwhile, you can learn more about this in our guide to testing baking powder for freshness. Another frequent issue is overbaking, which makes the edges too crisp. For perfectly soft cookies every time, pull them from the oven when the centers still look slightly underdone. Consequently, if you are new to baking, our article on common baking mistakes offers more helpful solutions.
Serving and Pairing Suggestions
How to serve this dish
Present your Pumpkin Archives – Sugar Apron warm to highlight its comforting spices. For a beautiful brunch spread, arrange the slices on a rustic wooden board. Furthermore, dust the top with a light snowfall of powdered sugar for an elegant touch. This dish truly shines during holiday gatherings, so consider it for your Thanksgiving table. Ultimately, a dollop of freshly whipped cream or a scoop of vanilla bean ice cream makes it irresistible.
h-it">What goes well with it
A hot cup of spiced chai tea wonderfully complements the warm flavors in Pumpkin Archives – Sugar Apron. Alternatively, a glass of cold milk provides a classic and refreshing balance. For a savory contrast, serve it alongside a fluffy spinach and feta quiche. This pairing creates a perfect sweet and savory brunch combination your family will love. Moreover, a drizzle of our simple vanilla glaze can elevate this treat into a spectacular dessert.
What is the best way to store pumpkin puree for recipes?
The best way to store homemade pumpkin puree is to let it cool completely, then portion it into airtight containers or freezer bags. It can be refrigerated for up to a week or frozen for several months, ensuring you have the perfect base ready for any recipe from the Pumpkin Archives – Sugar Apron.
ank-math-faq-item">
Can I use canned pumpkin instead of fresh for Sugar Apron’s recipes?
Yes, you can absolutely use canned pumpkin puree as a convenient substitute for fresh in most recipes. For the best results in Pumpkin Archives – Sugar Apron recipes, be sure to use 100% pure pumpkin puree, not pumpkin pie filling, which contains added sugars and spices.
What type of pumpkin is best for making pumpkin bread?
For the moistest and most flavorful pumpkin bread, Sugar Apron recipes often recommend using sugar pumpkins (also called pie pumpkins). These smaller varieties have a sweeter, less watery flesh than larger carving pumpkins, making them ideal for baking the delicious treats found in the Pumpkin Archives.
How do I make my pumpkin desserts more moist?
To ensure moist pumpkin desserts, avoid overmixing the batter once the dry and wet ingredients are combined, as this can develop too much gluten. Using the right amount of pumpkin puree and oils or butter, as specified in the Pumpkin Archives – Sugar Apron recipes, is also key to achieving a perfectly tender crumb.
div>
Best Creamy Chicken and Mushroom Soup Recipe
Introduction
There is something profoundly comforting about a warm bowl of soup on a chilly evening. It feels like a hug from the inside, a moment of pure, simple peace. If you crave that cozy feeling, you will absolutely adore this recipe for CREAMY CHICKEN AND MUSHROOM SOUP. It transforms basic ingredients into a luxurious, soul-satisfying meal that your entire family will request on repeat. Furthermore, it fills your kitchen with an incredible aroma that promises a delicious dinner is moments away.
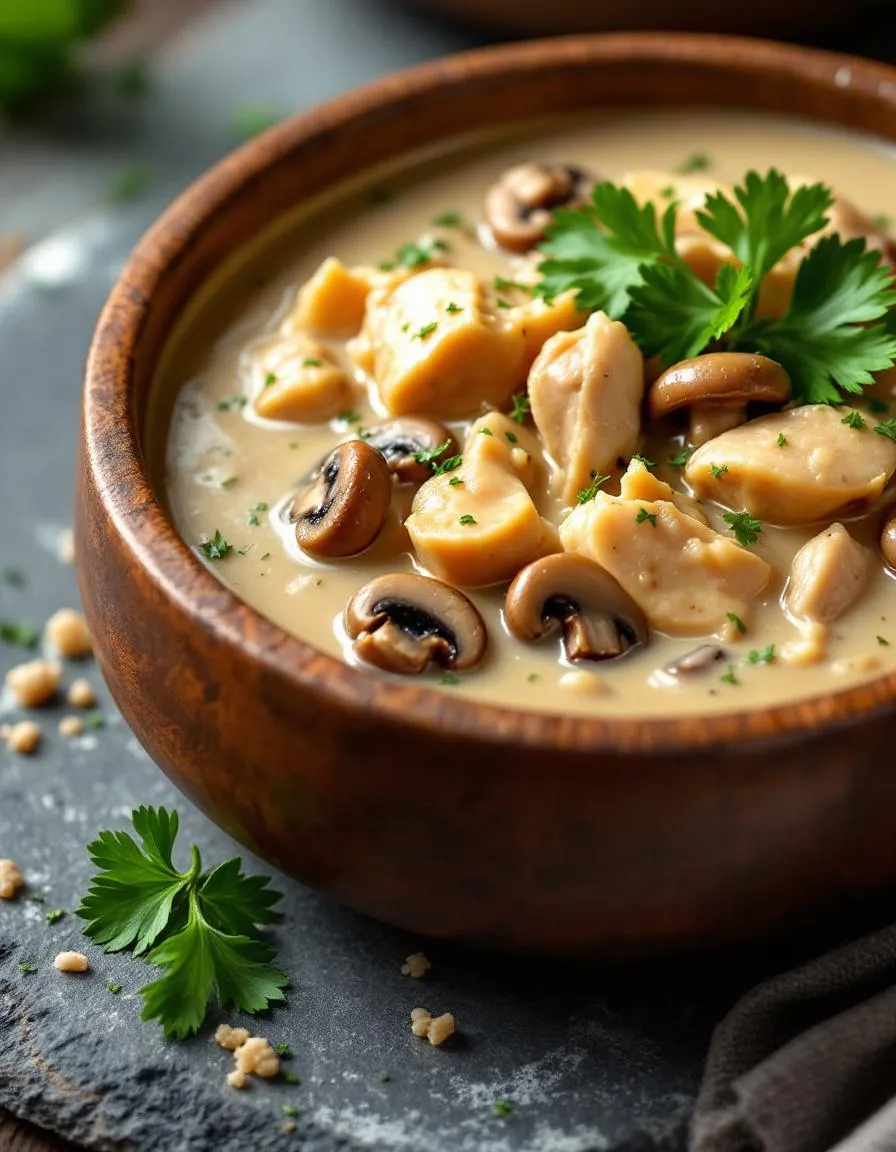
Creamy Chicken and Mushroom Soup is the ultimate comfort food, blending tender pieces of chicken and earthy mushrooms in a velvety, rich broth. This dish matters because it delivers restaurant-quality flavor with straightforward, home-cooked simplicity. It perfectly fits our blog’s tone of creating approachable yet impressive meals that bring people together around the table. You can easily make it a complete meal by pairing it with a slice of our crusty Classic French Baguette for dipping. Moreover, this soup is incredibly versatile. For instance, you can use a variety of mushrooms, from basic cremini to more exotic shiitake, to customize the flavor profile to your liking. Ultimately, a single pot yields a generous amount, making it ideal for meal prep or for soothing a crowd. It is the kind of recipe that builds your confidence in the kitchen and becomes a trusted staple in your weekly rotation. Additionally, its creamy texture and deep, savory notes make it far superior to any canned alternative.
Why I Love This Recipe
This Creamy Chicken and Mushroom Soup recipe holds a special place in my heart because it was my grandmother’s go-to remedy for everything from a rainy day to a case of the blues. She taught me that the best meals come not from complexity, but from patience and love, which you can truly taste in every spoonful of this soup. I love how it makes my own home smell just like hers did, creating a powerful sense of warmth and nostalgia. It is my absolute favorite thing to make on a Sunday, and it always reminds me of the simple joy of sharing a homemade meal with the people I love, especially when served alongside a fresh Easy Garden Salad.
Health and Nutrition
Why it’s good for your body
This creamy chicken and mushroom soup delivers a powerful nutritional punch in every comforting bowl. First, the lean chicken breast provides a fantastic source of high-quality protein. Consequently, this protein helps your body build and repair muscle tissue and keeps you feeling full and satisfied for hours. Furthermore, the mushrooms contribute a wealth of essential nutrients. They are a natural source of vitamin D, which supports strong bones and a healthy immune system.
Additionally, this creamy chicken and mushroom soup often incorporates other vegetables like onions and garlic. As a result, you get an extra boost of antioxidants and anti-inflammatory compounds. Moreover, when you prepare the soup with a broth base, you create a hydrating and mineral-rich meal. Ultimately, this combination makes creamy chicken and mushroom soup a wonderfully balanced and nourishing choice for any day.
How it fits in a healthy lifestyle
This soup fits beautifully into a balanced eating plan. You can easily tailor it to meet specific health goals. For a high-protein diet, simply add an extra portion of chicken. If you are watching your carbohydrate intake, this creamy chicken and mushroom soup is naturally a fantastic option, especially when you use a gluten-free thickener like cornstarch instead of traditional flour.
Preparing meals ahead is key to staying on track, and this soup is a perfect candidate for your weekly meal prep rotation. It stores and reheats wonderfully, guaranteeing you have a healthy lunch or dinner ready in minutes. Pairing a bowl with a simple side salad creates a complete, satisfying meal that aligns with a heart-healthy lifestyle focused on whole foods. For more inspiration on building nutritious meals, explore our guide to creating a perfectly balanced plate every time.
A rich and comforting soup with tender chicken, earthy mushrooms, and a velvety cream base.
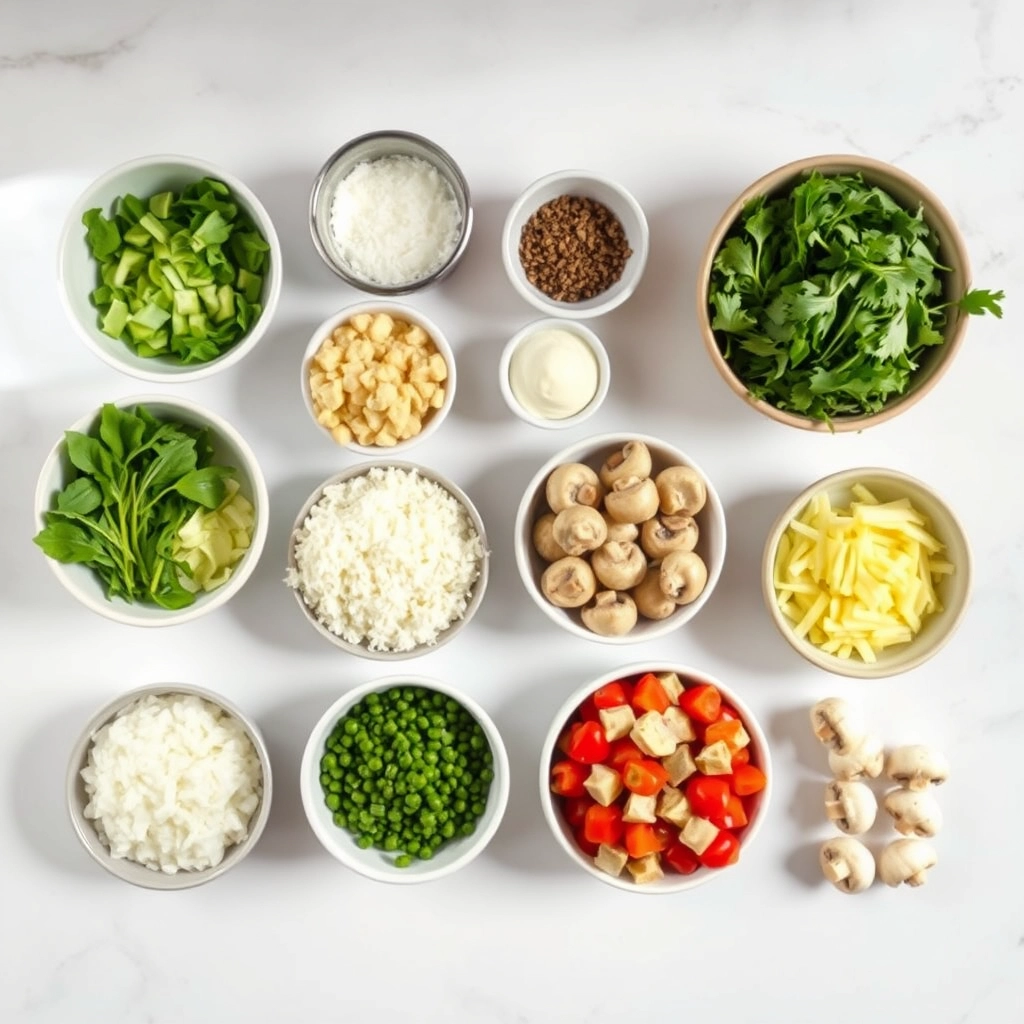
Ingredients
Scale
For the Crust:
2 boneless, skinless chicken breasts, diced
8 oz cremini mushrooms, sliced
1 medium onion, finely chopped
2 cloves garlic, minced
4 cups chicken broth
1 cup heavy cream
2 tbsp butter
2 tbsp all-purpose flour
1 tsp dried thyme
Salt and pepper to taste
2 tbsp olive oil
Fresh parsley for garnish
Instructions
1. Prepare the Crust:
Heat olive oil in a large pot over medium heat. Add diced chicken and cook until no longer pink, about 5-7 minutes. Remove and set aside.
In the same pot, melt butter. Add onions and sauté until translucent, about 3 minutes. Add garlic and mushrooms, cooking until mushrooms are tender and browned, about 5 minutes.
Sprinkle flour over the mushroom mixture and stir for 1 minute. Gradually pour in chicken broth, stirring constantly to avoid lumps.
Return cooked chicken to the pot. Add thyme, salt, and pepper. Simmer for 15 minutes.
Reduce heat to low and stir in heavy cream. Heat through without boiling. Adjust seasoning if needed and garnish with parsley before serving.
Notes
You can customize the seasonings to taste.
How to Prepare This Dish
Steps and time-saving tips
First, gather all your ingredients for this CREAMY CHICKEN AND MUSHROOM SOUP. Next, heat a large pot over medium heat and melt your butter. Then, add your chopped onions and sliced mushrooms. Sauté them until they become beautifully golden and fragrant. Meanwhile, season your chicken pieces generously. After that, push the veggies to the side and add the chicken to the pot. Consequently, you will brown it on all sides, which builds a fantastic flavor base. Now, sprinkle the flour over everything and stir constantly for one minute to cook out the raw taste. Gradually pour in your chicken broth, whisking continuously to avoid any lumps. Furthermore, bring the pot to a gentle simmer and let it cook until the chicken is tender and cooked through. Finally, reduce the heat to low and stir in the cream. Importantly, do not let it boil after adding the cream to prevent curdling. For a time-saving tip, use a pre-cooked rotisserie chicken. Simply shred the meat and add it with the broth to skip the browning step entirely. Your incredible CREAMY CHICKEN AND MUSHROOM SOUP is ready to enjoy!
Mistakes I’ve made and learned from
I have definitely learned a few lessons the hard way with this CREAMY CHICKEN AND MUSHROOM SOUP. My biggest mistake was rushing the roux. I once added the liquid too quickly after the flour, which resulted in a lumpy, unappealing texture instead of a velvety smooth soup. Now, I take my time and whisk the broth in slowly, which guarantees a perfect consistency every single time. Another error was using the wrong type of mushroom. I once chose a variety that released too much water, ultimately diluting the rich flavor of the entire pot. I discovered that cremini or baby bella mushrooms hold their shape and offer a much deeper, earthier taste, making them ideal for this kind of dish. If you’re new to working with roux, my guide on how to make a roux breaks it down into foolproof steps. And for more ideas on the best ingredients to use, check out my list of essential soup-making tools that can help you avoid these common pitfalls.
My grandmother always called this dish her “little piece of Europe in a bowl.” She learned to make a version of creamy chicken and mushroom soup from a French neighbor, who swore by wild foraged mushrooms and a splash of white wine. Meanwhile, across the Atlantic, my Polish family thickens their version with a roux and adds a generous amount of dill, serving it with a dollop of sour cream.
Indeed, this soup wears many hats around the world. For instance, the Russians have their own beloved take, often incorporating barley for extra heartiness. Conversely, a modern British cook might use a rich stock and double cream for ultimate luxury. Ultimately, every culture that embraces chicken and mushrooms seems to have developed its own comforting, creamy iteration.
In my own kitchen, I bl
end these traditions. I use a technique from my grandma but reach for more accessible cremini mushrooms. This particular CREAMY CHICKEN AND MUSHROOM SOUP recipe honors that global spirit. It’s a humble dish that truly connects us through shared, simple ingredients.
How it fits in today’s cooking
Thankfully, this classic soup fits perfectly into our modern lives. It remains a cornerstone of comfort cooking, especially during the chilly fall and winter months. Furthermore, it’s a fantastic way to use leftover roast chicken, making it a practical choice for a quick weeknight dinner.
Many home cooks now adapt it for specific dietary needs. For example, they might substitute coconut milk for dairy or use a gluten-free flour blend. You can easily pair this comforting bowl with a crisp, simple side. In fact, it goes wonderfully with our favorite easy side salad recipes for a complete and balanced meal.
Moreover, its creamy, s
avory profile makes it a fantastic make-ahead option for busy families. You can also turn it into a show-stopping first course for a holiday gathering. Simply serve it in small mugs or bread bowls for a touch of elegance. For a truly special occasion, consider starting your feast with this soup before moving on to a main like our herb crusted pork tenderloin. It truly is a timeless recipe that continues to evolve.
Taste and Texture
What makes it delicious
This CREAMY CHICKEN AND MUSHROOM SOUP delivers a deeply savory and earthy flavor profile. First, you notice the rich, umami aroma from the sautéed mushrooms and thyme, which promises pure comfort. Each spoonful feels luxuriously velvety and smooth against your tongue, thanks to the silky cream base. Tender pieces of chicken offer a satisfying, hearty chew, while the mushrooms provide a delightful, meaty texture. Ultimately, the savory broth, creamy consistency, and earthy notes create a perfectly balanced and warming bowl. You will love every comforting bite of this CREAMY CHICKEN AND MUSHROOM SOUP.
Boosting the flavor
For an even more dynamic soup, consider a few simple upgrades. A splash of dry white wine deglazes the pan and introduces a bright, acidic note that cuts through the richness beautifully. Furthermore, stirring in a spoonful of miso paste at the end will amplify the savory umami depth incredibly well. Alternatively, garnish each bowl with crispy fried shallots for a delightful crunch and aromatic sweetness. If you enjoy building flavor with herbs, our guide on growing fresh herbs makes it easy to have thyme and parsley on hand. Finally, a side of crusty bread is essential for dipping; our favorite quick dinner rolls complete the meal perfectly.
First, always sear your chicken pieces until they develop a golden-brown crust because this builds a deep, savory foundation for your CREAMY CHICKEN AND MUSHROOM SOUP. Then, make sure you sauté the mushrooms until they release all their moisture and begin to brown for maximum umami flavor. For an incredibly smooth and velvety texture, gradually add your broth or cream to the roux while whisking constantly. Finally, always allow your soup to simmer gently for at least fifteen minutes after combining all ingredients so the flavors can fully meld together.
Mistakes to avoid
Avoid adding all your liquid at once to the roux, as this often creates lumps; instead, gradually whisk in the liquid for a perfectly smooth base. Furthermore, do not skip deglazing the pan after cooking the chicken and mushrooms, since those browned bits are packed with flavor. Also, be careful not to let your soup reach a rolling boil after adding the dairy, because this can cause it to curdle. For more guidance on getting your soup bases just right, check out our guide on how to fix a lumpy sauce. Moreover, remember to season in layers and taste at the end, as underseasoning is a common pitfall; our tips on balancing soup flavors can help you get it perfect every time.
g-suggestions">Serving and Pairing Suggestions
How to serve this dish
First, ladle this CREAMY CHICKEN AND MUSHROOM SOUP into a warm, rustic bowl to keep it hot longer. For a beautiful finish, top each serving with a sprinkle of fresh thyme, a crack of black pepper, and a generous swirl of cream. Furthermore, a side of crusty bread for dipping makes the meal feel complete and satisfying.
This comforting CREAMY CHICKEN AND MUSHROOM SOUP truly shines on a chilly evening. Consequently, it is a perfect starter for a holiday dinner or the main event for a cozy family lunch. Finally, serve it alongside a simple green salad for a well-rounded and utterly delicious meal.
What goes well with it
Nothing beats a warm, crusty loaf for dipping into this rich soup. Specifically, our easy No Knead Artisan Bread soaks up the creamy broth perfectly. Alternatively, a crisp, acidic white wine like Sauvignon Blanc cuts through the richness beautifully.
For a heartier meal, pa
ir this CREAMY CHICKEN AND MUSHROOM SOUP with a light, refreshing side. A simple Classic Caesar Salad provides a fantastic crunch and tangy contrast. Ultimately, these pairings elevate your dining experience from simple to spectacular.
What is the best mushroom to use for creamy chicken and mushroom soup?
Cremini or baby bella mushrooms are the best choice for a rich, earthy flavor in your creamy chicken and mushroom soup. While white button mushrooms work fine, cremini have a deeper, more robust taste that stands up well to the creamy broth. You can also use a mix of wild mushrooms like shiitake for an even more complex flavor profile.
ank-math-faq-item">
Can I make creamy chicken and mushroom soup in a slow cooker?
Absolutely! For a slow cooker version, simply add all ingredients except the cream and flour to the pot. Cook on low for 6-7 hours or high for 3-4 hours. About 30 minutes before serving, shred the chicken, make a slurry with the cream and flour, and stir it in to thicken your creamy chicken and mushroom soup.
How can I thicken my creamy chicken and mushroom soup without flour?
For a gluten-free option, you can use cornstarch or arrowroot powder mixed with a little cold water to create a slurry. Alternatively, pureeing a portion of the cooked soup, including some mushrooms and vegetables, will naturally thicken the broth and intensify the flavor of your creamy chicken and mushroom soup.
How long does homemade creamy chicken and mushroom soup last in the fridge?
Properly stored in an airtight container, your homemade creamy chicken and mushroom soup will stay fresh for 3 to 4 days in the refrigerator. The soup may thicken upon standing, so you can thin it with a little extra broth or milk when reheating it gently on the stove.