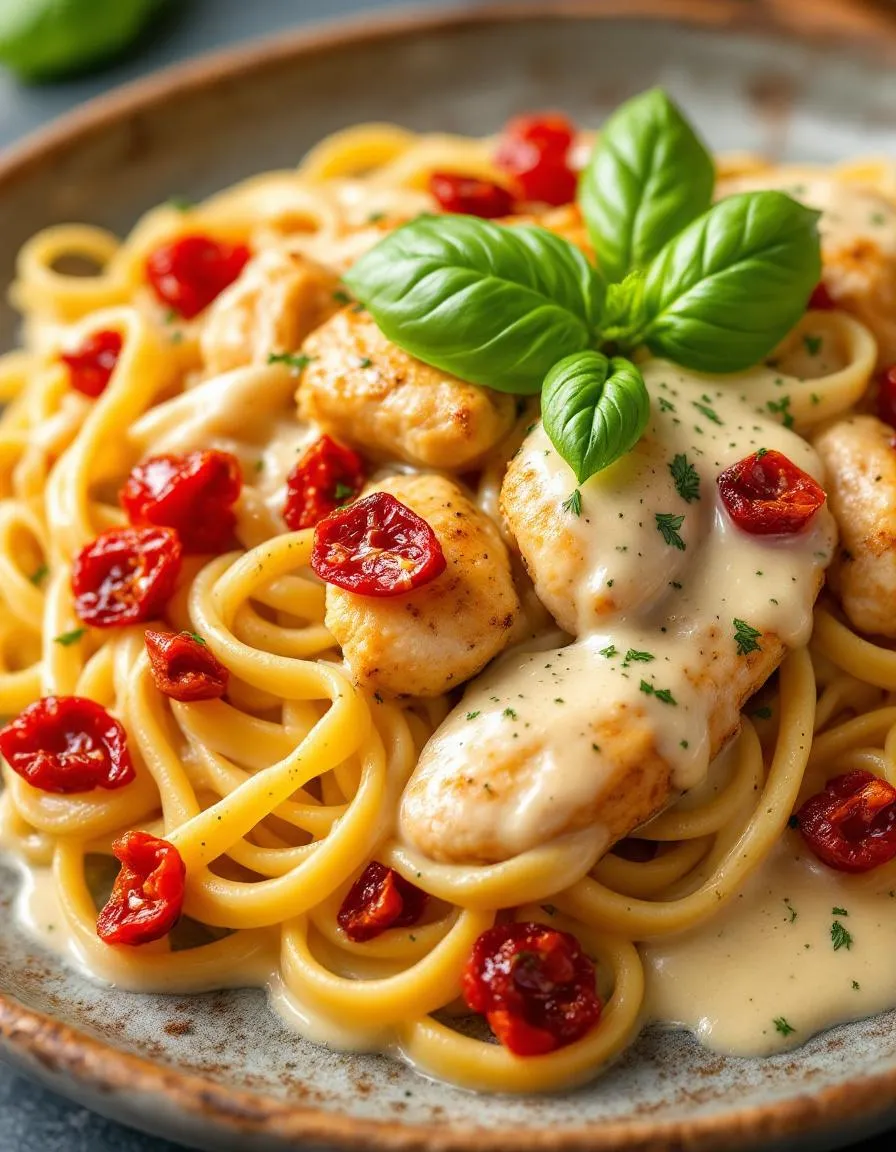
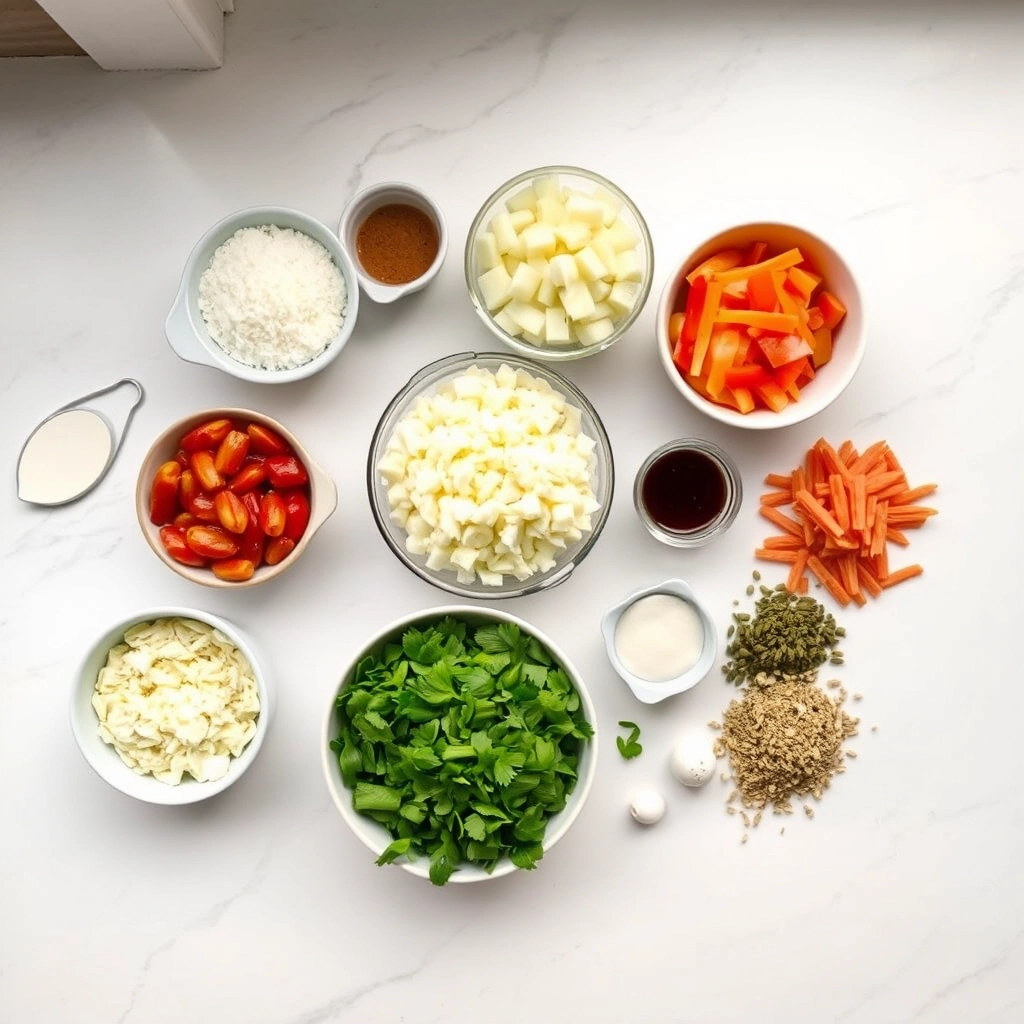
Have you ever needed a dinner recipe that feels like a warm, comforting hug and guarantees a chorus of delighted cheers around the table? This is that magical dish. Marry Me Chicken with Pasta promises not just a meal, but an experience. It combines succulent chicken and tender pasta in a luxuriously creamy sauce that people famously claim could lead to a proposal. Ultimately, it is the ultimate comfort food with a romantic, show-stopping name that absolutely delivers on flavor.
Marry Me Chicken with Pasta is a viral sensation for a very good reason. This dish features pan-seared chicken breasts simmered in a decadent sauce made with sun-dried tomatoes, garlic, heavy cream, and parmesan cheese. We then toss it all with your favorite pasta shape, creating a rich and cohesive meal. The name itself hints at its power, suggesting the recipe is so irresistibly delicious that it could inspire a lifelong commitment. Furthermore, it perfectly fits our blog’s philosophy of creating approachable yet impressive recipes that turn your weeknight dinner into a special occasion. For instance, if you enjoy creating memorable meals, you might also love our approach to a classic Creamy Tuscan Chicken. This particular recipe matters because it balances gourmet taste with straightforward preparation. You do not need to be a professional chef to achieve something extraordinary. Moreover, it uses simple, high-quality ingredients that work in harmony to build deep, complex flavors. The creamy sauce, the savory chicken, and the hearty pasta create a truly satisfying dish that everyone will adore. Consequently, it is an ideal choice for a date night in, a family gathering, or even when you simply want to treat yourself to something spectacular. Additionally, the versatility of this recipe means you can easily adapt it to your preferences, much like you can with our favorite One Pan Lemon Herb Chicken and Veggies.
Why I Love This Recipe
I truly love this Marry Me Chicken with Pasta because it never fails to create a joyful moment. I first made it for a close friend who was having a rough week, and the way her face lit up after the first bite is a memory I cherish. It is my go-to recipe when I want to show someone I care through the simple, powerful act of cooking a fantastic meal. The entire process, from searing the chicken to watching the sauce come together, is incredibly satisfying. Every time I make it, it feels both special and wonderfully familiar.
Health and Nutrition
Why it’s good for your body
Marry Me Chicken with Pasta delivers a powerful combination of nutrients your body will love. For instance, the lean chicken breast provides a fantastic source of high-quality protein, which is essential for building muscle and keeping you feeling full and satisfied. Furthermore, the sundried tomatoes and spinach contribute valuable vitamins and antioxidants that fight inflammation and support your immune system.
Additionally, the creamy sauce, often made with a broth and parmesan base, offers a rich flavor without overwhelming heaviness. Consequently, you enjoy a decadent-tasting meal that still feels balanced. Moreover, the carbohydrates from the pasta supply your body with immediate energy, making Marry Me Chicken with Pasta an excellent choice for an active lifestyle. Ultimately, this dish brings together taste and nourishment in every single bite.
How it fits in a healthy lifestyle
This dish easily supports a balanced approach to eating. You can tailor Marry Me Chicken with Pasta to meet specific health goals by using whole wheat or legume-based pasta for extra fiber and protein. For a gluten-free version, simply swap in your favorite gluten-free pasta; it works beautifully with the rich, creamy sauce.
Pairing a reasonable portion with a large side salad creates a perfectly rounded meal that satisfies without overindulgence. If you are looking for more ways to incorporate lean protein into your weekly rotation, explore our guide to easy chicken meal prep ideas. For those evenings when you need something both nutritious and incredibly fast, this dish pairs well with the principles behind our quick and healthy dinner solutions.
A romantic and creamy chicken dish with sun-dried tomatoes and herbs, served over pasta. So delicious it might just lead to a proposal!
Ingredients
Scale
For the Crust:
1 lb chicken breasts, sliced
8 oz fettuccine pasta
1 cup heavy cream
1/2 cup chicken broth
1/2 cup grated parmesan cheese
1/3 cup sun-dried tomatoes, chopped
3 cloves garlic, minced
1 tsp Italian seasoning
1/2 tsp red pepper flakes
2 tbsp olive oil
Salt and pepper to taste
Fresh basil for garnish
Instructions
1. Prepare the Crust:
Cook pasta according to package directions. Drain and set aside.
Season chicken with salt, pepper, and Italian seasoning. Heat olive oil in a large skillet over medium-high heat and cook chicken until golden, about 5-6 minutes per side. Remove and set aside.
In the same skillet, add garlic and red pepper flakes, cooking for 1 minute until fragrant. Pour in chicken broth to deglaze, scraping up any browned bits.
Reduce heat to medium. Stir in heavy cream, parmesan cheese, and sun-dried tomatoes. Simmer for 2-3 minutes until sauce thickens slightly.
Return chicken to the skillet and simmer for another 2 minutes. Serve chicken and sauce over cooked pasta, garnished with fresh basil.
Notes
You can customize the seasonings to taste.
How to Prepare This Dish
Steps and time-saving tips
First, generously season your chicken breasts with salt and pepper. Meanwhile, heat a large skillet with olive oil over medium-high heat. Sear the chicken for about 5-7 minutes per side until it develops a beautiful golden-brown crust. Then, remove the chicken and set it aside on a plate. Next, in that same skillet, you will sauté your minced garlic and a pinch of red pepper flakes for just one minute until fragrant. After that, pour in the chicken broth to deglaze the pan, scraping up all those delicious browned bits. Now, whisk in the heavy cream and sun-dried tomatoes, bringing the sauce to a gentle simmer. Finally, return the chicken to the skillet, reduce the heat, and let everything cook together for another 10 minutes until the sauce thickens and the chicken cooks through. Stir in the parmesan and fresh basil right at the end for maximum flavor. For a true time-saver, use pre-shredded parmesan and jarred minced garlic. Furthermore, you can prepare the sauce while your pasta water comes to a boil, effectively multitasking to get your Marry Me Chicken with Pasta on the table even faster.
Mistakes I’ve made and learned from
I have absolutely made my share of mistakes with this dish, so learn from my errors! Initially, I would crank the heat too high when making the sauce, causing the heavy cream to break and become oily instead of luxuriously smooth. Now, I keep everything at a gentle, lazy simmer. Another common blunder was using pre-grated parmesan that contained anti-caking agents; it never melted properly into the sauce, leaving a grainy texture. I learned that grating a block of parmesan myself makes a world of difference, creating that perfectly silky sauce we all love. Getting the seasoning right is also crucial, and I once under-salted the entire dish, making it taste flat. For more on balancing flavors, my guide on how to season perfectly saved me. Also, if your sauce ever does break, don’t panic! My post on fixing a broken sauce has a few simple tricks that work every time.
Interestingly, the story of Marry Me Chicken with Pasta begins not in a nonna’s kitchen but on the modern internet. Food bloggers popularized this dish, claiming its rich, creamy flavor could inspire a marriage proposal. Consequently, it quickly became a viral sensation. While its name is playful, its soul is deeply Italian-American. Essentially, it takes the classic flavors of a sun-dried tomato and cream sauce and turns them into a show-stopping main event.
Families across the U.S. have since made it their own. For instance, some add a pinch of red pepper flakes for heat, while others stir in fresh spinach for a colorful twist. In different regions, you might find cooks using heavy cream for ultimate luxury or, alternatively, half-and-half for a lighter touch. My family always serves Marry Me Chicken with Pasta with a generous sprinkle of fresh basil and extra parmesan cheese on the side. Ultimately, this flexibility is what makes the dish so beloved; it welcomes personalization.
ays-cooking">How it fits in today’s cooking
Today, this dish perfectly fits our desire for impressive yet achievable meals. It feels special enough for a date night at home but comes together quickly enough for a busy Wednesday. Furthermore, modern cooks constantly adapt it to fit dietary needs, easily swapping regular pasta for gluten-free or chickpea options. Its rich, comforting nature also makes it a fantastic choice for a cozy fall dinner as the weather turns cool.
You can easily find a place for it in your weekly rotation. Moreover, its one-pan nature means cleanup is a breeze, which everyone appreciates. For a complete meal, many people love to pair it with a simple side. A crisp, green salad is the perfect counterpart to the creamy sauce, and you can find inspiration for a great one in our collection of easy salad recipes. Ultimately, Marry Me Chicken with Pasta remains a timeless classic because it delivers restaurant-quality flavor with home-cooked ease.
Taste and Texture
What makes it delicious
This Marry Me Chicken with Pasta delivers a truly luxurious experience. First, you smell the fragrant garlic and sweet sun-dried tomatoes as they sizzle, creating an aroma that fills your entire kitchen. Consequently, each bite offers tender, juicy chicken coated in a supremely creamy and velvety Parmesan sauce. Furthermore, the al dente pasta provides a wonderfully chewy contrast that soaks up the rich sauce. Ultimately, the flavor profile is a perfect balance; for instance, the savory umami from the cheese melds with the subtle heat from red pepper flakes and the bright, tangy punch from the sun-dried tomatoes. This combination makes every forkful of Marry Me Chicken with Pasta incredibly satisfying and complex.
r">Boosting the flavor
Fortunately, you can easily elevate this dish with a few creative twists. For a fresh finish, try topping your bowl with a generous handful of peppery arugula or fresh basil leaves. Alternatively, swap the heavy cream for a lighter, yet equally luxurious, sun-dried tomato pesto to intensify that signature tangy flavor. If you enjoy a bit of crunch, crispy pancetta or toasted pine nuts make a fantastic garnish. Moreover, consider serving it alongside a simple, bright side salad to cut through the richness; our Easy Italian Salad Dressing is the perfect complement. For an extra flavor boost from within, a spoonful of our Homemade Chicken Stock in the sauce adds incredible depth and savory notes that will make your dish unforgettable.
Tips for Success
Best practices for results
First, always pat your chicken breasts completely dry before seasoning; consequently, you will achieve a beautiful golden sear instead of steaming them. Use freshly grated parmesan cheese for your sauce, as it melts much more smoothly and creates a luxurious, clump-free texture for your Marry Me Chicken with Pasta. Furthermore, reserve a cup of the starchy pasta water before you drain the noodles; therefore, you can adjust the sauce consistency to your perfect liking at the very end.
>Mistakes to avoid
Avoid rushing the sear on your chicken, because properly browned meat builds the foundational flavor for the entire dish. Additionally, do not add garlic to a screaming hot pan, as it will burn in an instant and create a bitter taste; instead, sauté it gently just until fragrant. Remember to taste your sauce before serving, and adjust the seasoning accordingly; otherwise, your Marry Me Chicken with Pasta might lack depth. For more guidance on balancing flavors, read our guide on how to season chicken perfectly. Finally, never pour thick, hot sauce over delicate pasta without combining them in the pan; instead, always toss everything together to ensure every single strand gets coated. Learn the best method for this in our tutorial on cooking pasta al dente.
Serving and Pairing Suggestions
How to serve this dish
Impress your guests by serving Marry Me Chicken with Pasta family-style in a large, shallow bowl. This approach encourages sharing and highlights the beautiful, creamy sauce. For a more elegant presentation, twirl the pasta neatly with tongs and place a chicken breast alongside it. Furthermore, always garnish with a final flourish of fresh basil and a sprinkle of parmesan cheese right before serving. Consequently, this simple step adds a pop of color and a burst of fresh flavor. This stunning Marry Me Chicken with Pasta truly shines as the centerpiece for a romantic date night or a celebratory holiday meal.
What goes well with it
Firstly, a crisp, acidic side cuts through the rich sauce beautifully. We highly recommend our ultimate Easy Caesar Salad for its classic crunch and tangy dressing. Secondly, a glass of chilled white wine, like a Pinot Grigio or Chardonnay, complements the creamy garlic and sun-dried tomato flavors perfectly. For a non-alcoholic option, sparkling water with a squeeze of lemon offers a refreshing palate cleanser. Finally, no Italian feast is complete without warm, crusty bread. Our simple Garlic Bread Sticks are ideal for soaking up every last bit of the delicious sauce from your Marry Me Chicken with Pasta.
Fettuccine is the classic pairing for Marry Me Chicken with Pasta, as its wide, flat surface perfectly holds the creamy sauce. Other excellent choices include penne, rigatoni, or linguine. The key is to use a pasta shape that can capture the rich, flavorful sauce of this beloved dish.
Why is it called Marry Me Chicken Pasta?
The name “Marry Me Chicken” comes from the romantic notion that the dish is so incredibly delicious, it could inspire a marriage proposal after one bite. When served with pasta, the creamy, sun-dried tomato and parmesan sauce creates a meal that feels both indulgent and special enough for such an occasion.
ank-math-faq-item">
Can I make Marry Me Chicken Pasta ahead of time?
Yes, you can prepare the creamy chicken and sauce components ahead of time and store them separately from the cooked pasta. Gently reheat the sauce in a skillet, adding a splash of chicken broth or cream to loosen it up, then combine with freshly cooked pasta just before serving for the best texture in your Marry Me Chicken with Pasta.
How do you thicken the sauce for Marry Me Chicken and Pasta?
The sauce for Marry Me Chicken with Pasta naturally thickens by reducing the heavy cream and chicken broth. For an even thicker consistency, you can create a slurry by mixing a tablespoon of cornstarch with two tablespoons of cold water and whisking it into the simmering sauce. Let it cook for another minute until it reaches your desired thickness.
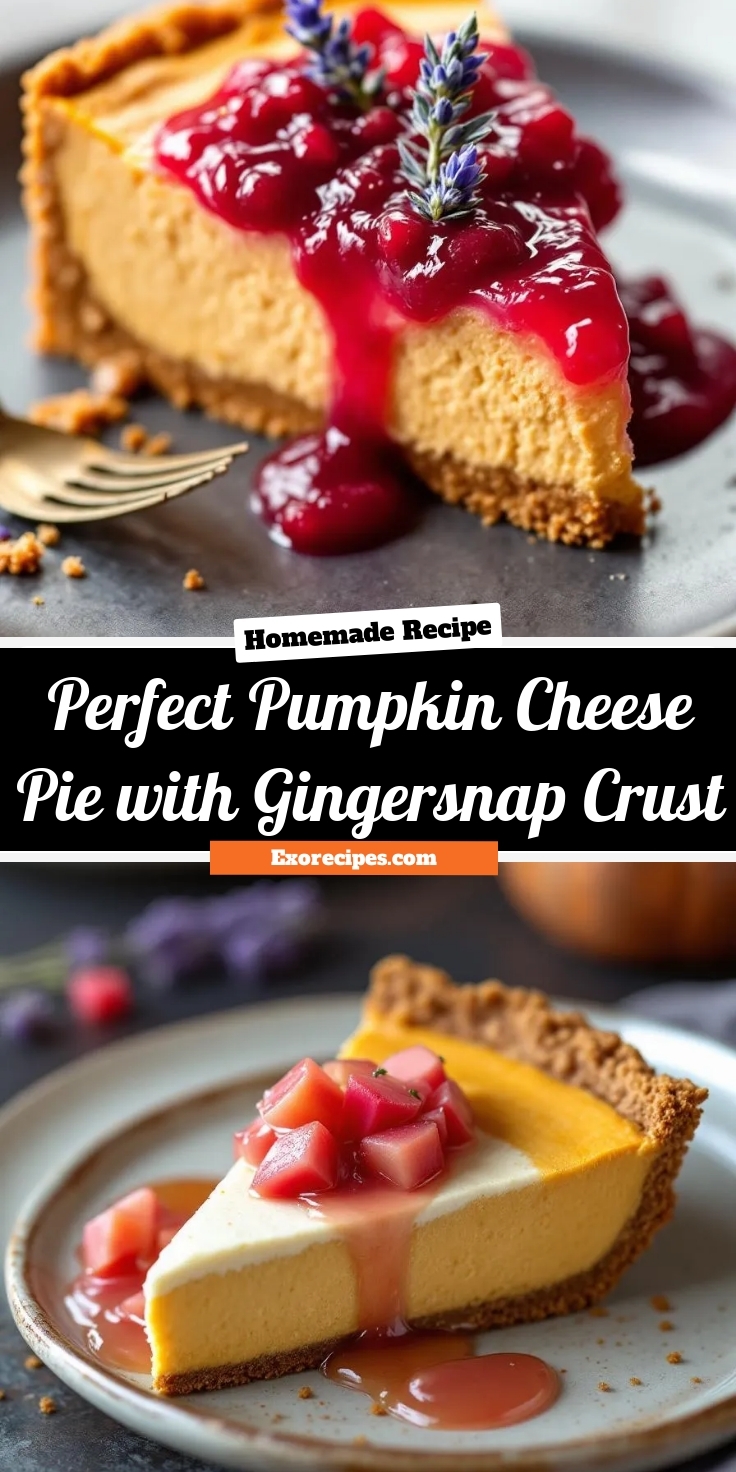
Perfect Pumpkin Cheese Pie with Gingersnap Crust
Introduction
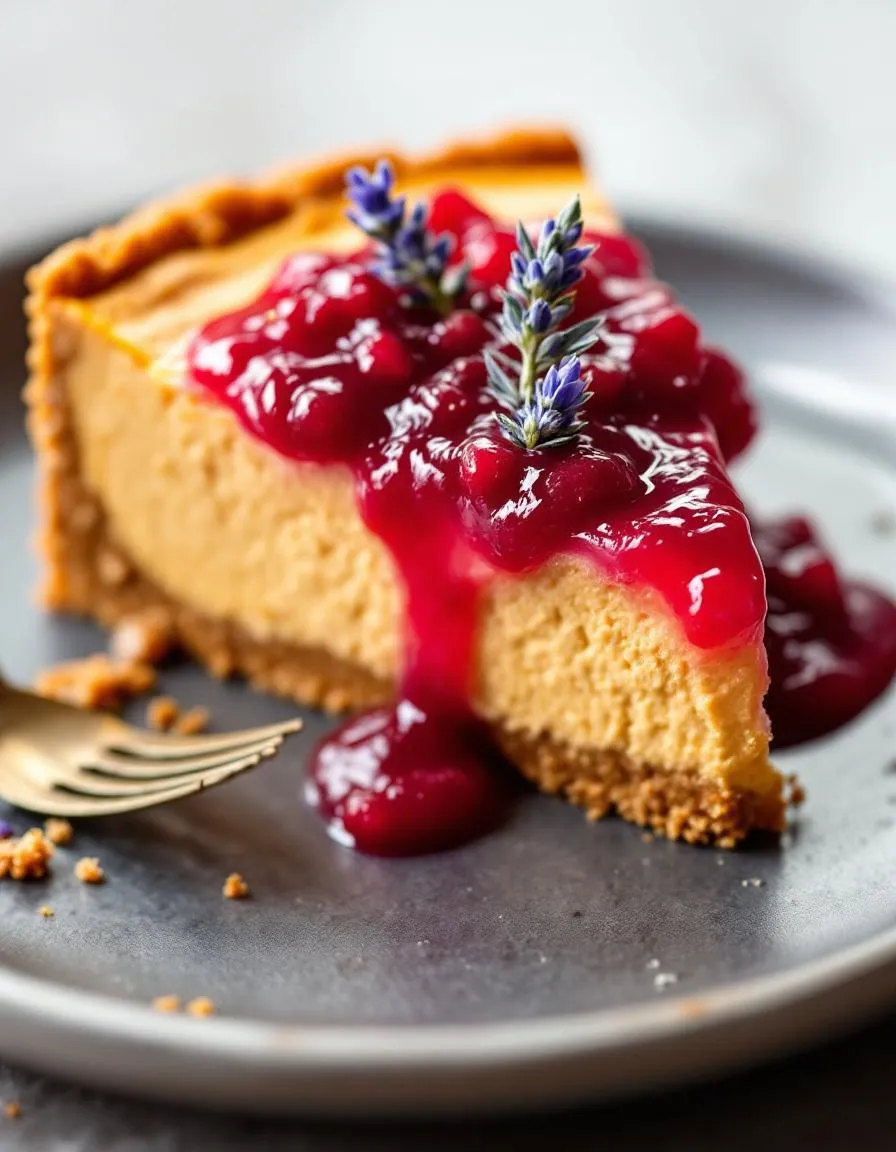
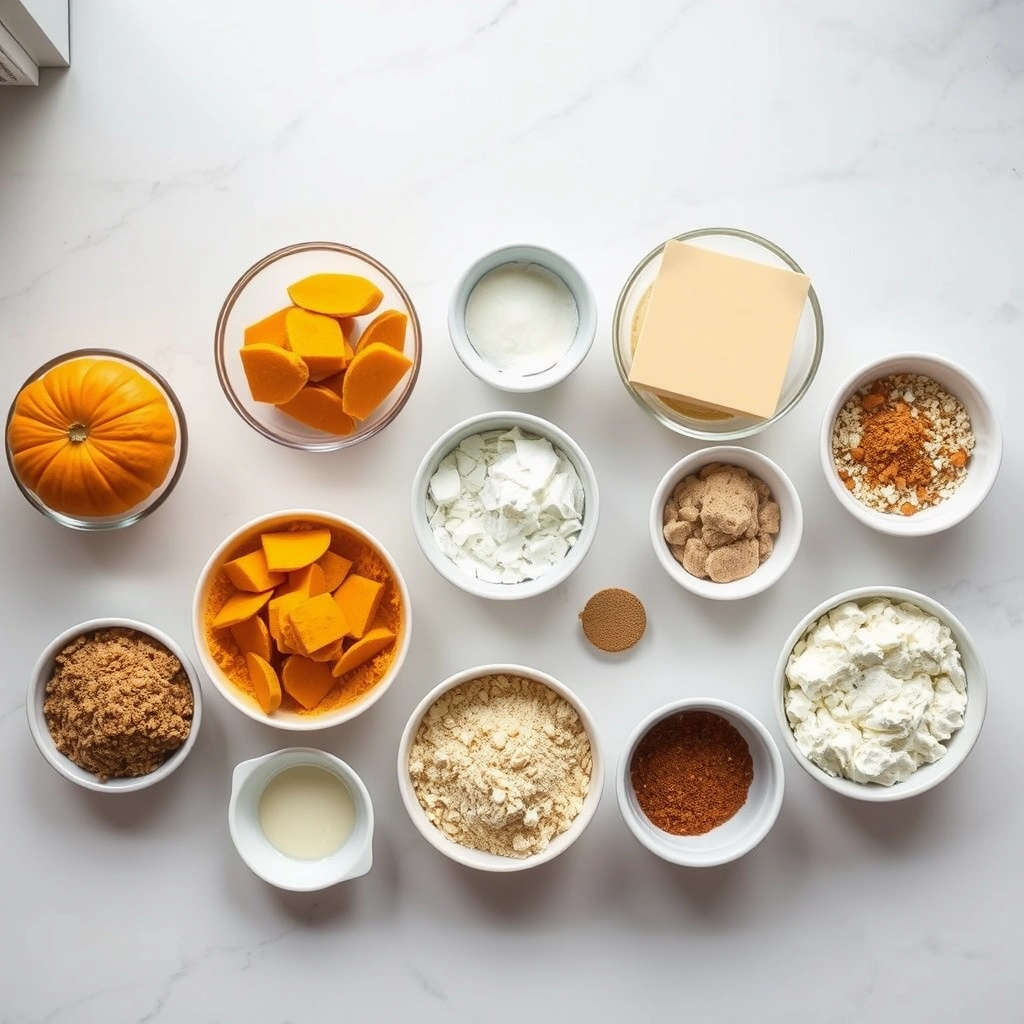
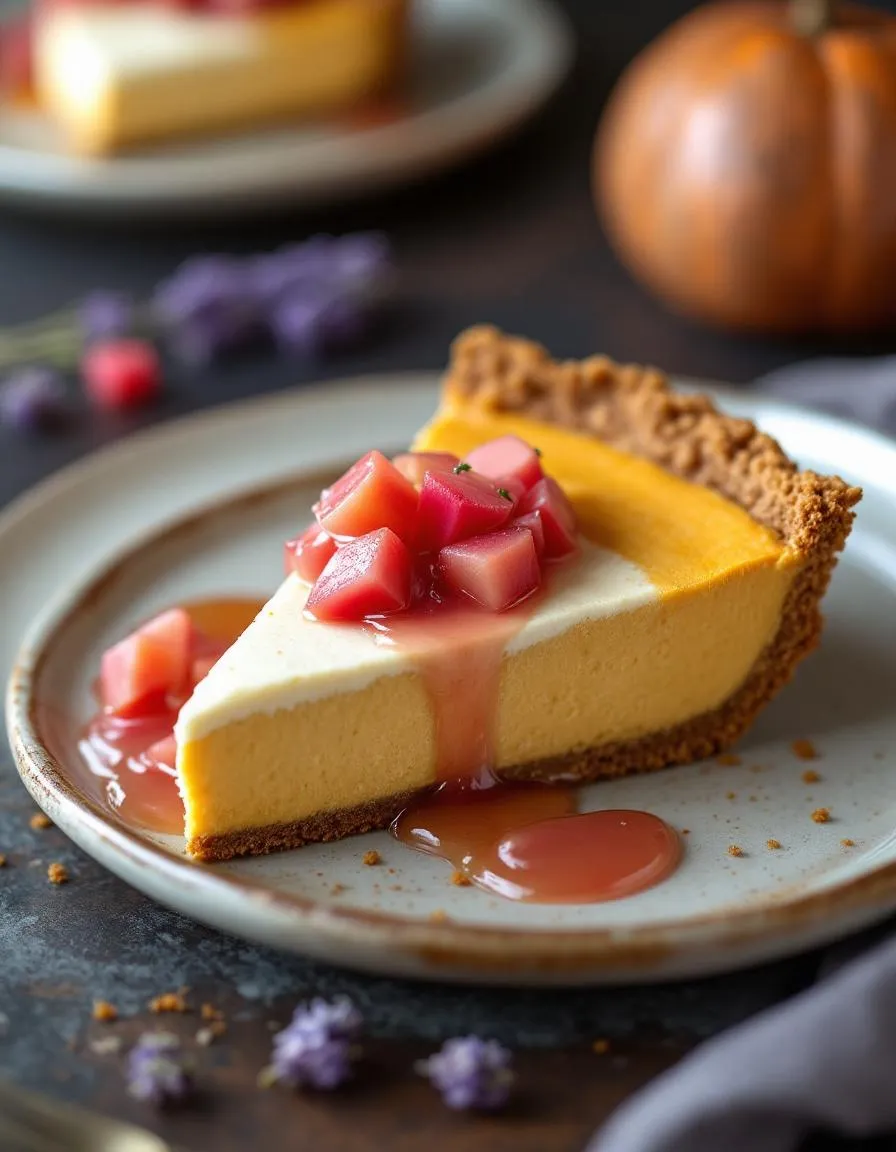
There is something truly magical about a dessert that captures the very essence of the season, isn’t there? Imagine the cozy, familiar comfort of pumpkin spice meeting the cool, creamy luxury of cheesecake, all nestled into a uniquely snappy crust. This Pumpkin Cheese Pie with Gingersnap Crust ~ Rhubarb & Lavender does exactly that, offering a sophisticated twist on beloved classics that will undoubtedly become your new autumn centerpiece. Furthermore, it promises to fill your kitchen with an unforgettable aroma and your table with a show-stopping masterpiece.
So what exactly is this stunning dessert? Essentially, this Pumpkin Cheese Pie with Gingersnap Crust ~ Rhubarb & Lavender is a beautiful hybrid. It masterfully combines the rich, spiced filling of a traditional pumpkin pie with the dense, velvety texture of a New York-style cheesecake. The base, however, breaks from tradition with a gingersnap crust that provides a warm, spicy crunch. Finally, a compote of rhubarb and a hint of culinary lavender introduces a tangy, floral note that cuts through the richness, creating a perfectly balanced bite. This recipe matters because it elevates the expected into the extraordinary, offering a creative and impressive option for your holiday gatherings or any special occasion. Moreover, it fits our blog’s tone perfectly, as we always strive to share unique, from-scratch recipes that inspire confidence and joy in the kitchen, much like our guide on how to make the perfect pie crust. Ultimately, this dessert is a conversation starter, a testament to the fact that classic flavors can be reinvented in the most delightful ways, proving that baking is an art form. For instance, if you enjoy exploring unique flavor profiles, you might also appreciate the principles behind our science of baking with lavender.
Why I Love This Recipe
This Pumpkin Cheese Pie with Gingersnap Crust ~ Rhubarb & Lavender holds a special place in my heart because it was my first successful attempt at creating a truly original recipe. I developed it for a Friendsgiving years ago, desperately wanting to bring something that felt both comforting and entirely new. The moment I saw my guests’ faces light up after that first bite, followed by a chorus of requests for the recipe, I knew it was a keeper. Consequently, it has been my go-to dessert for expressing gratitude and celebration ever since, and it never fails to create a warm, joyful moment around the table.
Health and Nutrition
Why it’s good for your body
This Pumpkin Cheese Pie with Gingersnap Crust ~ Rhubarb & Lavender offers a surprising number of nutritional benefits. First, pumpkin provides a powerful dose of beta-carotene, which your body converts into immune-boosting vitamin A. Moreover, this essential vitamin also actively promotes healthy vision and skin.
Additionally, the ginger in the gingersnap crust contributes its own wellness perks. Ginger possesses natural anti-inflammatory properties that can soothe digestion. Consequently, enjoying a slice of this dessert does more than just satisfy your sweet tooth; it also supports your gut health.
Furthermore, rhubarb introduces a unique set of advantages. It is a fantastic source of vitamin K, which plays a crucial role in bone health and blood clotting. Meanwhile, the lavender not only adds a beautiful aromatic quality but may also impart a calming effect. Ultimately, the Pumpkin Cheese Pie with Gingersnap Crust ~ Rhubarb & Lavender delivers a complex flavor profile that actively works for your well-being.
How it fits in a healthy lifestyle
You can absolutely enjoy this Pumpkin Cheese Pie with Gingersnap Crust ~ Rhubarb & Lavender as part of a balanced diet. Think of it as a celebratory centerpiece rather than an everyday snack. Savoring a reasonable portion allows you to indulge your cravings without derailing your nutritional goals.
For those managing specific dietary needs, this dessert can be a great option. You can easily adapt the recipe to be gluten-free by using certified gluten-free gingersnaps. If you are exploring more ways to enjoy wholesome desserts, our guide on gluten-free baking offers fantastic tips and flour alternatives. The combination of protein from the cheese and complex carbohydrates from the crust also provides a more satisfying treat that helps prevent a rapid sugar crash. Remember, a healthy lifestyle embraces balance and joy in eating. For more inspiration on creating nutritious and delicious meals, check out our thoughts on building a balanced plate that fuels your body and pleases your palate.
A creamy pumpkin cheesecake pie with a spiced gingersnap crust, topped with a tangy rhubarb and lavender compote.
Ingredients
Scale
For the Crust:
2 cups gingersnap cookie crumbs
6 tablespoons unsalted butter, melted
16 oz cream cheese, softened
1 cup canned pumpkin puree
3/4 cup granulated sugar
2 large eggs
1 teaspoon vanilla extract
1 teaspoon ground cinnamon
1/2 teaspoon ground ginger
1/4 teaspoon ground nutmeg
2 cups diced rhubarb
1/2 cup water
1/4 cup sugar
1 teaspoon dried culinary lavender
Instructions
1. Prepare the Crust:
Preheat oven to 350°F. Mix gingersnap crumbs with melted butter and press into a 9-inch pie dish. Bake for 8 minutes, then cool.
Beat cream cheese until smooth. Add pumpkin, sugar, eggs, vanilla, and spices. Mix until well combined.
Pour filling into crust. Bake for 35-40 minutes until set. Cool completely, then refrigerate for at least 4 hours.
For compote: Combine rhubarb, water, sugar, and lavender in a saucepan. Simmer for 15 minutes until rhubarb is soft. Cool before serving over pie.
Notes
You can customize the seasonings to taste.
s-dish">How to Prepare This Dish
Steps and time-saving tips
First, preheat your oven to 350°F to ensure it’s perfectly ready for baking. Meanwhile, pulse your gingersnap cookies in a food processor until they form fine crumbs; this step takes just minutes and creates the ideal base texture. Combine the crumbs with melted butter and a pinch of salt, then firmly press this mixture into your pie dish. For a neat and even crust, use the flat bottom of a measuring cup to press it down. Next, par-bake the crust for about 8 minutes; this crucial step prevents a soggy bottom later. While the crust cools slightly, start on your filling. In a large bowl, beat the cream cheese until it is completely smooth and lump-free; this is essential for a silky texture. Then, gradually whisk in the pumpkin puree, eggs, spices, and sugar until everything is beautifully combined. Pour this luxurious filling into your warm crust and smooth the top with a spatula. Finally, bake your Pumpkin Cheese Pie with Gingersnap Crust ~ Rhubarb & Lavender for 45-50 minutes until the center is just set. Let it cool completely on a wire rack before chilling it for at least four hours, preferably overnight. Meanwhile, prepare the rhubarb compote by simmering chopped rhubarb with a touch of sugar and lavender until it breaks down into a jammy consistency. Right before serving, generously drizzle the cooled compote over each slice for that perfect sweet-tart finish.
Mistakes I’ve made and learned from
I’ve certainly had my share of kitchen mishaps with this recipe, so learn from my errors! Initially, I would impatiently pour the filling into an un-baked crust, which resulted in a disappointingly soft and crumbly base that couldn’t hold a slice. Now, I never skip the par-baking step; it makes the crust sturdy and gives it a fantastic snap. Another classic mistake was over-mixing the filling after adding the eggs, which unfortunately incorporated too much air and caused the pie to crack dramatically as it cooled. I learned that gently folding in the final ingredients by hand is the secret to a perfectly smooth and crack-free top. For more insights on achieving that ideal creamy texture, my guide on avoiding cracks in your cheesecake covers all the crucial tips. Furthermore, I once made the rhubarb compote with far too little sugar, creating an overwhelmingly tart topping that overshadowed the delicate pumpkin and spice flavors. Balancing sweet and tart is an art, and understanding these flavor profiles is key, much like we discuss in our piece on mastering dessert flavor balance. Trust me, a little patience and these small adjustments will make your Pumpkin Cheese Pie with Gingersnap Crust ~ Rhubarb & Lavender absolutely flawless.
n-and-variations">Cultural Connection and Variations
Where this recipe comes from
This dessert tells a beautiful story of fusion. It marries the classic American pumpkin pie with the creamy texture of a New York-style cheesecake. My grandmother, however, always insisted on a gingersnap crust. She claimed the spicy snap perfectly cut through the richness. Meanwhile, the rhubarb and lavender compote on top came from a different place entirely. I discovered that combination at a farmers’ market in Provence. Consequently, this Pumpkin Cheese Pie with Gingersnap Crust ~ Rhubarb & Lavender became our family’s signature bridge between autumn and spring.
Around the world, people celebrate the harvest in their own ways. For instance, many British bakers might use a digestive biscuit base for a similar pie. Alternatively, in Australia, they often pair pumpkin with savory spices in pastries. Some families in the American South swear by a bourbon-spiked whipped cream topping instead of our fruit compote. Ultimately, every kitchen adds its own unique twist. This particular version, however, holds a special place at our Thanksgiving table. It beautifully represents a blend of tradition and personal adventure.
How it fits in today’s cooking
This pie remains incredibly relevant because it celebrates seasonal, whole ingredients. Modern home cooks absolutely adore its make-ahead convenience. Furthermore, they appreciate its stunning visual appeal on social media feeds. You can easily prepare the entire dessert a day before your big event. This strategy makes it a perfect star for your holiday baking schedule.
Today, many bakers adap
t the recipe to fit dietary needs. For example, they might use a gluten-free gingersnap blend for the crust. Others could opt for a plant-based cream cheese alternative. Regardless of these tweaks, the soul of the dish stays the same. It delivers cozy, familiar flavors that everyone craves. This Pumpkin Cheese Pie with Gingersnap Crust ~ Rhubarb & Lavender also fits beautifully into a broader menu of elegant fall dessert recipes. It provides a sophisticated yet comforting end to any meal, from a weeknight dinner to a festive gathering.
Taste and Texture
What makes it delicious
This Pumpkin Cheese Pie with Gingersnap Crust ~ Rhubarb & Lavender delivers a spectacular symphony of flavors and textures. First, your fork cracks through the spicy, crisp gingersnap crust. Then, it sinks into the impossibly creamy and rich pumpkin cheesecake filling. The floral hint of lavender beautifully complements the earthy pumpkin, while the rhubarb swirl cuts through the richness with a tangy, bright zing. Ultimately, each bite of this Pumpkin Cheese Pie with Gingersnap Crust ~ Rhubarb & Lavender feels both decadently smooth and delightfully complex.
Boosting the flavor
You can easily amplify this dessert’s wow factor with a few creative tweaks. For instance, a dollop of freshly whipped cream adds a lovely cloud-like texture and a cool contrast. Alternatively, a drizzle of warm salted caramel sauce introduces a delicious buttery depth that pairs wonderfully with the spices. If you adore the gingersnap crust, consider exploring our homemade gingersnap cookie recipe for an even more potent ginger flavor. Furthermore, a scoop of vanilla bean ice cream on the side melts into a luxurious sauce, making every bite even more special. For another layer of fruity complexity, try a spoonful of our simple berry compote alongside the rhubarb.
Always press your gingersnap crust firmly into the pan to create a stable base. Furthermore, make sure all your ingredients, especially the cream cheese, reach room temperature for a perfectly smooth filling. Then, bake your Pumpkin Cheese Pie with Gingersnap Crust ~ Rhubarb & Lavender until the edges are set but the center still has a slight jiggle. Finally, allow the pie to cool completely on a wire rack before chilling it for several hours, as this step ensures clean slices.
Mistakes to avoid
Avoid overmixing the filling once you add the eggs, as this incorporates too much air and can cause the pie to crack during baking. Instead, mix on low speed just until the ingredients combine. Additionally, do not skip the step of blind baking your crust if your recipe calls for it; otherwise, you might end up with a soggy bottom. For more guidance on achieving the perfect crumb, read our guide on how to blind bake a pie crust. Moreover, ensure your rhubarb compote is completely cool before adding it to the top, as a warm compote can make the creamy layer underneath weep. If you are working with fresh rhubarb, our rhubarb compote recipe offers excellent tips for balancing its tartness.
g-suggestions">Serving and Pairing Suggestions
How to serve this dish
For a stunning presentation, serve each slice of Pumpkin Cheese Pie with Gingersnap Crust ~ Rhubarb & Lavender chilled. Consequently, you can elevate the visual appeal with a delicate dusting of cinnamon or a dollop of freshly whipped cream. Moreover, a sprig of mint or a few edible lavender flowers make for an elegant, aromatic garnish. This beautiful dessert truly shines during holiday gatherings, yet it also makes any autumn brunch feel exceptionally special.
What goes well with it
A hot cup of spiced chai tea makes a wonderful companion. Its warm spices beautifully echo the gingersnap crust and pumpkin filling. Alternatively, for a decadent dessert pairing, consider a glass of rich, sweet dessert wine. Furthermore, if you want to offer another seasonal option, our popular Apple Crisp creates a fantastic fall dessert spread. Finally, for a lighter start to your meal, a simple Arugula Salad provides a fresh, peppery contrast that prepares the palate for the sweet and creamy pie.
math-faq-block">
Can I make the Pumpkin Cheese Pie with Gingersnap Crust ahead of time?
Absolutely! This pie is an excellent make-ahead dessert. You can prepare the Pumpkin Cheese Pie with Gingersnap Crust up to two days in advance; just keep it covered and refrigerated until you’re ready to serve.
What is the best way to serve Pumpkin Cheese Pie with Rhubarb & Lavender?
For the best experience, let the pie sit at room temperature for about 20-30 minutes before serving to soften slightly. This allows the creamy pumpkin cheese filling and the spiced gingersnap crust flavors to fully shine.
Can I substitute the rhubarb in the topping?
Yes, if fresh rhubarb is out of season, you can use a high-quality store-bought rhubarb compote or jam. While the unique rhubarb and lavender combination is signature, a tart cherry or cranberry compote would also provide a lovely contrast to the sweet pie.
ank-math-faq-item">
Do I need to use a springform pan for this pumpkin cheese pie?
A 9-inch springform pan is highly recommended for this particular recipe. It makes removing the Pumpkin Cheese Pie with Gingersnap Crust cleanly and easily much simpler, preserving the beautiful layers of the crust and filling.
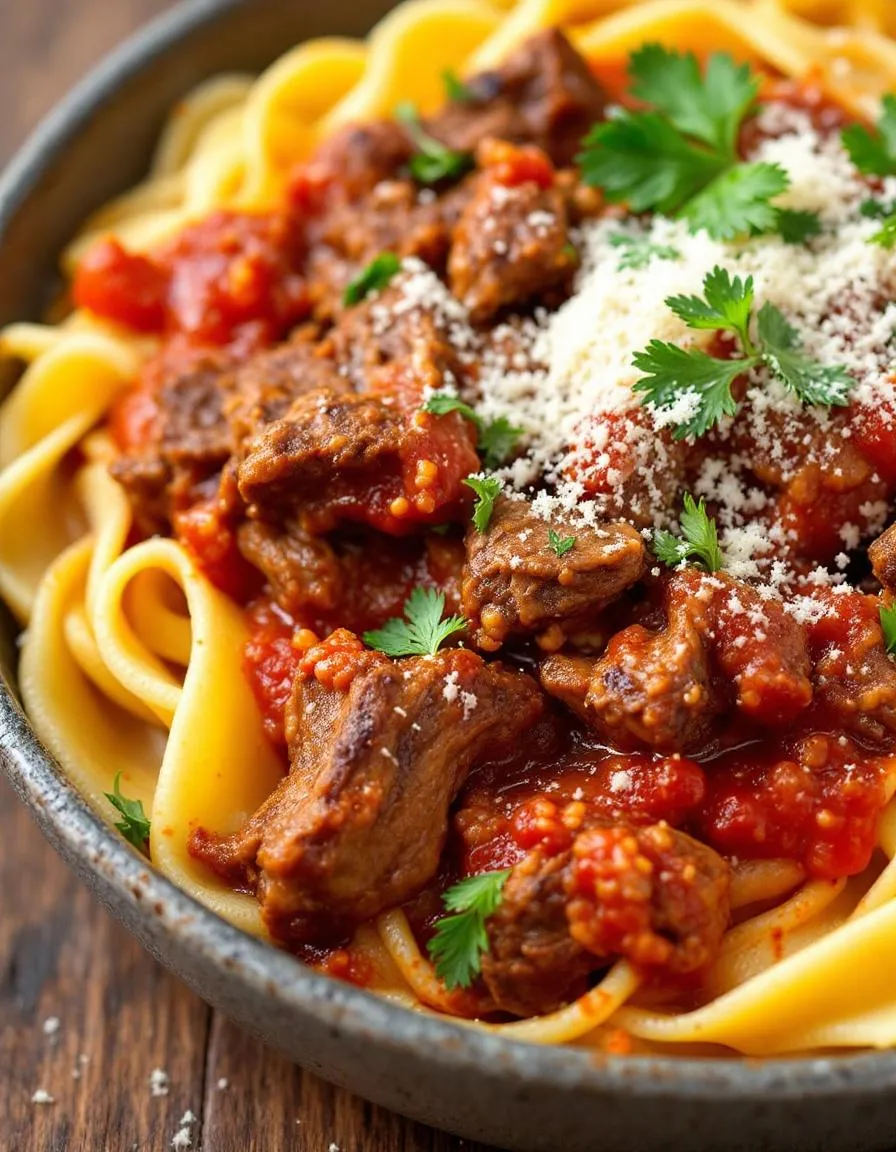
Ultimate Dutch Oven Short Rib Ragu with Pappardelle
Introduction
There is something incredibly comforting about a meal that simmers for hours, filling your home with an aroma that promises deep, complex flavors and a truly satisfying experience. This Dutch Oven Short Rib Ragu with Pappardelle delivers on that promise completely, offering a taste of rustic, slow-cooked perfection that feels both special and deeply nourishing. It is the ultimate project for a leisurely weekend, rewarding your patience with a dish that is absolutely unforgettable.
Essentially, this Dutch Oven Short Rib Ragu with Pappardelle is a masterclass in slow cooking. We start with bone-in short ribs, which we brown to create a flavorful fond. Then, we slowly braise the meat in a rich base of tomatoes and red wine until it becomes impossibly tender and shreds effortlessly. This luxurious ragu clings beautifully to wide, ribbon-like pappardelle pasta, ensuring every single bite is packed with flavor. This recipe matters because it transforms humble, affordable ingredients into a spectacular culinary event. It proves that you do not need fancy techniques to create restaurant-quality food at home; you just need time and a reliable heavy pot. This approach to cooking, which emphasizes technique and patience over complexity, perfectly matches our blog’s philosophy of creating authentic rustic meals that bring people together. Furthermore, mastering a braise like this builds fundamental kitchen confidence. The process teaches you the importance of building layers of flavor, a skill you can then apply to countless other dishes, from a simple hearty beef stew to a classic coq au vin. Ultimately, this Dutch Oven Short Rib Ragu with Pappardelle is more than just dinner; it is a rewarding cooking project that yields a profoundly delicious and impressive result.
Why I Love This Recipe
I truly love this Dutch Oven Short Rib Ragu with Pappardelle because it represents the heart of what I believe cooking should be about. Firstly, the entire process is a form of therapy for me; the slow, mindful steps force me to unwind and be present in the kitchen. Moreover, the transformative nature of the dish never fails to amaze me. Watching tough cuts of meat and basic pantry staples meld into something so elegant and deeply flavorful feels like kitchen magic every single time. Ultimately, this dish has become my go-to for celebrating milestones and comforting friends, making it deeply personal and full of happy memories.
Health and Nutrition
Why it’s good for your body
This Dutch Oven Short Rib Ragu with Pappardelle delivers a powerful nutritional punch. First, the slow-cooked short ribs provide an excellent source of high-quality protein and collagen. Consequently, these nutrients support strong muscles and promote healthy joints. Moreover, the extended cooking process in a Dutch oven breaks down tough connective tissue, making the iron and zinc in the meat highly bioavailable.
Additionally, the tomato-based sauce contributes significant lycopene, a potent antioxidant. Your body actually absorbs this antioxidant better from cooked tomatoes. Furthermore, this Dutch Oven Short Rib Ragu with Pappardelle incorporates aromatic vegetables like carrots, celery, and onions. These ingredients not only build a deep flavor foundation but also offer essential vitamins and fiber.
Ultimately, enjoying a hearty dish like this supports both physical health and mental well-being. Therefore, you can feel good about serving this nourishing meal to your family. This particular Dutch Oven Short Rib Ragu with Pappardelle truly combines robust flavor with substantial health benefits.
How it fits in a healthy lifestyle
This rich ragu fits perfectly into a balanced approach to eating. Think of it as a centerpiece meal that provides lasting energy and satisfaction, which can help prevent mindless snacking later. For those focusing on protein intake, the generous portion of meat offers a fantastic source to support fitness goals and muscle repair.
You can easily tailor the dish to meet specific dietary needs. Simply swap the pappardelle for your favorite whole wheat or gluten-free pasta alternative to make it work for you. While the dish is hearty, practicing mindful portion control allows you to enjoy its deep flavors as part of a varied weekly menu. Pair your Dutch Oven Short Rib Ragu with a light, crisp side salad to create a perfectly rounded meal. Explore our guide on building a balanced weekly meal plan for more ideas on incorporating satisfying dishes like this. For a lighter pasta option that doesn’t skimp on flavor, our lemon herb chicken zoodles is another fantastic choice.
A rich and hearty ragu featuring tender braised short ribs in a savory tomato sauce, served over wide pappardelle pasta.
Ingredients
Scale
For the Crust:
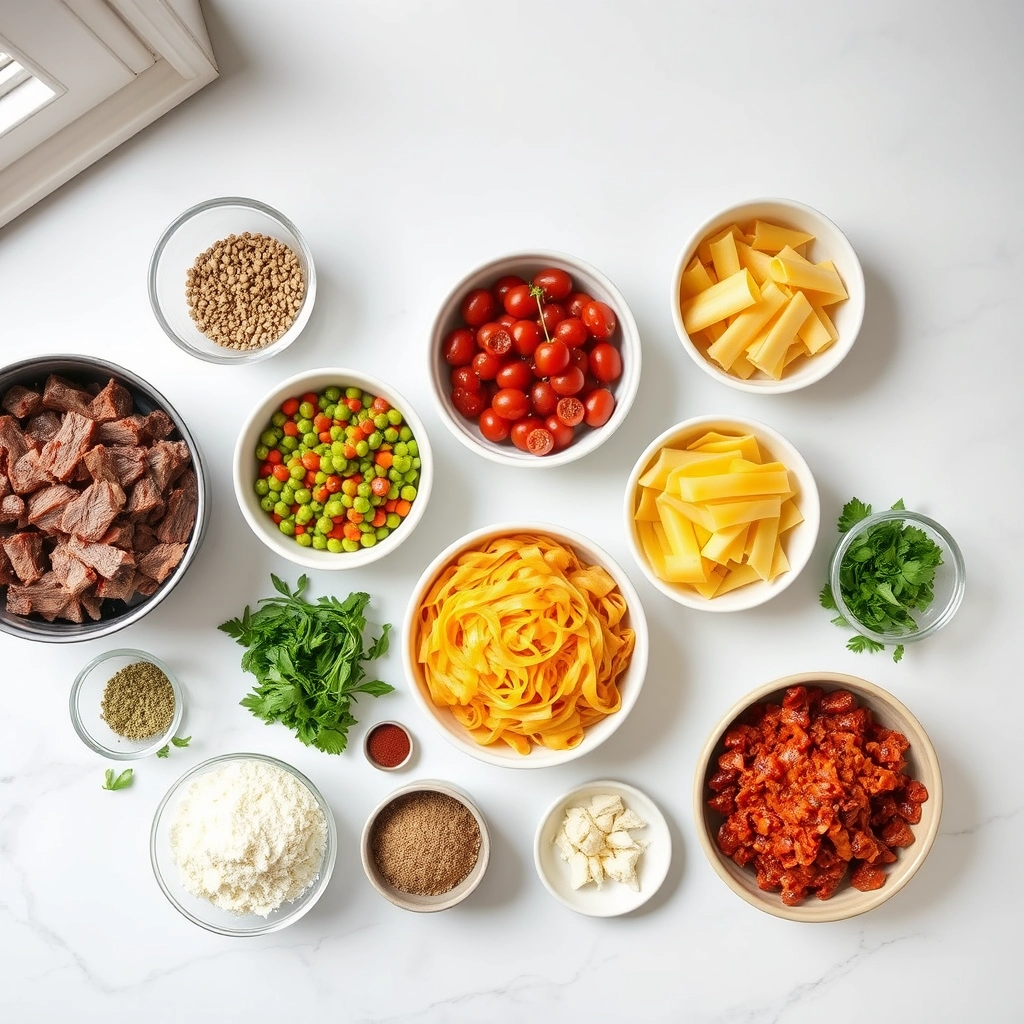
3 lbs bone-in beef short ribs
2 tbsp olive oil
1 large onion, diced
2 carrots, diced
2 celery stalks, diced
4 garlic cloves, minced
1 cup dry red wine
28 oz canned crushed tomatoes
2 cups beef broth
2 tbsp tomato paste
1 tsp dried oregano
1 bay leaf
Salt and black pepper to taste
1 lb pappardelle pasta
Fresh parsley for garnish
Grated Parmesan cheese for serving
Instructions
1. Prepare the Crust:
Preheat oven to 325°F. Season short ribs generously with salt and pepper.
Heat olive oil in a large Dutch oven over medium-high heat. Sear short ribs on all sides until browned, about 3-4 minutes per side. Remove and set aside.
Add onion, carrots, and celery to the pot. Cook until softened, about 5-7 minutes. Add garlic and cook for 1 minute until fragrant.
Pour in red wine, scraping up any browned bits from the bottom. Simmer for 2-3 minutes.
Stir in crushed tomatoes, beef broth, tomato paste, oregano, and bay leaf. Return short ribs to the pot, submerging them in the liquid.
Cover and transfer to the oven. Braise for 2.5-3 hours until meat is fork-tender.
Remove short ribs from the pot. Shred the meat, discarding bones and excess fat. Return shredded meat to the sauce. Simmer on stove if needed to thicken.
Meanwhile, cook pappardelle according to package directions. Drain and toss with the ragu.
Garnish with fresh parsley and serve with grated Parmesan.
Notes
You can customize the seasonings to taste.
How to Prepare This Dish
Steps and time-saving tips
First, pat your short ribs completely dry with paper towels; this step is crucial for achieving a beautiful, dark sear. Meanwhile, preheat your Dutch oven over medium-high heat with a thin layer of oil. Carefully sear the ribs on all sides until they develop a deep brown crust, then transfer them to a plate. Next, sauté your chopped onions, carrots, and celery in that same glorious, flavorful fat. After a few minutes, stir in the tomato paste and let it cook until it darkens slightly, which unlocks its sweetness. Now, pour in your red wine to deglaze the pot, scraping up all those tasty browned bits from the bottom. Let the wine reduce by half, concentrating its flavor. Finally, return the short ribs to the pot and add your crushed tomatoes and broth until the meat is nearly submerged. Bring everything to a gentle simmer, then cover and transfer it to a low oven for about three hours. The long, slow cook is what makes this Dutch Oven Short Rib Ragu so incredibly tender and rich. For a time-saving tip, you can complete these initial steps the night before and simply let the pot braise in the oven the next day while you relax. When the meat is fall-apart tender, shred it directly in the pot and stir it back into the luxurious sauce. Cook your pappardelle until al dente, and then toss it directly into the ragu, allowing the pasta to finish cooking in the sauce for the final minute. This helps the noodles absorb maximum flavor. Serve your Dutch Oven Short Rib Ragu with Pappardelle immediately with a generous sprinkle of fresh parsley and grated cheese.
Mistakes I’ve made and learned from
I have absolutely rushed the sear on the short ribs, which resulted in a less complex flavor for the entire Dutch Oven Short Rib Ragu. Patience here is non-negotiable; you need that deep, dark crust for the foundation of your sauce. Another common error I made was braising the meat at too high of an oven temperature, which caused the connective tissue to tighten up instead of breaking down into that perfect, silky texture. Low and slow is the only way to go for this dish. I also learned the hard way that not all Dutch ovens are created equal. Using a pot that didn’t distribute heat evenly led to some frustrating hot spots and uneven cooking. Thankfully, I found a solution by investing in a better piece of cookware, and now I always recommend checking out a reliable guide for the best Dutch oven for your kitchen. Finally, I used to make my ragu too far in advance and then reheat it aggressively, which sometimes made the meat a bit tough. Now, I gently warm it back up, and I often use the leftover braising liquid for other amazing dishes, like my favorite easy beef stew recipe, which is a fantastic way to reduce food waste.
This recipe for Dutch Oven Short Rib Ragu with Pappardelle feels like a warm hug from Northern Italy. It pulls its deep, soulful character from the tradition of slow-cooking tough cuts of meat until they surrender into something magical. Italian nonnas have perfected this art for generations, often using a heavy pot over a low flame for hours. My own family, however, puts a small American twist on the classic. We love adding a splash of robust red wine and a touch of orange zest to cut through the richness, creating a version that feels both old-world and entirely our own.
Meanwhile, variations pop up across the globe. In France, a similar stew might feature a bouquet garni and become a daube. Conversely, some modern chefs might even use a pressure cooker to speed up the process, though the Dutch oven method delivers an irreplaceable depth of flavor. No matter the region, the goal remains the same: to transform simple, humble ingredients into a luxurious and comforting meal. Ultimately, a well-made Dutch Oven Short Rib Ragu with Pappardelle tells a story of patience, family, and the power of low, slow heat.
ays-cooking">How it fits in today’s cooking
This dish absolutely thrives in modern kitchens because it champions both comfort and convenience. Furthermore, it fits perfectly into our love for weekend project cooking and effortless entertaining. You can braise the ribs one day and simply reheat the ragu for a spectacular weeknight dinner, making it a fantastic meal prep idea that feels anything but ordinary.
Today’s cooks also love to adapt it. Some might use an Instant Pot to cut the cooking time, while others keep it classic for a Sunday supper. Moreover, its rich, satisfying nature makes it a star for holiday gatherings or a cozy seasonal meal after a day outdoors. It pairs beautifully with a simple side, perhaps one of our favorite easy side dishes, for a complete and impressive feast. This timeless ragu continues to win hearts by blending tradition with our contemporary need for deeply flavorful, shareable food.
Taste and Texture
What makes it delicious
This Dutch Oven Short Rib Ragu with Pappardelle delivers a profoundly rich and savory experience. First, the aroma of slow-cooked beef, red wine, and herbs will fill your kitchen, building incredible anticipation. The short ribs become impossibly tender, melting into the sauce and creating a luxurious, velvety texture that clings to every wide ribbon of pappardelle. Each bite offers a complex symphony of flavors: deep umami from the tomato paste, a subtle sweetness from the soffritto, and a bright finish from a hint of citrus zest. Ultimately, the hearty, fall-apart meat and the perfectly al dente pasta make this Dutch Oven Short Rib Ragu with Pappardelle a truly unforgettable comfort food.
r">Boosting the flavor
For an extra layer of complexity, stir in a tablespoon of miso paste with your tomato paste; it will amplify the savory depth wonderfully. Furthermore, a finishing garnish is key. Try adding a sprinkle of gremolata or a generous shower of pecorino cheese right before serving. Alternatively, a drizzle of a high-quality, peppery olive oil can add a beautiful fruity note. If you love crafting homemade pasta to elevate dishes like this, our guide on how to make fresh pasta is a perfect next step. Moreover, the right wine can transform your meal; discover the best pairings with our tips for perfect wine pairing for pasta.
Tips for Success
Best practices for results
Always pat your short ribs completely dry with paper towels before searing them. This crucial step guarantees a beautiful, caramelized crust. Furthermore, use a good quality, full-bodied red wine for deglazing the pot. Simmer your Dutch Oven Short Rib Ragu with Pappardelle low and slow until the meat falls apart effortlessly with a fork. Finally, taste and adjust the seasoning just before serving to make the flavors truly sing.
>Mistakes to avoid
Avoid rushing the searing process, as crowding the Dutch oven will steam the meat instead of creating a flavorful fond. Instead, sear the ribs in batches for the best results. Additionally, do not skip skimming the excess fat from the surface of the ragu after braising; otherwise, your sauce may become greasy. For more on building flavor, read our guide on how to properly deglaze your pan. Also, ensure you use wide, flat noodles like pappardelle that can properly support the hearty sauce, unlike thinner pasta shapes which you can learn about in our primer on choosing the right pasta shape.
Serving and Pairing Suggestions
How to serve this dish
First, serve your Dutch Oven Short Rib Ragu with Pappardelle immediately while it is wonderfully hot. Furthermore, twirl the wide pappardelle noodles into a low bowl for a beautiful presentation. For a final touch, garnish with a generous sprinkle of fresh parsley and a few shavings of Parmesan cheese. Consequently, this dish becomes the ultimate centerpiece for a cozy dinner party or a special holiday gathering. Ultimately, its rich aroma and elegant look will impress every single guest at your table.
What goes well with it
Start your meal with a crisp, refreshing side to balance the rich flavors. For instance, our classic Arugula Salad offers a peppery contrast that cuts through the ragu’s decadence perfectly. Additionally, a full-bodied red wine like a Chianti or Cabernet Sauvignon complements the deep, savory notes of the Dutch Oven Short Rib Ragu with Pappardelle. Finally, complete your feast with something sweet; our beloved Easy Tiramisu provides a light, coffee-infused finish that everyone will adore.
What cut of short ribs is best for Dutch Oven Short Rib Ragu with Pappardelle?
English-cut or flanken-cut short ribs work best for this recipe. English-cut ribs (cut parallel to the bone) are ideal as they become incredibly tender and shred easily after slow-braising, which is perfect for creating the rich texture of the ragu. This cut is the traditional choice for a classic Dutch Oven Short Rib Ragu with Pappardelle.
Can I make short rib ragu ahead of time?
Absolutely, and it’s highly recommended! Making your Dutch Oven Short Rib Ragu a day or two in advance allows the flavors to meld and deepen. Simply reheat it gently on the stovetop while you cook the pappardelle pasta fresh for serving.
ank-math-faq-item">
What can I use instead of pappardelle pasta?
If you don’t have pappardelle, other wide, flat noodles like tagliatelle or fettuccine are excellent substitutes. Their broad surface area is perfect for clinging to the rich, chunky sauce of the short rib ragu. Avoid delicate, thin pasta as it can be overwhelmed by the hearty texture of the dish.
How long does it take to braise short ribs until tender?
In a Dutch oven set at a low simmer, short ribs typically take between 2.5 to 3.5 hours to become fall-off-the-bone tender. The meat is ready when it easily shreds with a fork. This slow cooking process is essential for developing the deep, complex flavors in your Dutch Oven Short Rib Ragu with Pappardelle.
Easy Whipped Pumpkin Spice Honey Butter Recipe
Introduction
Is there anything more comforting than the warm, inviting aroma of pumpkin spice wafting through your kitchen? Honestly, it instantly transports me to cozy autumn mornings and joyful holiday gatherings. Now, imagine capturing that entire feeling in one irresistibly creamy, spreadable delight. This magical creation is our Whipped Pumpkin Spice Honey Butter, and it is about to become your new secret weapon for elevating every breakfast and dessert. Furthermore, it is incredibly simple to make, requiring just a handful of pantry staples and a few minutes of your time.
Whipped Pumpkin Spice Honey Butter is a fluffy, spreadable condiment that masterfully combines rich, creamy butter with the warm, autumnal flavors of pumpkin pie spice and the natural sweetness of honey. Essentially, it takes the classic concept of compound butter and transforms it into an airy, luxurious treat that melts beautifully on warm surfaces. This matters because it offers an effortless way to add a gourmet touch to your simplest meals. For example, a dollop on a stack of fluffy pancakes turns an ordinary breakfast into a special occasion. Similarly, it can revolutionize your baking; swirling it into your favorite banana bread recipe before baking creates a marbled, spiced center that is absolutely divine. Ultimately, this recipe perfectly fits our blog’s tone because we champion approachable recipes that deliver maximum flavor and comfort without requiring complex techniques or hard-to-find ingredients.
Why I Love This Recipe
I genuinely adore this Whipped Pumpkin Spice Honey Butter because it embodies the spirit of cozy, intentional cooking. My family eagerly anticipates its first appearance each fall; it signals the official start of our holiday baking and gathering season. Personally, I love how a single batch fills my entire home with the most welcoming scent, a fragrance that promises delicious things to come. Moreover, it consistently impresses guests without any stress, making it my go-to recipe for creating those small, memorable moments around the table that everyone cherishes.
Health and Nutrition
Why it’s good for your body
Whipped Pumpkin Spice Honey Butter offers a delicious way to enjoy some surprising health perks. For instance, pumpkin puree provides a powerful dose of Vitamin A, which actively supports your vision and immune system. Moreover, the natural spices like cinnamon and nutmeg bring their own antioxidant properties to the mix, helping your body combat oxidative stress.
Furthermore, choosing honey as a sweetener presents a better alternative to refined sugars. Your body metabolizes it more slowly, helping to prevent those sharp energy spikes and crashes. Consequently, you can savor the sweet, spiced flavor while feeling more balanced. Additionally, the healthy fats from real butter aid in the absorption of fat-soluble vitamins, ensuring you get the most from every bite.
Ultimately, this homemade spread lets you control the ingredients, avoiding unwanted additives. Therefore, Whipped Pumpkin Spice Honey Butter becomes more than a treat; it becomes a mindful choice. You nourish your body with real food while indulging in a classic autumn flavor.
How it fits in a healthy lifestyle
Whipped Pumpkin Spice Honey Butter fits beautifully into a balanced diet when you enjoy it mindfully. A little bit adds a huge amount of flavor, making it perfect for those following a heart-healthy lifestyle who want to eat delicious food without overdoing it. It’s naturally gluten-free, so anyone with those dietary needs can slather it on their favorite gluten-free pancakes without a second thought.
Think of it as a tool to enhance nutritious foods, not just a topping for treats. For example, a small dollop can transform a plain slice of whole-grain toast or a bowl of oatmeal into a satisfying and special breakfast. This approach helps you stick to healthy eating habits because your meals feel exciting. Pair it with other wholesome choices, like our protein waffles, for a meal that is both delicious and keeps you fueled for hours.
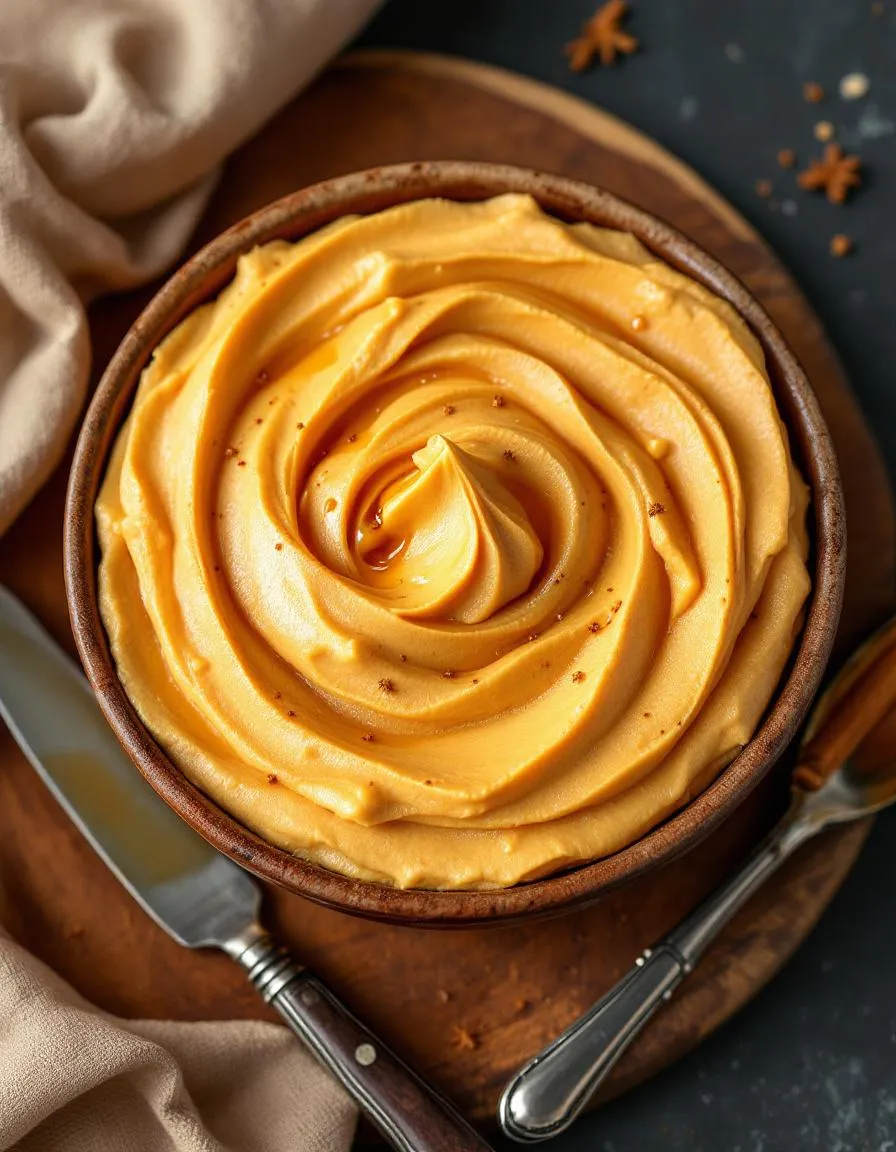
A smooth, fluffy, and flavorful spread combining the richness of butter with the warm spices of pumpkin and the sweetness of honey.
Ingredients
Scale
For the Crust:
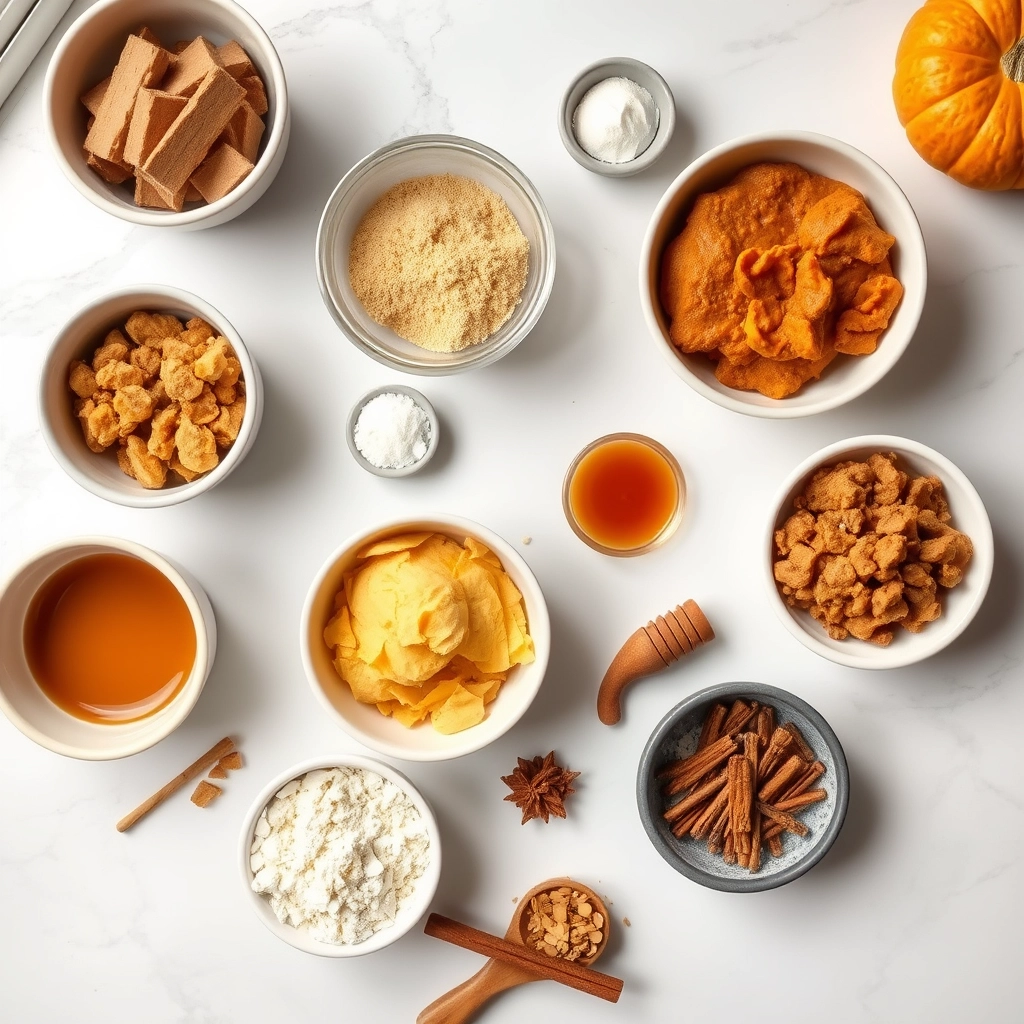
1 cup unsalted butter, softened
1/4 cup honey
1/4 cup pumpkin puree
1 teaspoon pumpkin pie spice
1/4 teaspoon ground cinnamon
Pinch of salt
Instructions
1. Prepare the Crust:
In a mixing bowl, combine the softened butter, honey, pumpkin puree, pumpkin pie spice, cinnamon, and salt.
Using an electric mixer, whip the mixture on medium-high speed for 3-4 minutes until light, fluffy, and well combined.
Transfer the whipped butter to an airtight container and refrigerate for at least 1 hour to allow flavors to meld before serving.
Notes
You can customize the seasonings to taste.
s-dish">How to Prepare This Dish
Steps and time-saving tips
First, gather all your ingredients at room temperature. This crucial step ensures your Whipped Pumpkin Spice Honey Butter becomes perfectly smooth and airy rather than lumpy. Next, add the softened butter to a medium mixing bowl. Using an electric hand mixer, whip the butter on medium-high speed for about two minutes until it turns pale and fluffy. Then, gradually drizzle in the honey while continuously mixing. This slow incorporation prevents the honey from pooling at the bottom. After that, add your pumpkin puree and all the warm spices. Continue to whip everything together for another minute or two until the mixture is beautifully combined and light. For a truly exceptional spread, use high-quality butter and real pumpkin puree. Finally, transfer your finished Whipped Pumpkin Spice Honey Butter into a jar or an airtight container. You can use it immediately, but I recommend chilling it for at least thirty minutes first. This brief rest allows the flavors to meld together wonderfully. Furthermore, this condiment stores beautifully in the refrigerator for up to two weeks.
Mistakes I’ve made and learned from
I have definitely learned a few lessons the hard way with this recipe. My biggest mistake was using cold, hard butter straight from the fridge. I thought I could just beat it into submission, but it resulted in a grainy, separated mess that never became fluffy. Now I always plan ahead to let my butter soften properly on the counter. Another error I made was using a subpar, watery pumpkin puree. This added too much moisture and made the final Whipped Pumpkin Spice Honey Butter slightly runny instead of spreadable. I now swear by using a high-quality brand or making my own homemade pumpkin puree for the best texture and flavor. Trust me, taking these small extra steps makes a world of difference. For more tips on getting your butter to the perfect consistency for all your baking projects, my guide on softening butter quickly has been a total game-changer for me.
n-and-variations">Cultural Connection and Variations
Where this recipe comes from
Whipped Pumpkin Spice Honey Butter feels like a warm hug from autumn itself. Its roots, however, stretch back to a practical need. Settlers and home cooks for generations have always sought ways to preserve the harvest’s bounty. They would blend sweet honey and rich butter to create a simple spread that brought joy to simple bread. Meanwhile, the warming spices like cinnamon and nutmeg have a much longer history, traveling along ancient trade routes and finding their way into holiday baking across Europe and the Americas. My own family always made a similar compound butter for Thanksgiving dinner rolls. We never used pumpkin puree though. That addition is a more modern twist, a brilliant way to weave the iconic flavor of pumpkin pie into something you can slather on everything. Across different regions, you might find similar concepts with local twists. In the South, someone might add a pinch of cayenne for heat. In other parts of the world, families might use sweet potato or even apple butter as their fruit base instead. Ultimately, crafting a batch of Whipped Pumpkin Spice Honey Butter connects us to that timeless tradition of making something ordinary feel extraordinarily special.
How it fits in today’s cooking
This versatile butter absolutely thrives in modern kitchens. It effortlessly bridges the gap between nostalgic holiday tradition and everyday convenience. Furthermore, it elevates the simplest breakfast into a seasonal event. Today’s cooks love it because it delivers that iconic fall flavor without requiring you to bake an entire pie. You can whip up a batch in minutes and instantly upgrade your morning toast, pancakes, or oatmeal. It’s the secret weapon for taking your basic buttermilk pancakes from a simple breakfast to a festive brunch centerpiece. Moreover, this butter fits perfectly into today’s focus on from-scratch cooking with real ingredients. You control the quality of the pumpkin and the sweetness of the honey. It also freezes beautifully, making it a fantastic make-ahead item for the hectic holiday season. A small jar of this homemade butter also makes a incredibly thoughtful and personal food gift. For another great gifting idea, consider pairing it with a loaf of my favorite moist banana bread. Ultimately, Whipped Pumpkin Spice Honey Butter remains relevant because it is simple, delicious, and packed with the comforting taste of fall.
Taste and Texture
What makes it delicious
This Whipped Pumpkin Spice Honey Butter offers a truly decadent sensory experience. First, its incredibly light and airy texture melts effortlessly on your tongue. The rich, creamy butter base carries the warm, fragrant notes of cinnamon, nutmeg, and ginger. Consequently, a sweet, floral hint of honey follows, perfectly balancing the earthy pumpkin puree. Every bite of this Whipped Pumpkin Spice Honey Butter feels like a cozy autumn celebration in your mouth.
r">Boosting the flavor
You can easily elevate this spread with a few creative twists. For a deeper molasses-like sweetness, try swapping the honey for pure maple syrup. Additionally, a tiny pinch of flaky sea salt on top just before serving creates a wonderful sweet-and-salty contrast. If you love a bit of crunch, consider folding in some finely chopped toasted pecans. This butter also makes an incredible topping for our classic Buttermilk Pancakes. Furthermore, for a next-level dessert, swirl it into a warm bowl of our Creamy Cinnamon Oatmeal.
Tips for Success
Best practices for results
Always start with room temperature butter for a smooth and fluffy texture. Furthermore, use high quality, pure honey for the best flavor in your Whipped Pumpkin Spice Honey Butter. Additionally, whip the mixture for a full three to five minutes to incorporate plenty of air. Finally, taste and adjust the spice levels to your personal preference before serving.
>Mistakes to avoid
Avoid using melted or overly soft butter, as it will not whip properly and will result in a runny consistency. Instead, ensure your butter is just soft enough to leave a slight indent when pressed. Moreover, do not skip the step of tasting your creation. Consequently, you might end up with a spice level that is too strong or too mild for your liking. For more guidance on getting the perfect consistency, check out our tips on how to soften butter correctly. Additionally, if you are new to working with spices, our guide on using warm spices will help you balance flavors like a pro.
Serving and Pairing Suggestions
How to serve this dish
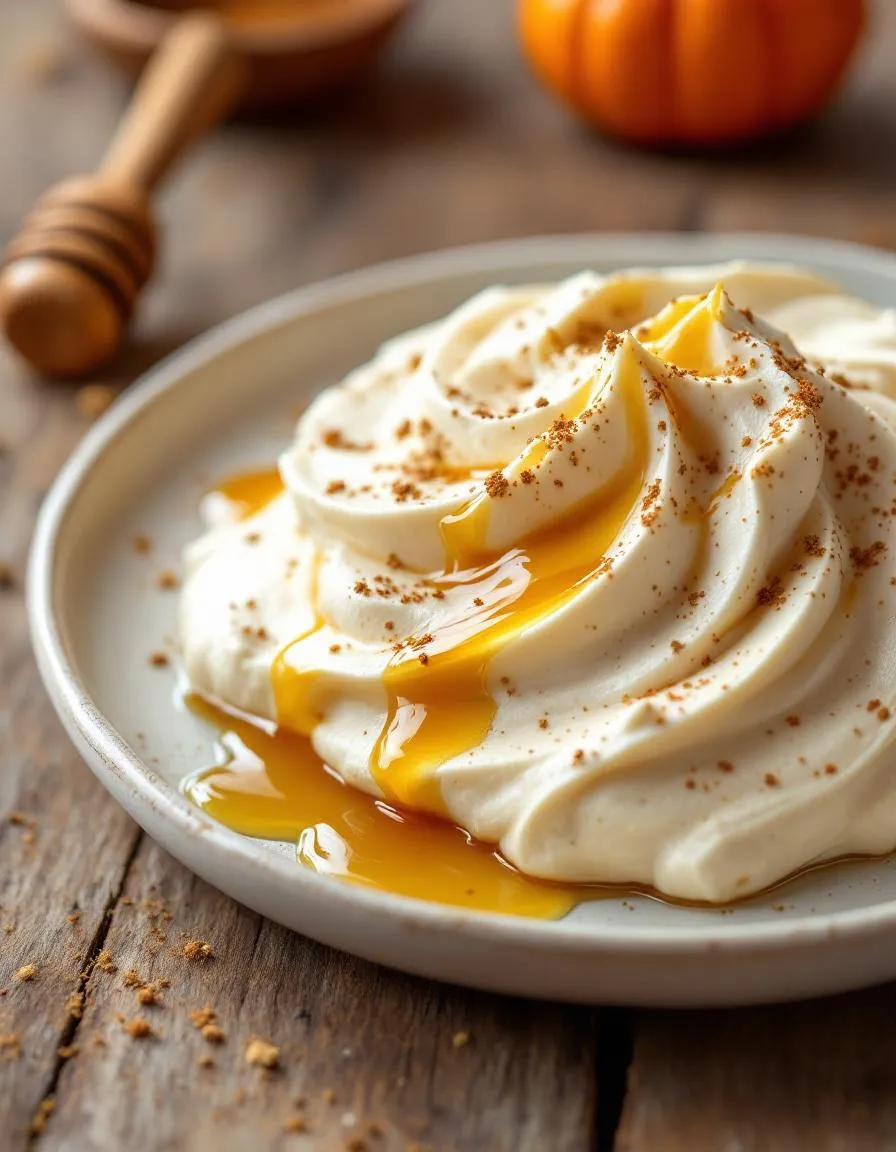
Present your Whipped Pumpkin Spice Honey Butter in a beautiful ceramic crock or a small, elegant bowl for a truly special touch. Furthermore, garnish the top with an extra sprinkle of cinnamon or a drizzle of raw honey to make it visually stunning. This spread truly shines during festive holiday brunches or as a cozy addition to your weekend breakfast table. For a memorable experience, serve it slightly softened so it spreads like a dream on warm bread.
What goes well with it
Firstly, slather this butter on a warm slice of our classic pumpkin bread for the ultimate autumn flavor combination. The spices in both recipes complement each other perfectly. Secondly, a hot cup of chai tea or a pumpkin spice latte makes an excellent beverage pairing. The warm notes in the drink beautifully echo the cozy essence of Whipped Pumpkin Spice Honey Butter. Finally, consider offering it alongside a stack of fluffy buttermilk pancakes or our famous buttermilk waffles. Consequently, your guests can create their own perfect, sweet-and-spicy bite every time.
What is whipped pumpkin spice honey butter made of?
Whipped Pumpkin Spice Honey Butter is typically made from a simple blend of softened unsalted butter, pure pumpkin puree, honey, and a mix of warm spices like cinnamon, nutmeg, ginger, and cloves. This combination creates a light, spreadable, and flavorful condiment that is perfect for fall. The key to its signature fluffy texture is whipping the ingredients together until they are light and airy.
How long does homemade pumpkin honey butter last?
When stored in an airtight container in the refrigerator, homemade Whipped Pumpkin Spice Honey Butter will stay fresh for about 1 to 2 weeks. Because it contains fresh pumpkin puree, it doesn’t have the same shelf life as plain butter. For the best quality and flavor, always use a clean utensil when scooping it out to prevent contamination.
ank-math-faq-item">
What do you eat pumpkin butter with?
This versatile spread is delicious on warm biscuits, toast, pancakes, waffles, and French toast. You can also use Whipped Pumpkin Spice Honey Butter to add a seasonal twist to your desserts, like melting it over baked sweet potatoes or stirring it into oatmeal. Its sweet and spiced flavor profile makes it a fantastic autumn treat.
Can you freeze whipped honey butter?
Yes, you can successfully freeze Whipped Pumpkin Spice Honey Butter for up to 3 months. Portion it into an airtight container or freezer-safe bag, leaving a little space for expansion. Thaw it overnight in the refrigerator before using, and give it a quick stir or rewhip to restore its creamy texture.
Best Cranberry Orange Muffins Recipe
Introduction
Is there anything better than the cozy, nostalgic aroma of fresh muffins filling your kitchen? Honestly, that sweet and tangy scent instantly transports me to happier, simpler mornings. Today, we are bringing that exact feeling to life with the ultimate bake: incredibly soft, bursting-with-flavor Cranberry Orange Muffins. This recipe promises a perfect balance of tart berries and bright citrus in every single bite, guaranteeing your new favorite breakfast or snack.
Cranberry Orange Muffins are a classic quick bread wonder, combining juicy, tart cranberries with the bright, sunny flavor of fresh orange. This pairing creates a muffin that is anything but ordinary. The tart berries cut through the sweetness perfectly, while the orange zest and juice infuse the entire batter with a wonderfully fragrant aroma. Moreover, this recipe matters because it delivers bakery-quality results with simple, straightforward steps. You do not need any special skills or equipment to achieve a moist, tender crumb and a beautifully domed top. Consequently, these muffins fit our blog’s mission perfectly: creating approachable, from-scratch recipes that build kitchen confidence. They are ideal for a busy weekday breakfast, a holiday brunch spread, or even as a thoughtful homemade gift. For another fantastic breakfast idea that uses fresh fruit, explore our popular Classic Blueberry Scones. Ultimately, baking a batch of these Cranberry Orange Muffins fills your home with an irresistible fragrance and provides a delicious, heartfelt treat for everyone to enjoy. Furthermore, understanding the basics of quick breads can elevate all your baking, which is why we recommend reading our guide on creating the perfect muffin batter every time.
Why I Love This Recipe
This recipe holds a special place in my heart because it reminds me of baking with my grandmother during the holidays. She always insisted on using fresh cranberries and would let me zest the oranges, filling the entire kitchen with that incredible citrus scent. Now, whenever I bake these Cranberry Orange Muffins, that same warm feeling comes rushing back. I love how the vibrant red berries peek through the golden tops and the way the orange glaze soaks in just slightly, making them incredibly moist. They are my absolute go-to for bringing a little sunshine to a cloudy day.
Health and Nutrition
Why it’s good for your body
These Cranberry Orange Muffins offer a delightful way to nourish your body. First, fresh cranberries pack a powerful antioxidant punch, which actively helps combat oxidative stress. Consequently, you support your cellular health with every delicious bite. Moreover, the natural zest and juice from oranges provide a substantial dose of immune-boosting vitamin C.
Additionally, this recipe often incorporates whole wheat flour. Therefore, it delivers more fiber and essential nutrients than many traditional muffin options. This dietary fiber promotes healthy digestion and helps you feel satisfied longer. Furthermore, you can easily tailor these Cranberry Orange Muffins to your needs by using alternative sweeteners or healthy fats.
Ultimately, the combination of tart fruit and bright citrus creates a wonderfully balanced treat. For instance, the flavors are so vibrant that they naturally satisfy your sweet tooth without excessive sugar. Enjoying a freshly baked Cranberry Orange Muffin means you are choosing a snack that truly loves you back.
How it fits in a healthy lifestyle
These muffins seamlessly fit into a balanced eating plan. Consider them a perfect companion to your morning coffee or a smart afternoon pick-me-up that provides sustained energy without a major crash. You can absolutely enjoy them as part of a mindful approach to eating.
For those with specific dietary goals, this recipe is wonderfully adaptable. You can easily make them gluten-free by using your favorite 1:1 baking flour. If you are exploring more wholesome baking, our guide on healthy baking substitutions offers fantastic tips for reducing sugar and fat without sacrificing flavor. Pairing a muffin with a source of protein, like a handful of nuts or a Greek yogurt, makes for a completely balanced snack. This approach aligns perfectly with building nutritious breakfast habits that keep you fueled all morning long.
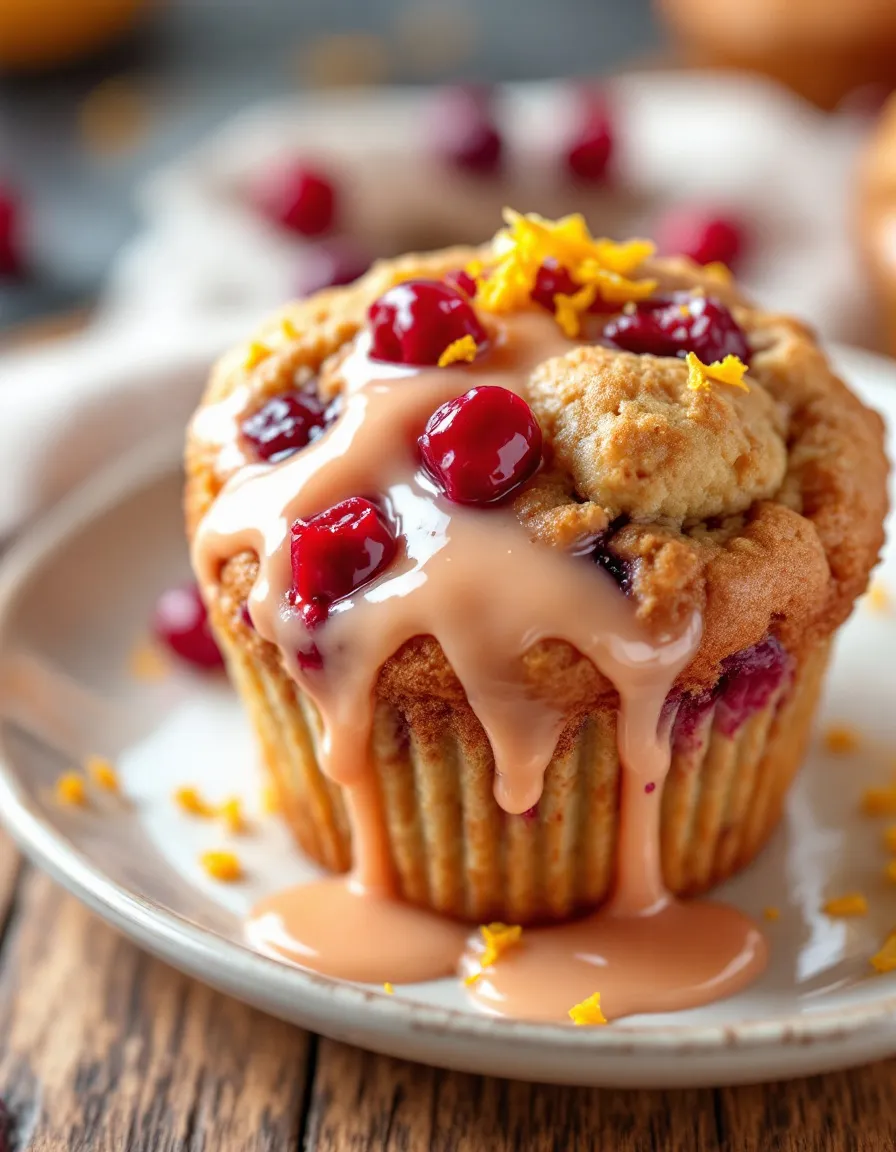
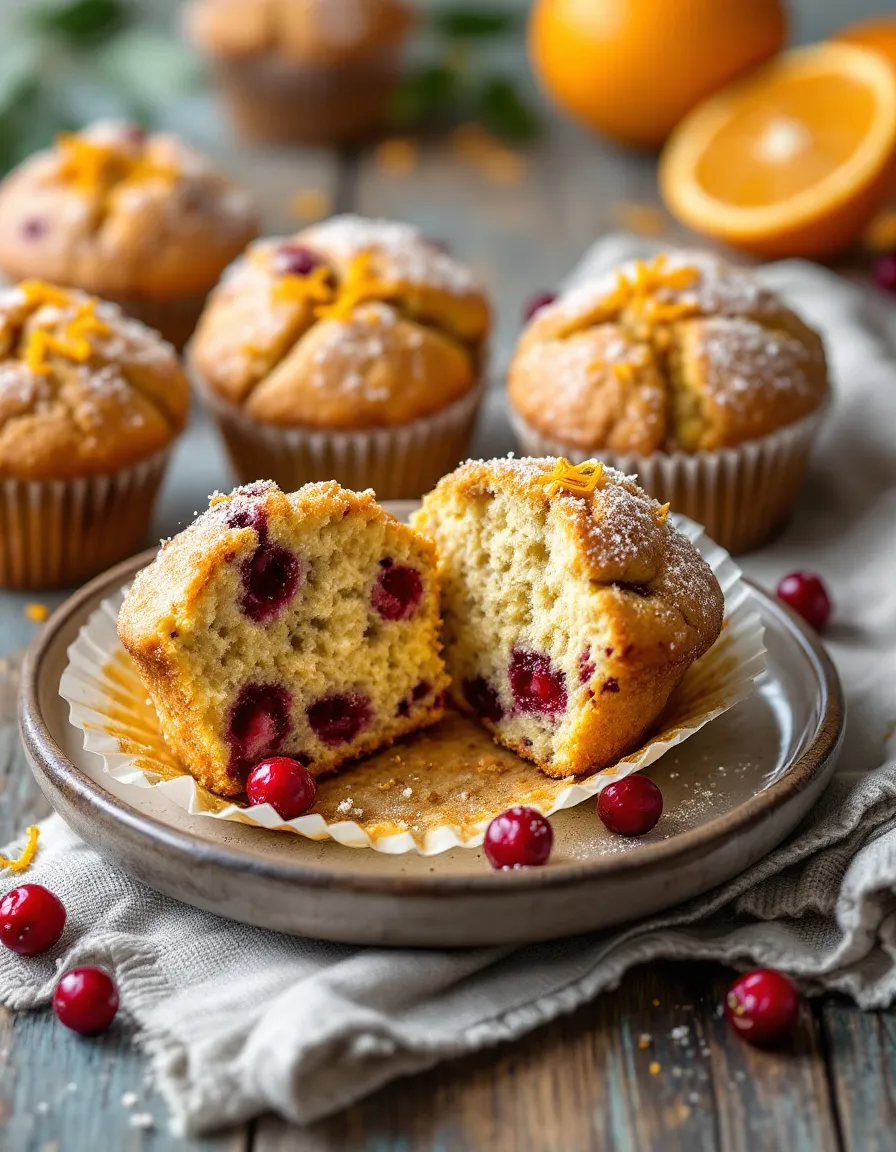
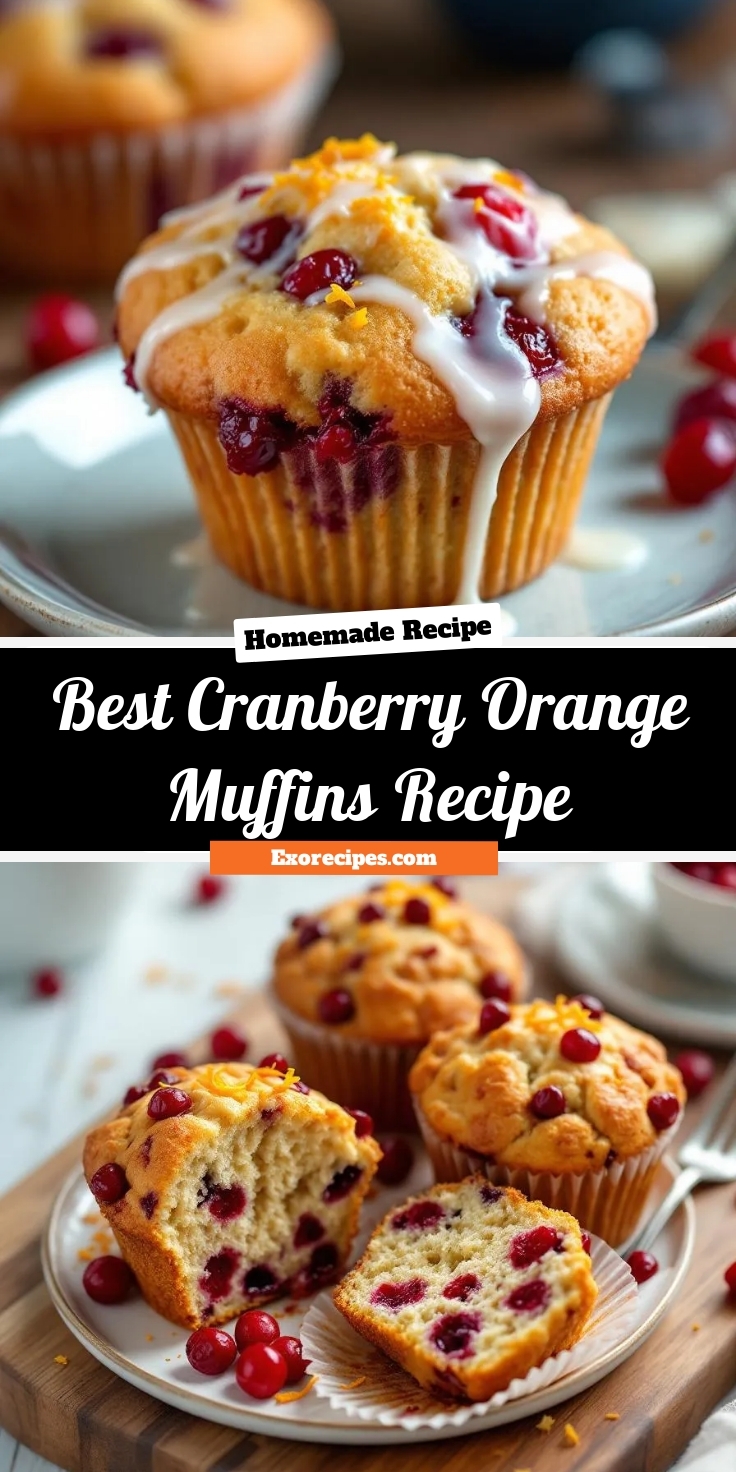
Moist and flavorful muffins with tart cranberries and bright orange zest, perfect for breakfast or a snack.
Ingredients
Scale
For the Crust:
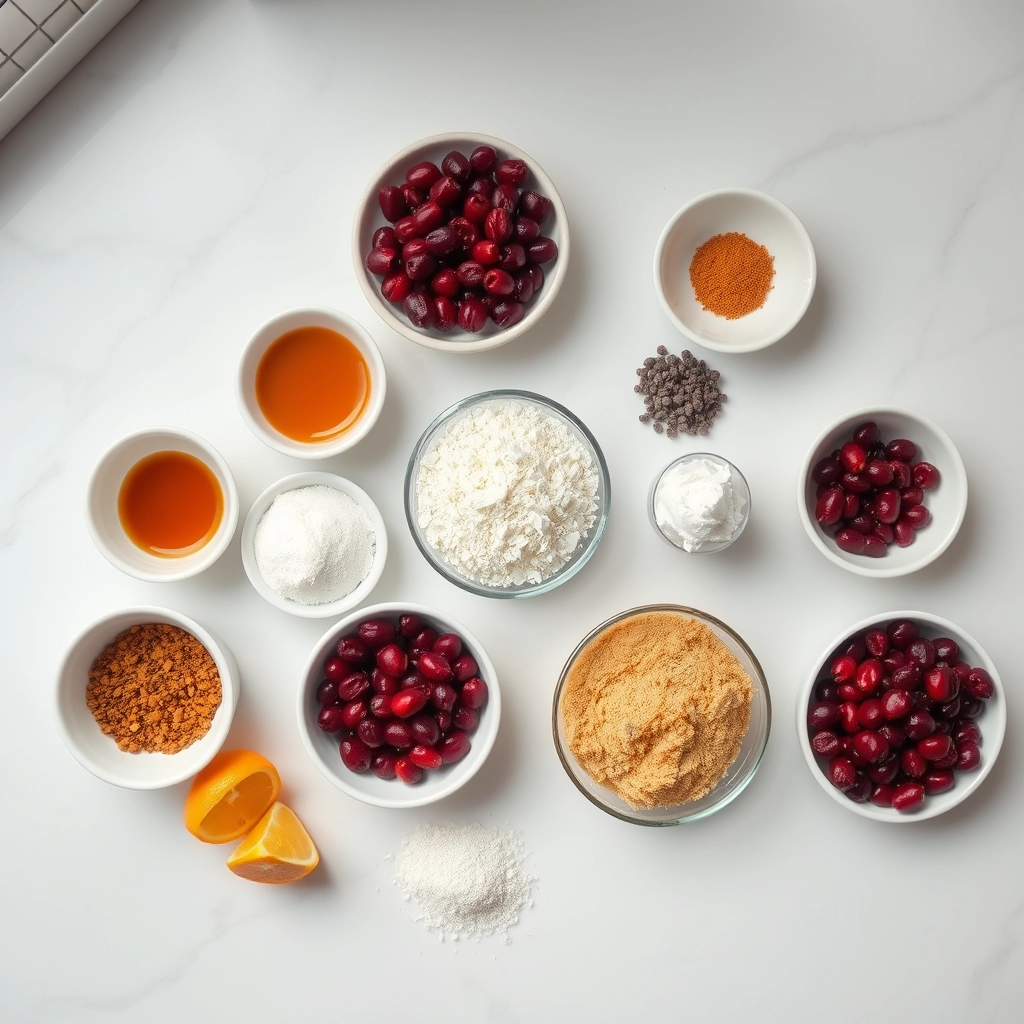
2 cups all-purpose flour
3/4 cup granulated sugar
2 tsp baking powder
1/2 tsp salt
1 cup fresh or frozen cranberries, chopped
1 tbsp orange zest
1/2 cup orange juice
1/2 cup milk
1/2 cup unsalted butter, melted
2 large eggs
1 tsp vanilla extract
Instructions
1. Prepare the Crust:
Preheat oven to 375°F (190°C) and line a muffin tin with paper liners.
In a large bowl, whisk together flour, sugar, baking powder, and salt. Stir in cranberries and orange zest.
In another bowl, mix orange juice, milk, melted butter, eggs, and vanilla until combined.
Pour wet ingredients into dry ingredients and stir until just combined; do not overmix.
Divide batter evenly among muffin cups, filling each about 3/4 full.
Bake for 18-22 minutes or until a toothpick inserted comes out clean. Cool in pan for 5 minutes, then transfer to a wire rack.
Notes
You can customize the seasonings to taste.
How to Prepare This Dish
Steps and time-saving tips
First, preheat your oven to 375°F and line a muffin tin with paper liners. Meanwhile, zest and juice your orange; this bright, fresh flavor is the heart of these Cranberry Orange Muffins. In a large bowl, whisk together the flour, baking powder, and salt. In a separate bowl, whisk the sugar with the eggs until they are pale and slightly fluffy. Then, pour in the milk, melted butter, and your fresh orange juice and zest, whisking until everything is just combined. Gently fold the wet ingredients into the dry ones; however, be careful not to overmix. A few lumps in the batter are perfectly fine. Finally, fold in the cranberries. For a time-saving tip, use a cookie scoop to evenly distribute the batter into the muffin cups; this ensures uniform baking. Bake your Cranberry Orange Muffins for about 20 minutes, or until a toothpick inserted into the center comes out clean. Let them cool in the pan for a few minutes before transferring them to a wire rack. Consequently, you will have perfectly tender muffins every single time.
and-learned-from">Mistakes I’ve made and learned from
I have absolutely overmixed this batter in a rush, and it resulted in dense, tough Cranberry Orange Muffins instead of the light, tender crumb I wanted. I learned that a gentle fold with a spatula until the flour streaks just disappear is the true secret. Another common blunder? Using frozen cranberries straight from the bag. They bleed so much juice into the batter and can create soggy pockets. Now, I always toss them in a tablespoon of flour first, which helps them stay suspended and prevents sinking. This simple trick was a game-changer for me, much like the lessons I learned from my early baking mistakes. Also, never skip creaming the sugar and eggs properly; that initial step builds the structure for a perfect dome. For more insights on getting that bakery-style rise, my post on achieving the perfect muffin top covers all the details. Trust me, learning these small things makes all the difference.
Cultural Connection and Variations
Where this recipe comes from
For many of us, the bright, cheerful flavor of Cranberry Orange Muffins instantly signals the holiday season. This pairing feels quintessentially North American, deeply rooted in the tradition of celebrating the fall harvest. New England settlers first used cranberries, and the citrus from sunny Florida or California provided a perfect, zesty counterpoint to the tart berry. Consequently, this muffin became a staple on breakfast tables from Thanksgiving right through Christmas morning.
Families often put thei
r own spin on the classic. Some bakers add a handful of toasted walnuts or pecans for a satisfying crunch. Others might stir in warm spices like cinnamon or nutmeg to enhance the cozy, festive feeling. In my home, we always use fresh orange zest and a splash of juice right in the batter, which makes the entire kitchen smell absolutely incredible. A perfect batch of Cranberry Orange Muffins truly captures the spirit of gathering and celebration.
Globally, bakers adapt the concept with local ingredients. For instance, you might find a version in the UK using dried currants and lemon. Alternatively, Scandinavian bakers might incorporate cardamom and lingonberries. Ultimately, the core idea of pairing tart fruit with citrus transcends borders, creating a universally beloved treat.
How it fits in today’s cooking
Today, these muffins absolutely hold their place as a beloved classic. They bridge the gap between nostalgic holiday baking and modern, everyday convenience. Busy home cooks appreciate that they can whip up a batch quickly for a satisfying breakfast or an afternoon snack. Furthermore, the combination of fruit and whole grains can fit into a balanced lifestyle, especially when you explore options for healthy breakfast ideas that don’t sacrifice flavor.
Modern adaptations are
endless. Many people now use gluten-free flour blends or substitute honey for refined sugar. Others might fold in dark chocolate chips for a decadent twist. They also fit perfectly into meal prep routines, freezing beautifully for a ready-to-go treat. This versatility ensures Cranberry Orange Muffins remain a go-to recipe. For another fantastic make-ahead option that everyone loves, consider our favorite classic banana bread recipe. Ultimately, this muffin continues to earn its spot in our kitchens and our hearts, season after season.
Taste and Texture
What makes it delicious
These Cranberry Orange Muffins deliver a vibrant burst of flavor in every single bite. Initially, you experience the bright, citrusy aroma of fresh orange zest, which perfectly complements the sweet and slightly tart pop of the cranberries. Furthermore, the muffin crumb remains incredibly tender and moist, creating a soft and fluffy texture that contrasts beautifully with the juicy, chewy fruit pieces. Ultimately, the combination creates a wonderfully balanced and fragrant treat that feels both comforting and refreshing.
Boosting the flavor
For an extra flavor boost, consider tossing your cranberries in a tablespoon of orange juice before folding them into the batter; this simple step amplifies their natural tartness. Alternatively, a sprinkle of coarse sugar on top before baking creates a delightful, sparkling crunch. If you adore citrus flavors, a simple orange glaze drizzled over the cooled muffins adds a sweet and zesty finish. For more inspiration on complementary pairings, explore our guide on creating the perfect breakfast board. Moreover, a dash of warm spices like cinnamon or cardamom can introduce a wonderfully cozy depth to your Cranberry Orange Muffins. Finally, consider serving them warm with a pat of honey butter for an utterly decadent experience. Discover even more ways to elevate your baking with our tips for the ultimate coffee cake.
For the best flavor, always zest your orange before juicing it; this simple step makes the process much easier. Furthermore, coat your fresh cranberries in a light dusting of flour to prevent them from sinking to the bottom of your muffins during baking. Use room temperature ingredients, especially eggs and dairy, to ensure your batter mixes smoothly and evenly. Always fill your muffin liners two-thirds full for the perfect domed top on your Cranberry Orange Muffins.
Mistakes to avoid
Avoid overmixing your batter, as this develops gluten and leads to tough, dense muffins; instead, gently fold the ingredients until just combined. Additionally, do not skip preheating your oven, as an inaccurate temperature can cause uneven baking. For more guidance on this, our article on oven temperature tips is a great resource. Finally, remember to let your muffins cool in the pan for just a few minutes before transferring them to a wire rack; this prevents the bottoms from becoming soggy from trapped steam. If you are new to baking, our guide on baking for beginners covers these essential cooling techniques.
g-suggestions">Serving and Pairing Suggestions
How to serve this dish
Present your freshly baked Cranberry Orange Muffins on a beautiful rustic wooden board for a charming, homespun feel. Alternatively, arrange them in a classic muffin basket lined with a crisp linen napkin. For a special holiday brunch, place a small bowl of our vanilla bean glaze nearby for guests to drizzle over their warm muffins. A light dusting of powdered sugar just before serving makes these Cranberry Orange Muffins look absolutely irresistible.
Serve them warm from the oven to maximize the burst of citrus aroma. These muffins truly shine during festive morning gatherings, like Christmas or Thanksgiving brunch. Finally, consider garnishing the plate with a few fresh cranberries and a twist of orange zest for a pop of color that promises delicious flavor.
What goes well with it
A hot cup of coffee perfectly cuts through the sweetness of these Cranberry Orange Muffins. The rich, bold flavors create a wonderful balance with the bright, fruity notes. Similarly, a glass of cold milk or a creamy latte also makes a classic and comforting pairing.
For a complete breakfas
t spread, serve these muffins alongside a savory dish. Their sweet and tangy profile contrasts beautifully with the hearty, salty flavors in our favorite sausage and egg breakfast casserole. Ultimately, a simple bowl of vanilla yogurt or a fresh fruit salad provides a light, refreshing complement to your muffin.
Can I use frozen cranberries for Cranberry Orange Muffins?
Yes, you can absolutely use frozen cranberries. There’s no need to thaw them; simply toss the frozen cranberries in a bit of flour to prevent them from sinking to the bottom of the muffin batter. This helps ensure every bite of your Cranberry Orange Muffins is packed with fruit.
ank-math-faq-item">
How do you keep muffins moist and fluffy?
The key to moist and fluffy muffins is to avoid overmixing the batter. Mix the wet and dry ingredients together just until they are combined; a few lumps are perfectly fine. Also, be sure to not overbake them, as this is the primary reason Cranberry Orange Muffins turn out dry.
What is a good substitute for buttermilk in muffins?
A great easy substitute is to make your own “soured milk.” Simply add one tablespoon of lemon juice or white vinegar to a liquid measuring cup, then add enough regular milk to make one cup. Stir and let it sit for 5-10 minutes before using it in your Cranberry Orange Muffin recipe.
How should I store cranberry orange muffins?
Once completely cooled, store your muffins in an airtight container at room temperature for up to 2 days. For longer storage, place them in a freezer-safe bag or container and freeze for up to 3 months. This will help maintain their freshness and prevent them from drying out.