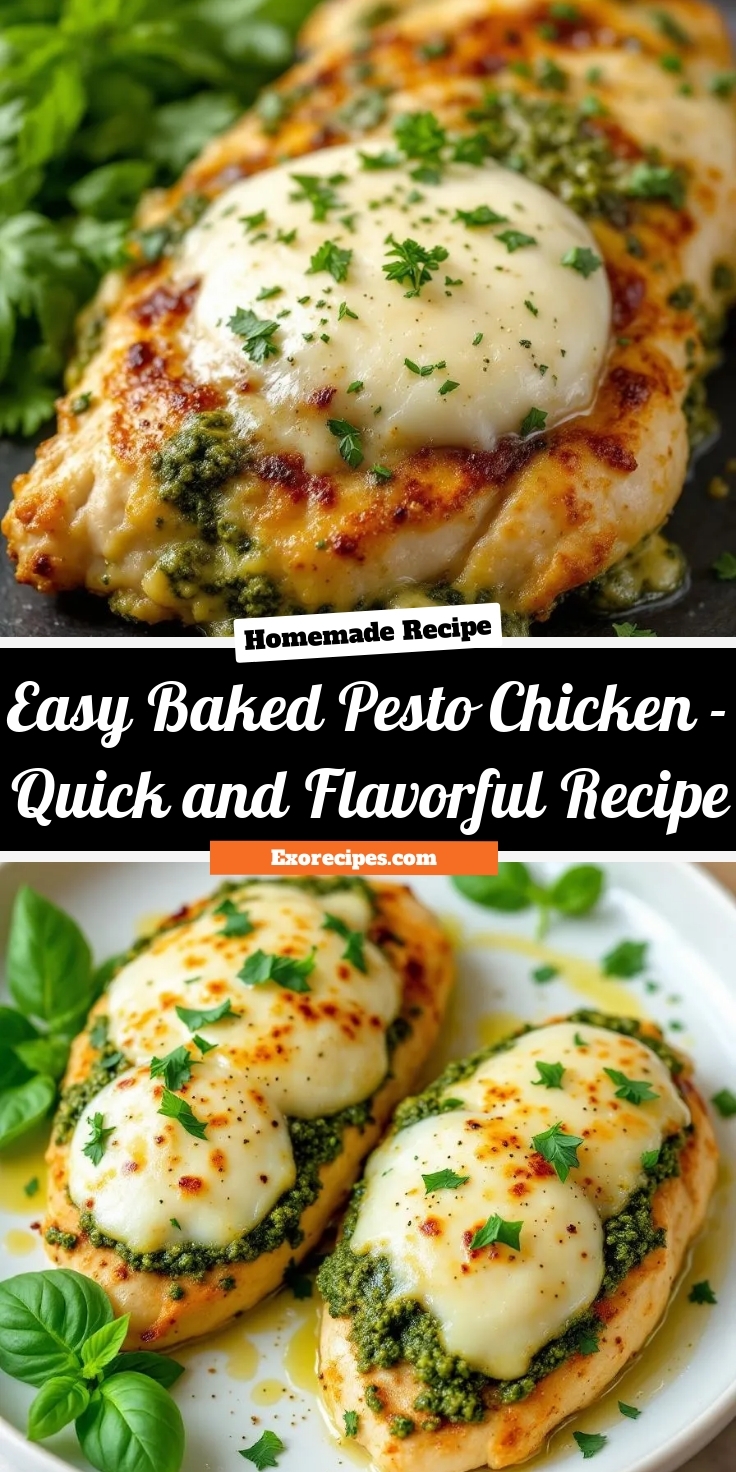
Easy Baked Pesto Chicken – Quick and Flavorful Recipe
Introduction
There’s something incredibly comforting about a dish that feels both gourmet and effortless. If you’re craving a meal that delivers bold flavors without hours in the kitchen, this Baked Pesto Chicken Recipe is your answer. Imagine tender chicken breasts smothered in vibrant pesto, baked to golden perfection, and paired with your favorite sides. Whether you’re cooking for a busy weeknight or impressing guests, this recipe strikes the perfect balance between simplicity and wow-factor. Plus, it’s a fantastic way to use up that jar of pesto sitting in your fridge. Let’s dive into why this dish deserves a spot in your regular rotation.
The Baked Pesto Chicken Recipe is a game-changer for anyone who loves quick, flavorful meals. At its core, it combines juicy chicken breasts with rich, herby pesto, creating a dish that’s both satisfying and versatile. Unlike fussy recipes that demand constant attention, this one lets the oven do most of the work. Simply coat the chicken, bake it, and enjoy the aromatic results. What makes it special? Pesto’s bright basil, garlic, and nutty Parmesan elevate the chicken, turning an ordinary protein into something extraordinary. For busy home cooks, it’s a lifesaver, and for food lovers, it’s a delicious twist on classic baked chicken.
This recipe fits perfectly with Exorecipes’ mission to deliver approachable yet impressive dishes. If you’re looking for more ways to use pesto, check out our creamy pesto pasta or explore our easy chicken dinners for more weeknight inspiration. The Baked Pesto Chicken Recipe also adapts easily to dietary preferences—swap in gluten-free breadcrumbs or dairy-free pesto without sacrificing flavor. Whether you’re a seasoned cook or just starting out, this dish proves that great meals don’t have to be complicated.
Why I Love This Recipe
This Baked Pesto Chicken Recipe holds a special place in my heart because it’s the dish that taught me how versatile pesto can be. Years ago, a friend made it for a casual dinner, and I was hooked by how something so simple could taste so decadent. Now, it’s my go-to when I need a meal that feels indulgent but requires minimal effort. I love how the pesto forms a crispy, flavorful crust while keeping the chicken moist inside. It’s also a hit with my family, and I adore how easily it pairs with roasted veggies or a fresh salad. Every bite reminds me that great cooking doesn’t have to be hard—it just has to be delicious.
Health and Nutrition
Why it’s good for your body
Baked Pesto Chicken Recipe packs a nutritious punch while delivering bold flavors. First, chicken provides lean protein, which helps build muscle and keeps you full longer. Additionally, the pesto adds healthy fats from olive oil and nuts, supporting heart health and brain function. Moreover, this dish includes fresh basil, which offers antioxidants to combat inflammation.
Since Baked Pesto Chicken Recipe uses minimal processed ingredients, it avoids unnecessary additives. The olive oil in pesto also promotes better cholesterol levels, while garlic boosts immunity. Furthermore, baking instead of frying keeps the meal lower in unhealthy fats. You get a satisfying, nutrient-dense dinner without sacrificing taste.
Finally, Baked Pesto Chicken Recipe balances macros beautifully. The protein aids recovery, the fats provide sustained energy, and the herbs add micronutrients. Whether you need a post-workout meal or a family-friendly dinner, this dish delivers both flavor and nourishment.
How it fits in a healthy lifestyle
Baked Pesto Chicken Recipe fits seamlessly into balanced eating habits. If you follow a high-protein diet, the chicken offers a solid foundation for muscle maintenance. For gluten-free eaters, this recipe naturally avoids grains, making it a safe choice. Even those focused on heart health benefit from the olive oil’s monounsaturated fats.
Pair this dish with a nutritious side like roasted veggies for a complete meal. It also works well for meal prep, saving time without compromising quality. If you’re exploring more wholesome dinner ideas, check out these simple weeknight recipes to keep your routine fresh and healthy. With minimal effort, Baked Pesto Chicken Recipe helps you stay on track without feeling restricted.
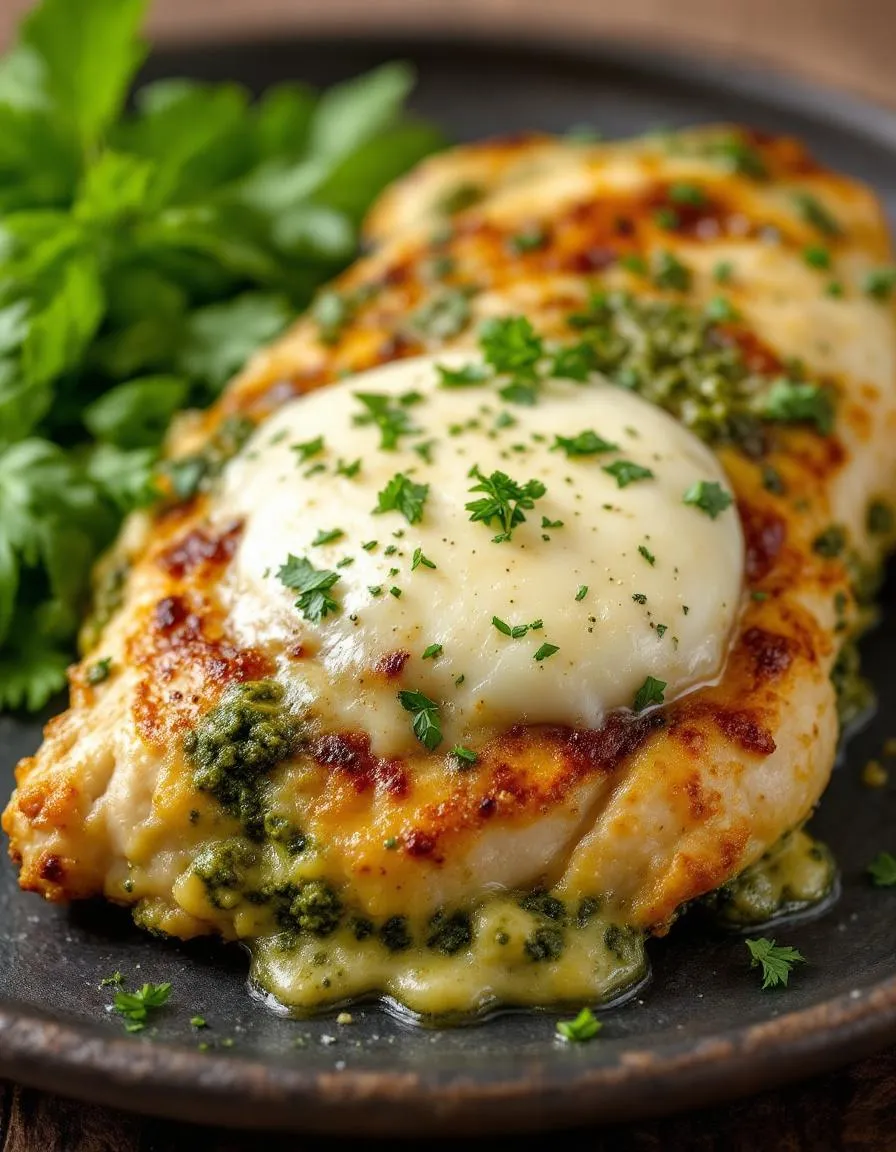
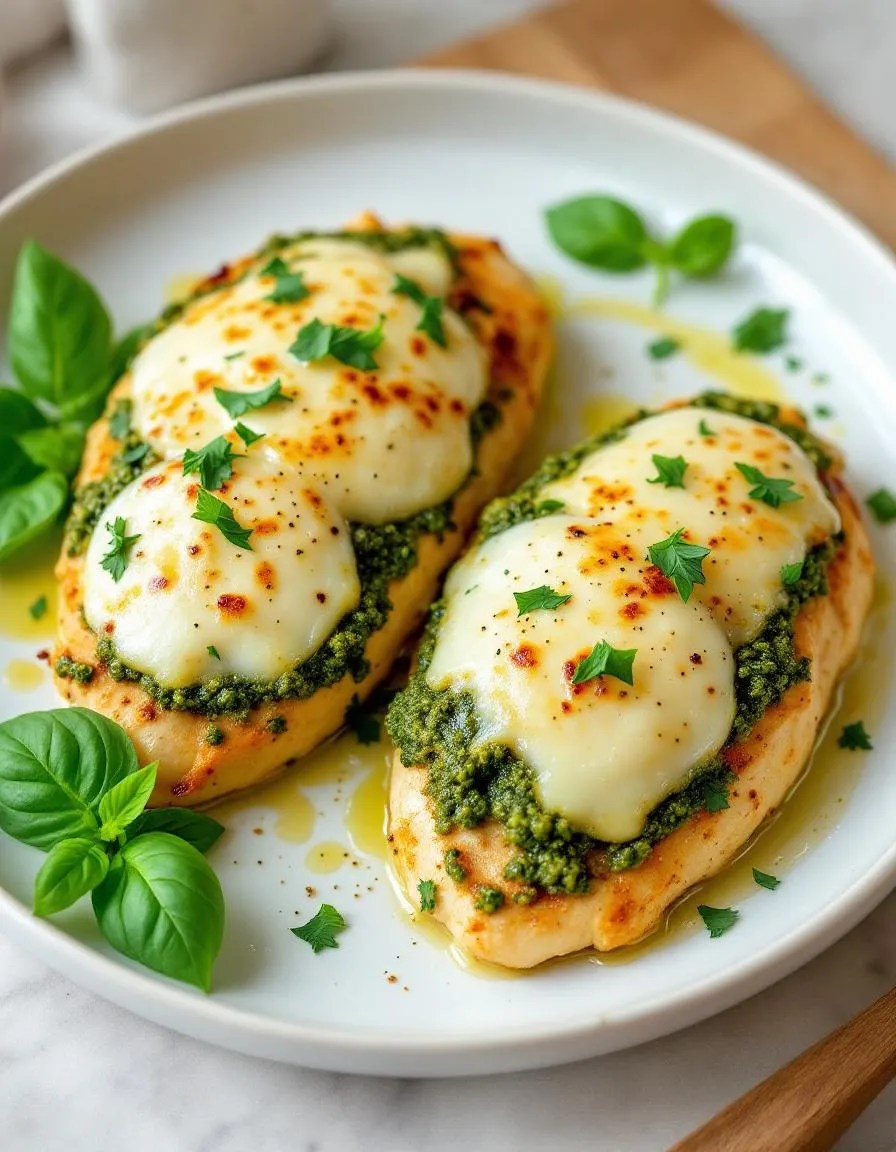
Juicy chicken breasts topped with pesto and melted cheese, baked to perfection.
Ingredients
Scale
For the Crust:
4 boneless, skinless chicken breasts
1/2 cup basil pesto
1 cup shredded mozzarella cheese
1/4 cup grated parmesan cheese
1 tbsp olive oil
1/2 tsp salt
1/4 tsp black pepper
Instructions
1. Prepare the Crust:
Preheat oven to 375°F (190°C). Lightly grease a baking dish with olive oil.
Season chicken breasts with salt and pepper, then arrange in the baking dish.
Spread 2 tablespoons of pesto over each chicken breast.
Top with mozzarella and parmesan cheeses.
Bake for 25-30 minutes or until chicken reaches 165°F internally.
Let rest for 5 minutes before serving.
Notes
You can customize the seasonings to taste.
How to Prepare This Dish
Steps and time-saving tips
Preheat your oven to 375°F and grab a baking dish large enough to hold your chicken breasts in a single layer. Pat the chicken dry with paper towels to help the pesto stick better, then season both sides generously with salt and pepper. Spread a thin layer of pesto over each piece, making sure to cover the entire surface for maximum flavor. If you’re short on time, use store-bought pesto—it works just as well. Layer sliced tomatoes over the pesto, then sprinkle shredded mozzarella cheese on top. Drizzle a little olive oil over the cheese to help it brown evenly. Bake for 25-30 minutes until the chicken reaches 165°F internally and the cheese turns golden. Let it rest for 5 minutes before serving to lock in the juices. For a quicker cleanup, line your baking dish with foil or parchment paper. If you want extra crispiness, broil for the last 2 minutes, but watch closely to avoid burning. Serve with a simple side salad or roasted vegetables for a complete meal.
and-learned-from">Mistakes I’ve made and learned from
I used to overcrowd the baking dish, thinking I could fit all the chicken in at once. This led to uneven cooking and soggy pesto. Now I always leave space between each piece for better airflow. Another mistake? Skipping the rest time. Cutting into the chicken right away caused all the juices to escape, leaving it dry. Letting it rest made a huge difference. If you’re new to cooking chicken, check out my guide on perfect chicken temperatures to avoid under or overcooking. Also, I once used too much pesto, which overpowered the dish. A thin, even layer is key—just like with my pesto pasta tips, balance is everything. Learn from my blunders, and your Baked Pesto Chicken Recipe will turn out flawless every time.
Cultural Connection and Variations
Where this recipe comes from
The Baked Pesto Chicken Recipe whispers of sun-drenched Italian summers, where basil grows wild and garlic perfumes the air. Originating in Genoa, the heart of pesto country, this dish takes the classic basil-and-pine-nut sauce and layers it over tender chicken for a simple yet vibrant meal. Families in Liguria might swap pine nuts for walnuts or skip the cheese for a lighter version, while nonnas often pan-fry the chicken first for extra crispness. Meanwhile, in my own kitchen, I love adding a sprinkle of chili flakes to the pesto—because why not?
Across the globe, cooks
put their own spin on the Baked Pesto Chicken Recipe. In California, avocado oil might replace olive oil for a buttery twist. Some Greek kitchens mix in a handful of feta, and in Thailand, chefs might toss in lemongrass for a bright, herbal kick. No matter where it lands, this dish carries the warmth of shared tables and adaptable flavors. Whether you serve it with crusty bread or a heap of roasted veggies, it always feels like a hug on a plate.
How it fits in today’s cooking
Today, the Baked Pesto Chicken Recipe shines as a weeknight hero—quick enough for busy schedules but fancy enough for date nights. Modern cooks streamline it with store-bought pesto (no shame!) or amp up the nutrition by blending kale into the sauce. It’s also a star at potlucks, especially when paired with crowd-pleasers like garlic butter rolls or a crisp strawberry spinach salad.
Seasonally, it’s a chameleon. In spring, fresh basil steals the show. Come fall, roasted squash or sweet potatoes turn it into cozy comfort food. And let’s not forget meal prep—this recipe reheats like a dream, making it a lunchbox favorite. Whether you’re feeding a family or just craving something wholesome, the Baked Pesto Chicken Recipe fits right into today’s rhythm of cooking: flexible, flavorful, and full of heart.
>Taste and Texture
What makes it delicious
The Baked Pesto Chicken Recipe delivers a burst of vibrant, herbaceous flavor with every bite. Juicy chicken breasts soak up the rich, garlicky pesto, while melted mozzarella adds a creamy, gooey finish. The golden, slightly crisp topping contrasts beautifully with the tender meat underneath. Fresh basil infuses the dish with a fragrant aroma, and toasted pine nuts lend a subtle crunch. Whether you serve it straight from the oven or let it rest, the Baked Pesto Chicken Recipe remains irresistibly moist and packed with layers of savory goodness.
Boosting the flavor
For an extra flavor kick, try swapping traditional pesto for a sun-dried tomato version or sprinkling grated Parmesan over the chicken before baking. A drizzle of balsamic glaze adds a tangy sweetness, while a pinch of red pepper flakes brings subtle heat. Pair this dish with a side of garlic butter roasted potatoes to round out the meal. Experiment with fresh herbs like thyme or rosemary to deepen the aroma, or layer prosciutto under the cheese for a salty, crispy twist.
Tips for Success
Best practices for results
Always pat the chicken dry before adding pesto to ensure the sauce sticks properly. For even cooking, pound thicker pieces to a consistent thickness or arrange them in a single layer. Spread pesto generously but not excessively to keep the Baked Pesto Chicken Recipe flavorful without becoming soggy. Meanwhile, check the internal temperature with a meat thermometer to reach 165°F for perfect doneness. Finally, let the chicken rest for 5 minutes before slicing to lock in juices.
Mistakes to avoid
Avoid overcrowding the baking dish, as this steams the chicken instead of letting it crisp. If you notice excess moisture, try blotting the pesto lightly with a paper towel before baking. Additionally, skip store-bought pesto with preservatives if possible—homemade blends like our Easy Fresh Basil Pesto deliver brighter flavor. Finally, don’t substitute boneless skinless thighs without adjusting cook time, as detailed in our Chicken Thighs vs Breast Guide.
Serving and Pairing Suggestions
How to serve this dish
For a stunning presentation, arrange your Baked Pesto Chicken Recipe on a white platter with fresh basil leaves and lemon wedges. Alternatively, layer the chicken over a bed of fluffy quinoa or couscous for a colorful contrast. If you’re hosting a dinner party, slice the chicken into strips and serve it family-style with a side of roasted vegetables. This dish also shines at casual gatherings, so pair it with a simple salad for a light yet satisfying meal. Whether it’s a weeknight dinner or a special occasion, the vibrant colors and rich flavors of Baked Pesto Chicken Recipe will impress every time.
h-it">What goes well with it
Brighten up your meal with a crisp arugula salad tossed in lemon vinaigrette—its peppery bite balances the creamy pesto perfectly. For heartier options, try serving Baked Pesto Chicken Recipe with garlic mashed potatoes or a warm slice of crusty bread to soak up the delicious juices. If you love wine, a chilled glass of Sauvignon Blanc enhances the herbaceous notes in the dish. Craving something sweet afterward? Our lemon blueberry cake makes a refreshing finale, while our classic tiramisu adds a rich, indulgent touch.
How long should I bake pesto chicken at 375°F?
For perfectly cooked Baked Pesto Chicken Recipe, bake boneless, skinless chicken breasts at 375°F for 25–30 minutes. The internal temperature should reach 165°F. The pesto coating keeps the chicken moist while adding rich flavor.
ank-math-faq-item">
Can I use store-bought pesto for baked pesto chicken?
Yes, store-bought pesto works well for Baked Pesto Chicken Recipe. Choose a high-quality brand for the best flavor, or opt for homemade if you prefer fresh ingredients. Either way, the pesto will infuse the chicken with delicious herbal notes.
What sides go well with baked pesto chicken?
Baked Pesto Chicken Recipe pairs beautifully with roasted vegetables, garlic mashed potatoes, or a simple arugula salad. For a complete meal, add crusty bread to soak up the flavorful pesto juices from the chicken.
Can I make baked pesto chicken ahead of time?
Yes! Assemble the Baked Pesto Chicken Recipe up to 24 hours in advance and refrigerate until ready to bake. Let it sit at room temperature for 15 minutes before cooking to ensure even baking. This makes it perfect for meal prep or entertaining.
div>
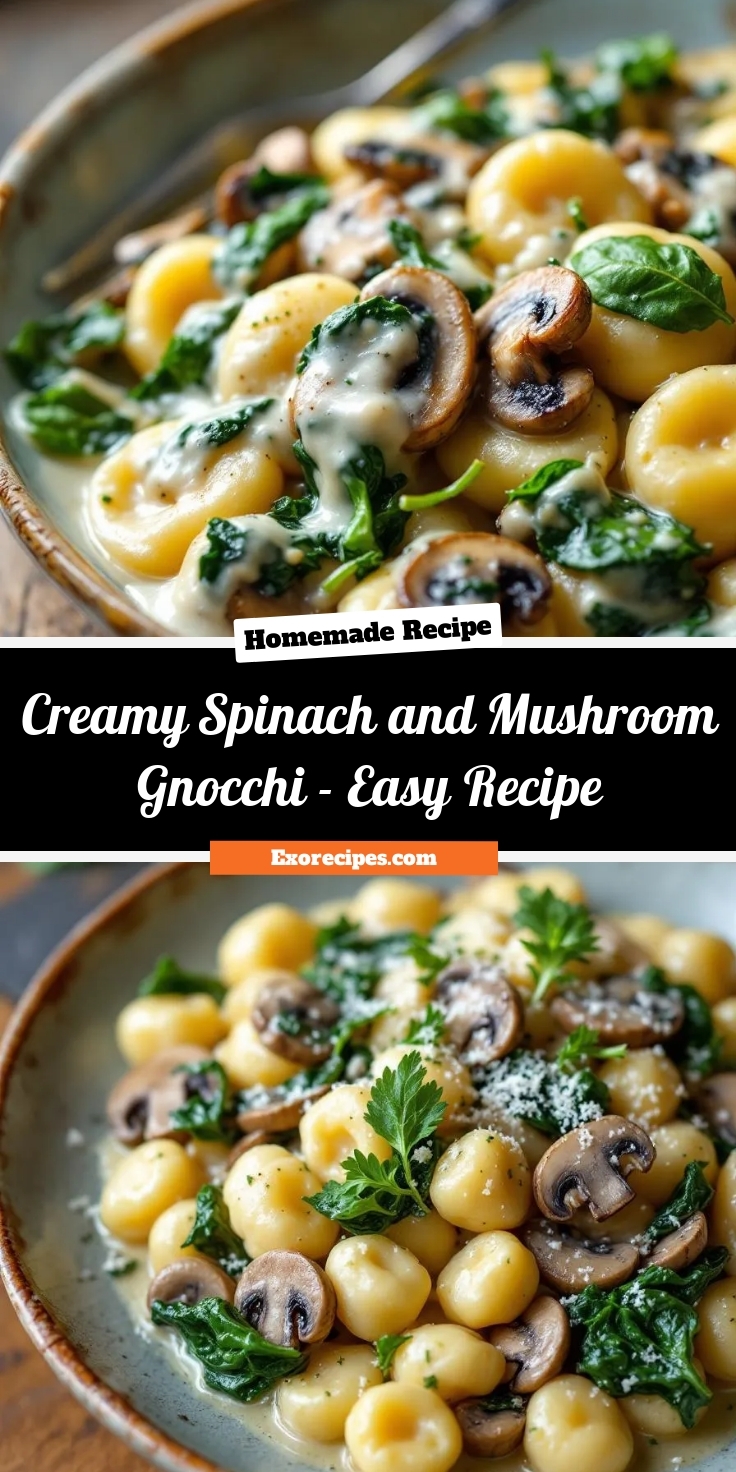
Creamy Spinach and Mushroom Gnocchi – Easy Recipe
Introduction
There’s something undeniably comforting about a bowl of creamy, pillowy gnocchi paired with earthy mushrooms and vibrant spinach. Whether you’re craving a cozy weeknight dinner or impressing guests with minimal effort, this Creamy Spinach and Mushroom Gnocchi Recipe delivers every time. It’s the kind of dish that feels indulgent yet comes together in under 30 minutes, making it a go-to for busy nights when you want flavor without the fuss. Plus, with its rich sauce and tender gnocchi, it’s guaranteed to become a family favorite.
Gnocchi, those soft Italian dumplings, shine in this Creamy Spinach and Mushroom Gnocchi Recipe, where they soak up a velvety sauce made with garlic, cream, and Parmesan. The mushrooms add a deep umami flavor, while the spinach brings freshness and a pop of color. What makes this dish special is its versatility. You can serve it as a hearty vegetarian main or pair it with grilled chicken for extra protein. If you love easy yet elegant meals, you’ll appreciate how this recipe balances simplicity with restaurant-quality taste. For more quick dinner ideas, check out our 30-minute meals collection, or explore other comforting pasta dishes like our Creamy Tomato Rigatoni.
Why I Love This Recipe
This Creamy Spinach and Mushroom Gnocchi Recipe holds a special place in my heart because it reminds me of lazy Sunday dinners with my family. My mom used to whip it up when we needed a little extra comfort, and now I make it for my own kids on hectic weeknights. The way the flavors meld together—creamy, savory, and slightly nutty—always feels like a hug in a bowl. Plus, it’s one of those rare dishes that pleases everyone, from picky eaters to foodies. Every bite takes me right back to those cherished moments around the table.
Health and Nutrition
Why it’s good for your body
Creamy Spinach and Mushroom Gnocchi Recipe packs a nutritious punch while delivering rich, satisfying flavors. First, spinach offers a powerhouse of vitamins A and C, which support immune health and glowing skin. Additionally, mushrooms provide a natural source of vitamin D and selenium, boosting energy and protecting cells. Together, these ingredients make every bite of Creamy Spinach and Mushroom Gnocchi Recipe a step toward better wellness.
Moreover, this dish balances indulgence with nourishment. The gnocchi offers comforting carbs, while the creamy sauce, when made with moderation in mind, adds just enough richness without overwhelming your diet. Furthermore, the fiber from spinach and mushrooms aids digestion, helping you feel full longer. Whether you’re fueling up after a workout or enjoying a cozy dinner, Creamy Spinach and Mushroom Gnocchi Recipe keeps your body happy.
Finally, the recipe’s versatility lets you tweak it for extra health perks. For instance, you can swap regular gnocchi for whole-wheat or gluten-free versions. You can also use low-fat dairy or plant-based alternatives to lighten the dish. No matter how you prepare it, Creamy Spinach and Mushroom Gnocchi Recipe remains a delicious way to nourish your body.
How it fits in a healthy lifestyle
Creamy Spinach and Mushroom Gnocchi Recipe fits seamlessly into a balanced diet. If you’re watching your gluten intake, simply opt for gluten-free gnocchi to enjoy the same creamy texture without compromise. For those focusing on heart health, the dish’s spinach and mushrooms contribute potassium and antioxidants, which support cardiovascular wellness.
This recipe also pairs well with other nutrient-dense meals. Try serving it alongside a light salad or protein-rich dish like our Grilled Lemon Herb Chicken for a complete, satisfying dinner. Plus, if you’re meal prepping, Creamy Spinach and Mushroom Gnocchi Recipe stores beautifully, making it a practical choice for busy weeknights. For more easy, healthy dinner ideas, check out our 30-Minute Meals collection.
Whether you’re cooking for family or treating yourself, this dish proves that comfort food can be both wholesome and delicious. With smart ingredient swaps and mindful portions, Creamy Spinach and Mushroom Gnocchi Recipe helps you stay on track without sacrificing flavor.
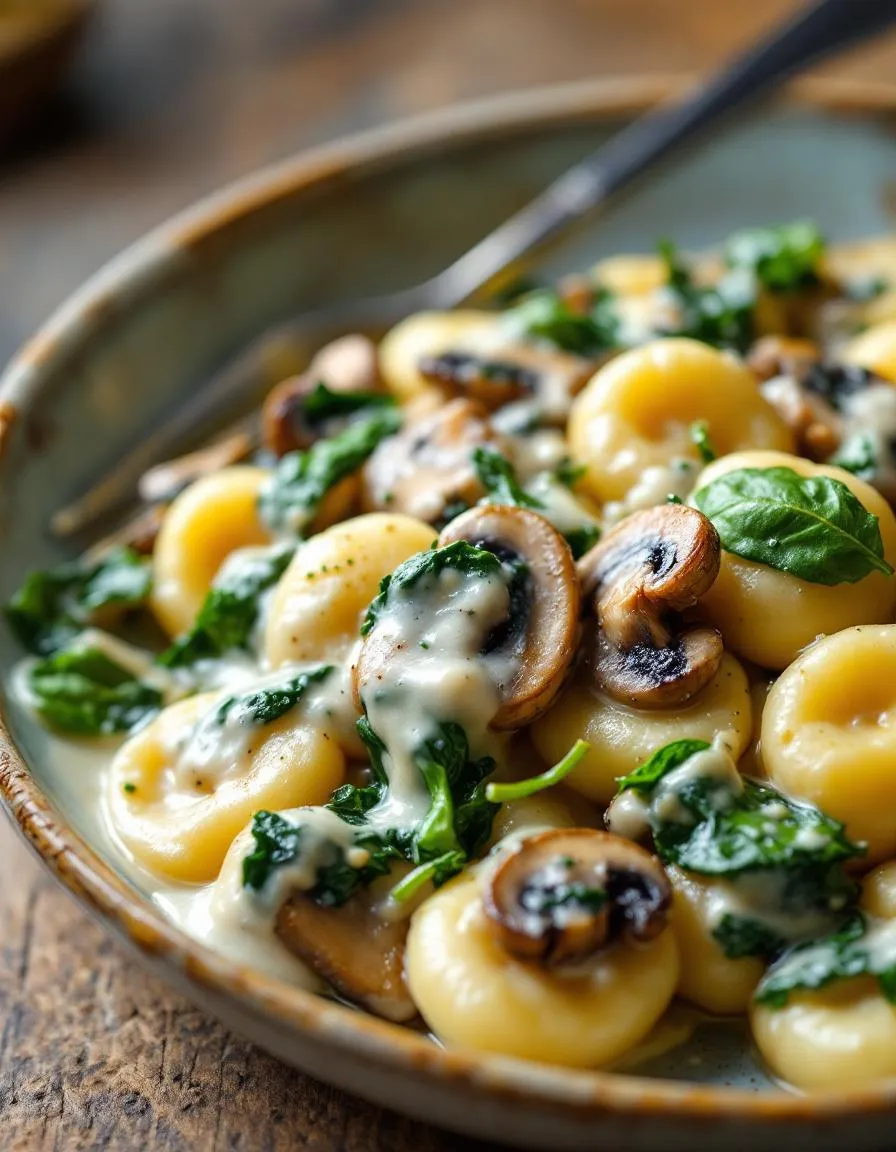
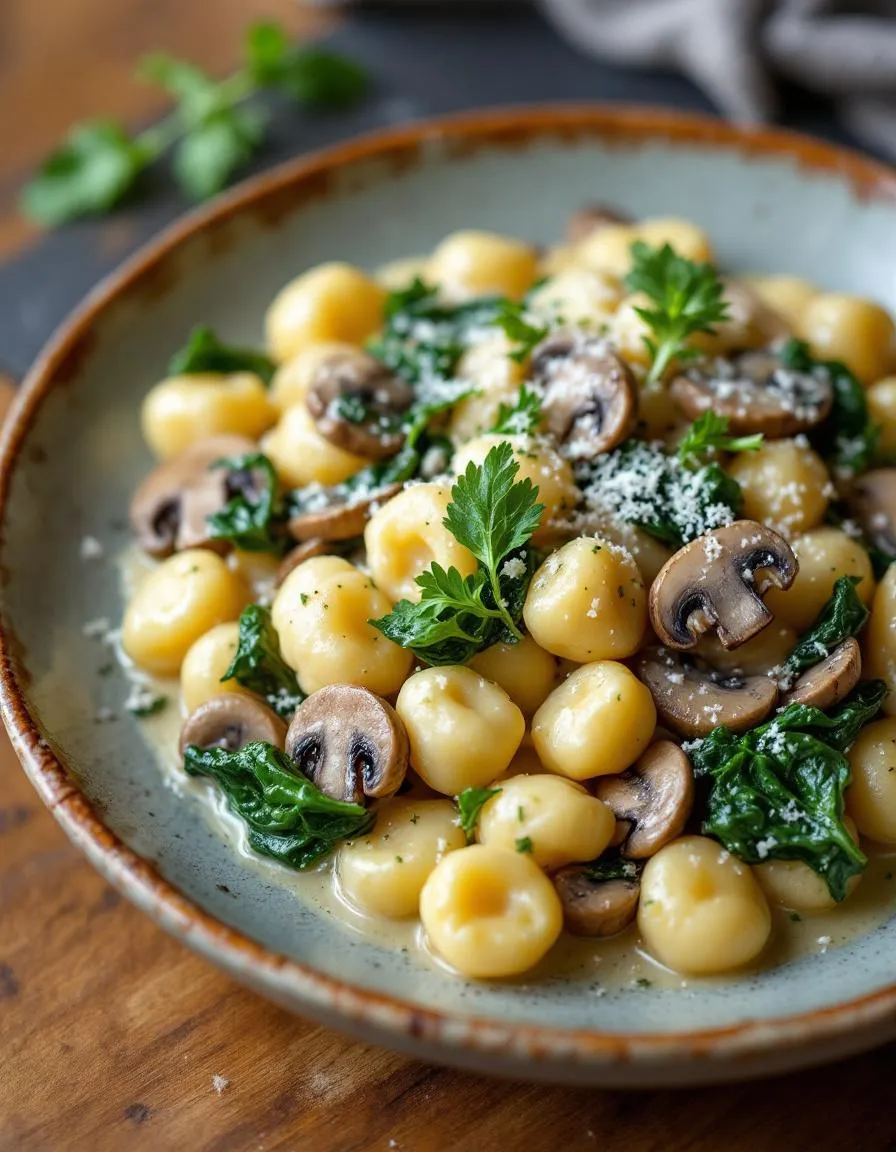
A rich and creamy gnocchi dish packed with sautéed mushrooms and fresh spinach, perfect for a comforting meal.
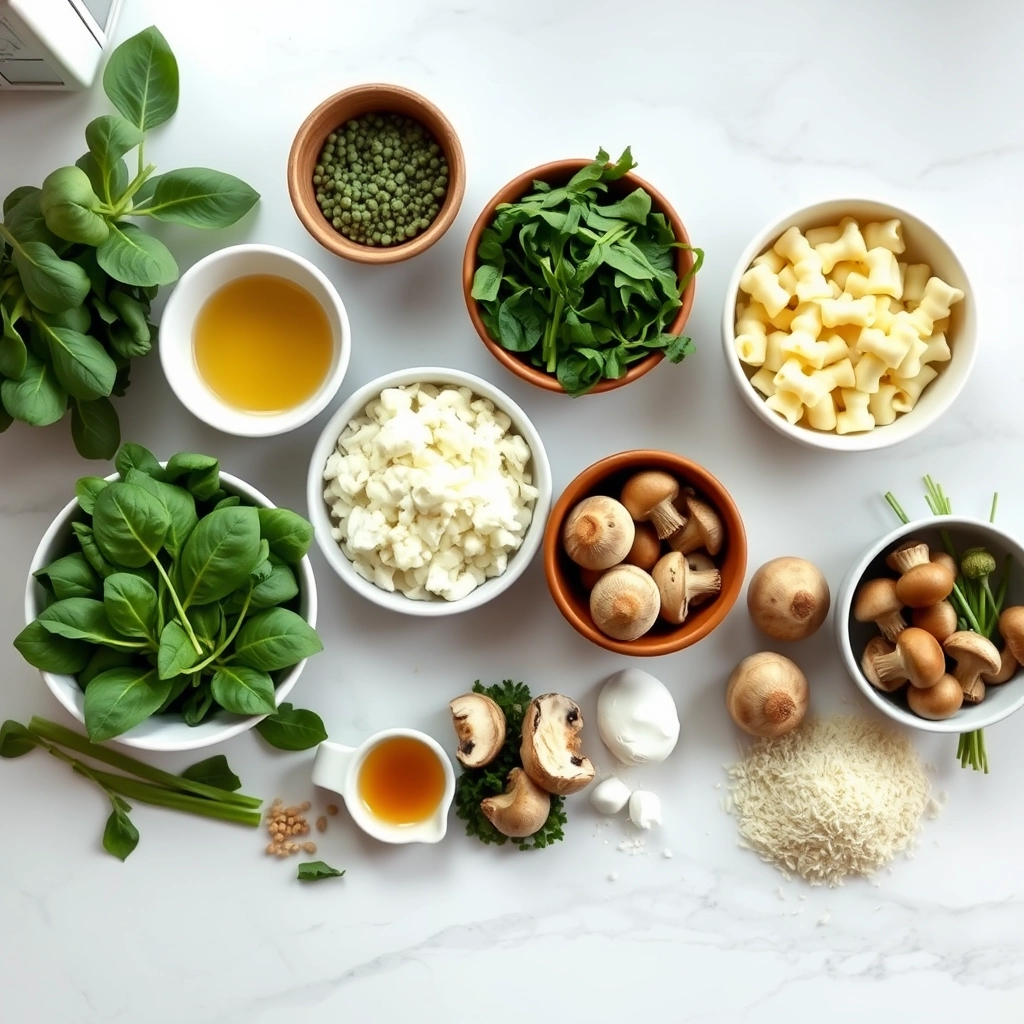
Ingredients
Scale
For the Crust:
1 lb potato gnocchi
2 tbsp olive oil
8 oz mushrooms, sliced
2 cloves garlic, minced
2 cups fresh spinach
1 cup heavy cream
1/2 cup grated parmesan cheese
1/4 tsp nutmeg
Salt and pepper to taste
Instructions
1. Prepare the Crust:
Cook the gnocchi according to package instructions, then drain and set aside.
Heat olive oil in a large skillet over medium heat. Add mushrooms and sauté until golden, about 5 minutes.
Add garlic and spinach to the skillet, cooking until spinach wilts, about 2 minutes.
Pour in heavy cream, parmesan, and nutmeg. Stir until the sauce thickens slightly.
Add the cooked gnocchi to the skillet and toss to coat evenly. Season with salt and pepper.
Serve warm with extra parmesan if desired.
Notes
You can customize the seasonings to taste.
“`html
How to Prepare This Dish
Steps and time-saving tips
Start by heating a large skillet over medium heat and adding a drizzle of olive oil. Toss in sliced mushrooms and sauté them until they turn golden brown, which takes about five minutes. Meanwhile, mince garlic and roughly chop fresh spinach to save time later. Stir the garlic into the skillet and let it cook for just 30 seconds until fragrant. Next, fold in the spinach and cook until it wilts, which happens quickly. Pour in heavy cream and vegetable broth, then whisk everything together until the sauce thickens slightly. Add store-bought gnocchi directly to the skillet—no need to boil it separately—and let it simmer in the creamy sauce for three to four minutes. Finish by sprinkling grated Parmesan cheese and a pinch of nutmeg for extra depth. If you’re short on time, prep the mushrooms and spinach ahead and store them in the fridge. For a richer flavor, swap vegetable broth for chicken broth or add a splash of white wine when sautéing the mushrooms.
and-learned-from">Mistakes I’ve made and learned from
I once rushed the mushroom sautéing step and ended up with soggy, undercooked mushrooms that watered down the sauce. Now I patiently let them brown fully, which adds so much flavor to the Creamy Spinach and Mushroom Gnocchi Recipe. Another blunder? Overcrowding the skillet with gnocchi, which made them stick together. Cooking them in batches or using a wider pan solves this. If your sauce seems too thin, let it simmer a bit longer or thicken it with a cornstarch slurry—just like I learned from my guide to perfect sauces. And don’t skip the nutmeg! It’s a small touch, but it balances the creaminess, as I discovered after testing tips from my secret ingredients post.
“`
n-and-variations">Cultural Connection and Variations
Where this recipe comes from
Picture a cozy Italian kitchen, where generations have rolled pillowy gnocchi by hand, pairing them with whatever fresh ingredients the season offers. The Creamy Spinach and Mushroom Gnocchi Recipe carries that tradition forward, blending earthy mushrooms and vibrant spinach into a dish that feels both rustic and refined. In Northern Italy, cooks might swap spinach for wild greens or add a splash of white wine for depth. Meanwhile, in the U.S., families often tweak it with cream cheese or garlic for extra richness.
My grandmother used to say gnocchi should “hug the sauce,” and this recipe does just that. Some versions skip the cream entirely, letting the mushrooms shine with a drizzle of olive oil and Parmesan. Others, like the Creamy Spinach and Mushroom Gnocchi Recipe, embrace indulgence. Whether served at a Sunday supper or a festive gathering, it bridges old-world charm and modern tastes effortlessly.
How it fits in today’s cooking
Today, this dish thrives as a weeknight hero or a star at dinner parties. Busy cooks love how the Creamy Spinach and Mushroom Gnocchi Recipe comes together in 30 minutes, while meal preppers might double the batch and freeze portions. It’s also a favorite for meatless Mondays, proving comfort food doesn’t need meat to satisfy. Pair it with a crisp salad from our spring salad roundup for a balanced meal.
Seasonal twists keep it
fresh year-round. In fall, roasted butternut squash joins the mix. Come winter, a sprinkle of nutmeg adds warmth. For more cozy inspiration, check out our comfort food classics. Whether you stick to tradition or make it your own, this dish proves some flavors never go out of style.
Taste and Texture
What makes it delicious
Every bite of this Creamy Spinach and Mushroom Gnocchi Recipe delivers a luxurious blend of textures and flavors. The gnocchi, tender and pillowy, melts in your mouth while the sautéed mushrooms add an earthy, meaty chew. Meanwhile, the velvety spinach brings a fresh, slightly sweet contrast. A rich, garlic-infused cream sauce ties it all together, offering a decadent, savory depth with hints of Parmesan. The aroma alone—fragrant garlic, buttery mushrooms, and fresh herbs—will have you reaching for seconds before you finish your first plate. Whether you crave comfort or elegance, this Creamy Spinach and Mushroom Gnocchi Recipe satisfies both with its harmonious balance of creamy, chewy, and fresh elements.
Boosting the flavor
For an extra flavor kick, try swapping the mushrooms for wild varieties like shiitake or chanterelle, which add deeper umami notes. A sprinkle of toasted pine nuts or crispy pancetta on top introduces a delightful crunch. If you love heat, a pinch of red pepper flakes or a drizzle of chili oil elevates the dish. Pair it with a bright, citrusy salad like our Arugula Salad with Lemon Vinaigrette to cut through the richness. For a finishing touch, a dash of truffle oil or a handful of fresh basil leaves amps up the aroma. Craving more creamy pasta ideas? Our Garlic Parmesan Pasta offers similar comfort with a bold twist.
Always sauté the mushrooms until golden before adding spinach to lock in flavor for your Creamy Spinach and Mushroom Gnocchi Recipe. Meanwhile, use fresh gnocchi if possible, as it holds its shape better than frozen. Additionally, stir the cream sauce gently to prevent curdling, and season in layers for balanced taste. Finally, garnish with freshly grated parmesan right before serving for the best texture.
Mistakes to avoid
Avoid overcrowding the pan when cooking mushrooms, as they’ll steam instead of brown. Instead, work in batches for perfect caramelization. Also, don’t skip wilting the spinach separately—excess moisture can make your Creamy Spinach and Mushroom Gnocchi Recipe watery. For more sauce consistency tips, check out our guide to perfect sauces. Lastly, resist overcooking gnocchi; it only needs 2-3 minutes. Learn how to spot doneness with our pasta cooking guide.
g-suggestions">Serving and Pairing Suggestions
How to serve this dish
For a restaurant-worthy presentation, plate the Creamy Spinach and Mushroom Gnocchi Recipe in shallow bowls to showcase its rich texture. Meanwhile, garnish with a sprinkle of freshly grated Parmesan and a few basil leaves for a pop of color. This dish shines at cozy dinner parties, but it also makes a comforting weeknight meal. If you’re hosting a holiday gathering, consider serving it family-style in a large skillet for a rustic touch. Either way, the creamy sauce and tender gnocchi will steal the spotlight.
What goes well with it
Pair the Creamy Spinach and Mushroom Gnocchi Recipe with a crisp white wine like Pinot Grigio to balance its richness. Alternatively, a light arugula salad with lemon vinaigrette adds a refreshing contrast. For heartier occasions, try serving it alongside our Garlic Butter Dinner Rolls to soak up every bit of the creamy sauce. If you love bold flavors, our Roasted Tomato Bruschetta makes a vibrant starter that complements the earthy mushrooms perfectly.
math-faq-block">
What type of mushrooms work best for Creamy Spinach and Mushroom Gnocchi Recipe?
Cremini or baby bella mushrooms are ideal for this Creamy Spinach and Mushroom Gnocchi Recipe because they hold their shape well and offer a rich, earthy flavor. White button mushrooms also work if you prefer a milder taste. Avoid delicate varieties like enoki, as they may become too soft during cooking.
Can I use frozen spinach in Creamy Spinach and Mushroom Gnocchi Recipe?
Yes, frozen spinach works perfectly in this Creamy Spinach and Mushroom Gnocchi Recipe—just thaw and squeeze out excess water before adding it to the dish. Fresh spinach can also be used; simply wilt it in the pan with the mushrooms. Either option ensures a vibrant green color and tender texture.
How do I prevent gnocchi from becoming gummy in this recipe?
To avoid gummy gnocchi in your Creamy Spinach and Mushroom Gnocchi Recipe, cook store-bought gnocchi just until they float (about 2 minutes) and immediately drain them. For homemade gnocchi, use a light hand when mixing the dough and avoid overworking it. Tossing them in the sauce right after cooking helps maintain the perfect texture.
ank-math-faq-item">
What protein pairs well with Creamy Spinach and Mushroom Gnocchi Recipe?
Grilled chicken, shrimp, or crispy pancetta are excellent protein additions to this Creamy Spinach and Mushroom Gnocchi Recipe. For a vegetarian option, try adding white beans or chickpeas. These proteins complement the creamy sauce without overpowering the dish’s delicate flavors.
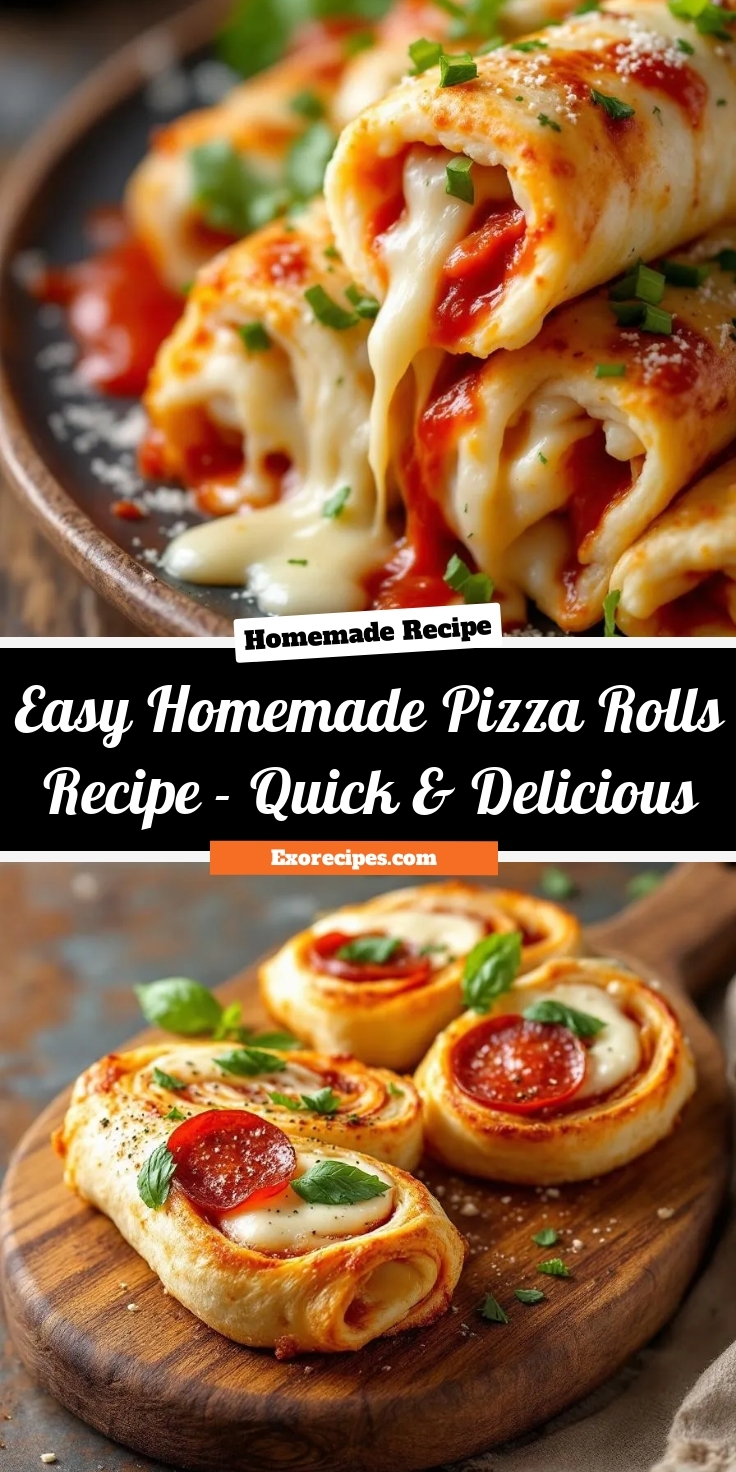
There’s something undeniably comforting about biting into a warm, cheesy Homemade Pizza Rolls Recipe. Whether you’re craving a quick snack, planning a game-day spread, or simply want to relive childhood memories, these little pockets of joy hit the spot every time. Unlike store-bought versions, making them from scratch lets you control the ingredients, customize the flavors, and fill your kitchen with that irresistible aroma of fresh-baked dough and melted mozzarella. Trust me, once you try this recipe, you’ll never go back to the freezer aisle again.
Homemade Pizza Rolls Recipe transforms simple pantry staples into a crowd-pleasing treat that’s perfect for any occasion. Essentially, they’re miniature rolled-up pizzas stuffed with your favorite toppings, sealed in a golden-brown crust, and baked until bubbly. What makes them special is their versatility. You can load them with pepperoni, veggies, or even experiment with gourmet ingredients like prosciutto and arugula. Moreover, they’re a fantastic way to get kids involved in the kitchen, turning meal prep into a fun activity. If you love easy appetizers, you’ll also adore our Garlic Knots Recipe, which pairs perfectly with these rolls.
This recipe aligns perfectly with our blog’s mission: delivering approachable, flavorful dishes that bring people together. Whether you’re hosting a party or need a quick weeknight dinner solution, Homemade Pizza Rolls Recipe fits the bill. They’re freezer-friendly, too, so you can bake a batch ahead of time and reheat them whenever cravings strike. For more family-friendly ideas, check out our Cheesy Pasta Bake, another guaranteed hit. Above all, these rolls prove that homemade doesn’t have to mean complicated—just delicious.
Why I Love This Recipe
Homemade Pizza Rolls Recipe holds a special place in my heart because it reminds me of lazy weekend afternoons with my family. My mom used to whip up a batch while my siblings and I argued over topping choices, and the smell alone would bring everyone running to the kitchen. Now, I love making them for my own kids, watching their faces light up as they pull apart the gooey, savory rolls. It’s more than just a recipe—it’s a tradition, a way to create moments that stick long after the last bite.
Health and Nutrition
Why it’s good for your body
Homemade Pizza Rolls Recipe packs a nutritious punch while satisfying your cravings. First, you control the ingredients, so you can skip processed additives and load up on wholesome toppings. For example, adding veggies like spinach or bell peppers boosts fiber and vitamins. Meanwhile, using whole wheat dough or a cauliflower base increases the nutrient density without sacrificing flavor.
Additionally, Homemade Pizza Rolls Recipe offers a balanced mix of macronutrients. The cheese and lean meats provide protein to keep you full, while the carbs from the dough deliver energy. Plus, healthy fats from olive oil or avocado support heart health. Unlike store-bought versions, you can tweak the recipe to reduce sodium or sugar, making it a smarter choice for long-term wellness.
Finally, this dish fits seamlessly into varied diets. Whether you need a post-workout snack or a kid-friendly meal, Homemade Pizza Rolls Recipe adapts to your needs. By baking instead of frying, you cut unnecessary calories while keeping the crispy texture everyone loves. With each bite, you get flavor and nourishment in one convenient package.
How it fits in a healthy lifestyle
Homemade Pizza Rolls Recipe works well in a balanced diet because you customize it to match your goals. For a high-protein option, add grilled chicken or turkey pepperoni. If you prefer plant-based eating, swap in vegan cheese and load up with mushrooms or roasted zucchini. The versatility makes it easy to align with your nutritional priorities.
For gluten-free diets, try almond flour dough or a pre-made gluten-free crust. You’ll still enjoy the same great taste without digestive discomfort. Pair your pizza rolls with a fresh salad or healthy snacks to round out the meal. Even better, batch-cook and freeze them for quick, portion-controlled lunches or meal prep solutions. With smart tweaks, this recipe becomes a staple for busy, health-conscious eaters.
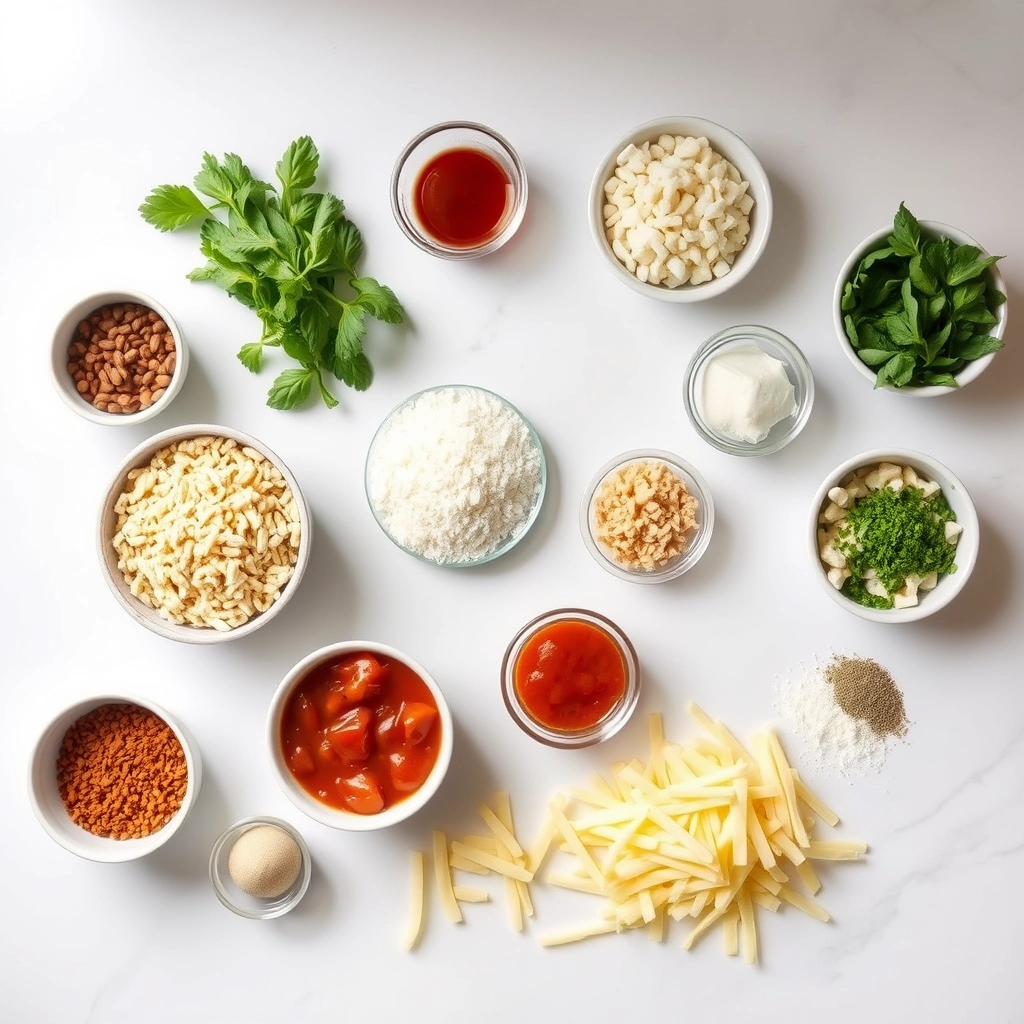
Delicious bite-sized pizza rolls perfect for snacking or parties.
Ingredients
Scale
For the Crust:
1 can refrigerated pizza dough
1 cup shredded mozzarella cheese
1/2 cup pepperoni, chopped
1/4 cup pizza sauce
1 tsp Italian seasoning
1 tbsp olive oil
1/4 tsp garlic powder
Instructions
1. Prepare the Crust:
Preheat oven to 375°F (190°C) and line a baking sheet with parchment paper.
Roll out the pizza dough into a rectangle and spread pizza sauce evenly over the surface.
Sprinkle mozzarella cheese, chopped pepperoni, and Italian seasoning over the sauce.
Roll the dough tightly into a log, starting from the long side, and pinch the seam to seal.
Cut the log into 1-inch slices and place them on the prepared baking sheet.
Brush the tops with olive oil and sprinkle with garlic powder.
Bake for 15-18 minutes or until golden brown. Serve warm.
Notes
You can customize the seasonings to taste.
“`html
="how-to-prepare-this-dish">How to Prepare This Dish
Steps and time-saving tips
Start by preheating your oven to 375°F so it’s ready when you finish assembling the Homemade Pizza Rolls Recipe. While the oven heats, roll out store-bought pizza dough on a lightly floured surface into a rectangle about ¼-inch thick. Spread a thin layer of marinara sauce evenly over the dough, leaving a small border around the edges. Next, sprinkle shredded mozzarella cheese and your favorite toppings—pepperoni, sautéed mushrooms, or bell peppers work great. Carefully roll the dough into a tight log, sealing the edges with a bit of water to prevent filling from leaking. Slice the log into 1-inch pieces and place them seam-side down on a parchment-lined baking sheet. Brush the tops with melted butter and a sprinkle of garlic powder for extra flavor. Bake for 15-18 minutes until golden brown. For a time-saving shortcut, prep the rolls the night before and refrigerate them covered—just pop them in the oven when ready. Serve warm with extra marinara for dipping.
Mistakes I’ve made and learned from
My first attempt at this Homemade Pizza Rolls Recipe was a mess—literally. I overloaded the dough with too much sauce and cheese, which oozed out during baking and stuck to the pan. After trial and error, I learned that less is more: a thin sauce layer and moderate cheese keep everything intact. Another blunder? Skipping the egg wash or butter brush. Without it, the rolls came out pale and dry. Now, I never skip that step for golden, crispy tops. If you’re new to working with dough, check out my guide on handling dough like a pro to avoid tearing. And if your oven runs hot like mine, peek at these oven temperature tips to prevent overbaking. Trust me, these small adjustments make all the difference!
Homemade Pizza Rolls Recipe might feel like a modern snack, but its roots stretch back to Italian calzones and stromboli. Families in Naples often folded leftover pizza ingredients into portable pockets, creating a quick meal for workers and kids. Meanwhile, in the U.S., the 1980s saw frozen pizza rolls explode in popularity, turning them into a game-day staple. Today, making them from scratch lets us reconnect with that hands-on tradition while adding personal twists.
Around the world, varia
tions pop up in surprising places. In Brazil, they stuff pão de queijo with pizza toppings, while in Japan, they bake melty rolls with mayo and corn. My grandma’s version of Homemade Pizza Rolls Recipe included a pinch of oregano and a smear of garlic butter—her “secret” for extra flavor. Whether you go classic or creative, these little bites carry big memories.
How it fits in today’s cooking
Homemade Pizza Rolls Recipe still shines because it’s endlessly adaptable. Busy parents pack them in lunchboxes, and food bloggers riff on the fillings—like swapping pepperoni for spicy chorizo or vegan cheese. They’re also a hit at parties, especially when paired with easy crowd-pleasing dips. Plus, they freeze beautifully, making them a smart meal prep option for hectic weeks.
Modern cooks love how they bridge nostalgia and convenience. Some even use air fryer shortcuts for extra crispiness. Whether you serve them during football season or as a late-night snack, Homemade Pizza Rolls Recipe keeps comfort food simple, fun, and deeply satisfying.
>Taste and Texture
What makes it delicious
Biting into these Homemade Pizza Rolls Recipe delivers a burst of savory, cheesy goodness wrapped in a golden, buttery crust. The dough bakes up crisp on the outside yet stays soft and pillowy inside, creating the perfect contrast. Melted mozzarella stretches with every bite, while tangy marinara sauce and fragrant garlic infuse each roll with rich, Italian-inspired flavor. Meanwhile, pepperoni adds a subtle smoky kick, making these rolls irresistible. Whether you serve them fresh from the oven or as a snack, the Homemade Pizza Rolls Recipe guarantees a satisfying, mouthwatering experience.
Boosting the flavor
For an extra flavor boost, try mixing shredded cheddar into the mozzarella for a sharper, bolder taste. Alternatively, sprinkle Italian seasoning or red pepper flakes over the rolls before baking to add warmth and depth. If you love bold toppings, fold in sautéed mushrooms or crispy bacon bits for a heartier twist. Pair them with a zesty homemade ranch dressing or a spicy garlic butter sauce for dipping. These simple tweaks elevate the Homemade Pizza Rolls Recipe without complicating the process.
Tips for Success
Best practices for results
Always chill the dough before rolling it out for your Homemade Pizza Rolls Recipe, as this prevents sticking and makes shaping easier. Additionally, use parchment paper when baking to ensure the rolls crisp evenly without burning. For the best flavor, finely chop your fillings so they distribute evenly, and seal the edges tightly to avoid leaks. Finally, brush the tops with melted butter or olive oil before baking for a golden finish.
Mistakes to avoid
One common mistake is overfilling the rolls, which causes them to burst open during baking. Instead, use just a tablespoon of filling per roll for the best results. Another error is skipping the egg wash, which helps seal the edges and gives the Homemade Pizza Rolls Recipe a glossy finish. If your dough feels sticky, check out our guide on how to work with sticky dough for troubleshooting tips. Also, avoid baking at too high a temperature—this leads to uneven cooking, so follow the recommended oven settings in our perfect baking temperatures article.
Serving and Pairing Suggestions
How to serve this dish
Serve your Homemade Pizza Rolls Recipe fresh from the oven for the best texture and flavor. Arrange them on a rustic wooden board or colorful platter to make them pop at parties. For a fun twist, skewer them with mini forks or toothpicks for easy grabbing. These bite-sized treats shine at game-day gatherings, kids’ birthday parties, or even as a cozy movie-night snack. To elevate the presentation, sprinkle fresh basil or grated Parmesan on top right before serving. If you’re hosting a brunch, pair them with a vibrant salad for a balanced spread.
h-it">What goes well with it
Homemade Pizza Rolls Recipe pairs perfectly with a tangy marinara or creamy garlic dip for extra flavor. For a refreshing contrast, try serving them alongside a crisp Caesar salad or our zesty Italian Chopped Salad. If you’re craving something heartier, these rolls complement a warm bowl of Tomato Basil Soup for a comforting meal. For drinks, a chilled sparkling lemonade or light beer balances the richness of the rolls beautifully.
How do you make homemade pizza rolls from scratch?
To make homemade pizza rolls from scratch, combine pizza dough, marinara sauce, shredded cheese, and your favorite toppings. Roll the dough into small pockets, bake until golden, and serve warm. This Homemade Pizza Rolls Recipe is perfect for snacks or parties.
ank-math-faq-item">
Can you freeze homemade pizza rolls?
Yes, you can freeze homemade pizza rolls after baking and cooling them. Store them in an airtight container or freezer bag for up to 2 months. Reheat in the oven or air fryer for the best texture in this Homemade Pizza Rolls Recipe.
What dipping sauces go well with homemade pizza rolls?
Classic marinara, ranch, or garlic butter are great dipping sauces for homemade pizza rolls. For a spicy twist, try sriracha mayo or buffalo sauce. These pairings elevate the flavors in your Homemade Pizza Rolls Recipe.
Can I use store-bought dough for homemade pizza rolls?
Absolutely! Store-bought pizza dough works well for homemade pizza rolls to save time. Just roll it out, add your fillings, and follow the rest of the Homemade Pizza Rolls Recipe steps. It’s a convenient shortcut without sacrificing taste.
div>
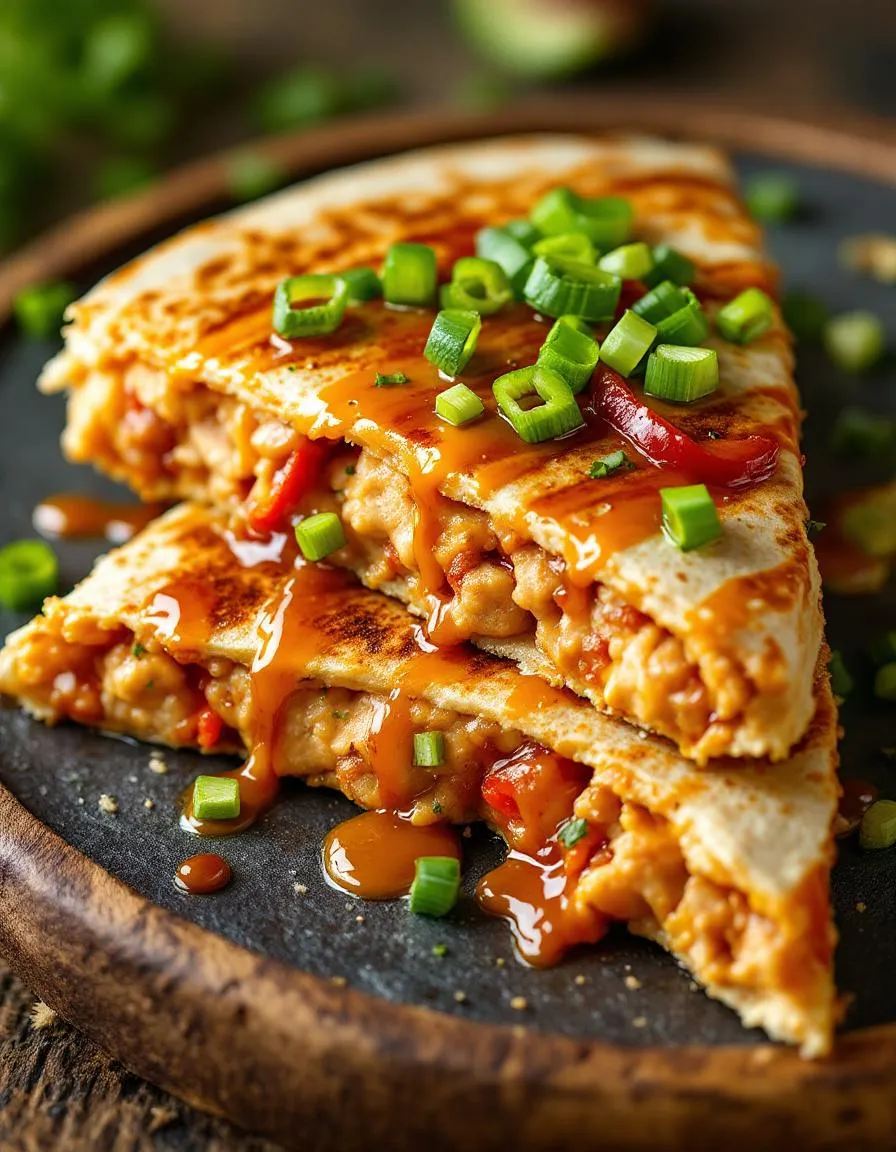
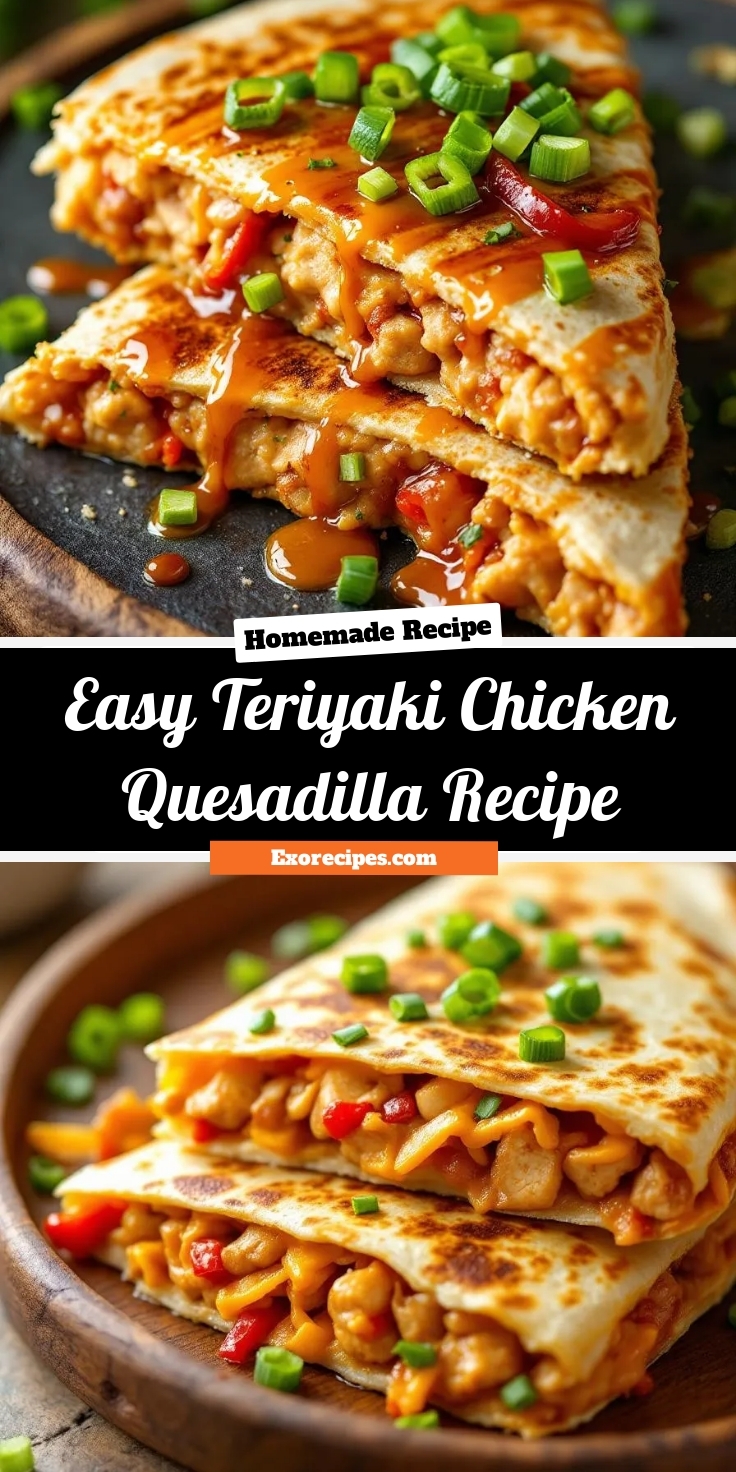
Easy Teriyaki Chicken Quesadilla Recipe
Introduction
Craving a meal that’s both comforting and bursting with flavor? Look no further than this Teriyaki Chicken Quesadilla Recipe. It’s the perfect fusion of sweet, savory, and crispy—a dish that satisfies your hunger while surprising your taste buds. Whether you’re cooking for a busy weeknight or a casual gathering, this recipe delivers big on flavor with minimal effort. Plus, it’s a fantastic way to repurpose leftover chicken into something extraordinary. Let’s dive into why this dish deserves a spot in your regular rotation.
The Teriyaki Chicken Quesadilla Recipe combines the best of two worlds: the rich, umami-packed notes of teriyaki sauce and the gooey, crunchy goodness of a classic quesadilla. This dish matters because it’s versatile, quick, and universally appealing. Even picky eaters will love the familiar flavors with a fun twist. If you’re a fan of easy yet impressive meals, this recipe fits right into your repertoire. It’s also a great way to introduce global flavors to your kitchen without complicated techniques. For more fusion inspiration, check out our Korean Taco Recipe, which plays with similar bold flavors.
What makes this recipe stand out is its adaptability. You can customize the fillings, adjust the spice level, or even swap proteins to suit your preferences. The blog’s tone celebrates approachable, flavorful cooking, and this dish embodies that perfectly. It’s a crowd-pleaser that doesn’t require fancy ingredients or hours in the kitchen. If you’re looking for more quick and tasty ideas, our 15-Minute Meals collection is packed with gems. Now, let’s talk about why this recipe holds a special place in my heart.
Why I Love This Recipe
This Teriyaki Chicken Quesadilla Recipe reminds me of lazy Sunday afternoons with friends, where we’d experiment with whatever ingredients we had on hand. The first time I made it, the combination of sticky teriyaki sauce and melted cheese felt like a revelation. It’s become my go-to for impromptu dinners because it always feels like a treat, even on the busiest days. The simplicity of the dish lets the flavors shine, and I love how it brings people together—everyone reaches for seconds. That’s the magic of food: it’s not just about eating, but about creating memories.
Health and Nutrition
Why it’s good for your body
The Teriyaki Chicken Quesadilla Recipe packs a nutritious punch while delivering bold flavors. First, the lean chicken provides high-quality protein to support muscle repair and keep you full longer. Additionally, the teriyaki sauce adds a savory-sweet kick, but when made with reduced-sodium soy sauce, it keeps sodium levels in check. Meanwhile, the whole wheat tortillas offer fiber, which aids digestion and stabilizes blood sugar.
Moreover, this dish includes colorful veggies like bell peppers and onions, boosting your intake of vitamins A and C. These nutrients strengthen immunity and promote healthy skin. Furthermore, the melted cheese adds calcium for strong bones, but you can easily opt for a lighter cheese to cut calories without sacrificing taste. The Teriyaki Chicken Quesadilla Recipe balances indulgence with nourishment, making it a smart choice for any meal.
Finally, the combination of protein, fiber, and healthy fats ensures steady energy levels. Whether you need a post-workout refuel or a satisfying lunch, this recipe delivers. With its well-rounded ingredients, the Teriyaki Chicken Quesadilla Recipe proves that tasty and wholesome can go hand in hand.
How it fits in a healthy lifestyle
The Teriyaki Chicken Quesadilla Recipe fits seamlessly into a balanced diet. For protein-focused eaters, the chicken and cheese provide a solid foundation, while the whole wheat tortillas keep it carb-conscious. If you’re watching sodium, simply swap regular soy sauce for a low-sodium version in the teriyaki glaze.
This dish also works well for meal prep. You can assemble quesadillas ahead and reheat them for quick, nutritious lunches. Pair them with a side salad or veggie-packed sides to round out your plate. For those tracking macros, the recipe offers flexibility—adjust cheese amounts or add extra veggies to meet your goals.
Even better, the Teriyaki Chicken Quesadilla Recipe suits active lifestyles. The protein aids recovery after workouts, and the fiber keeps you energized. If you’re exploring other high-protein options, check out our protein-packed dinner ideas for more inspiration. With simple tweaks, this recipe can align with nearly any dietary preference or health goal.
A fusion dish combining Japanese teriyaki chicken with Mexican quesadillas for a delicious and easy meal.
Ingredients
Scale
For the Crust:
2 boneless, skinless chicken breasts, sliced
1/4 cup teriyaki sauce
4 large flour tortillas
1 cup shredded mozzarella cheese
1/2 cup shredded cheddar cheese
1/2 cup sliced bell peppers
1/4 cup sliced green onions
1 tbsp vegetable oil
Instructions
1. Prepare the Crust:
Marinate chicken slices in teriyaki sauce for at least 15 minutes.
Heat oil in a pan over medium heat and cook chicken until fully done, about 5-7 minutes. Set aside.
Place a tortilla in a clean pan over medium heat. Sprinkle half with mozzarella and cheddar cheeses.
Add cooked chicken, bell peppers, and green onions on top of the cheese.
Fold the tortilla in half and cook for 2-3 minutes per side until golden brown and cheese melts.
Repeat with remaining tortillas and ingredients. Slice into wedges and serve warm.
Notes
You can customize the seasonings to taste.
How to Prepare This Dish
Steps and time-saving tips
Start by marinating your chicken in teriyaki sauce for at least 20 minutes to lock in flavor. While the chicken soaks, shred your cheese and slice your veggies so everything is ready to go. Heat a skillet over medium-high heat and cook the chicken until it’s golden and cooked through, then set it aside. Next, wipe the skillet clean and warm a tortilla on it. Sprinkle a layer of cheese, add the teriyaki chicken, and top with another handful of cheese before folding the tortilla in half. Press down gently with a spatula to help the quesadilla crisp evenly. Flip it after about 2 minutes, or when the bottom turns golden brown. For a time-saving trick, prep extra chicken ahead and store it in the fridge—it’ll cut your cooking time in half. If you’re serving a crowd, keep finished quesadillas warm in a 200°F oven while you cook the rest. Drizzle extra teriyaki sauce on top before serving for an extra flavor boost.
Mistakes I’ve made and learned from
I used to overload my quesadillas with filling, thinking more was better, but it just made them messy and hard to flip. Now I stick to a thin, even layer of chicken and cheese—it cooks faster and holds together perfectly. Another lesson? Don’t skip the cheese barrier between the tortilla and chicken. Without it, the tortilla can get soggy from the sauce. If you’re new to cooking with teriyaki, check out my guide on teriyaki sauce secrets to avoid a too-sweet or too-salty dish. And if your quesadillas keep falling apart, try using a lid to trap heat and melt the cheese faster—I picked up this trick from my perfect quesadilla technique post. Trust me, a little patience goes a long way!
The Teriyaki Chicken Quesadilla Recipe is a delicious fusion of Japanese and Mexican flavors, blending the sweet-savory glaze of teriyaki with the crispy, cheesy comfort of a quesadilla. While teriyaki chicken has deep roots in Japanese cuisine, often grilled over charcoal for a smoky finish, the quesadilla brings the warmth of Mexican street food. Together, they create a dish that feels both familiar and excitingly new.
In Japan, cooks might serve teriyaki chicken with steamed rice or noodles, but when it crosses borders, creativity takes over. Some families add pineapple for a tropical twist, while others toss in bell peppers or jalapeños for extra heat. My aunt, for instance, swears by adding a splash of lime juice to balance the sweetness. Meanwhile, in coastal regions, you might find seafood versions swapping chicken for shrimp or crab, proving how versatile the Teriyaki Chicken Quesadilla Recipe can be.
Seasonally, this dish s
hines year-round. In summer, it pairs perfectly with fresh mango salsa, while winter calls for heartier fillings like caramelized onions. No matter the variation, the core appeal stays the same: a satisfying bite that bridges cultures and tastes like home.
How it fits in today’s cooking
Today, the Teriyaki Chicken Quesadilla Recipe fits effortlessly into modern meal routines. Busy weeknights? It’s a 20-minute wonder. Game-day gatherings? Slice it into wedges and watch it disappear. The dish also adapts to dietary preferences—swap flour tortillas for gluten-free options or use plant-based cheese for a vegan twist.
What keeps it relevant is its crowd-pleasing simplicity. Teens love it for after-school snacks, and adults appreciate it as a quick lunch with a side of avocado salsa. Plus, meal preppers often batch-cook the teriyaki chicken, using leftovers for salads or rice bowls. Whether you’re honoring traditions or inventing new ones, this recipe bridges the gap between comfort and adventure, one cheesy bite at a time.
>Taste and Texture
What makes it delicious
The Teriyaki Chicken Quesadilla Recipe delivers a mouthwatering fusion of sweet, savory, and smoky flavors. Juicy teriyaki-glazed chicken mingles with melted cheese, creating a rich, gooey center, while the tortilla crisps to golden perfection. Each bite offers a satisfying contrast—tender meat against the crunch of the toasted shell, with a hint of garlic and ginger lingering in the background. The teriyaki sauce caramelizes slightly, adding a sticky-sweet depth that balances the sharpness of the cheese. Meanwhile, the Teriyaki Chicken Quesadilla Recipe fills the kitchen with an irresistible aroma, blending the smokiness of seared chicken with the tangy-sweet scent of teriyaki. It’s a dish that feels indulgent yet comforting, with every layer working in harmony.
Boosting the flavor
For an extra flavor kick, try drizzling spicy sriracha mayo over your Teriyaki Chicken Quesadilla Recipe or sprinkling toasted sesame seeds for nutty crunch. If you love heat, toss in pickled jalapeños or a dash of chili flakes to contrast the sweetness. Alternatively, swap the cheese for pepper jack to add a subtle kick. Pair it with a bright, tangy slaw or a side of Asian cucumber salad to cut through the richness. For a bolder teriyaki taste, brush extra sauce on the tortilla before grilling. And if you’re craving more fusion inspiration, check out our Korean BBQ tacos—they share the same crave-worthy balance of sweet and savory.
Tips for Success
Best practices for results
Always use freshly shredded cheese for your Teriyaki Chicken Quesadilla Recipe, as it melts more evenly than pre-shredded varieties. Meanwhile, cook the chicken on medium-high heat to lock in moisture and prevent dryness. Additionally, spread the teriyaki sauce lightly to avoid soggy tortillas. For extra crispiness, press the quesadilla firmly in the pan and flip it only once. Finally, let it rest for a minute before slicing to keep the filling intact.
Mistakes to avoid
Overloading the quesadilla with filling can make it messy and hard to flip. Instead, use just enough to cover half the tortilla evenly. Also, avoid cranking the heat too high, as this burns the tortilla before the cheese melts. For perfectly cooked chicken every time, check out our guide on how to cook chicken breast perfectly. Lastly, skipping the resting step causes the filling to spill out, so patience is key. If you need help with tortilla selection, our best tortillas for quesadillas breakdown will steer you right.
Serving and Pairing Suggestions
How to serve this dish
Make your Teriyaki Chicken Quesadilla Recipe shine by serving it fresh off the skillet with a golden, crispy exterior. For a restaurant-worthy presentation, slice each quesadilla into wedges and arrange them on a wooden board or colorful plate. Meanwhile, drizzle extra teriyaki sauce in zigzag patterns for a gourmet touch. Sprinkle sesame seeds or chopped green onions on top to add texture and vibrancy. Whether you’re hosting game day, a casual weeknight dinner, or a fun brunch, this dish always steals the spotlight. For gatherings, set up a DIY quesadilla bar with toppings like pickled ginger or sriracha mayo so guests can customize their plates.
h-it">What goes well with it
Pair your Teriyaki Chicken Quesadilla Recipe with a refreshing cucumber salad to balance the rich flavors. The crisp, cool veggies contrast beautifully with the savory-sweet quesadilla. Alternatively, try a side of miso soup for a cozy, umami-packed combo. If you love dipping sauces, whip up a creamy avocado crema or our zesty spicy mayo for an extra kick. For drinks, a chilled glass of jasmine tea or a citrusy margarita enhances the meal. Craving more fusion inspiration? Check out our Korean taco recipe for another delicious twist on classic flavors.
What ingredients do I need for a Teriyaki Chicken Quesadilla Recipe?
You’ll need cooked chicken breast, teriyaki sauce, shredded cheese (like Monterey Jack or cheddar), flour tortillas, and optional add-ins like bell peppers or green onions. The Teriyaki Chicken Quesadilla Recipe combines sweet and savory flavors for a delicious twist on classic quesadillas.
ank-math-faq-item">
Can I make Teriyaki Chicken Quesadillas ahead of time?
Yes! Prep the teriyaki chicken filling in advance and store it in the fridge for up to 2 days. Assemble and cook the Teriyaki Chicken Quesadilla Recipe just before serving for the crispiest results. Reheat leftovers in a skillet for best texture.
What sides go well with Teriyaki Chicken Quesadillas?
Pair your Teriyaki Chicken Quesadilla Recipe with Asian-inspired sides like sesame ginger slaw, miso soup, or steamed edamame. For a fusion approach, serve with guacamole and salsa to complement the quesadilla’s crispy-cheesy goodness.
How do I prevent my quesadillas from getting soggy?
Pat the teriyaki chicken dry before assembling and use a moderate amount of sauce. Cook the Teriyaki Chicken Quesadilla Recipe over medium heat until golden brown—this seals the tortilla. Let it rest 1 minute before cutting to keep the filling intact.
div>
Easy Sheet Pan Lemon Garlic Butter Salmon Recipe
Introduction
There’s something magical about a meal that comes together effortlessly yet tastes like you spent hours in the kitchen. If you crave a dish that’s both elegant and easy, this Sheet Pan Lemon Garlic Butter Salmon Recipe will become your new weeknight hero. Imagine tender, flaky salmon bathed in a bright lemon garlic butter sauce, roasted alongside crisp veggies—all on a single pan. No fuss, no piles of dishes, just a flavorful, wholesome dinner that feels like a hug on a plate. Whether you’re cooking for a busy family or treating yourself to something special, this recipe delivers every time.
Sheet pan dinners have revolutionized home cooking, and this Sheet Pan Lemon Garlic Butter Salmon Recipe perfectly embodies why. By combining protein, vegetables, and a luscious sauce on one tray, you maximize flavor while minimizing cleanup. The lemon garlic butter sauce elevates the salmon with its zesty, savory richness, while the roasted veggies soak up every delicious drop. Plus, this recipe aligns with modern lifestyles—it’s quick, adaptable, and packed with nutrients. If you love our 30-minute meals, you’ll appreciate how this dish fits into even the busiest schedules. It’s also a fantastic way to enjoy heart-healthy fats and vibrant produce, making it a staple for anyone who values both taste and wellness. And if you’re new to seafood, fear not: this method ensures perfectly cooked salmon every time, just like our guide to perfectly cooked fish promises.
Why I Love This Recipe
This Sheet Pan Lemon Garlic Butter Salmon Recipe holds a special place in my heart because it’s the dish that made me fall in love with cooking salmon at home. Before trying it, I worried about overcooking or underseasoning fish, but the foolproof method and bold flavors erased all my doubts. Now, it’s my go-to for impressing guests or enjoying a quiet night in. The way the butter melds with the garlic and lemon reminds me of cozy dinners by the beach, and I love how versatile it is—swap the veggies or add a sprinkle of herbs, and it feels brand new every time.
Health and Nutrition
Why it’s good for your body
Sheet Pan Lemon Garlic Butter Salmon Recipe packs a powerful nutritional punch while tasting delicious. First, salmon delivers high-quality protein to support muscle repair and keep you full longer. Additionally, it’s rich in omega-3 fatty acids, which boost heart health and reduce inflammation. The lemon and garlic not only add bright flavor but also provide antioxidants and immune-boosting benefits.
Moreover, this dish keeps things simple and wholesome. Olive oil and butter offer healthy fats that aid nutrient absorption, while the roasted vegetables add fiber and essential vitamins. Since everything cooks together on one pan, Sheet Pan Lemon Garlic Butter Salmon Recipe retains maximum nutrients without excessive oil or processed ingredients. The combination of lean protein, good fats, and veggies makes it a well-rounded meal.
Finally, this recipe fits seamlessly into various dietary needs. Whether you’re focusing on anti-inflammatory eating or just want a quick, nutrient-dense dinner, Sheet Pan Lemon Garlic Butter Salmon Recipe checks all the boxes. The balance of flavors and nutrients ensures you’re nourishing your body without sacrificing taste.
How it fits in a healthy lifestyle
Sheet Pan Lemon Garlic Butter Salmon Recipe effortlessly aligns with a balanced diet. If you’re aiming for a high-protein meal, the salmon provides a lean yet satisfying option. For those following gluten-free or low-carb lifestyles, this dish naturally fits the bill without any modifications. The healthy fats from olive oil and butter also make it heart-friendly, supporting long-term wellness.
Busy weeknights call for practical meals, and this recipe delivers. With minimal cleanup and quick prep, it’s perfect for maintaining healthy habits even on hectic days. Pair it with a side of quinoa or a fresh salad for extra variety. If you love easy, nutrient-packed dinners, explore our healthy weeknight dinners for more inspiration. For those focused on heart-healthy eating, our omega-3-rich recipes offer additional delicious options. Sheet Pan Lemon Garlic Butter Salmon Recipe proves that eating well can be simple, flavorful, and rewarding.
A simple and flavorful one-pan meal featuring tender salmon with a bright lemon garlic butter sauce, roasted alongside vegetables.
Ingredients
Scale
For the Crust:
4 (6 oz) salmon fillets
1 lb baby potatoes, halved
1 bunch asparagus, trimmed
4 tbsp unsalted butter, melted
4 garlic cloves, minced
1 lemon, juiced and zested
1 tsp dried oregano
1/2 tsp salt
1/4 tsp black pepper
2 tbsp fresh parsley, chopped
Instructions
1. Prepare the Crust:
Preheat oven to 400°F (200°C). Line a sheet pan with parchment paper.
Toss halved baby potatoes with 1 tbsp melted butter, salt, and pepper. Spread on the sheet pan and roast for 15 minutes.
In a bowl, mix remaining melted butter, minced garlic, lemon juice, zest, oregano, salt, and pepper.
Remove sheet pan from oven. Push potatoes to one side and add salmon fillets and asparagus. Drizzle the lemon garlic butter sauce over everything.
Return to oven and bake for 12-15 minutes, until salmon is cooked through and flakes easily.
Garnish with fresh parsley before serving.
Notes
You can customize the seasonings to taste.
How to Prepare This Dish
Steps and time-saving tips
Start by preheating your oven to 400°F so it’s ready when you are. While it warms up, line a sheet pan with parchment paper for easy cleanup. Next, whisk together melted butter, minced garlic, lemon juice, and a pinch of salt in a small bowl. This zesty mixture will give your Sheet Pan Lemon Garlic Butter Salmon Recipe its signature flavor. Place the salmon fillets skin-side down on the prepared pan, then generously drizzle the garlic butter sauce over each piece. For extra freshness, layer thin lemon slices on top of the salmon before baking. Slide the pan into the oven and let the fish cook for about 12-15 minutes—just until it flakes easily with a fork. Meanwhile, toss your favorite veggies like asparagus or cherry tomatoes in olive oil and season them lightly. After the salmon has baked for 8 minutes, add the veggies to the same pan to roast alongside it. This one-pan trick saves time and dishes. Once everything is tender and golden, garnish with chopped parsley and serve immediately. If you’re short on time, prep the garlic butter sauce ahead and store it in the fridge for up to two days.
Mistakes I’ve made and learned from
I’ve definitely overcooked salmon by leaving it in the oven too long, turning it dry and rubbery. Now I set a timer for 10 minutes and check early—it’s better to undercook slightly since residual heat keeps cooking it. Another blunder? Crowding the pan. When I piled on too many veggies, they steamed instead of roasting. Spreading them out ensures crispy edges. For more on perfecting oven timing, check out my guide to baking temperatures. Also, I once skipped the parchment paper, and the butter sauce caramelized into a sticky mess. Lesson learned! If you’re new to sheet pan dinners, my sheet pan meal prep tips can help avoid these pitfalls.
The Sheet Pan Lemon Garlic Butter Salmon Recipe draws inspiration from coastal cuisines where fresh seafood takes center stage. In the Pacific Northwest, salmon holds deep cultural significance for Indigenous communities, who often prepare it over open fires or cedar planks. Meanwhile, Mediterranean cooks might swap butter for olive oil and add capers or olives for a briny twist. Either way, this dish celebrates simplicity and bold flavors.
My family puts its own spin on the Sheet Pan Lemon Garlic Butter Salmon Recipe by tossing in handfuls of fresh herbs from the garden. Sometimes we even throw in thinly sliced potatoes or asparagus for a complete meal. In Scandinavia, you’ll find similar recipes but with dill and a creamy mustard sauce. No matter the variation, the magic lies in how the lemon brightens the rich salmon while the garlic butter ties everything together.
ays-cooking">How it fits in today’s cooking
Today, the Sheet Pan Lemon Garlic Butter Salmon Recipe fits perfectly into our fast-paced lives. Busy home cooks love it because it delivers restaurant-quality flavor with minimal cleanup. Plus, it’s versatile enough for weeknight dinners or elegant gatherings. For a cozy twist, try pairing it with garlic herb dinner rolls or a crisp salad.
Health-conscious eaters also appreciate how this dish packs protein and omega-3s without heavy sauces. Many adapt it for meal prep by swapping seasonal veggies or adding a sprinkle of chili flakes for heat. If you’re hosting a brunch crowd, serve it alongside blueberry lemon pancakes for a sweet-and-savory spread. No wonder this recipe remains a timeless favorite.
Taste and Texture
What makes it delicious
The Sheet Pan Lemon Garlic Butter Salmon Recipe delivers a bright, buttery flavor with every bite. Tangy lemon cuts through the richness of the salmon, while garlic adds a warm, aromatic depth. The fish itself stays tender and flaky, practically melting in your mouth. Meanwhile, the buttery sauce soaks into the salmon, creating a silky, luxurious texture. Fresh herbs like parsley or dill sprinkle on a grassy freshness, balancing the dish perfectly. Every forkful of this Sheet Pan Lemon Garlic Butter Salmon Recipe bursts with zesty, savory, and slightly sweet notes—making it irresistible from the first whiff to the last bite.
r">Boosting the flavor
For an extra flavor kick, try swapping butter with ghee or adding a pinch of red pepper flakes for subtle heat. A drizzle of honey mustard dressing can introduce a sweet-tangy twist, while toasted almonds add crunch. If you love herbs, mix in fresh basil or thyme for an earthy aroma. Pair this dish with a side of garlic parmesan roasted potatoes to round out the meal. With these easy tweaks, your Sheet Pan Lemon Garlic Butter Salmon Recipe will shine even brighter on the dinner table.
Tips for Success
Best practices for results
Always pat the salmon dry before seasoning to help the lemon garlic butter stick better. Use fresh lemon juice instead of bottled for the brightest flavor in your Sheet Pan Lemon Garlic Butter Salmon Recipe. Meanwhile, line your sheet pan with parchment paper to prevent sticking and make cleanup effortless. Roast the salmon skin-side down for even cooking, and check for doneness by gently flaking the thickest part with a fork. Finally, let the salmon rest for a few minutes after baking to lock in moisture.
>Mistakes to avoid
Avoid overcrowding the sheet pan, as this can steam the salmon instead of roasting it. For perfectly cooked fish, leave space between each fillet. Additionally, don’t skip preheating the oven, since a consistent temperature ensures your Sheet Pan Lemon Garlic Butter Salmon Recipe cooks evenly. If you’re unsure about seasoning, check out our guide on how to season salmon perfectly for foolproof tips. Lastly, resist the urge to overcook the salmon—aim for a slightly translucent center, as it will continue to cook off the heat. For more on ideal cooking times, explore our salmon cooking times reference.
Serving and Pairing Suggestions
How to serve this dish
For a stunning presentation, arrange the Sheet Pan Lemon Garlic Butter Salmon Recipe on a large platter with lemon slices and fresh herbs like dill or parsley. Meanwhile, drizzle any remaining garlic butter sauce over the top for extra flavor and shine. This dish works beautifully for dinner parties, especially when paired with elegant side dishes. Alternatively, serve it family-style on a sheet pan for casual weeknight meals. If you want to elevate brunch, flake the salmon into smaller portions and pair it with light, fresh accompaniments.
What goes well with it
Bright, crisp white wines like Sauvignon Blanc or Pinot Grigio enhance the citrus notes in the Sheet Pan Lemon Garlic Butter Salmon Recipe. For a non-alcoholic option, try sparkling water with a squeeze of lemon or lime. As for sides, roasted asparagus or a simple arugula salad with shaved Parmesan add freshness. If you prefer heartier options, our Garlic Herb Roasted Potatoes balance the dish perfectly. Finally, a tangy yogurt dill sauce or our Creamy Cucumber Salad adds a cool contrast to the rich salmon.
How long do you cook sheet pan lemon garlic butter salmon?
For the perfect Sheet Pan Lemon Garlic Butter Salmon Recipe, bake at 400°F (200°C) for 12–15 minutes. The salmon should flake easily with a fork when done. Cooking time may vary slightly depending on the thickness of your fillets.
What vegetables go well with lemon garlic butter salmon?
This Sheet Pan Lemon Garlic Butter Salmon Recipe pairs beautifully with asparagus, broccoli, or zucchini. Roast them alongside the salmon for an easy one-pan meal. The garlic butter sauce enhances both the fish and vegetables.
ank-math-faq-item">
Can I use frozen salmon for this recipe?
Yes, but thaw frozen salmon completely in the refrigerator first for best results in your Sheet Pan Lemon Garlic Butter Salmon Recipe. Pat it dry before cooking to ensure proper browning and texture. Fresh salmon yields superior flavor, but frozen works in a pinch.
How do I prevent salmon from sticking to the pan?
Line your sheet pan with parchment paper or foil for this Sheet Pan Lemon Garlic Butter Salmon Recipe. Lightly oil the surface even if using non-stick pans. The lemon garlic butter sauce also helps create a natural non-stick barrier.