There is something incredibly comforting about a meal that feels both nourishing and indulgent. As the seasons change and we crave warmer, heartier dishes, the search for the perfect centerpiece begins. This recipe for Stuffed Acorn Squash with Creamed Spinach answers that call beautifully. It wraps you in a cozy embrace, offering a delicious solution for anyone seeking a satisfying vegetarian meal that doesn’t compromise on flavor or elegance.
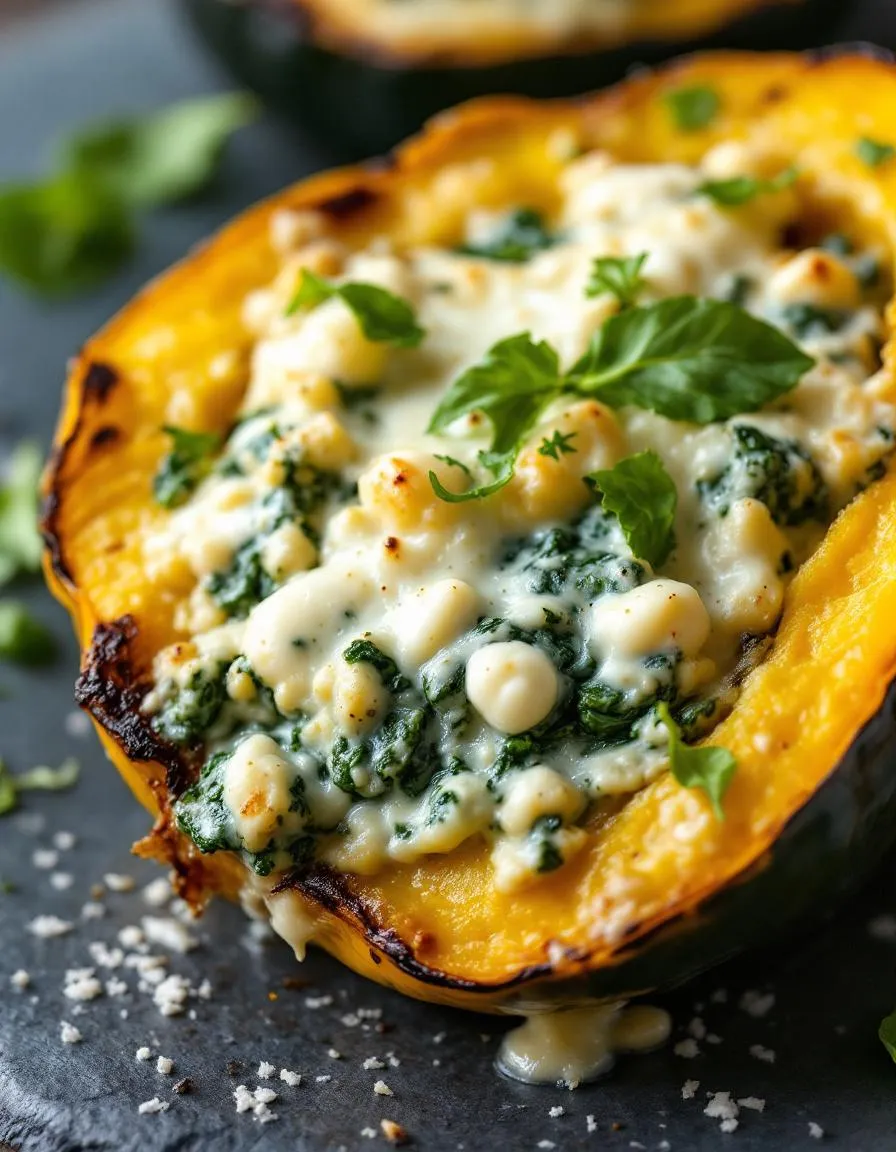
Stuffed Acorn Squash with Creamed Spinach is a quintessential fall and winter dish that transforms simple, wholesome ingredients into a stunning culinary experience. Essentially, we roast tender acorn squash halves until they become caramelized and sweet. Then, we fill them with a luxuriously rich and savory creamed spinach mixture, often topped with bubbling, golden cheese. This dish matters because it masterfully combines health and decadence. It is naturally gluten-free and vegetarian, yet it feels incredibly special and satisfying enough to please even the most dedicated carnivores at your table. Furthermore, it fits our blog’s philosophy perfectly. We celebrate approachable recipes that use seasonal produce to create unforgettable meals, just like our popular Roasted Butternut Squash Soup. This stuffed squash is a complete meal in itself, making weeknight dinners effortless and holiday menus impressive. The process is straightforward, but the final result always earns rave reviews. It is the kind of recipe that builds confidence in the kitchen and brings people together around the dinner table. For another fantastic way to enjoy seasonal vegetables, explore our guide on How to Roast Any Vegetable to perfection.
Why I Love This Recipe
This Stuffed Acorn Squash with Creamed Spinach holds a special place in my heart because it was the first meal I successfully made for my in-laws. I wanted to create something that felt festive and thoughtful without being overly complicated. The moment they cut into the tender squash and the creamy, cheesy spinach spilled out, I knew it was a hit. Now, it is a non-negotiable part of our family’s holiday rotation and a regular feature on our fall weeknight menu. It represents how food can create connection and build beautiful, lasting memories around something as simple as a shared meal.
Health and Nutrition
Why it’s good for your body
This Stuffed Acorn Squash with Creamed Spinach delivers a powerful nutritional punch. For instance, acorn squash provides a fantastic source of vitamins A and C, which actively support your immune system and vision. Moreover, its high fiber content promotes excellent digestive health and helps you feel full longer.
Furthermore, the creamy spinach filling significantly boosts the meal’s benefits. Spinach is famously rich in iron and folate, which are crucial for maintaining healthy energy levels. Additionally, the dairy components offer a great dose of calcium for strong bones. Consequently, every bite supports your body’s essential functions.
Ultimately, this Stuffed Acorn Squash with Creamed Spinach combines these elements into a truly balanced dish. Therefore, you can enjoy a comforting meal that also fuels your body with premium nutrients. Finally, this recipe proves that eating well does not require sacrificing flavor or satisfaction.
How it fits in a healthy lifestyle
This dish seamlessly fits into various healthy eating plans. It is naturally gluten-free and vegetarian, making it a fantastic centerpiece for a meatless Monday. The high fiber and protein content from the squash and dairy also supports weight management goals by promoting satiety.
You can easily incorporate this satisfying meal into your weekly rotation for a heart-healthy dinner option. If you are looking for more ways to enjoy nutritious vegetables, explore our guide to roasting vegetables to perfection. Planning a full week of balanced meals becomes simpler with dishes like this. For more inspiration on structuring your diet, check out our tips for building a healthy meal prep routine. This stuffed squash truly offers a simple and delicious path to everyday wellness.
A comforting autumn dish featuring roasted acorn squash halves filled with a rich, creamy spinach and cheese mixture.
Ingredients
Scale
For the Crust:
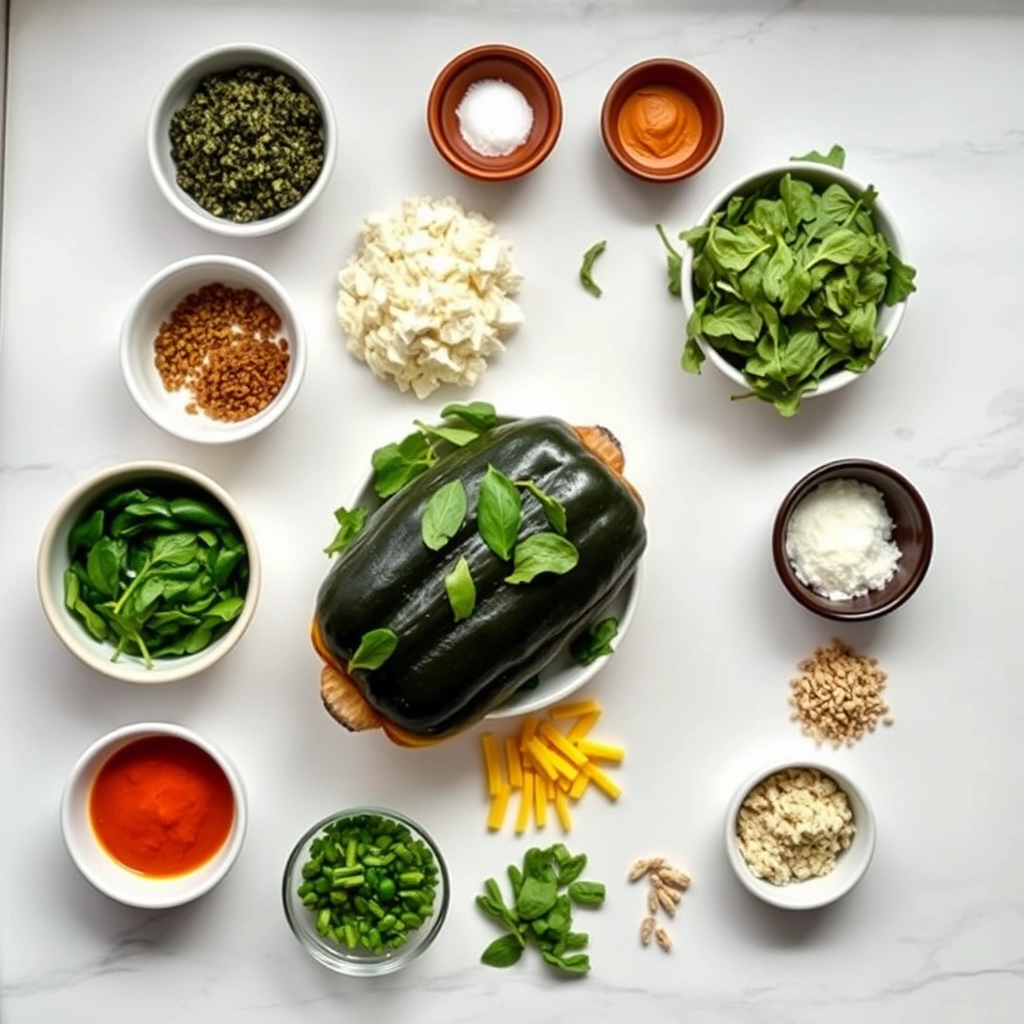
2 medium acorn squash, halved and seeded
2 tablespoons olive oil
1 teaspoon salt, divided
1/2 teaspoon black pepper, divided
1 small onion, finely chopped
2 cloves garlic, minced
10 ounces fresh spinach
4 ounces cream cheese, softened
1/4 cup grated Parmesan cheese
1/4 teaspoon nutmeg
1/2 cup shredded mozzarella cheese
Instructions
1. Prepare the Crust:
Preheat oven to 400°F (200°C). Brush squash halves with olive oil and season with 1/2 teaspoon salt and 1/4 teaspoon pepper. Place cut-side down on baking sheet and roast for 25-30 minutes until tender.
While squash roasts, heat remaining olive oil in large skillet over medium heat. Add onion and cook until softened, about 5 minutes. Add garlic and cook 1 minute more.
Add spinach to skillet and cook until wilted, about 3-4 minutes. Remove from heat and stir in cream cheese, Parmesan, nutmeg, remaining salt and pepper until well combined.
Flip roasted squash halves cut-side up. Divide spinach mixture among squash halves. Top with mozzarella cheese and return to oven for 10-12 minutes until cheese is melted and bubbly.
Let cool for 5 minutes before serving.
Notes
You can customize the seasonings to taste.
How to Prepare This Dish
Steps and time-saving tips
First, preheat your oven to 400°F. Meanwhile, slice each acorn squash in half from stem to bottom and scoop out the seeds with a sturdy spoon. Next, drizzle the flesh with olive oil and season generously with salt and pepper. Place the halves cut-side down on a parchment-lined baking sheet. This position helps them caramelize beautifully. Roast for about 30 minutes until the squash becomes tender and easily pierced with a fork. While the squash roasts, tackle the filling. In a large skillet, sauté your onion and garlic until they turn soft and fragrant. Then, add your fresh spinach in batches, wilting each addition before adding more. Now, pour in the heavy cream and let it simmer gently. Whisk in your grated nutmeg and a handful of Parmesan cheese until the sauce becomes wonderfully creamy. Finally, fold this luxurious creamed spinach mixture into the cavity of each roasted squash half. Top with a little extra cheese and pop them back in the oven for a final 10 minutes, just to get everything bubbly and golden. For a real time-saver, you can roast the squash a day ahead and simply reheat it with the filling just before serving.
Mistakes I’ve made and learned from
I have absolutely learned the hard way that under-roasting the squash is the biggest pitfall. I once pulled my acorn squash out too early, eager to get dinner on the table, and ended up with a frustratingly tough texture that was difficult to eat. Now, I always test for doneness with a fork; it should glide in without any resistance. Another classic mistake I made was overloading the creamed spinach filling, which then spilled over and made a mess of my baking sheet. The key is to mound the filling confidently but not exceed the rim of the squash boat. Getting the cream sauce right was another hurdle; I’ve accidentally let it break or become too thin. Through trial and error, I found that a gentle simmer and constant whisking are non-negotiable for a perfect, velvety sauce. If you’re new to working with creamy sauces, my guide on perfecting creamy sauces breaks it down simply. And for more foundational tips that prevent kitchen mishaps, my post on common beginner mistakes is a great resource. Trust me, a little patience here makes all the difference for your Stuffed Acorn Squash with Creamed Spinach.
My grandmother always said that the best recipes tell a story of place and time. She first made her version of Stuffed Acorn Squash with Creamed Spinach in the crisp autumn of her first year on the farm. Consequently, this dish became our family’s edible welcome mat for fall. We would gather around the table as the leaves turned, sharing stories over these hearty, individual squash bowls. Meanwhile, other cultures embrace the concept of stuffing vegetables in wonderfully different ways. For instance, Mediterranean cooks might use lamb, rice, and pine nuts, while a French cook may favor herbs de Provence and Gruyère cheese. Ultimately, our version celebrates the classic American comfort of creamy spinach and melted cheese. The beauty of this dish truly lies in its adaptability. Therefore, every family seems to add its own signature twist, making each Stuffed Acorn Squash with Creamed Spinach a unique tribute to harvest season.
How it fits in today’s cooking
This recipe absolutely thrives in modern kitchens. It seamlessly fits into today’s cooking routines, especially for those seeking impressive yet manageable meals. Furthermore, it naturally caters to a desire for cozy, vegetable-forward comfort food. Many contemporary cooks adapt it for special occasions, making it a stunning centerpiece for a vegetarian holiday menu. Conversely, others simplify it for a nutritious weeknight dinner that feels anything but ordinary. Its versatility is its greatest strength. You can easily find inspiration for other seasonal sides, perhaps by exploring our complete guide to roasting winter vegetables. Ultimately, this dish continues to connect us to tradition while allowing for endless personalization, ensuring its place at our tables for years to come.
>Taste and Texture
What makes it delicious
This Stuffed Acorn Squash with Creamed Spinach delivers a truly comforting experience. First, you encounter the sweet, nutty flesh of the roasted squash, which becomes incredibly tender and almost custardy. Meanwhile, the creamy spinach filling provides a rich, savory counterpoint with its luxurious, velvety texture. Aromatic garlic and sweet onions sautéed in butter create a fragrant base that makes the entire kitchen smell amazing. Finally, each bite finishes with a satisfying, slightly crisp topping of golden, melted cheese for a perfect textural contrast.
Boosting the flavor
For an instant flavor boost, consider mixing a teaspoon of smoked paprika into the creamed spinach filling; it adds a wonderful, subtle smokiness that complements the squash beautifully. Alternatively, a sprinkle of toasted pepitas or chopped walnuts right before serving introduces a delightful crunch. If you adore bold, cheesy flavors, try swapping the mozzarella for a sharp white cheddar or even a bit of gruyere. Moreover, a final drizzle of a bright, herby sauce can elevate everything. For instance, a simple lemon herb sauce cuts through the richness perfectly. Furthermore, if you want to explore another delicious vegetarian main, our creamy mushroom risotto offers a similarly luxurious texture.
Tips for Success
Best practices for results
First, always choose acorn squash that feel heavy for their size and have a deep green rind. Next, generously season the squash cavities before roasting to build a flavorful foundation for your Stuffed Acorn Squash with Creamed Spinach. Furthermore, thoroughly squeeze all excess water from your cooked spinach to prevent a soggy filling. Finally, let the roasted squash halves cool for a few minutes before stuffing them so you can handle them easily.
Mistakes to avoid
A common error involves undercooking the squash, which results in a difficult-to-eat texture. Conversely, make sure you do not overlook the importance of properly toasting your nuts or breadcrumbs for the topping, as this step adds crucial flavor and crunch. Additionally, if your creamed spinach seems too loose, simply continue cooking it over medium heat to evaporate the excess liquid. For more guidance on getting textures just right, explore our tips on how to make perfect roasted vegetables. Moreover, if your filling lacks depth, remember to taste and adjust your seasoning at the end, a fundamental practice outlined in our guide to balancing flavors.
Serving and Pairing Suggestions
How to serve this dish
Present your Stuffed Acorn Squash with Creamed Spinach as the stunning centerpiece it truly is. For instance, place each vibrant half on a contrasting white or rustic wooden plate to make the colors pop. Furthermore, a final sprinkle of fresh chopped parsley or a few pomegranate arils adds a beautiful, festive touch of color and freshness. This dish truly shines during holiday gatherings or as a special meatless main for a weekend dinner party. Ultimately, its elegant appearance and comforting flavors will impress every guest at your table.
h-it">What goes well with it
A crisp, acidic side salad perfectly cuts through the rich, creamy filling of your Stuffed Acorn Squash with Creamed Spinach. We highly recommend our simple Arugula Salad with Lemon Vinaigrette for a peppery, refreshing contrast. Additionally, a crusty piece of artisan bread is ideal for scooping up every last bit of the delicious creamed spinach. For a heartier meal, consider pairing it with a bowl of our savory Creamy Wild Mushroom Soup. Finally, a glass of chilled Chardonnay or a crisp hard cider complements the squash’s natural sweetness and the savory filling beautifully.
Can you make stuffed acorn squash ahead of time?
Yes, you can prepare Stuffed Acorn Squash with Creamed Spinach ahead of time. Assemble the dish completely, cover it tightly, and refrigerate for up to 24 hours before baking. You may need to add a few extra minutes to the baking time since you’ll be starting from a cold temperature.
ank-math-faq-item">
What protein can I add to stuffed acorn squash?
For a heartier meal, you can easily add protein to your Stuffed Acorn Squash with Creamed Spinach. Cooked ground Italian sausage, shredded rotisserie chicken, or crumbled bacon are excellent savory additions. For a vegetarian protein boost, consider stirring in cooked lentils or chickpeas into the creamed spinach filling.
How do you cut an acorn squash for stuffing?
To safely cut an acorn squash, first slice a small piece off the top and bottom to create stable flat surfaces. Stand the squash upright on one of the flat ends and carefully slice it in half from top to bottom. Use a sturdy spoon to scrape out the seeds and stringy pulp from each half, creating a perfect cavity for your creamed spinach filling.
Is acorn squash healthy?
Acorn squash is highly nutritious, making it a fantastic base for a healthy meal. It’s rich in fiber, vitamins C and B, potassium, and antioxidants. When stuffed with a filling like creamed spinach made with Greek yogurt instead of heavy cream, this dish becomes a powerhouse of vitamins and minerals.
div>
Best Crispy Golden Crab Bites Recipe
Introduction
Do you ever crave that perfect, restaurant-style appetizer that feels both incredibly special and surprisingly easy to love? You know, the one that makes everyone gather around the platter, eager for the next batch. Honestly, that is the exact experience I want to bring into your kitchen today with these irresistible Crispy Golden Crab Bites. They are the ultimate crowd-pleaser, promising a satisfying crunch with every single bite.
So, what exactly are Crispy Golden Crab Bites? Essentially, they are delectable morsels of seasoned crab meat, carefully coated and fried to achieve a spectacularly crunchy exterior that gives way to a tender, flavorful center. This dish matters because it transforms a luxurious ingredient into an approachable, shareable feast. It perfectly fits the tone of Exorecipes, where we celebrate turning fantastic ingredients into unforgettable meals for any occasion. Furthermore, you can easily pair these bites with a variety of dipping sauces. For a fantastic homemade option, our Creamy Cilantro Lime Dipping Sauce offers a tangy complement that cuts through the richness beautifully. Moreover, if you are looking for other impressive starters, our guide on how to build the perfect appetizer platter provides excellent inspiration. Ultimately, this recipe delivers gourmet flavor without any gourmet hassle, making it an essential addition to your entertaining repertoire.
Why I Love This Recipe
I absolutely adore this recipe for Crispy Golden Crab Bites because it always brings back warm memories of family gatherings. My grandmother used to make a similar version for special holidays, and the sound of everyone oohing and aahing as the platter hit the table is something I strive to recreate in my own home. They represent more than just food. They are a bite-sized piece of joy that connects me to my past while creating new memories with friends around my own table today.
Health and Nutrition
Why it’s good for your body
These Crispy Golden Crab Bites deliver a powerful nutritional punch. Primarily, they offer a fantastic source of high-quality, lean protein from the crab meat. Consequently, this protein helps build and repair muscle tissue, and it also keeps you feeling full and satisfied for longer. Furthermore, crab provides essential minerals like selenium and zinc, which actively support your immune system and thyroid function.
Moreover, when you bake them instead of deep-frying, you significantly cut down on unnecessary fats. As a result, you can enjoy that satisfying crunch without the guilt. Additionally, the omega-3 fatty acids found in crab contribute to heart and brain health. Therefore, each serving of Crispy Golden Crab Bites supports your overall wellness from multiple angles.
Finally, this dish incorporates other wholesome ingredients. For instance, whole-wheat breadcrumbs can add valuable fiber to aid digestion. Ultimately, you get a delicious appetizer that truly nourishes your body from the inside out. Enjoying Crispy Golden Crab Bites means you are treating yourself to a meal that is as good for you as it is tasty.
How it fits in a healthy lifestyle
These Crispy Golden Crab Bites fit beautifully into a balanced eating plan. You can easily serve them as a high-protein appetizer that satisfies hunger without overdoing it, or pair them with a big, leafy green salad for a complete and light lunch. They are perfect for those evenings when you want something flavorful but don’t want to spend hours in the kitchen.
For anyone following a specific diet, this recipe is wonderfully adaptable. You can use gluten-free breadcrumbs to make it celiac-friendly, and baking them keeps the fat content in check for a heart-healthy option. If you’re looking for more ways to incorporate smart, delicious choices into your week, explore our guide to easy meal prep ideas. Remember, enjoying your food is key! These bites prove that you don’t have to sacrifice flavor for nutrition. For another great recipe that balances health and taste, try our popular avocado toast variations.
Delicious bite-sized crab cakes with a crispy golden exterior and tender, flavorful interior, perfect as an appetizer or snack.
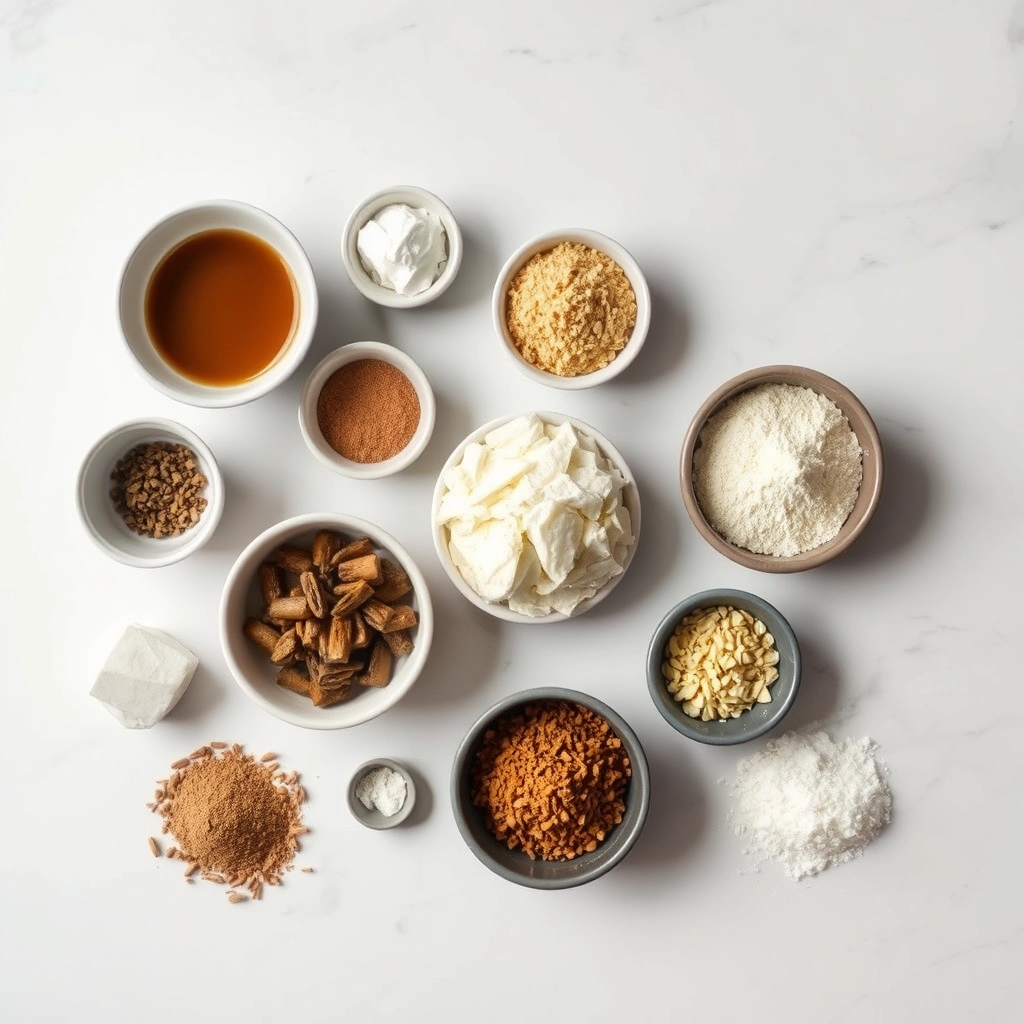
Ingredients
Scale
For the Crust:
1 lb lump crab meat, drained and picked
1/2 cup breadcrumbs
1/4 cup mayonnaise
1 egg, beaten
2 tbsp fresh parsley, chopped
1 tsp Old Bay seasoning
1/2 tsp Dijon mustard
1/4 tsp black pepper
1/4 cup vegetable oil for frying
Lemon wedges for serving
Instructions
1. Prepare the Crust:
In a bowl, combine crab meat, breadcrumbs, mayonnaise, egg, parsley, Old Bay seasoning, mustard, and pepper. Mix gently.
Form the mixture into small bite-sized patties, about 1 inch in diameter.
Heat vegetable oil in a skillet over medium heat. Fry crab bites in batches for 2-3 minutes per side until golden brown and crispy.
Drain on paper towels and serve immediately with lemon wedges.
Notes
You can customize the seasonings to taste.
How to Prepare This Dish
Steps and time-saving tips
First, gather all your ingredients and preheat your oven to 400°F. This simple step ensures everything moves quickly later. Meanwhile, whisk the mayonnaise, a squeeze of lemon juice, and your favorite seasonings in a large bowl. Next, gently fold in the lump crab meat until it is just combined; however, be careful not to overmix it. Overmixing can break down the delicate crab. Then, shape the mixture into small, even balls and place them on a parchment-lined baking sheet. For a golden, crispy exterior, lightly brush each bite with melted butter or a spray of olive oil. Bake for 12-15 minutes until they are perfectly golden brown. Furthermore, you can prepare the dipping sauce while they bake. Let the bites cool for a few minutes before serving; consequently, they will firm up beautifully. For a time-saving tip, you can mix the crab filling a day in advance and keep it covered in the refrigerator. Simply bake them when you are ready for a fast, impressive appetizer.
and-learned-from">Mistakes I’ve made and learned from
I have definitely learned a few lessons the hard way with these Crispy Golden Crab Bites. My first major mistake was using canned crab without draining it thoroughly. The excess moisture created a soggy mixture that simply would not hold its shape. Now, I always press the crab between paper towels to remove every last drop of liquid. Another error was overpacking the mixture, which resulted in dense, heavy bites instead of light and flaky ones. A gentle hand is absolutely crucial here. I also learned that skipping the parchment paper is a disaster waiting to happen. Sticking bites are a nightmare to salvage! For more tips on avoiding common kitchen blunders, check out my guide on common baking mistakes. And if you are looking for the perfect side to serve with these, my easy dipping sauces post has fantastic options that complement the crab flavor wonderfully.
Cultural Connection and Variations
Where this recipe comes from
My family first discovered these incredible bites on a trip to the Chesapeake Bay. We watched local watermen haul in bushels of blue crab, and that evening, a tiny waterfront shack served their version. They called them crab fritters, but we knew them as a revelation. The cook told us his secret was a dash of Old Bay seasoning and letting the batter rest, which creates that signature craggy, golden crust. Consequently, every family gathering now demands a platter of these Crispy Golden Crab Bites. They carry the taste of that salty air and summer sunshine.
Around the world, peopl
e put their own spin on this concept. In Japan, chefs might mix crab with panko for an ultra-light texture, often serving them with a ponzu dipping sauce. Meanwhile, in Thailand, you may find a similar fritter packed with fresh herbs like cilantro and lemongrass, served with a sweet chili sauce. Even across the American South, recipes vary. Some families add a spicy kick with cayenne pepper, while others stir in fresh sweet corn for a delightful burst of sweetness. Ultimately, the magic of Crispy Golden Crab Bites lies in their delicious adaptability.
How it fits in today’s cooking
This dish absolutely thrives in modern kitchens. For instance, it fits perfectly into today’s love for shareable appetizers and game day spreads. Furthermore, home cooks constantly adapt the recipe to fit their needs. Many people now use an air fryer to achieve that satisfying crunch with less oil, making it a slightly lighter option. You can easily find inspiration for other modern twists by exploring our collection of incredible appetizer recipes.
Moreover, these crab bites remain a star for holiday parties and seasonal celebrations. They bring a touch of elegant comfort to any table without requiring hours of work. Families often pass down their unique version, making it a cherished tradition. If you are looking for the perfect sweet ending to follow this savory treat, consider pairing it with one of our decadent dessert recipes. Ultimately, this classic continues to earn its place in our cooking routines because it consistently delivers joy and incredible flavor.
>Taste and Texture
What makes it delicious
These Crispy Golden Crab Bites deliver a truly satisfying crunch with every single bite. Furthermore, the exterior shatters delicately to reveal a warm, tender, and flaky crab interior. A hint of Old Bay seasoning and fresh lemon zest provides a bright, fragrant aroma that is utterly irresistible. Ultimately, the combination of creamy mayonnaise and sharp scallions creates a rich, savory flavor that perfectly complements the sweet crab meat. You will absolutely love the fantastic contrast in these Crispy Golden Crab Bites.
Boosting the flavor
For an instant flavor upgrade, consider serving your Crispy Golden Crab Bites with a zesty dipping sauce. A creamy sriracha aioli or a classic remoulade sauce introduces a tangy, spicy kick that cuts through the richness. Alternatively, you can mix a pinch of cayenne pepper or smoked paprika directly into the crab mixture for a warm, smoky depth. If you want to turn this appetizer into a main course, simply serve them on a soft brioche bun with crisp lettuce for an incredible crab cake slider. For more inspiration on crafting the perfect meal around them, explore our guide to perfect side dishes that pair wonderfully.
Tips for Success
Best practices for results
Always chill your crab mixture thoroughly before forming the bites because this crucial step helps them hold their shape during cooking. Furthermore, use a neutral, high-heat oil for frying to achieve that perfect golden exterior without any off-flavors. For the best texture, avoid overcrowding the pan so each piece cooks evenly and crisps up beautifully. Additionally, serve your Crispy Golden Crab Bites immediately with a squeeze of lemon for the ultimate flavor experience.
Mistakes to avoid
A common error involves using a filling that is too wet, which consequently causes the bites to break apart in the oil. Instead, gently squeeze excess moisture from your crab meat and binding ingredients; this simple step ensures your appetizers stay intact. Moreover, never skip the step of bringing your oil to the proper temperature, as otherwise you will end up with greasy results. For a deeper dive on getting this right, our guide on managing frying temperatures is incredibly helpful. Finally, resist the urge to constantly flip them; instead, let them develop a crispy crust on one side before turning. If you are looking for a fantastic dipping sauce to complement them, consider our creamy remoulade recipe for a perfect pairing.
Serving and Pairing Suggestions
How to serve this dish
Immediately serve your Crispy Golden Crab Bites straight from the skillet for maximum warmth and crunch. For a stunning presentation, arrange them on a sleek slate board or in a rustic basket lined with parchment paper. Additionally, garnish the platter with generous lemon wedges and a sprinkle of fresh, chopped chives to add a vibrant pop of color. Consequently, these little morsels become the star of any gathering, whether you’re hosting an elegant holiday cocktail party or a casual weekend brunch.
h-it">What goes well with it
First, a cool and creamy dipping sauce perfectly balances the hot, savory flavor of these Crispy Golden Crab Bites. We highly recommend our crowd-pleasing Creamy Cilantro Lime Dip for a zesty, herbaceous kick. Meanwhile, a crisp, chilled glass of Sauvignon Blanc or a light lager beer cuts through the richness beautifully. For a complete meal, simply pair these irresistible bites with a fresh, simple side salad. Alternatively, our Summer Watermelon Feta Salad offers a wonderfully sweet and salty contrast that everyone will love.
What is the best crab to use for crab bites?
For the most authentic flavor, jumbo lump crab meat is the best choice for Crispy Golden Crab Bites as it provides large, tender chunks. However, lump crab or backfin crab are excellent, more affordable alternatives that still deliver great taste and texture for this appetizer.
ank-math-faq-item">
Can you make crab bites ahead of time?
Yes, you can prepare Crispy Golden Crab Bites ahead of time for easy entertaining. Form the crab mixture into balls and arrange them on a baking sheet, then cover and refrigerate for up to 24 hours before frying or baking when ready to serve.
How do you keep crab cakes from falling apart?
The key to preventing your Crispy Golden Crab Bites from falling apart is to use enough binder, like egg and mayonnaise, and to chill the mixture thoroughly before cooking. Chilling helps the ingredients firm up, ensuring they hold their shape perfectly during frying or baking.
What dipping sauce goes with crab bites?
A classic remoulade, a creamy lemon-dill aioli, or a simple spicy cocktail sauce are all fantastic dipping sauces that complement the rich flavor of Crispy Golden Crab Bites. For a quick option, mix mayonnaise with a squeeze of lemon juice and a dash of Old Bay seasoning.
div>
Homemade Chai Scones with Maple Chai Glaze
Introduction
There is something truly magical about the moment warm, spiced chai aroma fills your kitchen. It promises comfort, coziness, and a little moment of peace. Now, imagine capturing that exact feeling in a tender, buttery scone, fresh from your own oven. These Homemade Chai Scones with Maple Chai Glaze turn your favorite latte into a delightful, handheld treat that feels like a warm hug on a plate. They are the perfect project for a quiet morning, promising a reward that is absolutely worth the effort.
So, what exactly are Homemade Chai Scones with Maple Chai Glaze? Essentially, we take a classic, tender scone base and infuse the dough with the warm, complex spices that define a perfect cup of chai. Think cinnamon, cardamom, ginger, and cloves. We then take that flavor to the next level by drizzling the warm scones with a simple glaze made from powdered sugar, a splash of real maple syrup, and even more of those signature chai spices. This one-two punch of flavor ensures every single bite is packed with cozy, aromatic goodness. This recipe matters because it elevates the everyday. It transforms a simple baking session into a sensory experience, creating something far more special than a basic pastry. It fits our blog’s mission perfectly: to deliver approachable recipes that feel celebratory and are packed with real, developed flavor. If you enjoy mastering bakery-style treats at home, you will absolutely adore our guide on creating the ultimate Classic French Croissants. Furthermore, this recipe uses a mixing technique similar to our favorite Flaky Buttermilk Biscuits, ensuring you achieve that perfect, craggy texture. Ultimately, these scones offer a beautiful bridge between familiar baking and exciting, global flavors.
Why I Love This Recipe
This recipe holds a special place in my heart because it perfectly merges my two great loves: a good cup of chai and the simple joy of baking. I developed these Homemade Chai Scones with Maple Chai Glaze on a crisp fall weekend, aiming to recreate the comforting spice of my favorite coffee shop drink in a form I could enjoy at home anytime. The result completely won me over. I love how the fragrance of the spices perfumes the entire house, creating an atmosphere of pure warmth and anticipation. Most importantly, that first bite, with the crunchy sugary top giving way to the soft, spiced interior, never fails to feel like a small, personal celebration.
Health and Nutrition
Why it’s good for your body
These Homemade Chai Scones with Maple Chai Glaze offer more than just incredible flavor. Furthermore, they provide a thoughtful blend of ingredients that deliver real benefits. For instance, the warming spices like cinnamon, ginger, and cardamom do more than create that signature chai taste. These spices also possess anti-inflammatory properties and can aid digestion. Therefore, every bite supports your body in small but meaningful ways.
Additionally, using real maple syrup in the glaze gives you a more natural sweetener. Unlike refined white sugar, maple syrup contains antioxidants and minerals like manganese and zinc. Consequently, you enjoy a sweet treat while also getting these micronutrients. The whole wheat flour in the scone base contributes dietary fiber, which promotes gut health and helps you feel satisfied. Ultimately, these Homemade Chai Scones with Maple Chai Glaze turn a simple pastry into a smarter choice.
Finally, the healthy fats from the butter provide a sustained energy source. This combination of complex carbs, fiber, and fat helps prevent a sharp blood sugar spike. So, you can savor your Homemade Chai Scones with Maple Chai Glaze knowing it fuels your day thoughtfully.
How it fits in a healthy lifestyle
Enjoying these scones fits perfectly into a balanced approach to eating. Think of them as a delightful part of your overall diet rather than an off-limits indulgence. You can easily pair one with a source of protein, like a glass of milk or a handful of nuts, for a completely satisfying breakfast or afternoon snack that keeps you full for hours.
For those mindful of specific dietary paths, you can adapt this recipe to meet your needs. Simply swap in your favorite gluten-free 1-to-1 baking flour to make them celiac-friendly. If you are exploring other ways to enjoy wholesome baked goods, our guide on gluten-free baking tips can help you get started. Remember, balance is key. A wholesome treat like this scone can absolutely be part of a heart-healthy lifestyle when enjoyed in moderation alongside other nutrient-dense foods. For more inspiration on creating nourishing meals, check out our thoughts on balanced meal prep that doesn’t sacrifice flavor.
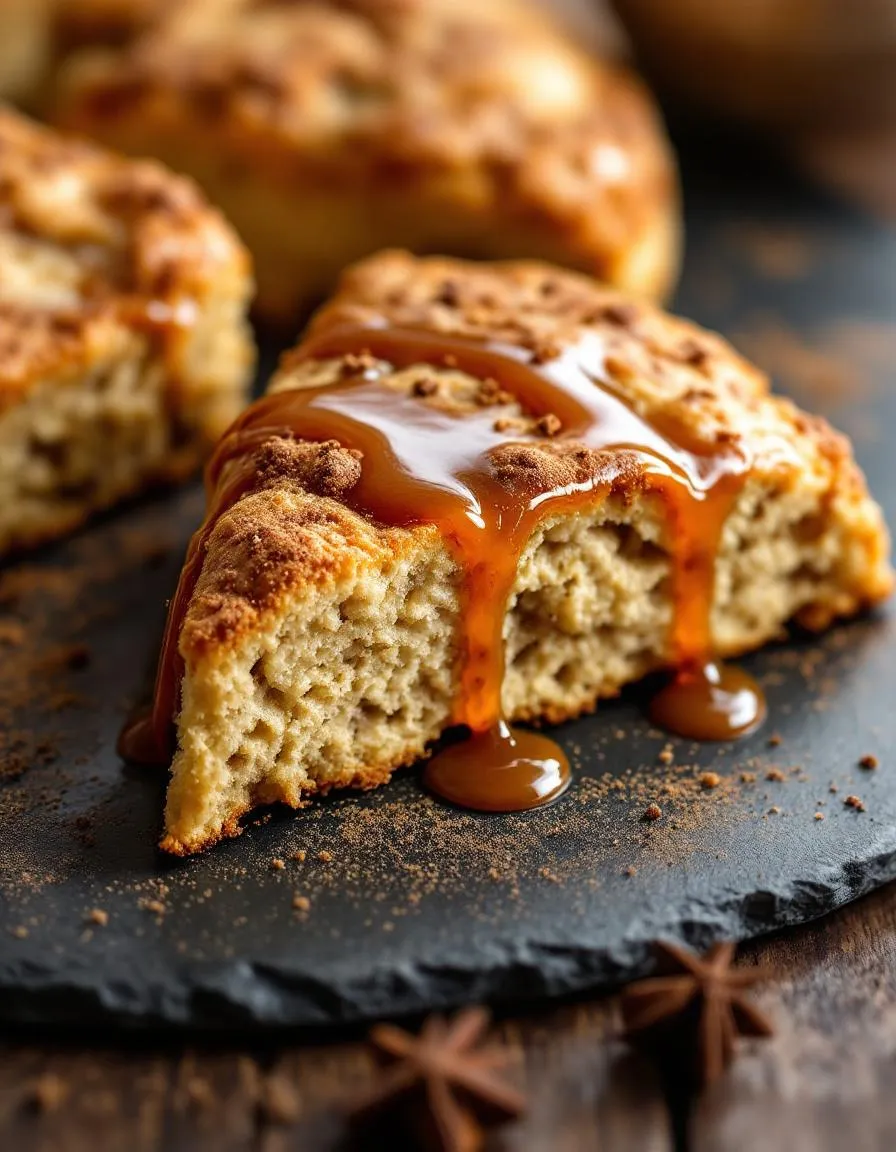
Flaky, buttery scones infused with warm chai spices and topped with a sweet maple chai glaze.
Ingredients
Scale
For the Crust:
2 cups all-purpose flour
1/3 cup granulated sugar
1 tbsp baking powder
1/2 tsp salt
2 tsp ground cinnamon
1 tsp ground ginger
1/2 tsp ground cardamom
1/4 tsp ground cloves
1/4 tsp ground nutmeg
1/2 cup cold unsalted butter, cubed
2/3 cup heavy cream
1 large egg
1 tsp vanilla extract
1/2 cup powdered sugar
2 tbsp maple syrup
1–2 tbsp strong brewed chai tea
Instructions
1. Prepare the Crust:
Preheat oven to 400°F (200°C). Line a baking sheet with parchment paper.
In a large bowl, whisk together flour, sugar, baking powder, salt, and all chai spices. Cut in cold butter until mixture resembles coarse crumbs.
In a separate bowl, whisk together cream, egg, and vanilla. Pour into dry ingredients and stir until just combined.
Turn dough onto a floured surface, knead gently, and pat into a 1-inch thick circle. Cut into 8 wedges and place on baking sheet.
Bake for 15-18 minutes until golden. Cool slightly.
Whisk powdered sugar, maple syrup, and chai tea to make glaze. Drizzle over warm scones.
Notes
You can customize the seasonings to taste.
How to Prepare This Dish
Steps and time-saving tips
First, whisk your dry ingredients together in a large bowl. Next, use a pastry cutter or your fingertips to quickly work the cold butter into the flour mixture until it resembles coarse crumbs. Meanwhile, steep your chai tea bag in the heavy cream; this simple step infuses incredible flavor directly into your Homemade Chai Scones with Maple Chai Glaze. Consequently, you will create a deeply aromatic dough. Gently stir the wet ingredients into the dry mixture until a shaggy dough just forms. Importantly, do not overmix here. Turn the dough out onto a floured surface and gently pat it into a circle. Then, cut the circle into wedges for that classic scone shape. For a major time-saving tip, you can pop the shaped scones into the freezer for 15 minutes before baking; this guarantees a perfect, lofty rise and a wonderfully tender interior. Finally, bake them until the edges are golden. While they cool slightly, whisk together the simple glaze and drizzle it generously over the top.
Mistakes I’ve made and learned from
I have absolutely overworked the dough in my haste, which resulted in tough, dense scones instead of the light, flaky texture we all want. I learned that a light touch is non-negotiable, and it is okay if the dough looks a little uneven. Another common hiccup involved the butter; if it isn’t cold enough, it will melt too quickly and fail to create those essential steam pockets. Now, I religiously chill my butter and even freeze my baking sheet for a few minutes beforehand. Getting the glaze consistency right was another learning curve. A too-thin glaze just slid right off, but a thick one was unappealing. I found the perfect balance by whisking in the maple syrup slowly. For more on mastering textures, my guide on common baking mistakes covers this in detail. And if your glaze ever seizes up, don’t panic. My tips for fixing baking disasters can easily save the day.
My love for these scones started on a chilly autumn morning. I was sipping a steaming cup of chai, a habit I picked up from a friend’s Indian grandmother, and dreaming of a cozy pastry. Consequently, I wondered why we relegate those warm, spicy flavors solely to our mugs. This simple question sparked the creation of our Homemade Chai Scones with Maple Chai Glaze.
Globally, chai masala recipes vary wonderfully. For instance, some families in Gujarat might add a generous pinch of black pepper for heat, while others in Kashmir might use almonds for a richer flavor. Similarly, our scone base takes a classic British teatime staple and gives it a spirited, aromatic twist. Therefore, every bite feels like a fusion of a proper English cream tea and a bustling Mumbai spice market. Ultimately, this recipe represents a beautiful, edible conversation between cultures.
In my own kitchen, the
recipe continues to evolve. Sometimes I fold in chopped dried apricots for a tangy sweetness. Other times, I might swap the maple glaze for a simple dusting of spiced sugar. No matter the variation, the goal remains the same: to fill the house with the unforgettable scent of comfort and spice. Indeed, baking a batch of Homemade Chai Scones with Maple Chai Glaze feels like sharing a warm, welcoming hug with everyone at the table.
How it fits in today’s cooking
This recipe fits perfectly into our modern desire for meaningful, from-scratch baking. Nowadays, people crave recipes that feel special yet remain approachable for a weekend baker. Furthermore, these scones offer a fantastic way to enjoy the beloved flavor of chai latte in a new, handheld form. They bridge the gap between an everyday treat and something truly extraordinary for your brunch table.
Many modern cooks love adapting this recipe to their routines. For a quicker version, some use a pre-made chai spice blend. Others might make a dairy-free version using almond milk and vegan butter, proving its incredible versatility. Meanwhile, these scones have become a star feature at my holiday gatherings, often paired with a batch of my favorite Gingerbread Cinnamon Rolls for the ultimate festive spread.
Ultimately, this dish e
mbodies the current trend of global flavor fusion in home cooking. It takes a familiar format and injects it with exciting, international spices that everyone recognizes and loves. Finally, serving these scones feels both nostalgic and entirely new, making them an ideal companion to other modern classics like this stunning Chocolate Orange Bundt Cake. They prove that some of the best culinary ideas come from blending traditions.
Taste and Texture
What makes it delicious
These Homemade Chai Scones with Maple Chai Glaze deliver a wonderfully fragrant aroma that fills your kitchen with warm spices. Each bite offers a tender, crumbly texture that practically melts in your mouth. Meanwhile, the chai spice blend creates a cozy, complex flavor profile with notes of cinnamon, ginger, and cardamom. Subsequently, the sweet and subtly earthy maple glaze provides a smooth, creamy finish that perfectly complements the warm spices. Ultimately, this combination creates a truly irresistible treat.
Boosting the flavor
For an even more decadent experience, consider adding a simple vanilla bean whipped cream on the side. Alternatively, you can amplify the warm spices by serving your scones with a hot beverage; a classic London Fog Latte makes a perfect pairing. Furthermore, if you enjoy a textural contrast, a sprinkle of chopped pecans or a drizzle of salted caramel sauce adds a delightful crunch and richness. Finally, feel free to experiment with a dash of black pepper in the glaze for an unexpected and warming kick.
Always chill your butter and cream beforehand for the flakiest texture. Furthermore, handle the dough as little as possible to prevent tough scones. Use a sharp biscuit cutter and press straight down without twisting for a perfect rise. Additionally, always let your Homemade Chai Scones with Maple Chai Glaze cool slightly before glazing so it sets beautifully.
Mistakes to avoid
Avoid overmixing the dough, as this develops gluten and leads to a tough result. Instead, mix the ingredients just until they come together. Moreover, do not skip the chilling step for your shaped scones, as cold dough spreads less and bakes up taller. For more on this, see our guide on why chilling dough matters. Also, ensure your baking powder is fresh for maximum lift; otherwise, your scones might turn out dense. If you are unsure, you can test its potency with our simple freshness test.
g-suggestions">Serving and Pairing Suggestions
How to serve this dish
Present your Homemade Chai Scones with Maple Chai Glaze on a beautiful rustic wooden board or a tiered cake stand for a truly inviting look. Furthermore, always serve them warm to maximize the aroma of the spices and the gooey goodness of the glaze. For a special touch, garnish the plate with a whole cinnamon stick or a light dusting of extra chai spice. These scones absolutely shine at a cozy weekend brunch or as the star of your holiday morning spread. Ultimately, their warm, festive flavor makes any occasion feel more celebratory.
What goes well with it
A hot cup of coffee is the classic partner, but these scones truly sing alongside a creamy, spiced latte. Alternatively, for a truly decadent experience, pair a warm Homemade Chai Scone with Maple Chai Glaze with a scoop of our simple Vanilla Bean Ice Cream. The cool, creamy vanilla beautifully offsets the warm spices. Moreover, if you are planning a full afternoon tea, consider adding our popular Lemon Curd Tartlets to the menu. The bright, citrusy flavor provides a wonderfully refreshing contrast to the rich, spiced scones.
math-faq-block">
What is the secret to making light and flaky scones?
The key is keeping your ingredients cold and handling the dough as little as possible. Use cold butter and cold heavy cream, and mix just until the dough comes together to avoid developing gluten. This technique ensures your Homemade Chai Scones with Maple Chai Glaze turn out perfectly tender and flaky, not tough.
Can I make the dough for chai scones ahead of time?
Absolutely! You can prepare the scone dough, cut it into shapes, and freeze it on a baking sheet. Once frozen solid, transfer the unbaked scones to a freezer bag for up to 2 months. Bake directly from frozen, adding just a few extra minutes to the baking time for perfect Homemade Chai Scones with Maple Chai Glaze.
What can I use if I don’t have loose leaf chai tea for the recipe?
If you don’t have loose leaf chai, you can finely grind the contents of 2-3 chai tea bags. Alternatively, you can use 1.5 to 2 teaspoons of a pre-mixed chai spice blend. The goal is to get those warm, spiced flavors into both the scone and the maple chai glaze for an authentic taste.
ank-math-faq-item">
How should I store leftover glazed scones?
Store any leftover Homemade Chai Scones with Maple Chai Glaze in an airtight container at room temperature for up to 2 days. For longer storage, keep unglazed scones in the container and add the maple chai glaze just before serving to prevent them from becoming soggy.
Classic Club Sandwich Recipe – The Ultimate Guide
Introduction
Ever crave a lunch that feels both incredibly satisfying and refreshingly simple? You are not alone. Furthermore, we all need a reliable, delicious meal that we can whip up without a fuss. This classic Club Sandwich Recipe delivers exactly that. It promises layers of flavor and texture in every single bite. Ultimately, it is the timeless answer to your midday hunger pangs.
The Club Sandwich Recipe stands as a true icon of American lunch counters and hotel menus. Essentially, it is a triple-decker marvel that expertly stacks toasted bread with chicken, bacon, lettuce, tomato, and mayonnaise. This specific combination matters because it creates a perfect harmony of savory, crispy, fresh, and creamy elements in every single layer. For anyone seeking a hearty yet balanced meal, this recipe provides a fantastic solution. It fits our blog’s tone perfectly because we champion approachable, crowd-pleasing dishes that truly work. This sandwich is a masterpiece of simplicity. Moreover, its structure is key to its success. The toasted bread provides a sturdy foundation, while the juicy tomato and crisp lettuce offer a refreshing contrast to the rich bacon and tender chicken. You can easily customize your Club Sandwich Recipe with ingredients like avocado or a different spread. For another fantastic lunch idea, consider our popular Classic Turkey Club Sandwich. Ultimately, mastering this recipe means you always have a impressive, no-fail option for a quick lunch or a light dinner. It is a skill that will serve you for years to come.
Why I Love This Recipe
This Club Sandwich Recipe holds a special place in my heart because it reminds me of lazy weekend lunches with my family. We would assemble all the ingredients on the counter and everyone would build their own perfect version. I love the audible crunch you get with every bite and the way the creamy mayonnaise binds all the flavors together. It feels both indulgent and wholesome, a rare combination that always hits the spot. Making this sandwich is my go-to comfort food ritual, and sharing it always brings people together around the table. For a different but equally satisfying experience, our Ultimate Grilled Chicken Sandwich is another favorite.
Health and Nutrition
Why it’s good for your body
This Club Sandwich Recipe delivers a powerful combination of lean protein and essential nutrients. For instance, the turkey breast provides a fantastic source of high-quality protein, which actively supports muscle repair and keeps you feeling full. Furthermore, the bacon, when baked until crispy, offers a satisfying crunch without excessive grease.
Moreover, the whole wheat bread contributes valuable complex carbohydrates and fiber. Consequently, this helps to maintain steady energy levels and promotes a healthy digestive system. Additionally, the fresh lettuce and tomato slices add crucial vitamins like vitamin C and vitamin K, along with a burst of hydration.
Ultimately, this Club Sandwich Recipe creates a genuinely balanced meal. Therefore, you get a complete package of macronutrients and micronutrients in every single bite. Finally, the healthy fats from the mayonnaise or avocado spread aid in the absorption of fat-soluble vitamins, making this a truly efficient and nutritious choice.
How it fits in a healthy lifestyle
This Club Sandwich Recipe fits perfectly into a balanced eating plan. You can easily customize it to meet specific health goals without sacrificing an ounce of flavor. For a high-protein version, simply double up on the turkey or add a hard-boiled egg slice to each layer.
If you follow a gluten-free diet, swapping the bread for your favorite gluten-free alternative makes this a safe and delicious option. For those focusing on heart-healthy choices, using low-sodium turkey and a light avocado spread instead of mayo works wonderfully. This kind of flexible recipe supports everyday healthy habits because it comes together quickly and satisfies those lunchtime cravings with real, wholesome ingredients. For more ideas on building nutritious meals, explore our guide to meal prep for weight loss. You can also discover how to boost your metabolism naturally with other smart food choices.
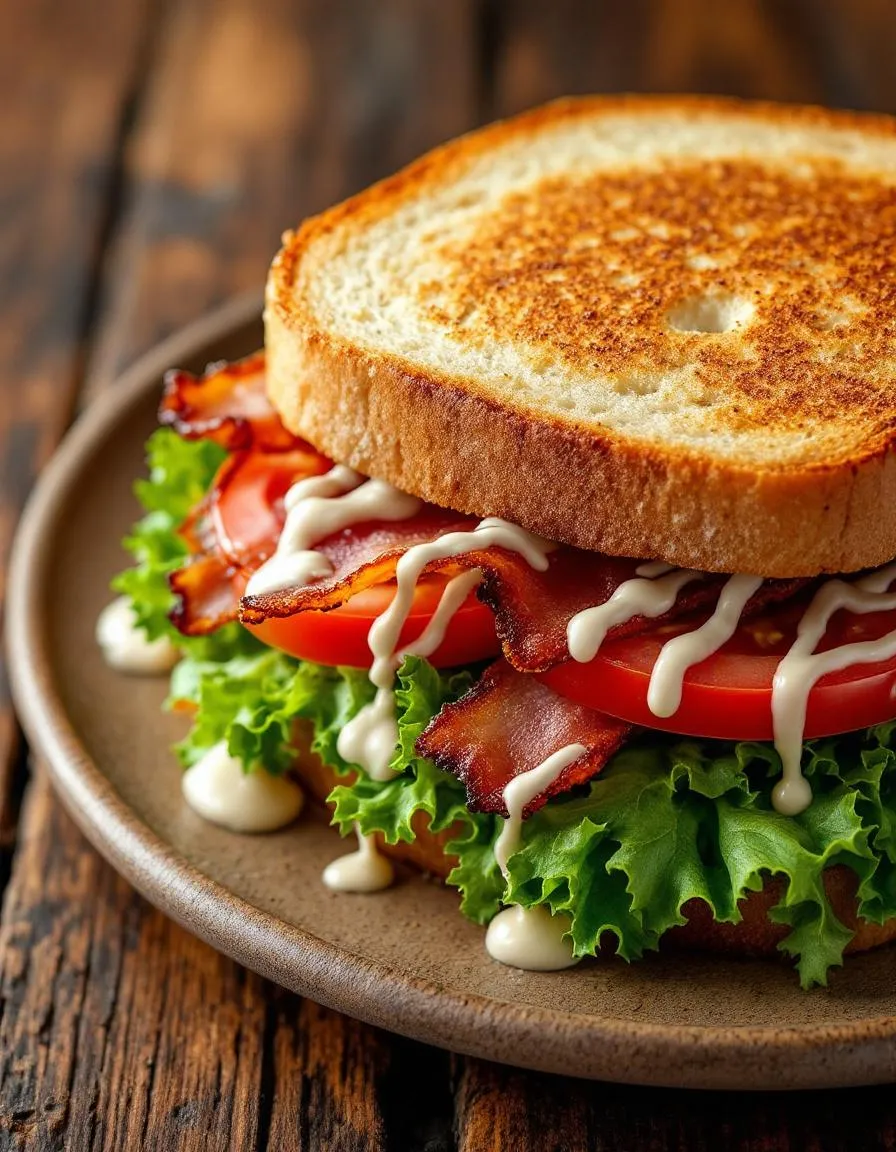
A triple-decker sandwich with layers of turkey, bacon, lettuce, tomato, and mayo on toasted bread.
Ingredients
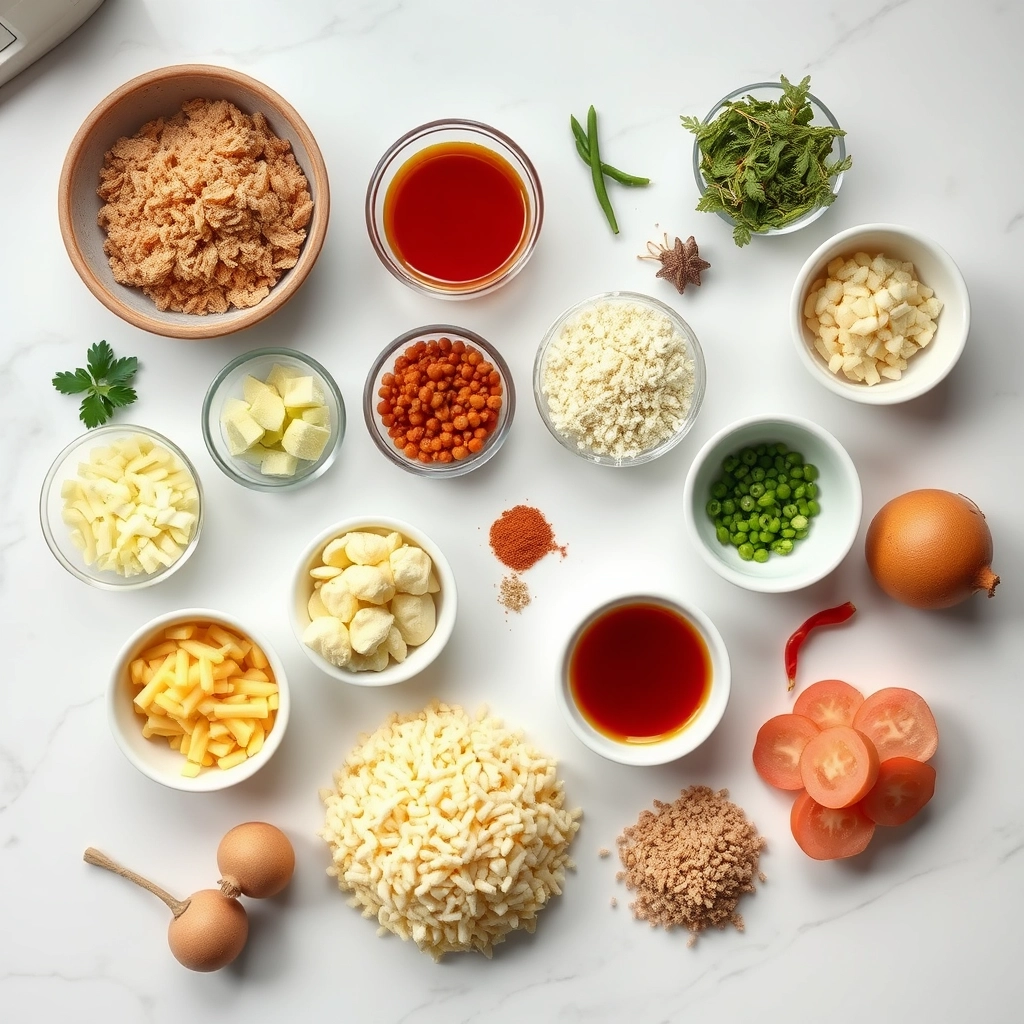
Scale
For the Crust:
12 slices white or wheat bread, toasted
1/2 cup mayonnaise
8 slices cooked turkey breast
8 slices cooked bacon
4 leaves romaine lettuce
1 large tomato, sliced
Salt and pepper to taste
Instructions
1. Prepare the Crust:
Toast the bread slices until golden brown and let cool slightly.
Spread mayonnaise on one side of each bread slice.
Layer 4 slices with turkey, bacon, lettuce, and tomato. Season with salt and pepper.
Top with another bread slice, mayo-side down. Repeat layering with remaining ingredients.
Place the final bread slice on top, mayo-side down. Secure with toothpicks if needed.
Cut each sandwich into quarters and serve immediately.
Notes
You can customize the seasonings to taste.
How to Prepare This Dish
Steps and time-saving tips
First, gather all your ingredients and equipment. This simple step, called mise en place, saves you so much time and stress later. Next, toast your bread slices to a perfect golden brown. Meanwhile, cook your bacon until it is wonderfully crispy. Then, slice your tomatoes and wash your lettuce leaves, patting them completely dry with a paper towel. After that, spread a generous layer of mayonnaise on one side of each toasted bread slice. Now, begin your Club Sandwich Recipe assembly on a clean cutting board. Place your first slice of bread down, mayo-side up. Layer on a piece of lettuce, followed by a few tomato slices and a sprinkle of salt. Add two or three slices of crispy bacon. Carefully place your second piece of bread on top, mayo-side down. Press down gently. Then, spread mayonnaise on the top of this second slice. Repeat the layering process with more lettuce, turkey or chicken, and finally, that last piece of bread. Secure the entire majestic tower with four cocktail picks, one near the center of each side. Finally, use a very sharp serrated knife to slice your sandwich diagonally into four perfect triangles. Serve immediately with a dill pickle spear and some potato chips.
Mistakes I’ve made and learned from
I used to assemble my Club Sandwich Recipe with warm, just-toasted bread, which made the mayonnaise melt and the entire structure soggy and unstable. I learned the hard way that you must let the toast cool completely before you start building. Another big mistake was overloading the layers; less is truly more here to prevent everything from squishing out with the first bite. I also once used flimsy, thin-cut bacon that just didn’t provide the necessary crunch and structural integrity. Now, I always opt for a thicker cut. Getting the right bread is crucial too; a soft loaf simply won’t hold up. For more tips on building the perfect sandwich, my guide on how to make the perfect breakfast sandwich covers the fundamentals of structural integrity. And if your bacon never turns out quite right, my secrets to perfectly crispy bacon will change your kitchen game forever.
We can trace the iconic Club Sandwich recipe back to the bustling men’s clubs of late 19th-century New York. Consequently, its three-story architecture and hearty fillings quickly satisfied the appetites of wealthy socialites. However, this classic dish soon traveled far beyond its elite origins. For instance, you might find a British version that swaps turkey for chicken and often includes a fried egg. Meanwhile, in India, local chefs might add a layer of spicy chutney or use tandoori chicken to create a vibrant twist on the traditional Club Sandwich Recipe.
My own family, on the other hand, has its own cherished variation. Therefore, we always toast the bread in a skillet with a little butter for extra crunch. Additionally, we layer thick-cut bacon right next to the juicy tomato, letting the flavors meld together perfectly. Ultimately, this simple act makes our version of the Club Sandwich Recipe a beloved weekend lunch ritual. Every culture and every kitchen seems to put its own unique stamp on this timeless combination.
ays-cooking">How it fits in today’s cooking
This sandwich absolutely thrives in modern cooking because of its incredible versatility. Today, health-conscious cooks often adapt it by using whole wheat bread, turkey bacon, or even air fryer chicken breast for a lighter take. Furthermore, its no-fuss assembly makes it a perfect solution for quick weeknight dinners or impressive last-minute entertaining. You can easily find it on upscale gastropub menus and in school lunchboxes alike.
Its relevance also continues through its role as a comforting, familiar favorite. For a delightful pairing, many people serve it alongside a simple, refreshing side. In fact, a cool, crisp cucumber tomato salad perfectly complements the sandwich’s rich flavors. Ultimately, the club sandwich remains a staple because it effortlessly fits into our fast-paced lives while still delivering a satisfying and delicious meal every single time.
Taste and Texture
What makes it delicious
This Club Sandwich Recipe delivers a symphony of textures and tastes in every single bite. You immediately notice the crisp, buttery toast giving way to layers of creamy mayonnaise and juicy, tender chicken. Next, the salty, smoky bacon and the sharp, tangy Swiss cheese create a rich and savory depth. Meanwhile, the fresh lettuce and ripe tomato provide a cool, crisp crunch and a burst of bright acidity that cuts through the richness perfectly. Ultimately, the entire experience is hearty, satisfying, and incredibly balanced, making this Club Sandwich Recipe a true classic for good reason.
r">Boosting the flavor
For an even more flavorful experience, consider a few simple upgrades. Firstly, spread a layer of creamy avocado or a zesty garlic aioli instead of plain mayonnaise for extra richness. Secondly, adding a few slices of crispy, fried shallots introduces a wonderful savory crunch. If you enjoy a bit of heat, a sprinkle of smoked paprika or a dash of hot sauce on the chicken works wonderfully. For a truly next-level sandwich, serve it with a side of seasoned fries or sweet potato wedges to complete the meal. A cool, creamy dipping sauce like our classic Ranch Dressing also pairs beautifully. Furthermore, marinating your chicken in this easy Chicken Marinade before cooking will guarantee it is packed with flavor from the inside out.
Tips for Success
Best practices for results
First, always use high-quality, fresh bread for your Club Sandwich Recipe as it provides the essential structural foundation. Furthermore, toast the bread slices lightly to prevent any sogginess from the fillings. Subsequently, spread your mayonnaise and condiments from edge to edge on each slice for maximum flavor in every single bite. Moreover, pat your lettuce completely dry with a paper towel before assembling to keep everything crisp. Finally, always insert frill picks or long toothpicks into each quarter to hold the impressive layers of your Club Sandwich Recipe securely together before slicing.
>Mistakes to avoid
A common mistake is overloading the sandwich, which consequently makes it impossible to eat neatly. Instead, aim for a balanced ratio of fillings to bread for the perfect structure and flavor. Additionally, many people forget to season their tomatoes, which really makes a significant difference. For more guidance on prepping your ingredients, read our guide on how to slice tomatoes evenly. Another error is using warm bacon; always drain your bacon on paper towels so it stays crispy and doesn’t wilt the lettuce. For a flawless cooking technique every time, our tips on how to cook bacon in the oven are a great resource.
Serving and Pairing Suggestions
How to serve this dish
Presenting your Club Sandwich Recipe beautifully makes it even more special. For instance, always slice it diagonally to showcase the colorful layers inside. Then, secure each half with a stylish toothpick or skewer to keep everything tidy. Furthermore, you can add a vibrant garnish like a crisp pickle spear, a handful of kettle-cooked chips, or a small cup of coleslaw on the side. This classic Club Sandwich Recipe truly shines at a weekend brunch or a casual summer gathering. Ultimately, serving it on a wooden board or a classic checkered plate enhances its comforting, timeless appeal.
What goes well with it
A crisp, cold side salad perfectly cuts through the rich flavors of this hearty meal. Alternatively, a bowl of creamy tomato soup makes for an iconic and comforting pairing. For drinks, an iced tea or a light lager complements the sandwich without overwhelming it. Moreover, you must try our popular crispy French fries for the ultimate diner-style experience. Finally, cool off with a refreshing strawberry milkshake to complete this delicious and satisfying combination.
The classic club sandwich has three distinct layers of toasted bread. The traditional fillings are sliced chicken or turkey, crispy bacon, lettuce, tomato, and mayonnaise. This triple-decker structure is a hallmark of an authentic club sandwich recipe.
How do you keep a club sandwich from getting soggy?
Toasting the bread is the most important step to prevent a soggy club sandwich. You should also pat your tomato slices and lettuce completely dry with a paper towel before assembling. Applying a thin layer of mayonnaise on the inside of each toast slice acts as a moisture barrier.
ank-math-faq-item">
What is the best bread to use for a club sandwich?
White toast is the traditional and best choice for an authentic club sandwich recipe, as it provides a sturdy, neutral base that holds up to the fillings. Whole wheat, sourdough, or rye bread are also excellent options for a different flavor profile. The key is to use a bread that toasts well and won’t fall apart.
Can I make a club sandwich ahead of time?
It’s best to assemble a club sandwich just before serving to maintain its texture. You can prepare the individual components ahead of time—cook the bacon, slice the vegetables, and toast the bread. Store everything separately in airtight containers in the fridge, then assemble your club sandwich recipe when you’re ready to eat.
Best Double Chocolate Banana Bread Recipe
Introduction
Is there anything more comforting than the smell of warm chocolate and ripe bananas wafting through your kitchen? Honestly, we think not. This Double Chocolate Banana Bread recipe is your ultimate answer to those overripe bananas sitting on your counter, transforming them into a decadent, moist, and deeply satisfying treat. It feels like a warm hug in loaf form, promising to turn a mundane day into something a little more special and a whole lot sweeter.
So what exactly is Double Chocolate Banana Bread? Essentially, it is a classic banana bread that we have elevated into a supremely chocolatey experience. We achieve this by incorporating rich cocoa powder into the batter and then generously folding in high-quality chocolate chips. The result is an incredibly moist, tender crumb with deep banana flavor and pockets of melted chocolate in every single slice. This recipe matters because it perfectly bridges the gap between a quick bread you can enjoy for breakfast and a legitimate dessert that feels indulgent yet somewhat wholesome. Furthermore, it fits our blog’s tone of creating approachable, crowd-pleasing recipes that deliver consistent, bakery-quality results right in your own home. You do not need any special equipment or advanced skills to master this beloved treat. Moreover, this recipe is incredibly versatile. For instance, you can easily adapt it to be gluten-free by using a reliable gluten-free flour blend. Additionally, if you find yourself with a bounty of ripe fruit, this bread pairs beautifully with other creative uses, much like our popular banana ice cream. Ultimately, this loaf is a guaranteed hit for potlucks, a thoughtful gift for a neighbor, or simply a secret stash for your own midnight snack cravings.
Why I Love This Recipe
This Double Chocolate Banana Bread holds a special place in my heart because it is the recipe that made my youngest nephew finally admit that he actually likes bananas. He would turn his nose up at them in their natural state, but the moment he tried a warm slice of this chocolate-packed loaf, he was completely sold. Now, he specifically asks me to “make the chocolate bread” whenever he visits. That small victory brings me so much joy. Furthermore, I love how the simple process of mashing the bananas and mixing the batter is almost therapeutic, providing a few quiet moments of baking therapy that always center me. It is my go-to recipe for using up fruit and spreading a little bit of homemade happiness.
Health and Nutrition
Why it’s good for your body
Double Chocolate Banana Bread offers more than just incredible flavor. For instance, its main ingredient, ripe bananas, provides a significant dose of potassium. This essential mineral actively supports healthy blood pressure and proper muscle function. Furthermore, the natural sweetness from the bananas means you can often use less added sugar in the recipe.
Additionally, cocoa powder delivers powerful antioxidants called flavonoids. These compounds help combat oxidative stress in your body. Moreover, when you use whole wheat flour, this treat contributes valuable fiber to your diet. This fiber promotes good digestive health and helps you feel satisfied longer.
Ultimately, enjoying a slice of Double Chocolate Banana Bread gives you a wholesome energy boost. Consequently, it makes for a far more nutritious snack than many processed alternatives. Therefore, you can feel good about indulging in this delicious baked good.
How it fits in a healthy lifestyle
This Double Chocolate Banana Bread fits beautifully into a balanced eating plan. You can easily enjoy a slice as a satisfying afternoon snack that curbs sweet cravings without derailing your goals. Consider pairing it with a source of protein, like a handful of almonds or a glass of milk, for a more complete and sustaining treat.
If you follow a specific dietary approach, you can easily adapt this recipe. For those exploring gluten-free options, simply swap the regular flour for a quality gluten-free flour blend. You can also boost the protein content by stirring in a scoop of your favorite protein powder or some chopped nuts. For more inspiration on creating healthier versions of your favorite desserts, check out our guide on smart baking substitutions. Remember, mindful indulgence is key to a sustainable and enjoyable healthy lifestyle.
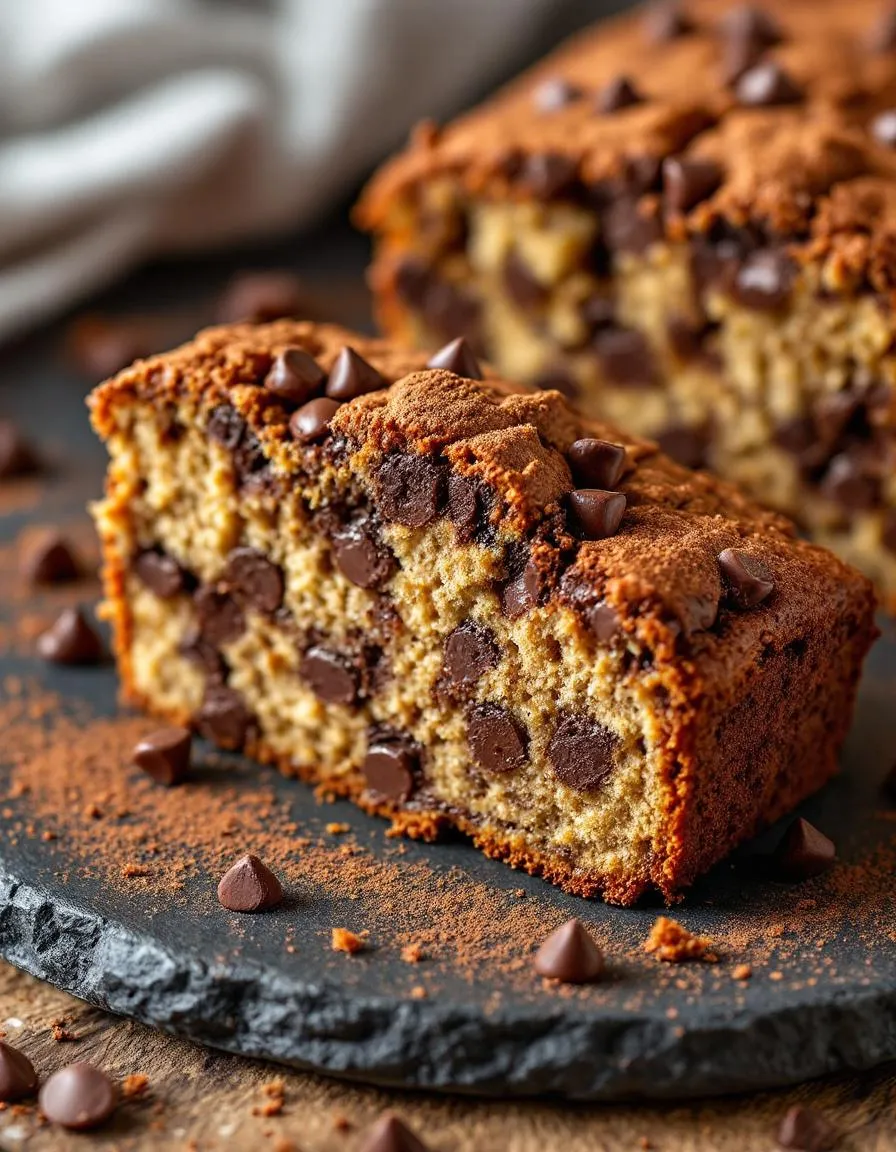
A rich and moist banana bread loaded with cocoa and chocolate chips for the ultimate chocolate lover’s treat.
Ingredients
Scale
For the Crust:
3 ripe bananas, mashed
1/2 cup unsalted butter, melted
3/4 cup granulated sugar
1 large egg
1 teaspoon vanilla extract
1 cup all-purpose flour
1/2 cup cocoa powder
1 teaspoon baking soda
1/2 teaspoon salt
1 cup semi-sweet chocolate chips
Instructions
1. Prepare the Crust:
Preheat oven to 350°F (175°C) and grease a 9×5 inch loaf pan.
In a bowl, mix mashed bananas, melted butter, sugar, egg, and vanilla until combined.
In another bowl, whisk together flour, cocoa powder, baking soda, and salt.
Gradually add dry ingredients to wet ingredients, mixing until just combined. Fold in chocolate chips.
Pour batter into prepared pan and bake for 50-60 minutes, or until a toothpick comes out clean. Cool before slicing.
Notes
You can customize the seasonings to taste.
s-dish">How to Prepare This Dish
Steps and time-saving tips
First, preheat your oven to 350°F and generously grease a 9×5-inch loaf pan. This initial step is crucial for a perfect bake. Meanwhile, mash your very ripe bananas in a large bowl until they are almost smooth. Consequently, you can use a fork, potato masher, or even the paddle attachment on your stand mixer for this task. Next, whisk in the melted butter, sugars, egg, and vanilla until the mixture is wonderfully smooth and well combined. In a separate bowl, whisk together the flour, cocoa powder, baking soda, and salt. Gradually add these dry ingredients to the wet banana mixture, stirring gently until just combined. Finally, fold in the chocolate chips, reserving a handful for the top.
Pour the thick batter into your prepared loaf pan and smooth the top with a spatula. Then, sprinkle those reserved chocolate chips on top for a beautiful, bakery-style finish. Immediately place the pan in the preheated oven and bake for 55 to 65 minutes. You will know your Double Chocolate Banana Bread is done when a toothpick inserted into the center comes out with just a few moist crumbs attached. Allow the loaf to cool in the pan for at least 15 minutes before transferring it to a wire rack. This patience prevents it from breaking apart. For an extra treat, drizzle melted chocolate over the cooled loaf.
Mistakes I’ve made and learned from
I have absolutely overmixed this batter in a rush, which resulted in a tough, dense loaf instead of the tender crumb we all want. The key is to stir until the flour streaks just disappear, even if the batter looks a little lumpy. Furthermore, I once used bananas that were not quite ripe enough, and my Double Chocolate Banana Bread lacked that deep, sweet banana flavor. Now I wait for them to be heavily speckled or even black for the best results. Another lesson learned the hard way was slicing the bread while it was still too warm. It crumbled everywhere! Now I use a serrated knife and wait until it’s nearly completely cool for those perfect, clean slices. For more tips on avoiding common pitfalls, check out my guide on common baking mistakes. And if you find yourself with extra ripe bananas, my collection of banana recipes has plenty of delicious ideas.
Banana bread itself tells a story of ingenuity. During the Great Depression, resourceful home bakers refused to waste overripe fruit. They created something beautiful from necessity. Eventually, we took this humble, comforting classic and gave it a decadent twist by adding not one, but two types of chocolate. My grandmother always made her version with a handful of chocolate chips. However, my ultimate Double Chocolate Banana Bread recipe, with its rich cocoa base, is my own personal homage to her.
Around the world, people put their own spin on this concept. For instance, bakers in Australia might stir in desiccated coconut for extra texture. Meanwhile, many European versions feature a hint of warm spice like cinnamon or cardamom. Some bakers even swirl in a ribbon of peanut butter or top it with a creamy cheese layer. Ultimately, this versatility is its magic. You can personalize a loaf of Double Chocolate Banana Bread to match any taste or tradition, making it a truly global treat.
ays-cooking">How it fits in today’s cooking
This recipe absolutely thrives in modern kitchens. Busy home cooks adore it because it turns leftover bananas into a spectacular treat with minimal effort. Furthermore, it fits perfectly into today’s flexible eating routines. You can enjoy a slice for a quick breakfast, an afternoon snack, or even as a simple dessert. Its crowd-pleasing nature also makes it a superstar at potlucks and bake sales.
Many bakers now adapt it for specific dietary needs. They might use a flax egg for a vegan version or swap in gluten-free flour. Some even sneak in vegetables like zucchini for an extra nutrient boost. If you love this kind of adaptable baking, you will definitely want to explore our guide on perfect baking substitutions for more ideas. Ultimately, a warm slice of this bread provides a much-needed moment of comfort. It pairs wonderfully with a cup of coffee, making it the ideal treat for any cozy gathering, much like our beloved classic coffee cake.
Taste and Texture
What makes it delicious
This Double Chocolate Banana Bread delivers an incredibly moist and tender crumb that practically melts in your mouth. Ripe bananas infuse every bite with a sweet, fruity depth that perfectly balances the rich, dark cocoa. Furthermore, pockets of gooey chocolate chips create delightful bursts of decadence. The aroma alone is intoxicating, filling your kitchen with the warm, comforting scent of chocolate and baked bananas. Ultimately, each slice of this Double Chocolate Banana Bread feels like an indulgent, yet wholesome, treat.
r">Boosting the flavor
You can easily elevate this treat with a few creative twists. For instance, a sprinkle of flaky sea salt on top before baking creates a wonderful sweet-and-salty contrast. Alternatively, try folding in a handful of toasted walnuts or pecans for a satisfying crunch. A dollop of our whipped cream cheese frosting transforms a simple slice into a decadent dessert. Moreover, a cup of coffee or a glass of cold milk makes the perfect pairing, much like the combinations we suggest for our classic coffee cake.
Tips for Success
Best practices for results
For the best Double Chocolate Banana Bread, always use very ripe bananas with brown spots because they mash easily and add natural sweetness. Furthermore, use room temperature eggs and dairy to ensure your batter blends together smoothly without overmixing. Additionally, line your loaf pan with parchment paper for easy removal and perfectly even baking. Finally, let the Double Chocolate Banana Bread cool completely in the pan before slicing it for clean, beautiful pieces.
>Mistakes to avoid
Avoid using underripe bananas as they lack sweetness and moisture, which can make your bread dry. Conversely, do not overmix the batter after adding the dry ingredients; instead, gently fold everything until just combined to keep the texture tender. Moreover, ensure you do not overbake the loaf. You can check for doneness properly with a simple toothpick test, a method we detail in our guide on how to tell when baked goods are done. Remember, the residual heat will continue to cook the bread as it cools. If your bananas aren’t quite ripe enough, you can quickly solve that problem using our tips for how to ripen bananas fast.
Serving and Pairing Suggestions
How to serve this dish
Serve your Double Chocolate Banana Bread warm for a truly decadent experience. Furthermore, a light dusting of powdered sugar or a drizzle of vanilla glaze creates a beautiful, bakery-style finish. For special occasions, top each slice with a dollop of freshly whipped cream and a few raspberries. This Double Chocolate Banana Bread also makes a fantastic gift; simply wrap a cooled loaf in parchment paper and tie it with baker’s twine. Ultimately, it shines as the star of any brunch spread or holiday dessert table.
What goes well with it
A cold glass of milk perfectly complements the rich, fudgy notes of this Double Chocolate Banana Bread. Alternatively, a robust cup of coffee cuts through the sweetness for a truly balanced bite. For an extra indulgent treat, serve a slice alongside a scoop of vanilla bean ice cream. The creamy, cool ice cream melts into the warm bread, creating a sensational dessert. If you enjoy this, you will absolutely love our classic Banana Bread Recipe. Moreover, a simple Berry Salad offers a refreshing, tart contrast that cleanses the palate between each delicious mouthful.
Can I use frozen bananas for Double Chocolate Banana Bread?
Absolutely! Thaw frozen bananas completely and drain any excess liquid before mashing them. Using previously frozen bananas often makes this Double Chocolate Banana Bread even more moist and flavorful.
What is the best cocoa powder to use?
For a rich, deep chocolate flavor, use natural unsweetened cocoa powder. Dutch-processed cocoa also works well and yields a slightly milder taste. The choice depends on your preference for the ultimate Double Chocolate Banana Bread experience.
ank-math-faq-item">
How do I know when my banana bread is done baking?
Insert a toothpick into the center of the loaf; it should come out with a few moist crumbs attached, but not wet batter. The edges of the Double Chocolate Banana Bread will also start to pull away from the sides of the pan.
Can I add nuts or chocolate chips to the recipe?
Yes, adding mix-ins is a great way to customize your loaf. Fold in up to one cup of walnuts, pecans, or extra chocolate chips into the batter before baking for added texture and flavor in your Double Chocolate Banana Bread.