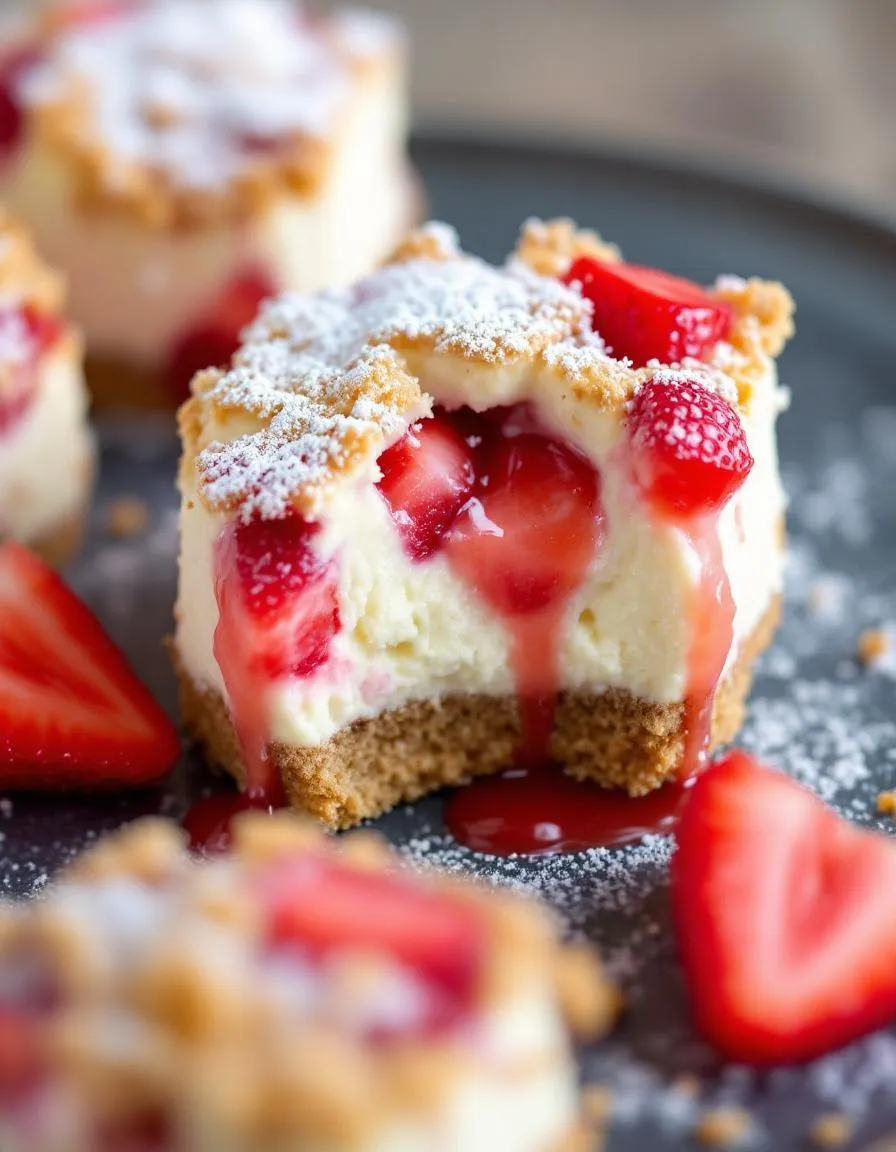
Imagine biting into a dessert that combines creamy cheesecake, sweet strawberries, and a satisfying crunch—all in one perfect bite. That’s exactly what you get with this Strawberry Cheesecake Crunch Bites Recipe. Whether you’re craving a quick treat or need a crowd-pleasing dessert for your next gathering, these little bites deliver big flavor without the fuss. Plus, they’re as fun to make as they are to eat, making them a hit for bakers of all skill levels.
Strawberry Cheesecake Crunch Bites Recipe brings together the best of three worlds: the tangy richness of cheesecake, the bright freshness of strawberries, and the irresistible texture of a crunchy crust. Unlike traditional cheesecakes, which require patience and precision, this recipe simplifies the process while keeping all the decadence. Each bite offers a balanced harmony of flavors and textures, making it ideal for everything from casual snacking to elegant dessert platters. If you love no-bake desserts, you’ll appreciate how effortlessly these come together. For more easy treats, check out our No-Bake Desserts Collection or explore our Quick Snacks Guide for other fast favorites.
Why I Love This Recipe
This recipe holds a special place in my heart because it reminds me of summer picnics with my family. My grandmother always made a version of these bites, and the combination of strawberries and cheesecake instantly transports me back to those sunny afternoons. What I adore most is how adaptable they are—you can swap ingredients based on what’s in season or your personal preferences. Every time I make them, friends and family rave about the flavor, and I love knowing I’m sharing a little piece of joy with every bite.
Health and Nutrition
Why it’s good for your body
Strawberry Cheesecake Crunch Bites Recipe packs a surprising nutritional punch while satisfying your sweet tooth. First, fresh strawberries deliver a hefty dose of vitamin C, which boosts immunity and supports skin health. Additionally, the natural sweetness of strawberries means you can cut back on added sugars without sacrificing flavor. Meanwhile, the creamy cheesecake layer provides a good source of calcium and protein, essential for strong bones and muscle repair.
Moreover, the crunchy base often includes nuts or whole grains, adding fiber to aid digestion and keep you full longer. Unlike traditional desserts, Strawberry Cheesecake Crunch Bites Recipe balances indulgence with wholesome ingredients. For instance, swapping heavy cream for Greek yogurt lightens the dish while maintaining richness. Finally, portion control becomes effortless with these bite-sized treats, helping you enjoy dessert mindfully.
Ultimately, Strawberry Cheesecake Crunch Bites Recipe proves that healthy eating doesn’t mean skipping treats. By combining nutrient-dense ingredients with smart swaps, this recipe fuels your body and delights your taste buds. Whether you need an energy boost or a post-workout reward, these bites deliver both flavor and function.
How it fits in a healthy lifestyle
Strawberry Cheesecake Crunch Bites Recipe fits seamlessly into a balanced diet. For gluten-free eaters, simply use almond flour or certified gluten-free oats in the crust. If you’re watching your heart health, the strawberries and nuts provide antioxidants and healthy fats to support cardiovascular wellness. These bites also work well as a protein-packed snack when you swap in high-protein yogurt or cottage cheese.
Planning ahead makes healthy eating easier, and these bites store perfectly in the freezer for quick cravings. Pair them with a green smoothie bowl for a nutrient-rich breakfast or enjoy them as a post-dinner treat without guilt. For more ideas on balancing sweets and nutrition, explore our guide to healthy dessert swaps. With smart choices and moderation, Strawberry Cheesecake Crunch Bites Recipe becomes a delicious part of your everyday wellness routine.
Delicious bite-sized strawberry cheesecake treats with a crunchy graham cracker base.
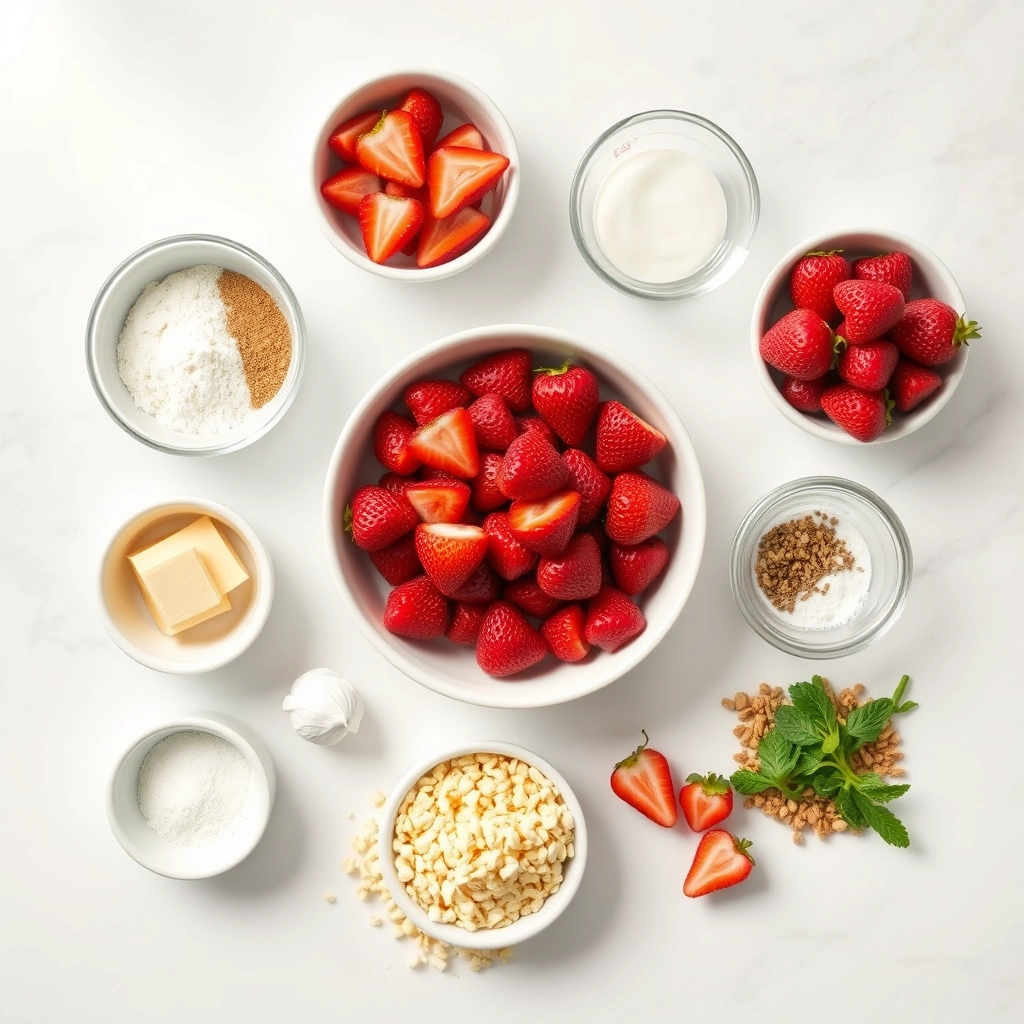
Ingredients
Scale
For the Crust:
1 cup graham cracker crumbs
3 tbsp melted butter
8 oz cream cheese, softened
1/4 cup powdered sugar
1 tsp vanilla extract
1/2 cup diced fresh strawberries
1/2 cup whipped cream
1/4 cup crushed graham crackers for topping
Instructions
1. Prepare the Crust:
Mix graham cracker crumbs with melted butter and press into mini muffin tins to form the base.
In a bowl, beat cream cheese, powdered sugar, and vanilla until smooth.
Fold in diced strawberries and whipped cream, then spoon mixture over the crusts. Top with crushed graham crackers and refrigerate for at least 2 hours before serving.
Notes
You can customize the seasonings to taste.
“`html
s-dish">How to Prepare This Dish
Steps and time-saving tips
Start by preheating your oven to 350°F and lining a baking sheet with parchment paper. Crush graham crackers into fine crumbs, then mix them with melted butter and a pinch of salt until the texture resembles wet sand. Press this mixture firmly into the bottom of a square pan to create the crust. Meanwhile, beat cream cheese, sugar, and vanilla extract until smooth, then fold in whipped cream for a light, airy filling. Spread this over the crust and smooth the top with a spatula. For the strawberry layer, blend fresh strawberries with a touch of sugar until pureed, then drizzle it over the cheesecake layer. Chill the dessert for at least four hours, or freeze for two if you’re short on time. Before serving, cut into bite-sized squares and top with extra strawberry slices and a sprinkle of crushed graham crackers for crunch. If you’re in a hurry, store-bought graham cracker crumbs work just as well as homemade, and frozen strawberries can substitute for fresh when blended.
Mistakes I’ve made and learned from
Early on, I rushed the chilling step and ended up with a gooey mess instead of neat Strawberry Cheesecake Crunch Bites. Now I always set a timer to ensure the dessert firms up properly—overnight chilling works even better. Another blunder? Overmixing the cheesecake layer, which made it dense instead of fluffy. A light hand with the whisk makes all the difference. For more cheesecake troubleshooting, check out my guide on common cheesecake mistakes. Also, if your strawberry puree turns out too runny, try my trick from this fruit sauce thickening tutorial—a teaspoon of cornstarch slurry saves the day every time.
The Strawberry Cheesecake Crunch Bites Recipe brings together the creamy indulgence of cheesecake with the bright, fruity pop of strawberries—a combo that feels both nostalgic and fresh. While cheesecake itself traces back to ancient Greece, modern twists like these bite-sized delights often draw inspiration from American diners and bakeries, where convenience meets decadence. In my family, we’ve always made them for summer picnics, layering fresh strawberries from local farms with a buttery graham cracker crunch.
Around the world, variations thrive. In Japan, you might find a lighter version with matcha-infused cream, while Italian cooks sometimes swap strawberries for Amarena cherries. Even within the U.S., regional twists shine—think key lime zest in Florida or a drizzle of salted caramel in the South. The Strawberry Cheesecake Crunch Bites Recipe adapts beautifully, whether you’re serving it at a backyard BBQ or a fancy tea party.
ays-cooking">How it fits in today’s cooking
Today, the Strawberry Cheesecake Crunch Bites Recipe fits perfectly into our love for shareable, no-fuss desserts. Busy home cooks appreciate how quickly they come together, and their portable size makes them ideal for potlucks or lunchbox treats. For a healthier twist, some swap in coconut yogurt or almond flour crusts—proof that this recipe evolves with modern tastes.
Seasonally, they’re a hit at spring brunches or holiday spreads, especially when paired with other easy favorites like blueberry lemon loaf. And because they freeze well, you can prep them ahead for last-minute guests—just like these chocolate avocado muffins, which balance indulgence with a nutrient boost. Whether you stick to the classic or experiment, these bites keep comfort cooking simple and satisfying.
Taste and Texture
What makes it delicious
Every bite of Strawberry Cheesecake Crunch Bites Recipe delivers a symphony of textures and flavors. The creamy cheesecake filling melts luxuriously on your tongue, while the crisp graham cracker crust adds a satisfying crunch. Fresh strawberries burst with juicy sweetness, balancing the rich, tangy cream cheese. Meanwhile, a hint of vanilla lingers in the background, tying everything together with its warm, fragrant aroma. Whether chilled or slightly softened, Strawberry Cheesecake Crunch Bites Recipe offers a playful contrast between silky smoothness and delightful crispness that keeps you reaching for more.
r">Boosting the flavor
Elevate your Strawberry Cheesecake Crunch Bites Recipe with a few creative tweaks. For extra depth, swirl in a spoonful of homemade strawberry sauce before chilling, amplifying the berry flavor. Alternatively, sprinkle toasted coconut flakes or crushed pistachios on top for nutty contrast. If you love a touch of warmth, a drizzle of vanilla bean glaze enhances the dessert’s luxurious finish. Experimenting with these small additions ensures each bite feels fresh and exciting.
Tips for Success
Best practices for results
Always chill the cream cheese before mixing to prevent a runny filling in your Strawberry Cheesecake Crunch Bites Recipe. Meanwhile, use fresh strawberries for the best flavor and texture. Press the crust firmly into the pan so it holds together after baking. Additionally, let the bites cool completely before slicing to keep them neat. For extra crunch, toast the graham crackers lightly before crushing them. Finally, refrigerate the bites for at least two hours to set properly.
>Mistakes to avoid
Avoid overmixing the cheesecake filling, as this can make it too airy and less creamy. Instead, blend just until smooth. Many bakers also skip lining the pan with parchment, but this step ensures easy removal later. If your crust crumbles, check out our guide on how to fix a crumbly crust. Another common mistake is using frozen strawberries without thawing and draining them first, which adds excess moisture. For more tips on handling fruit in desserts, visit our fruit in baking tips.
Serving and Pairing Suggestions
How to serve this dish
Showcase your Strawberry Cheesecake Crunch Bites Recipe by arranging them on a tiered dessert stand for an elegant touch. Alternatively, place them in mini cupcake liners for a casual yet charming presentation. For special occasions, drizzle melted white chocolate over the bites and top with fresh strawberry slices for a pop of color. These bites shine at brunches, baby showers, or holiday gatherings, where their bite-sized convenience makes them a crowd-pleaser. If you want to elevate the experience, serve them alongside a small bowl of whipped cream for dipping.
What goes well with it
Pair your Strawberry Cheesecake Crunch Bites Recipe with a refreshing glass of homemade strawberry lemonade for a burst of citrusy sweetness. The tangy lemonade balances the rich cheesecake flavor perfectly. For a cozy twist, try serving them with a warm cup of vanilla chai tea, which enhances the creamy notes of the dessert. If you love dessert pairings, consider adding our Classic Vanilla Bean Cupcakes or Decadent Chocolate Mousse to create a delightful dessert spread.
How do you make Strawberry Cheesecake Crunch Bites no-bake?
These 🍓 Strawberry Cheesecake Crunch Bites 🧁😋 are easy to make without baking! Simply mix cream cheese, powdered sugar, and crushed graham crackers, then fold in diced strawberries. Chill the mixture, roll into bites, and coat with more graham cracker crumbs for the perfect no-bake treat.
Can I use frozen strawberries for Strawberry Cheesecake Crunch Bites?
Yes, but thaw and drain frozen strawberries thoroughly to avoid excess moisture. Fresh strawberries work best for 🍓 Strawberry Cheesecake Crunch Bites 🧁😋, but if using frozen, pat them dry before mixing to prevent soggy texture.
ank-math-faq-item">
How long do Strawberry Cheesecake Crunch Bites last in the fridge?
Store 🍓 Strawberry Cheesecake Crunch Bites 🧁😋 in an airtight container for up to 3-4 days. For best freshness, keep them chilled and serve cold. The graham cracker coating may soften slightly over time, but they’ll still taste delicious!
What can I substitute for graham crackers in this recipe?
For a twist on 🍓 Strawberry Cheesecake Crunch Bites 🧁😋, try crushed vanilla wafers, shortbread cookies, or even gluten-free crackers. Any mildly sweet, crunchy base works well—just adjust the sugar slightly if your substitute is less sweet than graham crackers.
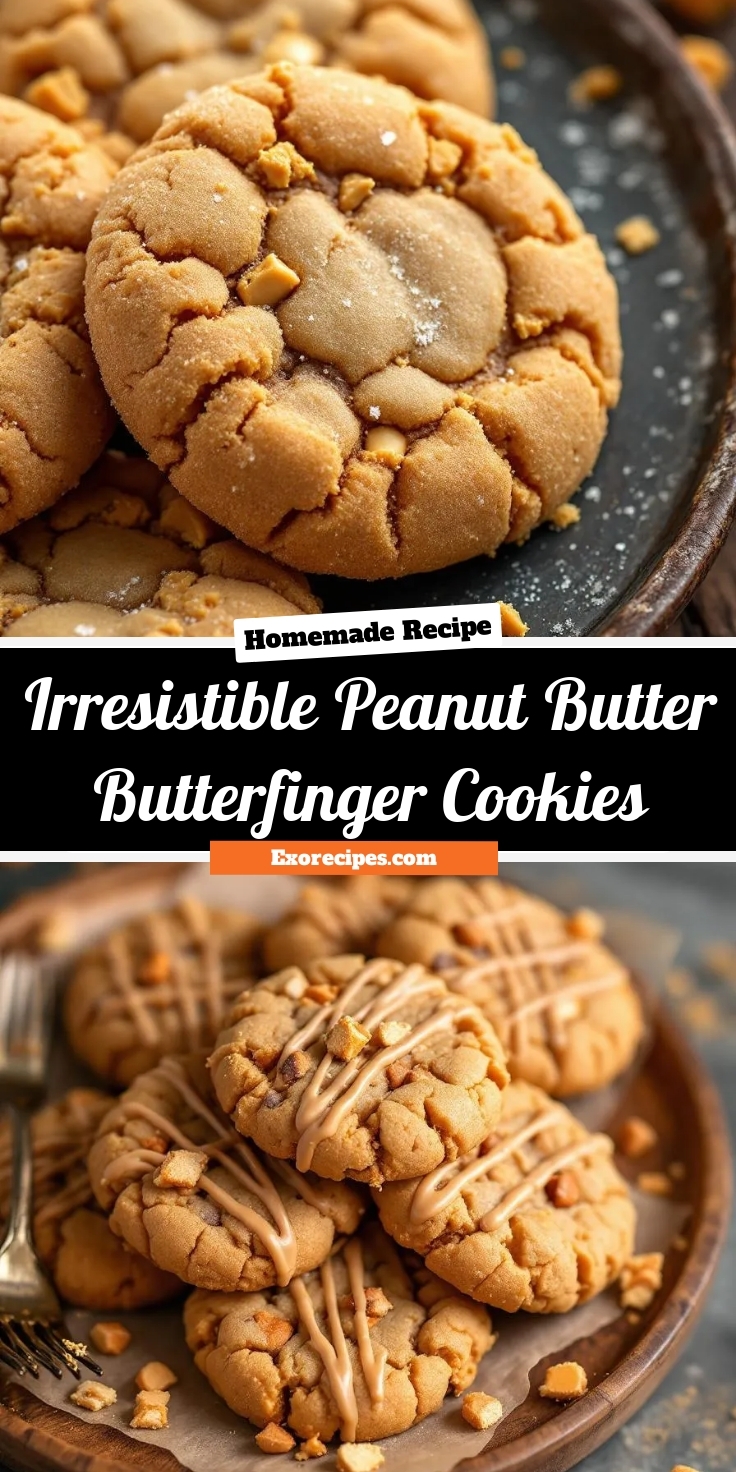
Best Peanut Butter Butterfinger Cookies Recipe
Introduction
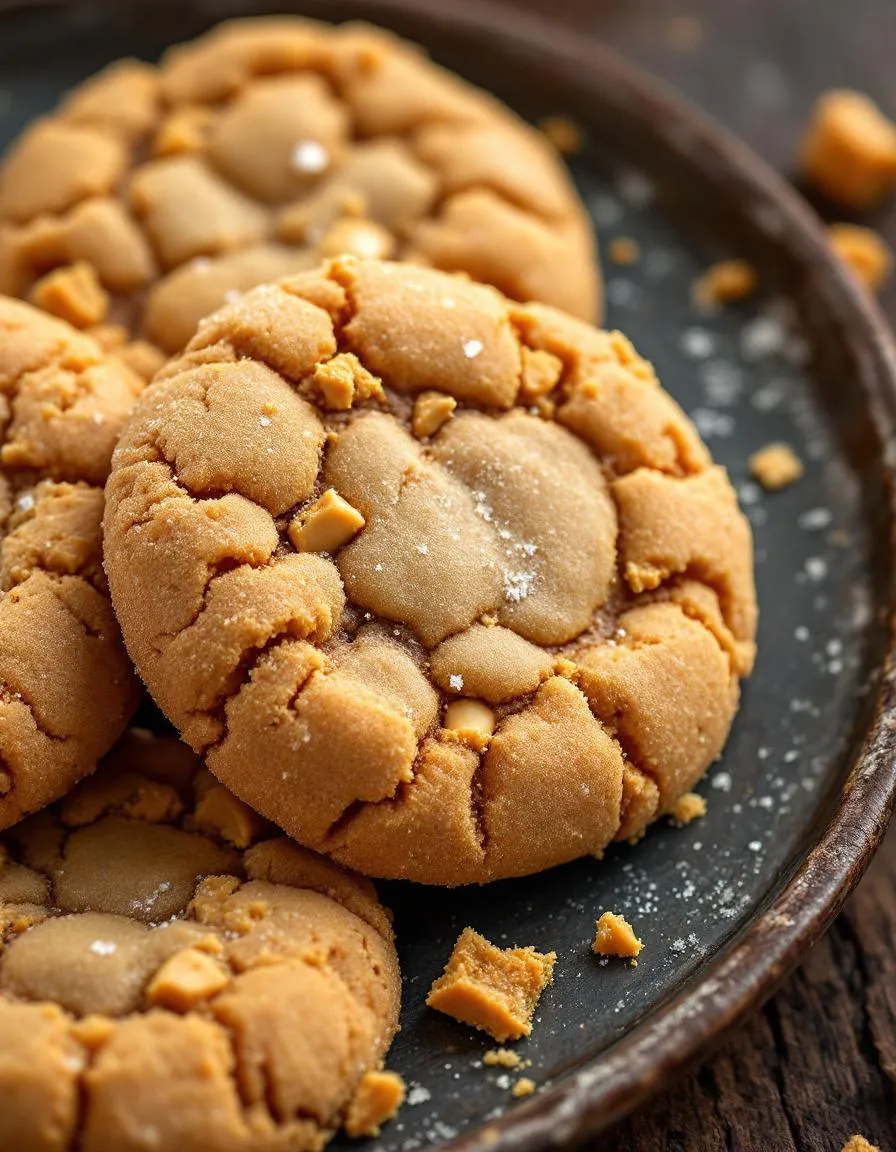
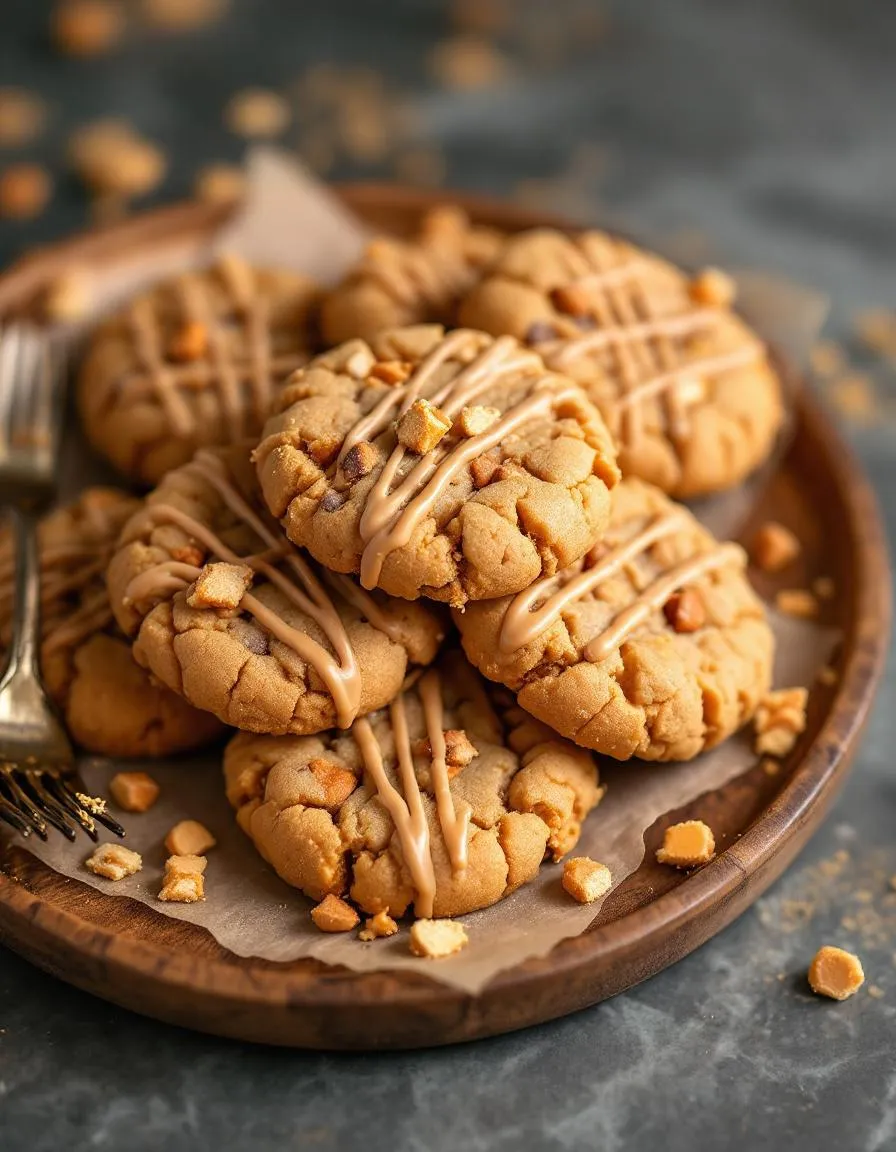
There’s something magical about the combination of peanut butter and Butterfinger candy—especially when they come together in warm, chewy cookies. If you’ve ever craved a treat that balances rich nutty flavor with crunchy caramelized goodness, these Irresistible Peanut Butter Butterfinger Cookies will hit the spot. Whether you’re baking for a crowd, surprising your kids, or just treating yourself, this recipe delivers comfort and nostalgia in every bite. Plus, it’s incredibly easy to make, so you can satisfy your sweet tooth without spending hours in the kitchen.
Irresistible Peanut Butter Butterfinger Cookies blend creamy peanut butter, chopped Butterfinger bars, and a soft cookie base for a dessert that’s both decadent and approachable. These cookies matter because they’re more than just a sweet snack—they’re a crowd-pleaser that works for bake sales, potlucks, or cozy nights in. The peanut butter adds depth, while the Butterfinger pieces create a satisfying crunch that keeps you reaching for another. If you love classic peanut butter cookies but want a fun twist, this recipe elevates the familiar with minimal effort. For more easy dessert ideas, check out our 5-Minute Microwave Fudge or Salted Caramel Brownies.
This recipe fits our blog’s tone perfectly because it’s practical, nostalgic, and packed with flavor. We focus on recipes that feel like home, and these cookies deliver that warmth. Whether you’re a beginner or a seasoned baker, you’ll appreciate the straightforward steps and reliable results. Best of all, the dough comes together quickly, so you can enjoy fresh cookies in no time. The combination of salty and sweet makes them versatile, too—pair them with milk for a classic treat or crumble them over ice cream for an extra-indulgent dessert.
Why I Love This Recipe
I’ll never forget the first time I made Irresistible Peanut Butter Butterfinger Cookies. My niece, who claimed she hated peanut butter, devoured three in a row and asked for the recipe. That’s the power of these cookies—they win over even the pickiest eaters. For me, they’re a reminder of lazy Sunday afternoons, sharing treats with family, and the joy of simple, delicious baking. Every time I smell them baking, I’m transported back to those moments. If you need a guaranteed smile-maker, these cookies never disappoint.
Health and Nutrition
Why it’s good for your body
Irresistible Peanut Butter Butterfinger Cookies pack a surprising nutritional punch while satisfying your sweet tooth. First, peanut butter delivers plant-based protein and healthy fats, which help keep you full and energized. Additionally, the natural richness of peanut butter supports heart health by promoting good cholesterol levels. Moreover, Butterfinger pieces add a satisfying crunch without overwhelming sugar content, especially if you use dark chocolate varieties.
Furthermore, these cookies contain essential nutrients like magnesium and vitamin E, thanks to the peanut butter. These nutrients support muscle function and skin health. Meanwhile, the fiber content aids digestion, making Irresistible Peanut Butter Butterfinger Cookies a smarter indulgence than many store-bought treats. Finally, homemade versions let you control ingredients, reducing unnecessary additives.
On top of that, enjoying Irresistible Peanut Butter Butterfinger Cookies in moderation can boost mood and curb cravings. The combination of protein and healthy fats stabilizes blood sugar, preventing energy crashes. So while they’re undeniably delicious, they also offer real benefits when enjoyed mindfully.
How it fits in a healthy lifestyle
Irresistible Peanut Butter Butterfinger Cookies fit seamlessly into a balanced diet when enjoyed as an occasional treat. For protein-focused eaters, the peanut butter base makes them a satisfying post-workout snack. If you follow a gluten-free diet, simply swap regular flour for almond or oat flour—our gluten-free baking guide makes it easy.
These cookies also pair well with heart-healthy habits. Opt for natural peanut butter without added sugars to maximize benefits. For those managing portions, try freezing dough in single servings—our meal-prep dessert tips show how to enjoy treats without overindulging. Ultimately, balance is key, and Irresistible Peanut Butter Butterfinger Cookies prove that wholesome ingredients can make decadence feel guilt-free.
Soft and chewy peanut butter cookies packed with crushed Butterfinger candy bars for an irresistible crunch.
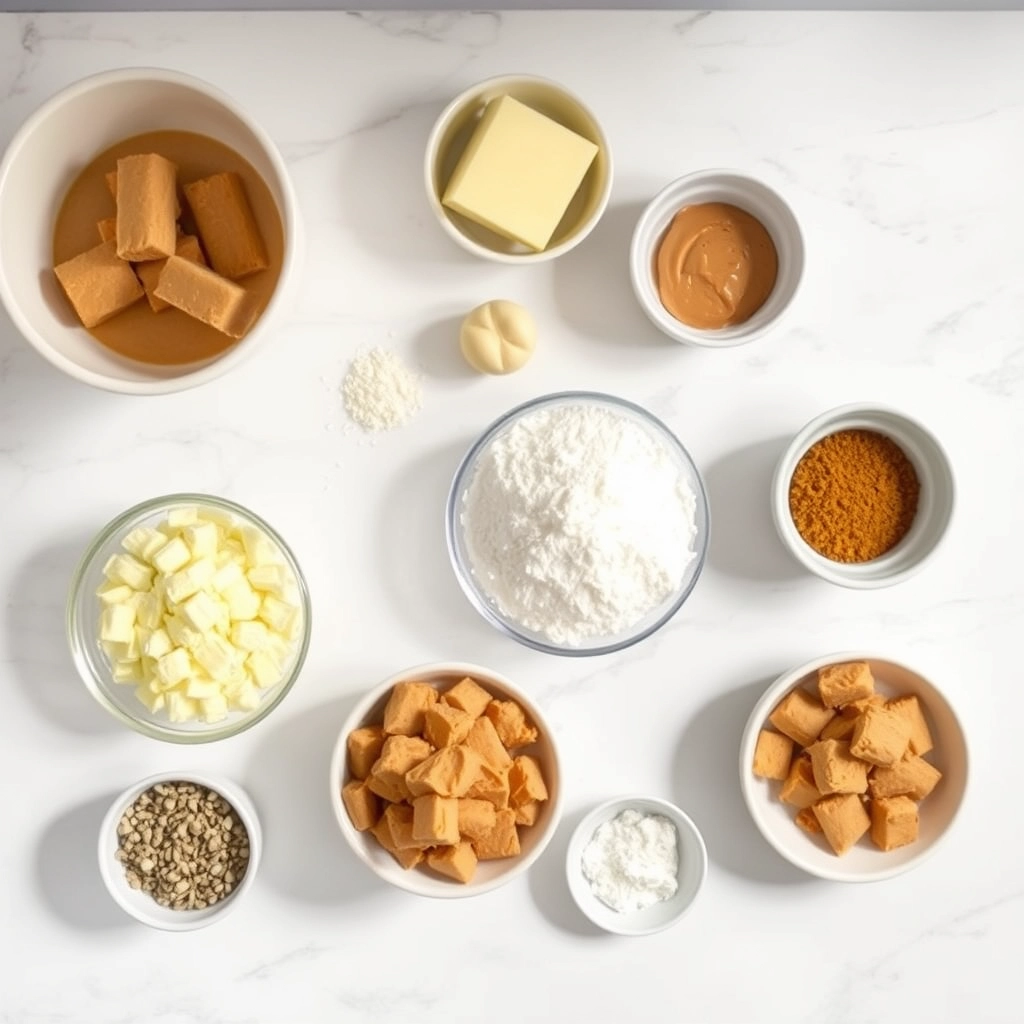
Ingredients
Scale
For the Crust:
1 cup creamy peanut butter
1 cup granulated sugar
1 large egg
1 tsp vanilla extract
1/2 tsp baking soda
1/4 tsp salt
1 cup crushed Butterfinger candy bars
1/4 cup additional sugar for rolling
Instructions
1. Prepare the Crust:
Preheat oven to 350°F (175°C) and line baking sheets with parchment paper.
In a large bowl, mix peanut butter, sugar, egg, vanilla, baking soda, and salt until well combined.
Fold in crushed Butterfinger pieces until evenly distributed.
Roll dough into 1-inch balls, then roll each ball in additional sugar to coat.
Place cookies 2 inches apart on baking sheets and flatten slightly with a fork in a crisscross pattern.
Bake for 10-12 minutes until edges are lightly golden. Let cool on baking sheets for 5 minutes before transferring to wire racks.
Notes
You can customize the seasonings to taste.
s-dish">How to Prepare This Dish
Steps and time-saving tips
Start by preheating your oven to 350°F and lining two baking sheets with parchment paper. In a large bowl, whisk together the flour, baking soda, and salt until well combined. Next, cream the softened butter, peanut butter, and sugars in a stand mixer until fluffy, about 2 minutes. Beat in the eggs one at a time, then mix in the vanilla. Gradually fold the dry ingredients into the wet mixture, but don’t overmix—just until no flour streaks remain. Gently stir in the chopped Butterfinger bars for that irresistible crunch. Scoop tablespoon-sized dough balls onto the sheets, spacing them 2 inches apart. Bake for 10-12 minutes until the edges turn golden. Let the cookies cool on the tray for 5 minutes before transferring them to a wire rack. For a time-saving hack, freeze extra dough balls for later baking. If you love peanut butter treats, try doubling the batch—these disappear fast!
Mistakes I’ve made and learned from
My first attempt at these Irresistible Peanut Butter Butterfinger Cookies ended in hockey pucks because I overmixed the dough. Turns out, vigorous stirring activates too much gluten, making them tough. Now I stop as soon as the flour blends in. Another blunder? Using cold butter straight from the fridge. It clumps instead of creaming smoothly, so I soften it properly now. Once, I skipped chilling the dough and wound up with flat cookies that spread into each other. Lesson learned: if your kitchen’s warm, pop the dough in the fridge for 30 minutes first. For more cookie-saving tricks, check out my guide to common baking mistakes. Trust me, these small tweaks make all the difference between good and unforgettable cookies.
n-and-variations">Cultural Connection and Variations
Where this recipe comes from
Irresistible Peanut Butter Butterfinger Cookies blend two American favorites—peanut butter cookies and Butterfinger candy—into one unforgettable treat. The recipe likely emerged in the mid-20th century when home bakers started folding crushed candy bars into cookie dough for extra crunch and nostalgia. In the South, some families add a dash of bourbon or swap peanut butter for pecans, while Midwestern versions might use caramel bits for extra gooeyness. Meanwhile, in other parts of the world, similar treats take different forms. For example, in Australia, they might use Violet Crumble bars, while British bakers often reach for Crunchie bars instead.
For many, Irresistible Peanut Butter Butterfinger Cookies evoke memories of after-school snacks or holiday cookie swaps. My grandma always made them during Christmas, doubling the Butterfinger chunks because “more candy means more joy.” Whether you grew up with them or discovered them later, these cookies carry a playful, universal appeal. After all, who can resist the combo of salty peanut butter and crunchy toffee-like candy?
How it fits in today’s cooking
Today, Irresistible Peanut Butter Butterfinger Cookies remain a crowd-pleaser, especially for potlucks or cozy weekend baking sessions. Modern cooks tweak the recipe to fit dietary needs, like using almond butter or gluten-free flour. Some even turn them into bar cookies for easier sharing. They’re also a staple in holiday tins, alongside classics like gingerbread cookies and fudge.
What keeps them relevan
t? Their versatility. You can freeze the dough for impromptu guests or bake them as mini cookies for parties. Plus, social media fuels new twists, like stuffing them with Nutella or drizzling them with salted caramel. Whether you stick to tradition or experiment, these cookies bridge generations—proving some flavors never go out of style.
Taste and Texture
What makes it delicious
Irresistible Peanut Butter Butterfinger Cookies deliver a symphony of flavors and textures in every bite. The rich, nutty peanut butter base melts into a buttery sweetness, while crushed Butterfinger bars add a satisfying crunch and caramel-like depth. Each cookie boasts a chewy center with crisp edges, creating the perfect contrast. Warm from the oven, the aroma of toasted peanuts and vanilla fills the air, making it impossible to resist. The chocolate drizzle on top adds a silky finish, tying all the flavors together. Irresistible Peanut Butter Butterfinger Cookies are a dream for anyone who loves the classic combo of peanut butter and chocolate.
Boosting the flavor
For an extra flavor boost, try folding in dark chocolate chunks or a sprinkle of sea salt before baking. The salt enhances the sweetness, while the chocolate adds a luxurious melt-in-your-mouth quality. Alternatively, swap the peanut butter for almond butter for a subtle twist—just ensure it’s creamy for the best texture. If you love crunchy toppings, press extra Butterfinger crumbs onto the dough right before baking. For more inspiration, check out our guide on perfect cookie textures or explore creative peanut butter pairings to elevate your baking game.
Always chill the dough for at least 30 minutes before baking to prevent spreading and ensure thick, chewy Irresistible Peanut Butter Butterfinger Cookies. Use parchment paper for even baking and easy cleanup, as it helps maintain the perfect texture. Additionally, measure your flour correctly by spooning it into the measuring cup and leveling it off—this avoids dry, crumbly cookies. For extra richness, slightly underbake the cookies by 1-2 minutes so they stay soft as they cool.
Mistakes to avoid
Avoid overmixing the dough once you add the dry ingredients, as this can make the Irresistible Peanut Butter Butterfinger Cookies tough. Instead, mix just until combined for a tender bite. Also, don’t skip the step of chopping the Butterfinger bars into small pieces—large chunks can cause uneven distribution or breakage. For more baking insights, check out our guide on common baking mistakes and tips for perfect cookie texture every time.
g-suggestions">Serving and Pairing Suggestions
How to serve this dish
Serve Irresistible Peanut Butter Butterfinger Cookies warm for a gooey, melt-in-your-mouth experience. Alternatively, stack them high on a vintage cake stand for a charming dessert display at parties. For holidays, drizzle melted chocolate over the cookies and sprinkle crushed Butterfinger bits on top for extra crunch. Meanwhile, pack them in cute gift boxes for a thoughtful homemade present. No matter how you present them, these cookies always steal the show.
What goes well with it
Pair Irresistible Peanut Butter Butterfinger Cookies with a cold glass of milk for a classic combo that highlights their rich flavor. If you prefer something bolder, try them with a scoop of homemade vanilla ice cream for a decadent dessert. For a cozy treat, serve them alongside a mug of salted caramel hot chocolate, as the caramel notes perfectly complement the peanut butter and chocolate layers. Each pairing enhances the cookies’ irresistible texture and taste.
math-faq-block">
What makes Irresistible Peanut Butter Butterfinger Cookies so addictive?
Irresistible Peanut Butter Butterfinger Cookies combine creamy peanut butter, crushed Butterfinger candy bars, and a soft, chewy texture for the perfect balance of flavors. The mix of sweet and salty, along with the crunchy candy pieces, makes these cookies hard to resist.
Can I use crunchy peanut butter instead of creamy for these Butterfinger cookies?
Yes, crunchy peanut butter works well in Irresistible Peanut Butter Butterfinger Cookies if you prefer extra texture. Just note that the Butterfinger pieces already add crunch, so creamy peanut butter helps balance the consistency.
How do I store Irresistible Peanut Butter Butterfinger Cookies to keep them fresh?
Store these cookies in an airtight container at room temperature for up to 5 days. For longer freshness, you can freeze Irresistible Peanut Butter Butterfinger Cookies for up to 3 months—just thaw before serving.
ank-math-faq-item">
Can I substitute another candy for Butterfinger in this cookie recipe?
While Butterfinger’s unique toffee-like crunch is ideal, you can try Reese’s Pieces or chopped peanut butter cups in Irresistible Peanut Butter Butterfinger Cookies. The flavor will vary slightly, but the cookies will still be delicious.
Best Decadent Choco Swiss Roll Delight Recipe
Introduction
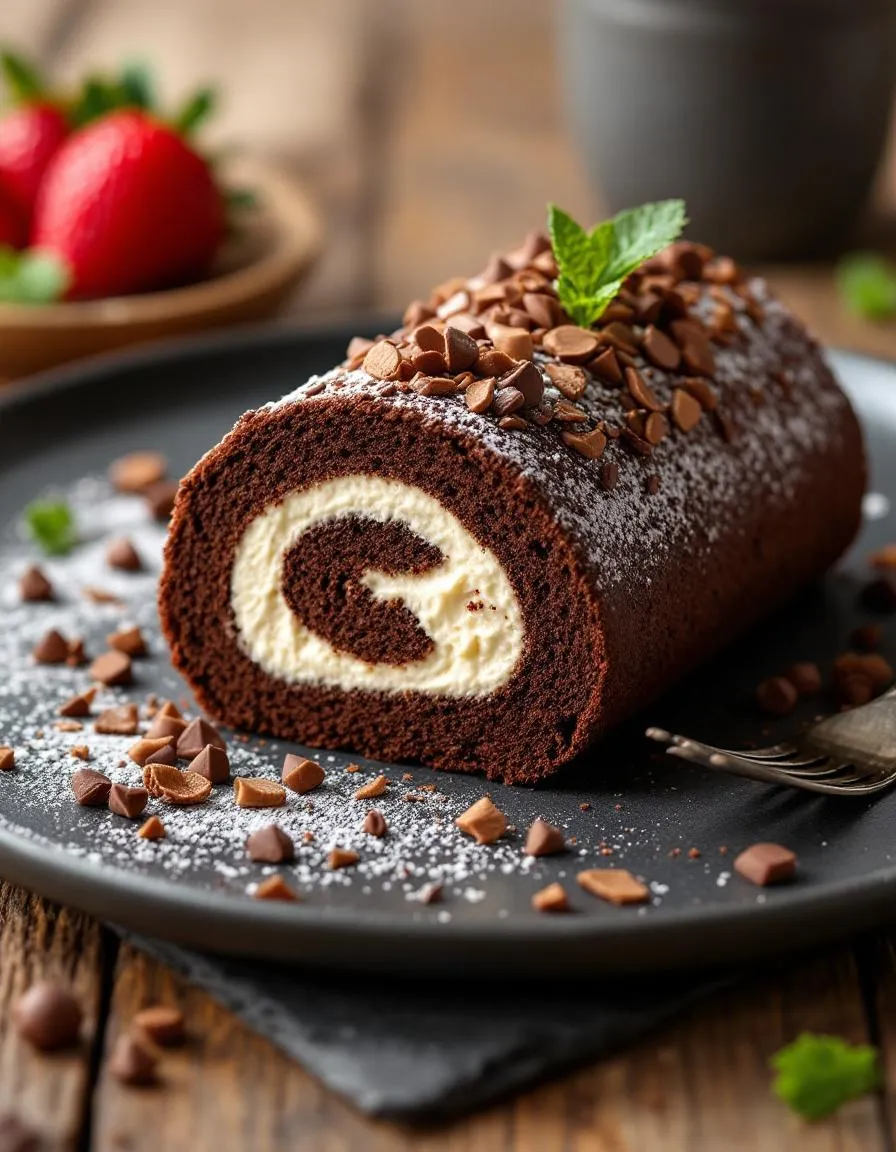
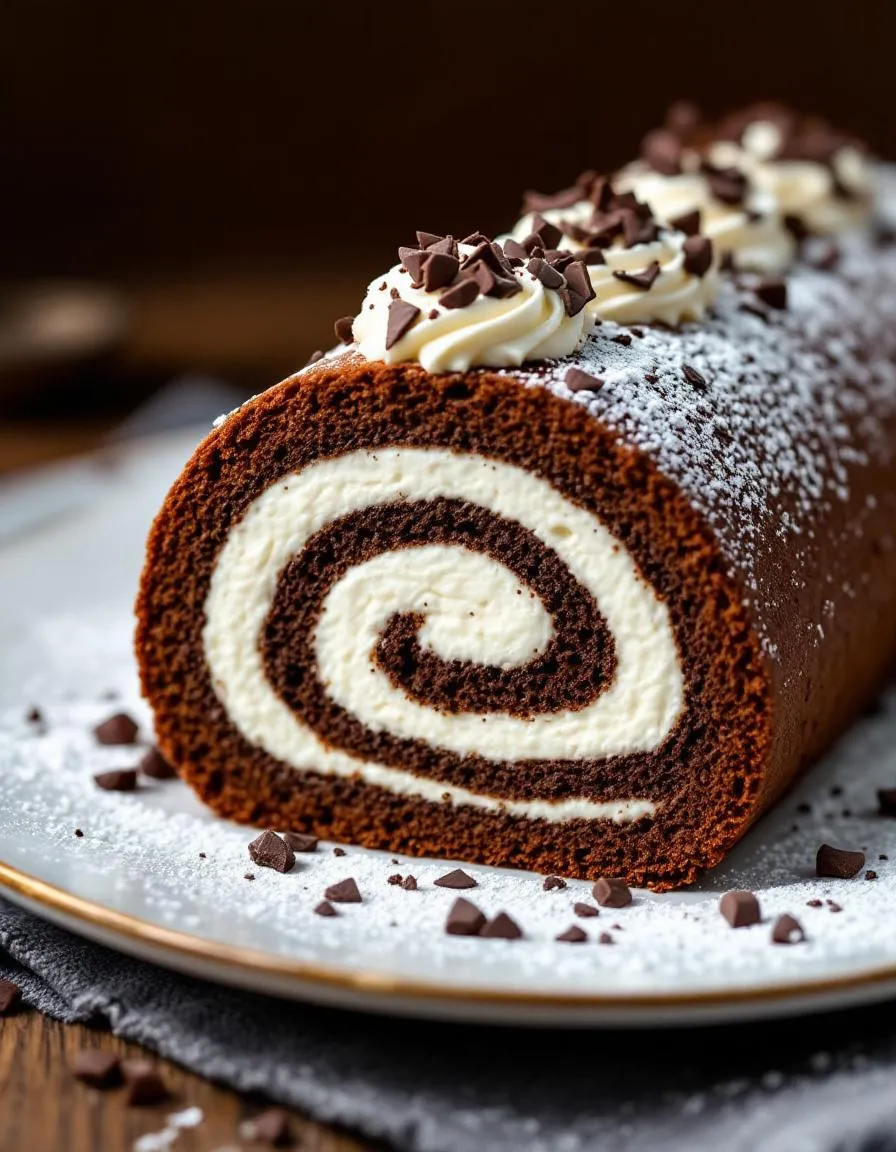
There’s something magical about the first bite of a perfectly baked Swiss roll—especially when it’s a Decadent Choco Swiss Roll Delight. Whether you’re celebrating a special occasion or simply treating yourself after a long day, this dessert wraps rich cocoa, velvety cream, and a touch of nostalgia into every slice. If you’ve ever hesitated to try making a Swiss roll at home, let me assure you: this recipe balances simplicity with showstopping results. Plus, it’s a guaranteed crowd-pleaser that’ll have everyone asking for seconds.
The Decadent Choco Swiss Roll Delight isn’t just another dessert; it’s a masterpiece of texture and flavor. A light, airy sponge cake hugs a luscious chocolate filling, creating a harmony of sweetness that never feels overwhelming. What makes this recipe stand out? For starters, it’s versatile. Serve it as the star of your holiday table, or enjoy it with coffee for an indulgent afternoon pick-me-up. Unlike fussy pastries, this Swiss roll comes together with pantry staples, proving that elegance doesn’t require complexity. If you love classic desserts with a twist, you’ll appreciate our Chocolate Lover’s Guide, which dives into creative ways to elevate cocoa-based treats.
This recipe also fits perfectly with our blog’s mission: approachable yet impressive cooking. Whether you’re a beginner or a seasoned baker, the Decadent Choco Swiss Roll Delight offers room to experiment. Swap the filling for a raspberry-infused cream, or dust the top with powdered sugar for a snowy finish. For more inspiration on balancing flavors, check out our Baking Essentials guide. Above all, this dessert reminds us that baking should be joyful—a chance to create memories as much as delicious bites.
Why I Love This Recipe
This Decadent Choco Swiss Roll Delight holds a special place in my heart because it was the first dessert I ever mastered. I remember the pride I felt when I rolled the cake without a single crack, and the way my family’s eyes lit up when I presented it. Over the years, I’ve tweaked the recipe, adding a pinch of espresso powder to deepen the chocolate flavor or a splash of vanilla for warmth. Every time I make it, I’m reminded that baking isn’t just about precision—it’s about sharing love, one slice at a time.
Health and Nutrition
Why it’s good for your body
Decadent Choco Swiss Roll Delight packs more than just irresistible flavor. First, the cocoa in this dessert delivers antioxidants that help combat oxidative stress. Additionally, the eggs in the sponge cake provide high-quality protein to support muscle repair. Meanwhile, the moderate sugar content ensures you enjoy sweetness without overloading your system.
Moreover, Decadent Choco Swiss Roll Delight contains essential nutrients like iron and magnesium from its chocolate components. These minerals play key roles in energy production and nerve function. Furthermore, the light, airy texture means you savor a satisfying treat without excessive heaviness. Even better, the balanced ingredients make it a smarter choice compared to overly processed desserts.
Finally, enjoying Decadent Choco Swiss Roll Delight in moderation can boost your mood. Dark chocolate triggers serotonin release, promoting feelings of happiness. So while it tastes indulgent, this dessert also offers real benefits for both body and mind.
How it fits in a healthy lifestyle
Decadent Choco Swiss Roll Delight fits perfectly into a balanced diet when enjoyed mindfully. Pair a slice with fresh berries for added fiber, or serve it alongside a protein-rich snack like Greek yogurt to stabilize blood sugar. If you follow a gluten-free diet, try substituting almond flour in the recipe for a celiac-friendly version.
For those focused on heart health, the dark chocolate in this dessert contains flavonoids that support circulation. You can also explore our guide to healthy baking swaps to tweak the recipe for lower sugar or higher protein. And if you love balancing treats with nutritious meals, check out our meal-prep dessert ideas to keep portions in check. With smart choices, Decadent Choco Swiss Roll Delight becomes a guilt-free pleasure.
A rich and indulgent chocolate Swiss roll with a creamy filling, perfect for any dessert lover.
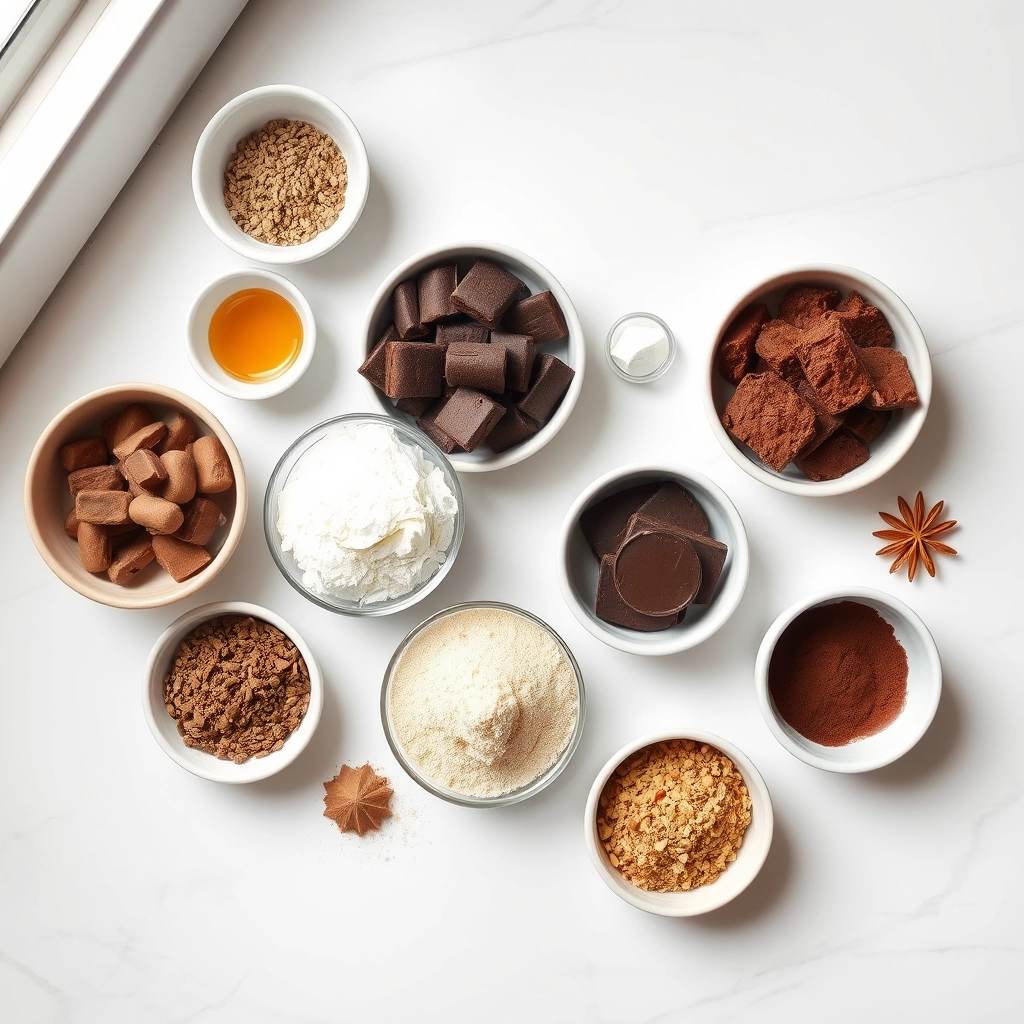
Ingredients
Scale
For the Crust:
4 large eggs
3/4 cup granulated sugar
1 teaspoon vanilla extract
1/2 cup all-purpose flour
1/4 cup cocoa powder
1 teaspoon baking powder
1/4 teaspoon salt
1 cup heavy whipping cream
2 tablespoons powdered sugar
1/2 teaspoon vanilla extract
1/4 cup chocolate shavings (for garnish)
Instructions
1. Prepare the Crust:
Preheat oven to 350°F (175°C). Line a 15×10-inch jelly roll pan with parchment paper.
In a large bowl, beat eggs, granulated sugar, and vanilla extract until thick and pale.
Sift in flour, cocoa powder, baking powder, and salt. Gently fold until combined.
Pour batter into prepared pan, spreading evenly. Bake for 12-15 minutes or until cake springs back when touched.
Immediately invert cake onto a clean kitchen towel dusted with powdered sugar. Carefully peel off parchment paper.
Roll cake and towel together from the short end. Let cool completely on a wire rack.
In a separate bowl, whip heavy cream, powdered sugar, and vanilla extract until stiff peaks form.
Unroll cake gently, spread whipped cream evenly, then re-roll without the towel. Chill for at least 1 hour before serving.
Garnish with chocolate shavings before serving.
Notes
You can customize the seasonings to taste.
s-dish">How to Prepare This Dish
Steps and time-saving tips
Start by preheating your oven to 350°F and lining a jelly roll pan with parchment paper. Lightly grease the paper to ensure your Decadent Choco Swiss Roll Delight releases easily later. In a large bowl, whisk together eggs and sugar until fluffy and pale, about 5 minutes. Gradually sift in flour, cocoa powder, and baking powder, then gently fold the dry ingredients into the egg mixture to keep the batter airy. Spread the batter evenly in the pan and bake for 10-12 minutes until the cake springs back when touched. Meanwhile, dust a clean kitchen towel with powdered sugar. As soon as the cake comes out, invert it onto the towel, peel off the parchment, and roll it up while warm. Let it cool completely this way to set its shape. For the filling, whip heavy cream with powdered sugar and vanilla until stiff peaks form. Unroll the cooled cake, spread the cream evenly, then roll it back up without the towel. Chill for at least an hour before slicing. To save time, prep the filling while the cake bakes or use store-bought whipped cream in a pinch.
Mistakes I’ve made and learned from
My first attempt at Decadent Choco Swiss Roll Delight ended in cracks because I overbaked the cake. Now I set a timer for 10 minutes and check early—it’s better slightly underdone than dry. Another blunder was rushing the rolling step; skipping the warm roll-up led to a messy, uneven spiral. Patience pays off here! If your cake does crack, don’t panic. A thick layer of filling can hide minor flaws, or repurpose it as a trifle like I did once. For more troubleshooting, check out my guide on fixing cracked cakes. Also, if you’re new to baking rolls, my Swiss roll basics post breaks down the technique with visuals. Trust me, even imperfect rolls taste heavenly!
n-and-variations">Cultural Connection and Variations
Where this recipe comes from
The Decadent Choco Swiss Roll Delight traces its roots to European patisserie traditions, where bakers perfected the art of light sponge cakes filled with rich creams. Originally inspired by the Swiss roll, this dessert gained global fame as home cooks added their own twists. In some regions, bakers fold in espresso or citrus zest for a bold contrast, while others layer it with fresh berries for a fruity touch. My grandmother, for instance, always dusted hers with cocoa powder and served it with a dollop of whipped cream, turning it into a weekend treat.
Across Asia, bakers often infuse the Decadent Choco Swiss Roll Delight with matcha or red bean paste, blending local flavors with the classic technique. Meanwhile, in Latin America, you might find it drizzled with dulce de leche or sprinkled with crushed nuts. No matter where it’s made, this dessert carries a sense of celebration—whether it’s a holiday centerpiece or a simple afternoon indulgence. The versatility of the recipe ensures it never feels out of place, no matter whose kitchen it graces.
How it fits in today’s cooking
Today, the Decadent Choco Swiss Roll Delight remains a beloved staple for bakers who crave nostalgia with a modern twist. Many home cooks now swap traditional fillings for vegan whipped cream or gluten-free flour, proving how adaptable this dessert can be. It’s a star at holiday gatherings, but it also fits seamlessly into weekday baking routines, especially when you need a quick yet impressive treat. For those who love experimenting, pairing it with a salted caramel frosting can elevate the flavor even further.
Social media has also g
iven this classic a fresh life, with bakers sharing their creative riffs—like adding crushed cookies or turning it into a layered ice cream cake. Whether you stick to tradition or reinvent it, the Decadent Choco Swiss Roll Delight continues to bring people together, one delicious slice at a time.
Taste and Texture
What makes it delicious
The Decadent Choco Swiss Roll Delight is a symphony of rich, velvety flavors and irresistible textures. Each bite delivers a luscious chocolate sponge that melts in your mouth, paired with a silky-smooth cocoa-infused cream filling. The cake itself is light yet moist, while the filling adds a cool, creamy contrast. A hint of vanilla enhances the deep chocolate notes, making every slice fragrant and indulgent. Whether you savor it chilled or at room temperature, the Decadent Choco Swiss Roll Delight leaves a lingering sweetness with just the right balance of richness.
Boosting the flavor
Elevate your Decadent Choco Swiss Roll Delight with a few creative tweaks. For a nutty crunch, sprinkle chopped toasted hazelnuts over the top or fold them into the filling. If you love fruity contrasts, drizzle a tart raspberry coulis on the plate before serving. For an extra layer of warmth, dust the roll with cinnamon or a pinch of espresso powder to intensify the chocolate flavor. Craving more inspiration? Explore our guide to perfect chocolate pairings or try a dollop of homemade whipped cream for an airy finish. Small changes make a big difference!
Always preheat your oven before baking the Decadent Choco Swiss Roll Delight to ensure even cooking. Use room-temperature eggs for a lighter, fluffier sponge, and gently fold the dry ingredients to maintain airiness. Spread the batter evenly in the pan for consistent thickness, and roll the cake while it’s still warm to prevent cracks. For best results, chill the rolled cake for at least 30 minutes before adding the filling.
Mistakes to avoid
Avoid overbaking the sponge, as it can dry out and crack when rolling. Instead, check for doneness a few minutes early by lightly pressing the center—it should spring back. Another common mistake is skipping the parchment paper, which makes removing the cake much harder. For more troubleshooting, check out our guide on fixing cracked Swiss rolls. Also, don’t rush the chilling step; a firm cake holds its shape better, as explained in our perfect roll techniques post.
g-suggestions">Serving and Pairing Suggestions
How to serve this dish
Slice the Decadent Choco Swiss Roll Delight into elegant spirals for a stunning presentation. For special occasions, dust the top with cocoa powder or powdered sugar to highlight its swirls. Meanwhile, fresh berries or mint leaves add a pop of color that makes it irresistible. Serve it chilled for a firmer texture or at room temperature for a softer bite. Whether you’re hosting a holiday gathering or a casual brunch, this dessert always steals the spotlight.
What goes well with it
Pair the Decadent Choco Swiss Roll Delight with a steaming cup of homemade vanilla latte to balance its rich chocolate flavor. Alternatively, a scoop of salted caramel ice cream creates a delightful contrast of temperatures and textures. For a lighter option, serve it alongside fresh strawberries or a dollop of whipped cream to enhance its decadence without overwhelming the palate.
math-faq-block">
What is the best way to store Decadent Choco Swiss Roll Delight?
To keep your Decadent Choco Swiss Roll Delight fresh, wrap it tightly in plastic wrap or store it in an airtight container at room temperature for up to 2 days. For longer storage, refrigerate it for up to 5 days or freeze for up to a month. Always let it come to room temperature before serving for the best texture.
Can I make Decadent Choco Swiss Roll Delight without eggs?
Yes, you can substitute eggs in Decadent Choco Swiss Roll Delight with alternatives like flax eggs or applesauce for a vegan version. However, the texture may be slightly denser. For best results, use a tested egg-free sponge cake recipe to ensure the roll holds together.
How do I prevent my Decadent Choco Swiss Roll Delight from cracking?
To avoid cracks in your Decadent Choco Swiss Roll Delight, roll the warm cake in a clean kitchen towel dusted with powdered sugar right after baking. This helps it retain flexibility. Also, avoid overbaking—the cake should spring back lightly when touched.
ank-math-faq-item">
What fillings pair well with Decadent Choco Swiss Roll Delight?
Classic pairings for Decadent Choco Swiss Roll Delight include whipped cream, chocolate ganache, or raspberry jam. For a twist, try coffee-flavored buttercream or a Nutella spread. The rich chocolate sponge complements both light and indulgent fillings beautifully.
Ultimate Caramel Apple Cheesecake Cake Recipe
Introduction
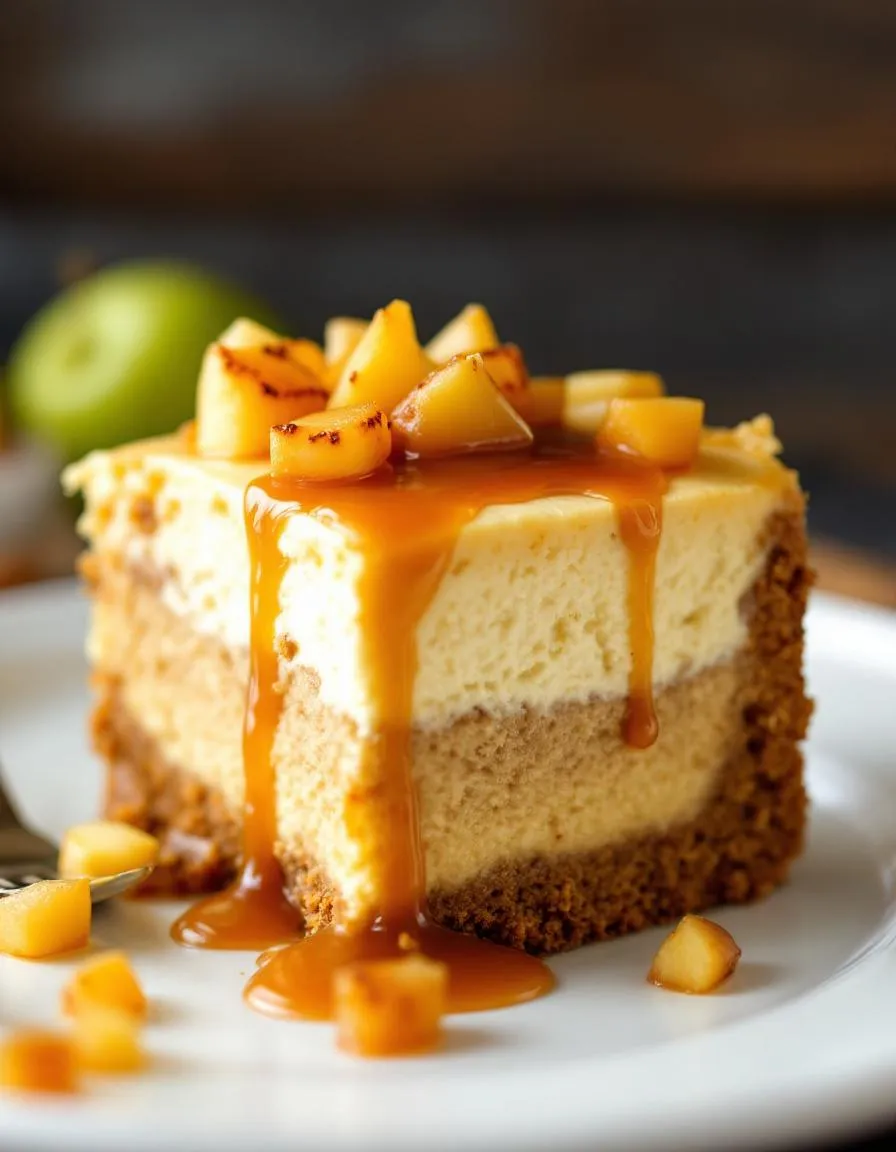
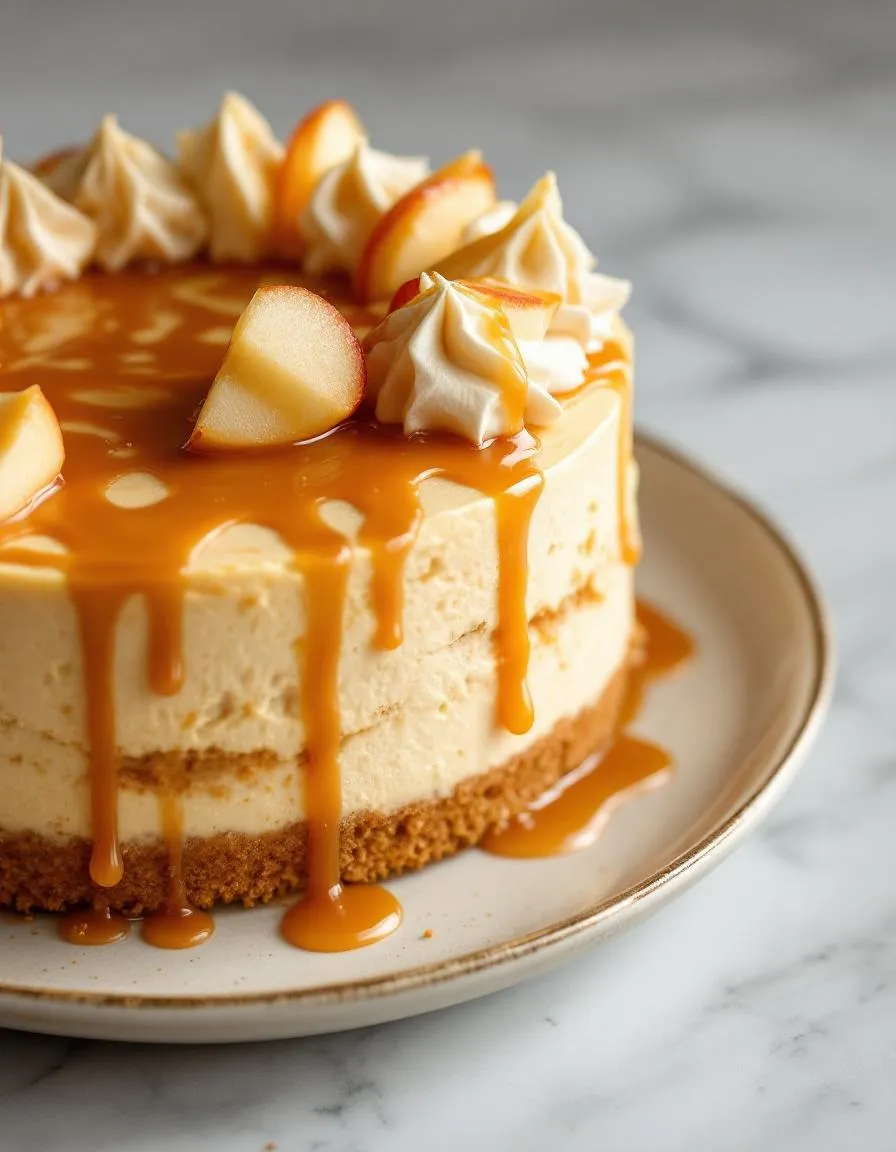
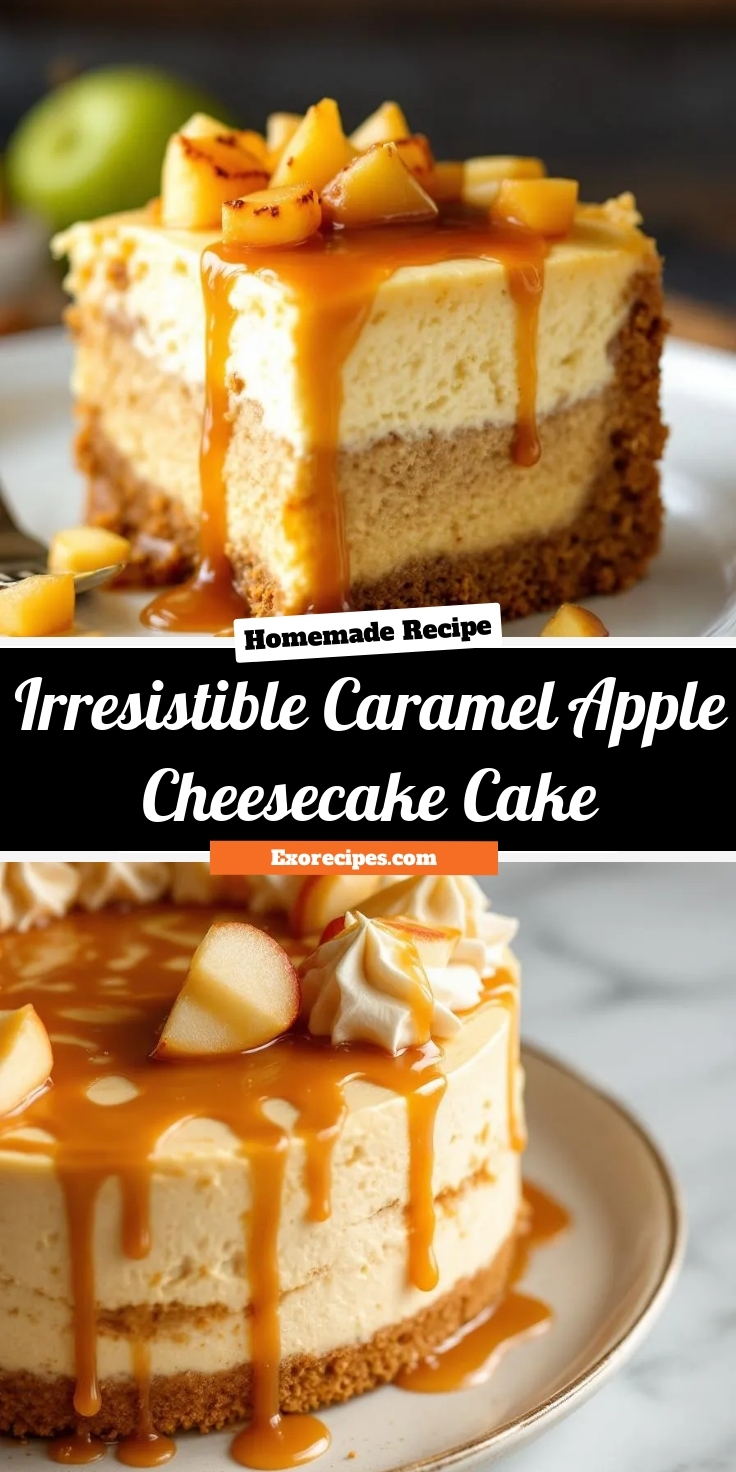
Picture this: a crisp autumn afternoon, the scent of cinnamon and caramel wafting through your kitchen, and a dessert so decadent it feels like a warm hug. That’s exactly what you’ll get with this Irresistible Caramel Apple Cheesecake Cake. Whether you’re celebrating a special occasion or simply treating yourself, this recipe combines the cozy flavors of fall with the creamy richness of cheesecake—all in one showstopping bite. Trust me, your family and friends won’t stop raving about it.
The Irresistible Caramel Apple Cheesecake Cake is a masterpiece of layers. First, a spiced apple cake forms the base, followed by a velvety cheesecake filling, and finally, another layer of moist cake. Topped with a drizzle of homemade caramel and a sprinkle of toasted pecans, every slice delivers the perfect balance of sweetness and warmth. This dessert isn’t just delicious—it’s a conversation starter, ideal for holiday gatherings or weekend baking projects. If you love our Classic New York Cheesecake, you’ll adore this seasonal twist.
What makes this recipe stand out? It’s the way it captures the essence of fall while remaining approachable for home bakers. The caramel adds a luxurious touch, while the apples keep it grounded and comforting. Plus, the cheesecake layer ensures every forkful is rich and satisfying. For more autumn-inspired treats, check out our Spiced Pumpkin Bread, another crowd-pleaser that pairs perfectly with this cake. Whether you’re a seasoned baker or a beginner, this recipe guides you step by step to dessert perfection.
Why I Love This Recipe
This Irresistible Caramel Apple Cheesecake Cake holds a special place in my heart because it reminds me of baking with my grandmother. She taught me how to balance flavors and take my time in the kitchen, and this recipe embodies those lessons. Every time I make it, I remember her laughter and the way she’d sneak an extra spoonful of caramel onto my plate. It’s more than just a dessert—it’s a memory, a tradition, and a little slice of joy I love sharing with others.
Health and Nutrition
Why it’s good for your body
Irresistible Caramel Apple Cheesecake Cake packs more than just incredible flavor. First, apples bring natural sweetness and fiber, which supports digestion and keeps you satisfied longer. Additionally, the creamy cheesecake layer provides a good dose of protein and calcium, helping to maintain strong bones and muscles. While this dessert is indulgent, it also delivers key nutrients that make it a smarter treat.
Moreover, cinnamon—a star ingredient in Irresistible Caramel Apple Cheesecake Cake—boasts antioxidants that may help reduce inflammation. The caramel drizzle, though decadent, uses real butter and sugar, avoiding artificial additives. Finally, when you enjoy this cake in moderation, you get a balanced mix of carbs, fats, and proteins, making it a satisfying dessert that won’t leave you crashing later.
Ultimately, Irresistible Caramel Apple Cheesecake Cake proves that treats can be both delicious and nourishing. By combining wholesome ingredients with mindful portions, you can savor every bite without guilt.
How it fits in a healthy lifestyle
Irresistible Caramel Apple Cheesecake Cake fits perfectly into a balanced diet when enjoyed thoughtfully. For example, pairing a small slice with a protein-rich snack, like Greek yogurt, helps stabilize blood sugar. If you’re watching gluten intake, simply swap the crust for a gluten-free alternative without sacrificing flavor.
This cake also works well for special occasions or as a weekend treat, keeping everyday eating habits flexible. For those focused on heart health, using reduced-fat cream cheese lightens the dish while maintaining creaminess. Want more ways to enjoy desserts mindfully? Check out our guide on smart dessert swaps to keep your goals on track. With a little planning, Irresistible Caramel Apple Cheesecake Cake becomes a delightful part of your wellness journey.
A decadent layered dessert combining the flavors of caramel, apple, and cheesecake in one stunning cake.
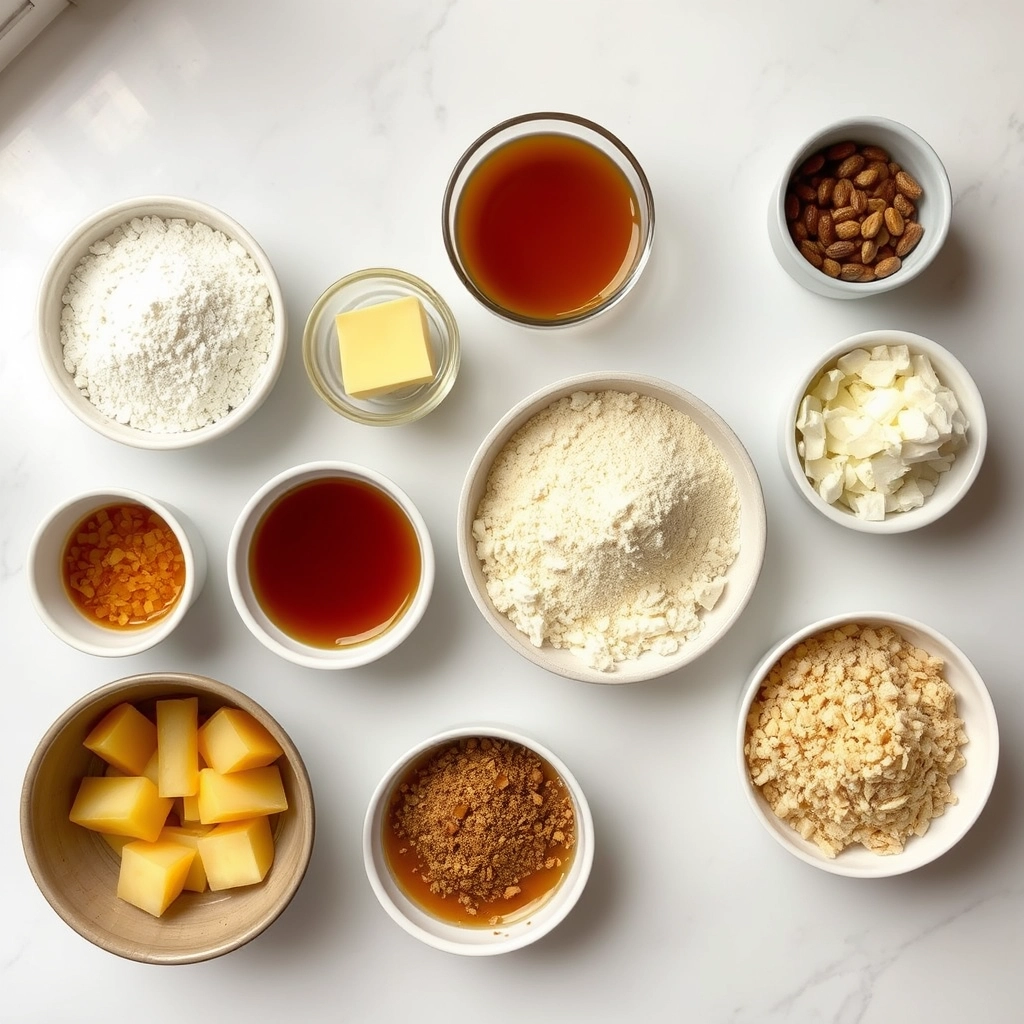
Ingredients
Scale
For the Crust:
2 cups all-purpose flour
1 1/2 cups granulated sugar
1/2 cup unsalted butter, softened
3 large eggs
1 tsp vanilla extract
1 tsp baking powder
1/2 tsp salt
1 cup milk
16 oz cream cheese, softened
1/2 cup brown sugar
2 medium apples, peeled and diced
1/2 cup caramel sauce
1 tsp cinnamon
Instructions
1. Prepare the Crust:
Preheat oven to 350°F (175°C). Grease and flour two 9-inch round cake pans.
In a large bowl, cream together butter and granulated sugar. Add eggs one at a time, then stir in vanilla.
Combine flour, baking powder, and salt in separate bowl. Alternate adding dry ingredients and milk to butter mixture.
Divide batter evenly between prepared pans. Bake for 25-30 minutes until golden. Cool completely.
Beat cream cheese and brown sugar until smooth. Fold in diced apples and cinnamon.
Assemble cake by spreading cheesecake mixture between layers. Drizzle with caramel sauce before serving.
Notes
You can customize the seasonings to taste.
How to Prepare This Dish
Steps and time-saving tips
Start by preheating your oven to 325°F and greasing a 9-inch springform pan. For the crust, mix crushed graham crackers with melted butter and press the mixture firmly into the pan. Bake it for 10 minutes to set, then let it cool slightly. Meanwhile, beat cream cheese, sugar, and vanilla until smooth, then whisk in eggs one at a time. Fold in diced apples and pour the batter over the crust. Bake for 45-50 minutes until the center barely jiggles. While the cheesecake cools, prepare the caramel drizzle by warming store-bought caramel with a splash of heavy cream for a silky texture. Once the cheesecake chills for at least 4 hours, layer it with spiced apple cake and frost with whipped cream. Drizzle caramel generously over the top just before serving. To save time, bake the cheesecake a day ahead and store it covered in the fridge. For even layers, use a serrated knife to slice the cake cleanly.
and-learned-from">Mistakes I’ve made and learned from
My first attempt at this Irresistible Caramel Apple Cheesecake Cake ended with a cracked cheesecake because I overbaked it. Now, I pull it from the oven when the edges are set but the center still wobbles slightly—it firms up as it chills. Another blunder? Skipping the apple-draining step, which made the filling watery. After learning from my common cheesecake mistakes, I pat the diced apples dry before folding them in. Also, rushing the caramel drizzle led to clumps; gently warming it with cream ensures a smooth finish. If you’re new to layered desserts, my layering cakes guide breaks down the process without stress. Trust me, patience pays off with this showstopper!
Cultural Connection and Variations
Where this recipe comes from
The Irresistible Caramel Apple Cheesecake Cake blends two beloved desserts into one showstopping treat, and its roots stretch across cultures. Cheesecake traces back to ancient Greece, while caramel apples became a fall favorite in America during the early 1900s. Combining them? That’s pure modern indulgence. In Germany, bakers might layer quark instead of cream cheese for a tangier twist. Meanwhile, in the American South, home cooks often add pecans for extra crunch.
Seasonally, this cake s
hines brightest in autumn when apples hit their peak. Families gather around it during Thanksgiving or Halloween, but my grandma always made hers with extra cinnamon for Christmas. Some bakers even swap the caramel for salted butterscotch or drizzle it with chocolate. No matter the variation, the Irresistible Caramel Apple Cheesecake Cake always feels like a hug in dessert form.
How it fits in today’s cooking
Today, this cake bridges nostalgia and innovation. Busy bakers streamline it with no-bake cheesecake layers, while food bloggers spotlight gluten-free crusts. It’s a star at potlucks, but also fits cozy weeknights when you crave something decadent. Thanks to its versatility, the Irresistible Caramel Apple Cheesecake Cake adapts to dietary trends without losing its charm.
Modern twists include using honeycrisp apples for sweetness or layering it into individual mason jars for parties. Whether you stick to tradition or experiment, this dessert proves some flavors never go out of style. After all, who can resist caramel, apples, and cheesecake in one bite?
>Taste and Texture
What makes it delicious
Irresistible Caramel Apple Cheesecake Cake delivers a symphony of flavors and textures in every bite. First, the spiced apple filling bursts with warm cinnamon and tender, slightly tart apples, while the velvety cheesecake layer adds a rich, creamy contrast. Meanwhile, the buttery cake base soaks up the gooey caramel drizzle, creating a melt-in-your-mouth experience. Each forkful balances sweet, tangy, and fragrant notes, with a hint of toasty caramel aroma that lingers. The crunch of toasted pecans on top? That’s the irresistible finishing touch.
Boosting the flavor
For an extra flavor kick, try swapping the caramel sauce with salted caramel to heighten the sweet-savory contrast. Alternatively, fold a pinch of nutmeg into the apple filling for deeper warmth. A dollop of vanilla whipped cream on the side adds lightness, while a sprinkle of sea salt amplifies the caramel’s richness. No matter how you tweak it, Irresistible Caramel Apple Cheesecake Cake stays a showstopper.
Tips for Success
Best practices for results
Always bring cream cheese to room temperature before mixing to ensure a smooth, lump-free batter for your Irresistible Caramel Apple Cheesecake Cake. Meanwhile, use fresh, crisp apples for the best texture, and slice them evenly so they bake uniformly. For a flawless presentation, drizzle caramel sauce while the cake is slightly warm so it sets without running. Additionally, chill the cake for at least two hours before serving to let the flavors meld perfectly.
Mistakes to avoid
Avoid overmixing the cheesecake batter, as this can incorporate too much air and cause cracks during baking. Instead, mix just until the ingredients combine smoothly. Also, don’t skip lining your pan with parchment paper—this ensures easy removal and prevents sticking. For more baking essentials, check out our guide on essential baking tools. Finally, resist slicing the Irresistible Caramel Apple Cheesecake Cake too soon; letting it cool completely prevents a crumbly mess. Need help troubleshooting? Our common baking mistakes post has extra solutions.
Serving and Pairing Suggestions
How to serve this dish
For a showstopping presentation, slice your Irresistible Caramel Apple Cheesecake Cake into generous wedges and drizzle extra caramel sauce on each plate before plating. Meanwhile, a sprinkle of chopped pecans or a dusting of cinnamon adds texture and warmth. Alternatively, serve it family-style on a cake stand for holiday gatherings or potlucks, letting guests admire its layers before digging in. Since this dessert shines year-round, pair it with a scoop of vanilla ice cream for summer barbecues or warm apple cider during cozy fall evenings.
h-it">What goes well with it
A hot cup of spiced chai tea balances the richness of Irresistible Caramel Apple Cheesecake Cake, enhancing its warm cinnamon notes. For a refreshing contrast, try our Homemade Vanilla Iced Coffee, whose creamy sweetness mirrors the caramel swirls. If you’re hosting a brunch, serve it alongside our Cinnamon Roll Muffins for a playful twist on apple-cinnamon flavors. Finally, a dollop of whipped cream or a side of salted caramel sauce lets guests customize each bite.
What makes Irresistible Caramel Apple Cheesecake Cake so special?
Irresistible Caramel Apple Cheesecake Cake combines three beloved desserts—cheesecake, apple cake, and caramel drizzle—into one showstopping treat. The layers of spiced apple cake, creamy cheesecake, and gooey caramel create a perfect balance of flavors and textures that keep people coming back for more.
ank-math-faq-item">
Can I make Irresistible Caramel Apple Cheesecake Cake ahead of time?
Yes! This dessert actually tastes better when made a day ahead, as the flavors meld together beautifully. Just store your Irresistible Caramel Apple Cheesecake Cake in the refrigerator and add the caramel drizzle right before serving for the freshest presentation.
What type of apples work best for Irresistible Caramel Apple Cheesecake Cake?
Firm, tart apples like Granny Smith or Honeycrisp work perfectly in Irresistible Caramel Apple Cheesecake Cake because they hold their shape during baking. Their natural acidity also balances the sweetness of the caramel and cheesecake layers beautifully.
How do you prevent the cheesecake layer from cracking in Irresistible Caramel Apple Cheesecake Cake?
To prevent cracks in your Irresistible Caramel Apple Cheesecake Cake, bake the cheesecake layer in a water bath and let it cool gradually in the oven with the door slightly ajar. The apple cake layer on top will also help hide any minor imperfections.
div>
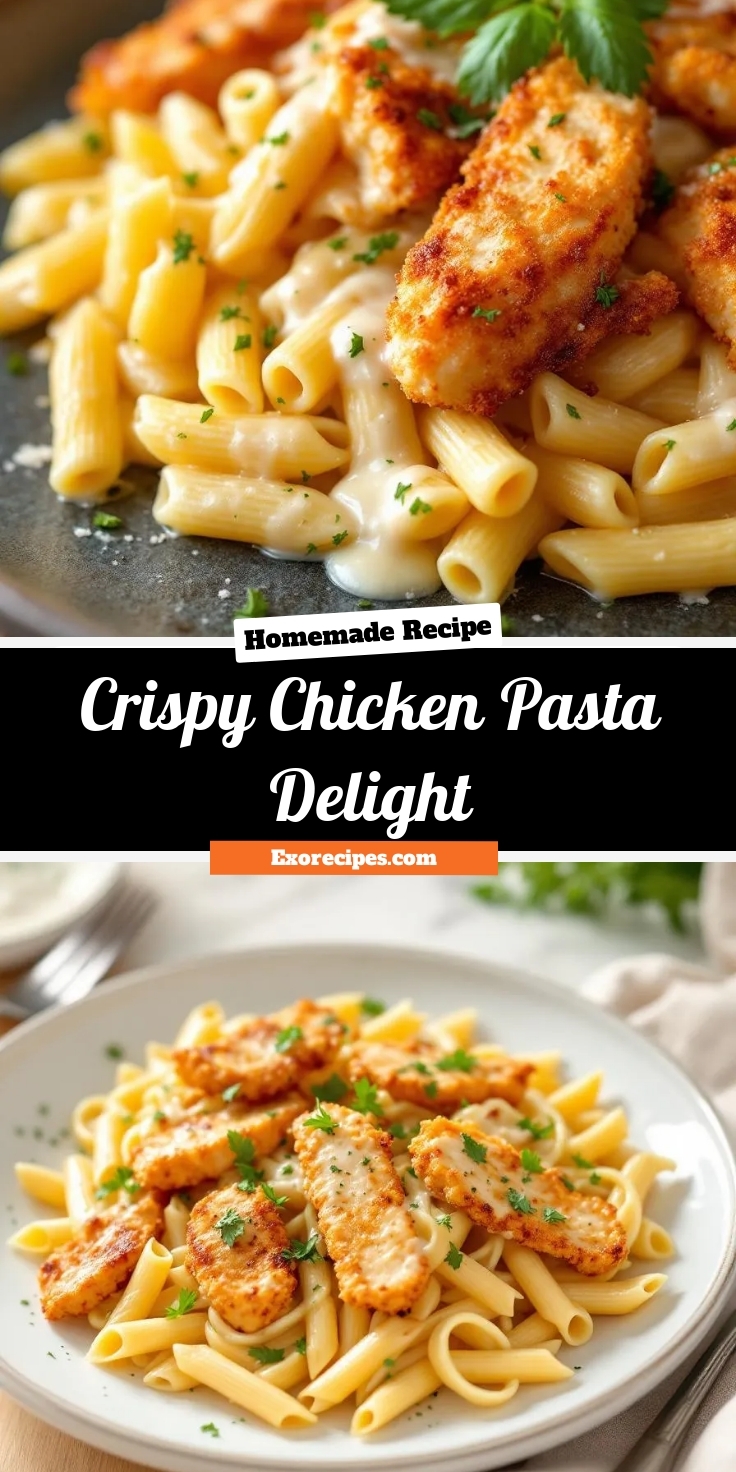
Best Crispy Chicken Pasta Delight Recipe
Introduction
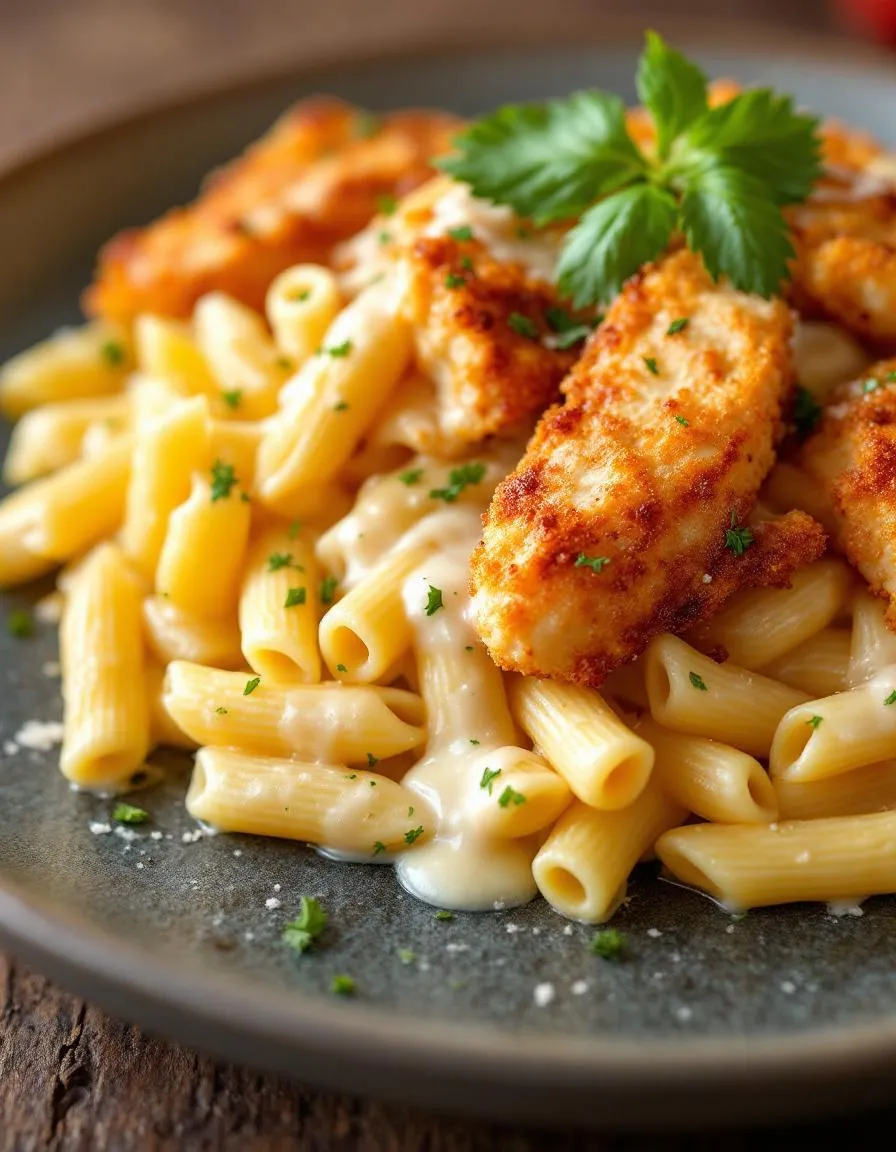
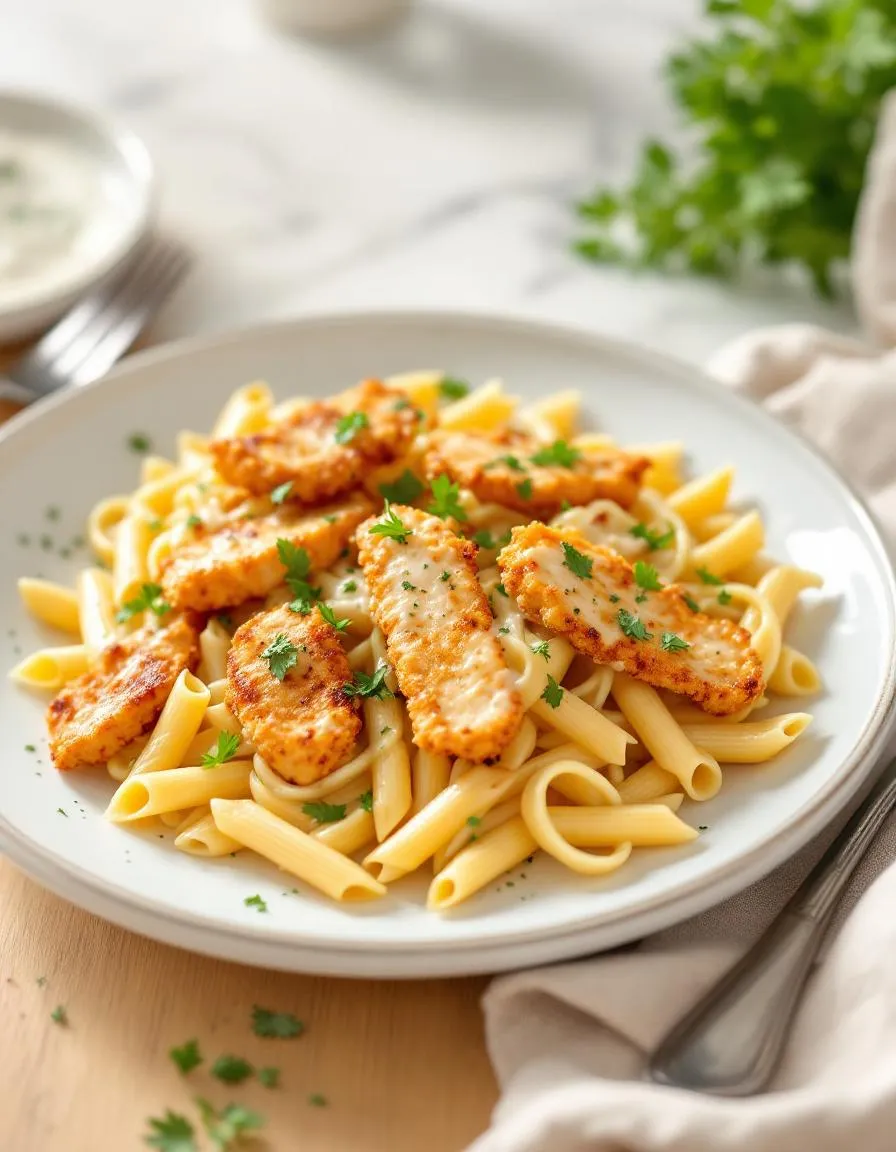
There’s something magical about the combination of crispy chicken and tender pasta that makes every bite feel like a celebration. Whether you’re craving comfort food after a long day or need a crowd-pleasing dish for family dinner, this Crispy Chicken Pasta Delight delivers on every level. It’s the kind of meal that brings people together, filling your kitchen with irresistible aromas and your table with happy faces. Best of all, it’s easier to make than you might think, proving that delicious doesn’t have to mean complicated.
Crispy Chicken Pasta Delight is a hearty, flavor-packed dish that balances golden, crunchy chicken with al dente pasta tossed in a creamy, savory sauce. What sets it apart is the contrast of textures—each forkful offers a satisfying crunch followed by the smooth richness of the sauce. This recipe matters because it solves the eternal question of what to cook when you want something indulgent yet approachable. It fits perfectly with our blog’s mission to share recipes that are both impressive and practical, like our Garlic Butter Shrimp Pasta or Creamy Tuscan Chicken. Whether you’re cooking for a weeknight meal or a weekend gathering, Crispy Chicken Pasta Delight adapts effortlessly to any occasion.
Why I Love This Recipe
This recipe holds a special place in my heart because it reminds me of Sunday dinners growing up. My mom would fry chicken to perfection while I stirred the pasta, and the whole house smelled like home. Now, whenever I make Crispy Chicken Pasta Delight, it’s not just about the flavors—it’s about the memories. Plus, the recipe never fails to impress, whether I’m serving it to friends or enjoying it as a solo treat. It’s the ultimate comfort food with a crispy twist, and that’s why I keep coming back to it.
Health and Nutrition
Why it’s good for your body
Crispy Chicken Pasta Delight packs a nutritious punch while satisfying your cravings. First, the lean chicken provides high-quality protein, which helps build and repair muscles. Additionally, the dish includes whole-grain pasta, offering fiber to support digestion and keep you full longer. Moreover, the blend of fresh vegetables adds essential vitamins like vitamin C and antioxidants to boost immunity.
Another benefit of Crispy Chicken Pasta Delight is its balanced macronutrient profile. The combination of protein, complex carbs, and healthy fats ensures steady energy levels. For instance, olive oil in the recipe contributes heart-healthy monounsaturated fats. Furthermore, the crispy texture comes from baking instead of deep-frying, reducing unnecessary calories while keeping flavor intact.
Finally, this dish adapts easily to dietary preferences. You can customize Crispy Chicken Pasta Delight with gluten-free pasta or extra veggies for added nutrients. Whether you need a post-workout meal or a family-friendly dinner, it delivers both taste and nourishment without compromise.
How it fits in a healthy lifestyle
Crispy Chicken Pasta Delight fits seamlessly into a balanced diet. If you focus on high-protein meals, the chicken and whole grains help meet your goals. For those watching carbs, swapping in zucchini noodles or chickpea pasta keeps it light. Pair it with a side salad from our easy salad recipes for extra greens.
This dish also works well for meal prep, saving time during busy weeks. You can store leftovers for quick lunches without sacrificing nutrition. Plus, it aligns with heart-healthy eating when you use minimal oil and load up on veggies. For more ideas on balancing indulgences, check out our healthy eating tips. Crispy Chicken Pasta Delight proves that wholesome food can still be delicious and convenient.
A delicious pasta dish featuring crispy chicken and a creamy sauce.
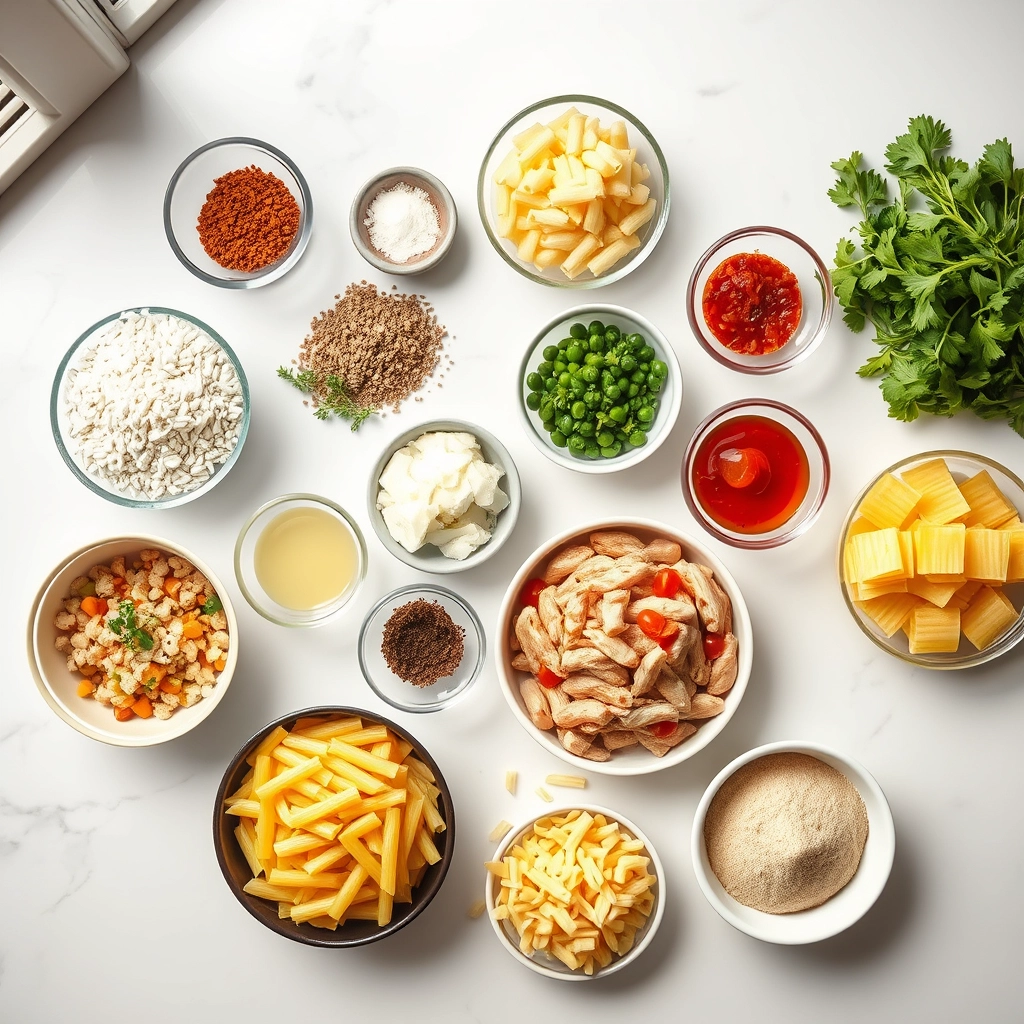
Ingredients
Scale
For the Crust:
2 boneless, skinless chicken breasts
8 oz penne pasta
1 cup heavy cream
1/2 cup grated parmesan cheese
2 cloves garlic, minced
1 tsp Italian seasoning
2 tbsp olive oil
Salt and pepper to taste
Instructions
1. Prepare the Crust:
Cook pasta according to package instructions. Drain and set aside.
Season chicken with salt, pepper, and Italian seasoning. Heat olive oil in a pan and cook chicken until golden and crispy, about 6-7 minutes per side. Slice into strips.
In the same pan, sauté garlic until fragrant. Add heavy cream and parmesan, stirring until sauce thickens.
Toss cooked pasta and chicken with the sauce. Serve hot.
Notes
You can customize the seasonings to taste.
s-dish">How to Prepare This Dish
Steps and time-saving tips
First, preheat your oven to 375°F to save time later. While it heats, season your chicken breasts with salt, pepper, and a pinch of garlic powder for extra flavor. Next, heat olive oil in a skillet over medium-high heat and cook the chicken until golden and crispy, about 6 minutes per side. Remove the chicken and let it rest before slicing it into strips. Meanwhile, boil your pasta in salted water until al dente, then drain and set aside. In the same skillet, sauté minced garlic and diced onions until fragrant, then stir in heavy cream, grated Parmesan, and a splash of chicken broth to create a rich sauce. Toss the cooked pasta into the sauce, mixing well to coat every strand. Finally, layer the crispy chicken strips on top and bake everything for 10 minutes to meld the flavors. For a time-saving shortcut, use rotisserie chicken or prep your ingredients the night before.
Mistakes I’ve made and learned from
I once rushed the sauce and ended up with a grainy texture because I didn’t let the cheese melt slowly. Now, I whisk the Parmesan into warm cream off the heat to avoid clumping. Another time, I overcooked the pasta, turning my Crispy Chicken Pasta Delight into a mushy mess. To fix this, I set a timer for 1 minute less than the package instructions and taste-test. If you’re new to balancing creamy sauces, check out my guide to perfect pasta sauces for foolproof tips. Also, if your chicken isn’t crispy enough, pat it dry before seasoning—moisture is the enemy of crunch! For more on getting that golden finish, my crispy chicken secrets post breaks it down step by step.
n-and-variations">Cultural Connection and Variations
Where this recipe comes from
Crispy Chicken Pasta Delight feels like a warm hug from the kitchen, blending comfort and crunch in every bite. While its exact origins are hard to pin down, the dish draws inspiration from Italian-American cuisine, where crispy fried chicken meets al dente pasta in a creamy, savory sauce. In the South, you might find a version with buttermilk-brined chicken and a kick of cayenne, while in the Midwest, home cooks often swap in cheddar cheese for extra richness.
Across the globe, variations pop up in unexpected places. In Japan, for example, chefs might top the dish with panko-breaded chicken for an extra-crispy texture, or in Mexico, a sprinkle of cotija cheese and chili powder adds a bold twist. My family’s version of Crispy Chicken Pasta Delight always includes a dash of smoked paprika, a nod to my grandmother’s Hungarian roots. No matter where it’s made, though, the dish brings people together—whether it’s a weeknight dinner or a festive gathering.
How it fits in today’s cooking
Today, Crispy Chicken Pasta Delight remains a go-to for busy cooks and comfort-food lovers alike. Its versatility makes it perfect for meal prep, and many modern twists keep it fresh—think air-fried chicken or gluten-free pasta swaps. During the holidays, it’s a crowd-pleaser at potlucks, especially when paired with sides like garlic parmesan roasted potatoes.
Health-conscious cooks
also lighten it up with Greek yogurt instead of heavy cream, proving the dish can adapt to any lifestyle. And let’s not forget its role in weeknight rotations—when time is tight, a one-pan version with pre-cooked chicken saves the day. For dessert, try serving it with easy chocolate lava cakes to round out the meal. Crispy Chicken Pasta Delight isn’t just a recipe—it’s a timeless tradition that keeps evolving.
Taste and Texture
What makes it delicious
Crispy Chicken Pasta Delight delivers a mouthwatering mix of textures and flavors in every bite. The golden, crunchy chicken contrasts perfectly with tender pasta, while a velvety sauce ties everything together. Garlic and herbs add a fragrant depth, and a hint of Parmesan brings a salty, umami richness. Juicy cherry tomatoes burst with brightness, balancing the dish’s creamy richness. Whether you savor the crispiness of the chicken or the smoothness of the sauce, Crispy Chicken Pasta Delight keeps your taste buds engaged from start to finish.
Boosting the flavor
For an extra flavor kick, try swapping regular pasta for garlic-infused noodles or adding a sprinkle of chili flakes for heat. A drizzle of homemade pesto brightens the dish, while crispy bacon bits add a smoky crunch. If you love bold flavors, mix in sun-dried tomatoes or top with a creamy garlic aioli. Experiment with fresh herbs like basil or thyme to elevate the aroma. With these tweaks, Crispy Chicken Pasta Delight becomes even more irresistible.
First, always pat the chicken dry before seasoning to ensure maximum crispiness in your Crispy Chicken Pasta Delight. Next, use freshly grated Parmesan instead of pre-shredded for a smoother, richer sauce. Meanwhile, cook the pasta al dente since it will continue softening when mixed with the sauce. Additionally, let the chicken rest for 5 minutes after frying to lock in juices before slicing. Finally, toss everything together while the sauce is hot for the best flavor distribution.
Mistakes to avoid
Overcrowding the pan when frying the chicken prevents even browning, so cook in batches if needed. Similarly, skipping the pasta water reserve makes the sauce too thick—save at least 1/2 cup for perfect consistency. For more on balancing textures, check out our guide on achieving pasta perfection. Also, avoid overcooking the garlic, which turns bitter; add it late in the process for gentle flavor. If you struggle with timing, our kitchen timer tips can help streamline prep.
g-suggestions">Serving and Pairing Suggestions
How to serve this dish
For a stunning presentation, serve Crispy Chicken Pasta Delight in wide, shallow bowls to showcase its golden crust and creamy sauce. Top it with fresh parsley or basil for a pop of color, and add a sprinkle of grated Parmesan for extra richness. Meanwhile, if you’re hosting a dinner party, pair it with warm breadsticks or a side salad to round out the meal. Alternatively, this dish shines at casual gatherings, where its comforting flavors make it a crowd-pleaser. Whether you’re serving it for a cozy family dinner or a festive occasion, Crispy Chicken Pasta Delight always delivers.
What goes well with it
First, a crisp white wine like Pinot Grigio balances the richness of Crispy Chicken Pasta Delight beautifully. The bright acidity cuts through the creamy sauce, enhancing every bite. Next, try pairing it with a simple garlic bread or our Garlic Herb Focaccia for a satisfying crunch. Finally, a light, refreshing salad like our Lemon Avocado Salad adds a zesty contrast to the dish. Together, these pairings elevate the meal into a memorable dining experience.
math-faq-block">
What makes Crispy Chicken Pasta Delight different from regular chicken pasta?
Crispy Chicken Pasta Delight stands out because it features golden, crunchy chicken pieces paired with perfectly cooked pasta, creating a satisfying texture contrast. The dish often includes a creamy sauce and fresh herbs, elevating it beyond basic chicken pasta recipes.
Can I make Crispy Chicken Pasta Delight ahead of time?
While you can prep ingredients in advance, Crispy Chicken Pasta Delight tastes best when served fresh to maintain the chicken’s crunchiness. If storing leftovers, reheat in the oven to help revive the crispy texture.
What type of pasta works best for Crispy Chicken Pasta Delight?
Short pasta shapes like penne, farfalle, or rigatoni work best for Crispy Chicken Pasta Delight because they hold the sauce well and complement the chicken pieces. Avoid overly delicate pasta that might get lost among the crispy chicken.
ank-math-faq-item">
How do I keep the chicken crispy in Crispy Chicken Pasta Delight?
To maintain maximum crispiness in your Crispy Chicken Pasta Delight, cook the chicken separately and add it just before serving. Use a light breading and fry or bake at high heat until golden brown for the best results.