Do you ever feel stuck in a boring dinner routine, desperately craving something that feels both gourmet and guilt-free? I know that struggle all too well, which is why I get so excited to share these incredible Zucchini Chicken Rolls. They transform simple ingredients into an elegant, satisfying meal that will absolutely wow your family and reignite your passion for cooking. Best of all, they prove that healthy eating never has to mean sacrificing flavor or fun in the kitchen.
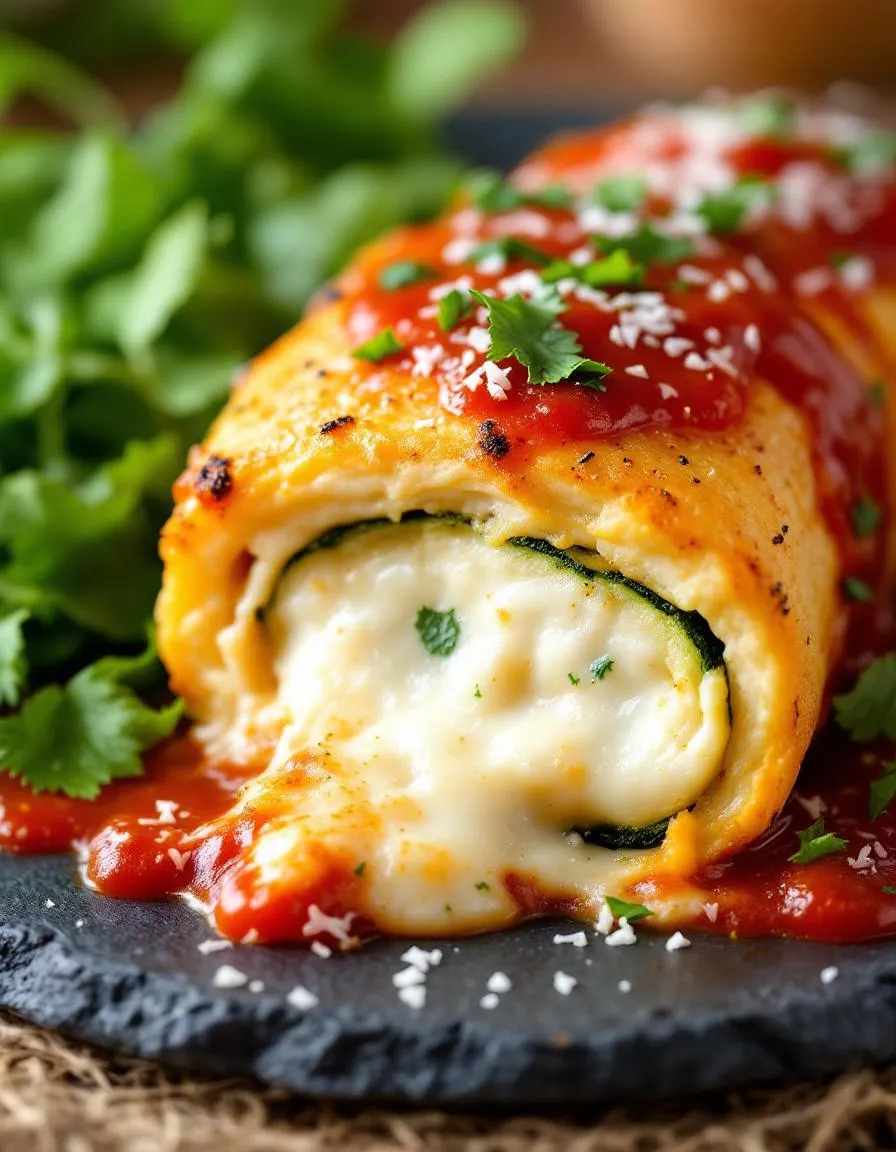
So what exactly are Zucchini Chicken Rolls? Essentially, we take thin slices of fresh zucchini and roll them around a savory, herby filling of ground chicken, Parmesan cheese, and sun-dried tomatoes. We then bake them until the zucchini becomes tender and the filling cooks through, resulting in a beautiful, flavorful roll. This dish matters because it offers a brilliant solution for anyone seeking a low-carb, high-protein meal that doesn’t compromise on taste or presentation. It fits our blog’s tone perfectly as we focus on creative, approachable recipes that make healthy living enjoyable and sustainable. Furthermore, this method of using zucchini as a wrap is a fantastic kitchen skill that opens doors to so many other culinary creations. You can easily adapt the filling to use whatever ingredients you have on hand, making it a versatile staple for your weekly meal plan. If you enjoy this style of cooking, you might also love our approach to creating a perfect Grilled Chicken Caprese Salad for another light yet fulfilling option. For a different take on using ground meat in a clever way, our Turkey Stuffed Bell Peppers are always a huge hit. This recipe truly delivers a restaurant-quality experience right from your own oven.
Why I Love This Recipe
This recipe holds a special place in my heart because it was my go-to dish when I first started my journey towards healthier eating. I needed food that felt like a treat but still aligned with my goals, and these rolls were the perfect answer. I love how the process of carefully rolling each one feels meditative and creative, and the final result never fails to impress guests. Most importantly, it reminds me that taking care of myself can and should be a delicious adventure.
Health and Nutrition
Why it’s good for your body
Zucchini Chicken Rolls deliver a powerful nutritional punch in every delicious bite. For starters, zucchini provides a fantastic source of vitamins A and C, which actively support your immune system and promote healthy skin. Furthermore, this vegetable contributes a healthy dose of dietary fiber, which aids in digestion and helps you feel full and satisfied.
Meanwhile, the lean chicken breast serves as an excellent source of high-quality protein. Consequently, this protein helps build and repair muscle tissue, making it a fantastic choice for post-workout recovery. Additionally, this macronutrient is a key player in keeping you energized and satiated for hours, which can help prevent unnecessary snacking.
Moreover, when you prepare Zucchini Chicken Rolls, you create a meal that is naturally low in carbohydrates and sugars. The combination of lean protein and fibrous vegetables offers a steady release of energy without the common crash associated with heavier meals. Ultimately, Zucchini Chicken Rolls provide a well-rounded profile of essential nutrients that your body will truly thank you for.
How it fits in a healthy lifestyle
Zucchini Chicken Rolls seamlessly fit into various healthy eating plans. If you follow a gluten-free diet, you can rest easy knowing this dish is naturally free from gluten-containing ingredients. It also aligns perfectly with high-protein and low-carb goals, supporting muscle maintenance and healthy weight management.
This recipe encourages practical, wholesome eating habits. You can easily prepare a batch of Zucchini Chicken Rolls ahead of time for a quick, nutrient-dense lunch that keeps you on track. For more inspiration on building balanced meals, explore our guide on easy meal prep ideas. Pairing these rolls with a simple side salad creates a complete, satisfying dinner that feels gourmet without any guilt. Finding dishes that are both delicious and supportive of your wellness journey is key, and our collection of healthy dinner recipes offers plenty of options to keep your menu exciting and diverse.
Tender chicken breasts rolled with seasoned zucchini and cheese, baked to perfection for a healthy and flavorful meal.
Ingredients
Scale
For the Crust:
2 large chicken breasts, pounded thin
1 medium zucchini, grated
1/2 cup shredded mozzarella cheese
1/4 cup grated Parmesan cheese
1 tsp Italian seasoning
1/2 tsp garlic powder
Salt and pepper to taste
2 tbsp olive oil
1/2 cup marinara sauce (optional for serving)
Instructions
1. Prepare the Crust:
Preheat oven to 375°F (190°C). Lightly grease a baking dish.
In a bowl, mix grated zucchini, mozzarella, Parmesan, Italian seasoning, garlic powder, salt, and pepper.
Lay pounded chicken breasts flat. Divide zucchini mixture evenly and spread over each chicken breast.
Roll up each chicken breast tightly and secure with toothpicks. Place seam-side down in baking dish.
Drizzle olive oil over rolls. Bake for 25-30 minutes or until chicken is cooked through.
Let rest for 5 minutes, remove toothpicks, and serve with marinara sauce if desired.
Notes
You can customize the seasonings to taste.
s-dish">How to Prepare This Dish
Steps and time-saving tips
First, grab your zucchini and slice it lengthwise into thin, even strips using a mandoline for perfect results. Next, generously salt the strips and let them sit for ten minutes; this crucial step pulls out excess water so your Zucchini Chicken Rolls do not become soggy. Meanwhile, prepare the filling by mixing shredded chicken, cream cheese, garlic, and herbs in a bowl. Pat the zucchini strips completely dry with a paper towel before assembling. Lay a strip flat, place a spoonful of the chicken mixture at one end, then gently roll it up tightly. Place each roll seam-side down in a baking dish. Drizzle them with a little olive oil and sprinkle Parmesan cheese on top for a golden, crispy finish. Bake for about 20 minutes until they are tender and delicious. For a time-saving tip, use a store-bought rotisserie chicken and pre-shredded cheese to cut your prep time in half. Finally, let the Zucchini Chicken Rolls rest for five minutes before serving; this helps them hold their shape beautifully.
Mistakes I’ve made and learned from
I have definitely learned a few lessons the hard way with these Zucchini Chicken Rolls. My first mistake was skipping the salting step for the zucchini, which resulted in a pan full of watery disappointment instead of firm, tasty rolls. Now, I never rush this process. Another common error I made was overstuffing the rolls, causing them to burst open during baking. A modest tablespoon of filling is the perfect amount for a secure roll. Getting your internal temperature right is also key for any meat dish. I once pulled the chicken filling from the stove a bit early, and it was underdone. Now I always use a reliable meat thermometer to guarantee food safety and perfect doneness every time. For more guidance on nailing your cooking times, my post on perfect baking times for various veggies has been a total game-changer for me and my readers.
n-and-variations">Cultural Connection and Variations
Where this recipe comes from
My grandmother first introduced me to the magic of Zucchini Chicken Rolls during a humid summer visit. She would harvest the zucchini from her sprawling garden, slice them thinly, and then carefully wrap them around a savory, herbed chicken filling. For her, this dish was a celebration of the season’s bounty and a clever way to create an elegant meal from humble ingredients. Consequently, this recipe always reminds me of family gatherings and the simple joy of cooking from the garden.
Globally, the concept of wrapping meat and vegetables in a thin slice of another vegetable appears in many cultures. For instance, in some Mediterranean regions, cooks might use eggplant or vine leaves instead of zucchini, stuffing them with lamb and rice. Similarly, Italian cooks often favor a version with prosciutto and cheese, baking it with a rich tomato sauce. Ultimately, our version of Zucchini Chicken Rolls feels like a beautiful fusion, focusing on lean protein and fresh produce.
In my own kitchen, I sometimes add a layer of prosciutto for a salty kick or swap the herbs based on what is growing on my windowsill. Therefore, this dish is wonderfully adaptable, allowing every cook to imprint their own story onto it.
ays-cooking">How it fits in today’s cooking
Zucchini Chicken Rolls fit perfectly into modern cooking routines because they offer a healthy, protein-packed meal that feels both gourmet and approachable. Today’s home cooks love them for meal prep, as they reheat beautifully for a satisfying lunch. Furthermore, their elegant presentation makes them a fantastic centerpiece for a dinner party menu without requiring hours of complicated work.
Many people now adapt the recipe to suit specific dietary needs, using turkey or even plant-based fillings. They also embrace seasonal flexibility, pairing the rolls with different sides throughout the year. For a complete and balanced weeknight meal, I often serve them alongside a light quinoa salad recipe. Ultimately, this dish continues to thrive because it masterfully blends tradition with contemporary, health-conscious tastes.
Taste and Texture
What makes it delicious
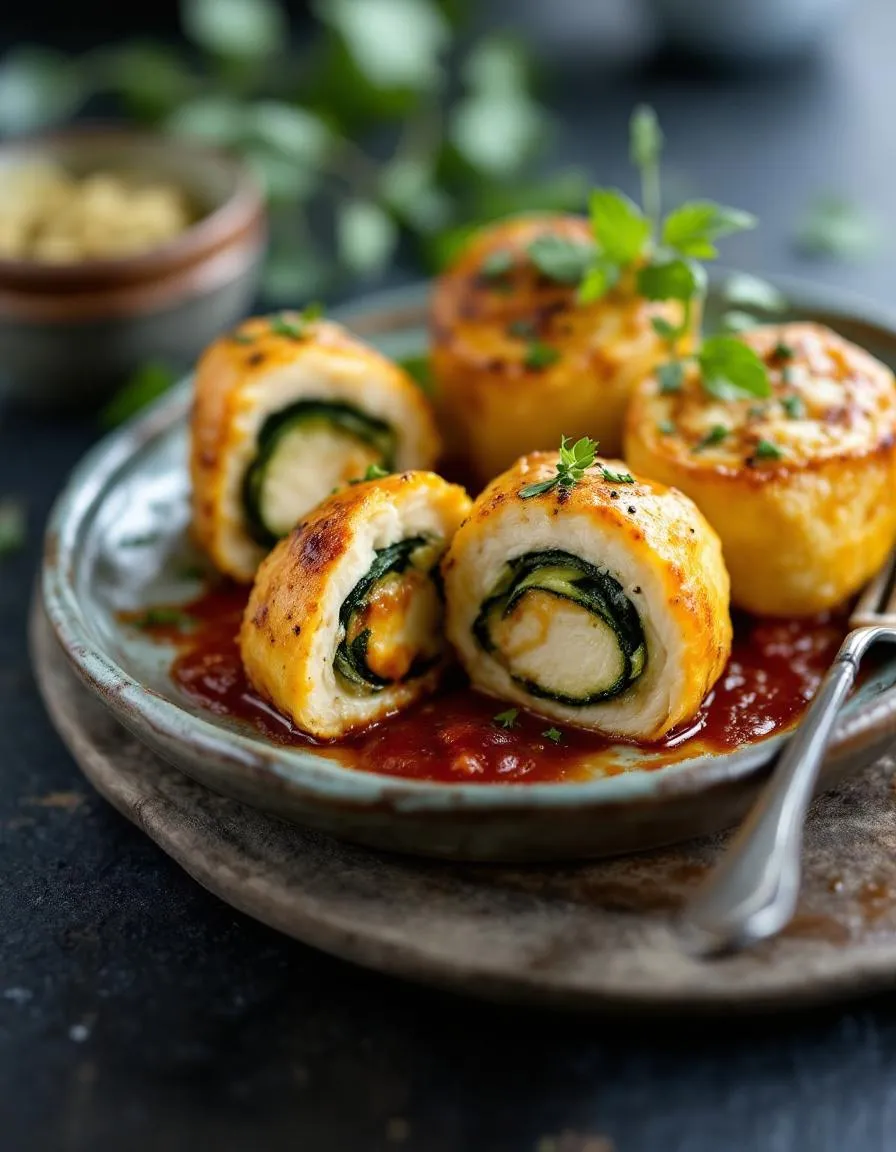
These Zucchini Chicken Rolls deliver a wonderfully savory and satisfying experience. First, you get the tender, juicy chicken, which is perfectly seasoned and wrapped around a creamy, rich filling. Meanwhile, the zucchini itself becomes soft and almost silky, creating a delicate package that holds everything together. Each bite offers a fantastic contrast between the hearty chicken and the melt-in-your-mouth vegetable. Ultimately, the fresh herbs provide a fragrant, bright note that cuts through the richness beautifully. You will absolutely love the comforting and elegant feel of these Zucchini Chicken Rolls.
r">Boosting the flavor
Fortunately, you can easily customize these rolls to suit your taste. For a richer, deeper flavor, try adding a sprinkle of smoked paprika or a pinch of red pepper flakes to the filling. Alternatively, a squeeze of fresh lemon juice right before serving brightens all the other ingredients wonderfully. Consider serving them with a simple, herby dipping sauce; a creamy dill sauce or a tangy yogurt dip complements the savory chicken perfectly. For more inspiration on creating fantastic sauces, explore our guide on how to make a creamy garlic sauce. Additionally, if you enjoy experimenting with herbs, our tips for using fresh herbs in cooking will give you even more creative ideas.
Tips for Success
Best practices for results
Always pat the zucchini slices completely dry before assembling your rolls; consequently, you will prevent a soggy filling. Use thin, uniform slices for even cooking and, moreover, ensure they roll easily without breaking. Tightly roll each Zucchini Chicken Rolls and, finally, secure them with a toothpick to maintain their perfect shape during baking.
>Mistakes to avoid
Avoid overstuffing the rolls with filling, as this often causes them to burst open during cooking; instead, use a moderate amount for best results. Do not skip salting and draining the zucchini; otherwise, excess moisture can make your dish watery. For a perfectly cooked chicken filling every time, remember to check the internal temperature with a reliable instant-read thermometer. Furthermore, always let your Zucchini Chicken Rolls rest for a few minutes after baking; this allows the juices to redistribute, much like when you rest meat for maximum flavor.
Serving and Pairing Suggestions
How to serve this dish
Present your Zucchini Chicken Rolls with style for a truly memorable meal. For instance, arrange them on a pristine white platter to let their golden color shine. Drizzle any remaining pan sauce over the top for extra flavor and a glossy finish. Furthermore, a final sprinkle of fresh chopped parsley or basil adds a vibrant pop of color. These elegant rolls absolutely shine at a dinner party or a special holiday brunch. Ultimately, their neat, rolled shape makes them a visually stunning centerpiece.
What goes well with it
Choose light, complementary sides to let your Zucchini Chicken Rolls stand out. For example, a simple arugula salad with a lemon vinaigrette cuts through the richness beautifully. Alternatively, a serving of fluffy quinoa or our popular Garlic Herb Roasted Potatoes makes a wonderfully satisfying base. Additionally, a cool, creamy dipping sauce like tzatziki or ranch always complements the savory chicken. Finally, a crisp white wine, such as Sauvignon Blanc, pairs perfectly for a complete dining experience. You can also explore our Creamy Cucumber Salad for a refreshing and tangy side dish option.
Can you make zucchini chicken rolls ahead of time?
Yes, you can assemble Zucchini Chicken Rolls a day in advance. Store them covered in the refrigerator and bake just before serving. This makes them a perfect appetizer or main course for entertaining.
What do you serve with zucchini chicken rolls?
These rolls pair wonderfully with a light side salad, garlic mashed potatoes, or roasted vegetables. A simple marinara or pesto dipping sauce also complements the flavors of the Zucchini Chicken Rolls beautifully.
ank-math-faq-item">
How do you keep zucchini from getting soggy in rolls?
The key is to salt the zucchini slices and let them sit for 10-15 minutes to draw out excess moisture. Pat them completely dry with paper towels before assembling to ensure your Zucchini Chicken Rolls stay firm and not watery.
Can I use ground chicken instead of chicken breast for zucchini rolls?
Absolutely. Using seasoned ground chicken is a great alternative to sliced chicken breast. It can be easier to roll and creates a different, equally delicious texture for your Zucchini Chicken Rolls.
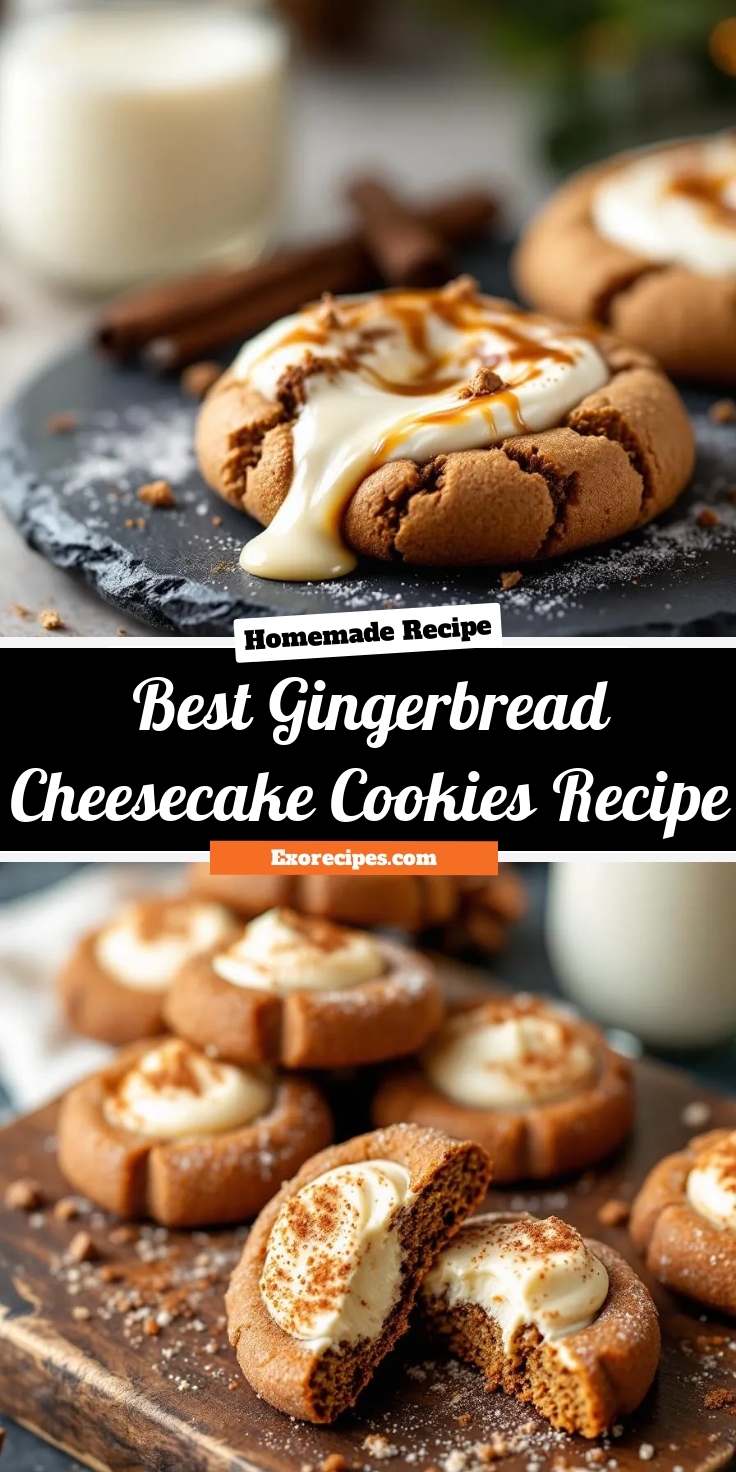
Best Gingerbread Cheesecake Cookies Recipe
Introduction
There is something truly magical about the aroma of gingerbread that instantly wraps you in a warm, nostalgic hug. Now, imagine that cozy feeling baked into a soft, decadent cookie with a surprise creamy center. These Gingerbread Cheesecake Cookies are not just a dessert; they are a heartfelt experience, combining the best of two beloved worlds into one unforgettable holiday treat that will have everyone begging for the recipe.
Gingerbread Cheesecake Cookies are a festive innovation, essentially a soft, spiced gingerbread cookie enveloping a rich, tangy cheesecake filling. This creation matters because it elevates classic holiday baking, offering a sophisticated and impressive cookie that stands out on any dessert platter. Furthermore, it perfectly captures the spirit of the season in a single, handheld bite. This recipe fits our blog’s tone beautifully, as we always strive to share unique and approachable recipes that create lasting memories around food. For instance, if you enjoy these, you might also love our ultimate guide to creating the perfect cheesecake for a larger-scale dessert. Ultimately, these cookies deliver the familiar comfort of gingerbread with the indulgent, creamy surprise of cheesecake, making them an instant classic for your cookie exchange or family gathering. They are surprisingly simple to make, yet the result looks and tastes incredibly professional. Moreover, the process of making them is a joyful activity, much like crafting our famous gingerbread cookies, but with an extra step that yields a spectacular payoff.
Why I Love This Recipe
I absolutely adore this recipe because it reminds me of baking with my grandmother. She always made the most incredible gingerbread houses, and the scent of molasses and spice brings me right back to her kitchen. However, my own twist with the cheesecake center feels like a modern homage to her tradition. Every time I pull a batch of these Gingerbread Cheesecake Cookies from the oven, I feel like I am both honoring the past and creating new, delicious memories for my own family to cherish.
Health and Nutrition
Why it’s good for your body
Believe it or not, these Gingerbread Cheesecake Cookies offer some surprising benefits. For instance, ginger, a star ingredient, actively soothes your stomach and fights inflammation. Furthermore, molasses provides a rich source of iron and calcium, which directly supports your bone health and energy levels. Consequently, enjoying one of these spiced treats does more than just satisfy your sweet tooth.
Moreover, the creamy cheesecake element contributes a valuable amount of protein and calcium. Therefore, these Gingerbread Cheesecake Cookies deliver a more balanced snack compared to many conventional desserts. Additionally, cinnamon, another key spice, helps regulate blood sugar levels. Ultimately, this combination of wholesome ingredients makes each cookie a flavorful and somewhat nutritious indulgence.
Finally, the warmth of these spices can actually boost your mood and metabolism. So, when you savor a Gingerbread Cheesecake Cookie, you are treating your body to a host of hidden advantages. In conclusion, this delightful dessert cleverly combines taste with tangible wellness perks.
How it fits in a healthy lifestyle
These cookies perfectly complement a balanced diet when you enjoy them mindfully. Think of them as a special treat within your overall eating pattern, not an everyday occurrence. Savoring one with a cup of tea or after a nutritious meal helps prevent overindulgence and keeps your health goals on track.
You can easily adapt the recipe to meet specific dietary needs. For a gluten-free version, simply swap the all-purpose flour for your favorite gluten-free flour blend. If you are monitoring your sugar intake, consider reducing the molasses slightly or exploring a natural sugar alternative. Pairing a cookie with a source of protein, like a handful of nuts, can also help create a more satisfying and balanced snack that keeps you full longer. For more ideas on creating satisfying treats, explore our guide to healthy baking substitutions that don’t sacrifice flavor.
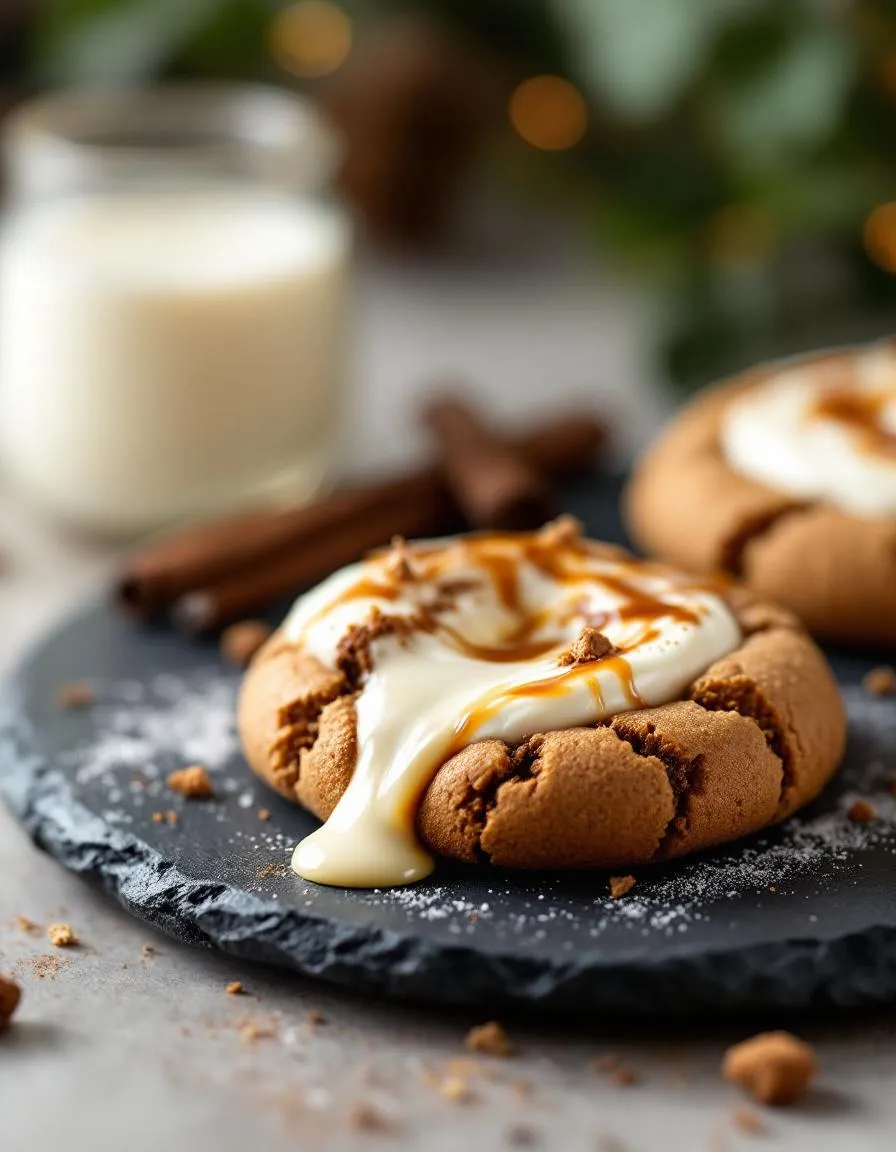
Soft, spiced gingerbread cookies with a creamy cheesecake swirl and a hint of molasses.
Ingredients
Scale
For the Crust:
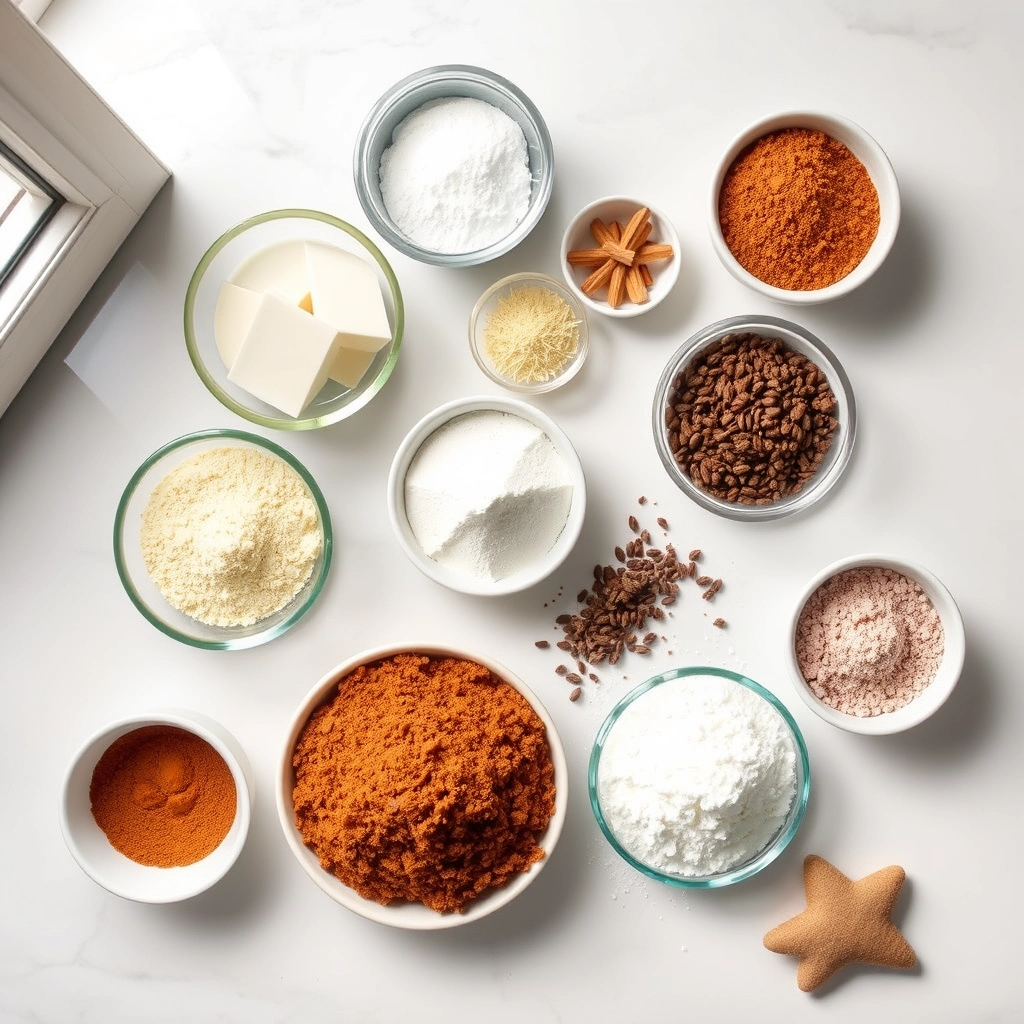
1 cup all-purpose flour
1 tsp ground ginger
1/2 tsp ground cinnamon
1/4 tsp ground cloves
1/4 tsp baking soda
1/4 tsp salt
4 tbsp unsalted butter, softened
1/4 cup brown sugar
1/4 cup molasses
1 large egg yolk
4 oz cream cheese, softened
2 tbsp granulated sugar
1/2 tsp vanilla extract
Instructions
1. Prepare the Crust:
Preheat oven to 350°F (175°C). Line a baking sheet with parchment paper.
In a medium bowl, whisk together flour, ginger, cinnamon, cloves, baking soda, and salt.
In a large bowl, beat butter and brown sugar until creamy. Add molasses and egg yolk; mix well. Gradually blend in dry ingredients until dough forms.
In a small bowl, mix cream cheese, granulated sugar, and vanilla until smooth.
Drop tablespoon-sized scoops of dough onto the baking sheet. Make a small indentation in each, add 1/2 tsp cream cheese mixture, and lightly swirl with a knife.
Bake for 10-12 minutes until edges are set. Cool on the baking sheet for 5 minutes before transferring to a wire rack.
Notes
You can customize the seasonings to taste.
How to Prepare This Dish
Steps and time-saving tips
First, gather all your ingredients to make the process smooth. Cream the softened butter with both sugars until the mixture becomes light and fluffy. Next, beat in the egg and molasses until everything combines perfectly. In a separate bowl, whisk together your dry ingredients like flour and spices. Gradually add these dry ingredients to your wet mixture, stirring just until a soft dough forms. For a major time-saving tip, use a cookie scoop to portion the dough onto your baking sheets; this ensures even baking and saves you a messy cleanup. Now, gently press your thumb into the center of each cookie dough ball to create a little well. Fill each well with a generous teaspoon of the cheesecake filling you prepared earlier. Finally, bake your Gingerbread Cheesecake Cookies until the edges look set. Let them cool completely on the pan so the filling can firm up beautifully.
Mistakes I’ve made and learned from
I’ve definitely had my share of kitchen mishaps with these Gingerbread Cheesecake Cookies. My biggest mistake was using cream cheese straight from the fridge, which resulted in a lumpy filling that refused to incorporate smoothly no matter how much I mixed. I learned that taking the time to let all your dairy ingredients, especially the cream cheese, truly come to room temperature is non-negotiable for a silky, perfect filling. Another hard lesson was overbaking them, which made the cookies dry and caused the delicate cheesecake center to crack. For more on getting that perfect texture, my guide on avoiding common baking errors was a lifesaver. Now, I always set a timer for the minimum bake time and check for doneness a minute early. Trust me, a soft, slightly underbaked center is far superior to a dry one. If your filling ever does crack, don’t panic. A simple cream cheese drizzle covers a multitude of sins and adds even more flavor.
We can trace the heart of this dessert to two beloved traditions. Gingerbread itself boasts a deep history, with medieval Europeans shaping spiced dough into decorative treats. Meanwhile, creamy cheesecake filling has long been a staple of New York delis and home bakers alike. Someone, somewhere, had a brilliant moment of inspiration and decided to marry these two classics. The result? The wonderfully spiced and decadently creamy Gingerbread Cheesecake Cookies we enjoy today.
Families often put their own spin on this holiday favorite. For instance, some bakers might add a pinch of black pepper for extra warmth, while others might fold in minced crystallized ginger for a chewy, spicy bite. In different regions, the type of molasses can change the cookie’s character; a light molasses offers a milder flavor, but a robust blackstrap molasses delivers a deeper, almost bitter note that contrasts beautifully with the sweet filling. Ultimately, every baker tells their own story through these spiced treats.
Furthermore, the method
of adding the cheesecake element varies widely. Some recipes swirl the cream cheese right into the dough, while others, like mine, prefer a stuffed center that creates a delightful surprise. No matter the technique, the goal remains the same: creating a perfect bite that honors both its heritage and your personal touch. This beautiful fusion makes every batch of Gingerbread Cheesecake Cookies a new discovery.
How it fits in today’s cooking
This cookie perfectly fits our modern love for mash-up desserts that deliver big flavor and nostalgia in one package. It has become a star of holiday cookie swaps and festive gatherings, effortlessly bridging the gap between classic gingerbread men and rich cheesecake. Moreover, contemporary bakers constantly adapt the recipe to suit different dietary needs, easily creating gluten-free or vegan versions without losing any of its festive charm.
You can also seamlessly incorporate these cookies into various baking traditions. They make a stunning addition to a Christmas dessert table, but their spiced profile also makes them a wonderful treat for a cozy autumn afternoon. For another fantastic holiday baking idea, consider pairing them with these popular Christmas Crinkle Cookies. The contrast in textures is absolutely magical.
Finally, their make-ahe
ad friendly nature suits our busy lifestyles perfectly. You can freeze the dough logs or even the fully baked cookies, ensuring you always have a homemade dessert ready to impress guests. This practicality, combined with their unforgettable taste, secures their place in today’s kitchens. If you love the combination of ginger and cream cheese, you must try my ultimate Gingerbread Layer Cake for a truly showstopping centerpiece.
Taste and Texture
What makes it delicious
These Gingerbread Cheesecake Cookies deliver a truly decadent experience. Initially, your nose catches the warm, fragrant aroma of molasses and ginger. Then, you bite into a wonderfully soft and chewy cookie that gives way to a rich, creamy cheesecake center. Ultimately, the cozy spices mingle perfectly with the tangy cream cheese filling, creating a festive flavor in every single bite. Consequently, each element from the spiced dough to the lush center makes these Gingerbread Cheesecake Cookies an unforgettable holiday treat.
Boosting the flavor
For an even more luxurious cookie, consider a few simple tweaks. First, roll the dough balls in coarse sparkling sugar before baking to add a delightful crunch. Alternatively, a drizzle of simple vanilla glaze complements the warm spices beautifully. Furthermore, serving them slightly warm amplifies the creamy center, making them utterly irresistible. If you love the cheesecake element, try using our homemade cheesecake filling for an extra tangy and robust flavor boost. Finally, a pinch of extra black pepper in the dough can surprisingly heighten all the other spices.
Always chill your dough thoroughly before baking, as this step prevents the Gingerbread Cheesecake Cookies from spreading too thin. Furthermore, use room temperature cream cheese for a perfectly smooth filling that seamlessly blends into your dough. For best results, line your baking sheets with parchment paper to guarantee a non-stick surface and an ideal golden-brown bottom. Additionally, measure your flour correctly by spooning it into the cup and leveling it off to avoid dense cookies.
Mistakes to avoid
Avoid overmixing your cookie dough once you add the dry ingredients, as this overdevelops the gluten and leads to a tough texture. Instead, mix just until you see no more flour streaks for a tender cookie. Moreover, do not skip the step of scraping down your bowl; otherwise, you might end up with pockets of unmixed ingredients. If your cookies are spreading, your butter was likely too warm; for more solutions, read our guide on how to fix flat cookies. Finally, ensure your spices are fresh for the most vibrant flavor, a key principle we discuss in our ultimate baking spices guide.
g-suggestions">Serving and Pairing Suggestions
How to serve this dish
For a truly stunning presentation, arrange your Gingerbread Cheesecake Cookies on a rustic wooden board or a festive holiday platter. Moreover, a light dusting of powdered sugar right before serving mimics a fresh snowfall and adds a beautiful finishing touch. These cookies absolutely shine during holiday gatherings, but they also make a special treat for a cozy weekend brunch. Ultimately, placing a small dollop of extra cheesecake filling on the side invites your guests to dip and delight in even more creamy goodness.
What goes well with it
A warm mug of spiced chai tea wonderfully complements the cozy gingerbread spices in every Gingerbread Cheesecake Cookie. Alternatively, a glass of cold milk remains a classic pairing that perfectly balances the rich cream cheese flavor. For an elegant dessert spread, consider serving these cookies alongside a slice of our creamy New York Cheesecake or a cup of our refreshing Pumpkin Spice Latte.
math-faq-block">
Can you freeze gingerbread cheesecake cookies?
Yes, you can absolutely freeze gingerbread cheesecake cookies! Let them cool completely after baking, then place them in a single layer on a baking sheet to freeze solid. Once frozen, transfer them to an airtight container or freezer bag with parchment paper between layers; they will keep for up to 3 months.
How do you keep cheesecake cookies from spreading?
To prevent your gingerbread cheesecake cookies from spreading too much, make sure your cookie dough is thoroughly chilled before baking. Using cold cream cheese and butter, along with chilling the dough for at least 1-2 hours, helps the cookies hold their shape and results in a thicker, chewier texture.
Why are my gingerbread cookies hard?
Hard gingerbread cookies are often the result of overbaking or using too much flour. For soft gingerbread cheesecake cookies, be careful not to overmix the dough and pull them from the oven just as the edges are set; the centers should still look slightly soft as they will continue to firm up while cooling on the baking sheet.
ank-math-faq-item">
What is the best way to store cheesecake cookies?
The best way to store gingerbread cheesecake cookies is in an airtight container in the refrigerator due to the cream cheese filling. They will stay fresh and delicious for up to 5 days. For the best taste and texture, let them sit at room temperature for about 10-15 minutes before serving.
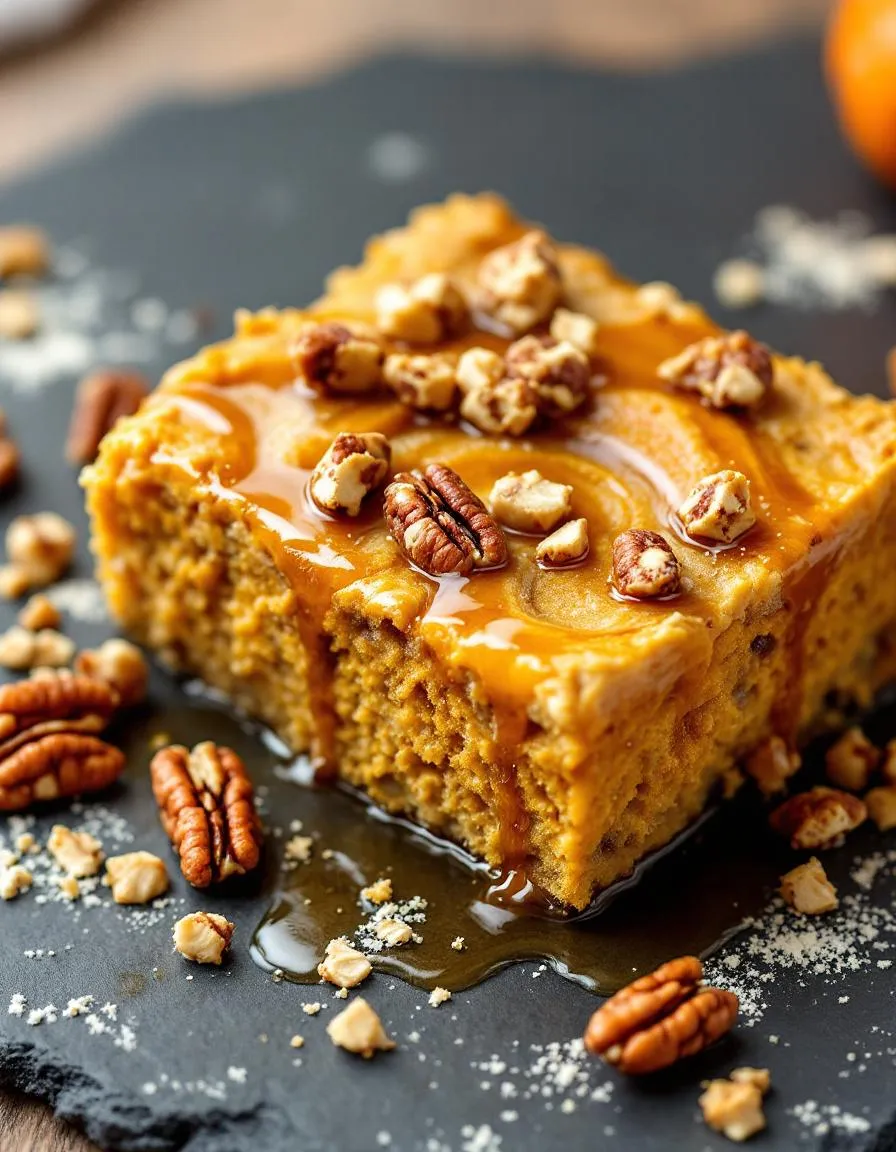
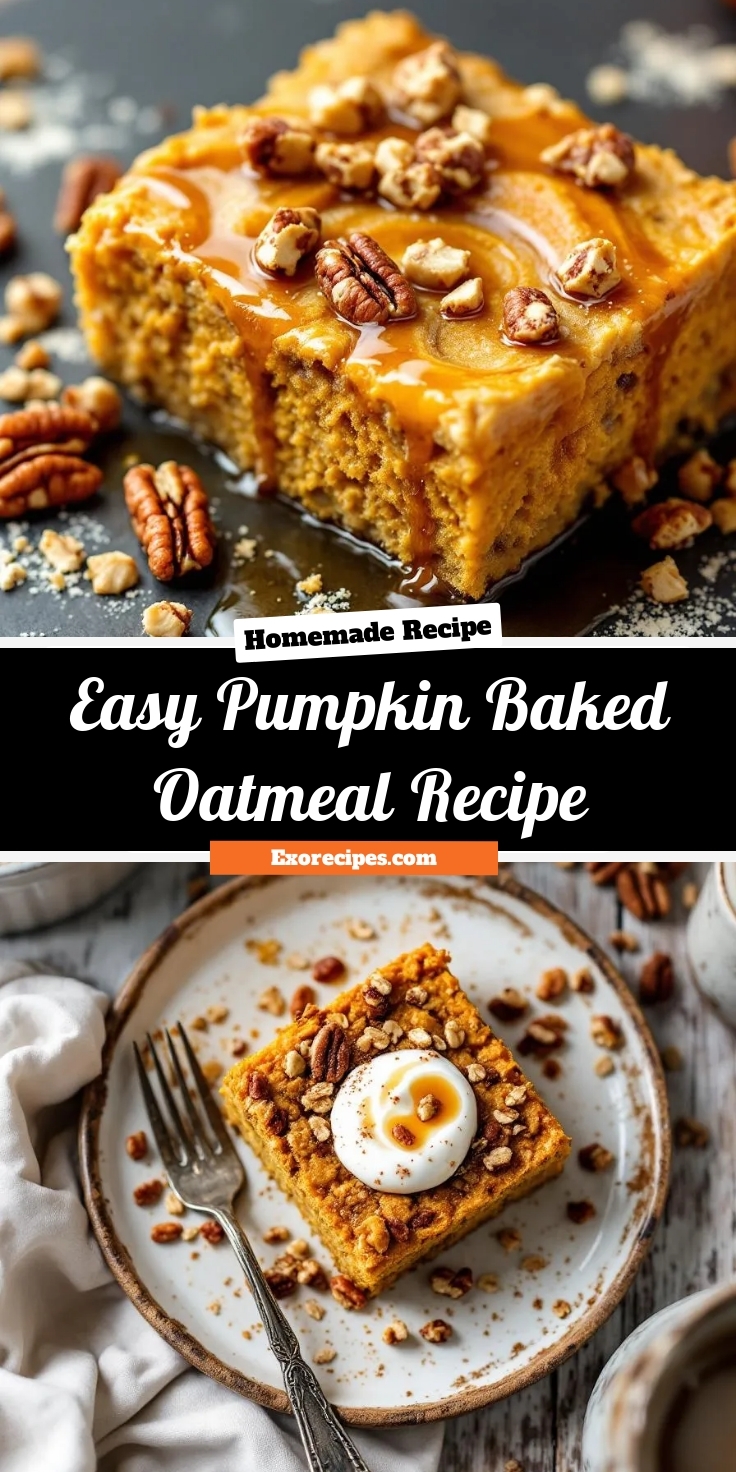
Easy Pumpkin Baked Oatmeal Recipe
Introduction
Is there anything cozier than the smell of pumpkin and warm spices wafting from your oven on a crisp morning? This simple pleasure transforms an ordinary day into something special. Fortunately, you do not need to be a professional baker to create that magical aroma and a nourishing breakfast. Our Pumpkin Baked Oatmeal recipe brings that warm, comforting feeling straight to your table with minimal effort. Ultimately, it is the perfect way to embrace the flavors of the season and start your day with a smile.
Pumpkin Baked Oatmeal is a hearty, custard-like breakfast casserole. Essentially, we combine rolled oats, pumpkin puree, warm autumnal spices, and a touch of sweetness, then bake everything into a warm, satisfying dish. This recipe matters because it delivers incredible flavor and nutrition in one pan. It is a fantastic make-ahead solution for busy families, as you can easily reheat individual portions throughout the week. Furthermore, it is a brilliant way to use seasonal ingredients, making your cooking feel both timely and intentional. This approach to breakfast aligns perfectly with our blog’s philosophy that wholesome food should also be incredibly delicious and simple to prepare. For those mornings when you need something even quicker, our 5-minute microwave pumpkin oatmeal offers a fantastic single-serving alternative. However, when you have a bit more time, this baked version is truly worth the wait. The final result is a versatile dish that you can customize with your favorite nuts, seeds, or even a handful of chocolate chips. It is a guaranteed crowd-pleaser for weekend brunch guests and a reliable staple for weekly meal prep. If you enjoy this style of easy, oven-baked breakfast, you will absolutely adore our classic blueberry baked oatmeal as well.
Why I Love This Recipe
This Pumpkin Baked Oatmeal holds a special place in my heart because it is the breakfast I make on the first truly chilly weekend of fall. The process of mixing the ingredients and watching my kitchen window steam up from the oven feels like a ritual that welcomes the new season. I love how the scent of cinnamon and nutmeg fills the entire house, inevitably drawing my family to the kitchen long before it is ready. Most importantly, it gives us a nourishing and delicious reason to sit down together, something that becomes so valuable as our schedules get busy. This dish represents more than just a meal; it is a warm, edible hug.
Health and Nutrition
Why it’s good for your body
This Pumpkin Baked Oatmeal truly nourishes your body from the inside out. First and foremost, it provides a fantastic source of sustained energy. Furthermore, the complex carbohydrates from the oats digest slowly, which steadily fuels your body and brain for hours. Consequently, you can avoid those mid-morning energy slumps.
Moreover, pumpkin puree packs a powerful nutritional punch. It delivers a huge dose of vitamin A, which actively supports healthy vision and a strong immune system. Additionally, pumpkin offers a great amount of fiber. This fiber promotes excellent digestive health and also helps you feel full and satisfied. Therefore, enjoying a slice of this Pumpkin Baked Oatmeal can support your wellness goals.
Finally, the warm spices like cinnamon and nutmeg do more than just add flavor. In fact, they bring their own anti-inflammatory properties to the table. Ultimately, this wholesome dish combines taste and nutrition perfectly. You can feel great about serving this hearty Pumpkin Baked Oatmeal to your entire family.
How it fits in a healthy lifestyle
This dish fits beautifully into a balanced eating plan. You can easily enjoy it as a make-ahead breakfast that supports a busy morning routine. It keeps you full and focused, helping you resist less nutritious snacks later on. For those following specific diets, this baked oatmeal is naturally gluten-free when you use certified gluten-free oats. It also caters to a heart-healthy lifestyle thanks to its good fiber content, which can help maintain healthy cholesterol levels.
If you are looking for a way to add more protein to your day, simply serve it with a side of Greek yogurt or a dollop of nut butter. This flexibility makes it a fantastic staple. For more inspiration on building a nutritious morning routine, explore our guide to meal prep breakfast ideas. And if you love the cozy flavor of pumpkin, you must try our popular healthy pumpkin muffins for another delicious and wholesome option.
A warm and comforting baked oatmeal infused with pumpkin and warm spices, perfect for a cozy breakfast or brunch.
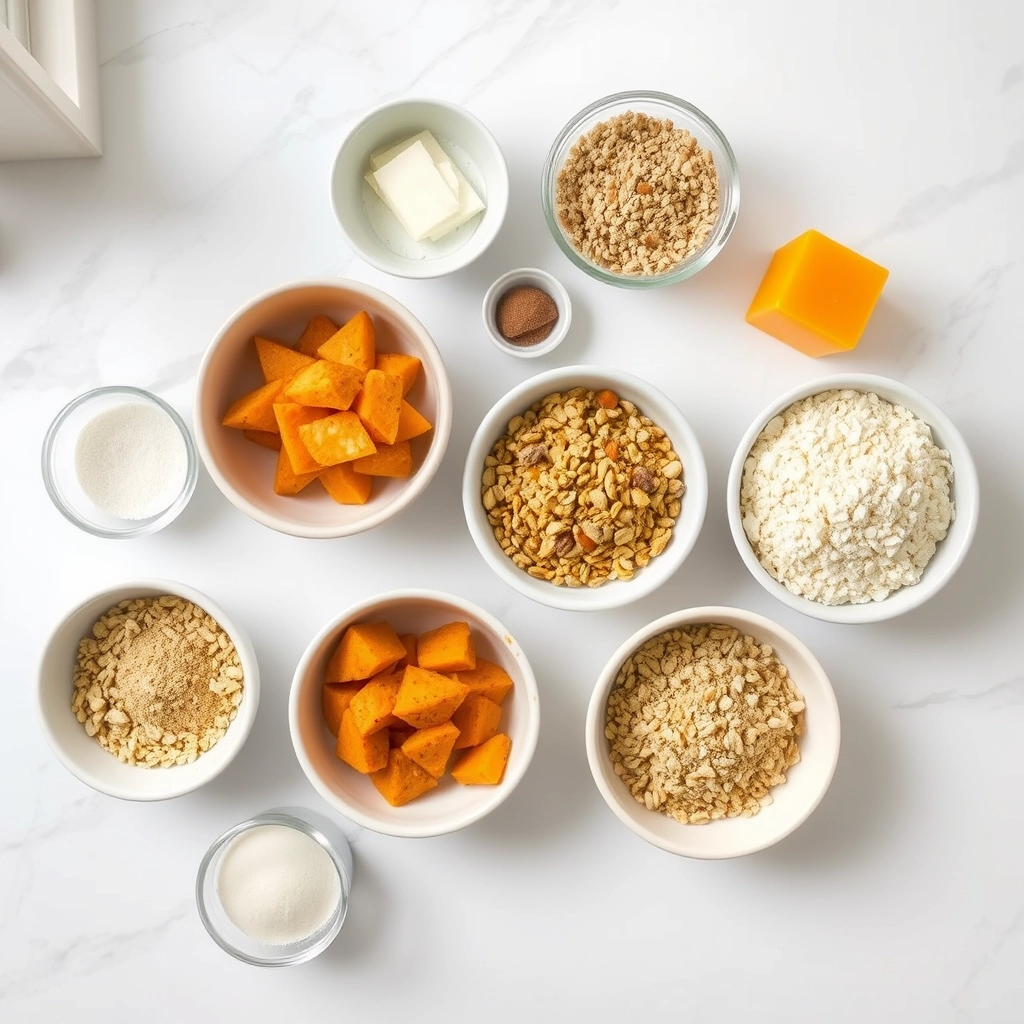
Ingredients
Scale
For the Crust:
2 cups rolled oats
1 teaspoon baking powder
1 teaspoon cinnamon
1/2 teaspoon nutmeg
1/4 teaspoon cloves
1/4 teaspoon salt
1 cup pumpkin puree
1/3 cup maple syrup
2 eggs
1 1/2 cups milk
1 teaspoon vanilla extract
1/2 cup chopped pecans
Instructions
1. Prepare the Crust:
Preheat oven to 375°F and grease an 8×8 baking dish.
In a large bowl, mix oats, baking powder, cinnamon, nutmeg, cloves, and salt.
In another bowl, whisk together pumpkin puree, maple syrup, eggs, milk, and vanilla.
Pour wet ingredients into dry ingredients and stir until combined. Fold in pecans.
Transfer mixture to prepared baking dish and bake for 30-35 minutes until set and golden.
Notes
You can customize the seasonings to taste.
How to Prepare This Dish
Steps and time-saving tips
First, preheat your oven to 375°F and generously grease your baking dish. This simple step prevents sticking and makes cleanup a breeze later. Next, grab a large bowl and whisk together the pumpkin puree, milk, eggs, maple syrup, and vanilla until everything is perfectly smooth and combined. Then, simply dump in all your dry ingredients—the oats, warming spices, baking powder, and a pinch of salt. Use a sturdy spatula to fold everything together until you see no more dry streaks of flour. Importantly, let this mixture sit for about ten minutes; this allows the oats to soak up the liquid for a much better texture. Meanwhile, you can quickly chop some nuts or chocolate chips for the topping. Pour the batter into your prepared dish, sprinkle your toppings over it, and pop it in the oven. Bake for 35-40 minutes until the edges are golden and the center is set. For a real time-saver, mix the dry ingredients the night before and store them in a container. Finally, let your Pumpkin Baked Oatmeal cool for a few minutes before slicing. This brief rest helps it firm up beautifully. Drizzle with a little extra maple syrup right before serving for a cozy, delicious breakfast.
and-learned-from">Mistakes I’ve made and learned from
I have definitely learned a few lessons the hard way with this Pumpkin Baked Oatmeal. My biggest mistake was using old-fashioned oats instead of quick oats, which resulted in a far too chewy and dense final product that nobody enjoyed. Now, I always check my pantry to make sure I’m using the right type for the perfect tender bite. Another common error I made was skipping the crucial step of letting the batter rest before baking. I was always in a rush, but that impatience led to a slightly gritty texture because the oats didn’t have time to properly hydrate. Trust me, those ten minutes make a world of difference. I also learned that properly measuring your flour is key to avoiding a dry bake, a tip I picked up from my own guide on common baking mistakes to avoid. And if you find yourself with leftover pumpkin puree, don’t just toss it. I have some fantastic creative recipes for using leftover ingredients that will help you reduce waste and create another tasty treat.
Cultural Connection and Variations
Where this recipe comes from
My grandmother always told me that the best recipes tell a story. Consequently, her Pumpkin Baked Oatmeal spoke of crisp autumn mornings and the joyful hustle of feeding a large family before a day of harvest chores. While we often associate pumpkin with pie, many cultures incorporate this versatile squash into their daily meals. For instance, in many parts of rural America, families have long combined pumpkin puree with hearty oats and warming spices for a nourishing, affordable breakfast.
Globally, people prepar
e similar dishes with their own unique twists. In the UK, for example, they might call it a “porridge bake” and serve it with a dollop of clotted cream. Alternatively, a Scandinavian version might feature cardamom and lingonberries alongside the pumpkin. Meanwhile, my family always added a handful of toasted pecans for extra crunch. This particular Pumpkin Baked Oatmeal recipe, therefore, feels like a warm hug from generations past, blending tradition with personal taste.
How it fits in today’s cooking
Thankfully, this cozy dish fits perfectly into our modern lives. It has become a staple for meal preppers and busy families who need a make-ahead breakfast that everyone loves. Furthermore, it shines as the star of any holiday brunch or seasonal gathering, filling the kitchen with an irresistible aroma. Many contemporary cooks also enjoy adapting the base recipe to suit dietary needs, easily making it gluten-free or vegan.
You can easily pair a slice with a morning smoothie for a complete and satisfying start to your day. Moreover, its simple preparation makes it a fantastic recipe to get kids involved in the kitchen, teaching them valuable skills. Ultimately, this dish proves that timeless, wholesome food never goes out of style. It provides the same comfort and nourishment it did decades ago, just maybe now we store it in glass containers instead of ceramic bowls.
>Taste and Texture
What makes it delicious
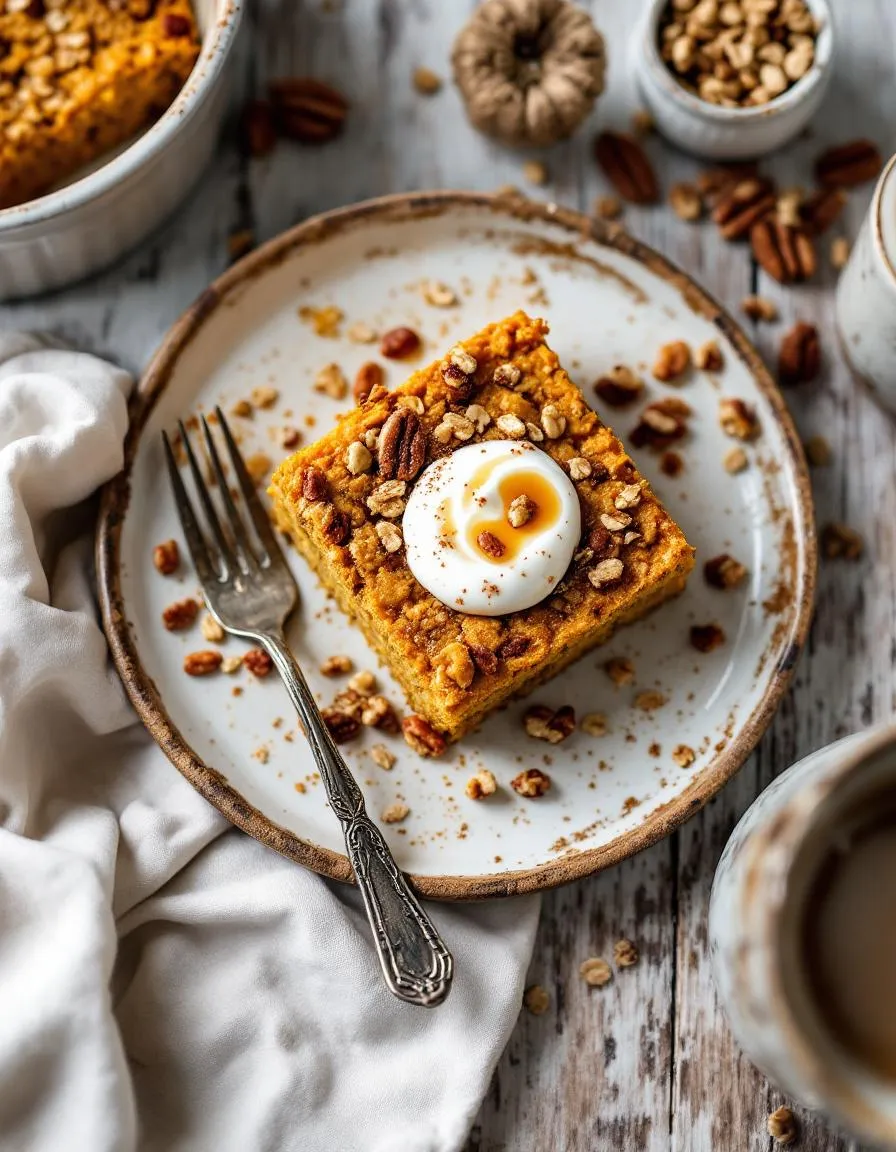
This Pumpkin Baked Oatmeal delivers a wonderfully warm and cozy experience. First, you will notice the rich, fragrant aroma of pumpkin pie spice that fills your kitchen. Each spoonful offers a soft, almost cake-like texture that is simultaneously hearty and tender. Furthermore, the natural sweetness from the pumpkin puree and maple syrup creates a deeply comforting flavor. Bits of chewy raisins or crunchy pecans add delightful contrast. Ultimately, this dish feels like a hug in a bowl, making every bite of Pumpkin Baked Oatmeal a truly satisfying treat.
Boosting the flavor
Fortunately, you can easily customize your breakfast to suit any craving. For a richer flavor, try swirling in a spoonful of our creamy almond butter before baking. Additionally, a dollop of vanilla Greek yogurt or a drizzle of cold cream on top of the warm oatmeal creates a fantastic temperature contrast. Moreover, a sprinkle of toasted coconut or dark chocolate chips right after baking introduces a new layer of texture. For the ultimate autumn experience, serve a square alongside a warm mug of our homemade pumpkin spice latte. Finally, never underestimate the power of an extra pinch of sea salt to make all the flavors pop beautifully.
Tips for Success
Best practices for results
First, always use pure pumpkin puree instead of pumpkin pie filling for the best flavor and texture in your Pumpkin Baked Oatmeal. Furthermore, make sure you properly grease your baking dish to guarantee easy serving later. For the perfect consistency, let your mixture sit for five minutes after combining the wet and dry ingredients so the oats can absorb the liquid. Additionally, do not overmix the batter; simply stir until the ingredients just combine for a tender final product. Finally, always check for doneness a few minutes before the timer goes off since oven temperatures can vary.
Mistakes to avoid
A common mistake is using quick oats instead of old-fashioned rolled oats, which unfortunately results in a mushy texture. For a heartier bite, always choose old-fashioned oats for your Pumpkin Baked Oatmeal. Moreover, many bakers forget to taste the batter before baking; however, this is the best time to adjust spices like cinnamon or nutmeg to your preference. Another error is overbaking the dish, which leads to a dry outcome. Consequently, you should remove it from the oven when the edges are set but the center still has a slight jiggle. For more guidance on perfect baking times, explore our guide to perfect bake times. Also, ensure your baking powder is fresh; otherwise, your Pumpkin Baked Oatmeal might not rise properly. If you are ever unsure about an ingredient substitution, our baking substitutions list is a fantastic resource to prevent mishaps.
Serving and Pairing Suggestions
How to serve this dish
For a beautiful presentation, slice your Pumpkin Baked Oatmeal into neat squares. Alternatively, scoop it warm into bowls for a more rustic, comforting feel. Top each serving with a dollop of whipped cream or a drizzle of maple syrup for extra indulgence. This dish truly shines during a holiday brunch or a cozy weekend breakfast. Garnish with a sprinkle of toasted pecans or pepitas for a delightful crunch that also makes it Instagram-worthy. Consequently, you create a memorable meal that feels both special and nourishing.
h-it">What goes well with it
A hot cup of coffee or a cold glass of milk perfectly balances the warm spices in this Pumpkin Baked Oatmeal. For a full autumnal breakfast spread, serve it alongside some crispy air fryer bacon. The salty, savory crunch creates a wonderful contrast with the sweet, soft oatmeal. Moreover, a smooth and creamy side always complements the heartiness of this bake. Consider pairing it with our simple yogurt parfait for a refreshing and protein-packed addition to your plate.
Can you use quick oats for baked oatmeal?
Yes, you can use quick oats for Pumpkin Baked Oatmeal, but the texture will be softer and less chewy compared to using old-fashioned rolled oats. Rolled oats provide a heartier, more substantial texture that holds up better during baking. For the best results in this recipe, stick with old-fashioned oats.
ank-math-faq-item">
Is baked oatmeal good for meal prep?
Absolutely, Pumpkin Baked Oatmeal is an excellent meal prep option. It stores beautifully in the refrigerator for up to 5 days and can be easily reheated in the microwave. You can also freeze individual portions for a quick and healthy breakfast on busy mornings.
How do you know when baked oatmeal is done?
Your Pumpkin Baked Oatmeal is done when the top is golden brown and the center is set, without any jiggle. You can also insert a toothpick into the center; if it comes out clean or with a few moist crumbs, the dish is ready. Let it rest for 10 minutes before serving to allow it to fully set.
Can I make pumpkin baked oatmeal without eggs?
Yes, you can make an egg-free version of this dish. A common substitute is to use a “flax egg” by mixing 1 tablespoon of ground flaxseed with 3 tablespoons of water for each egg, letting it sit for 5 minutes to gel. This binder will help hold your Pumpkin Baked Oatmeal together while keeping it vegan-friendly.
div>
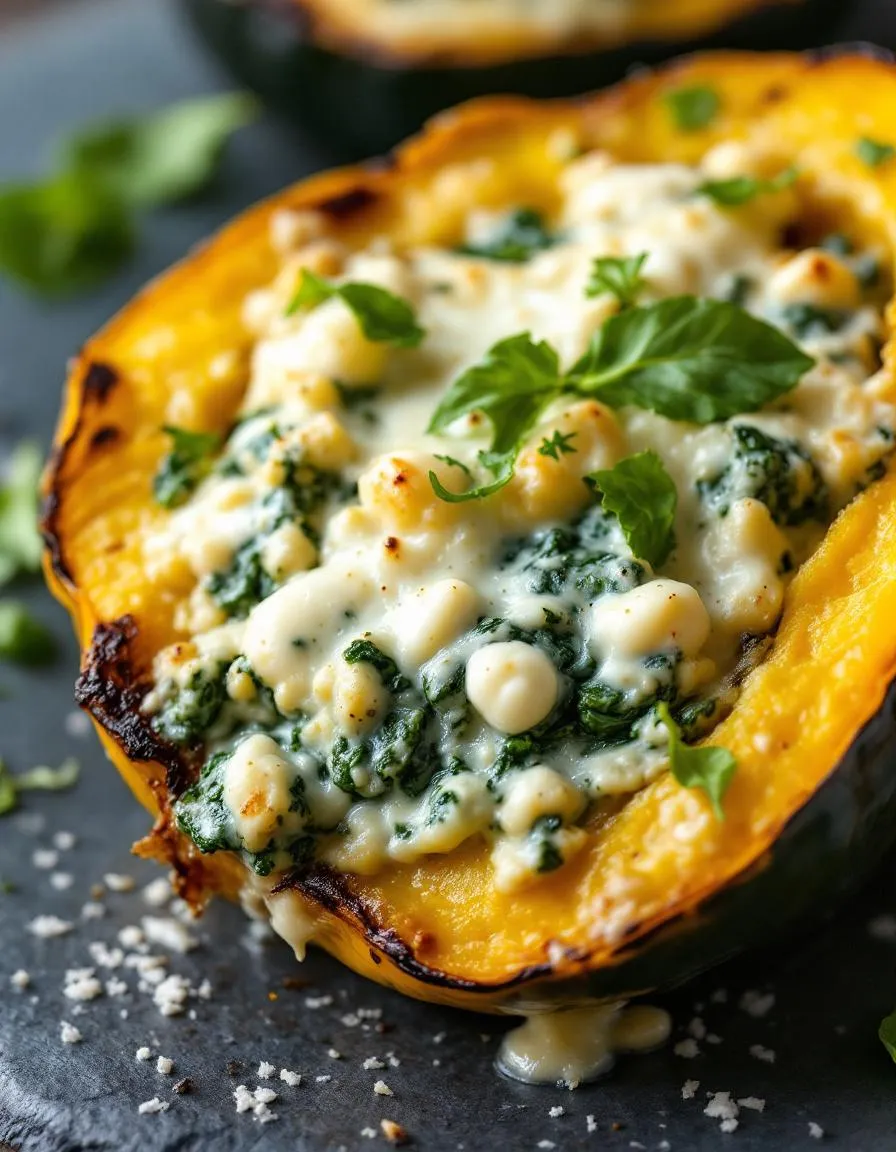
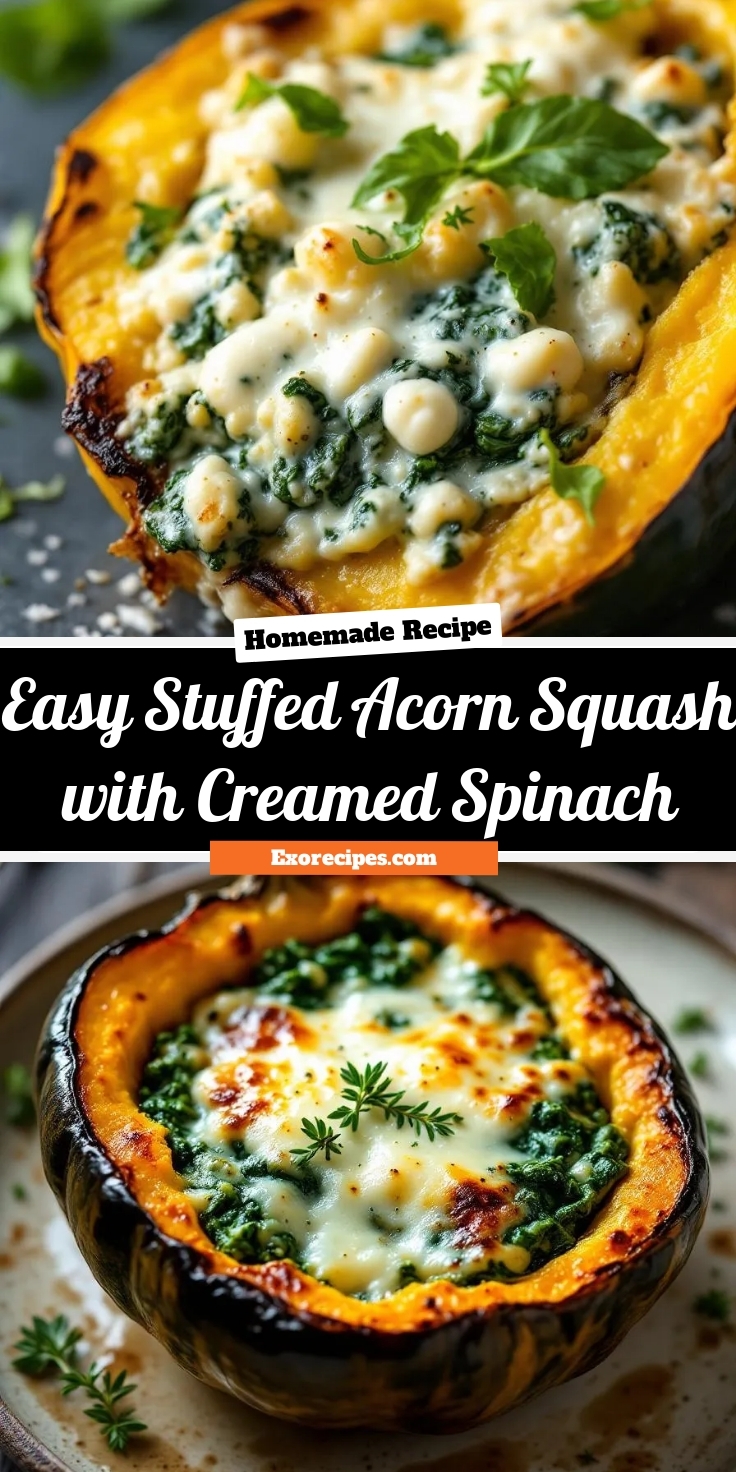
Easy Stuffed Acorn Squash with Creamed Spinach
Introduction
There is something incredibly comforting about a meal that feels both nourishing and indulgent. As the seasons change and we crave warmer, heartier dishes, the search for the perfect centerpiece begins. This recipe for Stuffed Acorn Squash with Creamed Spinach answers that call beautifully. It wraps you in a cozy embrace, offering a delicious solution for anyone seeking a satisfying vegetarian meal that doesn’t compromise on flavor or elegance.
Stuffed Acorn Squash with Creamed Spinach is a quintessential fall and winter dish that transforms simple, wholesome ingredients into a stunning culinary experience. Essentially, we roast tender acorn squash halves until they become caramelized and sweet. Then, we fill them with a luxuriously rich and savory creamed spinach mixture, often topped with bubbling, golden cheese. This dish matters because it masterfully combines health and decadence. It is naturally gluten-free and vegetarian, yet it feels incredibly special and satisfying enough to please even the most dedicated carnivores at your table. Furthermore, it fits our blog’s philosophy perfectly. We celebrate approachable recipes that use seasonal produce to create unforgettable meals, just like our popular Roasted Butternut Squash Soup. This stuffed squash is a complete meal in itself, making weeknight dinners effortless and holiday menus impressive. The process is straightforward, but the final result always earns rave reviews. It is the kind of recipe that builds confidence in the kitchen and brings people together around the dinner table. For another fantastic way to enjoy seasonal vegetables, explore our guide on How to Roast Any Vegetable to perfection.
Why I Love This Recipe
This Stuffed Acorn Squash with Creamed Spinach holds a special place in my heart because it was the first meal I successfully made for my in-laws. I wanted to create something that felt festive and thoughtful without being overly complicated. The moment they cut into the tender squash and the creamy, cheesy spinach spilled out, I knew it was a hit. Now, it is a non-negotiable part of our family’s holiday rotation and a regular feature on our fall weeknight menu. It represents how food can create connection and build beautiful, lasting memories around something as simple as a shared meal.
Health and Nutrition
Why it’s good for your body
This Stuffed Acorn Squash with Creamed Spinach delivers a powerful nutritional punch. For instance, acorn squash provides a fantastic source of vitamins A and C, which actively support your immune system and vision. Moreover, its high fiber content promotes excellent digestive health and helps you feel full longer.
Furthermore, the creamy spinach filling significantly boosts the meal’s benefits. Spinach is famously rich in iron and folate, which are crucial for maintaining healthy energy levels. Additionally, the dairy components offer a great dose of calcium for strong bones. Consequently, every bite supports your body’s essential functions.
Ultimately, this Stuffed Acorn Squash with Creamed Spinach combines these elements into a truly balanced dish. Therefore, you can enjoy a comforting meal that also fuels your body with premium nutrients. Finally, this recipe proves that eating well does not require sacrificing flavor or satisfaction.
How it fits in a healthy lifestyle
This dish seamlessly fits into various healthy eating plans. It is naturally gluten-free and vegetarian, making it a fantastic centerpiece for a meatless Monday. The high fiber and protein content from the squash and dairy also supports weight management goals by promoting satiety.
You can easily incorporate this satisfying meal into your weekly rotation for a heart-healthy dinner option. If you are looking for more ways to enjoy nutritious vegetables, explore our guide to roasting vegetables to perfection. Planning a full week of balanced meals becomes simpler with dishes like this. For more inspiration on structuring your diet, check out our tips for building a healthy meal prep routine. This stuffed squash truly offers a simple and delicious path to everyday wellness.
A comforting autumn dish featuring roasted acorn squash halves filled with a rich, creamy spinach and cheese mixture.
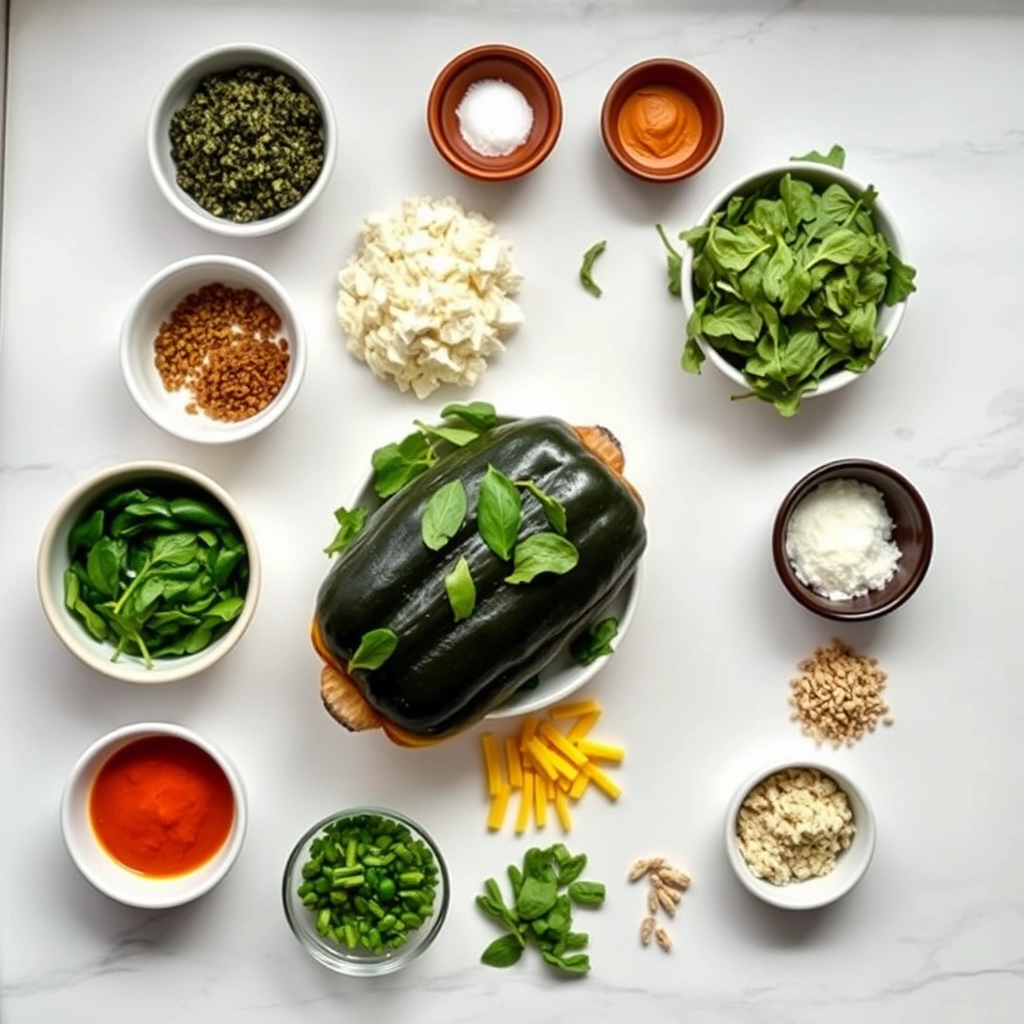
Ingredients
Scale
For the Crust:
2 medium acorn squash, halved and seeded
2 tablespoons olive oil
1 teaspoon salt, divided
1/2 teaspoon black pepper, divided
1 small onion, finely chopped
2 cloves garlic, minced
10 ounces fresh spinach
4 ounces cream cheese, softened
1/4 cup grated Parmesan cheese
1/4 teaspoon nutmeg
1/2 cup shredded mozzarella cheese
Instructions
1. Prepare the Crust:
Preheat oven to 400°F (200°C). Brush squash halves with olive oil and season with 1/2 teaspoon salt and 1/4 teaspoon pepper. Place cut-side down on baking sheet and roast for 25-30 minutes until tender.
While squash roasts, heat remaining olive oil in large skillet over medium heat. Add onion and cook until softened, about 5 minutes. Add garlic and cook 1 minute more.
Add spinach to skillet and cook until wilted, about 3-4 minutes. Remove from heat and stir in cream cheese, Parmesan, nutmeg, remaining salt and pepper until well combined.
Flip roasted squash halves cut-side up. Divide spinach mixture among squash halves. Top with mozzarella cheese and return to oven for 10-12 minutes until cheese is melted and bubbly.
Let cool for 5 minutes before serving.
Notes
You can customize the seasonings to taste.
How to Prepare This Dish
Steps and time-saving tips
First, preheat your oven to 400°F. Meanwhile, slice each acorn squash in half from stem to bottom and scoop out the seeds with a sturdy spoon. Next, drizzle the flesh with olive oil and season generously with salt and pepper. Place the halves cut-side down on a parchment-lined baking sheet. This position helps them caramelize beautifully. Roast for about 30 minutes until the squash becomes tender and easily pierced with a fork. While the squash roasts, tackle the filling. In a large skillet, sauté your onion and garlic until they turn soft and fragrant. Then, add your fresh spinach in batches, wilting each addition before adding more. Now, pour in the heavy cream and let it simmer gently. Whisk in your grated nutmeg and a handful of Parmesan cheese until the sauce becomes wonderfully creamy. Finally, fold this luxurious creamed spinach mixture into the cavity of each roasted squash half. Top with a little extra cheese and pop them back in the oven for a final 10 minutes, just to get everything bubbly and golden. For a real time-saver, you can roast the squash a day ahead and simply reheat it with the filling just before serving.
Mistakes I’ve made and learned from
I have absolutely learned the hard way that under-roasting the squash is the biggest pitfall. I once pulled my acorn squash out too early, eager to get dinner on the table, and ended up with a frustratingly tough texture that was difficult to eat. Now, I always test for doneness with a fork; it should glide in without any resistance. Another classic mistake I made was overloading the creamed spinach filling, which then spilled over and made a mess of my baking sheet. The key is to mound the filling confidently but not exceed the rim of the squash boat. Getting the cream sauce right was another hurdle; I’ve accidentally let it break or become too thin. Through trial and error, I found that a gentle simmer and constant whisking are non-negotiable for a perfect, velvety sauce. If you’re new to working with creamy sauces, my guide on perfecting creamy sauces breaks it down simply. And for more foundational tips that prevent kitchen mishaps, my post on common beginner mistakes is a great resource. Trust me, a little patience here makes all the difference for your Stuffed Acorn Squash with Creamed Spinach.
My grandmother always said that the best recipes tell a story of place and time. She first made her version of Stuffed Acorn Squash with Creamed Spinach in the crisp autumn of her first year on the farm. Consequently, this dish became our family’s edible welcome mat for fall. We would gather around the table as the leaves turned, sharing stories over these hearty, individual squash bowls. Meanwhile, other cultures embrace the concept of stuffing vegetables in wonderfully different ways. For instance, Mediterranean cooks might use lamb, rice, and pine nuts, while a French cook may favor herbs de Provence and Gruyère cheese. Ultimately, our version celebrates the classic American comfort of creamy spinach and melted cheese. The beauty of this dish truly lies in its adaptability. Therefore, every family seems to add its own signature twist, making each Stuffed Acorn Squash with Creamed Spinach a unique tribute to harvest season.
How it fits in today’s cooking
This recipe absolutely thrives in modern kitchens. It seamlessly fits into today’s cooking routines, especially for those seeking impressive yet manageable meals. Furthermore, it naturally caters to a desire for cozy, vegetable-forward comfort food. Many contemporary cooks adapt it for special occasions, making it a stunning centerpiece for a vegetarian holiday menu. Conversely, others simplify it for a nutritious weeknight dinner that feels anything but ordinary. Its versatility is its greatest strength. You can easily find inspiration for other seasonal sides, perhaps by exploring our complete guide to roasting winter vegetables. Ultimately, this dish continues to connect us to tradition while allowing for endless personalization, ensuring its place at our tables for years to come.
>Taste and Texture
What makes it delicious
This Stuffed Acorn Squash with Creamed Spinach delivers a truly comforting experience. First, you encounter the sweet, nutty flesh of the roasted squash, which becomes incredibly tender and almost custardy. Meanwhile, the creamy spinach filling provides a rich, savory counterpoint with its luxurious, velvety texture. Aromatic garlic and sweet onions sautéed in butter create a fragrant base that makes the entire kitchen smell amazing. Finally, each bite finishes with a satisfying, slightly crisp topping of golden, melted cheese for a perfect textural contrast.
Boosting the flavor
For an instant flavor boost, consider mixing a teaspoon of smoked paprika into the creamed spinach filling; it adds a wonderful, subtle smokiness that complements the squash beautifully. Alternatively, a sprinkle of toasted pepitas or chopped walnuts right before serving introduces a delightful crunch. If you adore bold, cheesy flavors, try swapping the mozzarella for a sharp white cheddar or even a bit of gruyere. Moreover, a final drizzle of a bright, herby sauce can elevate everything. For instance, a simple lemon herb sauce cuts through the richness perfectly. Furthermore, if you want to explore another delicious vegetarian main, our creamy mushroom risotto offers a similarly luxurious texture.
Tips for Success
Best practices for results
First, always choose acorn squash that feel heavy for their size and have a deep green rind. Next, generously season the squash cavities before roasting to build a flavorful foundation for your Stuffed Acorn Squash with Creamed Spinach. Furthermore, thoroughly squeeze all excess water from your cooked spinach to prevent a soggy filling. Finally, let the roasted squash halves cool for a few minutes before stuffing them so you can handle them easily.
Mistakes to avoid
A common error involves undercooking the squash, which results in a difficult-to-eat texture. Conversely, make sure you do not overlook the importance of properly toasting your nuts or breadcrumbs for the topping, as this step adds crucial flavor and crunch. Additionally, if your creamed spinach seems too loose, simply continue cooking it over medium heat to evaporate the excess liquid. For more guidance on getting textures just right, explore our tips on how to make perfect roasted vegetables. Moreover, if your filling lacks depth, remember to taste and adjust your seasoning at the end, a fundamental practice outlined in our guide to balancing flavors.
Serving and Pairing Suggestions
How to serve this dish
Present your Stuffed Acorn Squash with Creamed Spinach as the stunning centerpiece it truly is. For instance, place each vibrant half on a contrasting white or rustic wooden plate to make the colors pop. Furthermore, a final sprinkle of fresh chopped parsley or a few pomegranate arils adds a beautiful, festive touch of color and freshness. This dish truly shines during holiday gatherings or as a special meatless main for a weekend dinner party. Ultimately, its elegant appearance and comforting flavors will impress every guest at your table.
h-it">What goes well with it
A crisp, acidic side salad perfectly cuts through the rich, creamy filling of your Stuffed Acorn Squash with Creamed Spinach. We highly recommend our simple Arugula Salad with Lemon Vinaigrette for a peppery, refreshing contrast. Additionally, a crusty piece of artisan bread is ideal for scooping up every last bit of the delicious creamed spinach. For a heartier meal, consider pairing it with a bowl of our savory Creamy Wild Mushroom Soup. Finally, a glass of chilled Chardonnay or a crisp hard cider complements the squash’s natural sweetness and the savory filling beautifully.
Can you make stuffed acorn squash ahead of time?
Yes, you can prepare Stuffed Acorn Squash with Creamed Spinach ahead of time. Assemble the dish completely, cover it tightly, and refrigerate for up to 24 hours before baking. You may need to add a few extra minutes to the baking time since you’ll be starting from a cold temperature.
ank-math-faq-item">
What protein can I add to stuffed acorn squash?
For a heartier meal, you can easily add protein to your Stuffed Acorn Squash with Creamed Spinach. Cooked ground Italian sausage, shredded rotisserie chicken, or crumbled bacon are excellent savory additions. For a vegetarian protein boost, consider stirring in cooked lentils or chickpeas into the creamed spinach filling.
How do you cut an acorn squash for stuffing?
To safely cut an acorn squash, first slice a small piece off the top and bottom to create stable flat surfaces. Stand the squash upright on one of the flat ends and carefully slice it in half from top to bottom. Use a sturdy spoon to scrape out the seeds and stringy pulp from each half, creating a perfect cavity for your creamed spinach filling.
Is acorn squash healthy?
Acorn squash is highly nutritious, making it a fantastic base for a healthy meal. It’s rich in fiber, vitamins C and B, potassium, and antioxidants. When stuffed with a filling like creamed spinach made with Greek yogurt instead of heavy cream, this dish becomes a powerhouse of vitamins and minerals.
div>
Best Crispy Golden Crab Bites Recipe
Introduction
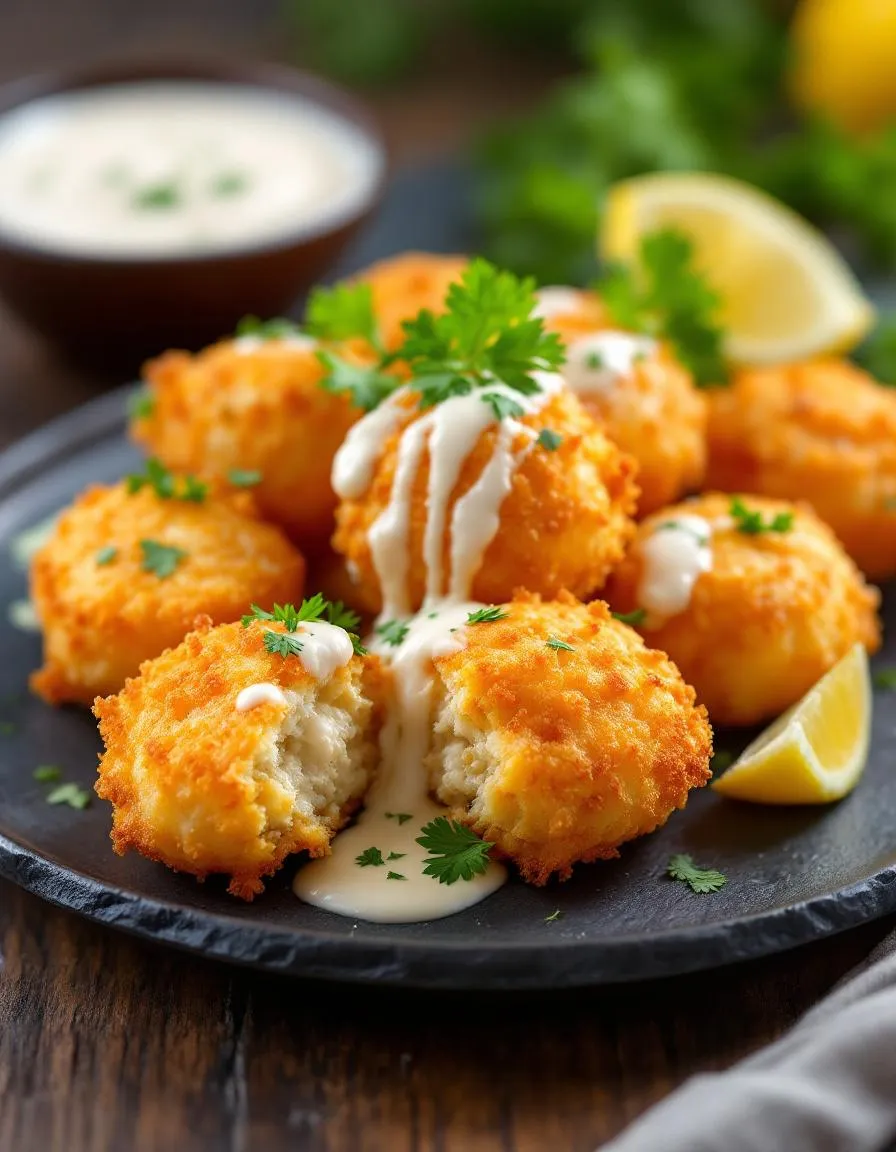
Do you ever crave that perfect, restaurant-style appetizer that feels both incredibly special and surprisingly easy to love? You know, the one that makes everyone gather around the platter, eager for the next batch. Honestly, that is the exact experience I want to bring into your kitchen today with these irresistible Crispy Golden Crab Bites. They are the ultimate crowd-pleaser, promising a satisfying crunch with every single bite.
So, what exactly are Crispy Golden Crab Bites? Essentially, they are delectable morsels of seasoned crab meat, carefully coated and fried to achieve a spectacularly crunchy exterior that gives way to a tender, flavorful center. This dish matters because it transforms a luxurious ingredient into an approachable, shareable feast. It perfectly fits the tone of Exorecipes, where we celebrate turning fantastic ingredients into unforgettable meals for any occasion. Furthermore, you can easily pair these bites with a variety of dipping sauces. For a fantastic homemade option, our Creamy Cilantro Lime Dipping Sauce offers a tangy complement that cuts through the richness beautifully. Moreover, if you are looking for other impressive starters, our guide on how to build the perfect appetizer platter provides excellent inspiration. Ultimately, this recipe delivers gourmet flavor without any gourmet hassle, making it an essential addition to your entertaining repertoire.
Why I Love This Recipe
I absolutely adore this recipe for Crispy Golden Crab Bites because it always brings back warm memories of family gatherings. My grandmother used to make a similar version for special holidays, and the sound of everyone oohing and aahing as the platter hit the table is something I strive to recreate in my own home. They represent more than just food. They are a bite-sized piece of joy that connects me to my past while creating new memories with friends around my own table today.
Health and Nutrition
Why it’s good for your body
These Crispy Golden Crab Bites deliver a powerful nutritional punch. Primarily, they offer a fantastic source of high-quality, lean protein from the crab meat. Consequently, this protein helps build and repair muscle tissue, and it also keeps you feeling full and satisfied for longer. Furthermore, crab provides essential minerals like selenium and zinc, which actively support your immune system and thyroid function.
Moreover, when you bake them instead of deep-frying, you significantly cut down on unnecessary fats. As a result, you can enjoy that satisfying crunch without the guilt. Additionally, the omega-3 fatty acids found in crab contribute to heart and brain health. Therefore, each serving of Crispy Golden Crab Bites supports your overall wellness from multiple angles.
Finally, this dish incorporates other wholesome ingredients. For instance, whole-wheat breadcrumbs can add valuable fiber to aid digestion. Ultimately, you get a delicious appetizer that truly nourishes your body from the inside out. Enjoying Crispy Golden Crab Bites means you are treating yourself to a meal that is as good for you as it is tasty.
How it fits in a healthy lifestyle
These Crispy Golden Crab Bites fit beautifully into a balanced eating plan. You can easily serve them as a high-protein appetizer that satisfies hunger without overdoing it, or pair them with a big, leafy green salad for a complete and light lunch. They are perfect for those evenings when you want something flavorful but don’t want to spend hours in the kitchen.
For anyone following a specific diet, this recipe is wonderfully adaptable. You can use gluten-free breadcrumbs to make it celiac-friendly, and baking them keeps the fat content in check for a heart-healthy option. If you’re looking for more ways to incorporate smart, delicious choices into your week, explore our guide to easy meal prep ideas. Remember, enjoying your food is key! These bites prove that you don’t have to sacrifice flavor for nutrition. For another great recipe that balances health and taste, try our popular avocado toast variations.
Delicious bite-sized crab cakes with a crispy golden exterior and tender, flavorful interior, perfect as an appetizer or snack.
Ingredients
Scale
For the Crust:
1 lb lump crab meat, drained and picked
1/2 cup breadcrumbs
1/4 cup mayonnaise
1 egg, beaten
2 tbsp fresh parsley, chopped
1 tsp Old Bay seasoning
1/2 tsp Dijon mustard
1/4 tsp black pepper
1/4 cup vegetable oil for frying
Lemon wedges for serving
Instructions
1. Prepare the Crust:
In a bowl, combine crab meat, breadcrumbs, mayonnaise, egg, parsley, Old Bay seasoning, mustard, and pepper. Mix gently.
Form the mixture into small bite-sized patties, about 1 inch in diameter.
Heat vegetable oil in a skillet over medium heat. Fry crab bites in batches for 2-3 minutes per side until golden brown and crispy.
Drain on paper towels and serve immediately with lemon wedges.
Notes
You can customize the seasonings to taste.
How to Prepare This Dish
Steps and time-saving tips
First, gather all your ingredients and preheat your oven to 400°F. This simple step ensures everything moves quickly later. Meanwhile, whisk the mayonnaise, a squeeze of lemon juice, and your favorite seasonings in a large bowl. Next, gently fold in the lump crab meat until it is just combined; however, be careful not to overmix it. Overmixing can break down the delicate crab. Then, shape the mixture into small, even balls and place them on a parchment-lined baking sheet. For a golden, crispy exterior, lightly brush each bite with melted butter or a spray of olive oil. Bake for 12-15 minutes until they are perfectly golden brown. Furthermore, you can prepare the dipping sauce while they bake. Let the bites cool for a few minutes before serving; consequently, they will firm up beautifully. For a time-saving tip, you can mix the crab filling a day in advance and keep it covered in the refrigerator. Simply bake them when you are ready for a fast, impressive appetizer.
and-learned-from">Mistakes I’ve made and learned from
I have definitely learned a few lessons the hard way with these Crispy Golden Crab Bites. My first major mistake was using canned crab without draining it thoroughly. The excess moisture created a soggy mixture that simply would not hold its shape. Now, I always press the crab between paper towels to remove every last drop of liquid. Another error was overpacking the mixture, which resulted in dense, heavy bites instead of light and flaky ones. A gentle hand is absolutely crucial here. I also learned that skipping the parchment paper is a disaster waiting to happen. Sticking bites are a nightmare to salvage! For more tips on avoiding common kitchen blunders, check out my guide on common baking mistakes. And if you are looking for the perfect side to serve with these, my easy dipping sauces post has fantastic options that complement the crab flavor wonderfully.
Cultural Connection and Variations
Where this recipe comes from
My family first discovered these incredible bites on a trip to the Chesapeake Bay. We watched local watermen haul in bushels of blue crab, and that evening, a tiny waterfront shack served their version. They called them crab fritters, but we knew them as a revelation. The cook told us his secret was a dash of Old Bay seasoning and letting the batter rest, which creates that signature craggy, golden crust. Consequently, every family gathering now demands a platter of these Crispy Golden Crab Bites. They carry the taste of that salty air and summer sunshine.
Around the world, peopl
e put their own spin on this concept. In Japan, chefs might mix crab with panko for an ultra-light texture, often serving them with a ponzu dipping sauce. Meanwhile, in Thailand, you may find a similar fritter packed with fresh herbs like cilantro and lemongrass, served with a sweet chili sauce. Even across the American South, recipes vary. Some families add a spicy kick with cayenne pepper, while others stir in fresh sweet corn for a delightful burst of sweetness. Ultimately, the magic of Crispy Golden Crab Bites lies in their delicious adaptability.
How it fits in today’s cooking
This dish absolutely thrives in modern kitchens. For instance, it fits perfectly into today’s love for shareable appetizers and game day spreads. Furthermore, home cooks constantly adapt the recipe to fit their needs. Many people now use an air fryer to achieve that satisfying crunch with less oil, making it a slightly lighter option. You can easily find inspiration for other modern twists by exploring our collection of incredible appetizer recipes.
Moreover, these crab bites remain a star for holiday parties and seasonal celebrations. They bring a touch of elegant comfort to any table without requiring hours of work. Families often pass down their unique version, making it a cherished tradition. If you are looking for the perfect sweet ending to follow this savory treat, consider pairing it with one of our decadent dessert recipes. Ultimately, this classic continues to earn its place in our cooking routines because it consistently delivers joy and incredible flavor.
>Taste and Texture
What makes it delicious
These Crispy Golden Crab Bites deliver a truly satisfying crunch with every single bite. Furthermore, the exterior shatters delicately to reveal a warm, tender, and flaky crab interior. A hint of Old Bay seasoning and fresh lemon zest provides a bright, fragrant aroma that is utterly irresistible. Ultimately, the combination of creamy mayonnaise and sharp scallions creates a rich, savory flavor that perfectly complements the sweet crab meat. You will absolutely love the fantastic contrast in these Crispy Golden Crab Bites.
Boosting the flavor
For an instant flavor upgrade, consider serving your Crispy Golden Crab Bites with a zesty dipping sauce. A creamy sriracha aioli or a classic remoulade sauce introduces a tangy, spicy kick that cuts through the richness. Alternatively, you can mix a pinch of cayenne pepper or smoked paprika directly into the crab mixture for a warm, smoky depth. If you want to turn this appetizer into a main course, simply serve them on a soft brioche bun with crisp lettuce for an incredible crab cake slider. For more inspiration on crafting the perfect meal around them, explore our guide to perfect side dishes that pair wonderfully.
Tips for Success
Best practices for results
Always chill your crab mixture thoroughly before forming the bites because this crucial step helps them hold their shape during cooking. Furthermore, use a neutral, high-heat oil for frying to achieve that perfect golden exterior without any off-flavors. For the best texture, avoid overcrowding the pan so each piece cooks evenly and crisps up beautifully. Additionally, serve your Crispy Golden Crab Bites immediately with a squeeze of lemon for the ultimate flavor experience.
Mistakes to avoid
A common error involves using a filling that is too wet, which consequently causes the bites to break apart in the oil. Instead, gently squeeze excess moisture from your crab meat and binding ingredients; this simple step ensures your appetizers stay intact. Moreover, never skip the step of bringing your oil to the proper temperature, as otherwise you will end up with greasy results. For a deeper dive on getting this right, our guide on managing frying temperatures is incredibly helpful. Finally, resist the urge to constantly flip them; instead, let them develop a crispy crust on one side before turning. If you are looking for a fantastic dipping sauce to complement them, consider our creamy remoulade recipe for a perfect pairing.
Serving and Pairing Suggestions
How to serve this dish
Immediately serve your Crispy Golden Crab Bites straight from the skillet for maximum warmth and crunch. For a stunning presentation, arrange them on a sleek slate board or in a rustic basket lined with parchment paper. Additionally, garnish the platter with generous lemon wedges and a sprinkle of fresh, chopped chives to add a vibrant pop of color. Consequently, these little morsels become the star of any gathering, whether you’re hosting an elegant holiday cocktail party or a casual weekend brunch.
h-it">What goes well with it
First, a cool and creamy dipping sauce perfectly balances the hot, savory flavor of these Crispy Golden Crab Bites. We highly recommend our crowd-pleasing Creamy Cilantro Lime Dip for a zesty, herbaceous kick. Meanwhile, a crisp, chilled glass of Sauvignon Blanc or a light lager beer cuts through the richness beautifully. For a complete meal, simply pair these irresistible bites with a fresh, simple side salad. Alternatively, our Summer Watermelon Feta Salad offers a wonderfully sweet and salty contrast that everyone will love.
What is the best crab to use for crab bites?
For the most authentic flavor, jumbo lump crab meat is the best choice for Crispy Golden Crab Bites as it provides large, tender chunks. However, lump crab or backfin crab are excellent, more affordable alternatives that still deliver great taste and texture for this appetizer.
ank-math-faq-item">
Can you make crab bites ahead of time?
Yes, you can prepare Crispy Golden Crab Bites ahead of time for easy entertaining. Form the crab mixture into balls and arrange them on a baking sheet, then cover and refrigerate for up to 24 hours before frying or baking when ready to serve.
How do you keep crab cakes from falling apart?
The key to preventing your Crispy Golden Crab Bites from falling apart is to use enough binder, like egg and mayonnaise, and to chill the mixture thoroughly before cooking. Chilling helps the ingredients firm up, ensuring they hold their shape perfectly during frying or baking.
What dipping sauce goes with crab bites?
A classic remoulade, a creamy lemon-dill aioli, or a simple spicy cocktail sauce are all fantastic dipping sauces that complement the rich flavor of Crispy Golden Crab Bites. For a quick option, mix mayonnaise with a squeeze of lemon juice and a dash of Old Bay seasoning.