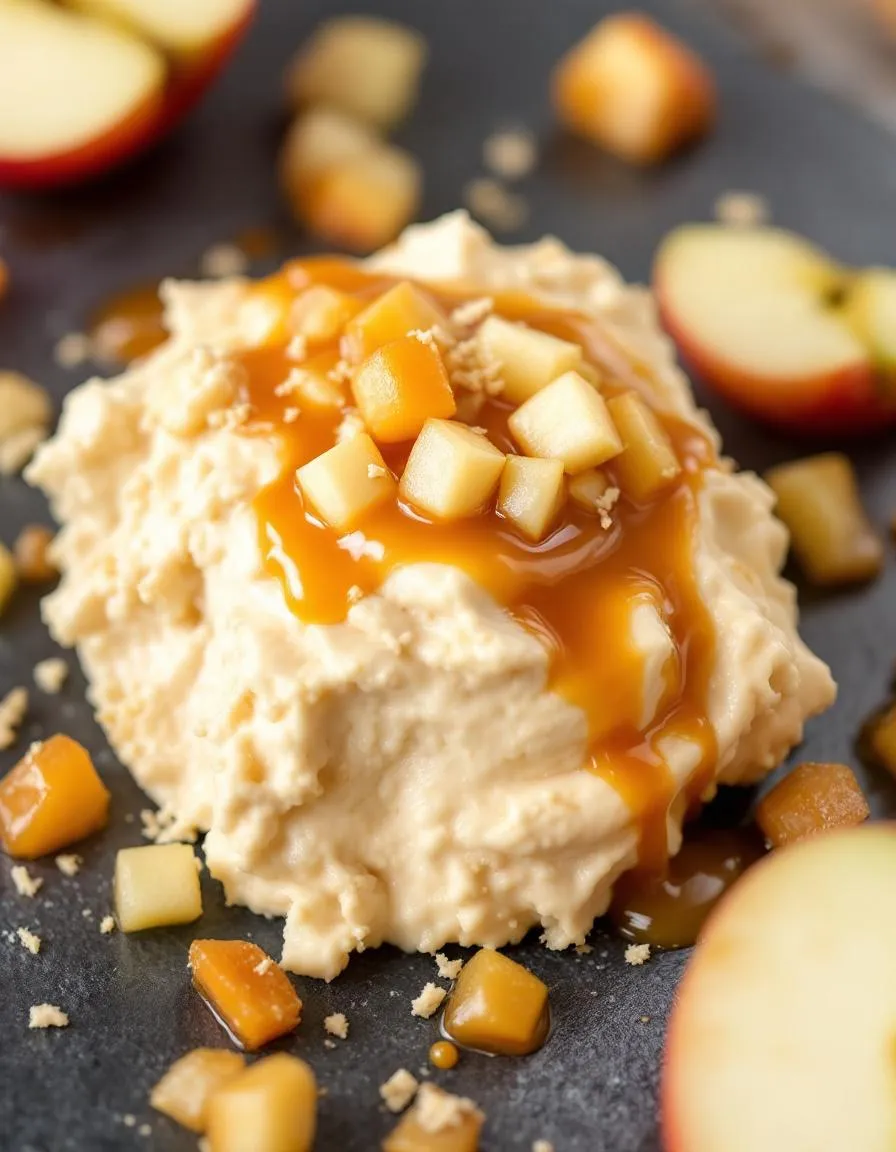
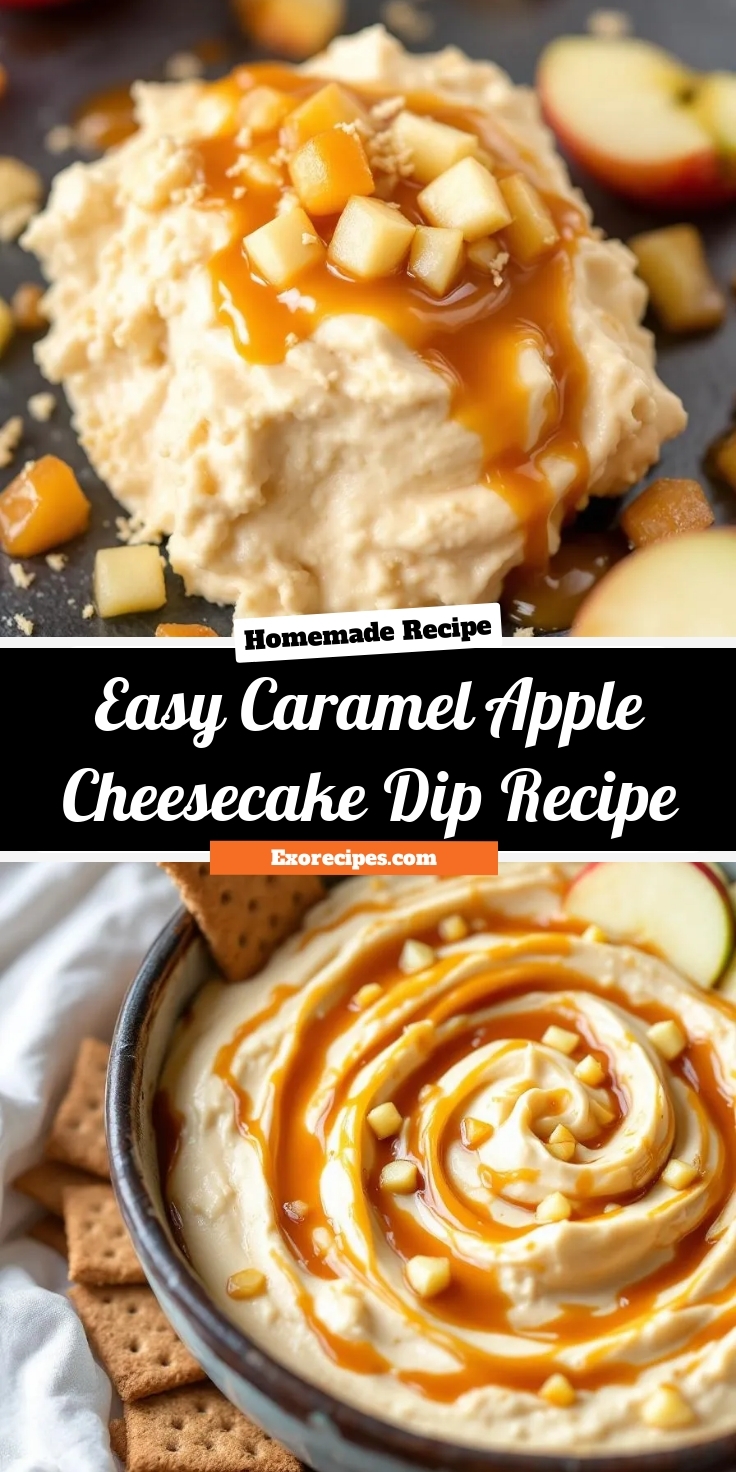
Imagine the coziest fall gathering where a single bowl becomes the center of everyone’s attention. That is the magic you can create with this incredibly simple dessert. This Easy caramel apple cheesecake dip captures the essence of autumn in every creamy, dreamy bite, offering all the flavor of a decadent cheesecake without any of the fuss. It is the perfect solution for when you crave something spectacular but need a recipe that truly understands a busy schedule.
So what exactly is this crowd-pleasing phenomenon? Essentially, this Easy caramel apple cheesecake dip is a no-bake cheesecake transformed into a dippable, shareable experience. We combine lush, creamy ingredients to form a rich base that mimics the filling of a classic New York cheesecake. Then, we swirl in generous amounts of sweet caramel and fold in tender, spiced apple pieces. The final result is a dip that pairs perfectly with crisp apple slices, salty pretzels, or graham crackers for that perfect sweet-and-salty crunch. This recipe matters because it delivers maximum flavor and joy with minimal effort, making you the hero of any potluck, game day party, or casual family night. Furthermore, it perfectly fits our blog’s philosophy of creating approachable, no-fuss recipes that deliver restaurant-quality results. If you enjoy simple yet impressive treats, you will absolutely adore our collection of easy no bake desserts. This dip is the ultimate make-ahead dish; in fact, its flavor improves after chilling, allowing you to prepare it stress-free long before your guests arrive. Ultimately, it solves the problem of needing a stunning dessert that requires zero baking and minimal cleanup, letting you spend less time in the kitchen and more time enjoying the moment.
Why I Love This Recipe
This Easy caramel apple cheesecake dip holds a special place in my heart because it became an instant tradition at our annual fall bonfire. I needed a dessert that could be passed around easily, enjoyed by both kids and adults, and made ahead of time without any stress. This dip was the undeniable answer. I love seeing the smiles it brings and how quickly the bowl always empties. It reminds me that the best recipes are not just about taste, but about creating effortless moments of connection and joy, much like our favorite quick party appetizers that keep the focus on fun.
Health and Nutrition
Why it’s good for your body
This easy caramel apple cheesecake dip brings more to the table than just incredible flavor. First, it features the star of the show: apples. Consequently, you get a serving of fruit packed with fiber and vitamin C. Moreover, this fiber helps support healthy digestion and keeps you feeling satisfied. Additionally, the Greek yogurt and cream cheese base provides a good source of protein and calcium for strong bones.
Furthermore, you can feel good about the ingredients you use. For instance, by preparing this easy caramel apple cheesecake dip at home, you control the sugar content. Ultimately, this makes it a smarter choice than many store-bought dessert dips. Finally, the combination of protein, fat, and fiber helps prevent a rapid spike in blood sugar. Therefore, this delicious treat offers a more balanced indulgence you can truly enjoy.
How it fits in a healthy lifestyle
This easy caramel apple cheesecake dip fits beautifully into a balanced lifestyle when you enjoy it mindfully. Consider it a perfect treat for sharing at gatherings, which naturally helps with portion control. Pair it with fresh apple slices for an extra fiber boost that makes the snack even more satisfying. It also works wonderfully as a pre-portioned dessert that satisfies a sweet craving without derailing your day.
For those following specific eating plans, this dip is naturally gluten-free. You can also easily adapt the recipe to be lower in sugar by choosing a light caramel option. Remember, a healthy diet has room for joyful eating, and this dip delivers on that promise. For more ideas on balancing your meals, explore our guide on easy meal prep ideas. If you are looking for other nutritious snacks, our healthy snack recipes offer plenty of inspiration.
A creamy, no-bake cheesecake dip swirled with caramel and topped with apple pieces—perfect for dipping with graham crackers or apple slices.
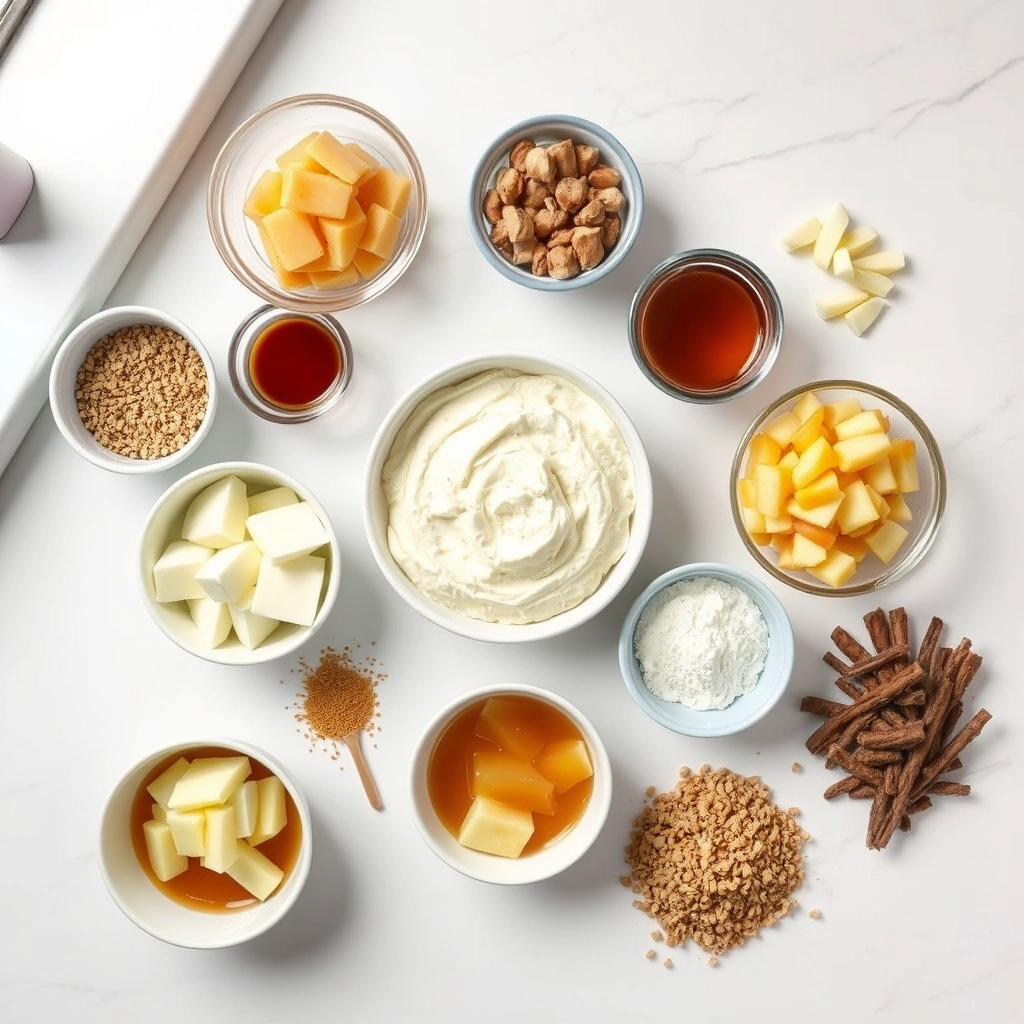
Ingredients
Scale
For the Crust:
8 oz cream cheese, softened
1/2 cup powdered sugar
1 tsp vanilla extract
1/2 cup caramel sauce, plus extra for drizzling
1 large apple, diced
1 tbsp lemon juice
Graham crackers or apple slices for serving
Instructions
1. Prepare the Crust:
In a medium bowl, beat cream cheese, powdered sugar, and vanilla until smooth and creamy.
Fold in 1/4 cup caramel sauce gently to create swirls—do not overmix.
Toss diced apple with lemon juice to prevent browning, then stir into the dip.
Transfer to a serving bowl, drizzle with remaining caramel, and chill for 30 minutes before serving with graham crackers or apple slices.
Notes
You can customize the seasonings to taste.
How to Prepare This Dish
Steps and time-saving tips
First, grab a large mixing bowl and your hand mixer. Beat the softened cream cheese and brown sugar together until the mixture becomes completely smooth and fluffy. This crucial step ensures your Easy caramel apple cheesecake dip has that signature creamy texture without any gritty sugar. Next, gently fold in the vanilla extract and a pinch of salt to balance the sweetness. Meanwhile, if you are using homemade caramel, have it ready to go. Otherwise, a good-quality store-bought jar works perfectly for a quick fix. Now, spread this creamy base evenly into your serving dish. Afterwards, generously drizzle that glorious caramel sauce over the entire layer. For the final touch, sprinkle the chopped pecans and those tiny, delicious toffee bits on top. Finally, cover the dish and chill your Easy caramel apple cheesecake dip in the refrigerator for at least one hour. This resting time allows the flavors to meld together beautifully. Serve it chilled with crisp apple slices, graham crackers, or even pretzels for a delightful sweet and salty contrast.
Mistakes I’ve made and learned from
I once made the classic mistake of using cream cheese straight from the fridge for my Easy caramel apple cheesecake dip. The result was a lumpy, unappetizing mess that no amount of mixing could fix. Now, I always let my cream cheese sit on the counter for a good hour before I start. Trust me, this simple step makes the entire process so much smoother. Another lesson learned the hard way involved my caramel sauce. I once drizzled it on while it was still piping hot, which immediately melted my creamy layer into a soupy puddle. Letting the caramel cool to room temperature first completely solved this kitchen disaster. For more tips on getting your ingredients to the perfect consistency, my guide on softening butter quickly has some great tricks that also apply to cream cheese. And if you’re feeling ambitious with your caramel, avoid the common pitfalls I experienced by checking out my homemade caramel sauce tutorial first.
We can trace the roots of this dessert dip straight back to American county fairs and autumn festivals. Picture crisp fall afternoons, the scent of cinnamon in the air, and the iconic treat everyone craves a caramel apple. Someone, a genius no doubt, looked at that classic combination and thought let us turn this into a shareable, no fuss dip. Consequently, they merged the creamy, tangy goodness of cheesecake with the sweet, buttery notes of caramel and the fresh crunch of apples. This fusion created a dish that immediately feels both nostalgic and excitingly new.
Families often put their own spin on it, too. For instance, some households might stir in toffee bits for extra crunch, while others might add a pinch of sea salt to cut the sweetness. In different regions, people might use local apple varieties like tart Granny Smiths in the north or sweeter Fujis in the west. Ultimately, this easy caramel apple cheesecake dip embodies that spirit of communal eating and personalization. It is a dessert that invites you to gather around and make it your own.
ays-cooking">How it fits in today’s cooking
This dip absolutely thrives in modern cooking because it champions simplicity and social connection. It fits perfectly into today’s fast paced lifestyle, offering a impressive dessert without any of the fuss of baking a whole cheesecake. Furthermore, it has become a staple at seasonal gatherings, from Halloween parties to Thanksgiving feasts and everything in between. Its no bake nature means anyone can whip it up quickly, making it a hero for last minute hosts.
Modern cooks continuously adapt the recipe to suit different dietary needs. Some might use a vegan cream cheese alternative to create a plant based version that everyone can enjoy. Others might serve it with a variety of dippers beyond apples, like pretzels or graham crackers, for a fun textural contrast. This versatility ensures its place as a go to recipe. It pairs wonderfully with other make ahead dishes, allowing you to create a full spread of effortless no bake desserts for any occasion. Therefore, this easy caramel apple cheesecake dip remains a beloved and relevant treat for all.
Taste and Texture
What makes it delicious
This Easy caramel apple cheesecake dip delivers a spectacular creamy texture that feels incredibly lush and smooth on your tongue. Each bite bursts with the sweet, buttery flavor of rich caramel, perfectly balanced by the subtle tang of cream cheese. Furthermore, the warm, fragrant notes of cinnamon and vanilla weave through the dip, creating a comforting aroma that reminds you of a fresh-baked dessert. Finally, when you scoop it with a crisp apple slice, you get a fantastic contrast between the cool, velvety dip and the juicy, snappy fruit. Ultimately, this combination makes the Easy caramel apple cheesecake dip an irresistible treat.
r">Boosting the flavor
For an even more decadent experience, consider folding in chopped pecans or toffee bits to introduce a delightful crunch. Alternatively, a drizzle of extra caramel sauce or a sprinkle of sea salt on top will amplify the sweet and salty profile beautifully. If you want to explore another fantastic dip variation, our pumpkin cheesecake dip offers a wonderfully spiced autumn twist. Moreover, serving this alongside a batch of homemade cinnamon sugar tortilla chips can turn your snack into a truly memorable dessert platter.
Tips for Success
Best practices for results
First, always use full-fat cream cheese for the richest and creamiest texture in your Easy caramel apple cheesecake dip. Furthermore, ensure your cream cheese sits at room temperature for at least 30 minutes; consequently, it will blend smoothly without any lumps. Additionally, gently fold the whipped topping in by hand at the final step to maintain a light and fluffy consistency. For the best flavor experience, always chill your finished Easy caramel apple cheesecake dip for one hour before serving.
>Mistakes to avoid
Avoid overmixing the dip once you add the whipped topping, as this can deflate it and make the consistency dense. Instead, use a spatula to gently fold everything together until it is just combined. Moreover, do not skip the chilling step; otherwise, the flavors will not have time to meld properly. For more guidance on getting the perfect creamy base, read our tips on how to soften cream cheese correctly. Also, remember to pat your chopped apples dry with a paper towel before adding them; this simple step prevents a watery dip. If you are preparing this for a party, you can learn how to make dips ahead of time without sacrificing quality.
Serving and Pairing Suggestions
How to serve this dish
First, present your Easy caramel apple cheesecake dip in a beautiful, wide-rimmed bowl. This simple step creates an inviting centerpiece for your dessert table. For a stunning visual effect, drizzle extra caramel sauce over the top and sprinkle it with finely chopped pecans. Consequently, this garnish adds a delightful crunch and makes the dip look absolutely irresistible.
Serve this creamy delight at your next holiday gathering or a casual game night. Alternatively, it makes a fantastic sweet treat for a brunch spread. Remember to surround the bowl with an array of dippers so everyone can dig in. Ultimately, this Easy caramel apple cheesecake dip promises to be the star of any occasion.
h-it">What goes well with it
Pair your Easy caramel apple cheesecake dip with crisp, tart apple slices for a classic combination. The fresh fruit cuts through the dip’s richness perfectly. Furthermore, salty pretzel rods or sweet graham crackers also offer a wonderful textural contrast that everyone loves.
For a truly decadent experience, serve it alongside a slice of our Snickerdoodle Cupcakes. Meanwhile, a hot cup of coffee or a glass of cold milk beautifully balances the sweetness. Finally, consider offering our Pumpkin Spice Latte Cupcakes for a full fall-themed dessert spread that will utterly delight your guests.
math-faq-block">
What do you serve with caramel apple cheesecake dip?
The best dippers for this easy caramel apple cheesecake dip are sliced apples (tossed in a little lemon juice to prevent browning), graham crackers, pretzels, or vanilla wafers. You can also use it as a delicious spread on toast or a topping for pancakes to make a special breakfast treat.
Can you make caramel apple dip ahead of time?
Absolutely! You can prepare this easy caramel apple cheesecake dip up to 2-3 days in advance. Store it covered tightly in the refrigerator, then give it a good stir before serving. Making it ahead allows the flavors to meld together beautifully.
How long does cheesecake dip last in the fridge?
When stored in an airtight container, this easy caramel apple cheesecake dip will stay fresh in the refrigerator for 3 to 4 days. Always check for any signs of spoilage before serving leftovers, especially if you’ve been dipping directly into the bowl.
ank-math-faq-item">
Can I use homemade caramel sauce for this dip?
Yes, homemade caramel sauce works wonderfully and can elevate the flavor. However, using a good quality store-bought caramel sauce is a major time-saver and is the key to keeping this recipe quick and simple. Either option will result in a delicious dip.
Easy Maple Pumpkin Cookies – Savory Splash
Introduction
Is there anything more comforting than the smell of warm spices and maple wafting through your kitchen? Honestly, it feels like a cozy autumn hug. Furthermore, we all crave those simple, soul-warming treats that make a season special. Consequently, I am absolutely thrilled to share my recipe for Maple Pumpkin Cookies – Savory Splash. This delightful twist on a classic cookie perfectly captures the essence of fall in every single bite.
So, what exactly are Maple Pumpkin Cookies – Savory Splash? Essentially, they are a soft, cake-like cookie bursting with real pumpkin flavor and sweet maple, but they feature a unique, savory splash that elevates them beyond the ordinary. This unexpected element, a hint of rosemary or a touch of black pepper, creates a sophisticated flavor profile that surprises and delights the palate. This recipe matters because it breaks the mold. Instead of just another overly sweet dessert, it offers a more complex and memorable experience. Moreover, it fits our blog’s tone perfectly. We champion approachable recipes that encourage culinary creativity, just like our guide to creating the perfect homemade spice blend. This recipe uses simple, whole ingredients to create something extraordinary, much like turning a few basic components into a stunning easy homemade focaccia. Ultimately, these Maple Pumpkin Cookies – Savory Splash are not just a treat; they are a conversation starter for your next gathering.
Why I Love This Recipe
I have a deep personal connection to these Maple Pumpkin Cookies – Savory Splash. My grandmother always made classic pumpkin cookies, but one year I decided to experiment with her recipe by adding a little fresh rosemary from my garden. The result was magical and immediately became a new family tradition. Now, baking these cookies signals the true start of fall in my home. The process fills my kitchen with the most incredible aroma, and sharing them with friends always brings so much joy. They represent a beautiful blend of cherished tradition and my own culinary adventure, which is why this recipe holds such a special place in my heart.
Health and Nutrition
Why it’s good for your body
Maple Pumpkin Cookies – Savory Splash pack a powerful nutritional punch. First, pumpkin puree provides a fantastic source of vitamin A, which actively supports your vision and immune system. Furthermore, this key ingredient delivers a healthy dose of fiber, promoting excellent digestive health and helping you feel satisfied. Consequently, you can enjoy a treat that truly nourishes your body from the inside out.
Additionally, we use real maple syrup as a natural sweetener. Unlike refined sugars, maple syrup offers beneficial antioxidants and minerals like manganese and zinc. Therefore, these cookies provide a more wholesome energy release without the typical sugar crash. Moreover, the warming spices like cinnamon and ginger not only add depth of flavor but also bring their own anti-inflammatory properties to every bite.
Ultimately, choosing Maple Pumpkin Cookies – Savory Splash means you are making a smart choice for your well-being. Each ingredient works together to create a snack that is as good for you as it is delicious. Finally, you can feel great about serving these cookies to your family, knowing you are supporting their health with every savory-sweet mouthful.
How it fits in a healthy lifestyle
Maple Pumpkin Cookies – Savory Splash seamlessly fit into a balanced eating plan. They make for a perfect afternoon snack that satisfies a sweet craving without derailing your goals. You can also enjoy one as a delightful dessert after a nutritious meal. For those following specific dietary paths, these cookies are a wonderful plant-based option that everyone can enjoy.
Pairing a cookie with a source of protein, like a handful of almonds or a glass of milk, can make it an even more satisfying and balanced treat. If you are looking for more inspiration on building a wholesome menu, explore our guide on creating a balanced meal plan. Remember, healthy living is all about balance and enjoying the foods you love. For another great recipe that complements an active lifestyle, try our wholesome energy bites for a quick protein boost.
A unique fusion of spicy Sichuan mapo flavors and sweet pumpkin in a soft, savory cookie with a hint of maple sweetness.
Ingredients
Scale
For the Crust:
1 cup pumpkin puree
2 tbsp maple syrup
1/4 cup doubanjiang (fermented chili bean paste)
1 tsp Sichuan peppercorns, ground
2 cups all-purpose flour
1/2 tsp baking soda
1/4 cup vegetable oil
1/4 cup finely chopped scallions
2 cloves garlic, minced
1 tsp ginger, grated
1/2 cup firm tofu, crumbled
1/4 cup water
Instructions
1. Prepare the Crust:
Preheat oven to 350°F (175°C) and line a baking sheet with parchment paper.
In a bowl, mix pumpkin puree, maple syrup, vegetable oil, doubanjiang, ground Sichuan peppercorns, garlic, and ginger until well combined.
Gradually add flour and baking soda to the wet ingredients, stirring until a soft dough forms. Fold in crumbled tofu and scallions.
Drop tablespoon-sized portions of dough onto the prepared baking sheet, spacing them about 2 inches apart.
Bake for 12-15 minutes or until edges are lightly golden. Let cool on the sheet for 5 minutes before transferring to a wire rack.
Notes
You can customize the seasonings to taste.
How to Prepare This Dish
Steps and time-saving tips
First, preheat your oven and line your baking sheets with parchment paper. Meanwhile, whisk your dry ingredients together in one bowl. In a larger separate bowl, cream the softened butter with both sugars until the mixture becomes light and fluffy. Next, beat in the pumpkin puree, maple syrup, egg, and vanilla. Gradually fold your dry ingredients into this wet mixture until you form a soft, slightly sticky cookie dough. For a major time-saving tip, use a medium cookie scoop to drop perfect dough portions onto your sheets; this ensures even baking and saves you from messy hands. Then, just bake your Maple Pumpkin Cookies – Savory Splash until the edges look set. Finally, let them cool completely on the pan before you drizzle on the simple maple glaze. Ultimately, this straightforward process yields the most wonderfully spiced and cakey cookies.
and-learned-from">Mistakes I’ve made and learned from
I have definitely learned a few lessons the hard way with these Maple Pumpkin Cookies – Savory Splash. My biggest mistake was using cold, hard butter straight from the fridge, which resulted in a lumpy batter that refused to cream properly. Now I always make sure my butter is truly softened at room temperature for a perfectly smooth base. Another common error I made was over-measuring the flour, which led to a dry and crumbly dough instead of the soft, cake-like texture we want. I finally solved this by using a kitchen scale for accuracy, and the difference was incredible. For more on getting your ingredients just right, my guide on ingredient substitutions can be a real lifesaver. Remember, patience is key; letting these cookies cool completely before glazing prevents a runny mess, a tip I picked up from my deep dive into baking science.
Cultural Connection and Variations
Where this recipe comes from
This recipe for Maple Pumpkin Cookies – Savory Splash pulls from a deep, cozy well of North American tradition. For generations, families have celebrated the autumn harvest by baking with pumpkin and warming spices. My own grandmother, however, always added a special twist. She insisted that a generous splash of real maple syrup, not just sugar, created a richer, more complex flavor. Consequently, her kitchen in Vermont smelled like a perfect fall day whenever these cookies were in the oven. Meanwhile, other cultures approach similar bakes quite differently. In Italy, for instance, cooks might fold pumpkin into a sweet ravioli filling with amaretti cookies. Alternatively, Australian bakers often pair pumpkin with sultanas and cinnamon for a classic scone. Ultimately, our version celebrates a very specific, rustic New England charm. The Maple Pumpkin Cookies – Savory Splash truly captures that spirit of hearth and home.
ays-cooking">How it fits in today’s cooking
This treat absolutely thrives in modern kitchens, especially as we seek meaningful, from-scratch cooking. Today, it fits perfectly into holiday cookie swaps and seasonal gatherings that celebrate the cooler months. Furthermore, contemporary home cooks love adapting the base recipe to suit their dietary needs. Some easily swap in gluten-free flour, while others might use a flax egg for a vegan version. You can even turn this recipe into a fun weekend project with the kids, much like our popular Rainbow Crepe Cake. Moreover, the warm spices and wholesome pumpkin make these cookies feel like a somewhat virtuous indulgence. They pair wonderfully with a cup of coffee for an afternoon pick-me-up or as a sweet ending to a hearty dinner. Ultimately, this recipe offers a delicious way to connect with tradition, much like the comforting flavors in our Butternut Squash Soup.
Taste and Texture
What makes it delicious
These Maple Pumpkin Cookies – Savory Splash deliver a wonderfully soft and cake-like texture that simply melts in your mouth. Each bite releases a warm, fragrant blend of cozy pumpkin and sweet maple, creating a truly autumnal experience. Furthermore, the rich, earthy spices complement the sweet glaze perfectly, making every cookie feel like a special treat. Ultimately, the delightful chewiness combined with the smooth, sweet icing makes these Maple Pumpkin Cookies – Savory Splash utterly irresistible.
Boosting the flavor
For an extra flavor kick, consider folding a handful of toasted pecans or walnuts into the batter for a delightful crunch. Alternatively, a sprinkle of flaky sea salt on top of the glaze just before it sets creates an amazing sweet-and-salty contrast. If you love warm spices, a pinch of extra cardamom or a dash of black pepper can really deepen the flavor profile. For another fantastic fall baking idea that uses similar warm spices, explore our popular Pumpkin Cinnamon Rolls. Moreover, serving these cookies slightly warm with a scoop of vanilla bean ice cream turns them into a decadent dessert. Discover more pairing inspiration with our guide to the perfect homemade vanilla ice cream.
Always chill your cookie dough for at least one hour before baking. This crucial step prevents the Maple Pumpkin Cookies – Savory Splash from spreading too thin in the oven. Furthermore, use a cookie scoop to ensure each portion is uniform. For the best texture, line your baking sheets with parchment paper. Finally, let the cookies cool completely on the pan so they set properly.
Mistakes to avoid
Avoid measuring your flour incorrectly, as too much creates a dry, crumbly cookie. Instead, fluff your flour with a spoon before gently spooning it into your measuring cup. Consequently, you will achieve the perfect soft texture for your Maple Pumpkin Cookies – Savory Splash. Moreover, do not overmix your dough once you add the dry ingredients. Overmixing develops gluten and leads to tough cookies, so just mix until you see no more flour streaks. For more guidance, our article on common baking mistakes offers excellent advice. Additionally, ensure your spices are fresh for the most vibrant flavor, a topic we cover in our guide to storing spices properly.
g-suggestions">Serving and Pairing Suggestions
How to serve this dish
Present your freshly baked Maple Pumpkin Cookies – Savory Splash on a rustic wooden board for a charming, homespun feel. Alternatively, arrange them on a elegant cake stand to instantly elevate your dessert table. For a special touch, lightly dust them with powdered sugar just before serving. These cookies truly shine during autumn gatherings and holiday feasts. Consequently, they make a wonderful edible gift when packaged in a beautiful tin or cellophane bag tied with twine. Always serve Maple Pumpkin Cookies – Savory Splash warm to maximize their cozy, aromatic spices.
What goes well with it
A hot cup of spiced chai tea makes a perfect partner for these cookies. The warm spices in the chai beautifully echo the cinnamon and nutmeg in your Maple Pumpkin Cookies – Savory Splash. For a truly decadent experience, try dunking them in a glass of cold milk. The creamy milk provides a lovely contrast to the cookie’s rich, spiced flavor. Furthermore, consider offering a scoop of vanilla bean ice cream on the side for a simple yet impressive dessert. This combination creates a fantastic textural play between the warm, soft cookie and the cool, creamy ice cream. You can find more inspiration for your next baking project with our popular Easy Homemade Bread Recipes. Finally, balance the sweetness by serving these cookies after a savory meal like our hearty Creamy Chicken Pot Pie.
math-faq-block">
Can I make Maple Pumpkin Cookies – Savory Splash without maple syrup?
While maple syrup is a key flavor component, you can substitute it with an equal amount of honey or agave nectar. However, this will alter the distinct autumnal taste, so the final result won’t be an authentic Maple Pumpkin Cookies – Savory Splash experience.
How do I store Maple Pumpkin Cookies to keep them soft?
To maintain their signature soft and cake-like texture, store your Maple Pumpkin Cookies – Savory Splash in an airtight container at room temperature. Placing a piece of bread in the container can help keep them moist for several days.
What kind of pumpkin should I use for these cookies?
For the best results, always use canned 100% pure pumpkin puree, not pumpkin pie filling. The puree provides the perfect moisture and flavor concentration needed for the Maple Pumpkin Cookies – Savory Splash recipe without making the batter too wet.
ank-math-faq-item">
Are Maple Pumpkin Cookies – Savory Splash freezer-friendly?
Absolutely! These cookies freeze beautifully. Ensure they are completely cooled, then place them in a single layer in a freezer-safe bag or container. They can be frozen for up to 3 months; simply thaw at room temperature when you’re ready to enjoy one.
Best Harvest Bowls with Fig Balsamic Vinaigrette
Introduction
Do you ever crave a meal that truly satisfies, one that makes you feel nourished from the inside out? Furthermore, we all need those go-to recipes that are both a joy to eat and simple to create. This is precisely why these Harvest Bowls with Fig Balsamic Vinaigrette will become your new favorite. Ultimately, they offer a perfect harmony of savory and sweet that celebrates the best of the season.
Harvest Bowls are essentially a complete, well-balanced meal served in a single dish. They typically feature a foundation of whole grains, a variety of roasted vegetables, a lean protein, and a generous drizzle of a standout dressing. In this case, the star is an incredibly flavorful Fig Balsamic Vinaigrette that ties everything together. This particular combination matters because it delivers maximum flavor and nutrition without requiring maximum effort from you. It fits our blog’s philosophy perfectly; we champion food that is both beautiful and approachable. Moreover, a great bowl meal like this is endlessly customizable. For instance, you can easily swap in your favorite seasonal veggies or use a different protein, much like the options in our perfectly prepped chicken breast guide. The result is a deeply satisfying lunch or dinner that feels gourmet but is honestly weeknight-easy. The dressing itself, a blend of sweet fig jam and tangy balsamic, is a game-changer you will want to put on everything. Additionally, this recipe is a fantastic way to embrace eating with the seasons, utilizing autumn’s most robust produce. It is a meal that truly delivers on its promise of being wholesome, delicious, and utterly craveable.
Why I Love This Recipe
I genuinely adore these Harvest Bowls with Fig Balsamic Vinaigrette because they remind me of crisp fall weekends. Specifically, the warm spices on the sweet potatoes and the rich aroma of the dressing whisk me right back to my family’s harvest gatherings. This recipe represents more than just a meal for me; it is a comforting and vibrant celebration of autumn’s bounty that I eagerly share with friends. Ultimately, it proves that healthy eating can and should be an absolute delight.
Health and Nutrition
Why it’s good for your body
Harvest Bowls with Fig Balsamic Vinaigrette deliver a powerful nutritional punch. First, the base of leafy greens and roasted vegetables provides a wealth of vitamins, minerals, and fiber. Consequently, this meal actively supports your digestive health and keeps you feeling full and satisfied. The lean protein from ingredients like chicken or chickpeas, furthermore, is essential for building and repairing muscle tissue.
Additionally, the star of the show, the homemade fig balsamic vinaigrette, offers its own unique benefits. Unlike many store-bought dressings, it contains no refined sugars or unhealthy fats. Instead, it uses the natural sweetness of figs and the heart-healthy fats from olive oil. Therefore, you get a delicious flavor boost that also contributes antioxidants and supports good cholesterol levels.
Ultimately, this combination creates a truly balanced meal. Every component in these Harvest Bowls with Fig Balsamic Vinaigrette works together to fuel your body efficiently. You will enjoy sustained energy levels after eating, thanks to the complex carbs and healthy fats. Moreover, the variety of colors on your plate ensures you are consuming a diverse range of phytonutrients. For these reasons, this dish is a fantastic choice for anyone seeking a meal that is as nourishing as it is delicious.
How it fits in a healthy lifestyle
Harvest Bowls with Fig Balsamic Vinaigrette seamlessly fit into almost any healthy eating plan. They are naturally gluten-free and can easily be made vegetarian or vegan by choosing plant-based proteins. This makes them a fantastic option for meal prep, as you can assemble a few at the beginning of the week for quick, nutritious lunches that support your goals.
The balance of macronutrients also makes this bowl ideal for managing energy. The fiber from the vegetables and grains provides a slow release of energy, preventing those mid-afternoon slumps. If you are looking for more gluten-free lunch ideas that keep you full, this recipe is a perfect addition to your rotation. It proves that eating well does not require sacrifice, just smart combinations.
Furthermore, the heart-healthy fats in the vinaigrette and from ingredients like nuts or avocado align perfectly with a cardiovascular-friendly diet. Adopting this kind of mindful eating habit is a sustainable approach to wellness. For more inspiration on creating a balanced plate, explore our guide to creating a balanced plate that works for your lifestyle. This harvest bowl is a delicious example of how simple, whole foods can come together to create a meal that truly supports your well-being every day.
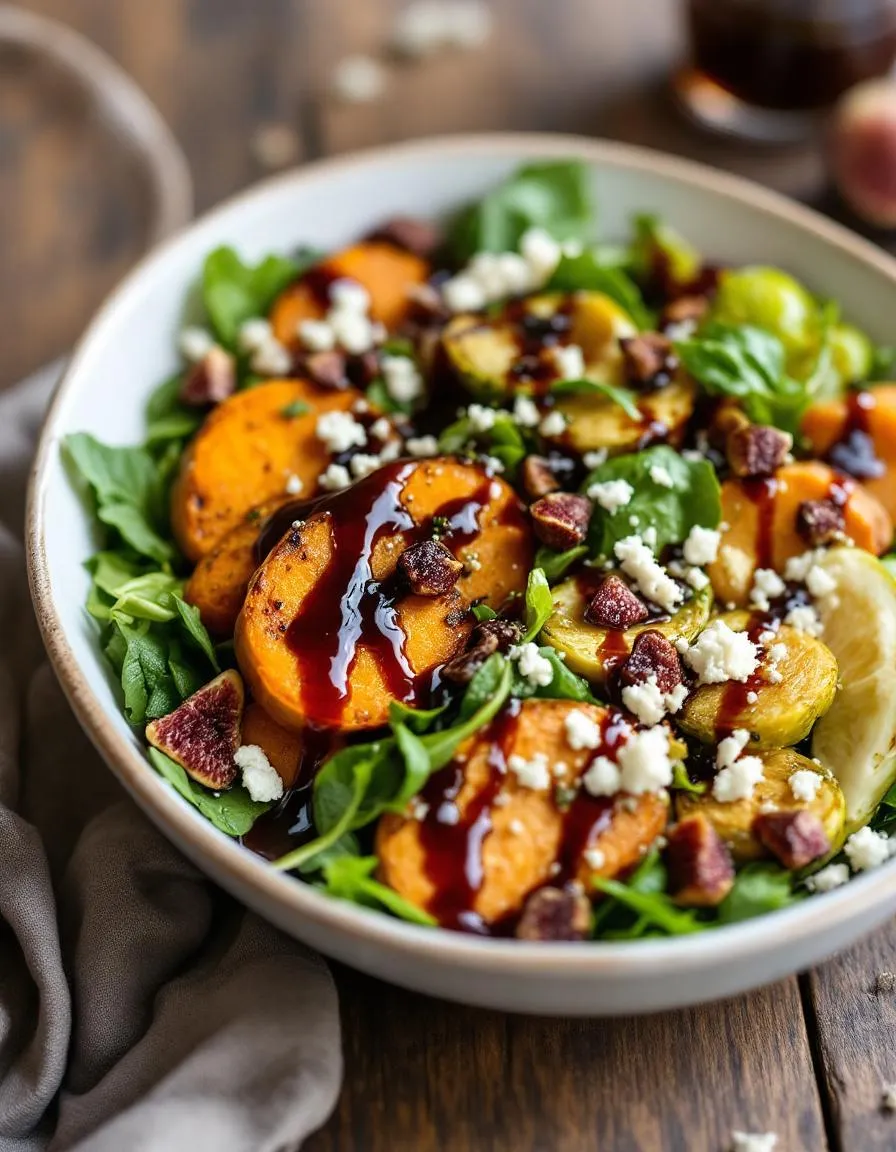
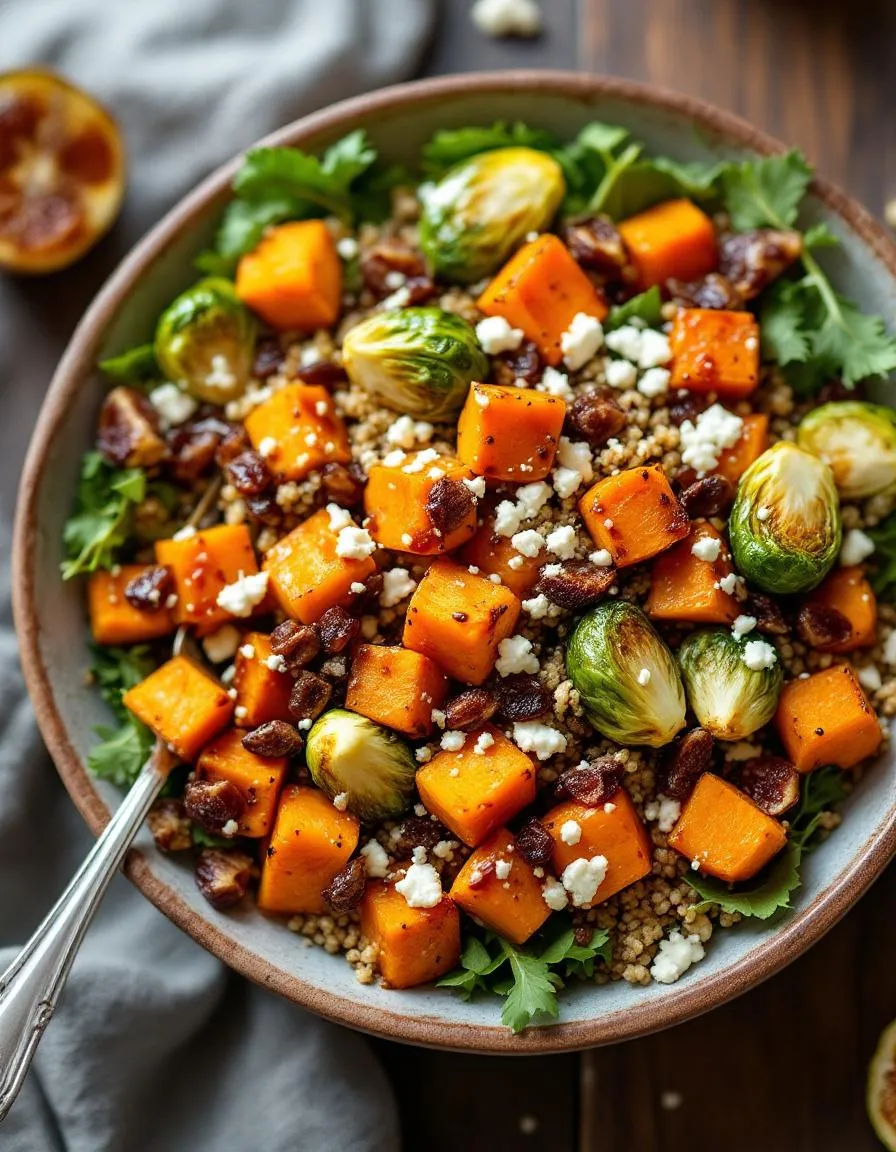
A wholesome and flavorful bowl featuring roasted vegetables, grains, and a sweet-tangy fig balsamic dressing.
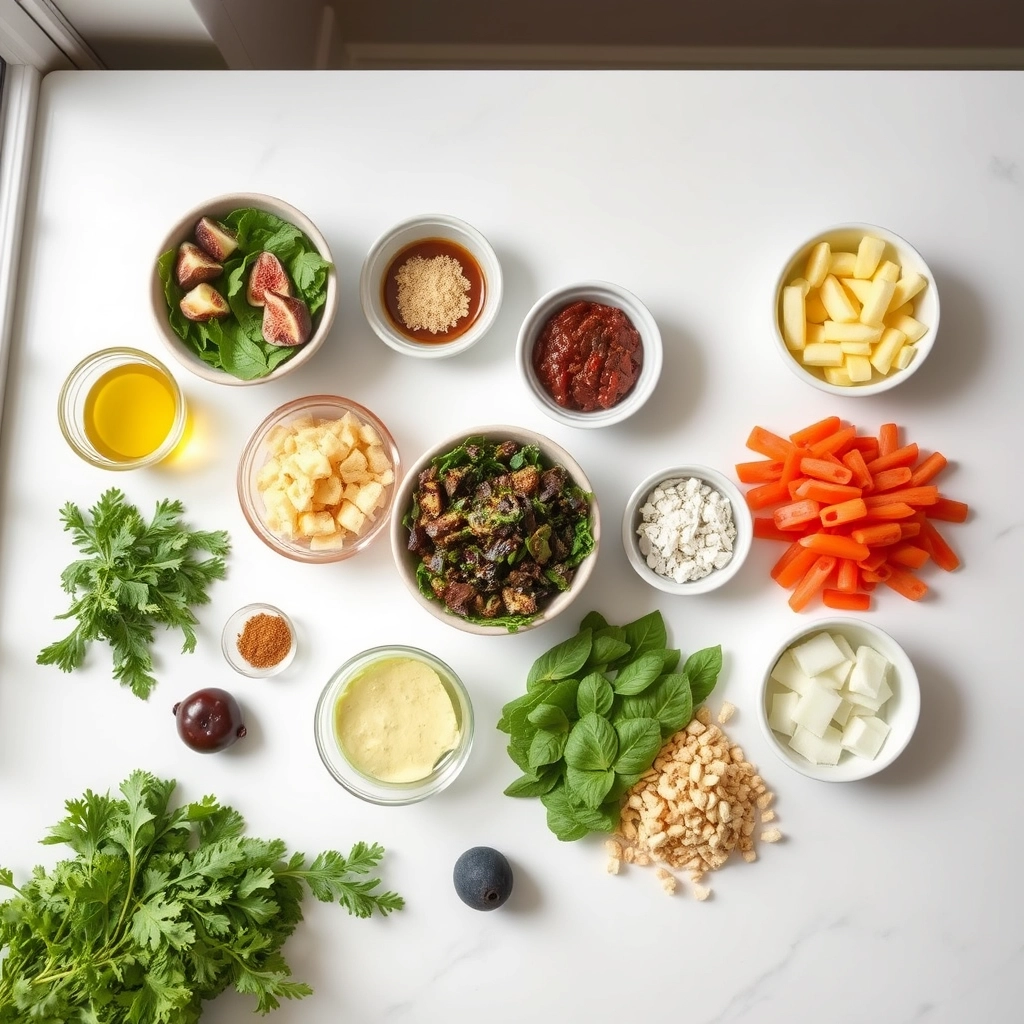
Ingredients
Scale
For the Crust:
1 cup quinoa, rinsed
2 cups vegetable broth
1 sweet potato, cubed
1 cup Brussels sprouts, halved
1 tbsp olive oil
Salt and pepper to taste
4 cups mixed greens
1/2 cup crumbled feta cheese
1/4 cup dried figs, chopped
1/4 cup balsamic vinegar
2 tbsp fig jam
1/4 cup olive oil
1 tsp Dijon mustard
Instructions
1. Prepare the Crust:
Preheat oven to 400°F. Toss sweet potato and Brussels sprouts with olive oil, salt, and pepper. Roast for 25 minutes or until tender.
Cook quinoa in vegetable broth according to package instructions. Let cool slightly.
Whisk together balsamic vinegar, fig jam, olive oil, and Dijon mustard for the vinaigrette.
Assemble bowls with mixed greens, quinoa, roasted vegetables, feta, and dried figs. Drizzle with vinaigrette.
Notes
You can customize the seasonings to taste.
s-dish">How to Prepare This Dish
Steps and time-saving tips
First, preheat your oven to 400°F for roasting the vegetables. While it heats up, chop your sweet potatoes and red onion into uniform, bite-sized pieces; this ensures everything cooks evenly and gets perfectly caramelized. Toss them on a baking sheet with a generous glug of olive oil, salt, and pepper. Meanwhile, whisk together the star of the show: the Fig Balsamic Vinaigrette. Simply combine fig jam, balsamic vinegar, olive oil, and a touch of Dijon mustard in a small jar, seal it tightly, and shake vigorously until it’s beautifully emulsified. Next, pop your vegetables in the hot oven to roast for about 25 minutes. Use this downtime to rinse your quinoa thoroughly and cook it according to package directions. Fluff it with a fork and let it cool slightly. Finally, assemble your vibrant Harvest Bowls with Fig Balsamic Vinaigrette by layering the fluffy quinoa, roasted veggies, fresh arugula, creamy goat cheese, and crunchy pecans. Drizzle that gorgeous dressing over everything right before serving for the ultimate flavor experience.
Mistakes I’ve made and learned from
I used to dread making dressings from scratch because mine would always separate into a sad, oily mess. I learned the hard way that simply whisking ingredients in a bowl isn’t enough; you need that tight seal on a jar to create a proper emulsion through shaking. Now, my vinaigrettes are perfectly creamy every single time. Another rookie mistake? Overcrowding the baking sheet. I’d pile on the sweet potatoes, hoping to save time, but they just steamed into a mushy disappointment instead of roasting into crispy perfection. Spreading them in a single layer is non-negotiable for that caramelized goodness we all love. For more on nailing dressings, my guide on emulsifying salad dressings breaks it down. And if you’re new to grain bowls, my perfect grain bowl formula offers a fantastic blueprint for endless combinations.
n-and-variations">Cultural Connection and Variations
Where this recipe comes from
This recipe for Harvest Bowls with Fig Balsamic Vinaigrette feels like a warm embrace from autumn itself. My grandmother, for instance, always celebrated the first figs of the season by turning them into a sweet, tangy glaze. She would simmer them down with balsamic vinegar, a technique I suspect she learned from her own Italian mother. Consequently, our family version always carries that old-world touch. Around the globe, however, cooks interpret this concept differently. In the Mediterranean, you might find a similar bowl featuring halloumi and pomegranate seeds. Meanwhile, a Middle Eastern variation could include spiced lamb and a date-based dressing instead. Ultimately, the beauty of a Harvest Bowl with Fig Balsamic Vinaigrette lies in its flexibility. It truly is a global celebration of the season’s bounty on a single plate.
How it fits in today’s cooking
Harvest Bowls with Fig Balsamic Vinaigrette fit perfectly into our modern love for vibrant, feel-good meals. They are a fantastic make-ahead lunch that actually excites you to open the container at noon. Furthermore, this dish shines as a stunning, nutrient-packed centerpiece for any fall gathering or Friendsgiving. Today’s cooks brilliantly adapt the base recipe to what they have. For a quick weeknight version, many use a pre-cooked grain like quinoa or farro. Others might add a protein like this perfect Air Fryer Chicken Thighs for a more filling dinner. Honestly, the customizable nature of this bowl makes it a forever favorite. It pairs wonderfully with a cozy dessert, perhaps a slice of Pumpkin Crunch Cake, completing the ultimate autumn dining experience.
Taste and Texture
What makes it delicious
Ultimately, these Harvest Bowls with Fig Balsamic Vinaigrette deliver a symphony of textures and tastes in every single bite. You immediately notice the sweet and tangy fragrance of the vinaigrette, which perfectly complements the earthy roasted vegetables. Furthermore, the creamy goat cheese melts slightly on the warm ingredients, creating a luxurious mouthfeel against the crisp, fresh greens and the hearty chew of the farro. Each element plays a role; for instance, the toasted pecans add a crucial buttery crunch, while the dried cranberries offer little bursts of tart sweetness. This combination makes the Harvest Bowls with Fig Balsamic Vinaigrette an incredibly satisfying and complex dish.
r">Boosting the flavor
Feel free to get creative and amplify your bowl with a few simple tweaks. For a richer, deeper flavor, try marinating your chicken in this incredible honey balsamic marinade before roasting it. Alternatively, you can add a spicy kick by sprinkling on some red pepper flakes or a dash of smoked paprika. Moreover, a generous dollop of lemon herb yogurt sauce introduces a bright, creamy element that cuts through the sweetness beautifully. Finally, always remember to season your grains and vegetables generously with salt and pepper before roasting, as this foundational step builds incredible flavor from the inside out.
Tips for Success
Best practices for results
First, always massage your kale with a bit of the vinaigrette; this crucial step tenderizes the leaves for a much more enjoyable texture. Furthermore, roast your sweet potatoes in a single layer on the baking sheet to ensure they caramelize properly instead of steaming. For the best flavor, always toast your nuts and seeds to unlock their rich, aromatic oils. Finally, shake your fig balsamic vinaigrette vigorously in a sealed jar just before drizzling to re-emulsify it for a perfectly smooth coating on your Harvest Bowls with Fig Balsamic Vinaigrette.
>Mistakes to avoid
A common error involves overdressing the greens too early, which unfortunately makes them soggy and wilted. Instead, always add your vinaigrette right before serving to maintain a fresh, crisp bite. Additionally, many people chop their ingredients into uneven sizes, which leads to inconsistent cooking; for instance, smaller pieces will burn before larger ones are tender. For more guidance on perfect knife skills, check out our guide on how to chop vegetables evenly. Also, do not skip tasting and adjusting the seasoning of your vinaigrette; a balanced dressing is key to a fantastic Harvest Bowl. If your dressing is too tart, our tips for fixing a broken vinaigrette can easily help you achieve the right flavor profile.
Serving and Pairing Suggestions
How to serve this dish
Present your Harvest Bowls with Fig Balsamic Vinaigrette in a wide, shallow bowl to showcase all the beautiful ingredients. For a final touch, drizzle a little extra vinaigrette around the edge just before serving. Consequently, this adds a professional flair. You can also top each bowl with a sprinkle of toasted nuts or seeds for a delightful crunch. These Harvest Bowls with Fig Balsamic Vinaigrette truly shine at a casual weekend brunch or as a vibrant holiday side dish. Ultimately, their colorful appearance makes them a feast for the eyes.
What goes well with it
A crisp, chilled white wine like Sauvignon Blanc beautifully complements the sweet and tangy notes of the fig balsamic vinaigrette. For a non-alcoholic option, try sparkling water with a squeeze of fresh lemon. Additionally, a warm, crusty loaf of bread is perfect for sopping up every last bit of the delicious dressing. In fact, our favorite Classic French Baguette recipe is ideal for this. Moreover, a simple cup of soup makes a wonderful partner. For instance, this dish pairs exceptionally well with our creamy Roasted Tomato Basil Soup for a complete and satisfying meal.
A classic Harvest Bowl typically features a base of grains like quinoa or farro, roasted sweet potatoes or butternut squash, hearty greens like kale, a protein like chicken or chickpeas, and other autumn vegetables. The defining element is the rich, sweet-and-tangy Fig Balsamic Vinaigrette that ties all the components together, making it a truly seasonal dish.
Can I make the fig balsamic vinaigrette ahead of time?
Absolutely! Making the Fig Balsamic Vinaigrette ahead of time is highly recommended. The flavors meld and intensify when it sits in the refrigerator for a few hours or even overnight. Simply store it in an airtight jar or container, give it a good shake before serving, and drizzle it over your Harvest Bowls.
ank-math-faq-item">
What protein goes well with fig balsamic?
The sweet and tangy notes of Fig Balsamic Vinaigrette pair wonderfully with a variety of proteins. Grilled or roasted chicken, crispy chickpeas, seared salmon, and even goat cheese are all excellent choices that complement the flavors in a Harvest Bowl with Fig Balsamic Vinaigrette beautifully.
How do you thicken fig balsamic glaze?
To thicken a Fig Balsamic Vinaigrette into more of a glaze consistency, you can simmer it in a small saucepan over medium-low heat for 5-10 minutes, allowing it to reduce. For an even thicker glaze, a small teaspoon of cornstarch mixed with water can be whisked in during the simmering process until it reaches your desired thickness.
Easy Minestrone with Sausage and Pesto Recipe
Introduction
Is there anything more comforting than a steaming bowl of soup on a crisp evening? Honestly, we think not. This feeling of pure warmth and satisfaction is exactly what you get with this incredible Minestrone with Sausage and Pesto from The Food Charlatan. It transforms the classic Italian soup into a hearty, flavor-packed meal that truly hugs you from the inside out. Furthermore, it is the ultimate answer for anyone seeking a simple yet spectacular one-pot dinner that the entire family will adore.
So what exactly is this Minestrone with Sausage and Pesto from The Food Charlatan? Essentially, it is a robust and savory twist on the traditional minestrone. This version generously incorporates Italian sausage for a deep, meaty foundation and a brilliant swirl of homemade pesto that adds a fresh, herby brightness right at the end. Consequently, every spoonful delivers a complex and satisfying flavor profile that far surpasses any canned soup. This recipe matters because it delivers restaurant-quality depth with straightforward, wholesome ingredients you can feel good about serving. Moreover, it perfectly fits our blog’s tone of creating approachable, from-scratch meals that are both impressive and completely achievable for home cooks of any skill level. For instance, if you are looking for another fantastic way to use Italian sausage, our popular Creamy Tuscan Sausage Pasta is a guaranteed crowd-pleaser. Ultimately, this minestrone is a complete meal in a bowl, but it also pairs wonderfully with a simple side salad or a slice of crusty bread for dipping.
Why I Love This Recipe
I have a profound personal connection to this Minestrone with Sausage and Pesto from The Food Charlatan. Specifically, it became a weekly staple in our house during a particularly hectic season. Surprisingly, it comes together quickly, and the entire process, from browning the sausage to stirring in the final pesto, feels therapeutic. Additionally, the aroma that fills my kitchen reminds me of my grandmother’s cooking, even though she never made this exact dish. Ultimately, it is my go-to recipe for delivering undeniable comfort and nourishment to my family, and it freezes beautifully for future easy dinners. In fact, I often double the batch and stash some away, right next to my favorite Hearty Chicken Pot Pie Soup, for those nights when I need a reliable, homemade meal in minutes.
Health and Nutrition
Why it’s good for your body
Minestrone with Sausage and Pesto from The Food Charlatan truly nourishes you from the inside out. For instance, the rich tomato base delivers a powerful dose of lycopene, an antioxidant that actively supports your heart health. Furthermore, the generous array of vegetables like carrots, celery, and zucchini provides essential vitamins and filling fiber.
This robust soup also offers a fantastic protein boost from the savory sausage. Consequently, this protein helps you feel satisfied longer, which can curb unhealthy snacking. Additionally, the beans contribute even more protein and fiber, creating a meal that truly sustains your energy levels.
Moreover, the signature pesto swirl does more than just add incredible flavor. Importantly, the olive oil and basil in the pesto offer anti-inflammatory benefits. Ultimately, every bowl of Minestrone with Sausage and Pesto from The Food Charlatan is a delicious and strategic choice for your well-being.
How it fits in a healthy lifestyle
This minestrone easily supports a balanced and practical approach to eating. You can make a big batch on Sunday for quick, healthy lunches all week, which helps you avoid less nutritious options when you are busy. The recipe is naturally packed with protein and fiber, two key nutrients that keep you full and energized.
If you are following a specific eating plan, this soup is wonderfully adaptable. For a gluten-free version, simply ensure your sausage is certified gluten-free and use your favorite gluten-free pasta. For more inspiration on crafting meals that fit your goals, explore our guide on easy meal prep ideas. The flexibility of Minestrone with Sausage and Pesto from The Food Charlatan means it can work for you. Remember, healthy eating is about finding delicious recipes you look forward to, like this one or our favorite healthy dinner recipes that the whole family will love.
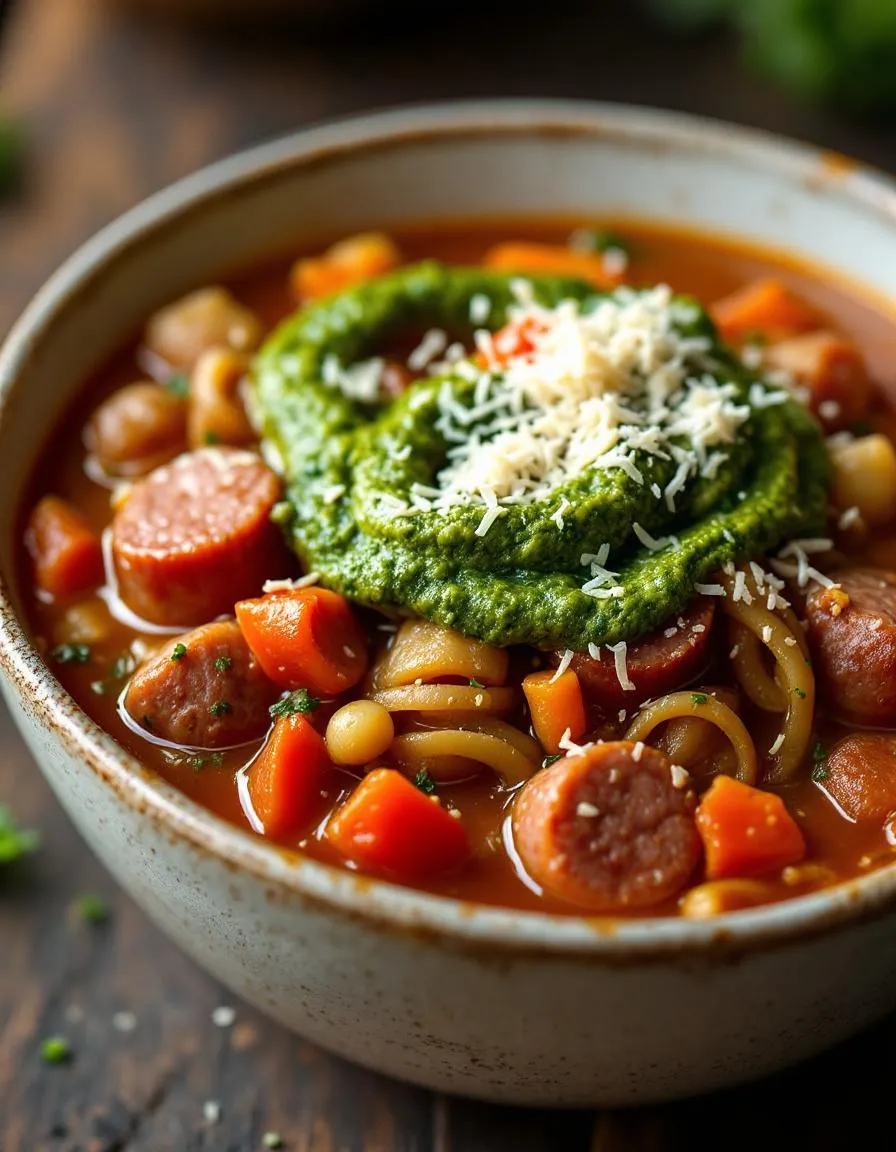
A hearty and flavorful Italian soup featuring savory sausage, fresh vegetables, and a swirl of basil pesto.
Ingredients
Scale
For the Crust:
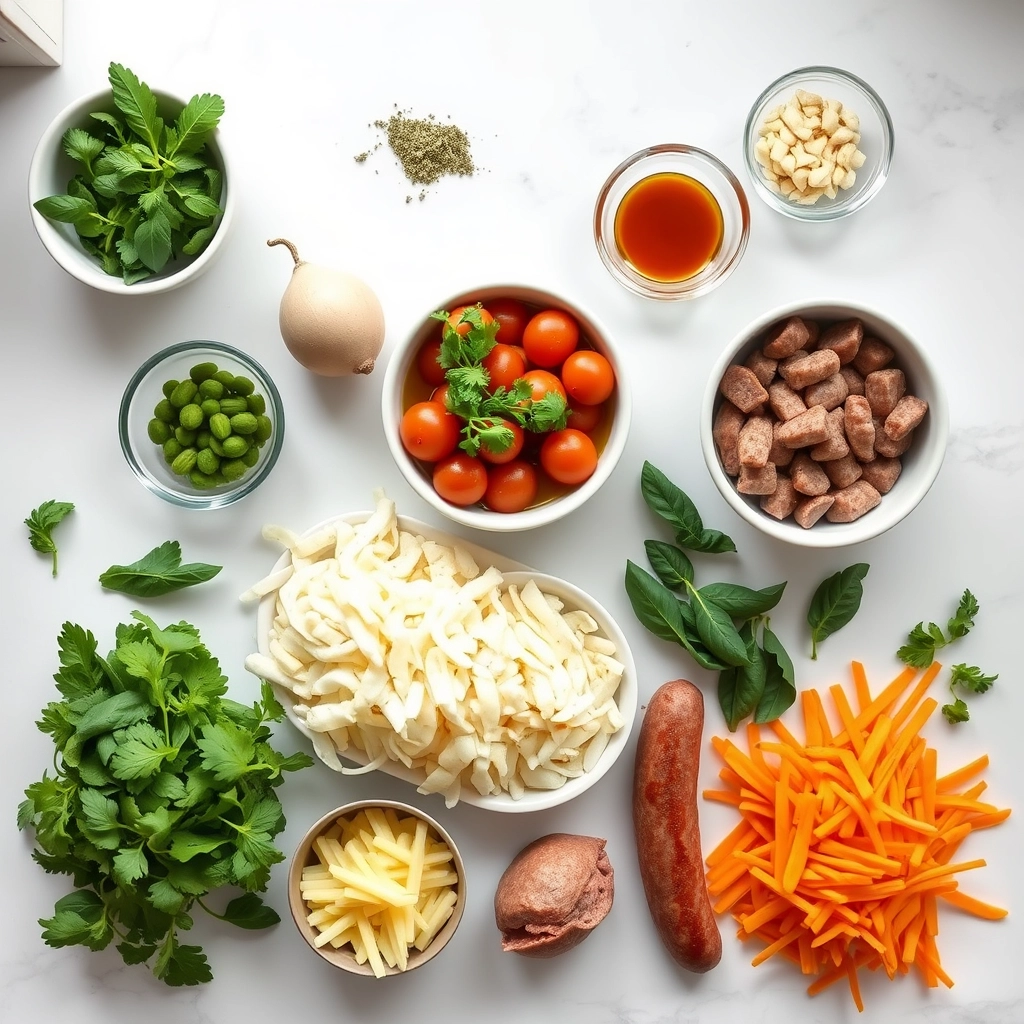
1 lb Italian sausage, casings removed
1 onion, diced
2 carrots, diced
2 celery stalks, diced
3 cloves garlic, minced
1 (28 oz) can diced tomatoes
6 cups chicken broth
1 (15 oz) can cannellini beans, drained and rinsed
1 cup ditalini pasta
2 cups chopped kale
1/4 cup basil pesto
Salt and pepper to taste
Grated Parmesan cheese for serving
Instructions
1. Prepare the Crust:
In a large pot, brown the sausage over medium heat, breaking it into small pieces. Remove and set aside, leaving drippings in the pot.
Add onion, carrots, and celery to the pot. Cook until softened, about 5-7 minutes. Add garlic and cook for 1 minute more.
Pour in diced tomatoes and chicken broth. Bring to a boil, then reduce heat and simmer for 10 minutes.
Stir in cooked sausage, beans, and pasta. Simmer until pasta is tender, about 10-12 minutes.
Add kale and cook until wilted, about 2-3 minutes. Season with salt and pepper.
Ladle into bowls, swirl with pesto, and top with Parmesan cheese before serving.
Notes
You can customize the seasonings to taste.
How to Prepare This Dish
Steps and time-saving tips
First, grab your largest soup pot and heat a drizzle of olive oil over medium-high heat. Next, brown the sausage, breaking it into small crumbles with your spoon. This step builds a fantastic flavor foundation for your Minestrone with Sausage and Pesto from The Food Charlatan. Then, add the chopped onions, carrots, and celery, and sauté them until they soften. Meanwhile, use this time to mince your garlic. Furthermore, a great time-saving tip is to use a bag of pre-chopped mirepoix from the produce section. Add the garlic and stir for just one minute until it becomes fragrant. Now, pour in the chicken broth, diced tomatoes, and your chosen beans. Bring everything to a lively boil before reducing the heat to a gentle simmer. Finally, stir in the pasta and cook until it is perfectly al dente. Turn off the heat and fold in the fresh pesto just before serving for a bright, herby finish.
Mistakes I’ve made and learned from
I learned the hard way that adding the pasta directly to the soup pot can lead to mushy noodles, especially if you have leftovers. The pasta continues to absorb broth and loses all texture. My solution is to cook the pasta separately and add it to each bowl when you serve. This keeps every bite perfect. Another mistake I made was using bland, store-bought broth. It made the entire pot of Minestrone with Sausage and Pesto from The Food Charlatan taste flat. Now, I swear by using a super flavorful homemade chicken broth; it makes a world of difference. Also, do not skip toasting your pine nuts for the pesto if you have the time. It unlocks their nutty flavor and prevents a bland pesto, a lesson I learned from perfecting my classic basil pesto recipe. Trust me, these small tweaks elevate the entire dish from good to incredible.
Minestrone tells a beautiful story of Italian resourcefulness. Traditionally, families made this hearty soup with whatever seasonal vegetables they had on hand. Consequently, no two pots ever tasted exactly the same. My version, this Minestrone with Sausage and Pesto from The Food Charlatan, draws inspiration from Northern Italy, where they often incorporate rich meats and vibrant, herbaceous pesto. Meanwhile, in other regions, you might find a lighter, tomato-based broth or even a seafood version along the coast.
In my own kitchen, this recipe evolved from a desire for deeper flavor. I remember my grandmother making a simpler vegetable soup. However, by adding savory sausage and a swirl of pesto, we created a new family favorite. Ultimately, this dish embodies the spirit of minestrone: adaptability. Whether you use kale or spinach, cannellini or kidney beans, you are participating in a generations-old tradition of making something wonderful from simple ingredients. This particular Minestrone with Sausage and Pesto from The Food Charlatan is our family’s twist on a timeless classic.
ays-cooking">How it fits in today’s cooking
This soup fits perfectly into our modern need for comforting, one-pot meals that don’t sacrifice flavor. Furthermore, it’s a fantastic way to clean out the vegetable drawer, making it both economical and sustainable. Busy home cooks adore it because they can make a huge batch on Sunday and enjoy effortless lunches all week long.
Its versatility is its greatest modern asset. For instance, you can easily adapt it to be gluten-free by using your favorite pasta alternative. Similarly, this minestrone pairs wonderfully with a simple side, much like a slice of moist lemon blueberry bread complements a morning coffee. It’s the kind of meal that satisfies everyone at the table. Ultimately, it proves that some traditions, especially those involving a warm bowl of soup and a hunk of crusty artisan bread, are truly timeless.
Taste and Texture
What makes it delicious
This Minestrone with Sausage and Pesto from The Food Charlatan delivers a deeply savory and satisfying experience. First, the rich, garlicky sausage and tangy tomatoes create a robust and hearty broth that warms you from the inside out. Meanwhile, the vegetables, like tender carrots and creamy white beans, provide a wonderful contrast in textures. Each spoonful bursts with the bright, herbaceous punch of pesto, which cuts through the richness beautifully. Ultimately, the Minestrone with Sausage and Pesto from The Food Charlatan offers a comforting and complex bowl that feels both rustic and refined.
r">Boosting the flavor
You can easily elevate your soup with a few creative tweaks. For instance, try stirring in a spoonful of creamy ricotta or a sprinkle of parmesan cheese right before serving to add a luxurious, salty finish. Additionally, a drizzle of high-quality olive oil or a squeeze of fresh lemon juice will brighten all the flavors. If you love a bit of heat, a pinch of red pepper flakes brings a welcome warmth. Consider serving it alongside a slice of crusty, homemade bread to soak up every last drop. For more inspiration on building flavor, explore our guide on crafting the perfect Panzanella salad, which shares similar Italian principles. Furthermore, a simple easy focaccia makes the ultimate dipping companion for this already incredible soup.
Tips for Success
Best practices for results
First, always brown your sausage thoroughly to develop a deep, savory flavor base for your Minestrone with Sausage and Pesto from The Food Charlatan. Furthermore, use a high-quality chicken stock, as it forms the foundation of your soup’s broth. Do not skip adding the pesto at the very end; consequently, you will preserve its vibrant, fresh flavor and beautiful green color. Finally, let your soup rest for about ten minutes before serving so the flavors can meld together perfectly.
>Mistakes to avoid
A common error is overcooking the vegetables, which results in a mushy texture. Instead, add delicate veggies like zucchini towards the end of the simmering time. Additionally, avoid using a bland broth, as it will make the entire soup taste flat. For a flavor boost, consider making your own stock using our guide on how to make chicken stock. Moreover, do not add the pasta directly to the soup pot if you plan on having leftovers, otherwise it will absorb all the liquid and become bloated. For perfect pasta every time, cook it separately and add it to each bowl. You can master this technique with our tips for how to cook pasta al dente.
Serving and Pairing Suggestions
How to serve this dish
Serve this Minestrone with Sausage and Pesto from The Food Charlatan in a deep, rustic bowl to showcase its hearty texture. For a beautiful finish, swirl a spoonful of extra pesto on top and add a sprinkle of grated Parmesan cheese. Furthermore, a final drizzle of high-quality olive oil just before serving adds a lovely sheen and richness. This dish truly shines as the centerpiece of a casual weeknight dinner or a cozy weekend lunch. Moreover, its comforting nature makes it perfect for a holiday potluck or a chilly evening gathered around the table.
What goes well with it
First, a thick slice of crusty artisan bread is a must for dipping into the flavorful broth of your Minestrone with Sausage and Pesto from The Food Charlatan. Alternatively, you can whip up a batch of our favorite Garlic Butter Dinner Rolls for an extra special touch. For a refreshing counterpoint to the rich soup, consider a simple side salad with a bright lemon vinaigrette. Finally, a medium-bodied red wine like a Chianti beautifully complements the savory sausage and robust vegetables. Conversely, if you prefer a sweet ending, a slice of our Classic New York Cheesecake makes for an unforgettable dessert pairing.
Can I make Minestrone with Sausage and Pesto from The Food Charlatan in a slow cooker?
Yes, you can easily adapt this recipe for a slow cooker. Simply brown the sausage and sauté the vegetables on the stove first, then transfer everything except the pasta and pesto to the slow cooker. Cook on low for 6-8 hours or high for 3-4 hours, adding the pasta and pesto in the last 30 minutes of cooking.
What kind of sausage is best for this minestrone soup?
Italian sausage is highly recommended for this recipe, as its fennel and herb seasoning perfectly complements the other flavors. You can use either mild or hot Italian sausage depending on your preferred spice level. The savory depth it provides is a key component of The Food Charlatan’s Minestrone with Sausage and Pesto.
ank-math-faq-item">
How do I store and reheat the leftovers?
Store leftovers in an airtight container in the refrigerator for up to 4 days. Be aware that the pasta will continue to absorb broth, so you may need to add a splash of water or extra broth when reheating on the stove or in the microwave. The flavors of this Minestrone with Sausage and Pesto often meld and improve overnight.
Can I make this minestrone soup vegetarian?
Absolutely. To make a vegetarian version, simply omit the sausage and use vegetable broth instead of chicken broth. For a protein boost, you could add a can of rinsed cannellini beans or chickpeas. The pesto swirl at the end will still provide a powerful, savory flavor that makes this dish so memorable.
Easy Mini Pumpkin Swirled Cheesecakes Recipe
Introduction
There is something truly special about a dessert that feels both elegant and comforting. Moreover, the arrival of crisp autumn air ignites a craving for those warm, spiced flavors we hold so dear. Consequently, if you are searching for a treat that perfectly captures the essence of the season in a single, delightful bite, you have found it. These Mini Pumpkin Swirled Cheesecakes promise to deliver that cozy feeling and become the star of your fall table.
Mini Pumpkin Swirled Cheesecakes are individual desserts featuring a spiced pumpkin batter marbled beautifully with a rich, classic cheesecake filling. Furthermore, they bake in a standard muffin tin, which makes them incredibly convenient for parties and gatherings. This recipe matters because it solves a common problem: how to serve a stunning, seasonally-perfect dessert without the fuss of a large springform pan. Ultimately, it delivers all the decadent flavor of a full-sized pumpkin cheesecake in a portable, personal package. This approachable recipe fits our blog’s mission to provide impressive yet completely doable dishes for home cooks. For instance, if you want to explore another fantastic make-ahead dessert, our no-bake Chocolate Tart is always a crowd-pleaser. Additionally, the warm spices in these mini cheesecakes, like cinnamon and nutmeg, echo the cozy flavors found in our beloved Classic Apple Crisp, making them a natural fit for our collection of fall favorites.
Why I Love This Recipe
I genuinely adore this recipe because it brings back fond memories of baking with my family during the holidays. We always wanted to offer a variety of desserts, but making multiple full-sized pies and cakes was overwhelming. These Mini Pumpkin Swirled Cheesecakes became our perfect solution. They allow everyone to have their own little masterpiece, and I love watching guests’ faces light up when they see the beautiful swirls. The process is therapeutic, and the result consistently feels both special and heartfelt.
Health and Nutrition
Why it’s good for your body
These Mini Pumpkin Swirled Cheesecakes actually deliver some impressive nutritional benefits. First, pumpkin puree provides a powerful dose of vitamin A, which actively supports healthy vision and a strong immune system. Additionally, this key ingredient offers a good amount of fiber, thereby promoting healthy digestion and keeping you feeling satisfied longer.
Furthermore, the spices like cinnamon and nutmeg do more than just add warmth and flavor. In fact, they possess natural anti-inflammatory properties and can help regulate blood sugar levels. Consequently, enjoying these mini desserts means you are treating yourself to more than just a sweet taste.
Moreover, by choosing a mini version, you naturally practice portion control. This approach allows you to enjoy a decadent dessert without overindulging. Ultimately, each Mini Pumpkin Swirled Cheesecake combines wholesome ingredients with mindful eating for a truly gratifying experience.
How it fits in a healthy lifestyle
These Mini Pumpkin Swirled Cheesecakes fit beautifully into a balanced eating plan. You can absolutely enjoy them as a mindful treat after a nutritious meal or as a special weekend dessert. Their individual portion size is a built-in guide for moderation, helping you savor the moment without derailing your goals.
If you follow a gluten-free diet, you will appreciate that this recipe naturally fits your needs when you use a gluten-free graham cracker alternative. For those exploring other delicious and health-conscious dessert options, our Gluten-Free Almond Flour Brownies are another fantastic choice. Remember, a healthy lifestyle is all about balance and finding joy in your food. Planning your treats, like these cheesecakes, into your weekly routine makes healthy eating sustainable and enjoyable. For more inspiration on building a nourishing routine, check out our guide on Meal Prep for Beginners.
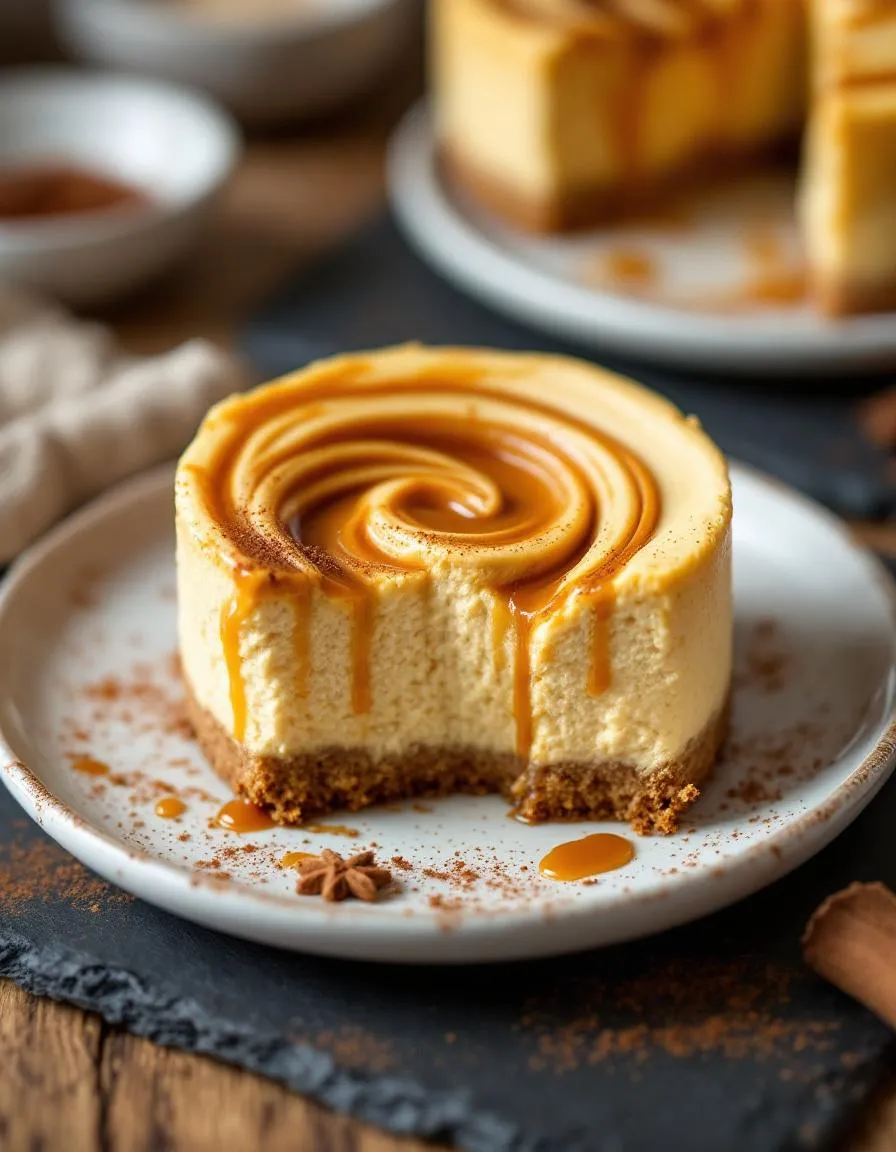
Creamy individual cheesecakes with a spiced pumpkin swirl, perfect for fall gatherings.
Ingredients
Scale
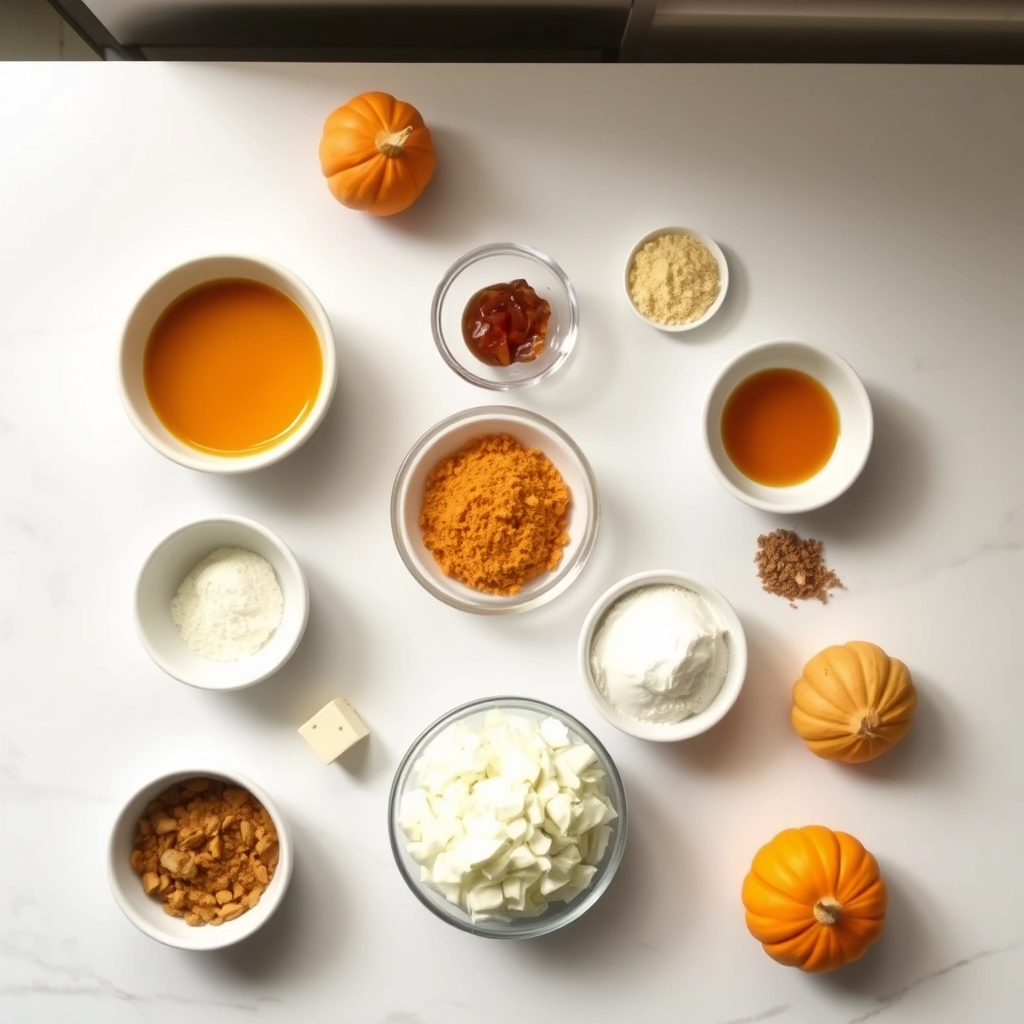
For the Crust:
1 cup graham cracker crumbs
3 tbsp melted butter
16 oz cream cheese, softened
1/2 cup granulated sugar
2 large eggs
1 tsp vanilla extract
1/2 cup pumpkin puree
1/2 tsp cinnamon
1/4 tsp nutmeg
1/4 tsp ginger
Instructions
1. Prepare the Crust:
Preheat oven to 325°F. Line a muffin tin with 12 liners.
Mix graham cracker crumbs and melted butter. Press 1 tbsp into each liner.
Beat cream cheese and sugar until smooth. Add eggs one at a time, then vanilla.
Remove 1 cup batter. To remaining, add pumpkin puree and spices.
Alternate spoonfuls of plain and pumpkin batter in liners. Swirl with a toothpick.
Bake 20-25 minutes until set. Cool completely before refrigerating 2 hours.
Notes
You can customize the seasonings to taste.
How to Prepare This Dish
Steps and time-saving tips
First, gather all your ingredients for the Mini Pumpkin Swirled Cheesecakes to streamline the process. Preheat your oven to 325°F and line a muffin tin with paper liners. Meanwhile, quickly pulse the graham crackers into fine crumbs for the crust. Combine the crumbs with melted butter and a touch of sugar, then firmly press this mixture into the bottom of each liner. Next, beat the cream cheese until it becomes perfectly smooth and creamy; this crucial step prevents a lumpy filling. Gradually add the sugar and continue beating for a few minutes. Subsequently, whisk in the eggs one at a time, followed by the vanilla and sour cream. Now, divide this base batter in half. Gently fold the pumpkin puree and warm spices into one portion. Then, spoon the plain cheesecake batter into the prepared crusts. After that, add a dollop of the pumpkin batter on top. Use a toothpick or a knife to swirl the two batters together beautifully. Importantly, avoid over-swirling to maintain those lovely marbled patterns. Finally, bake them for about 20 minutes until the edges are set but the centers still have a slight jiggle. Let them cool completely before chilling them in the refrigerator for at least four hours, or ideally overnight, for the best texture and flavor.
Mistakes I’ve made and learned from
I have definitely learned a few lessons the hard way with these Mini Pumpkin Swirled Cheesecakes. Initially, I used cold cream cheese straight from the fridge, which resulted in a lumpy, uneven batter that no amount of mixing could fix. Now, I always make sure my dairy ingredients are at room temperature for a silky smooth filling. Another common pitfall was overbaking; I used to pull them out only when the centers were completely firm, which led to a dry and cracked texture instead of that creamy, luxurious mouthfeel. Trusting the jiggle is a skill I had to develop. For more detailed troubleshooting on achieving that perfect bake, my guide on avoiding common cheesecake mistakes was a game-changer. Also, if your pumpkin puree seems too watery, always blot it with a paper towel first. This simple tip prevents a soggy filling and ensures your swirls hold their shape, a technique I refined after reading my notes on working with pumpkin puree. Learning these small adjustments truly makes all the difference.
We can trace the heart of this dessert back to two classic American traditions. Firstly, the rich, creamy cheesecake arrived with European immigrants. Secondly, we have the pumpkin pie, a staple of autumn harvests and Thanksgiving feasts. Someone, somewhere brilliantly decided to swirl these two icons into one perfect bite. Consequently, the Mini Pumpkin Swirled Cheesecakes were born, offering the best of both worlds.
Families often put their own spin on this treat. For instance, some bakers add a dash of bourbon or a sprinkle of candied ginger to the pumpkin layer for a warm kick. Others might use a gingersnap crust instead of graham cracker to amplify the spice notes. In my home, we always use fresh roasted pumpkin puree. It adds a deeper, earthier flavor that truly celebrates the season. Ultimately, these personal touches make each batch of Mini Pumpkin Swirled Cheesecakes a unique celebration of family and flavor.
ays-cooking">How it fits in today’s cooking
This dessert absolutely thrives in modern kitchens. Its individual portion size makes it ideal for today’s smaller gatherings and for controlling servings. Furthermore, it fits perfectly into holiday potlucks and seasonal celebrations, offering a familiar yet elegant treat.
Contemporary cooks also love adapting the recipe to suit different dietary needs. Many easily create a gluten-free version by swapping the crust ingredients. Similarly, others find ways to reduce the sugar without sacrificing the decadent experience. This versatility ensures everyone can enjoy a little slice of autumn.
Finally, these mini cheesecakes are a fantastic make-ahead dessert. They free up precious oven space on big cooking days. Moreover, their stunning appearance makes them a showstopper for any event, much like a beautifully crafted chocolate lover’s cheesecake. They beautifully bridge the gap between timeless tradition and contemporary convenience.
>Taste and Texture
What makes it delicious
These Mini Pumpkin Swirled Cheesecakes deliver a perfect harmony of flavors and textures. First, you experience the rich, creamy cheesecake base, which is tangy and luxuriously smooth. Meanwhile, the pumpkin swirl introduces a warmly spiced, earthy sweetness that feels incredibly velvety. Each bite offers a delightful contrast against the crisp, buttery graham cracker crust that crumbles just right. Furthermore, the warm aromas of cinnamon and nutmeg make the entire experience fragrant and deeply comforting. Ultimately, the magic of these Mini Pumpkin Swirled Cheesecakes lies in their decadent, melt-in-your-mouth quality.
Boosting the flavor
Fortunately, you can easily elevate these mini desserts with a few creative twists. For instance, a dollop of homemade whipped cream adds a light, airy contrast to the dense filling. Alternatively, a drizzle of salted caramel sauce introduces a wonderful salty-sweet complexity that complements the pumpkin spice. Moreover, consider rolling the crust in crushed ginger snaps for a spicy, molasses-kissed crunch. If you want to amplify the warmth, a pinch of extra cardamom or a splash of vanilla extract works wonders. For more inspiration on complementary toppings, explore our guide to the perfect whipped cream. Additionally, a simple salted caramel sauce can transform your presentation and flavor profile instantly.
Tips for Success
Best practices for results
Always start with room temperature cream cheese for a perfectly smooth filling. Furthermore, use a gentle swirling motion with a knife to create beautiful marbling in your Mini Pumpkin Swirled Cheesecakes. Subsequently, ensure you line the muffin tin with parchment liners for easy removal. Finally, allow the cheesecakes to chill in the refrigerator for at least four hours to set completely.
Mistakes to avoid
One common error is overmixing the batter after adding the eggs, which can incorporate too much air and cause cracking. Instead, mix just until the ingredients combine. Additionally, avoid overbaking, as the centers will firm up during chilling. For more detailed guidance, our article on common baking mistakes offers excellent insights. Moreover, do not skip the water bath if your recipe calls for it, as it creates a humid environment for even baking. If you are unsure about your oven’s temperature accuracy, consider reading our tips on getting your oven temperature right.
Serving and Pairing Suggestions
How to serve this dish
First, let these Mini Pumpkin Swirled Cheesecakes chill completely for the perfect firm yet creamy texture. For a stunning presentation, arrange them on a beautiful cake stand or a rustic wooden board. Moreover, a simple dusting of cinnamon or a dollop of freshly whipped cream makes each one look incredibly inviting. These individual desserts are perfect for holiday parties, as they offer a no-fuss, elegant end to a big meal. Alternatively, they make a delightful treat for a festive brunch or a cozy autumn gathering.
Finally, consider garni
shing each Mini Pumpkin Swirled Cheesecake with a tiny pecan or a delicate curl of orange zest. This small touch adds a wonderful visual pop and a hint of extra flavor.
What goes well with it
A hot cup of coffee beautifully cuts through the richness of these creamy desserts. Similarly, a glass of cold milk provides a classic, comforting pairing that everyone loves. For a truly decadent experience, serve these mini cheesecakes with a side of our homemade salted caramel sauce for drizzling.
If you are planning a larger dessert spread, these pair wonderfully with other seasonal bites. For instance, our popular spiced apple muffins create a fantastic autumnal flavor combination. Ultimately, these pairings will make your dessert table absolutely unforgettable.
Can I make mini pumpkin swirled cheesecakes ahead of time?
Absolutely! Mini Pumpkin Swirled Cheesecakes are an excellent make-ahead dessert. You can store them in an airtight container in the refrigerator for up to 3 days, which actually allows the flavors to meld and develop even more.
Do mini cheesecakes need a water bath?
No, one of the biggest advantages of making mini cheesecakes is that they do not require a traditional water bath. Their small size allows them to bake evenly and set with a perfectly creamy texture without the risk of cracking that larger cheesecakes often have.
ank-math-faq-item">
How do you get a clean swirl in cheesecake?
For a clean swirl in your Mini Pumpkin Swirled Cheesecakes, use a toothpick or a thin skewer. After dolloping the pumpkin mixture onto the plain cheesecake batter, gently drag the tool through the dollops in a figure-eight or zig-zag pattern. Avoid over-mixing, as this will muddy the distinct swirl effect.
Can you freeze mini pumpkin cheesecakes?
Yes, these Mini Pumpkin Swirled Cheesecakes freeze beautifully for longer storage. Place them in a single layer on a baking sheet to freeze solid, then transfer to a freezer-safe bag or container for up to 2 months. Thaw them overnight in the refrigerator before serving.