Easy Gluten-Free Pumpkin Donuts Recipe

easy-gluten-free-pumpkin-donuts

Introduction

There’s something truly magical about the aroma of pumpkin and warm spices filling your kitchen on a crisp autumn morning. It’s a feeling of pure comfort and cozy anticipation, especially when you know a batch of freshly baked, incredibly delicious Gluten-Free Pumpkin Donuts is moments away from being devoured. This recipe captures that quintessential fall flavor in a light, cakey donut that everyone can enjoy, making it the perfect treat to kick off the season.

These Gluten-Free Pumpkin Donuts are a dream come true for anyone following a gluten-free diet, but they are so flavorful and tender that no one will even notice they’re free from gluten. We bake them instead of frying, which creates a much healthier alternative to traditional donuts without sacrificing an ounce of taste or that wonderful, soft texture. The warm spices and rich pumpkin puree create a moist cake donut that is simply irresistible when you top it with a sweet cinnamon glaze. This recipe perfectly aligns with our mission to create decadent, crowd-pleasing desserts that cater to various dietary needs, so you never have to feel deprived. For more seasonal inspiration, check out our favorite Gluten-Free Apple Crisp, another essential fall dessert. And if you’re new to gluten-free baking, our guide on Gluten-Free Baking Tips will help you achieve perfect results every single time.

Why I Love This Recipe

I absolutely adore this recipe because it brings my entire family together. My niece has celiac disease, so I am always experimenting with gluten-free treats that make her feel included. The joy on her face when she can eat the same warm, freshly glazed donut as everyone else is priceless. Furthermore, I love that the process is so simple and the kitchen smells absolutely incredible while they bake, creating those cherished cozy memories I always associate with autumn.

Health and Nutrition

Why it’s good for your body

These Gluten-Free Pumpkin Donuts offer a surprisingly wholesome treat because they are packed with real pumpkin puree. Pumpkin is a fantastic source of beta-carotene, which your body converts into immune-boosting vitamin A. Furthermore, the warming spices like cinnamon and nutmeg not only add flavor but also provide their own anti-inflammatory properties. Although they taste indulgent, these donuts are a smarter choice, especially when compared to traditional fried versions.

You also benefit from the fiber content, so these donuts can help you feel satisfied for longer. This is a key advantage because it helps manage cravings and supports steady energy levels. Even though they are a baked good, Gluten-Free Pumpkin Donuts deliver essential nutrients without the gluten that causes discomfort for many. Choosing a treat like this means you are nourishing your body while still enjoying a delicious moment.

How it fits in a healthy lifestyle

These Gluten-Free Pumpkin Donuts fit perfectly into a balanced diet when enjoyed mindfully. They are an excellent option for anyone following a gluten-free lifestyle, providing a safe and satisfying dessert or snack. You can easily incorporate them into your weekly routine, perhaps as a weekend breakfast treat or a post-workout reward.

Pairing a donut with a source of protein, like a handful of nuts or a glass of milk, creates a more complete snack that stabilizes blood sugar. This approach to healthy meal prep and mindful eating allows for enjoyment without derailing your goals. Ultimately, Gluten-Free Pumpkin Donuts prove that you can have your treat and eat it too, all while supporting your overall wellness.

How to Prepare This Dish

Steps and time-saving tips

First, preheat your oven to 350°F and generously grease your donut pan. Meanwhile, whisk your dry ingredients together in a large bowl; this step ensures you avoid any pockets of baking soda in your final batter. In a separate bowl, vigorously whisk the wet ingredients, including the pumpkin puree, eggs, and oil, until they become completely smooth. Next, gently fold the wet mixture into the dry ingredients using a spatula; however, be careful not to overmix the batter. Spoon the thick batter into a large zip-top bag, snip off one corner, and pipe it neatly into the prepared donut cavities. This method is far less messy than using spoons. Finally, bake for 12-15 minutes until the donuts spring back when touched. For a speedy cleanup, immediately soak your mixing bowls and tools.

Mistakes I’ve made and learned from

I once completely overmixed the batter in a rush, which resulted in tough, dense Gluten-Free Pumpkin Donuts that nobody enjoyed. I learned that gently folding the ingredients just until combined is the absolute key to a tender crumb. Another time, I skipped properly greasing my pan, and those beautiful donuts stubbornly stuck in place, breaking into pieces when I tried to remove them. Now, I never skip this crucial step! For perfect results every time, I highly recommend using a good quality non-stick pan and checking out my essential guide on must-have baking tools. Furthermore, if you love the pumpkin flavor in these, you will adore my famous gluten-free pumpkin muffins which use a very similar mixing method.

Cultural Connection and Variations

Where this recipe comes from

The story of pumpkin donuts is deeply woven into the fabric of American autumn. Although they evoke the cozy feeling of a country fair or a small-town bakery, their roots are surprisingly practical. Early American colonists, inspired by Native American culinary traditions, embraced the pumpkin as a vital and versatile ingredient because it stored well through harsh winters. They would often hollow them out, fill them with sweetened milk and spices, and roast them in the fire, creating a primitive but delicious precursor to our modern flavors.

This tradition of pumpkin desserts evolved over centuries, naturally finding its way into fried dough. The classic cake donut, spiced with cinnamon, nutmeg, and ginger, became a cherished seasonal treat. The move to create Gluten-Free Pumpkin Donuts is a beautiful modern chapter in that story. It ensures that the joy of biting into a spiced, cakey donut on a crisp fall morning is an experience everyone can share, regardless of dietary needs. Many families now have their own cherished version of Gluten-Free Pumpkin Donuts, often baked instead of fried for a simpler, healthier twist on the classic, making the kitchen smell like the very essence of the season.

How it fits in today’s cooking

Gluten-Free Pumpkin Donuts have secured their place as a staple of modern fall cooking. They are a celebrated feature at Halloween parties and Thanksgiving brunches alike, offering an inclusive option that does not sacrifice flavor. Beyond holidays, they fit perfectly into everyday routines as a special weekend baking project or a lunchbox surprise that brings a taste of the season to an ordinary day.

Today’s cooks are brilliantly reimagining this treat with creative variations. Some add a handful of dairy-free chocolate chips to the batter for a decadent twist, while others experiment with different gluten-free flour blends like oat or almond flour to alter the texture. A popular trend involves topping them with a simple maple glaze or a dusting of cinnamon sugar for extra sweetness. For those seeking a different kind of autumnal bake, our recipe for Gluten-Free Apple Crisp captures a similar cozy spirit. And if you are looking for another fantastic gluten-free flour option to use in your donuts, our guide on how to use cassava flour is an excellent resource for perfecting your bake.

Taste and Texture

What makes it delicious

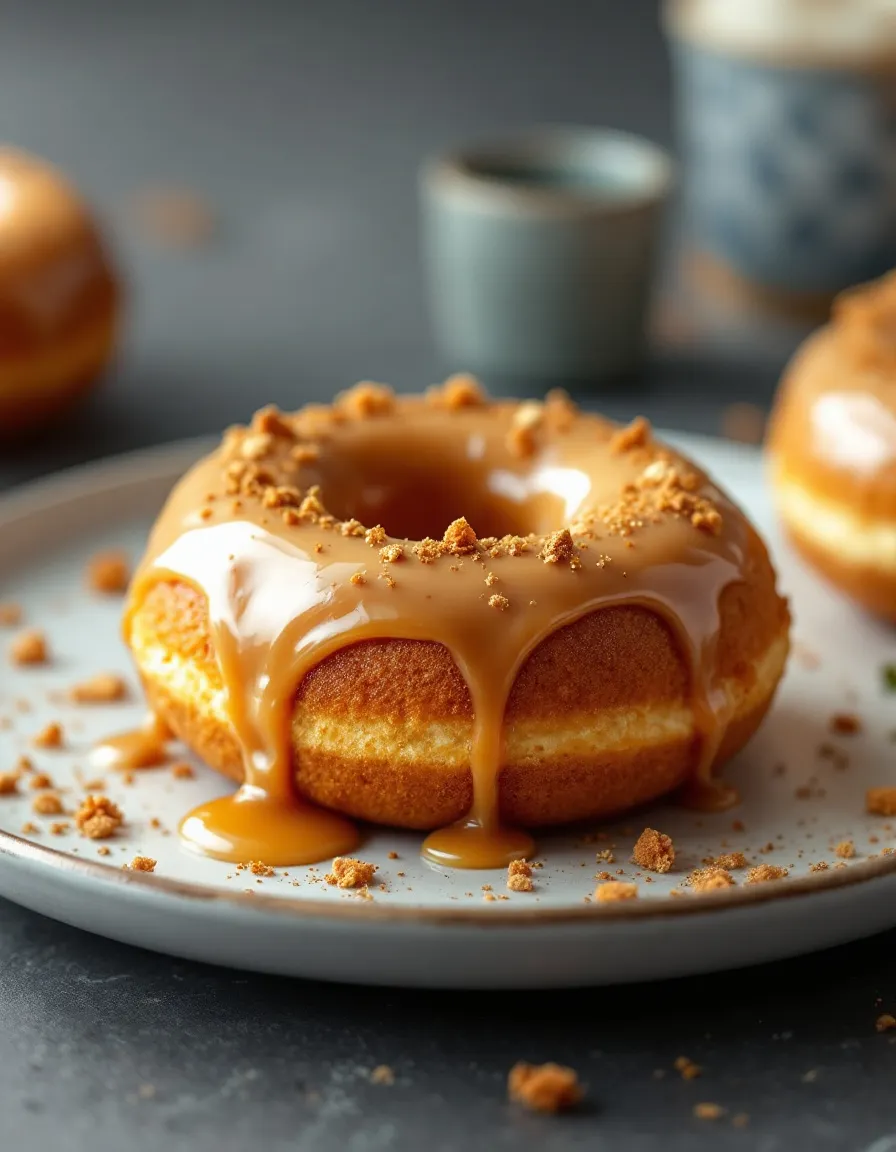
Imagine biting into a donut that is incredibly tender and moist even though it is completely gluten-free. The warm and fragrant spices of cinnamon, nutmeg, and ginger hit your nose first so they create an autumnal aroma that is simply irresistible. Each bite of these Gluten-Free Pumpkin Donuts is rich and satisfying because the pumpkin puree delivers a natural sweetness and a wonderfully dense and cake-like crumb. You will notice a subtle earthy sweetness from the pumpkin itself which is beautifully complemented by the deep and warm notes of molasses and brown sugar. The texture is the true star however as it remains perfectly airy and soft without any hint of the grittiness that sometimes plagues gluten-free baked goods. A final roll in cinnamon sugar provides a delightful and crisp contrast to the pillowy-soft interior so it creates a perfect symphony of textures in every single bite. This combination of spicy fragrance and rich flavor and contrasting textures makes these pumpkin donuts an unforgettable treat.

Boosting the flavor

You can easily boost the flavor of your Gluten-Free Pumpkin Donuts with a few simple tricks. Consider adding a pinch of cardamom or a dash of black pepper to your spice blend because these additions introduce a warm and complex depth that enhances the traditional pumpkin pie flavor. For a richer and more decadent experience, dip the warm donuts into a simple vanilla glaze or even a maple cream cheese frosting. If you are a chocolate lover, folding a handful of mini chocolate chips into the batter creates delightful melty pockets. A roll in toasted pecans or walnuts after glazing adds a fantastic crunchy texture and nutty flavor. For an extra layer of cozy warmth, serve your donuts alongside a mug of our specially crafted pumpkin spice latte. Finally, always remember to use high-quality vanilla extract and fresh spices since they make a significant difference in the final taste. For another delicious way to use your pumpkin puree, try our favorite gluten-free pumpkin bread recipe which shares a similar warm and comforting spice profile.

Tips for Success

Best practices for results

Always use room temperature wet ingredients for your Gluten-Free Pumpkin Donuts because this allows them to emulsify properly with the oil, which creates a more uniform and tender crumb. Furthermore, do not overmix the batter once the dry and wet ingredients are combined; simply stir until no large streaks of flour remain to avoid a tough, dense texture. For the best results, use a piping bag or a sturdy resealable plastic bag with the corner snipped off to neatly fill the donut pan, ensuring each cavity is filled evenly about two-thirds of the way full. Finally, allow the donuts to cool in the pan for a few minutes before transferring them to a wire rack, as this helps them set and prevents any breakage.

Mistakes to avoid

A common mistake is packing the gluten-free flour into the measuring cup, which leads to using too much flour and ultimately creates dry, crumbly donuts; instead, always spoon the flour into the cup and level it off for accuracy. Although it is tempting to add more pumpkin puree for extra flavor, avoid this because excess moisture can prevent the donuts from setting properly and result in a gummy interior, so follow the recipe measurements precisely. Even though you might be eager to taste them, do not skip the cooling step before applying a glaze, as a warm donut will cause the icing to melt and slide right off. For more guidance on achieving the perfect texture with alternative flours, our guide on choosing a gluten-free flour blend is an excellent resource, and you can explore various finishing touches with our collection of simple glaze recipes.

Serving and Pairing Suggestions

How to serve this dish

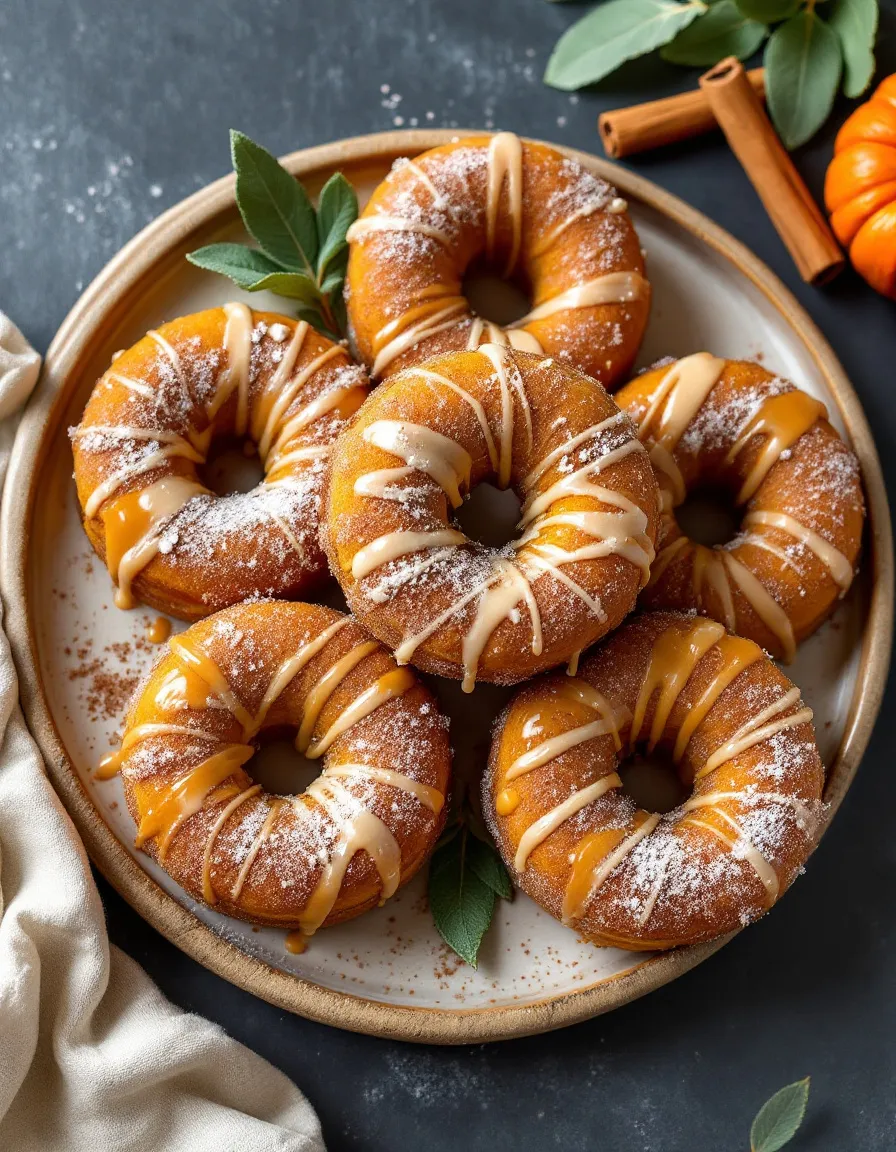
For a beautiful presentation, arrange your warm Gluten-Free Pumpkin Donuts on a rustic wooden board or an elegant cake stand. Moreover, a light dusting of powdered sugar or cinnamon right before serving adds a touch of snowy elegance. These donuts are perfect for a festive holiday brunch or as a special treat after a casual family dinner. Finally, for a fun twist at a celebration, set up a mini topping bar with different glazes and sprinkles so everyone can customize their own.

What goes well with it

A hot cup of spiced chai tea is a fantastic pairing because its warm spices echo the cozy flavors in the Gluten-Free Pumpkin Donuts. Alternatively, a cold glass of creamy almond milk provides a refreshing and dairy-free contrast. For a heartier brunch option, serve them alongside a savory dish like our popular breakfast casserole to balance the meal. Furthermore, a simple side of fresh fruit salad cuts through the richness beautifully. For an extra indulgent experience, a dollop of our homemade cinnamon whipped cream on the side makes for a divine dip.

Are pumpkin donuts healthy?

It depends on the recipe, but these Gluten-Free Pumpkin Donuts can be a healthier option. They are typically baked, not fried, and using pumpkin puree adds fiber and vitamins. The health factor ultimately depends on the specific ingredients and sugar content you choose.

How do you keep gluten-free donuts from getting soggy?

The key is to let your Gluten-Free Pumpkin Donuts cool completely on a wire rack before storing them. This allows steam to escape and prevents condensation, which is the main cause of sogginess. Always store them in an airtight container at room temperature once they are fully cooled.

Can I use almond flour for gluten-free baking?

Yes, almond flour is a very popular and nutritious choice for gluten-free baking. It adds a moist, dense texture and a slightly nutty flavor that works wonderfully in recipes like muffins and quick breads. For best results in donuts, it’s often blended with a starch like tapioca or arrowroot flour to improve the structure.

Why are my baked donuts tough?

Tough baked donuts are usually a result of overmixing the batter. Once you add the dry ingredients to the wet, mix just until combined; a few lumps are okay. Overmixing develops the gluten-free starches too much, leading to a dense and chewy texture instead of a light and tender crumb.

Print
clock clock iconcutlery cutlery iconflag flag iconfolder folder iconinstagram instagram iconpinterest pinterest iconfacebook facebook iconprint print iconsquares squares iconheart heart iconheart solid heart solid icon

Easy Gluten-Free Pumpkin Donuts (Dairy-Free)

  • Author: Robin Brookshire

Description

Gluten-free pumpkin donuts with brown sugar icing are the perfect treat for fall mornings.
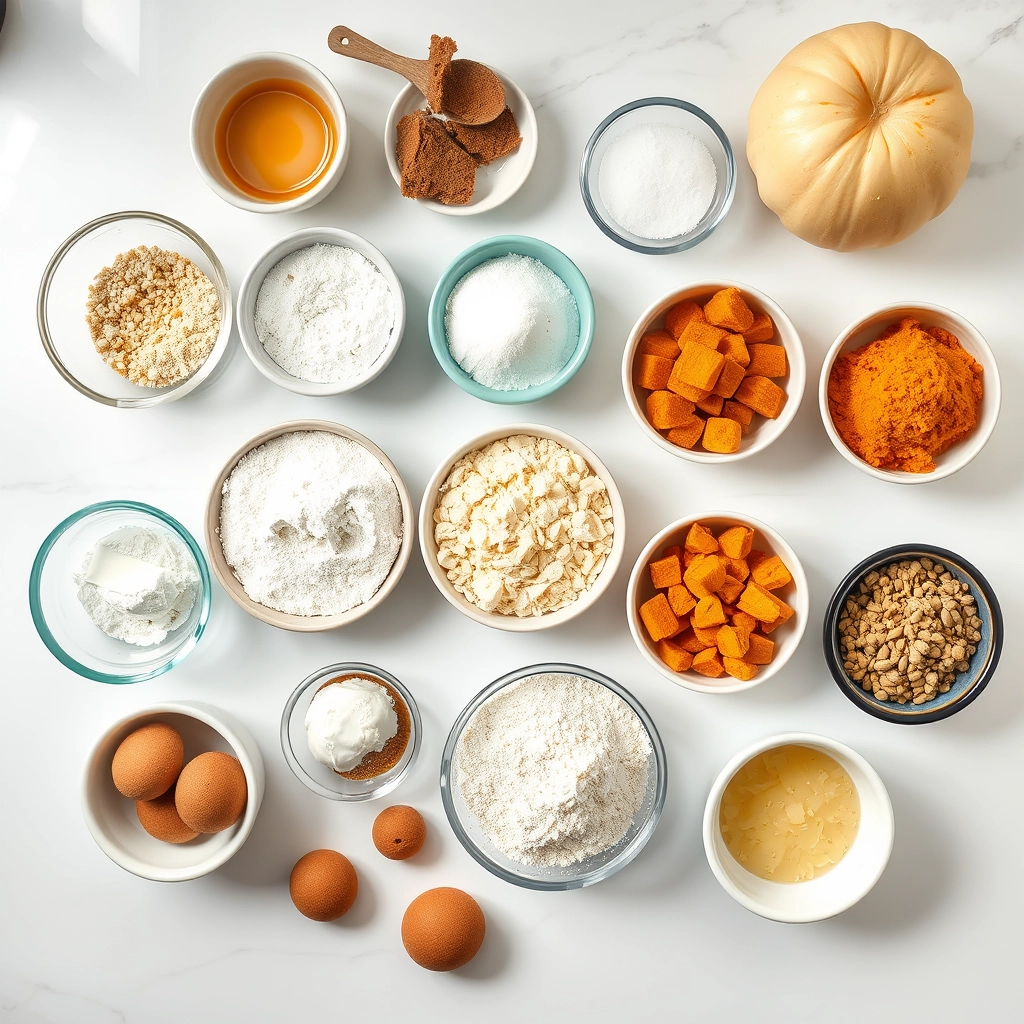

Ingredients

Scale

For the Crust:

  • 2 cups gluten-free 1-1 flour blend
  • 1 teaspoon baking powder
  • 3/4 teaspoon baking soda
  • 1/2 teaspoon sea salt
  • 2 teaspoons cinnamon
  • 1/4 teaspoon ginger
  • 1/4 teaspoon nutmeg
  • 1 cup pumpkin puree
  • 1/2 cup avocado oil or melted refined coconut oil
  • 1/2 cup brown sugar
  • 2 eggs
  • 1/2 cup sugar
  • 1/2 cup almond milk
  • 1 teaspoon vanilla extract
  • 3/4 cup packed brown sugar
  • 1/4 cup almond milk
  • 1 tablespoon dairy-free butter
  • 1/2 teaspoon vanilla extract
  • 1 and 1/2 cups powdered sugar
  • pinch of sea salt

Instructions

1. Prepare the Crust:

  1. Preheat the oven to 350°. Grease two donut pans with non-stick spray. I like to use an oil spritzer with avocado oil.
  2. Whisk the gluten-free flour, baking powder, baking soda, cinnamon, ginger, nutmeg, and salt together in a large mixing bowl. Set aside.
  3. Whisk together the pumpkin puree, oil, brown sugar, sugar, eggs, almond milk, and vanilla in a medium bowl.
  4. Add the wet ingredients to the dry ingredients and whisk until combined.
  5. Take a large zipped-top bag and fold down the top twice. Spoon the batter into the baggie. Unfold the top of the bag and close it with most of the air pushed out. Then, cut a small corner off of the bottom.
  6. Pipe the batter into the donut pans, filling 3/4 full. Bake for 11-12 minutes. When done, the tops will bounce back when tapped with your finger and be golden brown.
  7. Place the donut pans on a wire rack to cool for 2 minutes, and then remove the donuts to the wire rack to cool for another 10-15 minutes.
  8. Sift the powdered sugar through a fine mesh strainer by gently tapping your hand against the side of the strainer over a large bowl. Set aside.
  9. Make the brown sugar icing by adding the brown sugar, almond milk, and dairy-free butter to a saucepan and heating over medium heat. Stir until the mixture is smooth. Simmer for 1 minute, then remove from heat and whisk in the vanilla extract and powdered sugar. Allow to cool for 5 minutes.
  10. Place the wire rack of donuts on a large baking sheet. Then, dip the tops of the donuts into the icing and place them back on the wire rack to set. If the icing gets too thick, you can add a little more almond milk to it.

Easy Creamy Beef and Shells for Dinner Tonight

easy-creamy-beef-and-shells

Introduction

Craving a meal that feels like a warm hug after a long day? You know the feeling when you need something deeply satisfying yet incredibly simple to make. That is exactly why this recipe for Creamy Beef and Shells for Dinner Tonight exists. It is your answer to that universal question of what to feed your family that is both comforting and quick. Ultimately, this one-pan wonder delivers maximum flavor with minimal fuss, making your weeknight so much easier.

Creamy Beef and Shells for Dinner Tonight is a hearty, one-pot pasta dish that combines seasoned ground beef, tender shell pasta, and a luxuriously smooth, cheesy sauce. This recipe matters because it solves the perennial problem of busy weeknights. You get a complete, home-cooked meal that everyone loves without a sink full of dishes. It fits our blog’s mission perfectly by providing reliable, family-approved recipes that are straightforward and delicious. Furthermore, it uses simple ingredients you likely already have, making it a practical choice for any night of the week. If you enjoy this style of cooking, you will definitely appreciate our Easy One-Pan Chicken and Rice for another effortless meal solution. This dish is a fantastic alternative to traditional spaghetti or lasagna but comes together in a fraction of the time. Importantly, the creamy sauce clings to every nook and cranny of the pasta shells, ensuring every single bite is packed with flavor. For those who love a good beef dish, it is a must-try alongside classics like our Ultimate Beef Stew.

Why I Love This Recipe

This recipe holds a special place in my weekly rotation because it never fails to please. I love how the aroma of browning beef and simmering tomatoes fills my kitchen, instantly making the house feel like a home. It reminds me of the simple, satisfying meals my mom used to make, yet it feels completely modern and efficient. Most importantly, I always have the ingredients on hand, so it has saved me from countless last-minute grocery store trips. It is my go-to comfort food that truly delivers on its promise every single time.

Health and Nutrition

Why it’s good for your body

This Creamy Beef and Shells for Dinner Tonight delivers a powerful nutritional punch. First, the lean ground beef provides a fantastic source of high-quality protein, which is essential for building and repairing muscle tissue. Additionally, this protein helps you feel full and satisfied long after your meal is over. The dish also offers a solid foundation of complex carbohydrates from the pasta shells, giving your body lasting energy.

Moreover, you can pack the sauce with a variety of vegetables for extra vitamins and minerals. For instance, adding diced tomatoes, spinach, or mushrooms boosts the fiber content significantly. Consequently, this supports healthy digestion and promotes gut health. Furthermore, by using a lean cut of beef and a moderate amount of dairy, you create a creamy texture without excessive saturated fat.

Ultimately, enjoying a well-rounded meal like Creamy Beef and Shells for Dinner Tonight means you are nourishing your body with multiple macronutrients at once. Therefore, it stands as a delicious and smart choice for any night of the week.

How it fits in a healthy lifestyle

This creamy beef and shells recipe fits perfectly into a balanced eating plan. You can easily tailor it to meet specific health goals without sacrificing flavor. For a higher-protein version, simply use a leaner cut of ground beef or even substitute ground turkey. If you are monitoring your carbohydrate intake, consider using whole wheat or chickpea pasta shells to add extra fiber.

This approach to cooking—making simple, smart swaps—is a cornerstone of sustainable healthy habits. For more inspiration on building nutritious meals that your whole family will love, explore our guide on easy weekly meal prep ideas. Remember, a healthy lifestyle also includes understanding portion sizes. While this dish is nutrient-dense, being mindful of your serving helps maintain balance. For practical advice on this, check out our tips for mastering portion control. Ultimately, this dinner proves that comfort food can absolutely be part of your wellness journey.

Print
clock clock iconcutlery cutlery iconflag flag iconfolder folder iconinstagram instagram iconpinterest pinterest iconfacebook facebook iconprint print iconsquares squares iconheart heart iconheart solid heart solid icon

Creamy Beef and Shells for Dinner Tonight

  • Author: Chef Mia

Description

A comforting one-pot meal with tender ground beef, pasta shells, and a rich, creamy tomato sauce that comes together quickly for a satisfying dinner.


Ingredients

Scale

For the Crust:

  • 1 lb ground beef
  • 1 small onion, diced
  • 2 cloves garlic, minced
  • 1 (15 oz) can tomato sauce
  • 1 cup beef broth
  • 1 cup heavy cream
  • 2 cups medium pasta shells
  • 1 tsp Italian seasoning
  • 1/2 tsp salt
  • 1/4 tsp black pepper
  • 1/2 cup grated Parmesan cheese
  • 2 tbsp chopped fresh parsley

Instructions

1. Prepare the Crust:

  1. Brown ground beef with onion in a large skillet over medium heat until no longer pink. Drain excess fat.
  2. Add garlic and cook for 1 minute until fragrant. Stir in tomato sauce, beef broth, heavy cream, Italian seasoning, salt, and pepper.
  3. Bring to a simmer, then stir in pasta shells. Reduce heat to low, cover, and cook for 15-18 minutes until pasta is tender, stirring occasionally.
  4. Remove from heat and stir in Parmesan cheese until melted and creamy. Garnish with fresh parsley before serving.

Notes

You can customize the seasonings to taste.

How to Prepare This Dish

Steps and time-saving tips

First, grab your largest skillet and brown that ground beef over medium-high heat. Meanwhile, you can boil a big pot of salted water for your pasta shells. This multitasking trick shaves precious minutes off your total cook time. Once the beef is perfectly browned, drain any excess grease but leave a little for flavor. Next, stir in your minced garlic and let it cook for just one minute until it becomes incredibly fragrant. Then, pour in your crushed tomatoes, beef broth, and all those dried herbs. Let this hearty sauce simmer for about ten minutes; this allows the flavors to meld together beautifully. While that simmers, your pasta water should be ready, so toss in the shells and cook them until they are just al dente. Finally, reduce the heat to low and stir in the heavy cream and grated Parmesan cheese. Combine everything gently, and your Creamy Beef and Shells for Dinner Tonight is ready to serve immediately. For a complete meal, simply steam some broccoli or toss a quick salad while your sauce simmers.

Mistakes I’ve made and learned from

I have absolutely overcooked the pasta more times than I care to admit, which resulted in mushy shells that fell apart in the sauce. Now, I always set a timer for one minute less than the package suggests because the pasta continues to cook when you mix it into the hot beef. Another common hiccup was using cheese that didn’t melt well, leading to a grainy texture instead of a smooth, creamy sauce. I finally learned that freshly grating a block of high-quality Parmesan makes all the difference, a tip I picked up from my deep dive into kitchen hacks that actually work. Furthermore, rushing the simmering step meant my Creamy Beef and Shells for Dinner Tonight tasted bland. Letting the tomato and herb base simmer for the full ten minutes is non-negotiable for building a rich, deep flavor, much like developing the layers in a perfect beef stew.

rc="https://exorecipes.com/wp-content/uploads/2025/09/easy-creamy-beef-and-shells-recipe.webp" />

Cultural Connection and Variations

Where this recipe comes from

This dish feels like a warm hug from my grandmother’s kitchen. However, its roots stretch far beyond any single family. Essentially, we find its soul in Italian-American cuisine, a beautiful fusion that immigrants crafted in their new world homes. They combined accessible ground beef and hearty pasta shells with rich, creamy dairy to create something both comforting and affordable. My own family, for instance, always adds a pinch of smoked paprika for a subtle kick that reminds us of home.

Around the globe, cooks put their own unique spin on the concept. In Germany, they might swap the beef for pork and add caraway seeds. Meanwhile, in parts of Mexico, you may find a version with chorizo and a creamy, chili-infused sauce. Every culture embraces the core idea of pasta and meat in a luxurious sauce, but they make it their own with local flavors. Ultimately, this is the true magic of a classic like Creamy Beef and Shells for Dinner Tonight. It serves as a blank canvas for personal and regional stories.

ays-cooking">How it fits in today’s cooking

This recipe absolutely thrives in our modern kitchens. Busy weeknights demand satisfying meals that come together quickly, and this dish delivers every single time. Furthermore, its incredible versatility keeps it relevant. Today, many health-conscious cooks easily adapt it by using lean ground turkey or plant-based meat alternatives. They also love to sneak in extra veggies like spinach or zucchini for a nutrient boost.

You can seamlessly incorporate Creamy Beef and Shells for Dinner Tonight into your monthly meal prep routine. It reheats beautifully, making lunches something to actually look forward to. For a comforting weekend feast, pair it with a simple side like these easy roasted vegetables. Conversely, if you need a lighter option, a fresh classic Caesar salad provides the perfect crisp contrast. This enduring dish continues to bring families to the table, proving that some comforts are truly timeless.

Taste and Texture

What makes it delicious

This dish delivers a deeply satisfying and comforting experience. First, you encounter the rich, savory aroma of seasoned ground beef and sweet onions sautéed to perfection. Each bite then combines the wonderfully chewy texture of pasta shells with the incredibly creamy, velvety sauce that clings to them. Consequently, the sharp, tangy punch from the Parmesan cheese cuts through the richness, creating a perfect balance. Ultimately, the entire experience of Creamy Beef and Shells for Dinner Tonight is both hearty and luxurious, making it an instant family favorite.

r">Boosting the flavor

You can easily elevate your Creamy Beef and Shells for Dinner Tonight with a few creative tweaks. For instance, try stirring in a spoonful of tomato paste with the beef to add a sweet, umami depth. Alternatively, top your finished bowl with a handful of fresh, chopped parsley for a bright, herbal contrast. Furthermore, a dash of smoked paprika or a pinch of red pepper flakes will introduce a warm, subtle heat that complements the creamy sauce beautifully. For more inspiration on building flavors, explore our guide on creating your own spice blends. Finally, serving it alongside a simple garlic bread or a crisp green salad completes the meal perfectly.

Tips for Success

Best practices for results

First, always brown your ground beef thoroughly to develop a rich, deep flavor foundation for your Creamy Beef and Shells for Dinner Tonight. Additionally, reserve a cup of the starchy pasta water before draining the shells, as it will help you achieve a luxuriously smooth and cohesive sauce. Furthermore, shred your own cheese from a block instead of using pre-shredded varieties, which often contain anti-caking agents that can make your sauce grainy. Finally, let the finished dish rest for five minutes off the heat before serving, allowing the sauce to thicken perfectly around the pasta and beef.

>Mistakes to avoid

A common error is overcooking the pasta shells, which then become mushy when combined with the hot sauce. To prevent this, cook your pasta until it is just al dente, as it will continue to absorb liquid and soften in the sauce. Moreover, avoid draining the ground beef grease completely if you are using a leaner meat, as this can actually result in a dry final dish; instead, simply blot away the excess with a paper towel. For more guidance on getting your pasta texture just right, explore our guide on how to cook pasta al dente. Also, do not add cold dairy directly to the hot pan, as this can cause your sauce to break and become oily. Instead, always temper your cream or milk by warming it slightly first, a technique we detail in our post about preventing a curdled sauce.

Serving and Pairing Suggestions

How to serve this dish

Immediately serve your Creamy Beef and Shells for Dinner Tonight in shallow, pre-warmed bowls to keep everything wonderfully hot. For a beautiful finish, sprinkle a generous amount of freshly chopped parsley and a crack of black pepper on top. Furthermore, a final drizzle of high-quality olive oil adds a lovely sheen and richness. This comforting dish truly shines as a weeknight family dinner, yet it also easily scales up for a casual gathering with friends.

What goes well with it

First, a crisp, green side salad offers a refreshing crunch that cuts through the richness of the Creamy Beef and Shells for Dinner Tonight. We often pair it with our simple Easy Arugula Salad with a lemon vinaigrette. Additionally, a slice of warm, crusty bread is perfect for sopping up every last bit of the delicious sauce. For a drink pairing, a medium-bodied red wine like a Merlot complements the savory beef notes beautifully. Finally, if you need another hearty side, our Garlic Butter Roasted Carrots make a sweet and savory companion.

rc="https://s3-placid.s3.eu-central-1.amazonaws.com/production/rest-images/rawp1noeia0hh/int-1ba0d8f589a1b06ea659a868382a2bd0-nqysvwvd.jpg" />

What is Creamy Beef and Shells made of?

Creamy Beef and Shells for Dinner Tonight is a simple, one-pan dish primarily made with ground beef, medium pasta shells, a rich tomato sauce, and a creamy element like cream cheese or heavy cream. Common additions include onions, garlic, and Italian seasonings for extra flavor. It’s a hearty and comforting meal that comes together quickly with pantry staples.

How do you keep beef and shells from getting dry?

The key to preventing dry Creamy Beef and Shells is to not overcook the pasta and to ensure there’s enough sauce. Using a combination of broth and a dairy component like cream cheese creates a luxurious, clingy sauce that coats every shell. Letting the dish rest for a few minutes off the heat before serving allows the pasta to fully absorb the liquid and stay moist.

ank-math-faq-item"> Can I make Creamy Beef and Shells ahead of time?

Yes, you can prepare Creamy Beef and Shells for Dinner Tonight in advance. Simply store it in an airtight container in the refrigerator for up to 3 days. The pasta will continue to absorb the sauce, so you may need to add a splash of broth or water when reheating it on the stove to bring back its creamy consistency.

What can I serve with creamy beef and shells?

This dish is quite filling on its own, but it pairs wonderfully with a simple green salad dressed with a light vinaigrette to cut through the richness. Garlic bread or a crusty dinner roll is also perfect for soaking up the delicious sauce. For a lighter option, steamed green beans or broccoli make excellent sides for your Creamy Beef and Shells for Dinner Tonight.

Best Apple Bread with Cinnamon Pecan Crunch

best-apple-bread-cinnamon-pecan

Introduction

Is there anything more comforting than the smell of warm spices and baked apples filling your kitchen? This feeling of pure, cozy joy is exactly what you get with every slice of this incredible Apple Bread with Cinnamon Pecan Crunch. Furthermore, it transforms simple ingredients into a spectacular treat that feels like a warm hug. Ultimately, this recipe promises to become your new favorite autumnal baking project, filling your home with an unforgettable aroma and your heart with happiness.

Apple Bread with Cinnamon Pecan Crunch is a moist, tender quick bread bursting with fresh apple chunks and warm spices. However, the true showstopper is the generous cinnamon pecan streusel layer that bakes into an irresistible crunchy, sweet topping. This delightful contrast between the soft bread and the crunchy nut topping creates a perfect bite every single time. Moreover, this recipe matters because it delivers gourmet bakery quality with straightforward, easy-to-follow steps for home bakers of any skill level. It fits our blog’s mission perfectly by turning accessible ingredients into a truly special and shareable dish. For instance, if you adore apple desserts, you must try our classic Apple Pie recipe next. This Apple Bread with Cinnamon Pecan Crunch is an ideal project for a weekend morning or a thoughtful homemade gift. Additionally, it keeps wonderfully, meaning you can enjoy a slice with your afternoon coffee for days. Consequently, it is a versatile recipe that celebrates seasonal produce in the most delicious way possible.

Why I Love This Recipe

I truly love this Apple Bread with Cinnamon Pecan Crunch because it connects me to cherished family memories. My grandmother always made a similar version when the air turned crisp, and the scent instantly transports me back to her sunny kitchen. Now, I bake it for my own family, and it has become our official kickoff to fall. The process of mixing the batter and sprinkling on the crunchy topping feels like a comforting ritual. Every time I pull a golden loaf from the oven, I feel a deep sense of accomplishment and warmth, knowing I am creating new traditions. It is my go-to recipe for potlucks, and without a doubt, it always earns rave reviews and requests for the recipe. For another fantastic baking project, explore our Pumpkin Bread which has a similarly cozy vibe.

Health and Nutrition

Why it’s good for your body

This Apple Bread with Cinnamon Pecan Crunch offers a genuinely wholesome treat. For instance, apples provide a fantastic source of soluble fiber, which actively supports healthy digestion and helps you feel full. Furthermore, cinnamon brings more than just warmth and flavor; it also delivers powerful antioxidants that combat oxidative stress in your body.

Moreover, the pecans in the crunchy topping contribute healthy monounsaturated fats. These heart-healthy fats actively work to support good cholesterol levels. Consequently, enjoying a slice of this delicious bread means you are nourishing your body with essential nutrients. Additionally, the natural sweetness from the apples often means you can use less refined sugar in the recipe.

Ultimately, this Apple Bread with Cinnamon Pecan Crunch combines taste and nutrition in every single bite. Therefore, you can feel good about serving it to your family. Finally, the combination of fiber, healthy fats, and antioxidants makes this bake a smart choice for a satisfying snack or a light breakfast.

How it fits in a healthy lifestyle

This Apple Bread with Cinnamon Pecan Crunch fits beautifully into a balanced eating plan. Think of it as a nourishing snack or a weekend breakfast that satisfies your sweet tooth without derailing your goals. You can easily enjoy a slice alongside a source of protein, like a glass of milk or a scoop of Greek yogurt, for a more complete and satisfying meal.

For those mornings when you need a quick yet healthy start, this bread is a perfect choice. If you are exploring other make-ahead breakfast options that prioritize whole ingredients, our guide to healthy make-ahead breakfasts offers fantastic inspiration. Remember, balance is key; enjoying wholesome baked goods like this apple bread is part of a sustainable approach to eating well.

We love using simple, recognizable ingredients in our recipes. If you are curious about making smart swaps in your own baking, our article on healthy baking substitutions can help you customize this and other favorites to suit your dietary preferences.

Print
clock clock iconcutlery cutlery iconflag flag iconfolder folder iconinstagram instagram iconpinterest pinterest iconfacebook facebook iconprint print iconsquares squares iconheart heart iconheart solid heart solid icon

Apple Bread with Cinnamon Pecan Crunch

  • Author: Chef Mia

Description

A moist and flavorful quick bread loaded with fresh apples and topped with a crunchy cinnamon pecan streusel.


Ingredients

Scale

For the Crust:

  • 2 cups all-purpose flour
  • 1 tsp baking soda
  • 1/2 tsp salt
  • 1/2 cup unsalted butter, softened
  • 3/4 cup brown sugar
  • 2 large eggs
  • 1 tsp vanilla extract
  • 1/4 cup buttermilk
  • 2 cups peeled and diced apples
  • 1/2 cup chopped pecans
  • 1/4 cup granulated sugar
  • 1 tsp ground cinnamon

Instructions

1. Prepare the Crust:

  1. Preheat oven to 350°F (175°C). Grease a 9×5 inch loaf pan.
  2. In a medium bowl, whisk together flour, baking soda, and salt. Set aside.
  3. In a large bowl, cream butter and brown sugar until light. Beat in eggs one at a time, then stir in vanilla and buttermilk.
  4. Gradually blend in the flour mixture. Fold in diced apples. Pour batter into prepared pan.
  5. Mix pecans, granulated sugar, and cinnamon in a small bowl. Sprinkle evenly over batter.
  6. Bake for 50-60 minutes, or until a toothpick inserted comes out clean. Cool in pan for 10 minutes before transferring to a wire rack.

Notes

You can customize the seasonings to taste.

How to Prepare This Dish

Steps and time-saving tips

First, preheat your oven and generously grease a standard loaf pan. Next, whisk together all your dry ingredients in one large bowl. In a separate bowl, vigorously mix the wet ingredients until they become perfectly smooth and emulsified. Gradually pour the wet mixture into the dry ingredients, then gently fold everything together with a spatula. Importantly, do not overmix the batter; a few remaining lumps are completely fine. Subsequently, fold in your finely chopped apples until they distribute evenly throughout the batter. For a fantastic time-saving tip, use a food processor to shred your apples quickly; this also helps them blend seamlessly into the bread. Then, pour the thick batter into your prepared loaf pan, spreading it into an even layer. Afterwards, make your incredible cinnamon pecan crunch topping by stirring melted butter with brown sugar, cinnamon, and chopped pecans. Generously sprinkle this delicious crunch mixture over the entire surface of the batter. Finally, bake your Apple Bread with Cinnamon Pecan Crunch until a toothpick inserted into the center comes out clean. Let the loaf cool in the pan for a bit before transferring it to a wire rack. This patience ensures your bread holds its shape for perfect slicing later.

Mistakes I’ve made and learned from

I once rushed the process and used apples that weren’t finely chopped enough, which created soggy pockets in my finished loaf. Now, I always take the extra minute to ensure my apple pieces are small and uniform for even distribution and perfect baking. Another common error I made was overmixing the batter in a rush, which resulted in a tough, dense bread instead of the soft, tender crumb we all love. Remember, a few flour streaks are totally okay! Getting the baking time just right can also be tricky; I’ve pulled my Apple Bread with Cinnamon Pecan Crunch out too early only to find a gummy center. I finally learned to trust the toothpick test above all else. For more guidance on avoiding common pitfalls, my post on common baking mistakes is a great resource. And if you find your pecans are browning too quickly, simply tent the loaf with foil, a trick I picked up from my guide on getting the perfect loaf top every single time.

rc="https://exorecipes.com/wp-content/uploads/2025/09/best-apple-bread-cinnamon-pecan-recipe.webp" />

Cultural Connection and Variations

Where this recipe comes from

My grandmother’s kitchen always smelled of apples and cinnamon in the fall. Consequently, she would bake this Apple Bread with Cinnamon Pecan Crunch every weekend after we went apple picking. Meanwhile, her version, passed down from her mother, used whatever apples we had gathered and a handful of black walnuts from the old tree in the yard. However, this style of quick bread has much deeper roots. For instance, European settlers often baked dense, spiced fruit breads to preserve the harvest. Similarly, many cultures have their own version. In fact, the German Apfelkuchen often features a similar nutty streusel topping. Alternatively, the British might bake their apple bread with sultanas and a simple sugar crust. Ultimately, every family seems to put their own stamp on it. Therefore, our Apple Bread with Cinnamon Pecan Crunch feels both timeless and deeply personal.

How it fits in today’s cooking

This recipe absolutely thrives in modern kitchens. Firstly, it fits perfectly into our love for seasonal, comforting bakes. Moreover, it’s a fantastic way to use up a bounty of fall apples. Many home bakers now adapt it into muffins for an easy, on-the-go breakfast, much like our popular Healthy Breakfast Muffins. Furthermore, its warm spices make it a staple for holiday gatherings and Thanksgiving morning. Today’s cooks also love to experiment with its formula. For example, some add a handful of dried cranberries for a tart twist, while others might use gluten-free flour. It’s the kind of versatile, crowd-pleasing treat that never goes out of style. In fact, it pairs wonderfully with a cup of coffee for a simple afternoon pick-me-up, similar to enjoying a slice of our Classic Coffee Cake. Ultimately, this bread continues to create new memories in homes everywhere.

>Taste and Texture

What makes it delicious

This Apple Bread with Cinnamon Pecan Crunch greets you with a warm, fragrant aroma of baking spices and brown sugar. Meanwhile, each moist, tender slice bursts with sweet, juicy apple pieces that create a wonderfully soft crumb. The star, however, is the incredible crunchy topping. Ultimately, it provides a sweet, buttery, and crisp contrast that makes every bite of this Apple Bread with Cinnamon Pecan Crunch an exciting textural adventure.

Boosting the flavor

For an even more decadent experience, consider adding a simple vanilla glaze. Simply drizzle it over the cooled loaf to introduce a sweet, creamy element that complements the warm spices. Alternatively, a dollop of lightly sweetened whipped cream adds a cool, cloud-like contrast. Furthermore, feel free to experiment with different nuts; toasted walnuts offer a slightly more robust flavor than pecans. Finally, a scoop of warm cinnamon apple compote served alongside a slice transforms this bread into a spectacular dessert.

Tips for Success

Best practices for results

First, always use fresh, crisp apples for the best texture and flavor in your Apple Bread with Cinnamon Pecan Crunch. Furthermore, thoroughly coat your chopped apples in the dry flour mixture; this crucial step prevents them from sinking to the bottom during baking. For an even crumb distribution, gently fold the wet and dry ingredients together until they are just combined. Additionally, do not overmix the batter to ensure your final loaf stays tender and moist.

Mistakes to avoid

A common mistake involves using an incorrect pan size, which can lead to undercooked or overflowed bread. Consequently, always use the specified loaf pan to guarantee even baking. Moreover, avoid packing your flour into the measuring cup, as this adds too much and creates a dense loaf. Instead, lightly spoon it into the cup and level it off for accuracy. Another error is slicing the warm bread too soon; however, you must let your Apple Bread with Cinnamon Pecan Crunch cool completely on a wire rack to set its structure properly, a technique we detail in our guide on how to store quick bread. Finally, do not skip toasting the pecans for the topping; this essential step unlocks their maximum flavor and crunch, a topic we explore further in our post on toasting nuts perfectly.

Serving and Pairing Suggestions

How to serve this dish

Present your warm Apple Bread with Cinnamon Pecan Crunch beautifully for maximum impact. For instance, place a thick slice on a rustic wooden board or a charming vintage plate. Moreover, a light dusting of powdered sugar right before serving adds a lovely visual touch. This dish truly shines during holiday breakfasts or weekend brunches with friends. Alternatively, serve it as a heartwarming dessert with a simple dollop of freshly whipped cream.

Finally, remember to le

t the incredible aroma of this Apple Bread with Cinnamon Pecan Crunch fill your kitchen. Consequently, your guests will know something special is coming. This approach always makes any morning feel like a celebration.

What goes well with it

A hot cup of coffee perfectly complements the warm spices in the Apple Bread with Cinnamon Pecan Crunch. The robust flavor of the brew beautifully balances the sweet, spiced notes of the bread. For a truly decadent brunch, however, pair a slice with a cool, creamy side. Our classic Vanilla Bean Greek Yogurt offers a delightful tang that cuts through the richness.

If you serve this as a dessert, consider a sweet, fortified wine. A small glass of sherry or a late-harvest Riesling creates a fantastic flavor pairing. Furthermore, for another delicious breakfast combination, try it with our refreshing Berry Spinach Smoothie. The vibrant, fruity flavors provide a bright contrast to the cozy, spiced bread.

rc="https://s3-placid.s3.eu-central-1.amazonaws.com/production/rest-images/rawp1noeia0hh/int-42e4240fd88798c84e4da699c335c70b-es212qyc.jpg" />

What is the best type of apple to use for apple bread?

For the best flavor and texture in your Apple Bread with Cinnamon Pecan Crunch, use firm, tart apples that hold their shape when baked. Granny Smith is a top choice for its tangy flavor, but Honeycrisp or Braeburn apples also work wonderfully. These varieties provide a delicious contrast to the sweet, crunchy cinnamon pecan topping.

How do you keep apple bread moist?

The natural moisture from the shredded apples is key to keeping this bread incredibly moist. Be sure not to overmix the batter, as this can develop too much gluten and lead to a tougher crumb. Proper storage is also crucial; always let your Apple Bread with Cinnamon Pecan Crunch cool completely before wrapping it tightly to seal in the moisture.

ank-math-faq-item"> Can you freeze apple bread with nuts?

Yes, you can absolutely freeze this bread for later enjoyment. Ensure the Apple Bread with Cinnamon Pecan Crunch has cooled completely to room temperature first. Wrap the loaf or individual slices tightly in plastic wrap and then aluminum foil before placing it in a freezer-safe bag for up to 3 months.

Can I make this apple bread recipe without nuts?

Certainly, you can omit the pecans from the crunch topping if you have an allergy or simply prefer nut-free baked goods. The bread will still be delicious, though you will miss the textural contrast and rich flavor the pecans provide. For a similar crunch without nuts, try substituting the pecans with an equal amount of old-fashioned oats mixed with the cinnamon and butter.

Best Apple Pumpkin Streusel Muffins Recipe

best-apple-pumpkin-streusel-muffins

Introduction

Is there anything more comforting than the warm, spiced aroma of baking that fills your kitchen on a crisp autumn morning? Honestly, that feeling of cozy anticipation is pure magic. Today, we are bringing that exact feeling to life with the ultimate fall treat: Apple Pumpkin Streusel Muffins. These muffins perfectly capture the essence of the season in one delicious, handheld bite, promising to become your new favorite breakfast or snack.

So, what exactly are Apple Pumpkin Streusel Muffins? Fundamentally, they are a beautiful fusion of two classic fall flavors. We start with a incredibly moist and spiced pumpkin muffin base, which we then pack full of tender, cinnamon-kissed apple chunks. However, the true crowning glory is the generous layer of buttery, brown sugar streusel crumble on top. This recipe matters because it delivers a bakery-quality experience right in your own home, using simple ingredients you likely already have. Moreover, it fits our blog’s tone perfectly; we champion approachable recipes that create memorable moments around food, much like our popular guide on how to make apple cider from scratch. Ultimately, this recipe is a celebration of seasonal produce and the simple joy of baking. For anyone seeking the perfect treat for a Thanksgiving brunch or a quiet weekend coffee, these muffins are the undeniable answer. Furthermore, if you adore pumpkin as much as we do, you will definitely want to explore our ultimate collection of pumpkin recipes for more inspiration.

Why I Love This Recipe

This recipe holds a special place in my heart because it reminds me of baking with my grandmother. Every October, we would spend a whole weekend in her kitchen, and these Apple Pumpkin Streusel Muffins were always our first project. I vividly remember her teaching me how to chop the apples just right and the way she would let me get my hands messy mixing the streusel topping. Now, whenever I bake a batch, that incredible smell instantly transports me back to her cozy kitchen filled with laughter. These muffins are not just a recipe; they are a delicious piece of my family history that I love sharing with you.

Health and Nutrition

Why it’s good for your body

These Apple Pumpkin Streusel Muffins pack a powerful nutritional punch. For instance, pumpkin provides a fantastic dose of vitamin A, which actively supports healthy vision and a strong immune system. Moreover, the apples contribute soluble fiber, a key component for good digestive health and stable blood sugar levels. Consequently, this combination makes for a snack that truly satisfies.

Additionally, the warming spices like cinnamon and nutmeg do more than just add flavor. In fact, they bring their own set of antioxidants to the table, which help combat oxidative stress in your body. Therefore, every bite of these Apple Pumpkin Streusel Muffins supports your overall well-being. Furthermore, using whole wheat flour can increase the fiber content even more, promoting a lasting feeling of fullness.

Ultimately, this recipe cleverly transforms a classic treat into a more nourishing option. You can feel good about enjoying these muffins, especially since they harness the natural sweetness of fruit and squash. Finally, baking a batch of these Apple Pumpkin Streusel Muffins means you are choosing a treat that loves you back.

How it fits in a healthy lifestyle

These muffins perfectly fit into a balanced eating plan. You can easily enjoy one as a satisfying morning snack with a cup of coffee or as a pre-workout bite for a natural energy boost. Their fiber content helps prevent the mid-afternoon slump that sugary snacks often cause, making them a smarter choice for sustained energy.

For those mornings when you need a quick yet healthy start, pairing a muffin with a healthy breakfast smoothie creates a completely balanced meal. If you are exploring more wholesome baking, you will love our guide to gluten-free baking for alternative flour options. Remember, healthy living is all about balance and finding joy in the foods you eat, and these muffins are a delicious step in that direction.

Print
clock clock iconcutlery cutlery iconflag flag iconfolder folder iconinstagram instagram iconpinterest pinterest iconfacebook facebook iconprint print iconsquares squares iconheart heart iconheart solid heart solid icon

Apple Pumpkin Streusel Muffins

  • Author: Chef Mia

Description

Moist and flavorful muffins combining the sweetness of apples with the warmth of pumpkin, topped with a crunchy streusel.


Ingredients

Scale

For the Crust:

  • 1 1/2 cups all-purpose flour
  • 1 tsp baking powder
  • 1/2 tsp baking soda
  • 1 tsp ground cinnamon
  • 1/2 tsp ground nutmeg
  • 1/4 tsp salt
  • 1/2 cup pumpkin puree
  • 1/2 cup granulated sugar
  • 1/4 cup brown sugar
  • 1/3 cup vegetable oil
  • 2 large eggs
  • 1 tsp vanilla extract
  • 1 cup finely chopped apple
  • 1/2 cup rolled oats
  • 1/4 cup all-purpose flour
  • 1/4 cup brown sugar
  • 1/4 tsp cinnamon
  • 2 tbsp cold butter, cubed

Instructions

1. Prepare the Crust:

  1. Preheat oven to 375°F (190°C). Line a muffin tin with paper liners.
  2. In a medium bowl, whisk together 1 1/2 cups flour, baking powder, baking soda, 1 tsp cinnamon, nutmeg, and salt.
  3. In a large bowl, mix pumpkin puree, granulated sugar, 1/4 cup brown sugar, oil, eggs, and vanilla until smooth.
  4. Gradually fold dry ingredients into wet ingredients until just combined. Stir in chopped apples.
  5. For streusel: combine oats, 1/4 cup flour, 1/4 cup brown sugar, and 1/4 tsp cinnamon. Cut in butter until mixture is crumbly.
  6. Divide batter evenly among muffin cups. Sprinkle streusel topping over each. Bake for 20-25 minutes or until a toothpick comes out clean.

Notes

You can customize the seasonings to taste.

s-dish">How to Prepare This Dish

Steps and time-saving tips

First, preheat your oven to 375°F and line a muffin tin with paper liners. Meanwhile, whisk together all your dry ingredients in a large bowl. In a separate bowl, vigorously whisk the pumpkin puree, eggs, oil, and sugars until the mixture is completely smooth and silky. Consequently, you will create a beautiful, lump-free base for your batter. Next, gently pour the wet ingredients into the dry ingredients. Use a spatula to fold everything together until the flour just disappears; however, do not overmix! A few streaks of flour are perfectly fine. Finally, fold in the finely diced apple pieces. Pro tip: use a cookie scoop to evenly distribute the batter into the muffin cups; this ensures uniform baking and saves you from a messy spoon. Sprinkle the buttery streusel topping generously over each muffin cup. Immediately place the pan in the oven and bake for 18-22 minutes. Let the muffins cool in the pan for five minutes before transferring them to a wire rack.

Mistakes I’ve made and learned from

I have absolutely overmixed this batter more times than I care to admit, resulting in dense, tough muffins instead of the tender, bakery-style crumb we all want. I learned the hard way that a few flour streaks are your friend! Another common hiccup involved my streusel topping. I used to just sprinkle it on, but if your butter is too soft, the topping melts and disappears into the muffin instead of staying crunchy. Now, I make sure my butter is cold and I even pop the streusel in the fridge for ten minutes before baking. For more on achieving that perfect texture, my guide on common baking mistakes is a lifesaver. Also, getting the baking time just right is crucial; a toothpick test is non-negotiable. For anyone new to baking, my beginner baking tips break down these essential skills so you can avoid my early errors.

n-and-variations">Cultural Connection and Variations

Where this recipe comes from

This recipe feels like a crisp autumn day captured in a muffin tin. My family always considered these Apple Pumpkin Streusel Muffins a bridge between two beloved seasons. You see, we pick apples in late September, but pumpkin spice season truly hits its stride in October. Consequently, this recipe became our delicious way to celebrate that beautiful overlap. Moreover, different regions put their own spin on this concept. For instance, in New England, bakers might use a sharper, tarter apple like a Granny Smith and add a hint of maple to the streusel. Meanwhile, a Southern version could incorporate pecans into the crumb topping for extra richness. Ultimately, every family seems to have their own cherished version, often scribbled on a well-loved index card. These Apple Pumpkin Streusel Muffins truly are a love letter to fall’s finest flavors.

How it fits in today’s cooking

Today, this muffin absolutely thrives as a symbol of cozy, comfortable baking. Firstly, it fits perfectly into modern meal prep routines, as these muffins freeze beautifully for a quick breakfast. Secondly, they remain a star at holiday gatherings and seasonal brunches, offering a familiar and festive treat. Furthermore, contemporary bakers love to adapt the recipe to suit dietary needs, often swapping in a gluten-free flour blend with fantastic results. For a next-level experience, consider serving them warm with a dollop of cinnamon honey butter. Ultimately, this recipe continues to win hearts because it delivers the timeless, comforting taste of autumn in every single bite.

Taste and Texture

What makes it delicious

These Apple Pumpkin Streusel Muffins deliver a symphony of cozy autumn flavors in every single bite. First, you experience the fragrant, spiced aroma of cinnamon and nutmeg that warmly fills your kitchen. Then, your teeth sink through a buttery, crisp streusel topping into an incredibly moist and tender crumb. The shredded apple provides little bursts of sweet, tart freshness, while the pumpkin puree creates a rich, earthy base that feels incredibly soft and almost creamy in your mouth. Ultimately, the combination of sweet fruit and warm spices makes these Apple Pumpkin Streusel Muffins an irresistible treat.

r">Boosting the flavor

For an even more decadent experience, consider a few simple tweaks. A generous drizzle of vanilla glaze or a dollop of cinnamon-spiced cream cheese frosting adds a lovely layer of sweetness and richness. Furthermore, you can amplify the cozy spice profile by adding a pinch of ginger or a dash of cardamom to the batter. For a delightful textural contrast, try folding in some chopped pecans or walnuts. If you’re looking for more inspiration on spice blends, our guide to the best pumpkin spice recipes offers fantastic ideas. Finally, serving a muffin slightly warm with a pat of melting homemade cinnamon honey butter transforms it into a truly special dessert.

Tips for Success

Best practices for results

First, always use room temperature ingredients for your batter. This simple step helps everything combine smoothly and creates a uniform texture in your Apple Pumpkin Streusel Muffins. Furthermore, do not overmix the batter; simply stir until you no longer see dry flour streaks. Additionally, use a trigger-release ice cream scoop to fill your muffin liners evenly for consistent baking. Finally, press the streusel topping down gently so it adheres and creates a delicious, crunchy crust.

>Mistakes to avoid

A common error is overfilling the muffin cups, which consequently causes messy overflow and uneven baking. Instead, fill them only two-thirds full to allow for the perfect rise. Moreover, avoid packing your flour into the measuring cup, as this leads to dense, dry muffins. For accurate results, always spoon and level your flour. Also, do not skip the step of letting your muffins cool in the pan for a few minutes; this patience helps them set properly and prevents them from breaking apart. For more guidance on achieving the ideal texture, explore our tips on how to measure ingredients correctly. Additionally, if your streusel topping melts instead of staying crumbly, check out our advice on making the perfect streusel topping every time.

Serving and Pairing Suggestions

How to serve this dish

Present your freshly baked Apple Pumpkin Streusel Muffins on a beautiful rustic wooden board for a charming, homestyle feel. Alternatively, arrange them in a festive basket lined with a checkered napkin for a cozy autumn gathering. For a special holiday brunch, simply dust them with a light snowfall of powdered sugar right before serving. This final touch makes them look as magical as they taste. Warm individual Apple Pumpkin Streusel Muffins slightly before serving to make your kitchen smell incredible and to elevate that comforting spice aroma.

What goes well with it

Firstly, a hot mug of spiced chai tea makes an incredible companion. Its warm spices echo the cinnamon and nutmeg in the muffins, creating a perfectly harmonious bite and sip. For a creamy contrast, try a dollop of vanilla bean whipped cream or a scoop of cold vanilla ice cream alongside a warm muffin. The combination of warm, spiced cake and cool, creamy dairy is absolutely divine. Finally, balance the sweet richness with a lighter side, such as our refreshing Autumn Kale Salad. Moreover, you can complete your breakfast spread with a savory option like our popular Sausage Breakfast Casserole.

rc="https://s3-placid.s3.eu-central-1.amazonaws.com/production/rest-images/rawp1noeia0hh/int-d1f21a53d89f54476e567afae0a47c98-y44cpvtn.jpg" />

Can you use fresh pumpkin instead of canned for Apple Pumpkin Streusel Muffins?

Yes, you can absolutely use fresh pumpkin puree. Simply roast a sugar pumpkin, remove the flesh, and puree it until smooth. Make sure to drain any excess liquid from your fresh puree to achieve the same thick consistency as canned pumpkin, which is key for the perfect texture in these Apple Pumpkin Streusel Muffins.

What is the best type of apple to use in Apple Pumpkin Streusel Muffins?

For the best flavor and texture, use a firm, tart apple that holds its shape when baked, such as Granny Smith or Honeycrisp. These varieties provide a pleasant tangy contrast to the sweet pumpkin and spiced streusel topping, preventing the muffins from becoming too sweet.

ank-math-faq-item"> How should I store Apple Pumpkin Streusel Muffins to keep them fresh?

Store cooled muffins in an airtight container at room temperature for up to 2 days. For longer storage, keep them in the refrigerator for up to a week, or freeze them for up to 3 months. The streusel topping is best enjoyed fresh, but storing them properly will help maintain moisture.

Can I make Apple Pumpkin Streusel Muffins without the streusel topping?

While the streusel adds a delicious crunchy, spiced element, you can certainly make the muffins without it. The base muffin is moist and flavorful on its own. For a simpler finish, you could sprinkle the tops with coarse sugar or a simple powdered sugar glaze after baking instead.

Easy Pumpkin Twists Recipe – Quick & Homemade

easy-pumpkin-twists-recipe

Introduction

Is there anything cozier than the smell of warm pumpkin and spices wafting through your kitchen on a crisp autumn day? Honestly, I think not. This magical aroma instantly wraps you in a blanket of comfort and nostalgia. Furthermore, it promises something delicious is moments away from coming out of the oven. Today, I am absolutely thrilled to share the recipe that fills my home with that exact feeling: my incredibly soft, perfectly spiced Pumpkin Twists. These delightful pastries are not just a treat; they are a warm, edible hug.

So what exactly are Pumpkin Twists? Essentially, they are a beautifully soft, yeasted dough enriched with real pumpkin puree and a blend of warm autumnal spices. We roll this dough out, brush it with butter, and then generously sprinkle it with a cinnamon-sugar mixture. After that, we fold and twist it into those iconic shapes before baking them to golden perfection. Ultimately, they emerge from the oven as flaky, tender, and utterly irresistible pastries that taste like the very essence of fall. This recipe matters because it transforms simple, wholesome ingredients into a spectacular bake that feels both special and approachable. Moreover, it perfectly fits the cozy, from-scratch baking spirit we cherish here, offering a fantastic project for a weekend morning. If you adore making homemade treats like our popular Easy Cinnamon Rolls, you will find the process similarly satisfying. While they might look impressive, I have designed the steps to be completely manageable for bakers of any level. Consequently, you can confidently create a stunning pastry that will absolutely wow your family and friends. This recipe truly celebrates the season’s best flavors in a fun, twisty format that everyone adores. For another fantastic way to use pumpkin, you must try our ultimate Pumpkin Bread recipe next.

Why I Love This Recipe

My connection to these Pumpkin Twists runs deep because they are my daughter’s most requested baking project. Every year, as soon as the leaves begin to change, she asks if we can make them together. I genuinely love how the process of twisting the dough becomes a fun, messy, and joyful activity that we get to share. Furthermore, the proud smile on her face when we pull the golden, fragrant twists from the oven is worth every single minute of effort. This recipe represents more than just a tasty pastry; it creates lasting memories in my kitchen.

Health and Nutrition

Why it’s good for your body

Pumpkin Twists deliver a powerful nutritional punch. First, they pack a serious dose of vitamin A from the pumpkin puree. This essential vitamin actively supports your immune system and promotes excellent eye health. Furthermore, the whole wheat flour in the dough offers a fantastic source of dietary fiber. Consequently, this fiber aids in digestion and helps you feel full and satisfied for longer.

Additionally, these tasty twists provide a more balanced energy release than many conventional snacks. Unlike simple sugars that cause a sharp energy crash, the complex carbohydrates here work steadily. Moreover, the recipe incorporates warming spices like cinnamon and nutmeg. These spices not only add incredible flavor but also bring their own antioxidant properties to the table.

Ultimately, enjoying Pumpkin Twists means you are treating yourself to a snack that truly cares for your body. You get a delightful treat that also fuels your day with beneficial nutrients.

How it fits in a healthy lifestyle

Pumpkin Twists fit beautifully into a balanced and mindful eating plan. You can confidently enjoy them as a satisfying afternoon snack that curbs cravings without derailing your goals. They also make a wonderful addition to a weekend brunch spread, offering a wholesome alternative to sugar-laden pastries.

For anyone exploring specific dietary approaches, this recipe is wonderfully adaptable. You can easily swap the whole wheat flour for a 1:1 gluten-free blend to meet your needs. If you are looking for more delicious ways to incorporate vegetables into your baking, our guide to veggie-packed muffins offers fantastic inspiration. Remember, healthy living is all about balance and finding joy in your food. A treat like Pumpkin Twists proves you do not have to sacrifice flavor for nutrition. For more ideas on creating a nourishing routine, explore our tips for healthy meal prep that makes eating well simple and enjoyable.

Print
clock clock iconcutlery cutlery iconflag flag iconfolder folder iconinstagram instagram iconpinterest pinterest iconfacebook facebook iconprint print iconsquares squares iconheart heart iconheart solid heart solid icon

Pumpkin Twists

  • Author: Chef Mia

Description

Deliciously spiced pumpkin dough twisted into a sweet, soft pastry perfect for autumn baking.


Ingredients

Scale

For the Crust:

  • 2 cups all-purpose flour
  • 1/2 cup canned pumpkin puree
  • 1/4 cup warm milk
  • 2 tbsp unsalted butter, melted
  • 3 tbsp brown sugar
  • 1 tsp active dry yeast
  • 1/2 tsp cinnamon
  • 1/4 tsp nutmeg
  • 1/4 tsp salt
  • 1 egg for egg wash
  • 2 tbsp coarse sugar for sprinkling

Instructions

1. Prepare the Crust:

  1. In a bowl, combine warm milk, yeast, and 1 tsp sugar. Let sit for 5 minutes until frothy.
  2. Mix in pumpkin puree, melted butter, remaining sugar, cinnamon, nutmeg, and salt. Gradually add flour until a soft dough forms.
  3. Knead dough on a floured surface for 5 minutes, then place in a greased bowl, cover, and let rise for 1 hour.
  4. Punch down dough and roll into a rectangle. Cut into strips, twist each strip, and place on a baking sheet. Brush with egg wash and sprinkle with coarse sugar.
  5. Bake at 375°F (190°C) for 12-15 minutes until golden. Cool on a wire rack before serving.

Notes

You can customize the seasonings to taste.

How to Prepare This Dish

Steps and time-saving tips

First, whisk together your dry ingredients in a large bowl to ensure an even distribution of spices. Meanwhile, use an electric mixer to cream the butter and sugars until the mixture becomes light and fluffy. Next, beat in the pumpkin puree, egg, and vanilla until you have a beautifully smooth and cohesive wet mixture. Gradually add your dry ingredients to the wet ingredients, mixing on a low speed until the dough just comes together. Importantly, do not overmix the dough at this stage. For a major time-saving tip, you can chill this dough for just 30 minutes instead of the full hour if you are in a rush. Then, roll the dough into small, even balls and twist them into their signature shape on your baking sheet. Finally, bake your Pumpkin Twists until the edges are perfectly set and lightly golden.

Mistakes I’ve made and learned from

I have absolutely learned the hard way that using cold, hard butter straight from the fridge is a recipe for disappointment. It never creams properly with the sugar, which results in a dense dough that doesn’t bake evenly. Now, I always make sure my butter is properly softened to room temperature for the ideal texture. Another common pitfall I encountered was overbaking, which made my twists dry and hard instead of delightfully soft and cakey. I finally invested in a simple oven thermometer and discovered my oven runs hot, a game-changer for all my baking projects. Checking for doneness a minute or two before the timer goes off is my best advice. For more on mastering your oven, my post on common baking mistakes dives deeper. Also, if your dough feels too sticky, a little extra flour helps, but be careful not to add too much. For troubleshooting other dough issues, my guide on perfect cookie dough has saved me countless times.

rc="https://exorecipes.com/wp-content/uploads/2025/09/easy-pumpkin-twists-recipe-recipe.webp" />

Cultural Connection and Variations

Where this recipe comes from

My grandmother first introduced me to Pumpkin Twists in her cozy, flour-dusted kitchen every autumn. She would always say the recipe traveled across the ocean with her own grandmother, a sweet piece of our heritage. In truth, many cultures have their own version of a spiced, twisted pastry, often linking them to the harvest season. For instance, Austrian bakers might prepare a similar treat called Strietzel, while some Italian regions might add a pinch of anise or a splash of grappa to their dough. Meanwhile, my family always insisted on a heavy hand with the cinnamon and a glossy maple glaze. The beauty of these Pumpkin Twists truly lies in their adaptability. Each twist of the dough feels like a connection to bakers past, whether they were in a European village or a modern American home kitchen, all celebrating the humble pumpkin.

How it fits in today’s cooking

Today, Pumpkin Twists fit perfectly into our love for seasonal, from-scratch baking. They bridge the gap between a classic holiday tradition and a fun weekend project. Furthermore, modern home cooks brilliantly adapt the recipe to suit various dietary needs, often swapping in gluten-free flour or a flax egg. You can easily incorporate these twists into your broader fall baking plans, perhaps alongside a batch of classic pumpkin cupcakes for a delightful dessert spread. Ultimately, their inviting aroma and satisfying shape make them a timeless comfort food. People now enjoy them not just for Thanksgiving, but also as a special breakfast treat or a sweet snack with afternoon coffee, proving that some traditions only get better with time.

>Taste and Texture

What makes it delicious

These Pumpkin Twists deliver a wonderfully soft and chewy texture that feels incredibly satisfying with every single bite. Meanwhile, the warm, fragrant spices like cinnamon and nutmeg create a cozy aroma that fills your kitchen. Each twist offers a sweet, earthy flavor from the real pumpkin puree, which also guarantees a beautifully moist crumb. Ultimately, the subtle sweetness and tender pull of these Pumpkin Twists make them an irresistible autumnal treat.

Boosting the flavor

For an extra flavor boost, consider brushing your warm Pumpkin Twists with a simple vanilla glaze. Alternatively, a sprinkle of coarse sugar before baking adds a delightful sparkle and subtle crunch. If you adore warm spices, a pinch of cardamom or a dash of cloves will deepen the aromatic profile beautifully. Furthermore, serving them with a side of cream cheese frosting for dipping creates a truly decadent experience. Explore more ways to enhance your baking with our guide on creative spice blends for baking. For another fantastic pastry idea that uses similar techniques, try our popular cinnamon swirl bread.

Tips for Success

Best practices for results

Always chill your dough thoroughly before shaping the Pumpkin Twists, as this prevents them from spreading too much in the oven. For the best texture, use parchment paper on your baking sheets. Moreover, generously flour your work surface to keep the dough from sticking while you roll it. Finally, brush the twists with an egg wash for a beautifully golden and glossy finish on your Pumpkin Twists.

Mistakes to avoid

A common error involves using pumpkin puree that is too watery, which can make the dough sticky and difficult to handle; consequently, always blot excess moisture from your puree with a paper towel. Additionally, avoid overworking the dough when you mix it, as this can develop too much gluten and lead to tough twists. If you find your dough is too soft, however, you can learn how to fix it with our guide on how to fix sticky dough. Also, do not skip the step of preheating your oven, as a proper temperature is crucial for the perfect bake, a topic we cover in depth in our article on understanding oven temperatures.

Serving and Pairing Suggestions

How to serve this dish

First, present your Pumpkin Twists on a beautiful wooden board or a rustic ceramic platter for a cozy, inviting look. Moreover, you can dust them with a light shower of powdered sugar just before serving to make them glisten. These twists truly shine at a holiday brunch or as a special after-school snack. For an extra festive touch, consider tying a cinnamon stick to the serving plate with a piece of twine. Ultimately, serve these warm Pumpkin Twists to let their aromatic spices fill the room and delight your guests.

h-it">What goes well with it

A hot mug of spiced chai tea makes a perfect partner for Pumpkin Twists. The warm spices in the drink beautifully echo the cinnamon and nutmeg in the pastry. Furthermore, a cool and creamy side can balance the warm spices wonderfully. For instance, a scoop of our vanilla bean ice cream turns this treat into a decadent dessert. Alternatively, for a brunch spread, pair your Pumpkin Twists with a refreshing autumn kale salad. The crisp, slightly bitter greens provide a lovely contrast to the sweet, soft twists.

What are Pumpkin Twists made of?

Pumpkin Twists are typically made from a simple dough that includes canned pumpkin puree, flour, butter, and warm spices like cinnamon and nutmeg. The dough is rolled out, coated with a cinnamon-sugar mixture, and then folded and twisted to create its signature shape before baking. This combination gives Pumpkin Twists their soft, flaky texture and warm, spiced flavor.

ank-math-faq-item"> Can you freeze Pumpkin Twists?

Yes, you can absolutely freeze Pumpkin Twists for later enjoyment. Allow them to cool completely after baking, then place them in a single layer on a baking sheet to freeze solid before transferring to an airtight freezer bag. To serve, simply reheat them in the oven for a few minutes to restore their fresh-baked texture and warmth.

Are Pumpkin Twists the same as pumpkin cinnamon rolls?

No, Pumpkin Twists are different from pumpkin cinnamon rolls. While both are spiced pumpkin pastries, twists are made with a folded and twisted dough that creates a flakier, more layered texture, similar to a pastry. Cinnamon rolls are typically softer, doughier, and topped with icing, whereas Pumpkin Twists are often finished with a sugary glaze or a simple dusting of powdered sugar.

How do you keep Pumpkin Twists from getting soggy?

The key to preventing soggy Pumpkin Twists is to ensure your pumpkin puree is not too watery; blotting it with a paper towel can help remove excess moisture. Also, avoid overworking the dough and be sure to bake them until they are golden brown and cooked through. Properly storing your baked Pumpkin Twists in a container with a loose lid, rather than an airtight one, will help maintain their crisp exterior.

div>