Table of Contents
Banana Cream Cheesecake: The Only Recipe You’ll Ever Need
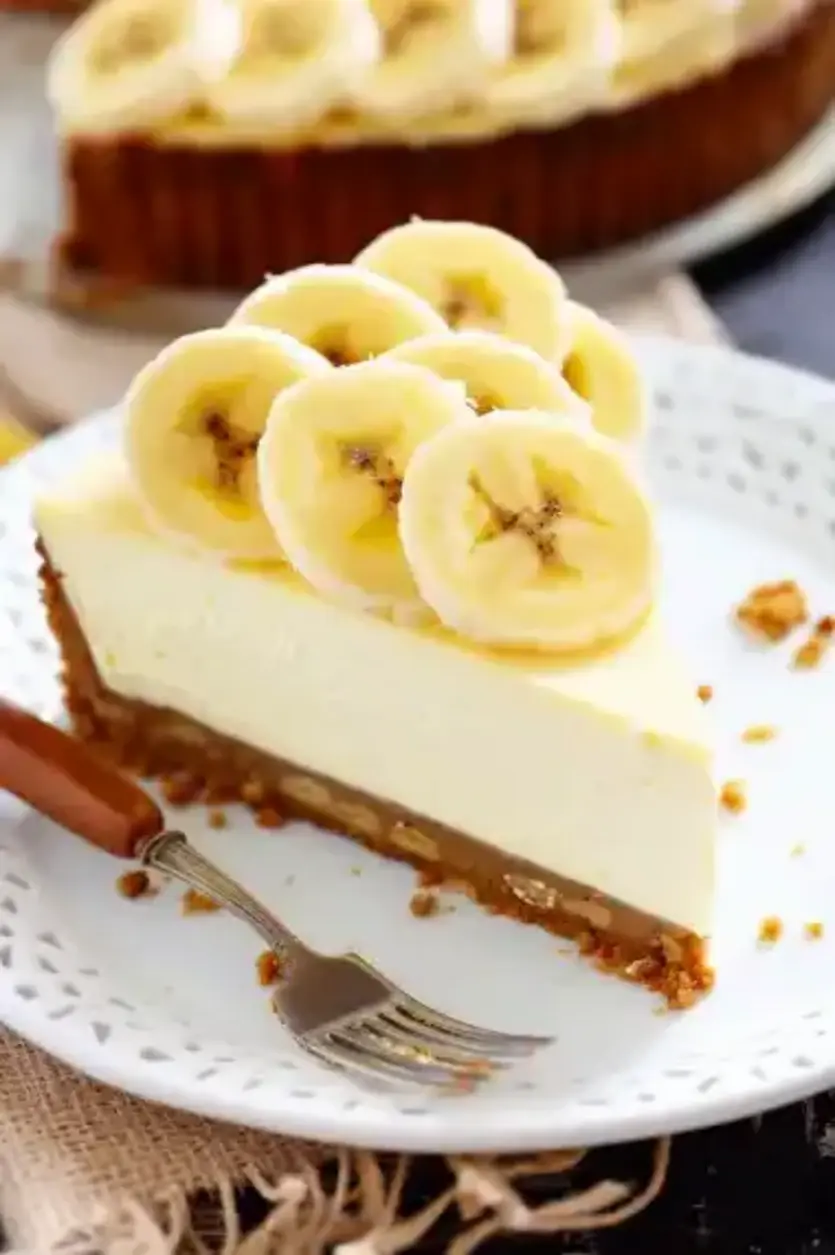
Imagine transforming simple ingredients into an ultra-creamy Banana Cream Cheesecake that becomes the star of your next family gathering or dinner party. This isn’t just any banana cheesecake recipe; it’s a meticulously crafted delight with an ultra-creamy banana infusion that elevates the classic dessert to new heights. Picture layers of silky, banana-infused filling nestled in a buttery graham cracker crust, offering a perfect balance of sweetness and tang. As the ultimate Banana Cream Cheesecake guide from exorecipes.com, this recipe has been expertly tested for foolproof results, ensuring every home cook can achieve professional-level success right in their kitchen.
The allure of this Banana Cream Cheesecake lies in its irresistible sensory experience. Each bite delivers a velvety, ultra-creamy texture that melts in your mouth, thanks to the fresh mashed bananas blended seamlessly into the filling. The aroma of ripe bananas baking with creamy cheese fills the air, evoking memories of sunny afternoons and tropical escapes. The crisp graham cracker crust provides a satisfying crunch that contrasts beautifully with the smooth interior, while subtle notes of vanilla and cinnamon add layers of warmth and depth. It’s a symphony of flavors and textures that will have you savoring every last crumb of this banana dessert masterpiece.
What sets this Banana Cream Cheesecake recipe apart on exorecipes.com is our commitment to providing the single best resource for home cooks, drawing from the expertise of Chef Mia. This version incorporates a chef’s secret ultra-creamy banana infusion technique that guarantees a flawlessly smooth filling without cracks or inconsistencies. You’ll learn insider tips, detailed instructions, and common pitfalls to avoid, making this guide not just a recipe, but a comprehensive tutorial. By the end, you’ll feel confident creating this banana cheesecake that’s been perfected through multiple tests for unbeatable results every time.
Why This Banana Cream Cheesecake Recipe is a Game-Changer
The chef’s secret behind this Banana Cream Cheesecake is the ultra-creamy banana infusion technique, where ripe bananas are meticulously mashed and folded into the filling for an unparalleled smoothness and natural sweetness. This method not only enhances the flavor profile but also ensures the cheesecake remains moist and creamy throughout, setting it apart from standard recipes that often result in dense or grainy textures. By incorporating fresh bananas directly into the cream cheese mixture, we achieve a tropical twist that infuses every layer with authentic banana essence.
For unbeatable texture, the science lies in the gradual cooling process after baking, which prevents the proteins in the cream cheese from contracting too quickly and causing cracks. This banana cheesecake recipe uses high-quality cream cheese and sour cream to create a rich, emulsified filling that holds its shape while remaining luxuriously soft. The result is a dessert with the perfect balance of firmness in the crust and silkiness in the center, making it a standout banana dessert.
Foolproof for a reason, this recipe has been tested multiple times in our kitchens to guarantee success, even for novice bakers. We account for variables like oven temperatures and ingredient variations, ensuring that your Banana Cream Cheesecake turns out perfectly every time. It’s reliable, easy to follow, and designed to build your confidence in cheesecake recipes.
Ingredient Spotlight: Quality Makes the Difference
When it comes to creating the ultimate Banana Cream Cheesecake, selecting high-quality ingredients is key to achieving that ultra-creamy texture and vibrant flavor. Let’s dive into the main components from our recipe.
For the crust, start with 1 1/2 cups of graham cracker crumbs. These provide the foundational crunch and a subtle sweetness that complements the creamy filling. Quality matters here because fresh crumbs ensure a sturdy base that doesn’t become soggy; opt for whole graham crackers you crush yourself for the best results. If you’re out of graham crackers, a tested substitution is an equal amount of digestive biscuits, which offer a similar texture without altering the flavor profile.
Moving to the filling, 3 ripe bananas, mashed, are the heart of this ultra-creamy Banana Cream Cheesecake. Their natural sweetness and moisture create a smooth, banana-infused consistency that sets this recipe apart. Always choose bananas that are spotty and soft for optimal flavor—underripe ones can make the filling taste bland. For a substitution, you could use 1 cup of unsweetened banana puree, but fresh is best to maintain that authentic, tropical essence.
Cream cheese is another star, with 3 (8 ounce) packages softened to perfection. It forms the ultra-creamy base of the cheesecake, providing tanginess that balances the sweetness. Use full-fat, brick-style cream cheese for the richest texture; low-fat versions can lead to a watery filling. A reliable substitution is an equal amount of mascarpone cheese, which adds a slightly sweeter note while keeping the mixture velvety.
White sugar, at 3/4 cup in the filling, helps sweeten and stabilize the mixture. It’s crucial for that just-right sweetness in banana cheesecake recipes, but for a refined option, swap it with coconut sugar to add a hint of caramel flavor without compromising the ultra-creamy result.
For the topping, 1 cup of heavy whipping cream whipped with 2 tablespoons of powdered sugar creates a light, airy finish. Heavy cream ensures stable peaks for garnishing, and quality matters for a non-grainy texture. If dairy-free, substitute with full-fat coconut cream, whipped until fluffy, to keep the recipe adaptable while preserving that luxurious mouthfeel.
Step-by-Step Instructions
Step 1: Preparing the Crust
Preheat your oven to 350°F (175°C). In a medium bowl, combine 1 1/2 cups graham cracker crumbs, 1/3 cup white sugar, 6 tablespoons melted butter, and 1/2 teaspoon cinnamon (if using). Mix until the ingredients form a wet sand-like consistency, then press the mixture firmly into the bottom and up the sides of a 9-inch springform pan for an even base.
Pro Tip: Use the bottom of a flat measuring cup to press the crust evenly—this ensures a uniform layer that bakes perfectly and prevents any weak spots that could lead to crumbling.
Step 2: Creating the Filling
In a large mixing bowl, beat 3 (8 ounce) packages of softened cream cheese with 3/4 cup white sugar until smooth and creamy, about 2-3 minutes. Add 3 large eggs one at a time, beating well after each addition to incorporate air and avoid lumps. Stir in 1 teaspoon vanilla extract and 1/2 cup sour cream, then gently fold in 3 mashed ripe bananas until fully blended, ensuring no streaks remain for that ultra-creamy banana infusion.
Common Mistake to Avoid: Overmixing the batter can incorporate too much air, leading to cracks in your Banana Cream Cheesecake. Mix just until combined after adding the eggs to keep the filling dense and smooth.
Step 3: Adding the Topping
Once the cheesecake has cooled as per the previous step, whip 1 cup heavy whipping cream with 2 tablespoons powdered sugar and 1 teaspoon vanilla extract in a clean bowl until stiff peaks form, about 3-5 minutes. Spread this topping evenly over the cooled cheesecake and garnish with fresh sliced bananas just before serving to enhance the visual appeal and fresh banana flavor.
Pro Tip: Chill the mixing bowl and beaters in the freezer for 10 minutes before whipping the cream—this helps achieve quicker, stiffer peaks for a professional-quality finish on your Banana Cream Cheesecake.
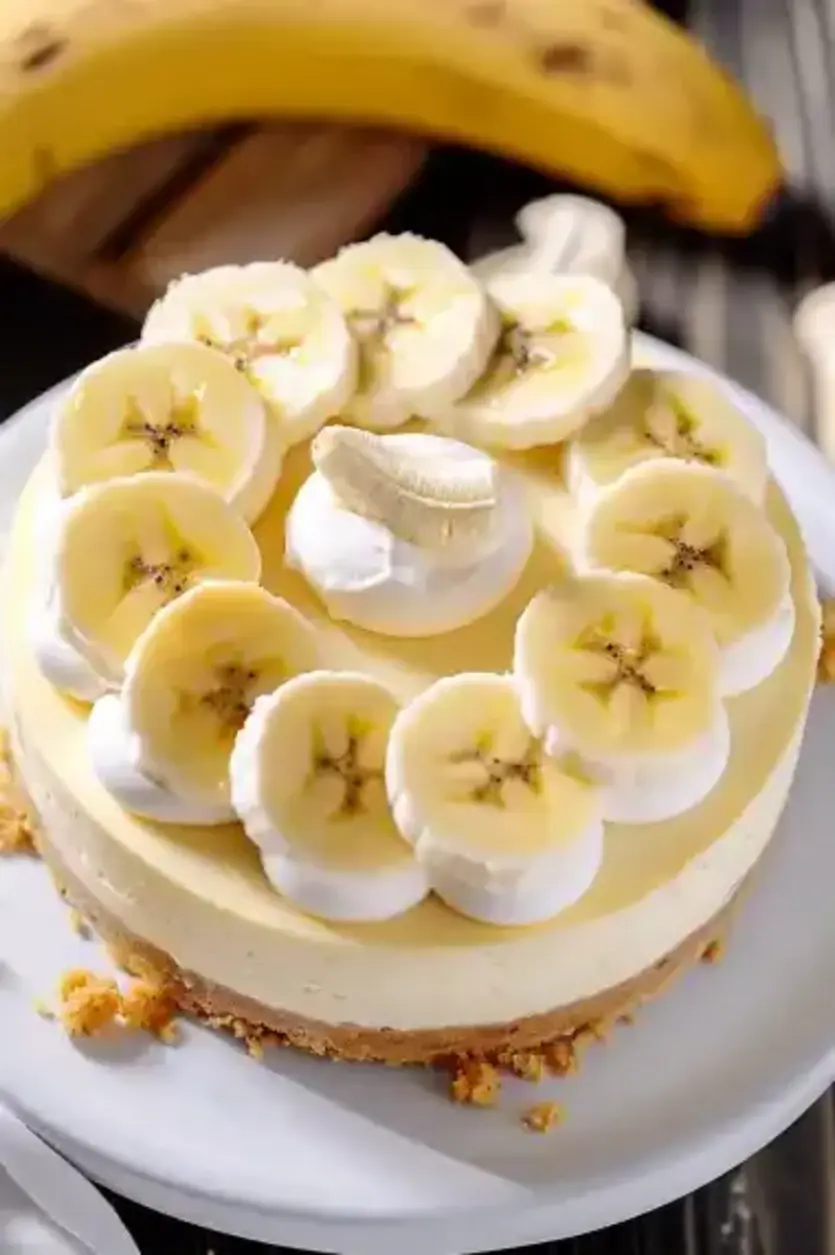
Serving & Presentation
Elevate your Banana Cream Cheesecake with creative plating that makes it the centerpiece of any meal. For an impressive presentation, slice the cheesecake with a warm knife for clean cuts, revealing the ultra-creamy layers, and arrange fresh banana slices in a circular pattern on top for a tropical flair. Dust with a light sprinkle of cinnamon or cocoa powder for added visual contrast. This banana dessert pairs beautifully with complementary sides like a scoop of vanilla ice cream to amplify the creamy notes, or fresh berries for a tangy balance. Serve it after a light meal, such as grilled chicken salad, to create a harmonious end to your dining experience, ensuring your guests feel delighted and satisfied.
Make-Ahead & Storage Solutions
Planning ahead is key for this Banana Cream Cheesecake recipe. For a make-ahead strategy, prepare the crust and filling up to 3 days in advance: bake the crust and store it in an airtight container at room temperature, then mix and refrigerate the filling separately. Assemble and bake the day before serving, allowing it to cool gradually in the oven as instructed.
When storing leftovers, cover the cheesecake tightly with plastic wrap or transfer slices to an airtight container and refrigerate for up to 5 days. This maintains the ultra-creamy texture without absorbing odors from the fridge. For freezing, wrap individual slices in freezer-safe wrap and store for up to 2 months; thaw overnight in the refrigerator to preserve freshness.
The best way to reheat is gently—bring refrigerated slices to room temperature for 30 minutes or warm in a 250°F oven for 10 minutes. Avoid microwaving to prevent the banana infusion from becoming watery, ensuring your Banana Cream Cheesecake retains its original silky texture and flavor.
Frequently Asked Questions (FAQ)
How do you make Banana Cream Cheesecake from scratch?
Making Banana Cream Cheesecake from scratch involves three main steps: first, prepare the graham cracker crust by mixing crumbs, sugar, butter, and cinnamon, then bake it briefly. Next, create the filling by beating cream cheese with sugar, adding eggs, vanilla, sour cream, and mashed bananas for that ultra-creamy infusion. Finally, bake, cool, and top with whipped cream. Our detailed instructions above ensure success, using fresh ingredients for the best banana cheesecake results.
What can I substitute for butter in Banana Cream Cheesecake?
For the crust in this Banana Cream Cheesecake recipe, you can substitute butter with an equal amount of coconut oil or a plant-based butter alternative for a dairy-free version. Coconut oil maintains the crisp texture and adds a subtle tropical note that complements the banana infusion. However, avoid using substitutes in the filling, as butter is only in the crust; always test for taste, as it might slightly alter the flavor profile of your banana dessert.
How long do you bake Banana Cream Cheesecake for the perfect texture?
Bake Banana Cream Cheesecake at 350°F for 50-55 minutes, then let it cool in the oven with the door ajar for 1 hour. This gradual cooling prevents cracks and ensures an ultra-creamy, set texture. Factors like oven calibration affect timing, so check for a slight jiggle in the center before removing it—this technique guarantees the perfect balance in your homemade banana cheesecake.
What are some creative ways to serve Banana Cream Cheesecake?
Get creative with serving Banana Cream Cheesecake by topping it with caramel drizzle and chopped nuts for a decadent twist, or layer it in parfait glasses with whipped cream and banana slices for individual portions. For a fun presentation, turn it into bite-sized cheesecake bars at parties, or pair it with coffee for a morning treat. These ideas enhance the ultra-creamy banana infusion, making it versatile for any occasion.
Can I make this recipe gluten-free?
Yes, you can make this Banana Cream Cheesecake gluten-free by swapping the graham cracker crumbs with an equal amount of gluten-free graham cracker alternatives or crushed gluten-free cookies. Ensure all other ingredients, like vanilla extract, are certified gluten-free. This adjustment maintains the ultra-creamy texture and flavor, making it a safe, delicious option for those with gluten sensitivities.
What’s the best way to prevent my Banana Cream Cheesecake from cracking?
To prevent cracking in your Banana Cream Cheesecake, avoid overbeating the batter, which introduces excess air, and use a water bath during baking for even heat distribution. Additionally, cool the cheesecake gradually in the oven as specified. These steps preserve the ultra-creamy banana infusion and ensure a flawless finish every time.
Tried This Recipe? Leave a Comment!
Did you make this Banana Cream Cheesecake? I’d love to hear how it turned out! Please leave a comment and a rating below. Your feedback helps other home cooks and supports exorecipes!
For more delicious inspiration, follow me on Pinterest!
Banana Cream Cheesecake
- Prep Time: 20 minutes
- Cook Time: 55 minutes
- Total Time: 1 hour 15 minutes
- Yield: 12 servings 1x
- Method: Dessert
- Cuisine: American
Description
Dive in the creamy, dreamy delight of Banana Cream Cheesecake—a dessert that promises to steal the show at any gathering. With its luscious banana-infused creamy filling and a crisp graham cracker crust, this cheesecake is a symphony of flavors that dances beautifully on the palate. Follow this recipe to create a masterpiece that looks as splendid as it tastes, and share the joy with friends and family who will undoubtedly ask for seconds!
Ingredients
- For the Crust:1 1/2 cupsgraham cracker crumbs1/3 cupwhite sugar6 tablespoonsbutter, melted1/2 teaspooncinnamon (optional)
- 1 1/2 cupsgraham cracker crumbs
- 1/3 cupwhite sugar
- 6 tablespoonsbutter, melted
- 1/2 teaspooncinnamon (optional)
- For the Filling:3ripe bananas, mashed3(8 ounce) packages cream cheese, softened3/4 cupwhite sugar3large eggs1 teaspoonvanilla extract1/2 cupsour cream
- 3ripe bananas, mashed
- 3(8 ounce) packages cream cheese, softened
- 3/4 cupwhite sugar
- 3large eggs
- 1 teaspoonvanilla extract
- 1/2 cupsour cream
- For the Topping:1 cupheavy whipping cream2 tablespoonspowdered sugar1 teaspoonvanilla extractSliced bananas, for garnish
- 1 cupheavy whipping cream
- 2 tablespoonspowdered sugar
- Sliced bananas, for garnish
Instructions
- Prepare the Crust: Preheat yourovento 350°F (175°C). Mix graham cracker crumbs, sugar, melted butter, and cinnamon until well combined. Press into the bottom and up the sides of a9-inch springform pan. Bake for 7-8 minutes. Let cool.
- Make the Filling: In a large bowl, beat the cream cheese with sugar until smooth. Add eggs one at a time, mixing after each addition. Incorporate vanilla and sour cream. Fold in mashed bananas. Pour over crust and bake for 50-55 minutes. Let cool in theovenwith the door ajar for 1 hour.
- Add the Topping: Whip the heavy cream with powdered sugar and vanilla until stiff peaks form. Spread over the cooled cheesecake. Garnish with banana slices before serving.
Notes
Ensure bananas are ripe for the best flavor.Cool the cheesecake in theovengradually to avoid cracks.Decorate with fresh banana slices right before serving to maintain freshness.
Nutrition
- Calories: 400
- Sugar: 25
- Fat: 25
- Carbohydrates: 35
- Protein: 6
Conclusion
With its creamy texture and delightful banana flavor, this Banana Cream Cheesecake is the perfect indulgent dessert for any gathering or a simple treat at home, balancing sweetness and richness in every bite. The combination of fresh bananas and smooth cream cheese creates a refreshing yet satisfying finish to any meal. For a serving tip, chill it for a few hours before slicing to enhance the flavors, or try a variation by adding a layer of chocolate ganache for an extra decadent twist.