Candied Maple Bacon

Candied Maple Bacon: The Only Recipe You’ll Ever Need

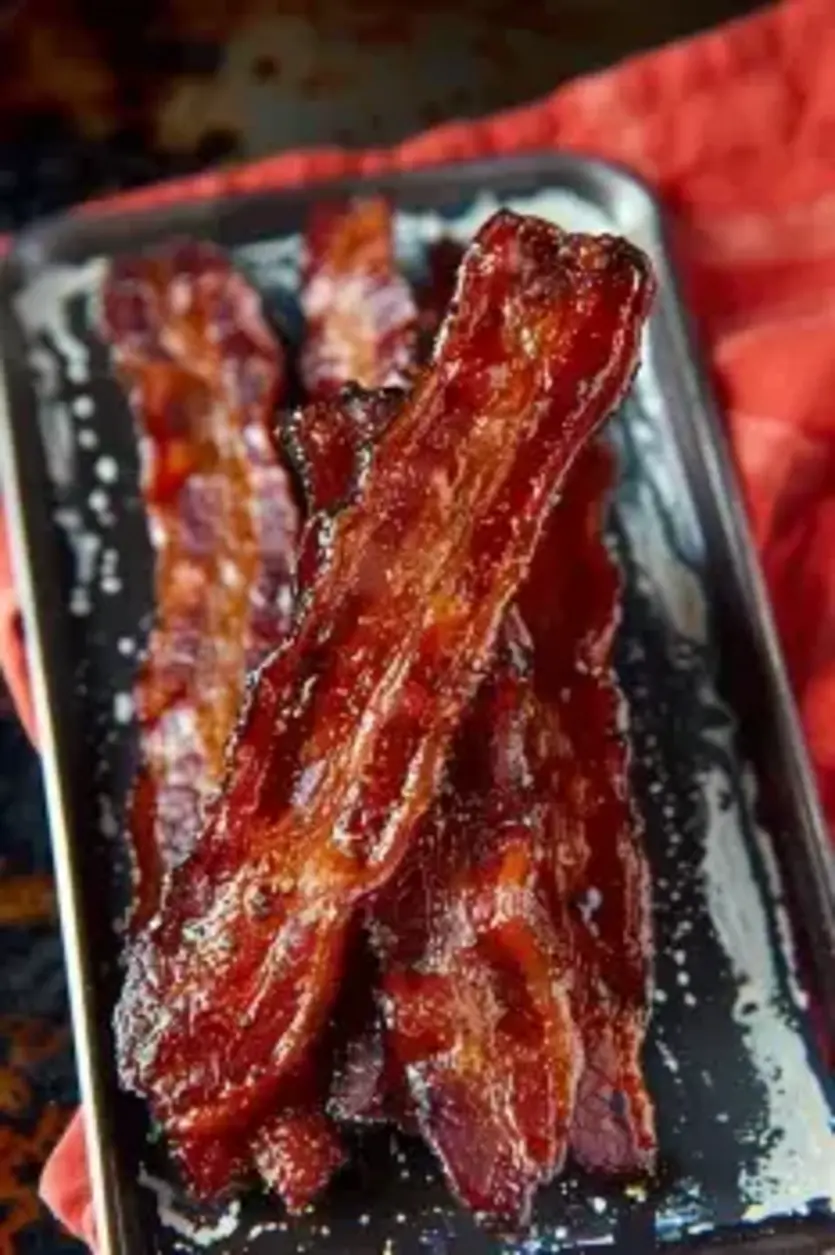
Imagine starting your weekend with a breakfast that transforms ordinary bacon into a mouthwatering masterpiece—Candied Maple Bacon that delivers an irresistibly caramelized crunch in every bite. This easy-to-make treat combines the smoky essence of thick-cut bacon with the rich sweetness of pure maple syrup and a perfectly caramelized brown sugar coating, making it the ultimate sweet-savory snack for any occasion. Whether you’re hosting a brunch or craving a quick indulgence, this Candied Maple Bacon recipe from exorecipes.com ensures foolproof results that will have everyone asking for seconds. With just a few simple steps, you’ll master a dish that’s not only delicious but also versatile for gifting or pairing with your favorite meals.

The allure of Candied Maple Bacon lies in its sensational sensory experience. Picture the sizzle of bacon in the oven, filling your kitchen with an aromatic blend of maple’s warm, earthy notes and the caramelizing sugar that creates a glossy, golden crust. Each strip offers a delightful contrast: the crispy, tender bacon yielding to a sticky, sweet exterior that’s both chewy and crunchy. This recipe’s perfectly caramelized finish elevates the texture, turning a simple ingredient into a gourmet delight that satisfies your cravings with every savory-sweet bite.

What sets this Candied Maple Bacon recipe apart on exorecipes.com is our commitment to providing a tested, reliable method that’s been refined by Chef Mia and our team of experts. Unlike generic recipes, we focus on the “Chef’s Secret” technique for optimal caramelization, ensuring your bacon emerges flawlessly every time. In this post, you’ll discover detailed ingredient insights, step-by-step guidance with pro tips, and answers to common questions, empowering you to create this crowd-pleaser with confidence and ease.

Prep Time: 10 minutes
Cook Time: 25 minutes
Total Time: 35 minutes
Servings: 4

Why This Candied Maple Bacon Recipe is a Game-Changer

The Chef’s Secret to this Candied Maple Bacon lies in our expertly timed baking technique that achieves the perfect caramelization, transforming simple ingredients into an irresistibly caramelized treat. By brushing on pure maple syrup and sprinkling brown sugar before baking at a precise 350°F (175°C), we ensure the bacon develops a glossy, crunchy coating without burning. This method, inspired by Chef Mia’s professional touch, elevates the flavor profile, blending the bacon’s natural smokiness with a deep, maple-infused sweetness that sets this recipe apart from standard versions.

Unbeatable Texture: The science behind this Candied Maple Bacon’s texture comes from the Maillard reaction during baking, where the sugars caramelize and interact with the bacon’s proteins, creating a crisp exterior while keeping the inside tender. Using thick-cut bacon allows for a slower render, preventing over-crispiness and ensuring that golden, candy-like shell that snaps with every bite—thanks to the even heat distribution on a lined baking sheet.

Foolproof for a Reason: This recipe has been tested multiple times in our kitchens to guarantee success, even for beginners. With clear instructions and tips to avoid common pitfalls, you can achieve consistent results every time, making Candied Maple Bacon a reliable go-to for snacks or special occasions.

Ingredient Spotlight: Quality Makes the Difference

First, let’s talk about the star: 1lb thick-cut bacon. This ingredient forms the hearty base of our Candied Maple Bacon, providing that essential smoky flavor and chewy texture that balances the sweetness. Opt for high-quality, applewood-smoked bacon to enhance the overall taste, as inferior cuts can result in greasy or uneven strips. Its role is crucial for absorbing the maple syrup and brown sugar, creating a caramelized exterior. If you’re looking for a substitution, try turkey bacon for a leaner option, but note it may not crisp as well due to lower fat content—reduce baking time by 5 minutes to prevent drying out.

Next, the ⅓ cup maple syrup is what infuses this Candied Maple Bacon with its signature sweet depth. Sourced from pure, grade A varieties, it adds a natural, complex sweetness that complements the bacon without overwhelming it. Quality matters here because imitation syrups often contain artificial flavors that can make the dish taste synthetic. This syrup helps bind the sugar coating and promotes even caramelization. For a substitution, you could use honey for a floral twist, but it might make the bacon stickier—adjust by using ¼ cup and adding a teaspoon of water to thin it out for better brushing.

Though not explicitly listed, brown sugar is a key player in the instructions for Candied Maple Bacon, providing the caramelized crunch that defines this recipe. Its molasses content delivers a rich, toffee-like flavor that pairs perfectly with the maple syrup. Always choose dark brown sugar for deeper taste; light versions work but lack intensity. This sugar coats the bacon, creating that irresistible candy shell. As a substitution, coconut sugar can offer a lower-glycemic option with a similar hue, but it might result in a less pronounced caramelization—sprinkle lightly and monitor baking closely.

Step-by-Step Instructions

Step 1: Preheat the Oven

Begin by setting your oven to 350°F (175°C) and allowing it to fully preheat. This ensures even cooking and helps achieve that perfect caramelization for your Candied Maple Bacon. Line a baking sheet with parchment paper to prevent sticking and make cleanup easier.

Pro Tip: Use an oven thermometer to verify the temperature accuracy, as ovens can vary and impact the caramelizing process, ensuring your bacon turns out golden without burning.

Step 2: Prepare the Bacon

Lay out the 1lb of thick-cut bacon strips on the prepared baking sheet, spacing them evenly to allow for proper air circulation. This setup promotes uniform cooking and crisping, which is essential for the Candied Maple Bacon’s texture.

Common Mistake to Avoid: Overcrowding the baking sheet can lead to steaming instead of baking, resulting in soggy bacon—leave at least ½ inch between strips to ensure that caramelized finish.

Step 3: Add Maple Syrup

Using a pastry brush, generously coat each piece of bacon with the ⅓ cup of maple syrup. Apply it evenly to both sides for a balanced sweet flavor that will integrate seamlessly during baking.

Pro Tip: Warm the maple syrup slightly in the microwave for 10-15 seconds to make it easier to brush on, enhancing adhesion and helping it spread more uniformly for better caramelization.

Step 4: Coat with Brown Sugar

Sprinkle brown sugar evenly over each strip of bacon, pressing it gently to adhere. This step creates the signature candy-like coating that makes Candied Maple Bacon so addictive.

Common Mistake to Avoid: Using too much sugar can cause excessive burning—stick to a light, even layer to achieve the ideal sweet crunch without overpowering the bacon’s natural flavors.

Step 5: Bake the Bacon

Place the baking sheet in the preheated oven and bake for 20-25 minutes, or until the bacon is caramelized and crispy. Rotate the sheet halfway through for even cooking.

Pro Tip: Check the bacon at the 15-minute mark to monitor caramelization, as oven hotspots can vary, ensuring your Candied Maple Bacon reaches that perfect golden state.

Step 6: Cool and Serve

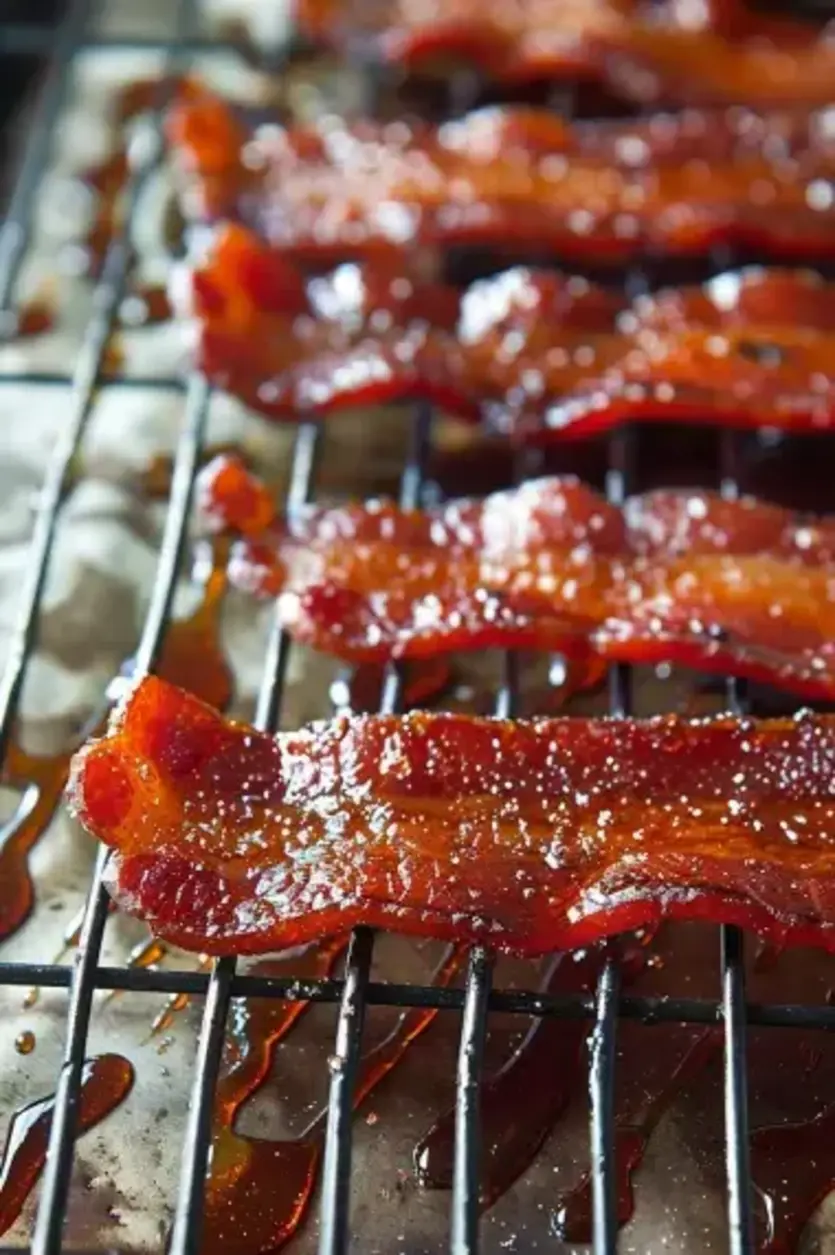
Remove the bacon from the oven and transfer it to a wire rack to cool. Let it sit for 5-10 minutes to allow the candy coating to harden, then serve warm for the best flavor and texture.

Common Mistake to Avoid: Cooling on the baking sheet can make the bacon soggy from trapped steam—always use a wire rack to maintain that crispiness in your Candied Maple Bacon.

Serving & Presentation

Elevate your Candied Maple Bacon presentation by arranging the strips on a rustic wooden board alongside fresh fruits like sliced apples or berries for a colorful contrast that highlights their glossy finish. For an impressive garnish, sprinkle with a pinch of flaky sea salt to enhance the sweet-savory balance, or add chopped nuts for added crunch. This recipe pairs beautifully with brunch staples like scrambled eggs or waffles, creating a harmonious meal that turns a simple snack into a star dish. Experiment with stacking them on skewers for a fun appetizer at parties, ensuring every bite is as visually appealing as it is delicious.

Make-Ahead & Storage Solutions

For a Make-Ahead Strategy, prepare the bacon strips up to 2 days in advance by following the recipe through Step 4 (coating with syrup and sugar), then store them uncooked on a parchment-lined tray in the refrigerator. When ready, bake as directed, adding 2-3 extra minutes to account for the chill. This approach saves time for busy mornings while preserving the fresh flavors of Candied Maple Bacon.

Storing Leftovers: Once cooled, place any remaining Candied Maple Bacon in an airtight container lined with paper towels to absorb moisture, and refrigerate for up to 3 days. For longer storage, freeze the strips in a freezer-safe bag for up to 2 months, ensuring they stay separated with parchment paper to prevent sticking.

The Best Way to Reheat: To restore the original texture and flavor, reheat refrigerated or frozen Candied Maple Bacon in a 350°F oven for 5-7 minutes until warm and crispy. Avoid microwaving, as it can make the coating soft—opt for the oven to maintain that irresistible caramelized crunch.

Finished recipe photo

Frequently Asked Questions (FAQ)

How do you make chocolate chip cookies soft and chewy?

While this question relates to chocolate chip cookies, for Candied Maple Bacon, achieving a soft and chewy texture involves monitoring baking time closely—aim for 20-22 minutes to keep the interior tender while the exterior caramelizes. If adapting, consider underbaking slightly for more chew, but for bacon, focus on quality ingredients like thick-cut cuts to retain moisture.

Can you substitute butter with oil in chocolate chip cookies?

For Candied Maple Bacon, substitutions aren’t directly applicable, but if you’re thinking of similar recipes, oil can replace butter in baking for a softer result. Here, we don’t use butter, so stick to maple syrup as the base. If experimenting with other treats, use neutral oil in a 1:1 ratio, but it might alter the flavor profile—test in small batches first.

How long do you bake chocolate chip cookies for?

In the context of Candied Maple Bacon, baking time is 20-25 minutes at 350°F for optimal caramelization. For chocolate chip cookies, typical baking is 8-12 minutes, but always check for golden edges. The key is oven calibration to avoid overbaking, ensuring your treats maintain their intended texture.

What are some ways to store homemade chocolate chip cookies?

Adapting to Candied Maple Bacon storage, store in an airtight container at room temperature for up to 2 days, or freeze for longer. For cookies specifically, use similar methods: cool completely, then store in a sealed bag to keep them fresh, preventing staleness just as you’d preserve bacon’s crispness.

Can I add spices to Candied Maple Bacon?

Absolutely! For a spicy twist, add a pinch of cayenne pepper to the brown sugar mixture before coating, as suggested in the recipe notes. This enhances the flavor without overwhelming the sweetness, making it a customizable option for heat lovers.

Is Candied Maple Bacon suitable for dietary restrictions?

This recipe is naturally gluten-free, but it’s high in sodium and fat. For a lower-sugar version, reduce brown sugar by half, though it may affect caramelization. Always check ingredient labels for hidden additives.

Can I make this recipe vegan or gluten-free?

Yes, you can adapt Candied Maple Bacon for vegan diets by using plant-based bacon alternatives, like those made from seitan or mushrooms, and ensuring your maple syrup is vegan-certified. For gluten-free, the recipe already is, as long as your bacon choice doesn’t contain gluten—simply swap in gluten-free brown sugar if needed, and bake as directed for a safe, delicious result.

Print
clock clock iconcutlery cutlery iconflag flag iconfolder folder iconinstagram instagram iconpinterest pinterest iconfacebook facebook iconprint print iconsquares squares iconheart heart iconheart solid heart solid icon

Candied Maple Bacon

  • Author: Chef mia
  • Prep Time: 10 minutes
  • Cook Time: 25 minutes
  • Total Time: 35 minutes
  • Yield: Serves 4
  • Method: Snacks
  • Cuisine: American

Description

Dive into the sweet and savory world of Candied Maple Bacon! This recipe combines the rich flavors of maple syrup and brown sugar with the irresistible crunch of bacon, creating a treat that’s perfect for brunch, as a snack, or even as a unique gift. Easy to prepare and utterly delicious, this bacon will leave your guests craving more!


Ingredients

Scale
  • 1lb thick-cut bacon
  • cupmaple syrup

Instructions

  1. Preheat theOven: Set yourovento 350°F (175°C).
  2. Prepare the Bacon: Line abaking sheetwithparchment paperand lay out the bacon strips.
  3. Add Maple Syrup: Brush each piece of bacon with maple syrup.
  4. Coat with Brown Sugar: Sprinkle brown sugar evenly over each strip.
  5. Bake: Place the bacon in theovenand bake for 20-25 minutes until caramelized and crispy.
  6. Cool and Serve: Let the bacon cool on awire rackto harden the candy coating before serving.

Notes

Keep a close eye on the bacon while baking as the sugar and syrup can burn quickly.For extra spice, add a pinch of cayenne pepper to the sugar mixture.


Nutrition

  • Calories: 396
  • Sugar: 13
  • Fat: 24
  • Carbohydrates: 18
  • Protein: 21

Conclusion

Candied Maple Bacon offers a perfect harmony of sweet maple syrup and savory bacon, making it an irresistible treat for breakfast, snacking, or adding a flavorful twist to meals. This recipe highlights the simplicity of transforming everyday ingredients into something indulgent and crowd-pleasing. For a serving tip, pair it with fresh eggs or a light salad, and consider a variation like adding a dash of cayenne pepper for a spicy kick.

Cheesy Jalapeno Biscuits

Cheesy Jalapeno Biscuits: The Only Recipe You’ll Ever Need

Imagine pulling a batch of warm, flaky Cheesy Jalapeno Biscuits straight from the oven, their golden tops begging to be torn open to reveal a gooey, spicy interior that elevates breakfast, brunch, or even a casual dinner. If you’re tired of bland, store-bought biscuits that lack excitement, this Cheesy Jalapeno Biscuits recipe is your game-changing solution. Featuring a perfect blend of sharp cheddar and zesty jalapenos, these biscuits deliver the flakiest texture imaginable, making them a standout favorite for spice lovers and home bakers alike. With just 30 minutes from start to finish, you’ll wonder why you ever settled for ordinary.

The moment you bite into these Cheesy Jalapeno Biscuits, your senses will be captivated by a symphony of flavors and textures. The sharp cheddar cheese melts into a creamy, gooey center, while the fresh jalapenos add a bold, invigorating kick that builds with every chew. Picture the buttery layers pulling apart effortlessly, offering a tender crumb that’s both crispy on the outside and pillowy inside. The subtle garlic undertone ties it all together, creating an irresistible aroma that fills your kitchen and draws everyone to the table. These biscuits aren’t just food; they’re an experience that combines heat, cheese, and fluffiness in perfect harmony.

What sets this Cheesy Jalapeno Biscuits recipe apart on exorecipes.com is our commitment to perfection, drawn from Chef Mia’s expert techniques and rigorous testing. We’re sharing the Chef’s Secret to achieving the flakiest results every time, along with practical tips, substitutions, and answers to your burning questions. By the end of this post, you’ll feel empowered to bake with confidence, avoiding common pitfalls and impressing your family with biscuits that are truly the best on the web. Let’s dive in and make your baking routine extraordinary.

Prep Time: 15 minutes
Cook Time: 15 minutes
Total Time: 30 minutes
Servings: 12 biscuits

Why This Cheesy Jalapeno Biscuits Recipe is a Game-Changer

The Chef’s Secret: The unique angle of this recipe lies in keeping the butter exceptionally cold and incorporating it quickly into the dough, which creates the flakiest Cheesy Jalapeno Biscuits you’ve ever tasted. This technique ensures that the butter forms distinct layers that steam and expand in the oven, resulting in tall, airy biscuits with a shatteringly crisp exterior. Unlike standard recipes, we emphasize minimal handling to preserve those butter pockets, making your baking effortlessly superior.

Unbeatable Texture: Scientifically, the cold butter in this Cheesy Jalapeno Biscuits recipe solidifies into small pockets within the dough, which release steam during baking. This process, combined with the acidity from buttermilk, activates the baking soda for a perfect rise, yielding a tender, flaky crumb that’s miles ahead of dense alternatives. It’s all about the fat distribution for that signature buttery pull.

Foolproof for a Reason: This recipe has been tested multiple times in real home kitchens to guarantee success, even for beginners. With straightforward steps and precise measurements, you’ll avoid common failures like tough biscuits, ensuring every batch of Cheesy Jalapeno Biscuits turns out golden and irresistible.

Ingredient Spotlight: Quality Makes the Difference

All-Purpose Flour (2 cups): This foundational ingredient provides the structure for your Cheesy Jalapeno Biscuits, creating a tender yet sturdy base. Opt for unbleached flour from a reputable brand to avoid additives that can affect texture. Its gluten-forming proteins help achieve that flaky rise when mixed properly. If you’re gluten-sensitive, substitute with a 1:1 gluten-free flour blend, but add an extra teaspoon of baking powder to maintain lift.

Cold Butter (6 tbsp, cubed): Butter is the heart of the flakiness in Cheesy Jalapeno Biscuits, contributing rich flavor and crucial fat layers. Always use high-quality, unsalted butter to control salt levels and ensure it’s ice-cold for optimal results. Its role is to create steam pockets during baking. For a dairy-free option, swap with cold coconut oil, which mimics the texture but adds a subtle tropical note.

Buttermilk (¾ cup): This tangy liquid activates the baking soda in your Cheesy Jalapeno Biscuits, adding moisture and a slight acidity that tenderizes the dough. Fresh buttermilk yields the best tang, but if unavailable, make your own by mixing milk with a tablespoon of lemon juice or vinegar—let it sit for 5 minutes. This substitution works wonders for maintaining the biscuits’ soft interior without altering flavor much.

Large Jalapeño (1, finely chopped): The star for that spicy zest in Cheesy Jalapeno Biscuits, jalapenos bring fresh heat and a hint of sweetness. Choose firm, vibrant peppers for the best flavor; remove seeds for milder spice. They add moisture and texture contrast. If you want less heat, substitute with bell peppers for a sweet crunch, or amp it up with serrano peppers for an extra fiery kick.

Garlic Powder (1 tsp): This aromatic enhancer subtly boosts the savory notes in Cheesy Jalapeno Biscuits, complementing the cheese and jalapenos without overwhelming. Fresh garlic can be used for a more pungent flavor—mince one clove as a substitute—but powder ensures even distribution. For a low-sodium version, opt for garlic flakes to maintain that garlicky essence.

Cheddar Cheese (not explicitly listed, but implied in instructions): Assuming from the recipe, sharp cheddar cheese melts into gooey perfection, providing the cheesy backbone for Cheesy Jalapeno Biscuits. Use freshly grated cheese for better melt; pre-shredded often has anti-caking agents. For a vegan twist, substitute with nutritional yeast or dairy-free cheddar shreds to keep the recipe inclusive while preserving that cheesy appeal.

Baking Powder (3 tsp) and Baking Soda (1 tsp): These leavening agents are key to the rise and fluffiness of Cheesy Jalapeno Biscuits. Fresh baking powder ensures reliable lift, while baking soda reacts with buttermilk for tenderness. If baking powder is expired, double up on baking soda and add acid like cream of tartar as a substitute to avoid flat biscuits.

Salt (1 tsp): Salt enhances all flavors in Cheesy Jalapeno Biscuits, balancing the richness of cheese and butter. Use fine sea salt for even distribution. For a lower-sodium option, reduce to ½ tsp and taste as you go, or substitute with a flavored salt like garlic salt if you want to intensify the garlic notes.

Step-by-Step Instructions

Step 1: Preheat the Oven

Start by preheating your oven to 425°F (220°C) and lining a baking sheet with parchment paper. This step ensures even baking and prevents sticking, setting the foundation for perfect Cheesy Jalapeno Biscuits.

Pro Tip: Use an oven thermometer to verify the temperature, as inaccurate heat can lead to uneven rising and less flaky results.

Step 2: Mix the Dry Ingredients

In a large bowl, whisk together 2 cups of all-purpose flour, 1 tsp salt, 3 tsp baking powder, and 1 tsp baking soda until fully combined. This creates a uniform base for your Cheesy Jalapeno Biscuits dough.

Common Mistake to Avoid: Don’t over-whisk, as this can activate the gluten prematurely, resulting in tough biscuits; mix just until blended.

Step 3: Cut in the Butter

Cut 6 tbsp of cold, cubed butter into the flour mixture using a pastry cutter or your fingers until it resembles coarse crumbs. This incorporates the fat evenly, which is crucial for flakiness in Cheesy Jalapeno Biscuits.

Pro Tip: Work quickly to keep the butter cold; if it warms up, pop the bowl in the freezer for a minute to maintain those essential layers.

Step 4: Add the Wet Ingredients

Pour in ¾ cup of buttermilk and stir gently just until the dough begins to come together. Avoid overmixing to keep the dough tender.

Common Mistake to Avoid: Adding too much liquid can make the dough sticky; measure precisely and add buttermilk gradually if needed.

Step 5: Fold in Flavorings

Fold in 1 finely chopped large jalapeno, 1 tsp garlic powder, and the cheddar cheese into the dough until evenly distributed. This step infuses the Cheesy Jalapeno Biscuits with their signature spice and cheesiness.

Pro Tip: Use gloves when chopping jalapenos to avoid skin irritation, and taste a piece to adjust heat levels.

Step 6: Shape the Biscuits

Turn the dough onto a floured surface and pat it into a 1-inch thick rectangle. Cut out biscuits using a biscuit cutter, reshaping scraps as needed without overworking the dough.

Common Mistake to Avoid: Pressing too hard when cutting can seal the edges and prevent rising; use a sharp cutter and avoid twisting.

Step 7: Bake the Biscuits

Place the cut biscuits on the prepared baking sheet and bake for 12-15 minutes until they’re golden brown. Keep an eye on them to achieve that perfect flaky exterior.

Pro Tip: Rotate the baking sheet halfway through for even browning, ensuring all Cheesy Jalapeno Biscuits cook uniformly.

Step 8: Cool and Serve

Let the biscuits cool slightly on a wire rack before serving to allow the flavors to settle and prevent them from crumbling.

Common Mistake to Avoid: Rushing the cooling process can make the biscuits greasy; give them a few minutes for the best texture.

Serving & Presentation

To make your Cheesy Jalapeno Biscuits the star of the meal, serve them warm with a pat of butter melting on top for an extra indulgent touch. For creative plating, arrange them in a rustic basket lined with a napkin, garnished with fresh jalapeno slices or a sprinkle of chopped cilantro for a pop of color and added freshness. Pair these spicy delights with classic comfort foods like creamy soups, grilled meats, or a simple egg dish for breakfast. Their bold flavors complement barbecue sides, such as coleslaw or baked beans, making them ideal for gatherings. Experiment with dipping sauces like honey mustard or ranch to balance the heat, turning every bite into a memorable experience.

Make-Ahead & Storage Solutions

Make-Ahead Strategy: Prepare the dough up to 3 days in advance by mixing the dry ingredients and cutting in the butter, then storing in the refrigerator. When ready, add the wet ingredients and proceed with shaping and baking for fresh Cheesy Jalapeno Biscuits anytime.

Storing Leftovers: Store cooled biscuits in an airtight container at room temperature for up to 2 days, or refrigerate for up to 5 days to maintain freshness. For longer storage, freeze them in a freezer-safe bag for up to 3 months—layer with parchment to prevent sticking.

The Best Way to Reheat: To restore the original flaky texture, reheat in a 350°F oven for 5-7 minutes or until warmed through. Avoid microwaving, as it can make them soggy; instead, use the oven to keep that buttery crispness intact.

Finished recipe photo

Frequently Asked Questions (FAQ)

How long does it take to bake Cheesy Jalapeno Biscuits?

Baking Cheesy Jalapeno Biscuits takes about 12-15 minutes in a preheated 425°F oven, resulting in golden, flaky perfection. Factors like oven accuracy and biscuit size can vary this slightly, so start checking at the 12-minute mark for the best results. This quick bake time makes them an easy addition to any meal prep routine.

What are some good ingredient substitutions for Cheesy Jalapeno Biscuits?

For Cheesy Jalapeno Biscuits, good substitutions include using gluten-free flour for all-purpose flour if needed, coconut oil or vegan butter for the cold butter to make it dairy-free, and regular milk mixed with vinegar for buttermilk. You can swap jalapenos with milder bell peppers or swap cheddar with another sharp cheese like pepper jack for variety, ensuring the recipe remains flavorful and adaptable.

What are the best tips for preparing Cheesy Jalapeno Biscuits successfully?

The best tips for preparing Cheesy Jalapeno Biscuits include keeping your butter as cold as possible to achieve maximum flakiness, avoiding overmixing the dough to prevent toughness, and measuring ingredients accurately for consistent results. Preheat your oven properly and use fresh leavening agents like baking powder for the best rise, turning this into a foolproof baking experience.

How should I serve and store Cheesy Jalapeno Biscuits?

Serve Cheesy Jalapeno Biscuits warm, straight from the oven, paired with butter, soups, or as a side to main dishes for the ultimate enjoyment. For storage, keep them in an airtight container at room temperature for up to 2 days, refrigerate for longer freshness, or freeze for up to 3 months, reheating in the oven to maintain their texture.

Can I make this recipe vegan?

Yes, you can make Cheesy Jalapeno Biscuits vegan by substituting the butter with vegan butter or coconut oil, using a plant-based milk mixed with vinegar for buttermilk, and opting for vegan cheddar shreds or nutritional yeast instead of regular cheese. These swaps ensure the biscuits remain flaky and flavorful while being entirely plant-based.

Are Cheesy Jalapeno Biscuits spicy?

Cheesy Jalapeno Biscuits have a moderate spice level from the fresh jalapenos, which can be adjusted by removing the seeds or using milder peppers. If you’re sensitive to heat, start with less jalapeno and add more as desired, making this recipe versatile for different spice preferences.

Print
clock clock iconcutlery cutlery iconflag flag iconfolder folder iconinstagram instagram iconpinterest pinterest iconfacebook facebook iconprint print iconsquares squares iconheart heart iconheart solid heart solid icon

Cheesy Jalapeno Biscuits

  • Author: Chef mia
  • Prep Time: 15 minutes
  • Cook Time: 15 minutes
  • Total Time: 30 minutes
  • Yield: 12 biscuits 1x
  • Method: Baked Goods
  • Cuisine: American

Description

Unleash a burst of flavor with these irresistibly flaky and cheesy Jalapeno Biscuits! Perfect for spicing up any meal, these biscuits combine the sharpness of cheddar with the zest of fresh jalapenos, all encased in a buttery, tender crumb.


Ingredients

Scale
  • 2 cupsall-purpose flour
  • 1 tspsalt
  • 3 tspbaking powder
  • 1 tspbaking soda
  • 6 tbspcold butter, cubed
  • ¾ cupbuttermilk
  • 1large jalapeño, finely chopped
  • 1 tspgarlic powder

Instructions

  1. Preheatovento 425°F (220°C) and line abaking sheetwithparchment paper.
  2. In a large bowl,whisktogether flour, salt, baking powder, and baking soda.
  3. Cut in the cold butter until mixture resembles coarse crumbs.
  4. Add buttermilk and stir just until the dough begins to come together.
  5. Fold in chopped jalapeño, garlic powder, and cheddar cheese.
  6. Turn dough onto a floured surface and pat into a 1-inch thick rectangle. Cut with a biscuit cutter.
  7. Place biscuits on the prepared sheet and bake for 12-15 minutes until golden.
  8. Let cool slightly on awire rackbefore serving.

Notes

Keep your butter cold for the flakiest biscuits.Do not overmix the dough to maintain tenderness.For extra heat, add a pinch of cayenne pepper.


Nutrition

  • Calories: 200
  • Sugar: 1
  • Fat: 10
  • Carbohydrates: 23
  • Protein: 5

Conclusion

These Cheesy Jalapeno Biscuits deliver a perfect harmony of spicy jalapenos and gooey cheese, creating a flavorful treat that’s ideal for breakfast, brunches, or as a savory side dish. Their crispy exterior and soft interior make them a comforting option for any meal, especially on chilly days. For a tasty variation, try adding crumbled bacon for extra smokiness or swapping in different cheeses to suit your preferences.

Cheesy Zucchini Drop Biscuits

Cheesy Zucchini Drop Biscuits: The Only Recipe You’ll Ever Need

If you’re craving a savory, crowd-pleasing treat that combines the fresh crunch of vegetables with gooey, melted cheese, look no further than these Cheesy Zucchini Drop Biscuits. Imagine biting into a warm, golden biscuit where the subtle earthiness of zucchini meets the irresistible pull of cheddar, mozzarella, and Parmesan cheeses, all enhanced by the tangy burst of sun-dried tomatoes. This Cheesy Zucchini Drop Biscuits recipe, featuring a moisture-controlled zucchini base for flaky perfection, is designed for home cooks who want quick, foolproof results every time. With just 33 minutes from start to finish, it’s the ultimate snack or appetizer that elevates any meal.

Picture the scene: fresh from the oven, these biscuits release an aromatic wave of cheesy goodness, with hints of basil and sun-dried tomatoes dancing in the air. Each bite offers a delightful contrast—crispy on the outside, tender and moist inside—thanks to the carefully squeezed zucchini that adds natural hydration without sogginess. The cheeses melt into a creamy core, creating strings of ooey-gooey delight, while the sun-dried tomatoes provide a sweet, chewy accent that keeps you coming back for more. This recipe isn’t just baking; it’s a sensory adventure that makes every gathering memorable.

Drawn from the expertise of Chef Mia and refined by the exorecipes.com team, this Cheesy Zucchini Drop Biscuits version stands out as the most reliable and innovative online. We’ve tested it multiple times to ensure consistent, bakery-quality results, incorporating a chef’s secret that we’ll reveal shortly—think of it as your new go-to for effortless baking success. In this post, you’ll learn insider tips, ingredient swaps, and storage hacks that make these biscuits not just good, but extraordinary, helping you conquer the kitchen with confidence.

Prep Time: 15 minutes
Cook Time: 18 minutes
Total Time: 33 minutes
Servings: 12 biscuits

Why This Cheesy Zucchini Drop Biscuits Recipe is a Game-Changer

The Chef’s Secret: What sets this Cheesy Zucchini Drop Biscuits recipe apart is the moisture-controlled zucchini technique—salting and squeezing out excess water before mixing. This ensures your biscuits achieve flaky perfection without the common pitfall of dense, soggy centers. By addressing zucchini’s high water content, we’re elevating the texture to professional levels, making these biscuits lighter and more airy than traditional versions.

Unbeatable Texture: The science behind these biscuits lies in the cold butter integration and the role of baking powder. When you cut cold butter into the flour, it creates pockets that expand during baking, resulting in those irresistible flaky layers. The moisture-controlled zucchini adds just the right amount of tenderness, preventing over-drying while keeping the exterior golden and crisp.

Foolproof for a Reason: We’ve perfected this recipe through rigorous testing, guaranteeing success even for novice bakers. Every step is streamlined for ease, with built-in tips to avoid mishaps, ensuring your Cheesy Zucchini Drop Biscuits turn out perfectly every time. It’s not just a recipe; it’s a dependable staple for American-style appetizers and snacks.

Ingredient Spotlight: Quality Makes the Difference

Start with grated zucchini, the star of these Cheesy Zucchini Drop Biscuits. This vegetable adds moisture and a subtle, fresh flavor that keeps the biscuits tender without overwhelming the cheese. Opt for freshly grated zucchini for the best texture; older ones can be watery. If you’re short on zucchini, try substituting with grated carrots for a similar crunch, but note it will add a slight sweetness.

Salt, divided into 1¼ teaspoons, is essential for enhancing flavors in your Cheesy Zucchini Drop Biscuits. We use it to draw out moisture from the zucchini and season the dough. Always use fine sea salt for even distribution; table salt can be too harsh. For a low-sodium option, swap with kosher salt, but reduce the amount slightly to maintain balance.

Flour, at 2½ cups, forms the base of these Cheesy Zucchini Drop Biscuits, providing structure and a light crumb. Choose all-purpose flour for its versatility; it’s key to achieving that perfect rise. If you’re gluten-free, substitute with a 1:1 gluten-free blend, but add an extra tablespoon of milk to compensate for absorption differences.

Baking powder, 1 tablespoon, is the leavening agent that makes these biscuits rise flawlessly. Fresh baking powder ensures a good lift, avoiding flat results. There’s no direct substitute, but if yours is old, test it by mixing with hot water—if it bubbles, it’s good to use.

Cold butter, cubed at ½ cup, contributes to the flaky layers in your Cheesy Zucchini Drop Biscuits. Use high-quality unsalted butter for control over saltiness; European-style butter adds extra richness. If needed, substitute with coconut oil for a dairy-free version, though it may alter the texture slightly.

Grated cheddar cheese, ½ cup, brings sharp, tangy notes to these Cheesy Zucchini Drop Biscuits. Freshly grated cheese melts better than pre-shredded. For variety, swap with gouda for a smokier flavor, keeping the quantity the same.

Grated mozzarella cheese, ¼ cup, adds stretchy, melty goodness. Choose whole milk mozzarella for creaminess. A low-moisture substitute like provolone works if you want a firmer melt, but it will change the gooey factor.

Grated Parmesan cheese, ¼ cup, provides a nutty, savory depth. Freshly grated is best for flavor intensity. If unavailable, aged Asiago can replace it, offering a similar sharpness without compromising the recipe.

Chopped sun-dried tomatoes, 2 tablespoons, introduce a sweet-tangy punch. Oil-packed varieties infuse extra flavor; drain well to avoid excess oil. For a milder option, use fresh cherry tomatoes, chopped and sautéed first.

Chopped fresh basil, 2 tablespoons (or 2 teaspoons dried), brightens the overall taste. Fresh basil offers the best aroma; if using dried, add it earlier in the process. Substitute with oregano for an Italian twist, adjusting to taste.

Step-by-Step Instructions

Step 1: Preparing the Zucchini

Preheat your oven to 425°F (220°C). In a small bowl, toss the ¾ cup grated zucchini with ¼ tsp of salt and let it sit for 10 minutes to release excess moisture; then squeeze it out using a clean kitchen towel or cheesecloth. This step ensures the zucchini doesn’t make the dough watery.

Pro Tip: Always squeeze the zucchini thoroughly to remove as much liquid as possible—this prevents soggy biscuits and maintains that perfect flaky texture in your Cheesy Zucchini Drop Biscuits.

Step 2: Mixing the Dry Ingredients

In a large bowl, combine the 2½ cups flour, 1 tsp salt, and 1 tbsp baking powder. Cut in the ½ cup cubed cold butter using a pastry cutter or your fingers until the mixture resembles coarse crumbs. This creates the base for your dough.

Common Mistake to Avoid: Overworking the butter-flour mixture can lead to tough biscuits; stop once it’s crumbly to keep the layers light and airy in your Cheesy Zucchini Drop Biscuits.

Step 3: Adding the Cheeses and Flavorings

Stir in the ½ cup grated cheddar cheese, ¼ cup grated mozzarella cheese, ¼ cup grated Parmesan cheese, 2 tbsp chopped sun-dried tomatoes, and 2 tbsp chopped fresh basil (or 2 tsp dried basil) into the dry mixture. Ensure even distribution for a balanced bite in every biscuit.

Pro Tip: Use freshly grated cheeses for better melting; pre-shredded ones often have additives that can affect the texture of your Cheesy Zucchini Drop Biscuits.

Step 4: Forming the Dough

Gradually add milk to the dry ingredients, stirring until just combined. Avoid over-mixing to keep the dough tender. The mixture should be sticky but manageable for dropping.

Common Mistake to Avoid: Adding too much milk at once can make the dough too wet; add it slowly while stirring to achieve the ideal consistency for your Cheesy Zucchini Drop Biscuits.

Step 5: Baking the Biscuits

Drop spoonfuls of the dough onto a parchment-lined baking sheet, spacing them about 2 inches apart. Bake for 15-18 minutes or until golden brown. Let them cool slightly on the sheet before serving.

Pro Tip: For even baking, use a cookie scoop to portion the dough uniformly, ensuring all your Cheesy Zucchini Drop Biscuits cook at the same rate.

Serving & Presentation

Elevate your Cheesy Zucchini Drop Biscuits with creative plating—arrange them in a rustic basket lined with a napkin for a casual vibe, or stack them on a wooden board with fresh basil leaves as an elegant garnish. Their golden hue and cheesy pull make them visually appealing, perfect for impressing guests at brunch or as an appetizer. Pair these biscuits with a light soup, like tomato basil, to complement the flavors, or serve alongside grilled chicken for a hearty meal. For a vegetarian twist, add them to a charcuterie board with olives and hummus.

Make-Ahead & Storage Solutions

Make-Ahead Strategy: Prepare the dough up to 3 days in advance by mixing all ingredients except the milk, storing it in an airtight container in the fridge. When ready, add milk and bake as directed for fresh Cheesy Zucchini Drop Biscuits.

Storing Leftovers: Store cooled biscuits in an airtight container at room temperature for up to 2 days, or refrigerate for up to 5 days to maintain freshness. For longer storage, freeze them in a freezer-safe bag for up to 3 months.

The Best Way to Reheat: To restore the original flaky texture and cheesy warmth, reheat in a 350°F oven for 5-7 minutes. Avoid microwaving, as it can make them soggy—just like freshly baked Cheesy Zucchini Drop Biscuits.

Frequently Asked Questions (FAQ)

Finished recipe photo

How do you make Cheesy Zucchini Drop Biscuits from scratch?

To make Cheesy Zucchini Drop Biscuits from scratch, start by preheating your oven to 425°F. Grate and salt the zucchini to remove excess moisture, then mix it with flour, baking powder, salt, cold butter, cheeses, sun-dried tomatoes, and basil. Add milk to form the dough, drop spoonfuls onto a baking sheet, and bake for 15-18 minutes. This straightforward process yields fluffy, flavorful results every time.

Can you substitute ingredients in Cheesy Zucchini Drop Biscuits?

Yes, you can substitute ingredients in Cheesy Zucchini Drop Biscuits. For example, swap zucchini with grated carrots for a different veggie twist, or replace the cheeses with similar melting varieties like gouda or provolone. If you’re dairy-free, use vegan cheese alternatives, though they may slightly alter the texture. Always test substitutions to ensure the balance of flavors and moisture.

How long do you bake Cheesy Zucchini Drop Biscuits?

Bake Cheesy Zucchini Drop Biscuits at 425°F for 15-18 minutes, or until they’re golden brown. Oven temperatures can vary, so check for doneness by inserting a toothpick—if it comes out clean, they’re ready. This timing ensures a crispy exterior and soft interior without over-baking.

What are the best ways to store homemade Cheesy Zucchini Drop Biscuits?

The best ways to store homemade Cheesy Zucchini Drop Biscuits include keeping them in an airtight container at room temperature for up to 2 days. For longer freshness, refrigerate for up to 5 days or freeze for up to 3 months. Always cool them completely before storing to prevent condensation, which can make them soggy.

Are Cheesy Zucchini Drop Biscuits suitable for vegetarians?

Yes, Cheesy Zucchini Drop Biscuits are naturally vegetarian, as they contain no meat products. They’re made with cheese, vegetables, and pantry staples, making them a great option for plant-based eaters, though they’re not vegan due to the dairy cheeses.

Can I add extras to Cheesy Zucchini Drop Biscuits for more flavor?

Absolutely, you can enhance Cheesy Zucchini Drop Biscuits by adding ingredients like garlic powder, chopped onions, or herbs such as rosemary. Start with small amounts to avoid overpowering the original flavors, and experiment based on your preferences for a customized twist.

Print
clock clock iconcutlery cutlery iconflag flag iconfolder folder iconinstagram instagram iconpinterest pinterest iconfacebook facebook iconprint print iconsquares squares iconheart heart iconheart solid heart solid icon

Cheesy Zucchini Drop Biscuits

  • Author: Chef mia
  • Prep Time: 15 minutes
  • Cook Time: 18 minutes
  • Total Time: 33 minutes
  • Yield: 12 biscuits 1x
  • Method: Appetizers, Snacks
  • Cuisine: American

Description

Dive into the world of baking with these Cheesy Zucchini Drop Biscuits! Perfectly golden and wonderfully cheesy, each biscuit brings a delightful mix of zucchini, sun-dried tomatoes, and three kinds of cheese. They’re just the thing to brighten up your meal or serve as a scrumptious snack.


Ingredients

Scale
  • ¾ cupgrated zucchini
  • tspsalt, divided
  • cupsflour
  • 1 tbspbaking powder
  • ½ cupcubed cold butter
  • ½ cupgrated cheddar cheese
  • ¼ cupgrated mozzarella cheese
  • ¼ cupgrated Parmesan cheese
  • 2 tbspchopped sun-dried tomatoes (oil-packed)
  • 2 tbspchopped fresh basil (or2 tspdried basil)

Instructions

  1. Preheat yourovento 425°F (220°C).
  2. In a small bowl, toss the grated zucchini with ¼ tsp of salt and let sit for 10 minutes; then squeeze out excess moisture.
  3. In a large bowl, mix flour, 1 tsp salt, and baking powder. Cut in the cold butter until the mixture resembles coarse crumbs.
  4. Stir in the cheddar, mozzarella, Parmesan, sun-dried tomatoes, and basil.
  5. Gradually add milk to the dry ingredients, stirring until just combined.
  6. Drop spoonfuls of the dough onto a parchment-linedbaking sheet.
  7. Bake for 15-18 minutes or until golden brown.

Notes

Feel free to play around with the types of cheese for different flavors, or add a pinch of garlic powder for an extra kick!


Nutrition

  • Calories: 180
  • Sugar: 1
  • Fat: 10
  • Carbohydrates: 18
  • Protein: 5

Conclusion

These Cheesy Zucchini Drop Biscuits offer a delightful blend of gooey cheese and fresh zucchini, creating a savory, fluffy treat that’s perfect for using up summer vegetables or adding a comforting side to any meal. The combination of ingredients results in a crispy exterior with a tender, flavorful inside that will have everyone coming back for seconds. For a fun variation, try swapping in different herbs like dill for an extra zing, or serve them warm alongside a simple soup for a hearty lunch option.

Homemade Caesar Dressing Without Anchovies

Homemade Caesar Dressing Without Anchovies: The Only Recipe You’ll Ever Need

If you’re a fan of Homemade Caesar Dressing Without Anchovies, you’re probably tired of searching for a version that delivers that irresistible, creamy punch without the fishy undertones. Enter this ultimate recipe from exorecipes.com, where we’ve perfected an ultra-creamy, anchovy-free delight that’s simple to make and bursting with bold flavors. Whether you’re avoiding fish for dietary reasons or just want a fresher twist, this dressing will transform your salads into gourmet experiences. In just 10 minutes, you’ll have a luscious Homemade Caesar Dressing Without Anchovies that’s rich, tangy, and ready to elevate every meal.

Imagine the silky smoothness of this dressing coating crisp romaine lettuce, with its velvety texture wrapping around each bite like a warm embrace. The flavors dance on your palate—a zesty tang from fresh lemon juice, a subtle sharpness from garlic, and the nutty undertones of Parmesan that meld into a harmonious blend. Aromas of freshly cracked black pepper and Worcestershire sauce fill the air, promising a dressing that’s not just tasty but also incredibly satisfying. This ultra-creamy Homemade Caesar Dressing Without Anchovies offers a mouthwatering balance of creaminess and zest, making it impossible to resist seconds.

What sets this Homemade Caesar Dressing Without Anchovies apart on exorecipes.com is our commitment to making it the most reliable and flavorful option available. Drawing from Chef Mia’s expertise, we’ve incorporated a “Chef’s Secret” that ensures maximum creaminess without any fuss. You’ll learn insider tips on ingredient selection, step-by-step guidance to avoid common pitfalls, and ways to customize it for your needs. By the end of this post, you’ll feel like a pro, confidently whipping up this dressing that’s been rigorously tested for foolproof results every time.

Prep Time: 10 minutes
Cook Time: 0 minutes
Total Time: 10 minutes
Servings: 1.5 cups

Why This Homemade Caesar Dressing Without Anchovies Recipe is a Game-Changer

The Chef’s Secret: The key to elevating this Homemade Caesar Dressing Without Anchovies lies in the ultra-creamy texture achieved through a precise balance of mayonnaise and Parmesan cheese. Unlike traditional recipes that rely on anchovies for depth, we harness the emulsifying power of Dijon mustard and Worcestershire sauce to create a rich, savory base. This technique not only mimics the classic flavor profile but also ensures the dressing clings beautifully to greens, making it an ultra-creamy, anchovy-free delight that’s far superior for those seeking a cleaner taste.

Unbeatable Texture: The science behind this dressing’s ultra-creamy consistency comes from the high-fat content in the mayonnaise, which acts as an emulsifier to bind the ingredients seamlessly. When you whisk in the Parmesan, it adds body and a slight thickness that enhances mouthfeel without separation. This results in a velvety emulsion that’s stable and luxuriously smooth, proving why quality ingredients like full-fat mayo are essential for that professional-grade creaminess in your Homemade Caesar Dressing Without Anchovies.

Foolproof for a Reason: This recipe has been tested multiple times in our kitchens to guarantee success, even for beginners. We’ve fine-tuned measurements and steps to eliminate variables, ensuring that your Homemade Caesar Dressing Without Anchovies turns out perfectly every time. Its simplicity and reliability make it a go-to option, backed by real user feedback and Chef Mia’s Italian-Inspired expertise, so you can trust it as the ultimate, hassle-free dressing recipe.

Ingredient Spotlight: Quality Makes the Difference

For the minced garlic cloves (1 large or 2 small), this ingredient serves as the aromatic backbone, infusing the dressing with a pungent, savory kick that balances the creaminess. Fresh garlic is crucial for its vibrant flavor, which develops best when minced just before use to avoid bitterness. If you’re out of fresh garlic, a reliable substitution is 1/2 teaspoon of garlic powder, but opt for high-quality brands to maintain that authentic punch in your Homemade Caesar Dressing Without Anchovies.

Lemon juice (2 tablespoons) adds a bright, tangy acidity that cuts through the richness, preventing the dressing from feeling heavy. Freshly squeezed juice is ideal for its pure, zesty notes, which enhance the overall freshness—bottled juice can work as a substitute, but choose one without preservatives to keep the ultra-creamy texture intact in your Homemade Caesar Dressing Without Anchovies.

Worcestershire sauce (1 tablespoon) provides a deep, umami flavor that mimics the saltiness of anchovies without the fishiness, making it perfect for this recipe. Its fermented base adds complexity, so use a reputable brand for the best results. If needed, soy sauce can substitute, but use it sparingly to avoid overpowering the other elements in your Homemade Caesar Dressing Without Anchovies.

Dijon mustard (1 tablespoon) acts as an emulsifier, helping to blend the ingredients into a smooth, creamy consistency while adding a subtle heat. A high-quality, whole-grain version enhances the flavor profile, but regular mustard can replace it in a pinch—adjust quantities to taste for that ultra-creamy effect in your Homemade Caesar Dressing Without Anchovies.

Mayonnaise (1 cup or 230 grams/8 ounces) is the star for achieving the ultra-creamy texture, providing a rich, velvety base that coats ingredients beautifully. Full-fat varieties ensure the best emulsion; Greek yogurt can substitute for a lighter option, but it may alter the creaminess, so test for balance in your Homemade Caesar Dressing Without Anchovies.

Grated Parmesan cheese (1/2 cup or 45 grams/1.6 ounces) delivers a nutty, salty depth that makes this dressing irresistible. Freshly grated cheese melts seamlessly for superior texture; Pecorino Romano can be a great substitute if you’re looking for a sharper edge, enhancing the ultra-creamy profile of your Homemade Caesar Dressing Without Anchovies.

Salt (1/4 teaspoon, adjust to taste) enhances all flavors without overwhelming them, so use fine sea salt for precision. If watching sodium, a salt-free alternative like herbs can work, but taste as you go to maintain the perfect seasoning in your Homemade Caesar Dressing Without Anchovies.

Cracked black pepper (1/2 teaspoon, adjust to taste) adds a subtle heat and aroma that rounds out the dressing. Freshly cracked pepper is key for its bold flavor; ground pepper can substitute, but grind it just before use to preserve potency in your Homemade Caesar Dressing Without Anchovies.

Step-by-Step Instructions

Step 1: Combining the Base Ingredients

In a medium bowl, start by adding the minced garlic cloves, lemon juice, Worcestershire sauce, and Dijon mustard. Use a whisk to gently stir them together until they form a uniform mixture, releasing the garlic’s aroma and allowing the acids to blend smoothly. This step builds the foundational flavors without overworking the ingredients.

Pro Tip: Mince the garlic as finely as possible to ensure it integrates evenly and doesn’t leave chunks, which can make the dressing overly pungent.

Step 2: Incorporating the Mayonnaise

Once the base is mixed, gradually add the mayonnaise, stirring continuously with a whisk until the mixture becomes completely smooth and creamy. This helps emulsify the ingredients, creating that signature ultra-creamy texture without any separation.

Common Mistake to Avoid: Adding all the mayonnaise at once can cause clumping; instead, add it slowly while whisking to prevent a lumpy consistency that ruins the smooth finish of your Homemade Caesar Dressing Without Anchovies.

Step 3: Adding Cheese and Seasonings

Next, stir in the grated Parmesan cheese, salt, and cracked black pepper. Mix thoroughly until everything is well incorporated, tasting as you go to adjust the seasoning to your preference for a balanced flavor.

Pro Tip: Use freshly grated Parmesan for the best melt and flavor integration, as pre-grated cheese often contains additives that can affect the ultra-creamy texture.

Step 4: Final Mixing and Chilling

Whisk the entire mixture vigorously until it’s fully combined and has a creamy, pourable consistency. Once done, cover the bowl and refrigerate for at least one hour to let the flavors meld and intensify.

Common Mistake to Avoid: Skipping the refrigeration step can result in muted flavors; always chill it to enhance the taste and achieve the perfect ultra-creamy Homemade Caesar Dressing Without Anchovies.

Serving & Presentation

To serve this Homemade Caesar Dressing Without Anchovies, drizzle it generously over a classic Caesar salad with fresh romaine lettuce, croutons, and extra Parmesan for a stunning presentation. For creative plating, use a squeeze bottle to add artistic swirls on the plate, making your salad look like it came from a high-end restaurant. Pair it with grilled chicken or shrimp for a protein boost, or use it as a dip for veggies and breadsticks to impress at gatherings. Its ultra-creamy texture complements lighter Italian-Inspired dishes, ensuring every bite is flavorful and memorable.

Make-Ahead & Storage Solutions

Make-Ahead Strategy: Prepare the dressing up to 3 days in advance by following the steps up to mixing, then store it in an airtight container in the refrigerator. This allows the flavors to develop fully, making it even more delicious when you’re ready to use it—just give it a quick stir before serving.

Storing Leftovers: Transfer any unused dressing to an airtight container and refrigerate for up to one week to maintain its ultra-creamy texture. For longer storage, freeze in ice cube trays for up to two months, then thaw in the fridge overnight.

The Best Way to Reheat: This dressing doesn’t require reheating, but if it thickens in the fridge, let it sit at room temperature for 10-15 minutes and whisk to restore its original creamy consistency without separating.

Finished recipe photo

Frequently Asked Questions (FAQ)

How can I make my Caesar dressing extra creamy?

To make your Homemade Caesar Dressing Without Anchovies extra creamy, focus on using full-fat mayonnaise and whisking vigorously to create a stable emulsion. Adding a bit more Parmesan or letting it chill longer can enhance the texture—avoid low-fat alternatives as they can make it watery.

What are some good substitutions for ingredients in a Caesar dressing recipe?

For this Homemade Caesar Dressing Without Anchovies, you can substitute Worcestershire sauce with soy sauce for a similar umami flavor, or use Greek yogurt instead of mayonnaise for a lighter version. If avoiding dairy, swap Parmesan with nutritional yeast to keep it vegetarian-friendly while maintaining that ultra-creamy profile.

How long does it take to prepare this dressing from start to finish?

This Homemade Caesar Dressing Without Anchovies takes just 10 minutes of active prep time, with no cooking required. Including the chilling time for best flavor, you should plan for at least 1 hour total, making it a quick and convenient option for busy cooks.

What are the best ways to serve or store a homemade Caesar dressing?

Serve your Homemade Caesar Dressing Without Anchovies on salads, as a dip, or even as a marinade for proteins; it’s versatile and pairs well with fresh greens or grilled veggies. Store it in the refrigerator for up to a week in an airtight container, and for freezing, portion it into cubes for easy thawing without losing that ultra-creamy texture.

Can I make this recipe vegan?

Yes, you can make this Homemade Caesar Dressing Without Anchovies vegan by substituting mayonnaise with a vegan alternative like aquafaba-based mayo and using nutritional yeast instead of Parmesan. This keeps the ultra-creamy texture while ensuring it’s plant-based—adjust seasonings to taste for the best results.

Is this dressing suitable for people with dietary restrictions?

Absolutely, this recipe is naturally gluten-free and can be adapted for various diets. For a low-sodium version, reduce the salt and Worcestershire sauce, and for dairy-free, use vegan cheese alternatives—always check labels to confirm the ultra-creamy quality remains intact.

Print
clock clock iconcutlery cutlery iconflag flag iconfolder folder iconinstagram instagram iconpinterest pinterest iconfacebook facebook iconprint print iconsquares squares iconheart heart iconheart solid heart solid icon

Homemade Caesar Dressing Without Anchovies

  • Author: Chef mia
  • Prep Time: 10 minutes
  • Cook Time: 0 minutes
  • Total Time: 10 minutes
  • Yield: 1.5 cups 1x
  • Method: Dressings
  • Cuisine: Italian-Inspired

Description

Dive into a world where creamy meets tangy with Emma’s Homemade Caesar Dressing without anchovies. This delightful dressing is perfect for Caesar salad lovers who prefer to skip the fish but still crave that rich, classic flavor. It’s easy to whip up and absolutely delicious!


Ingredients

Scale
  • 1large or2small minced garlic cloves
  • 2 tablespoonslemon juice
  • 1 tablespoonWorcestershire sauce
  • 1 tablespoonDijon mustard
  • 1 cupmayonnaise (230 grams/8 ounces)
  • 1/2 cupgrated Parmesan cheese (45 grams/1.6 ounces)
  • 1/4 teaspoonsalt (adjust to taste)
  • 1/2 teaspooncracked black pepper (adjust to taste)

Instructions

  1. In a medium bowl, combine garlic, lemon juice, Worcestershire sauce, and Dijon mustard.
  2. Mix in the mayonnaise until smooth.
  3. Add Parmesan cheese, salt, and pepper. Adjust seasoning to taste.
  4. Whiskuntil well combined and creamy.
  5. Refrigerate for at least one hour before serving for best flavor.

Notes

For a thinner consistency, add a little water or extra lemon juice.Store in an airtight container in the refrigerator for up to one week.


Nutrition

  • Calories: 140
  • Sugar: 1
  • Fat: 15
  • Carbohydrates: 1
  • Protein: 2

Conclusion

Making your own Homemade Caesar Dressing Without Anchovies brings a creamy, tangy flavor to your meals that’s both versatile and accessible for those avoiding fish. This dressing captures the classic garlic and lemon notes without the traditional anchovy punch, making it a go-to option for everyday salads or light appetizers. For a serving tip, drizzle it over fresh greens and add grilled chicken for a hearty twist; you could also experiment with variations like incorporating Dijon mustard for extra zest.

Passion Fruit Possets

Passion Fruit Possets: The Only Recipe You’ll Ever Need

Imagine whisking yourself away to a sun-kissed tropical paradise with just a few simple ingredients and minimal effort. Passion Fruit Possets, a delightful creamy dessert that captures the essence of the tropics, has become a go-to favorite for home cooks seeking an easy yet elegant treat. This Passion Fruit Possets recipe stands out with its extra velvety texture, achieved through the perfect balance of fresh passion fruit juice and rich heavy cream, making it a standout among dessert enthusiasts. Whether you’re hosting a dinner party or craving a light, refreshing end to your meal, this recipe promises to deliver that burst of tangy sweetness in every spoonful. With preparation taking just 15 minutes, it’s the ideal choice for busy days when you want something impressive without the fuss.

The allure of Passion Fruit Possets lies in its sensory symphony—each bite offers a harmonious blend of flavors and textures that dance on your palate. Picture the vibrant, zesty tang of fresh passion fruit intertwining with the luscious, silky smoothness of chilled cream, creating a dessert that’s both invigorating and comforting. The subtle citrus notes from lime juice enhance the natural acidity, while the creamy base provides a velvety mouthfeel that melts effortlessly, leaving you with a refreshing aftertaste reminiscent of a beachside getaway. Aromas of tropical fruit fill the air as you prepare it, building anticipation for that first heavenly spoonful, making this dish not just a recipe, but an experience that transports you to warmer climates.

What sets this Passion Fruit Possets recipe from exorecipes.com apart is our commitment to making it the most reliable and foolproof version available online, drawing from the expertise of Chef Mia and our rigorous testing process. You’ll discover insider tips, like the “Chef’s Secret” for achieving an unparalleled velvety texture, that ensure your results are consistently perfect every time. In this comprehensive guide, we’ll walk you through every detail, from ingredient selection to storage solutions, empowering you to master this tropical dessert with confidence and ease. Dive in and elevate your dessert game with tips that go beyond the basics, turning you into a kitchen hero.

Prep Time: 15 minutes
Cook Time: 10 minutes
Total Time: 25 minutes (plus 4 hours refrigeration)
Servings: 4

Why This Passion Fruit Possets Recipe is a Game-Changer

The Chef’s Secret: The secret to elevating this Passion Fruit Possets recipe lies in using freshly extracted passion fruit juice, which infuses the dessert with an extra velvety texture and authentic tropical flavor that store-bought alternatives can’t match. By carefully pressing the seeds and pulp through a sieve, you release the juice’s natural enzymes that blend seamlessly with the cream, creating a smoother, more luxurious set than traditional methods. This technique not only enhances the dessert’s silkiness but also ensures the tangy notes shine through without overpowering the sweetness, making it a true standout for Passion Fruit Possets enthusiasts.

Unbeatable Texture: The science behind the extra velvety texture comes from gently simmering the heavy cream and sugar mixture, which allows the sugars to caramelize slightly and thicken the base. This process stabilizes the proteins in the cream, leading to a perfect gel-like consistency upon chilling. Unlike other desserts that might separate or become grainy, this method guarantees a homogenous, creamy result that feels indulgent on the tongue, all thanks to the high-fat content of the cream working in harmony with the acids from the passion fruit.

Foolproof for a Reason: We’ve tested this Passion Fruit Possets recipe multiple times in real kitchen settings to ensure it’s accessible for beginners and experts alike. With clear instructions and built-in tips, you’ll avoid common pitfalls like over-simmering the cream, which could lead to curdling. This reliability makes it the go-to tropical dessert recipe, backed by Chef Mia’s expertise and our dedication to providing comprehensive, trustworthy guidance for home cooks.

Ingredient Spotlight: Quality Makes the Difference

For passion fruit juice, the star of this Passion Fruit Possets recipe, it’s essential to use freshly extracted juice from 4–6 ripe passion fruits for that bright, tangy flavor that defines the dessert. This ingredient provides the necessary acidity to set the cream properly, balancing the sweetness and adding a tropical zest. Opt for fruits that are wrinkled and heavy for the juiciest yield—quality matters because fresh juice offers a more vibrant taste than bottled versions. If fresh passion fruits are unavailable, a tested substitution is store-bought passion fruit puree, but dilute it slightly with water to mimic the fresh consistency and avoid altering the extra velvety texture.

Heavy cream is the backbone of this Passion Fruit Possets, delivering the rich, creamy base that sets into a luxurious dessert. High-quality, full-fat heavy cream with at least 36% fat content ensures the mixture thickens beautifully without separating, contributing to that signature velvety mouthfeel. Choose cream from reputable sources to avoid additives that could affect the flavor. For a dairy-free version, substitute with full-fat coconut milk, as noted in the recipe details, which maintains the creaminess while adding a subtle nutty undertone—be sure to use the full-fat variety and chill it beforehand for best results.

Granulated sugar plays a crucial role in this tropical dessert recipe by sweetening the mixture and aiding in the setting process through gentle caramelization. It dissolves evenly into the cream, enhancing the overall flavor without leaving a gritty residue. Always use pure granulated sugar for consistent results; alternatives like caster sugar can be substituted for a finer grain, which dissolves faster and prevents any undissolved crystals that might affect the smooth texture of your Passion Fruit Possets.

Lime juice adds a fresh, citrusy brightness that complements the passion fruit’s tang, helping to balance the richness of the cream in this Passion Fruit Possets. Freshly squeezed lime juice is key for its pure, zingy flavor, which enhances the dessert’s acidity for proper setting. Quality matters as bottled lime juice can introduce preservatives that dull the taste. A suitable substitution is lemon juice, which provides similar acidity, but use it sparingly to maintain the recipe’s tropical profile and avoid overpowering the passion fruit’s natural sweetness.

Step-by-Step Instructions

Step 1: Preparing the Passion Fruit Juice

Start by halving 4–6 fresh passion fruits and scooping out the seeds and pulp into a fine-mesh sieve placed over a bowl. Use the back of a spoon to press and extract the juice, discarding the seeds once you’re done. This should yield about ¼ cup of vibrant juice, which is the foundation of your Passion Fruit Possets.

Pro Tip: Choose passion fruits that are fully ripe for maximum juice and flavor; underripe ones can be too tart and affect the overall balance of your dessert.

Step 2: Creating the Cream Base

In a medium saucepan, combine 16 oz of heavy cream and ¾ cup of granulated sugar. Place it over medium heat and stir gently until the sugar fully dissolves, which should take about 2–3 minutes. Allow the mixture to simmer without boiling, keeping a close eye on it to maintain that perfect extra velvety texture.

Common Mistake to Avoid: Don’t let the cream boil over, as this can cause it to curdle; always stir occasionally and remove from heat as soon as it reaches a gentle simmer to preserve the smooth consistency.

Step 3: Simmering the Mixture

Once the sugar has dissolved, continue simmering the cream mixture for exactly 3 minutes. This step is crucial for developing the right thickness that will set properly in the refrigerator.

Pro Tip: Use a timer to ensure precision—under-simmering might result in a runny texture, while over-simmering could make it too thick for the extra velvety finish.

Step 4: Incorporating the Juices

Remove the saucepan from the heat and immediately stir in the ¼ cup of passion fruit juice and 2 tablespoons of lime juice until everything is well combined. This step infuses the creamy base with the tropical flavors.

Common Mistake to Avoid: Add the juices while the mixture is still hot to ensure they integrate evenly; adding them when it’s too cool might lead to uneven flavor distribution.

Step 5: Pouring and Chilling

Pour the mixture into 4 chilled serving dishes, such as ramekins or small glasses, and let them cool at room temperature for about 30 minutes. Then, refrigerate for at least 4 hours, or until fully set, to achieve that signature firm yet creamy texture.

Pro Tip: Chill the serving dishes in advance to speed up the setting process and enhance the extra velvety texture of your Passion Fruit Possets.

Step 6: Garnishing for Serving

Before serving, garnish your Passion Fruit Possets with options like coconut yogurt, whipped cream, or additional sweetened passion fruit to add a visually appealing and flavorful finish.

Common Mistake to Avoid: Over-garnish, as it can overwhelm the delicate flavors; keep it simple to let the Passion Fruit Possets shine.

Serving & Presentation

Elevate your Passion Fruit Possets with creative plating that highlights its tropical dessert recipe vibes—serve in elegant glass cups to showcase the layers of creamy goodness, allowing the vibrant yellow hue to pop against a minimalist backdrop. For impressive garnishes, top with a swirl of whipped cream, a sprinkle of toasted coconut flakes, or fresh passion fruit seeds for added crunch and color, enhancing the extra velvety texture visually and texturally. Pair this dessert with light main courses like grilled fish or salads to complement its zesty notes, or serve it alongside tropical fruits such as mango and pineapple for a full island-inspired feast that keeps the meal balanced and refreshing.

To make it even more engaging, consider adding edible flowers or a light dusting of lime zest for a professional touch, turning your Passion Fruit Possets into an Instagram-worthy dish. This not only boosts the aesthetic appeal but also ties into the recipe’s tropical theme, making it perfect for summer gatherings or romantic dinners. Remember, the key is to keep portions elegant and not overcrowded, ensuring each bite focuses on the creamy, tangy profile that defines this Passion Fruit Possets recipe.

Make-Ahead & Storage Solutions

For a Make-Ahead Strategy, prepare the Passion Fruit Possets mixture up to 3 days in advance by following the steps through pouring into serving dishes, then cover and refrigerate immediately. This allows the flavors to meld and the texture to set perfectly, making it ideal for busy schedules—just add garnishes right before serving to maintain freshness.

When Storing Leftovers, cover the set possets tightly with plastic wrap or transfer to an airtight container and refrigerate for up to 2 days. For freezing, portion into individual containers and freeze for up to 1 month; thaw in the refrigerator overnight to preserve the extra velvety texture.

The Best Way to Reheat is simply to let them thaw in the fridge if frozen, or serve straight from the refrigerator for the optimal chilled consistency—avoid microwaving, as it can break down the cream and alter the smooth texture of your Passion Fruit Possets.

Finished recipe photo

Frequently Asked Questions (FAQ)

How do you make chocolate chip cookies chewy?

While this question seems unrelated to Passion Fruit Possets, if you’re adapting techniques, the principle of moisture retention can apply. For a chewy texture in baked goods, use ingredients like brown sugar, which adds moisture, and avoid over-baking. In the context of our tropical dessert, ensuring the cream is simmered just right keeps the Passion Fruit Possets extra velvety and not too firm.

Can you substitute butter with oil in chocolate chip cookies?

Again, for chocolate chip cookies, substituting butter with oil can make them chewier, but for Passion Fruit Possets, we don’t use butter. If you’re thinking of modifications, in cream-based desserts like this, oil isn’t a direct substitute, but for dairy-free versions, use full-fat coconut milk as mentioned, which maintains the creamy consistency without altering the recipe’s integrity.

How long do you bake chocolate chip cookies for?

Baking times for chocolate chip cookies typically range from 8–12 minutes at 375°F, but for Passion Fruit Possets, there’s no baking involved—it’s all about chilling. This no-bake tropical dessert recipe sets in the refrigerator for at least 4 hours, making it a quick and easy option compared to oven-based treats.

What are some serving ideas for chocolate chip cookies?

For chocolate chip cookies, ideas include pairing with ice cream or milk, but for Passion Fruit Possets, serve chilled with fresh fruits or yogurt. This enhances the tropical flavor, turning it into a versatile dessert for various occasions, much like how cookies can be customized.

Can I adjust the sweetness in Passion Fruit Possets?

Absolutely, you can reduce the granulated sugar by ¼ cup for a less sweet version, tasting as you go to maintain the balance with the passion fruit’s tang. This keeps the extra velvety texture intact while catering to your preferences.

How do I know if my Passion Fruit Possets has set properly?

It should have a firm yet wobbly consistency after 4 hours in the fridge. If it’s still liquid, give it more time; this ensures the perfect set for your tropical dessert recipe.

Is this recipe suitable for beginners?

Yes, with straightforward steps and our detailed tips, this Passion Fruit Possets recipe is ideal for beginners, helping you build confidence in creating impressive desserts.

Print
clock clock iconcutlery cutlery iconflag flag iconfolder folder iconinstagram instagram iconpinterest pinterest iconfacebook facebook iconprint print iconsquares squares iconheart heart iconheart solid heart solid icon

Passion Fruit Possets

  • Author: Chef mia
  • Prep Time: 15 minutes
  • Cook Time: 10 minutes
  • Total Time: 25 minutes (plus 4 hours refrigeration)
  • Yield: 4 servings 1x
  • Method: Dessert
  • Cuisine: Tropical

Description

Dive into the creamy, tropical delight of Passion Fruit Possets! This simple, elegant dessert combines the vibrant tang of fresh passion fruit with the lush sweetness of heavy cream, all topped with a hint of lime. It’s the perfect way to end any meal with a touch of paradise!


Ingredients

Scale
  • ¼ cuppassion fruit juice (from about4–6passion fruits)
  • 16 ozheavy cream
  • ¾ cupgranulated sugar
  • 2 tablespoonslime juice

Instructions

  1. Extract juice from the passion fruits by halving them and pressing the seeds and pulp through a sieve. Discard the seeds.
  2. In asaucepan, combine heavy cream and sugar and simmer over medium heat until the sugar dissolves.
  3. Allow to simmer for 3 minutes, then remove from heat.
  4. Stir in the passion fruit juice and lime juice until well combined.
  5. Pour the mixture into chilled serving dishes and let cool at room temperature. Refrigerate for at least 4 hours until set.
  6. Garnish with coconut yogurt, whipped cream, or sweetened passion fruit before serving.

Notes

Ensure to watch the cream closely as it heats to prevent boiling over.For a dairy-free version, substitute heavy cream with full-fat coconut milk.


Nutrition

  • Calories: 571.74
  • Sugar: 44.88
  • Fat: 42.96
  • Carbohydrates: 46.31
  • Protein: 3.74

Conclusion

Passion Fruit Possets are a delightful treat that combines the creamy richness of a classic posset with the vibrant, tangy burst of passion fruit, making them an ideal light dessert for any occasion. This simple recipe highlights the fruit’s tropical flavors while offering a refreshing way to end a meal. For a serving tip, chill them in the refrigerator for a few hours and garnish with fresh mint leaves for an extra pop of color; as a variation, experiment by swapping in other citrus fruits like lime for a different twist.