Easy Vegetarian Quesadillas: A Weeknight Savior
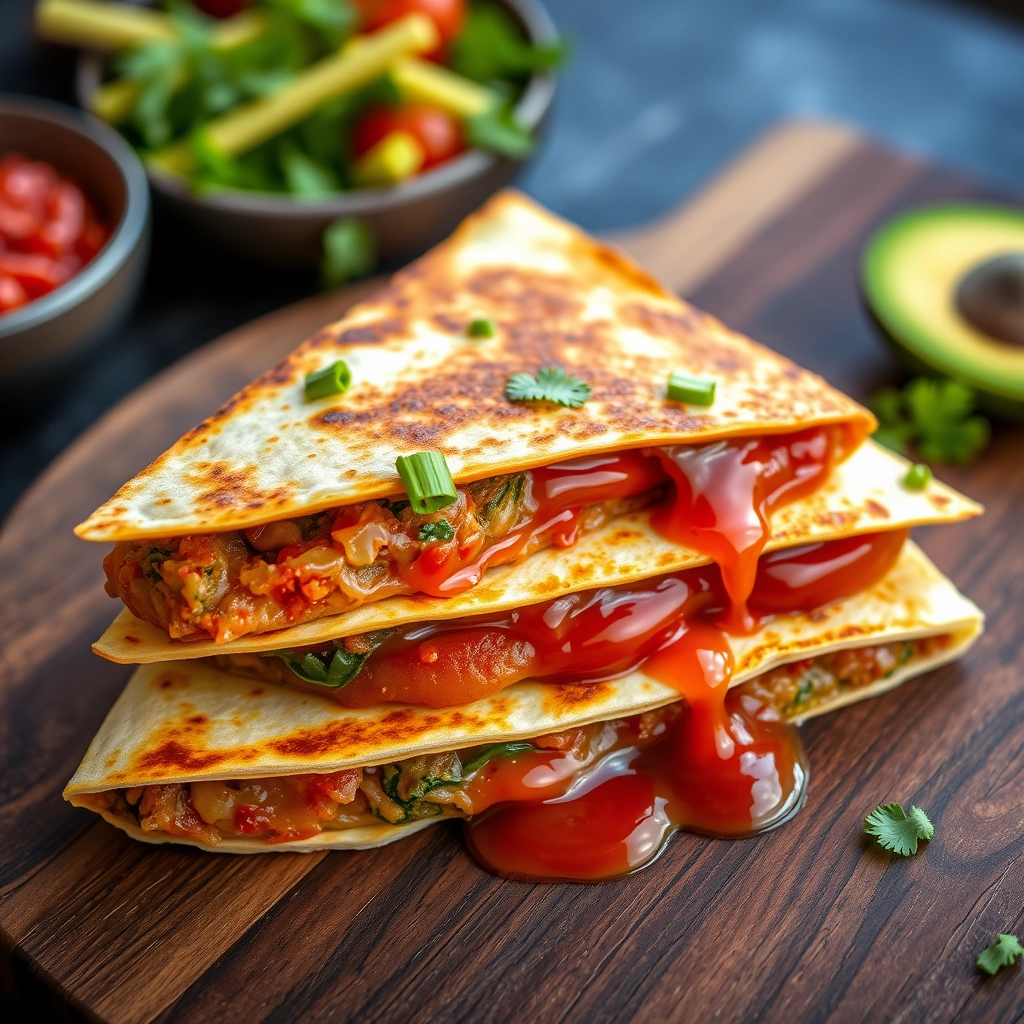
There’s something deeply comforting about a golden, crispy quesadilla—especially on those evenings when time is short but cravings are big. I remember one particularly chaotic Tuesday, my fridge nearly bare except for a handful of veggies and a lonely block of cheese. Desperation led to inspiration, and in 15 minutes flat, these Easy Vegetarian Quesadillas were born. Now, they’re my go-to when life feels a little too fast, a little too messy. Simple, satisfying, and packed with flavor—this is the kind of recipe that feels like a warm hug.
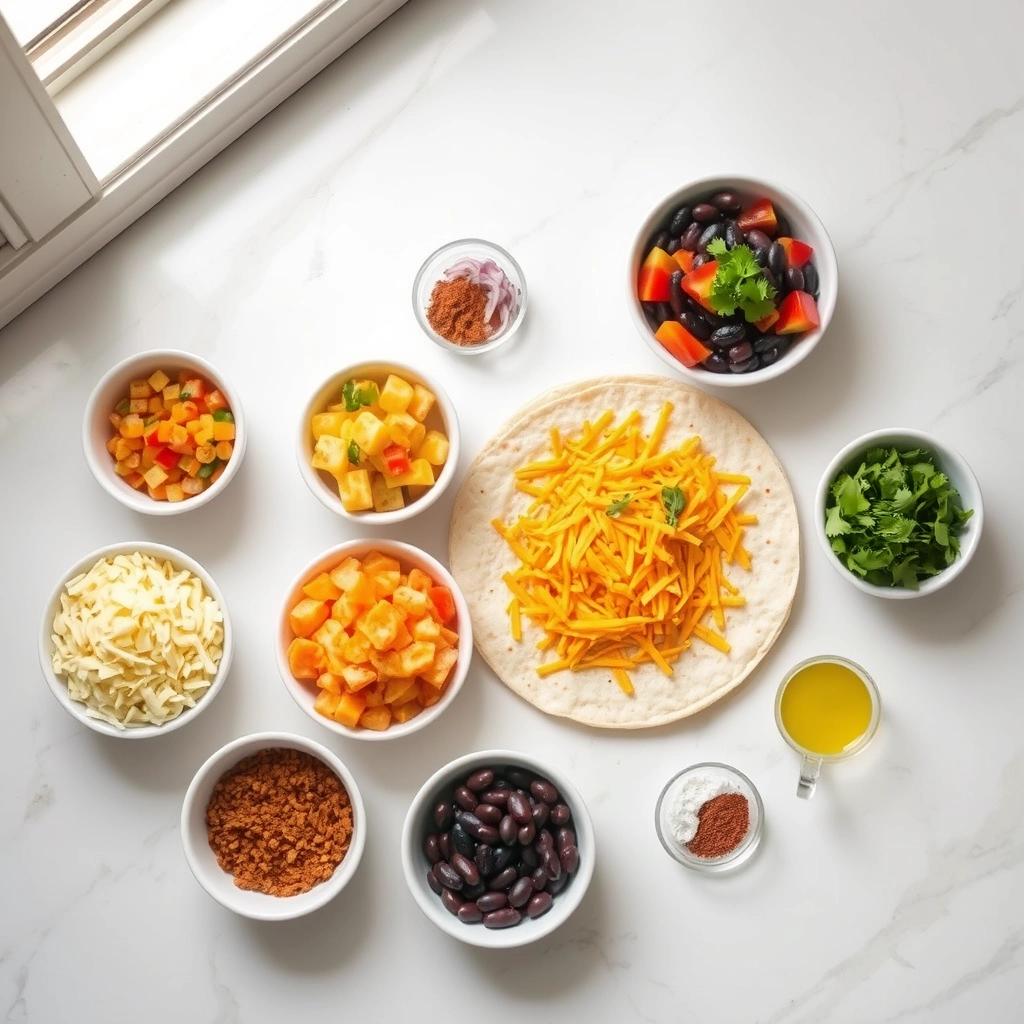
Ingredients You’ll Need
- Flour tortillas – The sturdier, the better! I love using whole wheat or spinach tortillas for extra texture and nutrients.
- Shredded cheese – A melty blend like Monterey Jack or cheddar works wonders, but pepper jack adds a lovely kick if you’re feeling bold.
- Bell peppers – Thinly sliced for sweetness and crunch. I adore the rainbow of red, yellow, and orange for color.
- Red onion – Just a bit, finely diced, for that sharp, caramelized bite.
- Black beans – Rinsed and drained for protein and heartiness. A pantry staple in my kitchen!
- Corn kernels – Fresh or frozen, they add a pop of sweetness. If using frozen, no need to thaw—just toss them in!
- Spices – Cumin, smoked paprika, and a pinch of chili powder for warmth and depth.
- Fresh cilantro – Because everything tastes better with a sprinkle of green.
- Olive oil or butter – For that perfect golden crisp on the tortilla.
Let’s Make Magic Happen
First, let’s talk prep. The beauty of this recipe is that you can customize it endlessly, but here’s how I love to build mine:
- Sauté the veggies. Heat a drizzle of olive oil in a pan over medium heat. Toss in your sliced bell peppers and red onion, letting them soften just until they’re tender-crisp—about 3 minutes. A pinch of salt and those spices (cumin, smoked paprika, chili powder) go in now, filling your kitchen with the most irresistible aroma.
- Add the beans and corn. Stir in the black beans and corn, warming them through for another minute. This is when I sneak a taste—adjusting spices or adding a squeeze of lime if the mood strikes.
- Assemble with love. Lay a tortilla flat and sprinkle half with cheese (this acts as the “glue” for your filling). Spoon the veggie mixture over the cheese, then top with another sprinkle of cheese and fresh cilantro. Fold the tortilla in half, pressing gently.
- Cook to crispy perfection. In a clean pan, melt a little butter or olive oil over medium heat. Carefully place your quesadilla in the pan, cooking for 2-3 minutes per side until golden and the cheese is gloriously melted. A heavy spatula press helps everything stick together!
And here’s my secret: let it rest for a minute before slicing. I know, the temptation is real, but that brief pause lets the cheese settle so every wedge holds together beautifully. Serve with salsa, guacamole, or—my favorite—a dollop of cool sour cream.
Pro Tips, Variations, and Substitutions
Want to take your vegetarian quesadillas to the next level? Here are some expert tips and fun twists to try:
- Cheese choices: While Monterey Jack and cheddar are classics, try pepper jack for spice, Oaxaca for meltiness, or even goat cheese for tang
- Extra crispiness: Brush the tortillas lightly with oil or melted butter before cooking for golden perfection
- Protein boost: Add black beans, pinto beans, or crumbled tofu for extra staying power
- Veggie variations: Swap in sautéed mushrooms, roasted sweet potatoes, or caramelized onions for different flavor profiles
- Gluten-free option: Use corn tortillas or gluten-free flour tortillas
What to Serve With Your Quesadillas
These versatile quesadillas pair beautifully with so many sides! Here are our favorites:
- Fresh homemade guacamole or chunky salsa
- Cooling sour cream or Greek yogurt
- A crisp green salad with lime vinaigrette
- Mexican rice or cilantro-lime quinoa
- Pickled jalapeños or quick-pickled red onions
Storage and Reheating Tips
Leftover quesadillas? No problem! Here’s how to keep them tasting fresh:
Storage: Let cooled quesadillas sit uncovered for 10 minutes to prevent sogginess, then store in an airtight container in the fridge for up to 3 days.
Reheating: For best results, reheat in a dry skillet over medium heat for 1-2 minutes per side. The microwave works in a pinch (about 30 seconds), but the tortilla won’t stay as crisp.
Freezing: Wrap individual quesadillas in parchment paper, then foil, and freeze for up to 2 months. Reheat from frozen in a 350°F oven for 15-20 minutes.
Frequently Asked Questions
Can I make these quesadillas ahead of time?
Absolutely! Prepare the fillings up to 2 days in advance, then assemble and cook when ready to serve for freshest results.
How do I keep my quesadillas from getting soggy?
Make sure your veggies are well-drained and not too watery. Also, don’t overstuff – about 1/3 cup filling per quesadilla is perfect.
What’s the best way to flip a quesadilla?
Use a large spatula and confidence! Slide it completely under one half, then swiftly flip. If nervous, you can always cook one side at a time.
Can I make these vegan?
Yes! Use vegan cheese alternatives or make a “cheesy” filling with mashed sweet potato, nutritional yeast, and spices.
Wrapping Up Our Quesadilla Adventure
There you have it – everything you need to create perfect vegetarian quesadillas that will have everyone asking for seconds! Whether it’s a quick weeknight dinner, a fun lunch, or party appetizers, these cheesy, veggie-packed delights never disappoint. The beauty of this recipe is how easily it adapts to what you have on hand and your personal tastes.
I’d love to hear about your quesadilla creations! What fillings did you try? Any special twists that became family favorites? Share your stories in the comments below. Now go forth and enjoy your perfectly crispy, melty, veggie-filled masterpiece – you’ve earned it!
Print
Vegetarian Quesadillas
Description
A delicious and easy-to-make vegetarian quesadilla filled with black beans, cheese, and fresh veggies.
Ingredients
For the Crust:
- 4 large flour tortillas
- 1 cup shredded cheddar cheese
- 1 cup shredded Monterey Jack cheese
- 1 cup cooked black beans, drained and rinsed
- 1/2 cup diced bell peppers
- 1/2 cup diced red onion
- 1/4 cup chopped fresh cilantro
- 1 tsp ground cumin
- 1/2 tsp chili powder
- 2 tbsp olive oil
- Salt and pepper to taste
Instructions
1. Prepare the Crust:
- In a bowl, mix the black beans, bell peppers, red onion, cilantro, cumin, chili powder, salt, and pepper.
- Heat a large skillet over medium heat and add 1 tbsp olive oil.
- Place one tortilla in the skillet and sprinkle half of the cheese evenly over the tortilla.
- Spread the black bean mixture over the cheese, then top with the remaining cheese.
- Place another tortilla on top and press down gently.
- Cook for 3-4 minutes until the bottom is golden brown, then flip and cook the other side for another 3-4 minutes.
- Remove from the skillet and repeat with the remaining tortillas and filling.
- Cut into wedges and serve warm.
Notes
You can customize the seasonings to taste.