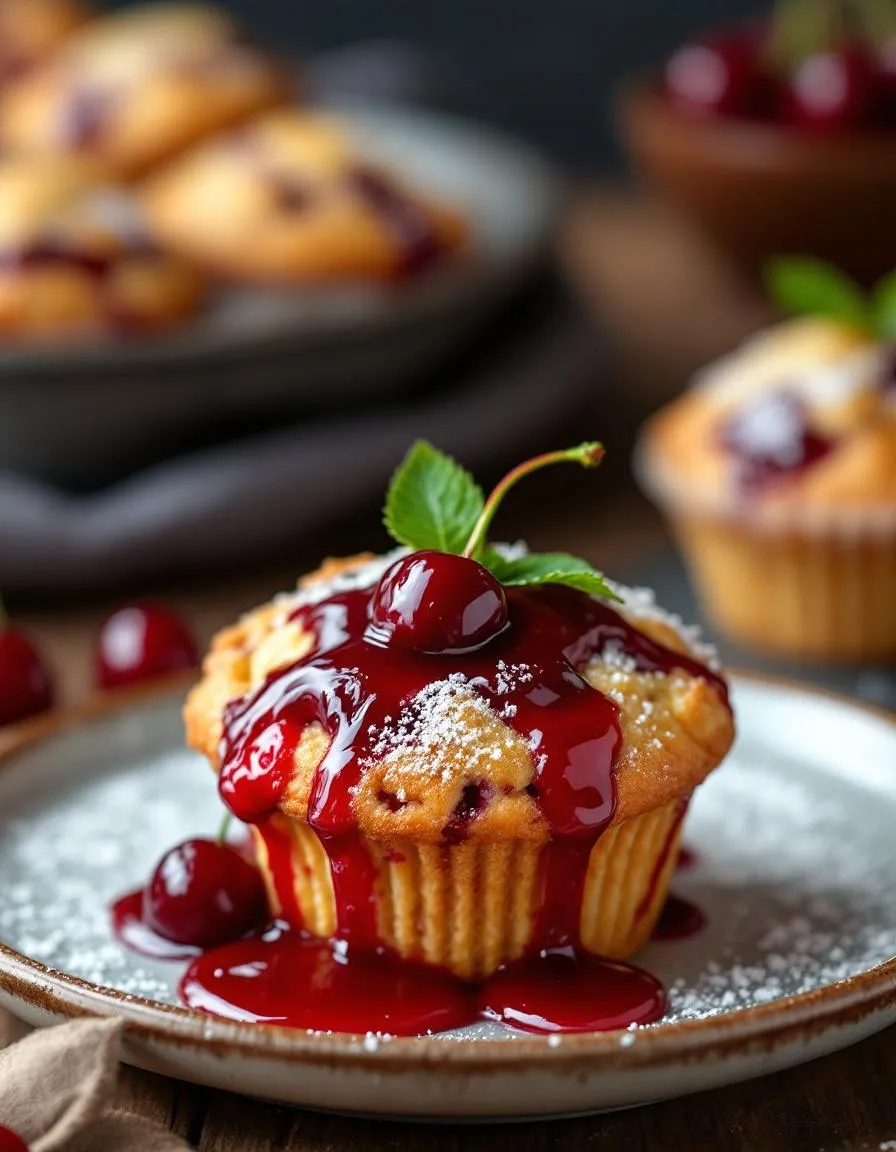
There’s something undeniably comforting about the aroma of freshly baked treats filling your home. Whether you’re craving a nostalgic dessert or a quick breakfast with a twist, Cherry Cobbler Muffins deliver that perfect balance of sweet, tart, and cozy. These muffins capture the essence of a classic cobbler but in a portable, irresistible form. Plus, they’re a fantastic way to use up seasonal cherries or even frozen ones when fresh aren’t available. Trust me, one bite will transport you straight to your happiest kitchen memories.
Cherry Cobbler Muffins combine the best of two worlds: the tender crumb of a muffin and the juicy, buttery topping of a cobbler. Unlike traditional muffins, these feature a streusel-like crown that bakes into a golden, crisp layer, while the cherries inside stay wonderfully soft and jammy. What makes them special is their versatility. You can serve them warm with a scoop of vanilla ice cream for dessert or enjoy them as a grab-and-go snack. They also fit perfectly with the brekcakes.com philosophy of approachable yet impressive baking. If you love easy breakfast recipes or crave simple desserts like our classic cobbler, this recipe will quickly become a favorite.
Why I Love This Recipe
Cherry Cobbler Muffins hold a special place in my heart because they remind me of summer visits to my grandma’s house. She always had a cherry tree in her backyard, and we’d spend hours pitting cherries for pies, crisps, and cobblers. This recipe is my way of keeping those sweet moments alive. Every time I bake them, I’m reminded of her laughter and the way she’d sneak an extra muffin onto my plate. Now, I love sharing that same joy with my own family—and with you.
Health and Nutrition
Why it’s good for your body
Cherry Cobbler Muffins pack a nutritious punch while satisfying your sweet tooth. First, cherries deliver powerful antioxidants like anthocyanins, which fight inflammation and support heart health. Additionally, these muffins often include whole grains or oats, providing fiber to keep you full and aid digestion. Moreover, the natural sweetness of cherries means you can cut back on added sugars without sacrificing flavor.
Another benefit of Cherry Cobbler Muffins is their versatility. You can easily tweak the recipe to boost protein with Greek yogurt or almond flour. Furthermore, cherries offer vitamins C and K, promoting immune function and bone health. Whether you enjoy them for breakfast or a snack, these muffins give you energy without the crash. Finally, baking them at home lets you control ingredients, avoiding processed additives. With each bite, you get a balance of taste and nourishment.
How it fits in a healthy lifestyle
Cherry Cobbler Muffins fit perfectly into a balanced diet when enjoyed mindfully. Pair one with a protein-rich food like Greek yogurt or eggs to create a satisfying meal. For gluten-free diets, simply swap regular flour for alternatives like almond or oat flour. If you’re watching sugar intake, reduce the sweetener and let the cherries shine.
These muffins also make meal prep easier. Bake a batch ahead of time for grab-and-go breakfasts or snacks. For more heart-healthy recipes, explore our gluten-free baking guide. If you love fruity treats, try our berry protein muffins for another nutrient-packed option. With smart choices, Cherry Cobbler Muffins can be part of your everyday wellness routine.
Start by preheating your oven to 375°F and lining a muffin tin with paper liners for easy cleanup. In a large bowl, whisk together the dry ingredients—flour, sugar, baking powder, and a pinch of salt—until well combined. Next, melt the butter and let it cool slightly before mixing it with milk, vanilla extract, and an egg in a separate bowl. Pour the wet ingredients into the dry mixture and gently stir until just combined; overmixing will make your Cherry Cobbler Muffins dense. Fold in the fresh or frozen cherries, reserving a handful for topping. Spoon the batter evenly into the muffin cups, then sprinkle the reserved cherries and a crumbly streusel topping over each one. Bake for 18-22 minutes, or until golden and a toothpick comes out clean. For a time-saving hack, prepare the streusel in advance and store it in the fridge. Let the muffins cool slightly before serving, or drizzle them with a simple glaze for extra sweetness.
Mistakes I’ve made and learned from
I once rushed the mixing process and ended up with tough Cherry Cobbler Muffins—turns out, overworking the batter activates too much gluten. Now, I stir just until the ingredients come together, and the texture is perfect every time. Another lesson? Using overly juicy cherries can make the muffins soggy. To avoid this, I toss the cherries in a bit of flour first, which helps absorb excess moisture. If you’re new to baking, check out my guide on avoiding common baking mistakes for more tips. And if you love fruity desserts, don’t miss my perfect streusel topping recipe—it’s a game-changer for muffins and cobblers alike.
Cherry Cobbler Muffins weave together the cozy charm of classic cobbler and the convenience of handheld muffins. Originally inspired by Southern fruit cobblers, this recipe borrows the sweet, jammy cherry filling and buttery topping but bakes it into individual portions. In the South, cobblers often star in summer gatherings, especially during cherry season when orchards burst with ripe fruit. Meanwhile, in the Midwest, home bakers might swap cherries for apples or berries, adapting the recipe to local harvests.
Families often put their own spin on Cherry Cobbler Muffins too. Some add a sprinkle of cinnamon or nutmeg for warmth, while others fold in almond extract to highlight the cherries’ natural sweetness. Across the pond, British bakers might top them with a crumbly streusel instead of a cobbler-style dough. No matter the variation, these muffins carry the same comforting spirit—a taste of nostalgia with every bite.
ays-cooking">How it fits in today’s cooking
Today, Cherry Cobbler Muffins fit perfectly into our fast-paced lives. They’re a quick way to enjoy dessert-for-breakfast vibes or a sweet afternoon pick-me-up. Modern cooks love how easily they adapt to dietary needs, like using gluten-free flour or coconut sugar. For busy parents, they’re a hit in lunchboxes, and for brunch hosts, they pair beautifully with easy brunch recipes.
Seasonally, these muffins shine in summer but work year-round with frozen cherries. They’ve also found a place in holiday baking, often appearing alongside holiday treats like gingerbread and peppermint bark. Whether you’re craving comfort or celebrating a special occasion, Cherry Cobbler Muffins bridge tradition and modern convenience effortlessly.
Taste and Texture
What makes it delicious
Cherry Cobbler Muffins deliver a burst of sweet-tart flavor with every bite, thanks to juicy cherries folded into the batter. The tender, buttery crumb melts in your mouth, while the golden-brown streusel topping adds a satisfying crunch. Warm cinnamon and vanilla weave through each muffin, creating a cozy, fragrant aroma that fills the kitchen. Meanwhile, the cherries soften just enough to offer a jammy contrast to the fluffy texture. Whether enjoyed fresh from the oven or at room temperature, Cherry Cobbler Muffins taste like dessert for breakfast—irresistibly comforting and packed with fruity goodness.
r">Boosting the flavor
For an extra layer of indulgence, drizzle warm Cherry Cobbler Muffins with a vanilla glaze or a dollop of whipped cream. Alternatively, swap the cherries for a mix of berries, like raspberries and blackberries, to deepen the fruity complexity. A pinch of nutmeg or cardamom in the streusel can also elevate the spice profile. If you love pairing baked goods with drinks, try serving these muffins alongside a homemade chai latte for a cozy twist. For more streusel inspiration, check out our guide to perfect crumb topping—it works wonders on muffins too!
Tips for Success
Best practices for results
Always measure your flour correctly by spooning it into the cup and leveling it off—this prevents dense Cherry Cobbler Muffins. Meanwhile, use room-temperature butter for even mixing and a tender crumb. For extra flavor, toss the cherries in a bit of sugar before folding them into the batter. Additionally, fill muffin liners only two-thirds full to avoid overflow and ensure even baking. Finally, let the muffins cool in the pan for 5 minutes before transferring them to a wire rack.
>Mistakes to avoid
Avoid overmixing the batter, as this can make Cherry Cobbler Muffins tough instead of light and fluffy. Instead, gently fold ingredients until just combined. Another common mistake is using frozen cherries without thawing and draining them first—excess moisture leads to soggy muffins. For more baking tips, check out our guide on perfect muffin texture. Also, don’t skip the crumb topping—it adds the classic cobbler touch. If you need help mastering toppings, explore our crumb topping secrets.
Serving and Pairing Suggestions
How to serve this dish
For a stunning presentation, serve Cherry Cobbler Muffins warm on a rustic wooden board or a vintage cake stand. Meanwhile, dust them lightly with powdered sugar or drizzle with vanilla glaze for extra charm. These muffins shine at brunch gatherings, holiday breakfasts, or even as a sweet afternoon treat. Additionally, top each muffin with a scoop of vanilla ice cream or whipped cream to elevate them into a decadent dessert. Finally, garnish with fresh cherries or mint leaves for a pop of color.
What goes well with it
Pair Cherry Cobbler Muffins with a hot cup of spiced chai or cold vanilla latte for a cozy contrast. Alternatively, try them alongside our homemade whipped cream for a creamy, indulgent bite. For a balanced brunch spread, serve them with our savory breakfast casserole, which offsets the muffins’ sweetness perfectly. Moreover, a side of fresh berries or a dollop of Greek yogurt adds a refreshing touch.
How do you make Cherry Cobbler Muffins from scratch?
To make Cherry Cobbler Muffins from scratch, combine flour, sugar, and baking powder, then mix in wet ingredients like milk and eggs. Fold in fresh or canned cherries and top with a crumbly cobbler-style streusel before baking. These muffins capture the classic flavors of cherry cobbler in a portable, handheld treat.
Can I use frozen cherries for Cherry Cobbler Muffins?
Yes, frozen cherries work well for Cherry Cobbler Muffins—just thaw and drain them thoroughly to avoid excess moisture. Pat them dry with a paper towel and toss with a bit of flour to prevent sinking during baking. The result will be just as delicious as using fresh cherries.
rank-math-faq-item">
What’s the best way to store Cherry Cobbler Muffins?
Store Cherry Cobbler Muffins in an airtight container at room temperature for up to 3 days or refrigerate for up to a week. For longer storage, freeze them in a sealed bag for up to 3 months—just reheat in the microwave for a warm, gooey texture.
Can I add a glaze to Cherry Cobbler Muffins?
A simple powdered sugar glaze or vanilla drizzle pairs perfectly with Cherry Cobbler Muffins for extra sweetness. For a more authentic cobbler touch, brush melted butter and sprinkle coarse sugar on top before baking for a crispy, caramelized finish.
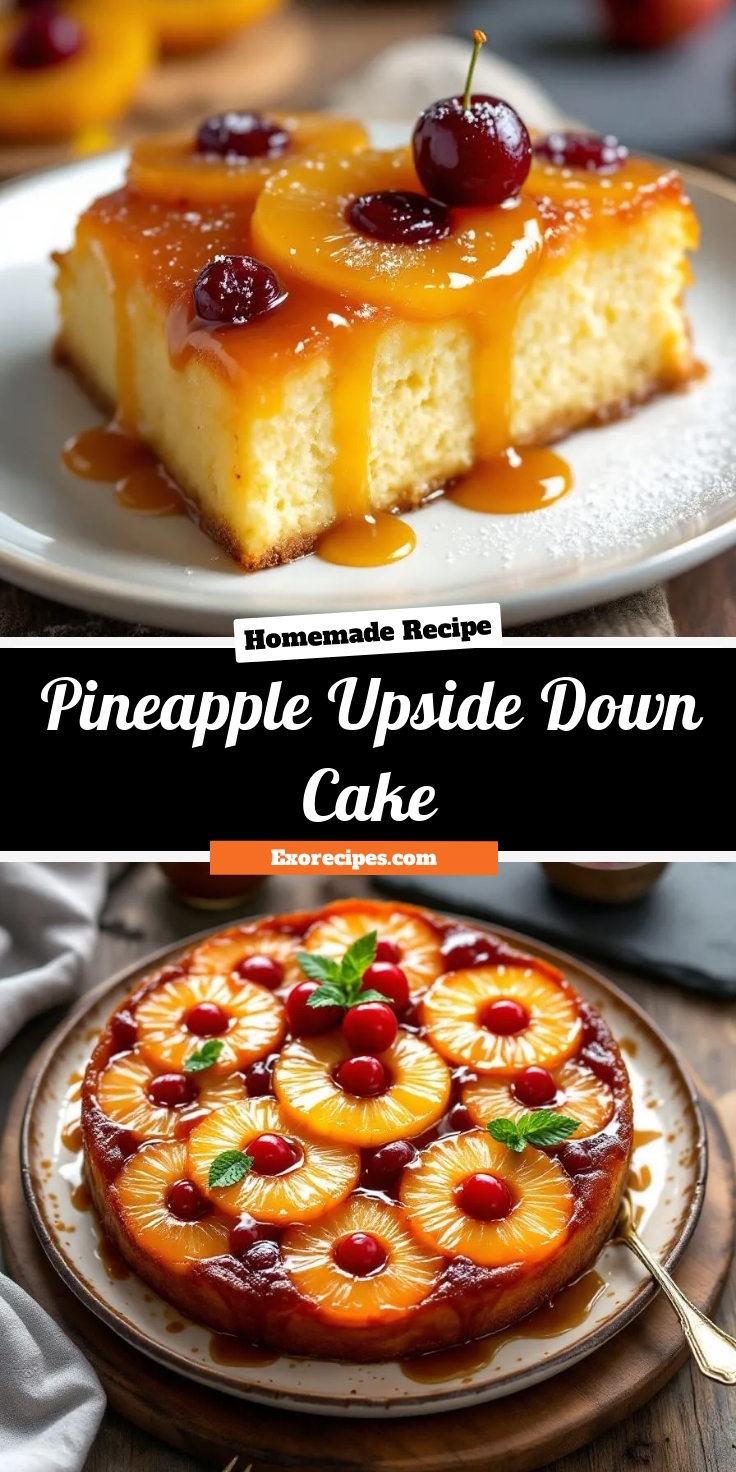
Classic Pineapple Upside Down Cake – Easy Recipe
Introduction
There’s something undeniably comforting about a dessert that brings both nostalgia and joy with every bite. That’s exactly why I adore Pineapple Upside Down Cake—it’s a timeless classic that never fails to brighten my day. Whether you’re baking it for a special occasion or simply craving a sweet escape, this recipe promises to deliver golden caramelized pineapple, tender cake, and a whole lot of happiness. Plus, it’s easier to make than you might think!
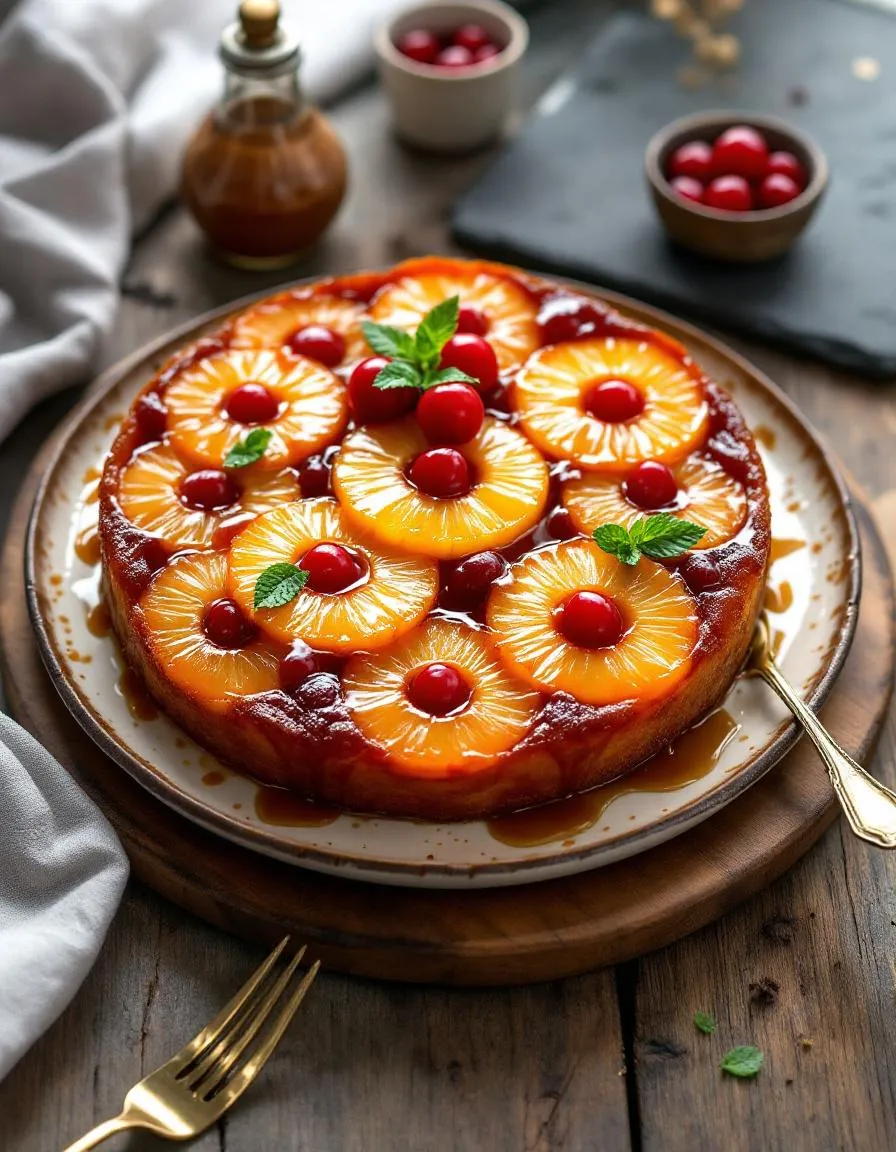
Pineapple Upside Down Cake is a retro-inspired dessert that combines juicy pineapple rings, maraschino cherries, and a buttery brown sugar glaze atop a moist vanilla cake. What makes it so special? First, its stunning presentation—flipping the cake reveals a glossy, caramelized topping that looks as impressive as it tastes. Second, it carries a sense of tradition, evoking memories of family gatherings and potluck dinners. Here at brekcakes.com, we celebrate recipes that blend simplicity with heartwarming flavors, and this cake fits perfectly. If you love nostalgic treats, you’ll also enjoy our Classic Banana Bread or Homemade Apple Pie, which share the same cozy appeal.
Why I Love This Recipe
Pineapple Upside Down Cake holds a special place in my heart because it reminds me of baking with my grandmother. She taught me how to arrange the pineapple rings just right and patiently waited as I nervously flipped the cake for the first time. Now, every time I make it, I feel that same excitement and connection. It’s more than just a dessert—it’s a sweet reminder of the moments and people who shaped my love for baking.
Health and Nutrition
Why it’s good for your body
Pineapple Upside Down Cake offers more than just irresistible flavor. First, the star ingredient, pineapple, packs a punch of vitamin C, which boosts immunity and supports healthy skin. Additionally, pineapple contains bromelain, an enzyme that aids digestion and reduces inflammation. Meanwhile, the caramelized fruit topping adds natural sweetness, so you can often use less refined sugar.
Moreover, Pineapple Upside Down Cake includes eggs and butter, which provide essential fats and protein for sustained energy. While it’s a dessert, the cake’s ingredients contribute small amounts of nutrients like manganese from pineapple and calcium from dairy. Of course, moderation is key, but enjoying a slice means you’re treating yourself to more than empty calories.
Finally, Pineapple Upside Down Cake brings joy, and mental well-being matters just as much as physical health. Sharing this classic dessert can create meaningful moments, which indirectly supports emotional balance. So whether you savor it warm or chilled, this cake delivers both comfort and nourishment.
How it fits in a healthy lifestyle
Pineapple Upside Down Cake can absolutely fit into a balanced diet when enjoyed mindfully. For instance, pairing a small slice with a protein-rich snack, like Greek yogurt, helps stabilize blood sugar. If you’re watching your gluten intake, try a gluten-free flour blend to make it celiac-friendly without sacrificing taste.
For those focused on heart health, swapping butter for avocado oil or reducing sugar slightly keeps the dessert light yet satisfying. You can also explore our guide on smart dessert substitutions to tailor the recipe to your needs. Remember, treats like Pineapple Upside Down Cake aren’t about restriction—they’re about savoring quality ingredients in a way that complements your overall wellness goals.
A classic dessert featuring caramelized pineapple and cherries atop a moist vanilla cake.
Ingredients
Scale
For the Crust:
1/4 cup unsalted butter
3/4 cup brown sugar
1 can pineapple slices (20 oz), drained
Maraschino cherries
1 1/2 cups all-purpose flour
1 1/2 tsp baking powder
1/4 tsp salt
1/2 cup unsalted butter, softened
3/4 cup granulated sugar
2 large eggs
1 tsp vanilla extract
1/2 cup milk
Instructions
1. Prepare the Crust:
Preheat oven to 350°F (175°C). Melt 1/4 cup butter in a 9-inch round cake pan. Sprinkle brown sugar evenly over melted butter.
Arrange pineapple slices on top of the brown sugar mixture. Place a cherry in the center of each pineapple ring and in the gaps between slices.
In a bowl, whisk together flour, baking powder, and salt. In another bowl, beat softened butter and granulated sugar until light and fluffy. Add eggs one at a time, then mix in vanilla.
Alternately add the flour mixture and milk to the butter mixture, beginning and ending with flour. Spread batter evenly over the pineapple layer.
Bake for 30-35 minutes or until a toothpick inserted comes out clean. Let cool for 5 minutes, then invert onto a serving plate.
Start by preheating your oven to 350°F to ensure it reaches the right temperature while you prepare the batter. Meanwhile, melt butter in a saucepan and drizzle it evenly into a 9-inch round cake pan. Next, sprinkle brown sugar over the butter, then arrange pineapple rings in a single layer, placing maraschino cherries in the centers for that classic Pineapple Upside Down Cake look. In a large bowl, whisk together flour, baking powder, and salt to create a smooth dry mix. In another bowl, beat softened butter and granulated sugar until fluffy, then blend in eggs and vanilla. Gradually fold the dry ingredients into the wet mixture, alternating with milk, until just combined. Pour the batter over the pineapple layer, smoothing the top with a spatula. Bake for 40-45 minutes or until a toothpick comes out clean. Let the cake cool for 10 minutes before inverting it onto a plate. For a time-saving tip, use canned pineapple rings and pre-measure your dry ingredients ahead of time to streamline the process.
and-learned-from">Mistakes I’ve made and learned from
One of my biggest mistakes with Pineapple Upside Down Cake was rushing the cooling process. I once flipped it too soon, and the topping stuck to the pan, leaving a messy presentation. Now, I always wait at least 10 minutes before inverting it—patience pays off! Another lesson came from overmixing the batter, which made the cake dense instead of light. I learned to gently fold the ingredients just until combined, as detailed in my common cake mistakes guide. Also, I used to skip the step of evenly spreading the brown sugar, resulting in uneven caramelization. Now, I take extra care to layer it properly, just like I do with my caramel perfection tips. These small adjustments made all the difference in achieving that perfect golden finish.
“`
n-and-variations">Cultural Connection and Variations
Where this recipe comes from
Pineapple Upside Down Cake carries a nostalgic charm that takes many of us back to family gatherings and potluck dinners. Interestingly, its roots trace back to early 20th-century America, when canned pineapple became widely available. Home cooks loved how the caramelized fruit topping transformed a simple cake into something showstopping. Over time, the recipe traveled globally, adapting to local tastes. In the Caribbean, for example, bakers often add rum-soaked cherries or coconut flakes for extra flair. Meanwhile, in the South, cast-iron skillets give the cake a rustic, crispy edge.
My grandma made Pineapple Upside Down Cake every summer, swapping maraschino cherries for fresh berries when they were in season. Some families even use peaches or apples instead of pineapple, proving how versatile this dessert can be. Whether served at a holiday feast or a weeknight treat, Pineapple Upside Down Cake always feels like a warm hug from the past. Its sweet, sticky topping and tender crumb connect generations, making it a timeless favorite.
How it fits in today’s cooking
Today, Pineapple Upside Down Cake still shines as a crowd-pleaser, especially during summer barbecues or festive occasions. Modern bakers put creative spins on it, like using gluten-free flour or coconut sugar for a healthier twist. Some even turn it into cupcakes for easy sharing, proving this classic adapts effortlessly to contemporary tastes. If you love nostalgic desserts, you might also enjoy our Classic Banana Bread, which shares the same comforting appeal.
Seasonal ingredients ke
ep the recipe fresh year-round. In winter, cranberries or pears add a festive touch, while spring calls for rhubarb compote. For busy home cooks, sheet pan versions save time without sacrificing flavor. Whether you stick to tradition or experiment, Pineapple Upside Down Cake fits perfectly into today’s mix of quick weeknight baking and special-occasion treats. Craving more retro-inspired sweets? Try our Vintage Chocolate Pudding for another dose of nostalgia.
Taste and Texture
What makes it delicious
Pineapple Upside Down Cake delivers a symphony of sweet, tangy, and buttery flavors in every bite. The caramelized pineapple rings soak into the moist cake, creating a luscious, fruity contrast to the tender crumb. Meanwhile, the maraschino cherries add bursts of bright, jammy sweetness. As it bakes, your kitchen fills with the warm, tropical aroma of caramelized brown sugar and juicy pineapple. When you slice into it, the cake reveals a sticky, golden top layer that’s slightly crisp at the edges yet melts in your mouth. Each forkful balances the soft cake with the succulent fruit, making Pineapple Upside Down Cake a nostalgic yet irresistible treat.
Boosting the flavor
For an extra flavor boost, try swapping brown sugar with coconut sugar in the caramel glaze—it deepens the richness while adding a hint of caramel-like complexity. A sprinkle of cinnamon or nutmeg in the batter also enhances the warm, spiced notes. If you love texture, top slices with a dollop of whipped cream or a scoop of vanilla bean ice cream for a creamy contrast. For a tropical twist, drizzle with homemade caramel sauce or sprinkle toasted coconut flakes over the finished cake. These small tweaks elevate Pineapple Upside Down Cake from classic to unforgettable.
Always use fresh pineapple for your Pineapple Upside Down Cake, as canned pineapple often releases too much liquid and makes the cake soggy. Meanwhile, preheat your oven thoroughly to ensure even baking from the start. For the best caramelization, generously butter the pan before adding the brown sugar and pineapple rings. Additionally, let the cake cool in the pan for just 5 minutes before flipping it—this helps the topping set without sticking. Finally, serve the cake warm for the most flavorful experience.
Mistakes to avoid
Avoid overmixing the batter, as this can make your Pineapple Upside Down Cake dense instead of light and fluffy. Instead, gently fold the ingredients until just combined. Another common mistake is skipping the parchment paper lining, which can cause the cake to stick. For more baking essentials, check out our guide on must-have baking tools. Also, don’t rush the flipping step—waiting too long or flipping too soon can ruin the presentation. If you’re unsure about timing, our cake baking tips offer extra guidance.
g-suggestions">Serving and Pairing Suggestions
How to serve this dish
For a stunning presentation, serve Pineapple Upside Down Cake warm with the caramelized fruit side facing up. Meanwhile, drizzle extra caramel sauce over each slice for a glossy finish. Alternatively, top it with a dollop of whipped cream or a scoop of vanilla ice cream to balance the rich flavors. Since this cake shines at gatherings, consider it for summer barbecues or holiday desserts. Finally, garnish with fresh mint leaves or toasted coconut flakes to add a pop of color and texture.
What goes well with it
Pair Pineapple Upside Down Cake with a tropical twist by serving it alongside a chilled glass of coconut milk or a pineapple-infused iced tea. The creamy coconut milk enhances the cake’s sweetness, while the tea adds a refreshing contrast. If you prefer something richer, try our Homemade Vanilla Bean Ice Cream for a classic combo. For a lighter option, serve it with fresh berries or a citrus salad, which you can find in our Summer Fruit Salad Recipe. Each pairing elevates the cake’s tropical flavors without overpowering them.
math-faq-block">
Why is it called Pineapple Upside Down Cake?
Pineapple Upside Down Cake gets its name from the unique baking method. The fruit and caramelized sugar topping is placed at the bottom of the pan before adding the batter. After baking, the cake is flipped upside down to reveal the beautiful pineapple design on top.
Can you make Pineapple Upside Down Cake with fresh pineapple?
Yes, fresh pineapple works perfectly for Pineapple Upside Down Cake. Just make sure to slice it thinly and pat it dry to prevent excess moisture. Some bakers prefer canned pineapple rings for their uniform size and sweetness, but fresh pineapple adds a vibrant flavor.
How do you keep Pineapple Upside Down Cake from sticking to the pan?
To prevent sticking, generously butter the pan before adding the brown sugar and pineapple layer. Let the Pineapple Upside Down Cake cool for just 5-10 minutes before inverting it onto a plate—waiting too long can make the caramel harden and stick.
rank-math-faq-item">
What’s the best way to store Pineapple Upside Down Cake?
Store Pineapple Upside Down Cake at room temperature covered tightly with plastic wrap for up to 2 days. For longer storage, refrigerate it for up to 5 days. The moisture from the pineapple helps keep this cake deliciously tender.
Best Chick-fil-A Frosted Lemonade – Easy Copycat Recipe
Introduction
There’s something undeniably refreshing about sipping a cold, creamy drink on a hot summer day. That’s why I’m thrilled to share my take on the beloved Chick-fil-A Frosted Lemonade. Whether you’re craving a sweet treat or need a pick-me-up after a long day, this recipe delivers the perfect balance of tart and sweet. Plus, it’s incredibly easy to make at home, so you can skip the drive-thru and enjoy it anytime.
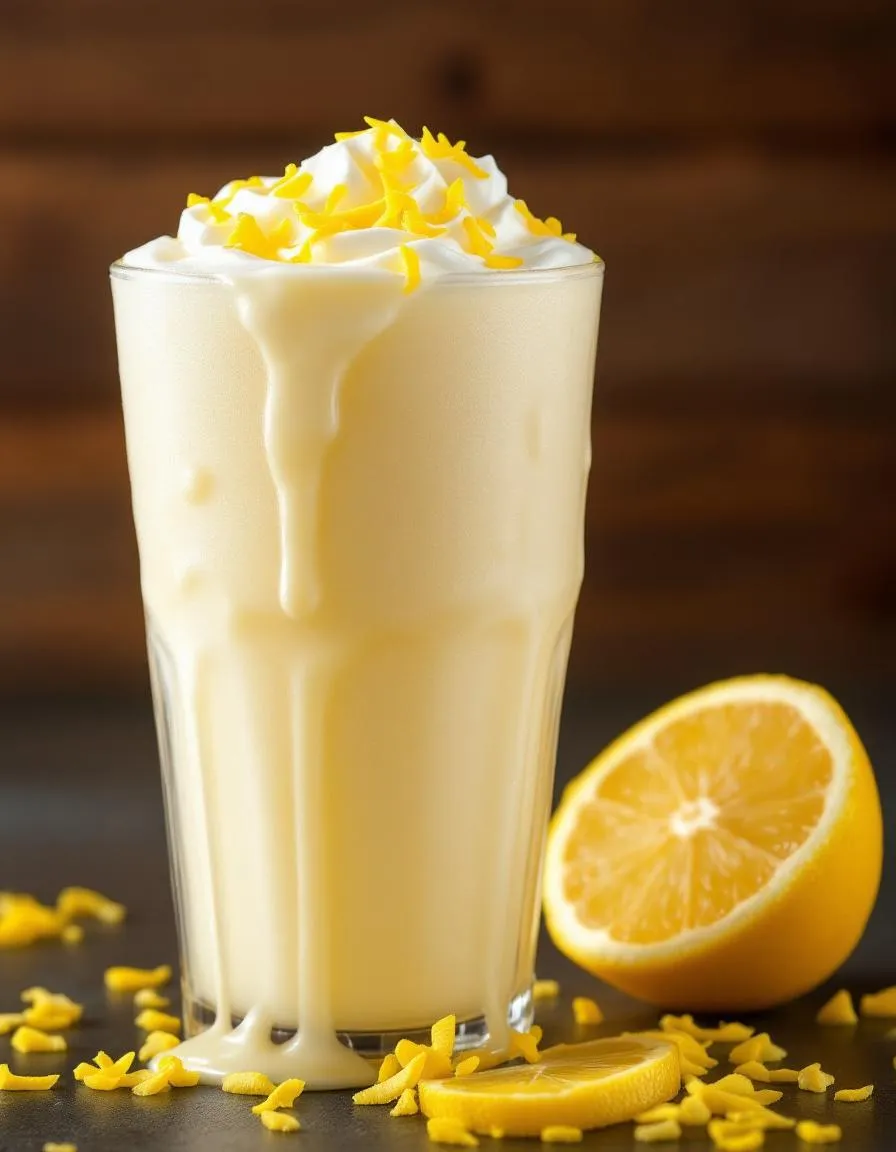
Chick-fil-A Frosted Lemonade is a dreamy blend of creamy vanilla ice cream and tangy lemonade, whipped into a smooth, frosty delight. It’s a fan favorite for good reason—the contrast of flavors creates a refreshing experience that’s hard to resist. Over the years, I’ve tweaked this recipe to match the iconic taste while adding my own little twist. If you love copycat recipes that capture the essence of restaurant favorites, you’ll adore this one. And if you’re looking for more delicious drink ideas, check out my homemade strawberry milkshake or my iced vanilla latte for other easy, crowd-pleasing options.
Why I Love This Recipe
Chick-fil-A Frosted Lemonade holds a special place in my heart because it reminds me of lazy summer afternoons with my family. We’d often stop by Chick-fil-A after a day at the pool, and this drink was our go-to reward. Now, whenever I make it at home, it brings back those warm memories. What I love most is how effortlessly it comes together—just a few ingredients and a blender create pure magic. It’s the kind of recipe that feels indulgent yet simple, making it perfect for any occasion.
Health and Nutrition
Why it’s good for your body
Chick-fil-A Frosted Lemonade offers a refreshing way to enjoy a sweet treat while still providing some nutritional benefits. First, it combines real lemonade with creamy ice cream, delivering a dose of vitamin C from the citrus. This antioxidant helps support your immune system and promotes healthy skin. Additionally, the calcium in the ice cream contributes to strong bones and teeth.
Because Chick-fil-A Frosted Lemonade uses simple ingredients, you avoid artificial flavors found in many other desserts. The balance of tart lemon and smooth dairy creates a satisfying flavor without excessive additives. Meanwhile, the natural sugars provide quick energy, making it a great occasional pick-me-up.
Another perk is its versatility. Whether you need a cool-down on a hot day or a lighter dessert option, Chick-fil-A Frosted Lemonade fits the bill. Just remember to enjoy it in moderation as part of a varied diet. After all, treating yourself mindfully keeps both your taste buds and body happy.
How it fits in a healthy lifestyle
Chick-fil-A Frosted Lemonade can easily fit into a balanced diet when enjoyed thoughtfully. If you’re watching your gluten intake, this treat is naturally gluten-free, so it won’t disrupt your dietary needs. For those focusing on heart health, pairing it with a protein-rich meal like grilled chicken helps balance indulgence with nutrition.
Planning ahead makes it even easier to incorporate. Try savoring Chick-fil-A Frosted Lemonade as an occasional reward after a workout or alongside a nutritious homemade meal. If you’re craving something sweet but want to keep portions in check, share it with a friend or save half for later.
Remember, healthy eating isn’t about perfection. It’s about making choices that align with your goals while still enjoying life. For more tips on balancing treats with wholesome foods, explore our guide to smart snacking strategies.
Making Chick-fil-A Frosted Lemonade at home is easier than you think, and the results taste just like the real thing. Start by chilling your lemonade and vanilla ice cream for at least 30 minutes—this ensures a thick, creamy texture. Next, scoop the ice cream into a blender, then pour in the lemonade. Blend on high for about 30 seconds until smooth, but don’t overmix or the drink will become too thin. If you prefer a thicker consistency, add a few more ice cream scoops and blend again. For a quicker cleanup, rinse the blender immediately after use. Serve the frosted lemonade in a tall glass with a straw, and garnish with a lemon slice for that signature Chick-fil-A touch. If you’re prepping ahead, store the mixture in the freezer for up to an hour, but give it a quick stir before serving to maintain the perfect texture.
Mistakes I’ve made and learned from
When I first tried making Chick-fil-A Frosted Lemonade, I used room-temperature lemonade, which turned the drink into a watery mess. Now I always chill both ingredients first—trust me, it makes all the difference. Another time, I overblended the mixture, and it lost its creamy thickness. A quick fix? Add a bit more ice cream and pulse briefly. If you’re new to blending drinks, check out my guide on perfect smoothie consistency for more tips. Also, don’t skip the garnish—it’s not just for looks! A fresh lemon slice adds a bright flavor boost, something I learned from my post on easy cocktail garnishes. Small adjustments like these elevate the drink from good to just like Chick-fil-A.
Chick-fil-A Frosted Lemonade blends two Southern staples—creamy milkshakes and tart lemonade—into one refreshing treat. Originally inspired by the chain’s love for hand-spun desserts, this drink captures the essence of summer in the American South. Families often associate it with road trips, picnics, or post-game treats, making it more than just a beverage but a nostalgic experience.
Around the world, people put their own spin on frosted lemonades. In Italy, gelato replaces ice cream for a silkier texture, while in Mexico, street vendors might add a pinch of chili powder for a sweet-and-spicy kick. Even at home, some cooks blend in fresh herbs like basil or mint for a garden-fresh twist. No matter the variation, Chick-fil-A Frosted Lemonade remains a beloved starting point for creativity.
ays-cooking">How it fits in today’s cooking
Today, Chick-fil-A Frosted Lemonade thrives as a versatile treat for modern lifestyles. Busy parents whip it up as a quick dessert, while fitness enthusiasts lighten it with Greek yogurt or almond milk. It’s also a star at summer gatherings, pairing perfectly with grilled peach salads or honey lavender cupcakes for a balanced spread.
Social media fuels its popularity, with home cooks sharing hacks like dairy-free versions or boozy adult upgrades. Whether you enjoy it poolside or as a post-workout refresher, this drink adapts effortlessly. Its timeless appeal lies in its simplicity—just a few ingredients, yet endless ways to make it your own.
Taste and Texture
What makes it delicious
Chick-fil-A Frosted Lemonade delivers a refreshing burst of tangy sweetness with every sip. The creamy vanilla soft-serve blends perfectly with the bright, citrusy lemonade, creating a smooth yet zesty contrast. Each mouthful feels luxuriously thick, almost like a milkshake, while the icy lemonade keeps it light and drinkable. Fragrant lemon zest cuts through the richness, leaving a clean, vibrant finish. Whether you crave something indulgent or thirst-quenching, Chick-fil-A Frosted Lemonade strikes the ideal balance.
r">Boosting the flavor
For a fun twist, swirl in fresh raspberry puree or a drizzle of salted caramel sauce to add depth to the lemon-vanilla duo. A sprinkle of crushed shortbread cookies mimics the texture of a lemon bar, while a pinch of turmeric or ginger enhances the drink’s natural brightness. Pair it with a buttermilk waffle for a sweet-and-tangy brunch combo. Experiment with fresh herbs like basil or mint for an aromatic upgrade that elevates every sip.
Tips for Success
Best practices for results
Always use fresh lemons for the brightest flavor in your Chick-fil-A Frosted Lemonade. Meanwhile, chill your ice cream beforehand so it blends smoothly without melting too fast. For the perfect texture, blend the mixture just until creamy, as overmixing can make it too thin. Additionally, serve your Frosted Lemonade immediately to enjoy its ideal frosted consistency.
>Mistakes to avoid
Avoid using bottled lemon juice, since it lacks the fresh, tangy punch of real lemons. If your Frosted Lemonade turns out too thick, simply add a splash of cold water while blending. On the other hand, if it’s too runny, try freezing it for 10 minutes before serving. For more blending tips, check out our smoothie hacks guide. Also, don’t skip straining the lemon juice—this prevents bitter pulp from ruining the smooth texture. Learn more about perfecting citrus drinks in our citrus mistakes post.
Serving and Pairing Suggestions
How to serve this dish
Serve Chick-fil-A Frosted Lemonade in a tall, chilled glass to keep it refreshingly cool. For a fun twist, rim the glass with a sprinkle of sugar or crushed graham crackers. Meanwhile, garnish with a thin lemon slice or a sprig of fresh mint for a pop of color. This drink shines at summer picnics, backyard barbecues, or even as a sweet treat after a family dinner. If you’re hosting brunch, pair it with a vibrant fruit platter to balance its creamy tang.
What goes well with it
Chick-fil-A Frosted Lemonade pairs perfectly with crispy, savory dishes like our Air Fryer Chicken Tenders, as the lemonade’s sweetness cuts through the richness. Alternatively, try it alongside a light, flaky pastry such as our Homemade Blueberry Scones for a delightful contrast of flavors. For a refreshing combo, serve it with a citrusy salad to echo its bright lemon notes.
Chick-fil-A Frosted Lemonade is a creamy blend of their signature lemonade and vanilla ice cream. It combines tart lemon flavor with sweet, smooth ice cream for a refreshing treat. The drink is available in regular and diet versions, with the latter using diet lemonade.
How many calories are in a Chick-fil-A Frosted Lemonade?
A small Chick-fil-A Frosted Lemonade contains about 330 calories, while a large has around 530 calories. The diet version reduces the calorie count significantly, with a small having just 140 calories. The treat is indulgent but perfect for an occasional summer refreshment.
rank-math-faq-item">
Can you make Chick-fil-A Frosted Lemonade at home?
Yes! You can recreate Chick-fil-A Frosted Lemonade by blending equal parts lemonade and vanilla ice cream until smooth. For an authentic taste, use freshly squeezed lemon juice and high-quality ice cream. Adjust sweetness by adding simple syrup if needed.
Is Chick-fil-A Frosted Lemonade available year-round?
Chick-fil-A Frosted Lemonade is typically available year-round at most locations, though some stores may limit it to warmer months. It’s always best to check with your local restaurant. The drink remains a popular menu item due to its perfect balance of sweet and tart flavors.
Easy Circus Animal Cookie Balls Recipe
Introduction
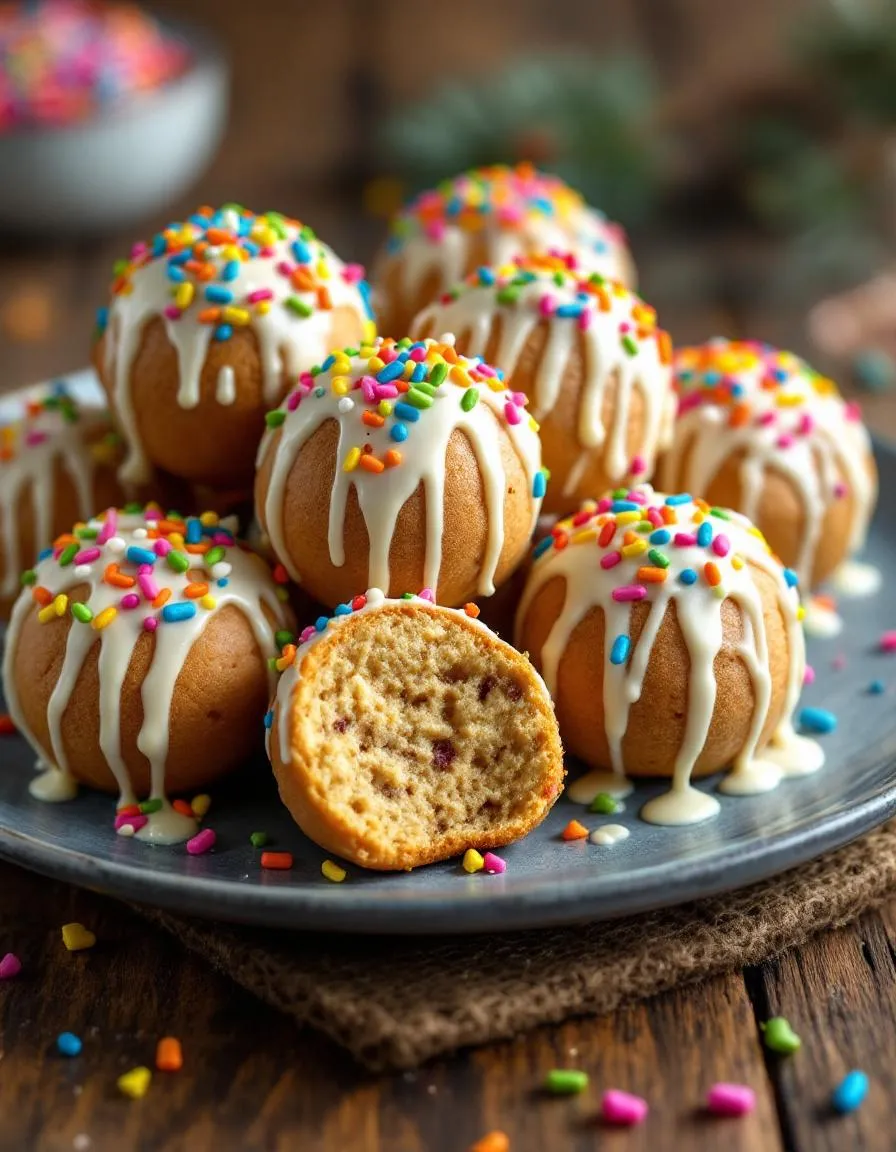
Do you remember the joy of biting into those colorful, sprinkle-covered Circus Animal Cookies as a kid? Today, I’m bringing that nostalgia to life with a fun twist—Circus Animal Cookie Balls. These no-bake treats combine the iconic flavors of those beloved cookies with creamy, dreamy textures, making them perfect for parties, gifts, or just a sweet moment to yourself. Whether you’re a longtime fan of the classic cookies or new to their charm, this recipe promises a burst of happiness in every bite.
Circus Animal Cookie Balls are playful, bite-sized confections that blend crushed Circus Animal Cookies with cream cheese and white chocolate, then roll them in vibrant sprinkles for that signature whimsical look. They’re incredibly easy to make, requiring just a handful of ingredients and zero baking time, which makes them ideal for last-minute cravings or spontaneous gatherings. Beyond their simplicity, these treats capture the essence of childhood nostalgia while fitting seamlessly into modern dessert trends. If you love no-bake desserts like my Peanut Butter Pie, you’ll adore how these cookie balls deliver the same effortless charm. Plus, their eye-catching colors and familiar flavors make them a hit with both kids and adults, aligning perfectly with brekcakes.com’s mission to create approachable, joy-filled recipes.
Why I Love This Recipe
Circus Animal Cookie Balls hold a special place in my heart because they remind me of baking with my mom during the holidays. She’d always keep a box of those pink-and-white cookies in the pantry, and we’d sneak them while decorating sugar cookies. Now, every time I make this recipe, I feel that same warmth and excitement. It’s more than just a dessert—it’s a little edible hug, and I hope it brings you as much happiness as it does me. For more nostalgic treats, check out my Funfetti Cake, another recipe that celebrates life’s sweetest moments.
Health and Nutrition
Why it’s good for your body
Circus Animal Cookie Balls pack a surprising nutritional punch while satisfying your sweet tooth. First, they contain protein from ingredients like almond flour or yogurt, which helps keep you full longer. Additionally, the natural sugars in these treats provide quick energy without the crash of processed sweets. Because they often include healthy fats from nuts or coconut oil, Circus Animal Cookie Balls support brain function and heart health.
Moreover, these colorful bites can boost your mood thanks to their playful appearance and balanced flavors. The combination of textures and nutrients makes them a smarter choice than traditional cookies. For instance, many recipes use dark chocolate drizzle, which adds antioxidants to each bite. Circus Animal Cookie Balls also often skip artificial additives, so you enjoy pure, wholesome ingredients.
Finally, portion control becomes effortless since each ball is individually sized. This way, you savor the treat without overindulging. Whether you need a post-workout snack or a midday pick-me-up, Circus Animal Cookie Balls deliver both flavor and nourishment.
How it fits in a healthy lifestyle
Circus Animal Cookie Balls fit seamlessly into balanced eating habits. They work well as a mindful dessert or a protein-packed snack between meals. If you follow a gluten-free diet, many versions use almond flour or oat flour instead of wheat. For those watching sugar intake, natural sweeteners like honey or maple syrup often replace refined sugar.
Pair them with a handful of nuts or fresh fruit for a satisfying mini-meal. You can also prep a batch ahead of time for quick, portion-controlled treats throughout the week. Check out our meal prep guide for more easy snack ideas. If you love creative desserts, explore our healthy dessert swaps to keep your cravings in check. With Circus Animal Cookie Balls, you enjoy flavor and nutrition without compromise.
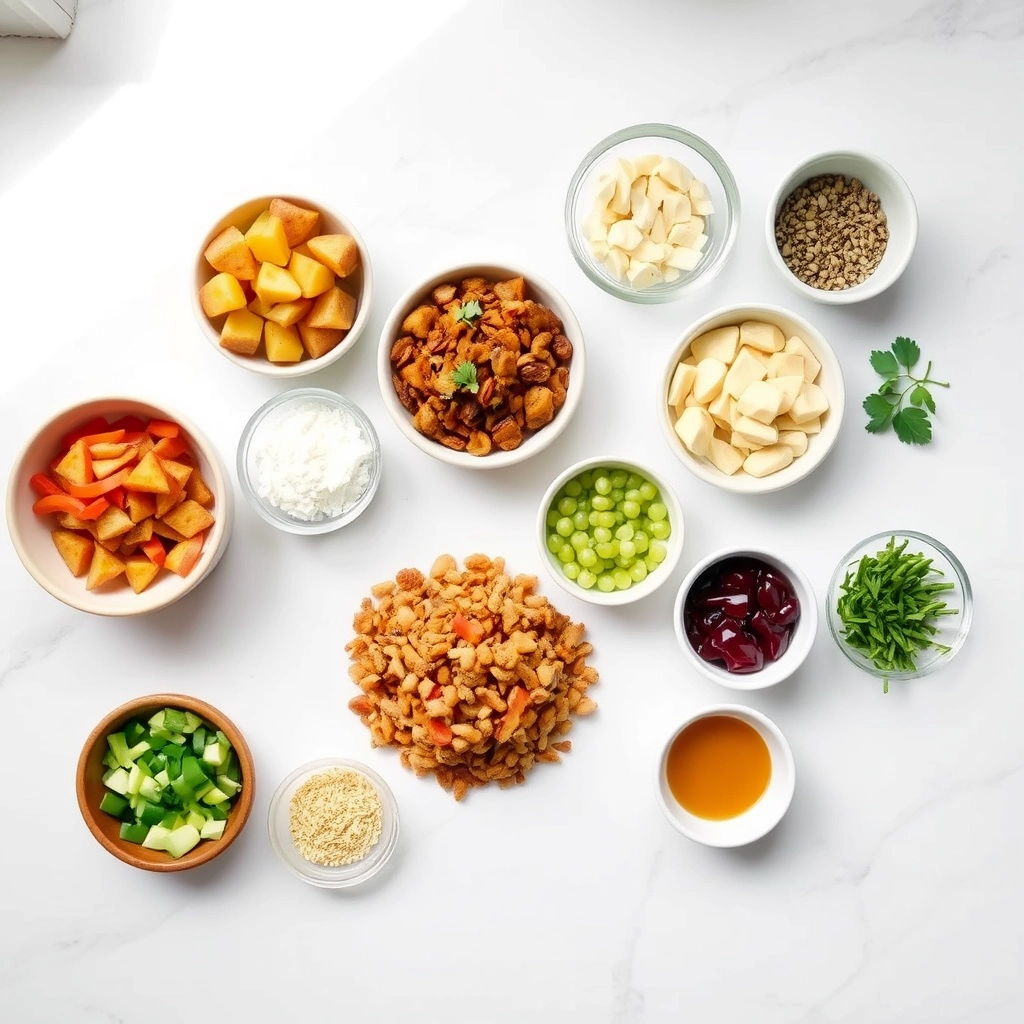
First, gather all your ingredients for Circus Animal Cookie Balls to streamline the process. Crush the cookies into fine crumbs using a food processor or a zip-top bag and rolling pin. Next, blend the crumbs with softened cream cheese in a large bowl until the mixture holds together easily. If the dough feels too sticky, chill it for 10 minutes to make rolling easier. Scoop tablespoon-sized portions and roll them into smooth balls, then place them on a parchment-lined tray. For a quicker finish, freeze the balls for 15 minutes before dipping them in melted white chocolate. Use a fork to lift each ball, letting excess chocolate drip off, and return them to the tray. Immediately sprinkle with rainbow sprinkles or extra cookie crumbs before the chocolate sets. Finally, refrigerate the Circus Animal Cookie Balls for at least 30 minutes to firm up. To save time, prep the dough ahead and store it in the fridge overnight.
Mistakes I’ve made and learned from
Early on, I rushed the chilling step and ended up with sticky, misshapen Circus Animal Cookie Balls. Now, I never skip the freezer time—it makes dipping so much cleaner. Another lesson? Overheating the white chocolate. I once microwaved it too long, and it seized into a grainy mess. Low heat and frequent stirring work best, as I learned from my chocolate-dipping guide. If your chocolate thickens, a teaspoon of coconut oil can save it. Also, don’t skip the parchment paper—my first batch stuck to the tray, just like my no-bake dessert disasters. A little patience and these fixes guarantee perfect results every time.
Circus Animal Cookie Balls bring back childhood nostalgia for many of us, blending the iconic pink-and-white cookies with a playful, bite-sized twist. These treats trace their roots to the classic circus animal cookies, which have been a staple in American pantries since the 1960s. However, the idea of turning them into no-bake balls likely emerged from creative home bakers who wanted a faster, more shareable version. After all, who can resist the colorful sprinkles and sweet vanilla flavor?
Different regions put their own spin on Circus Animal Cookie Balls. Some families mix in white chocolate for extra richness, while others roll them in crushed graham crackers for texture. In the Midwest, you might find them topped with a drizzle of caramel, and on the West Coast, coconut flakes often make an appearance. Meanwhile, holiday versions swap rainbow sprinkles for red and green ones, making them a hit at Christmas parties. No matter the variation, these balls always deliver that familiar, comforting taste.
ays-cooking">How it fits in today’s cooking
Today, Circus Animal Cookie Balls remain a favorite for their simplicity and crowd-pleasing appeal. Busy parents love them as a quick dessert for school events, and food bloggers showcase them as a fun twist on no-bake treats. They also fit perfectly into modern trends, like 5-minute desserts, proving that delicious doesn’t have to mean complicated.
Seasonal adaptations keep them relevant year-round. For example, pastel versions shine at Easter, while Halloween calls for orange and black sprinkles. Many home cooks also pair them with holiday baking ideas, like cookie platters or gift boxes. Whether you’re craving nostalgia or need a last-minute sweet, Circus Animal Cookie Balls deliver every time.
Taste and Texture
What makes it delicious
Circus Animal Cookie Balls deliver a playful burst of nostalgia with every bite. The creamy, vanilla-infused center melts luxuriously on your tongue, while the crunchy rainbow sprinkles add a satisfying contrast. Fragrant notes of butter and sugar mingle with a hint of almond extract, creating a sweet yet balanced flavor. Meanwhile, the soft, chewy texture makes these treats irresistible—perfect for snacking or sharing. Whether you savor them slowly or pop them whole, Circus Animal Cookie Balls bring joy with their vibrant colors and comforting taste.
r">Boosting the flavor
Elevate your Circus Animal Cookie Balls with a few creative tweaks. For a richer taste, swap vanilla extract for almond or coconut extract, amplifying the cookie’s signature sweetness. Drizzle melted white chocolate over the top for extra decadence, or roll the balls in crushed freeze-dried strawberries for a tangy twist. If you love contrasting textures, pair them with a scoop of homemade vanilla ice cream or dunk them in a glass of cold brew coffee. Experiment with these ideas to make each bite even more memorable.
Tips for Success
Best practices for results
Always chill the dough for at least 30 minutes before shaping your Circus Animal Cookie Balls, as this prevents them from becoming too sticky. For the best texture, use parchment paper when rolling the mixture to avoid sticking. Additionally, measure your ingredients precisely, especially the powdered sugar, to maintain the perfect balance of sweetness. If you want extra color, gently press additional sprinkles onto the surface right after shaping. Finally, store your Circus Animal Cookie Balls in an airtight container to keep them fresh for days.
>Mistakes to avoid
Avoid overmixing the dough, as this can make your Circus Animal Cookie Balls dense instead of light and tender. If the mixture feels too dry, add a teaspoon of milk, but do so gradually to prevent it from becoming too wet. Many bakers also forget to let the cream cheese soften fully, which leads to lumpy dough. For more troubleshooting tips, check out our guide on fixing dry cookie dough. Another common mistake is skipping the chilling step, which causes the balls to lose their shape. For more help with no-bake treats, see our tips for perfect no-bake desserts.
Serving and Pairing Suggestions
How to serve this dish
Bring out the playful charm of Circus Animal Cookie Balls by arranging them on a colorful platter or cake stand. For parties, stack them in a whimsical tower or scatter them alongside other bite-sized treats. Meanwhile, holidays call for festive touches like edible glitter or rainbow sprinkles to match the theme. If you’re serving them at a brunch, pair them with fresh berries for a bright contrast. No matter the occasion, these cookie balls always steal the show with their cheerful colors and irresistible crunch.
What goes well with it
Elevate your dessert spread by pairing Circus Animal Cookie Balls with a creamy vanilla milkshake—the cool, smooth texture balances their crunchy sweetness perfectly. Alternatively, serve them with a warm cup of homemade hot chocolate for a cozy treat. If you love contrasting flavors, try them alongside tangy lemon berry tartlets to cut through the richness. Each pairing enhances the fun, nostalgic vibe of these delightful bites.
Circus Animal Cookie Balls are typically made with crushed circus animal cookies, cream cheese, and white chocolate. These no-bake treats combine the nostalgic flavor of the cookies with a creamy, truffle-like texture. Some recipes also include sprinkles or extra cookie crumbs for decoration.
Can you freeze Circus Animal Cookie Balls?
Yes, Circus Animal Cookie Balls freeze well for up to 2 months. Place them in an airtight container with parchment paper between layers to prevent sticking. Thaw in the refrigerator for a few hours before serving to maintain their perfect texture.
rank-math-faq-item">
How long do Circus Animal Cookie Balls last in the fridge?
Circus Animal Cookie Balls stay fresh in the refrigerator for 5-7 days when stored in an airtight container. The cream cheese base means they should always be refrigerated. For best flavor, let them sit at room temperature for 10 minutes before eating.
Can I use different cookies for this recipe?
While Circus Animal Cookie Balls rely on the iconic pink-and-white cookies for their signature look and taste, you can substitute golden Oreos or vanilla wafers in a pinch. The colorful sprinkles and frosting flavors won’t be the same, but the method remains identical.
Easy Taco Potatoes – Crispy and Flavorful Recipe
Introduction
If you’ve ever craved a meal that’s both comforting and packed with bold flavors, you’re in the right place. Today, I’m sharing my ultimate Taco Potatoes recipe—a dish that combines the heartiness of baked potatoes with the zesty kick of tacos. Whether you’re feeding a crowd or just treating yourself, this recipe delivers joy in every bite. Plus, it’s perfect for busy weeknights or lazy weekends when you want something delicious without the fuss.
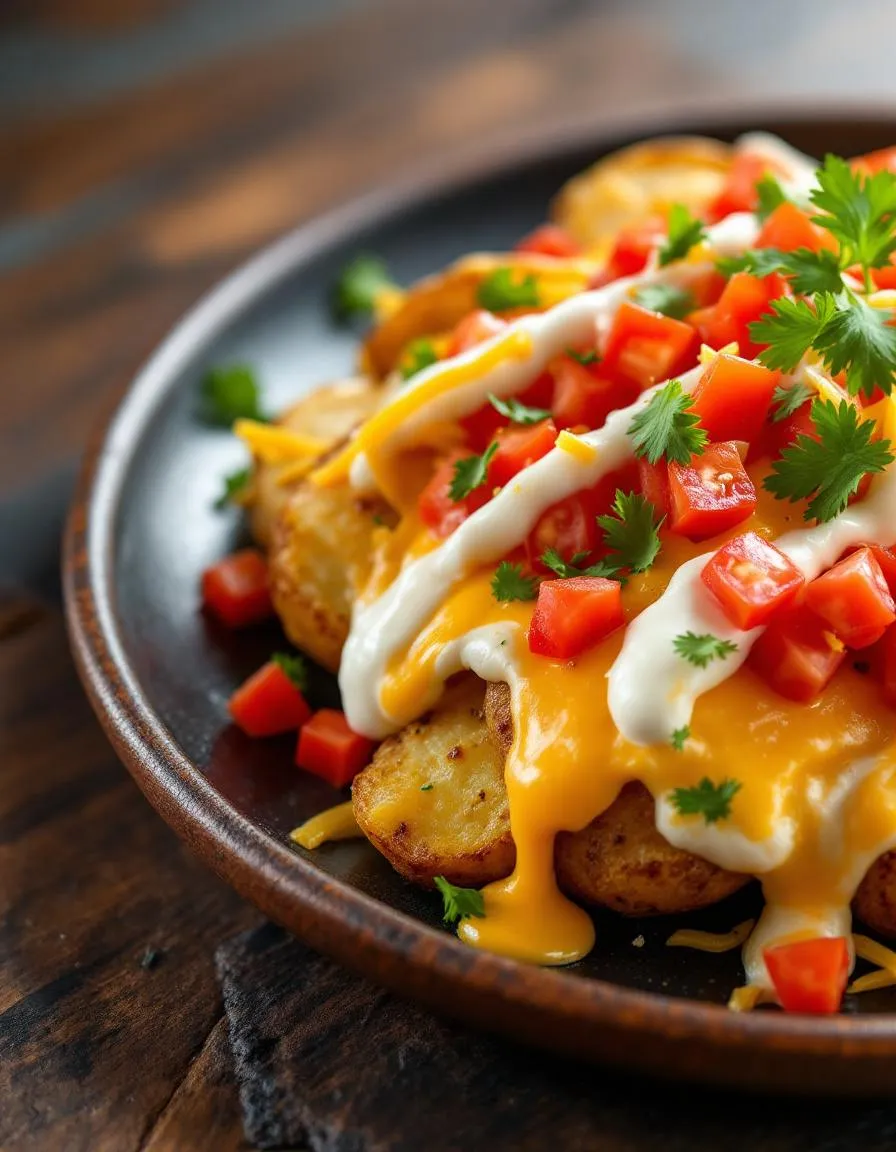
Taco Potatoes are exactly what they sound like: fluffy baked potatoes loaded with all the vibrant toppings you’d find in your favorite taco. Think seasoned ground beef, melted cheese, fresh salsa, and a dollop of cool sour cream. What makes this dish special is its versatility. You can customize it to suit any taste, swap ingredients based on what’s in your pantry, or even make it vegetarian. At brekcakes.com, we celebrate recipes that are approachable yet exciting, and Taco Potatoes fit that vibe perfectly. They’re a fun twist on two classics, proving that sometimes the best meals come from mixing things up. If you love easy, crowd-pleasing dishes, you’ll also enjoy our Loaded Sweet Potato Skins or Beef and Cheese Stuffed Peppers—both share the same spirit of comfort with a creative flair.
Why I Love This Recipe
Taco Potatoes hold a special place in my heart because they remind me of family game nights. My dad used to make a similar version when I was a kid, and the smell of spices filling the kitchen always meant fun was about to happen. Now, I love how this recipe brings people together. It’s the kind of dish that sparks conversation, encourages customization, and leaves everyone at the table happy. Every time I make it, I’m reminded that food isn’t just about nourishment—it’s about connection.
Health and Nutrition
Why it’s good for your body
Taco Potatoes pack a nutritious punch while delivering bold flavors. First, the base of russet or sweet potatoes provides complex carbs and fiber, which keep you full and support digestion. Additionally, the lean protein from seasoned ground turkey or beef helps maintain muscle health and energy levels. Moreover, toppings like fresh tomatoes, avocado, and Greek yogurt add vitamins, healthy fats, and probiotics.
Beyond macronutrients, Taco Potatoes offer a range of micronutrients. For instance, black beans contribute iron and folate, while cheese adds calcium for strong bones. Furthermore, the dish includes metabolism-boosting spices like cumin and chili powder. Since you can customize the ingredients, Taco Potatoes easily adapt to dietary needs without sacrificing taste.
Finally, this meal balances indulgence and nourishment. Unlike heavy fast-food tacos, Taco Potatoes use wholesome ingredients that fuel your body. Whether you choose a loaded or lighter version, you’ll enjoy a satisfying meal that supports overall wellness.
How it fits in a healthy lifestyle
Taco Potatoes fit seamlessly into balanced eating habits. For gluten-free diets, simply skip flour tortillas and enjoy the natural goodness of potatoes. If you’re watching your heart health, opt for lean proteins and swap sour cream for Greek yogurt, as suggested in our healthy taco toppings guide.
Meal preppers love Taco Potatoes because they reheat well and stay flavorful. You can also tweak portion sizes or ingredients to match fitness goals, like adding extra veggies for volume eating. For more high-protein twists, check out our protein-packed dinners roundup. Whether you need a quick weeknight dinner or a post-workout refuel, Taco Potatoes deliver nutrition without compromise.
A delicious twist on traditional tacos, using baked potatoes as the base for all your favorite taco toppings.
Ingredients
Scale
For the Crust:
4 large russet potatoes
1 lb ground beef
1 packet taco seasoning
1/2 cup shredded cheddar cheese
1/2 cup sour cream
1/2 cup diced tomatoes
1/4 cup chopped green onions
1/4 cup sliced black olives
1 tbsp olive oil
Salt and pepper to taste
Instructions
1. Prepare the Crust:
Preheat oven to 400°F. Scrub potatoes and pat dry, then pierce each several times with a fork.
Rub potatoes with olive oil and sprinkle with salt. Place directly on oven rack and bake for 45-50 minutes until tender.
While potatoes bake, brown ground beef in a skillet over medium heat. Drain fat, then add taco seasoning and water as directed on packet. Simmer for 5 minutes.
Slice open baked potatoes and fluff the insides with a fork. Top each with taco meat, cheese, sour cream, tomatoes, green onions, and olives.
Serve immediately with additional toppings as desired.
Notes
You can customize the seasonings to taste.
How to Prepare This Dish
Steps and time-saving tips
First, preheat your oven to 400°F and scrub the potatoes thoroughly. Poke each one a few times with a fork to let steam escape while baking. Meanwhile, drizzle them lightly with olive oil and sprinkle with salt. Roast the potatoes directly on the oven rack for about 45 minutes until tender. For a quicker option, microwave them for 8-10 minutes before finishing in the oven for crispier skins.
While the potatoes bake
, brown the ground beef in a skillet over medium heat. Drain any excess fat, then stir in taco seasoning and a splash of water. Let the mixture simmer for 5 minutes until fragrant. To save time, use pre-cooked taco meat or swap in shredded chicken from last night’s dinner. Once the potatoes are ready, slice them open and fluff the insides with a fork. Generously layer the taco meat, then top with shredded cheese so it melts beautifully.
Finally, load up your Taco Potatoes with fresh toppings like diced tomatoes, creamy avocado, and cool sour cream. For extra crunch, sprinkle tortilla strips or crushed chips on top. Serve immediately while everything’s warm and gooey. If you’re meal prepping, store components separately and assemble just before eating to keep textures perfect.
Mistakes I’ve made and learned from
Early on, I’d overcrowd the baking sheet with potatoes, which made them steam instead of crisp up. Now I space them evenly or roast directly on the rack for better airflow. Another blunder? Underseasoning the filling. After one bland batch, I started adding a pinch of cumin and garlic powder to the store-bought taco mix—game changer! For more seasoning tricks, check out my favorite spice blends. Oh, and don’t skip the potato poking step unless you want mini explosions in your oven (learned that the hard way). If you’re new to working with baked potatoes, my perfect baked potatoes guide covers all the basics.
Taco Potatoes blend two beloved comfort foods—crispy baked potatoes and zesty taco fillings—into one irresistible dish. While no single culture claims this recipe as its own, it reflects the creative fusion of Mexican and American flavors. In Texas, for example, you might find Taco Potatoes loaded with brisket and smoky barbecue sauce, while in California, avocado and fresh pico de gallo often top them. Meanwhile, home cooks across the Midwest might swap ground beef for seasoned black beans, making it a hearty vegetarian option.
My family’s version of Taco Potatoes always includes a sprinkle of cotija cheese and a dash of hot sauce, a nod to my aunt’s time living in Mexico City. Interestingly, in some parts of Europe, chefs reinvent the dish by using local ingredients like paprika-spiced sausage or herbed sour cream. No matter where you go, though, the essence remains the same: a satisfying, customizable meal that brings people together. Whether you’re serving it at a summer cookout or a cozy winter dinner, Taco Potatoes always deliver big flavor with minimal fuss.
ays-cooking">How it fits in today’s cooking
Today, Taco Potatoes fit perfectly into our fast-paced, flavor-driven lives. Busy parents love them for easy weeknight dinners, while meal preppers appreciate how well the components store for later. Plus, with the rise of plant-based eating, many cooks now use lentils or vegan taco meat as a protein swap. The dish also shines at gatherings, whether it’s a game-day spread or a casual potluck.
Seasonally, Taco Potatoes adapt effortlessly. In fall, roasted sweet potatoes and warm spices like cumin create a cozy twist. Come summer, fresh corn and juicy tomatoes turn them into a bright, vibrant meal. For more inspiration on balancing flavors, check out our guide to homemade spice blends. No matter how you tweak it, this recipe stays a crowd-pleaser—proof that great food doesn’t need to be complicated to be memorable.
Taste and Texture
What makes it delicious
Taco Potatoes deliver a bold, satisfying bite with layers of flavor and texture. The crispy potato skins contrast perfectly with the fluffy, buttery insides, while the seasoned taco meat adds a savory, slightly smoky depth. Melted cheese binds everything together, creating a creamy richness, and fresh toppings like tangy sour cream, crisp lettuce, and juicy tomatoes brighten each forkful. Every bite of Taco Potatoes bursts with warmth from spices like cumin and chili powder, mingling with the earthy aroma of roasted potatoes. Whether you savor them fresh from the oven or as leftovers, the combination of hearty, zesty, and fresh elements makes this dish irresistible.
r">Boosting the flavor
Elevate your Taco Potatoes with a few easy tweaks. For extra heat, mix diced jalapeños into the taco seasoning or drizzle with a smoky chipotle sauce. If you love bold flavors, swap regular cheese for pepper jack or crumble cotija on top for a salty punch. A squeeze of lime brightens the dish, while fresh cilantro adds an herby freshness. Pair them with a creamy avocado crema or a spoonful of pico de gallo for a vibrant crunch. Craving more texture? Try adding crushed tortilla chips or crispy bacon bits. For more inspiration, check out these taco seasoning variations to customize the spice level to your taste.
Tips for Success
Best practices for results
Always bake your potatoes until fork-tender before stuffing them for Taco Potatoes, as undercooked spuds won’t hold toppings well. Meanwhile, generously season the taco meat with bold spices like cumin and chili powder to ensure rich flavor in every bite. For the best texture, lightly crisp the potato skins under the broiler for two minutes after baking. Finally, load Taco Potatoes with fresh toppings like diced avocado and cilantro right before serving to keep them vibrant.
>Mistakes to avoid
Overstuffing the potatoes can make them soggy, so distribute toppings evenly without packing them down. If your cheese isn’t melting properly, try shredding it fresh instead of using pre-shredded varieties, which often contain anti-caking agents. For perfectly balanced flavors, avoid skipping the lime juice or sour cream—they cut through the richness of Taco Potatoes. Check out our guide to choosing the right potatoes for sturdier results, and learn how to perfect taco seasoning for next-level taste.
Serving and Pairing Suggestions
How to serve this dish
Serve Taco Potatoes straight from the oven while they’re still piping hot for the best flavor and texture. For a fun twist, arrange them on a large platter with colorful toppings like diced tomatoes, fresh cilantro, and a drizzle of lime crema. Meanwhile, if you’re hosting a casual gathering, let guests build their own loaded Taco Potatoes with a toppings bar featuring shredded cheese, guacamole, and pickled jalapeños. These versatile spuds shine at backyard barbecues, game day spreads, or even as a hearty weeknight dinner.
What goes well with it
Pair Taco Potatoes with a crisp, citrusy margarita to balance the rich, savory flavors. Alternatively, a chilled Mexican lager or a refreshing agua fresca works equally well. For sides, try a light mango avocado salad to add brightness, or whip up a batch of black bean soup for a cozy, protein-packed combo. Finally, don’t forget a side of warm tortilla chips and smoky salsa for dipping between bites.
Taco Potatoes are a delicious fusion dish combining baked or roasted potatoes with classic taco toppings like seasoned ground beef, cheese, salsa, and sour cream. Think of them as a loaded baked potato with a Mexican twist. They’re perfect for a hearty meal or party appetizer.
How do you make Taco Potatoes in the oven?
Start by baking russet potatoes at 400°F for 45-60 minutes until tender. While they cook, brown ground beef with taco seasoning. Split the potatoes open, fluff the insides, then top with the taco meat, shredded cheese, and other favorite toppings. Return to the oven briefly to melt the cheese for the ultimate Taco Potatoes.
rank-math-faq-item">
Can you make vegetarian Taco Potatoes?
Absolutely! Swap the ground beef for black beans, lentils, or plant-based crumbles seasoned with taco spices. Load your Taco Potatoes with avocado, pico de gallo, and dairy-free cheese for a satisfying meatless version that’s just as flavorful.
What toppings go best on Taco Potatoes?
The best Taco Potatoes feature classic taco toppings: shredded lettuce, diced tomatoes, sliced jalapeños, guacamole, and a drizzle of crema. For extra crunch, add crushed tortilla chips. Don’t forget the essentials like shredded cheese and a dollop of sour cream to tie all the flavors together.