Classic Bolognese Sauce – Authentic Italian Recipe
Introduction
There’s something deeply comforting about a rich, slow-simmered Bolognese Sauce. Whether you’re cooking for a crowd or just craving a cozy night in, this classic Italian dish wraps you in warmth like a culinary hug. After years of tweaking my recipe, I’ve finally perfected a version that balances hearty meatiness with bright tomato notes—and today, I’m thrilled to share it with you. Trust me, once you taste this Bolognese Sauce, it’ll become a staple in your kitchen too.
Bolognese Sauce, or “ragù alla bolognese,” hails from the heart of Italy’s Emilia-Romagna region. Unlike quick meat sauces, authentic Bolognese simmers low and slow, melding ground meat, tomatoes, wine, and aromatics into a luxuriously thick texture. What makes it special? The patience. As the flavors deepen over hours, you create something far greater than the sum of its parts. Here at brekcakes.com, we celebrate recipes that tell a story—and this sauce embodies that philosophy. It’s a dish meant to be shared, whether tossed with homemade pasta or layered into a classic lasagna. Plus, its versatility lets you riff on tradition while keeping soul-satisfying richness at the core.
Why I Love This Recipe
Bolognese Sauce holds a special place in my heart because it reminds me of Sunday dinners growing up. My grandmother would stir the pot for hours, filling the house with an aroma that promised love on a plate. Now, whenever I make it, I feel that same connection—to her, to family, and to the joy of feeding people well. It’s more than a recipe; it’s a tradition worth passing down.
Health and Nutrition
Why it’s good for your body
Bolognese Sauce packs a nutritious punch while delivering rich, savory flavor. First, it provides a solid dose of protein from ground meat, which helps build and repair muscles. Additionally, the tomatoes in Bolognese Sauce offer lycopene, an antioxidant that supports heart health and may reduce inflammation. Since the sauce simmers slowly, it retains many of these benefits while deepening its taste.
Moreover, Bolognese Sauce often includes onions, carrots, and celery, which add fiber and essential vitamins. These ingredients aid digestion and boost immunity. Olive oil, another common component, contributes healthy fats that promote brain function and reduce bad cholesterol. Together, these elements make Bolognese Sauce a well-rounded choice for a nourishing meal.
Finally, the versatility of Bolognese Sauce means you can pair it with whole-grain pasta or zucchini noodles for extra nutrients. Whether you seek protein, antioxidants, or fiber, this sauce delivers. With balanced ingredients and slow-cooked goodness, Bolognese Sauce satisfies both your taste buds and your body.
How it fits in a healthy lifestyle
Bolognese Sauce fits seamlessly into a balanced diet. For protein-focused eaters, it offers a hearty base for meals, especially when paired with lean meats or plant-based alternatives. If you follow a gluten-free diet, try serving it over gluten-free pasta or spiralized veggies for a satisfying twist.
Heart-healthy eaters will appreciate the olive oil and lycopene-rich tomatoes, which support cardiovascular wellness. You can also customize Bolognese Sauce by adding extra vegetables or using turkey instead of beef for a lighter version. For more ideas on balancing indulgent flavors with nutrition, check out our guide to healthy comfort food swaps. Whether you’re meal prepping or cooking for a family, Bolognese Sauce adapts to your goals without sacrificing flavor.
Start by heating olive oil in a large pot over medium heat. Add finely chopped onions, carrots, and celery, then sauté until they soften, about 5 minutes. Next, stir in minced garlic and cook for another minute until fragrant. Crumble ground beef into the pot, breaking it apart with a wooden spoon, and brown it evenly. Once the meat loses its pink color, pour in a splash of red wine to deglaze the pan, scraping up any browned bits for extra flavor. Stir in tomato paste, crushed tomatoes, and a pinch of salt, then reduce the heat to low. Let the Bolognese Sauce simmer uncovered for at least 45 minutes, stirring occasionally. If you’re short on time, a pressure cooker can cut the simmering time in half. For a richer taste, add a splash of milk or a Parmesan rind while cooking. Finally, adjust the seasoning with black pepper and fresh basil before serving over pasta.
Mistakes I’ve made and learned from
I once rushed the sautéing step, leaving my veggies undercooked and the Bolognese Sauce slightly crunchy. Now, I take my time to soften them properly—it makes all the difference. Another blunder? Skipping the wine deglaze. The sauce lacked depth until I realized those browned bits are flavor gold. If you’re new to cooking with wine, check out my guide on cooking with wine for tips. Also, I used to drown the sauce in tomatoes, making it too acidic. Balancing it with a touch of milk, as I learned from my sauce consistency post, saved the day. Trust me, patience and small tweaks turn good Bolognese into greatness.
Bolognese Sauce hails from Bologna, Italy, where locals call it “ragù alla bolognese.” This rich, meaty sauce has deep roots in Northern Italian cuisine, often simmered for hours to develop its signature depth. Traditionally, families serve it with tagliatelle, a flat pasta that clings to every savory bite. Yet, outside Italy, people often pair it with spaghetti, sparking playful debates among food lovers.
Interestingly, every region puts its own spin on Bolognese Sauce. In Tuscany, cooks might add a splash of red wine for extra richness, while some American versions sneak in mushrooms or carrots for sweetness. My grandmother, for instance, swore by a pinch of nutmeg to elevate the flavors. Meanwhile, in Sweden, they serve it with pickled cucumbers for a tangy contrast. No matter the variation, Bolognese Sauce remains a beloved comfort food worldwide.
ays-cooking">How it fits in today’s cooking
Today, Bolognese Sauce thrives as a versatile staple in modern kitchens. Busy cooks appreciate make-ahead batches for quick weeknight dinners, while foodies experiment with plant-based swaps like lentils or walnuts. It’s also a star at gatherings, whether layered in a hearty lasagna or spooned over creamy polenta.
Seasonal twists keep it fresh year-round. In winter, a slow-simmered pot warms the soul, while summer versions might lighten up with fresh herbs. For those craving global flavors, try adding smoked paprika or coconut milk for a fun twist. And if you’re meal prepping, Bolognese Sauce freezes beautifully—just like these freezer-friendly recipes. No wonder it’s a timeless favorite.
Taste and Texture
What makes it delicious
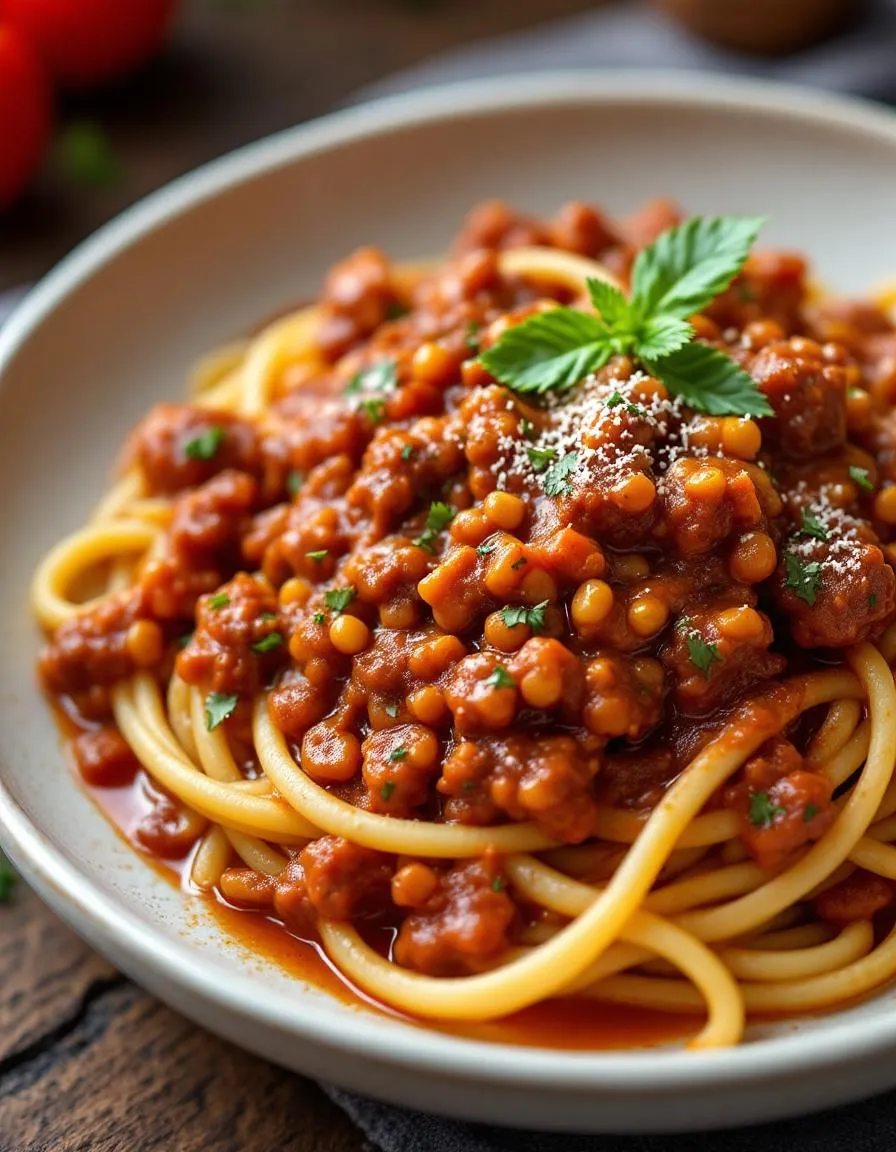
Bolognese Sauce wraps your taste buds in a rich, savory embrace, blending tender ground meat with a deep, slow-simmered tomato base. The sauce smells heavenly—fragrant with garlic, onions, and a hint of earthy herbs like oregano and thyme. Each bite delivers a velvety texture, thanks to the melding of crushed tomatoes and a splash of cream or milk. Meanwhile, the umami punch from Parmesan and pancetta makes Bolognese Sauce irresistibly crave-worthy. Whether tossed with pasta or layered in lasagna, its hearty, meaty goodness lingers deliciously on the palate.
r">Boosting the flavor
For an even bolder Bolognese Sauce, try stirring in a spoonful of tomato paste or a splash of red wine while cooking—it deepens the flavor beautifully. Alternatively, top your dish with crispy pancetta bits or fresh basil for a bright contrast. If you love experimenting, pair it with a creamy Homemade Alfredo Sauce for a luxurious twist. Craving heat? A pinch of red pepper flakes or a dash of Smoked Paprika Seasoning adds a warm, smoky kick. Small tweaks can transform your Bolognese into a showstopper!
Tips for Success
Best practices for results
Brown the ground meat thoroughly before adding other ingredients to develop deep flavor in your Bolognese Sauce. Additionally, simmer the sauce low and slow for at least two hours to let the flavors meld perfectly. For a richer taste, stir in a splash of whole milk or cream during the final 15 minutes of cooking. Always use fresh herbs like basil or oregano to brighten the dish just before serving.
>Mistakes to avoid
Avoid rushing the cooking process, as high heat can cause the Bolognese Sauce to burn or taste bitter. Instead, keep the temperature gentle for even cooking. Another common mistake is skipping the deglazing step after browning the meat. Scrape up those flavorful browned bits with a bit of wine or broth, just like when making our Beef Stew. Finally, don’t overlook seasoning adjustments. Taste the sauce as it simmers, and if it needs more depth, try adding a pinch of sugar or a dash of Worcestershire sauce, similar to our Umami Boosters guide.
Serving and Pairing Suggestions
How to serve this dish
For a cozy family dinner, spoon the rich Bolognese Sauce over al dente pasta and top it with freshly grated Parmesan. Alternatively, layer it in a baking dish with lasagna noodles for a crowd-pleasing casserole. To elevate the presentation, garnish with a sprinkle of chopped parsley or basil leaves. Meanwhile, for a casual gathering, serve the sauce in a warm bread bowl or alongside garlic knots for dipping. Whether you’re hosting a holiday feast or a weeknight meal, Bolognese Sauce always brings comfort to the table.
What goes well with it
Pair Bolognese Sauce with a crisp Caesar salad to balance its hearty richness. The tangy dressing and crunchy croutons add a refreshing contrast. Additionally, a glass of full-bodied red wine, like Chianti, enhances the deep flavors of the sauce. For a lighter option, try our homemade garlic knots, which soak up every last bit of sauce. If you’re craving more Italian-inspired sides, our creamy risotto makes a perfect companion, blending seamlessly with the savory notes of Bolognese Sauce.
What is the difference between Bolognese sauce and regular spaghetti sauce?
Bolognese sauce is a slow-cooked meat-based sauce originating from Bologna, Italy, featuring ground beef, pancetta, tomatoes, and milk or cream. Unlike regular spaghetti sauce, which is often tomato-heavy, Bolognese has a richer, thicker texture and deeper umami flavor from the meat and wine reduction.
How long should Bolognese sauce simmer?
Authentic Bolognese sauce should simmer for at least 2-3 hours to develop its signature depth of flavor. The slow cooking allows the meat to become tender and the liquids to reduce, creating a thick, velvety texture that clings perfectly to pasta.
rank-math-faq-item">
Can you freeze Bolognese sauce?
Yes, Bolognese sauce freezes exceptionally well for up to 3 months. Let it cool completely before transferring to airtight containers or freezer bags, leaving some space for expansion. Thaw overnight in the fridge and reheat gently to preserve the sauce’s texture.
What pasta goes best with Bolognese sauce?
Tagliatelle is the traditional pasta for Bolognese sauce in Italy, as its flat ribbons hold the chunky sauce beautifully. Other great options include pappardelle, fettuccine, or rigatoni – any sturdy pasta with ridges or texture to capture the rich meat sauce.
If you’re craving a dish that’s both comforting and bursting with flavor, you’ve come to the right place. Mexican Chicken Casserole is one of those meals that brings people together, filling your kitchen with irresistible aromas and your table with happy faces. Whether you’re cooking for a busy weeknight or a cozy family gathering, this recipe delivers hearty satisfaction without the fuss. Plus, it’s a fantastic way to repurpose leftovers, making it as practical as it is delicious.
Mexican Chicken Casserole is a layered masterpiece of tender chicken, vibrant spices, gooey cheese, and crisp tortillas. Unlike traditional casseroles that rely on heavy creams, this version balances richness with fresh ingredients like tomatoes, peppers, and cilantro. What makes it special is its versatility—you can customize the heat level, swap proteins, or even sneak in extra veggies for a nutritious twist. At brekcakes.com, we celebrate recipes that blend simplicity with bold flavors, and this dish perfectly embodies that philosophy. If you love easy yet impressive meals, you’ll also adore our One-Pot Wonders collection or explore more Comfort Food Classics for inspiration.
Why I Love This Recipe
Mexican Chicken Casserole holds a special place in my heart because it reminds me of Sunday dinners with my family. My mom used to make a similar version, and the scent of cumin and melted cheese would draw everyone to the table before she even called us. Now, whenever I prepare it, I feel that same sense of warmth and togetherness. It’s a recipe that never fails to comfort, whether I’m serving it to friends or enjoying leftovers the next day. For me, food is about connection, and this casserole always delivers on that promise.
Health and Nutrition
Why it’s good for your body
Mexican Chicken Casserole packs a nutritious punch while delivering bold flavors. First, it combines lean protein from chicken with fiber-rich beans, keeping you full longer. Additionally, the dish includes tomatoes and peppers, which provide vitamin C and antioxidants to support immunity. Moreover, the spices like cumin and chili powder not only enhance taste but also offer anti-inflammatory benefits.
Another reason to love Mexican Chicken Casserole is its balanced macronutrients. The chicken supplies high-quality protein for muscle repair, while the whole grains or tortillas add complex carbs for steady energy. Furthermore, the cheese and avocado toppings contribute healthy fats, which promote heart health. Together, these ingredients create a meal that fuels your body without unnecessary additives.
Finally, Mexican Chicken Casserole is versatile enough to fit various dietary needs. You can easily swap ingredients to boost nutrition, like using Greek yogurt instead of sour cream for extra protein. Whether you’re aiming for weight management or simply want a wholesome dinner, this dish delivers both flavor and nourishment in every bite.
How it fits in a healthy lifestyle
Mexican Chicken Casserole fits seamlessly into a balanced diet. For those focusing on high-protein meals, it’s a great option to support muscle growth and recovery. If you’re gluten-free, simply use corn tortillas or skip them altogether for a lighter version. The dish also works well for meal prep, making it easier to stick to healthy eating habits during busy weeks.
Heart-healthy eaters will appreciate the lean protein and fiber from beans, which help maintain cholesterol levels. Plus, the customizable toppings let you control portions and ingredients. For more ideas on balancing indulgences with nutrition, check out our guide to smart diet choices. Whether you’re cooking for family or solo dinners, Mexican Chicken Casserole keeps health and taste in perfect harmony.
A flavorful and easy-to-make casserole with layers of chicken, beans, cheese, and tortillas.
Ingredients
Scale
For the Crust:
2 cups cooked chicken, shredded
1 can (15 oz) black beans, drained and rinsed
1 can (10 oz) diced tomatoes with green chilies
1 cup corn kernels
1 packet taco seasoning
8 small corn tortillas, cut into quarters
2 cups shredded Mexican cheese blend
1/2 cup sour cream
1/4 cup chopped fresh cilantro
Instructions
1. Prepare the Crust:
Preheat oven to 375°F (190°C). Lightly grease a 9×13-inch baking dish.
In a large bowl, mix shredded chicken, black beans, diced tomatoes, corn, and taco seasoning until well combined.
Layer half of the tortilla pieces on the bottom of the baking dish. Spread half of the chicken mixture over the tortillas, then sprinkle with 1 cup of cheese.
Repeat the layers with remaining tortillas, chicken mixture, and cheese.
Bake for 25-30 minutes, or until cheese is melted and bubbly.
Let cool for 5 minutes before serving. Top with sour cream and cilantro.
Notes
You can customize the seasonings to taste.
How to Prepare This Dish
Steps and time-saving tips
Start by preheating your oven to 375°F so it’s ready when you finish assembling the Mexican Chicken Casserole. Meanwhile, shred cooked chicken—rotisserie chicken saves time—and mix it with taco seasoning for bold flavor. In a large bowl, whisk together sour cream, cream of chicken soup, and diced green chiles until smooth. Then, gently fold in the seasoned chicken and half of your shredded cheese. Next, spread a thin layer of salsa on the bottom of a greased baking dish to prevent sticking and add moisture. Layer half of your tortilla strips over the salsa, followed by the creamy chicken mixture. Repeat the layers, finishing with a generous sprinkle of cheese. Cover with foil and bake for 25 minutes, then uncover and bake another 10 minutes until bubbly and golden. Let it rest 5 minutes before serving—this helps the layers set. For a time-saving twist, prep the filling the night before and assemble just before baking.
and-learned-from">Mistakes I’ve made and learned from
I once rushed the layering and ended up with a soggy Mexican Chicken Casserole because I skipped the salsa base. Now I always spread it evenly for better texture. Another time, I overbaked it, drying out the cheese—setting a timer is key! If your casserole looks too dry, try adding a splash of broth before baking, like I learned from my save-a-dry-casserole trick. Also, don’t skip resting time; cutting too soon makes the layers slide apart, as I discovered the hard way. For more layering tips, check out my guide to perfect casserole layers. Trust me, these small tweaks make all the difference!
Cultural Connection and Variations
Where this recipe comes from
Mexican Chicken Casserole has deep roots in the heart of home cooking, blending Mexican flavors with American comfort food traditions. Families in northern Mexico often layer tender chicken with corn tortillas, salsa, and cheese, while Tex-Mex versions might add black beans or sour cream. My abuela made her Mexican Chicken Casserole with a smoky chipotle twist, but my neighbor swears by a verde version with tomatillos. Either way, this dish brings people together, whether it’s a weeknight dinner or a festive potluck star.
Across borders, cooks a
dapt the recipe to local tastes. In some regions, they swap chicken for pork or load it with poblanos for extra heat. Others keep it simple with just a handful of pantry staples. What stays the same? The warmth of melted cheese and the joy of sharing a hearty meal. Mexican Chicken Casserole isn’t just food—it’s a story on a plate, passed down with love and a dash of creativity.
How it fits in today’s cooking
Today, Mexican Chicken Casserole still shines as a go-to for busy cooks and comfort-seekers alike. It’s a lifesaver for meal prep, easily customized with gluten-free tortillas or extra veggies. Many families, like mine, pair it with a crisp Mexican salad for balance, or serve it at game-day gatherings alongside classic guacamole. Whether you’re feeding a crowd or craving cozy flavors, this dish fits seamlessly into modern routines.
Seasonal twists keep it fresh, too. In summer, grilled corn and fresh tomatoes brighten it up, while winter versions might lean into earthy spices. No matter how you tweak it, Mexican Chicken Casserole remains a timeless favorite—proof that great food only gets better with time.
>Taste and Texture
What makes it delicious
Mexican Chicken Casserole delivers a bold, comforting experience with layers of vibrant flavors and satisfying textures. The first bite brings tender, juicy chicken mingling with creamy melted cheese, while the corn tortillas soften just enough to hold their shape. Spices like cumin and chili powder add warmth, and a hint of smokiness lingers in every forkful. Fresh cilantro brightens the dish, and a touch of lime juice cuts through the richness, balancing each bite. Meanwhile, the aroma of roasted tomatoes and garlic fills the kitchen, making it impossible to resist. Whether you crave something hearty or crave-worthy, Mexican Chicken Casserole checks every box.
Boosting the flavor
For an extra flavor kick, try swapping regular cheese for a blend of pepper jack and cotija—it adds a tangy, spicy depth. A dollop of creamy avocado sauce on top introduces a cool contrast, while pickled jalapeños bring a punchy crunch. If you love heat, stir in chipotle peppers or a dash of smoked paprika. For a fresh finish, pile on crisp shredded lettuce and a drizzle of homemade salsa verde. These small tweaks elevate Mexican Chicken Casserole from delicious to unforgettable.
Tips for Success
Best practices for results
Always preheat your oven before baking the Mexican Chicken Casserole to ensure even cooking. For the best flavor, use freshly shredded cheese instead of pre-shredded varieties, as it melts more smoothly. Additionally, layer your ingredients evenly to prevent dry spots, and cover the dish with foil for the first half of baking to lock in moisture. Finally, let the casserole rest for 5-10 minutes after baking so the flavors settle and it slices cleanly.
Mistakes to avoid
Avoid overloading your Mexican Chicken Casserole with too many toppings, as this can make it soggy. Instead, stick to balanced layers for the perfect texture. Also, don’t skip draining canned ingredients like tomatoes or beans, since excess liquid can throw off the consistency. For more layering tips, check out our guide to perfect casserole layering. Another common mistake is using undercooked chicken—always ensure it’s fully cooked before adding it to the dish. If you’re unsure about doneness, our chicken cooking times article will help you nail it every time.
Serving and Pairing Suggestions
How to serve this dish
Mexican Chicken Casserole shines when you serve it fresh from the oven with a sprinkle of fresh cilantro or a dollop of cool sour cream. For a vibrant touch, top it with diced avocado, sliced jalapeños, or a squeeze of lime. Meanwhile, consider transferring individual portions to colorful ceramic bowls for a cozy family dinner or layering it onto a festive platter for potlucks. Since this dish packs bold flavors, it works equally well for casual weeknight meals or lively gatherings like Cinco de Mayo celebrations. Finally, pair it with warm tortillas or crunchy tortilla chips for added texture.
h-it">What goes well with it
Brighten your meal by pairing Mexican Chicken Casserole with a zesty mango avocado salad, which adds a refreshing contrast to the rich, cheesy layers. Alternatively, serve it alongside cilantro lime rice for a hearty combination that soaks up the savory sauce. For drinks, a classic margarita or a chilled horchata balances the spices perfectly. If you love bold flavors, try our easy homemade salsa verde or creamy queso dip for extra dipping options. No matter how you serve it, this casserole always delivers crowd-pleasing comfort.
What are the key ingredients in a Mexican Chicken Casserole?
A classic Mexican Chicken Casserole typically includes shredded chicken, tortillas, cheese, beans, corn, and enchilada sauce. You can customize it with toppings like avocado, sour cream, or cilantro for extra flavor. This dish combines bold Mexican flavors with easy preparation.
rank-math-faq-item">
Can I make Mexican Chicken Casserole ahead of time?
Yes! Mexican Chicken Casserole is perfect for meal prep—assemble it up to 24 hours in advance and refrigerate until ready to bake. Just add 10-15 minutes to the cooking time if baking straight from the fridge. Leftovers also reheat well for quick meals.
How do I make Mexican Chicken Casserole less spicy?
Use mild enchilada sauce and skip jalapeños or chili powder to reduce heat in your Mexican Chicken Casserole. Opt for Monterey Jack cheese instead of pepper Jack, and top with cooling ingredients like sour cream or Greek yogurt. The dish will still pack flavor without the burn.
What sides go well with Mexican Chicken Casserole?
Mexican Chicken Casserole pairs perfectly with cilantro lime rice, black beans, or a crisp green salad. For lighter options, try roasted vegetables or avocado slices. The casserole’s rich flavors balance well with fresh, simple sides.
>
Easy Boiled Potatoes – Perfect Side Dish Recipe
Introduction
There’s something deeply comforting about a bowl of perfectly cooked potatoes, don’t you think? Whether you’re a busy parent, a college student, or just someone who craves simplicity, this Easy Boiled Potatoes Recipe will become your go-to side dish. Not only does it require minimal effort, but it also delivers maximum flavor—proving that great food doesn’t need to be complicated. Plus, it pairs beautifully with so many of my favorite dishes, like this garlic herb chicken or a fresh summer salad.
Easy Boiled Potatoes Recipe is exactly what it sounds like: a straightforward, no-fuss way to cook potatoes that lets their natural creaminess shine. Unlike roasting or frying, boiling preserves the potato’s delicate texture while keeping the process quick and mess-free. This recipe matters because it’s a foundational skill every home cook should master. Whether you’re meal prepping for the week or need a last-minute side for dinner, these potatoes adapt effortlessly. They’re also incredibly versatile—toss them with butter and herbs, mash them lightly, or chill them for a potato salad. At brekcakes.com, we celebrate approachable recipes that fit real life, and this one embodies that philosophy perfectly. It’s humble, reliable, and always satisfying—just like the kind of food I grew up loving.
Why I Love This Recipe
This Easy Boiled Potatoes Recipe holds a special place in my heart because it reminds me of Sunday dinners at my grandma’s house. She’d simmer them just until tender, then drizzle them with melted butter and a sprinkle of salt. It was pure comfort in every bite. Even now, whenever I make them, I feel that same warmth and nostalgia. Simple food has a way of bringing people together, and these potatoes are proof of that.
Health and Nutrition
Why it’s good for your body
Easy Boiled Potatoes Recipe delivers a powerhouse of nutrients while keeping things simple. First, potatoes provide a solid dose of potassium, which helps regulate blood pressure and supports muscle function. Additionally, they offer vitamin C, an antioxidant that boosts immunity and promotes healthy skin. Since you boil them with the skin on, you also retain more fiber, aiding digestion and keeping you fuller longer.
Moreover, Easy Boiled Potatoes Recipe is naturally low in fat and calories, making it a smart choice for weight management. Unlike fried alternatives, boiling preserves the potato’s nutrients without adding unhealthy oils. The recipe also pairs well with lean proteins or veggies, creating a balanced meal. For example, tossing them with olive oil and herbs enhances flavor without compromising health benefits.
Finally, Easy Boiled Potatoes Recipe fits seamlessly into various diets, from vegan to gluten-free. Potatoes are naturally gluten-free and versatile enough to complement any eating plan. Whether you need energy for workouts or a steady source of complex carbs, this dish delivers. With minimal prep and maximum nutrition, it’s a win for your body and your schedule.
How it fits in a healthy lifestyle
Easy Boiled Potatoes Recipe effortlessly supports a balanced diet. If you’re watching your carbs, portion control keeps it heart-healthy while still providing energy. Pair it with a protein like grilled chicken or tofu for a meal that stabilizes blood sugar. For gluten-free eaters, it’s a safe and satisfying side that won’t trigger sensitivities.
Busy weeknights? This recipe saves time without sacrificing nutrition. Boil a batch ahead and use it in salads, soups, or as a base for meal prep. You can even mash them lightly for a lighter twist on traditional mashed potatoes. Plus, the simplicity of Easy Boiled Potatoes Recipe makes it easy to avoid processed foods, aligning with clean eating goals.
Looking for more ways to keep meals nutritious? Explore our guide to balanced eating for smart swaps and recipe ideas. Whether you’re fueling workouts or just craving wholesome comfort food, this dish fits right in.
Simple and delicious boiled potatoes seasoned with butter and herbs.
Ingredients
Scale
For the Crust:
1.5 lbs small potatoes (washed and halved)
4 cups water
1 tsp salt
2 tbsp butter
1 tbsp chopped fresh parsley
1/2 tsp black pepper
Instructions
1. Prepare the Crust:
Place potatoes in a large pot and add water until fully submerged.
Add salt and bring to a boil over medium-high heat.
Reduce heat to medium and simmer for 15-20 minutes until potatoes are tender when pierced with a fork.
Drain water and return potatoes to the pot.
Add butter, parsley, and black pepper. Toss gently to coat.
Serve warm.
Notes
You can customize the seasonings to taste.
“`html
="how-to-prepare-this-dish">How to Prepare This Dish
Steps and time-saving tips
Start by scrubbing the potatoes thoroughly under cold water to remove any dirt. Next, grab a large pot and fill it with enough water to cover the potatoes completely. Add a generous pinch of salt to the water—this enhances the flavor of your Easy Boiled Potatoes Recipe from the inside out. Bring the water to a rolling boil over high heat, then gently lower the potatoes in. Reduce the heat to medium and let them simmer uncovered for 15-20 minutes, depending on their size. To save time, cut larger potatoes into even chunks so they cook faster and more evenly. Test doneness by piercing a potato with a fork; it should slide in effortlessly. Drain the water immediately to prevent overcooking, then let the potatoes sit in the colander for a minute to steam dry. For extra flavor, drizzle them with melted butter or olive oil while still warm, and toss with fresh herbs like parsley or dill. If you’re meal prepping, boil the potatoes ahead and store them in the fridge for up to three days—just reheat gently before serving.
Mistakes I’ve made and learned from
I once rushed the boiling process and ended up with unevenly cooked potatoes—some were mushy while others stayed stubbornly hard. The fix? I now always cut them into uniform sizes, just like I do for my Perfect Roasted Vegetables. Another blunder was skipping the salting step, which left the potatoes bland no matter how much seasoning I added later. Now I salt the water as aggressively as I do for pasta, and it makes all the difference. If you’re new to boiling potatoes, don’t worry—it’s forgiving once you know these tricks. For more beginner-friendly tips, check out my guide on Cooking Basics Everyone Should Know. Trust me, a little patience and attention to detail turn this Easy Boiled Potatoes Recipe into a foolproof side dish every time.
Easy Boiled Potatoes Recipe might seem simple, but it carries deep roots in kitchens worldwide. In Ireland, people often boil potatoes with their skins on for a rustic, earthy flavor, while in Peru, they serve them alongside spicy sauces like huancaina. My grandmother, however, always added a bay leaf and a pinch of salt to the water, turning plain spuds into something fragrant and memorable.
Interestingly, the dish
adapts effortlessly to local tastes. In Scandinavia, cooks might toss boiled potatoes with dill and butter, while in India, they could season them with turmeric and mustard seeds. Even within families, the Easy Boiled Potatoes Recipe evolves. Some prefer them fork-tender for mashing, while others keep them firm for salads. No matter the variation, this humble dish bridges cultures through its versatility.
How it fits in today’s cooking
Today, the Easy Boiled Potatoes Recipe remains a staple for its simplicity and nutrition. Busy home cooks love it for meal prep, pairing it with roasted chicken or folding it into quick weeknight dinners. Meanwhile, health-conscious eaters appreciate its clean, unprocessed appeal—just toss with olive oil and herbs for a guilt-free side.
Seasonally, boiled potatoes shine in summer picnics and holiday feasts alike. Modern twists, like smashing and air-frying them, give the classic a crispy upgrade. They also star in comfort food favorites, proving that even the most basic recipes endure when they’re this adaptable. Whether dressed up or kept plain, they’re a timeless crowd-pleaser.
>Taste and Texture
What makes it delicious
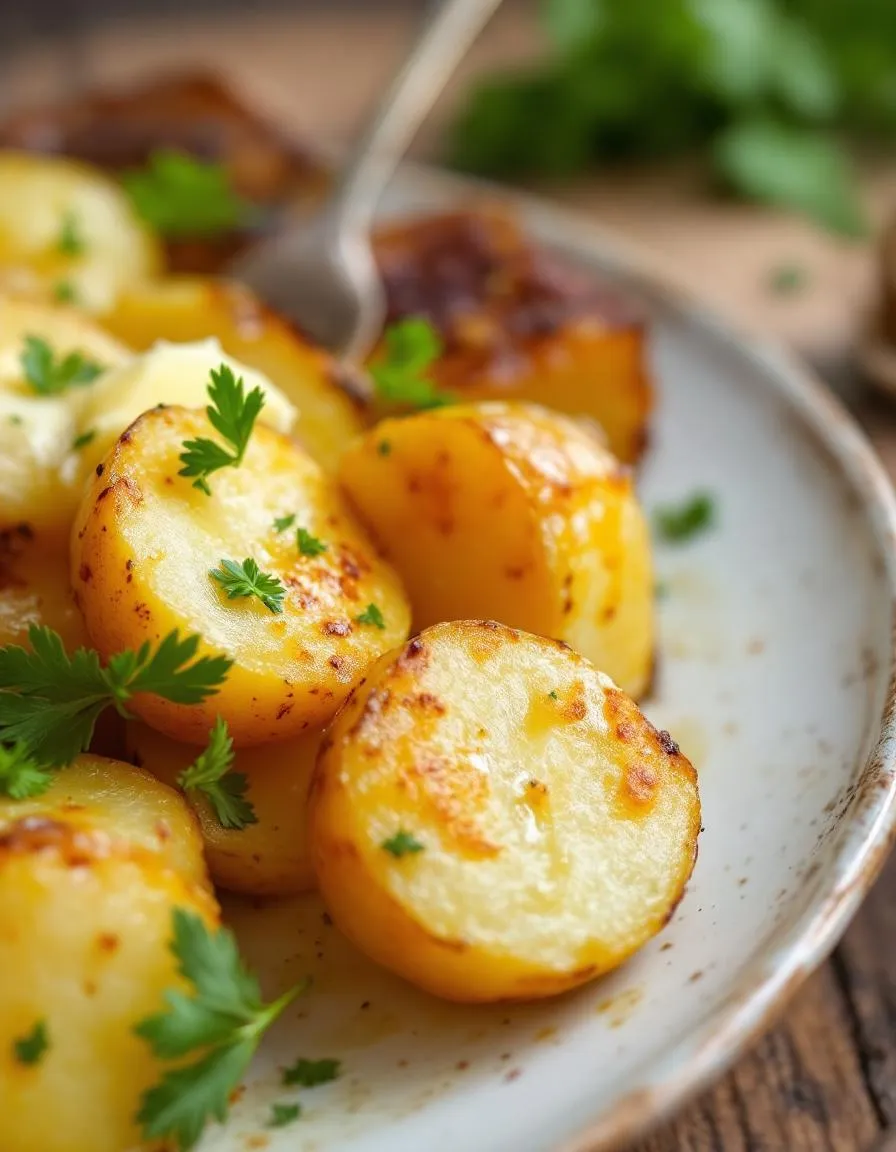
The Easy Boiled Potatoes Recipe delivers a comforting, buttery taste with a hint of earthy sweetness. Each bite offers a tender, creamy texture that melts in your mouth, while the skin adds just the right amount of delicate chewiness. Fresh herbs like rosemary or thyme infuse the dish with a fragrant aroma, elevating the simplicity of the potatoes. Meanwhile, a sprinkle of sea salt enhances their natural flavor, making the Easy Boiled Potatoes Recipe irresistibly satisfying. Whether served warm or chilled, the dish feels hearty yet light—perfect for any meal.
Boosting the flavor
For an extra burst of flavor, try tossing the Easy Boiled Potatoes Recipe with garlic-infused olive oil or a drizzle of homemade herb sauce. Alternatively, top them with crumbled feta or grated Parmesan for a salty, tangy kick. If you love heat, a pinch of smoked paprika or chili flakes adds depth. Pair them with a side of creamy avocado dip for a cool contrast. With these easy tweaks, you can transform this humble dish into something extraordinary.
Tips for Success
Best practices for results
Start with evenly sized potatoes so they cook uniformly. Then, always cover them with cold water and add salt before boiling for the best flavor. Keep the heat medium-high and test for doneness with a fork—they should slide off easily when ready. For the perfect Easy Boiled Potatoes Recipe, drain them immediately to prevent overcooking. Finally, let them steam-dry for a minute before serving for ideal texture.
Mistakes to avoid
Avoid dropping potatoes into boiling water, as this causes uneven cooking. Instead, begin with cold water as mentioned in our guide to boiling potatoes. Also, don’t skip salting the water—it’s key for flavor. Overcrowding the pot is another common issue, so use a large enough pot to give them space. For more on avoiding mushy results, check our tips on achieving perfect potato texture.
Serving and Pairing Suggestions
How to serve this dish
For a simple yet elegant presentation, arrange your Easy Boiled Potatoes Recipe in a rustic ceramic bowl and drizzle them with melted butter or olive oil. Meanwhile, sprinkle fresh herbs like parsley or dill on top for a pop of color. If you’re hosting a brunch or holiday gathering, serve them family-style on a large platter alongside other comforting dishes. Alternatively, skewer the potatoes with toothpicks for a fun appetizer option. No matter how you plate them, these tender potatoes will steal the show.
h-it">What goes well with it
Pair your Easy Boiled Potatoes Recipe with a tangy garlic aioli or creamy sour cream dip for extra flavor. Additionally, they make a perfect side for hearty mains like our Herb-Roasted Chicken or Grilled Salmon, balancing rich proteins with their mild taste. For drinks, try a crisp white wine or sparkling lemonade to cut through the dish’s buttery notes. Finally, add a fresh green salad or roasted vegetables to round out the meal.
How long does it take to boil potatoes?
For an Easy Boiled Potatoes Recipe, small potatoes typically take 15–20 minutes, while larger chunks may need 25–30 minutes. Always check tenderness with a fork—they’re done when easily pierced. Overcooking can make them mushy, so timing is key for perfect boiled potatoes.
rank-math-faq-item">
Should you boil potatoes with the skin on?
Yes, boiling potatoes with skins on helps retain nutrients and prevents waterlogging. For this Easy Boiled Potatoes Recipe, just scrub them well first. You can peel after cooking if preferred—the skins slide off easily when boiled.
What’s the best potato type for boiling?
Waxy potatoes like Yukon Gold or Red Bliss hold their shape best in an Easy Boiled Potatoes Recipe. Avoid starchy varieties like Russets for boiling—they tend to fall apart. Medium-starch potatoes offer a nice balance of texture and flavor.
Do you put potatoes in boiling water or cold?
Start potatoes in cold water for even cooking in your Easy Boiled Potatoes Recipe. This prevents the outside from overcooking before the center softens. Bring to a boil, then reduce to a simmer for perfect results every time.
>
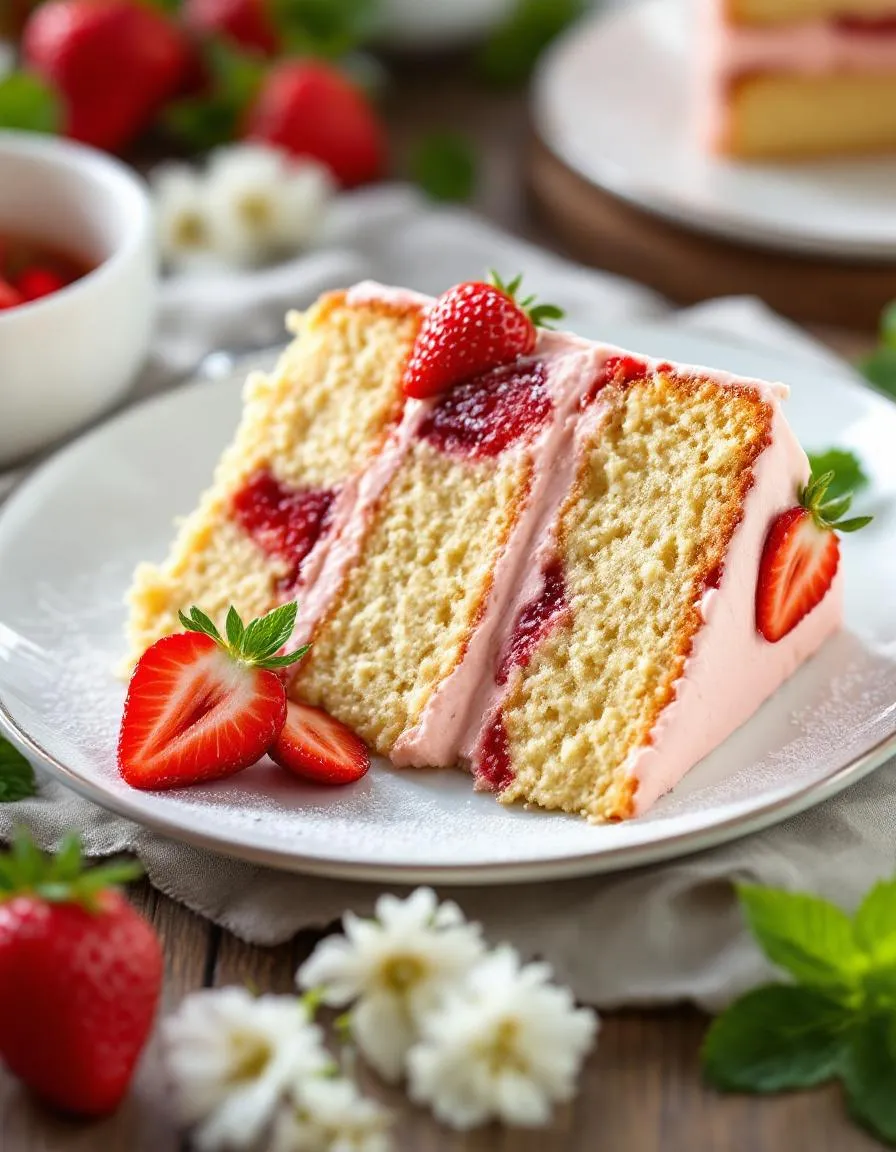
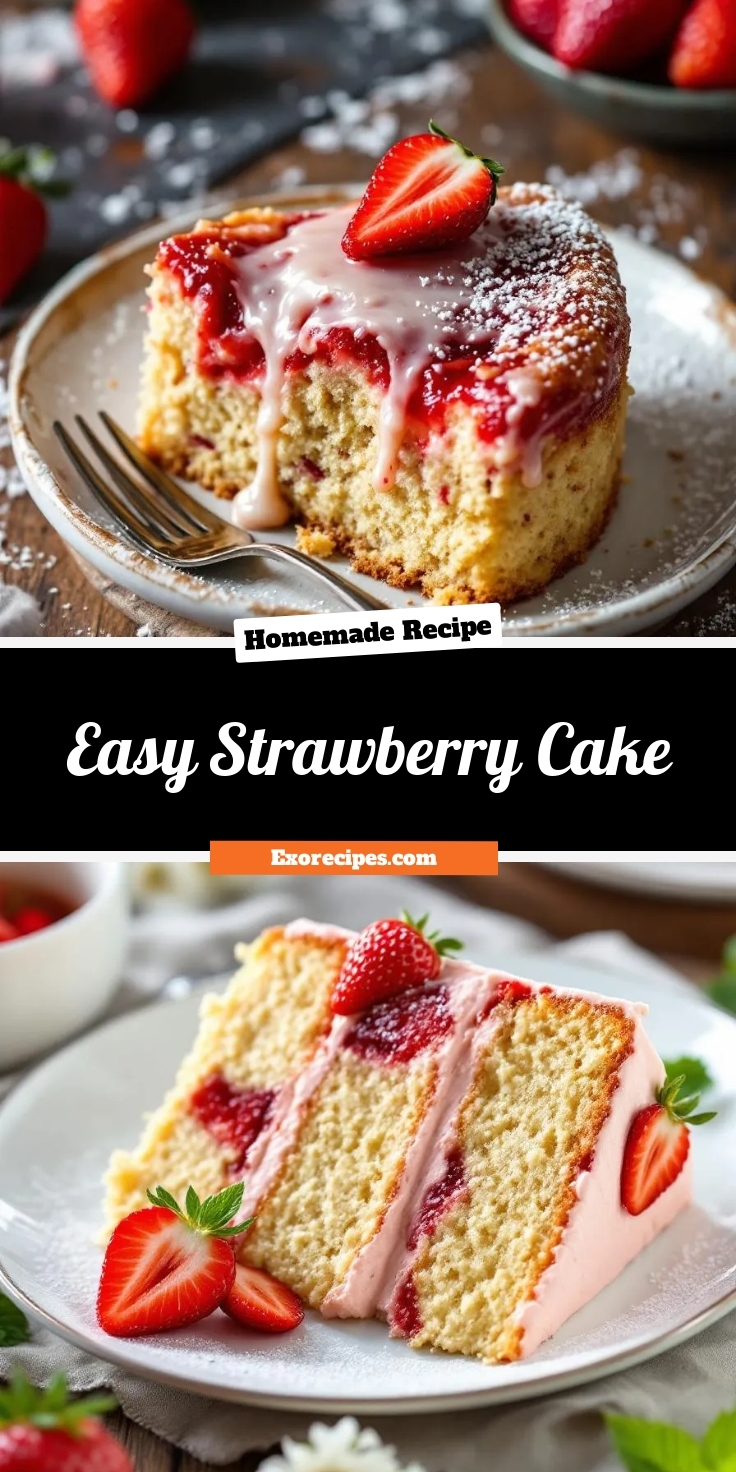
Easy Strawberry Cake – Simple Homemade Recipe
Introduction
There’s something undeniably special about a dessert that brings joy without the fuss. Whether you’re celebrating a milestone or simply craving a sweet escape, this Easy Strawberry Cake delivers every time. With its tender crumb and bursts of fresh strawberry flavor, it’s the kind of treat that feels like a hug in every bite. Plus, it’s perfect for bakers of all levels—no fancy techniques required. If you’ve ever wanted to whip up a showstopper without the stress, this recipe is your answer.
Easy Strawberry Cake is a celebration of simplicity and flavor. Unlike dense, overly sweet desserts, this cake strikes the perfect balance with its light texture and natural fruitiness. Fresh strawberries fold into the batter, creating pockets of juicy goodness, while a hint of vanilla ties everything together. What makes it truly stand out is its versatility. Serve it as an afternoon pick-me-up, a birthday centerpiece, or even a cozy weekend treat. At brekcakes.com, we believe baking should be joyful, not intimidating. That’s why this recipe aligns perfectly with our mission to share approachable, crowd-pleasing dishes. For more inspiration, check out our Classic Vanilla Cupcakes or explore our guide to Baking with Fresh Fruit.
Why I Love This Recipe
This Easy Strawberry Cake holds a special place in my heart because it reminds me of summers at my grandma’s house. She always had a way of turning humble ingredients into something magical, and this cake captures that spirit. Every time I bake it, the aroma fills my kitchen with nostalgia. But what I love most is how it brings people together. Whether it’s my kids sneaking slices before dinner or friends asking for the recipe, this cake creates moments worth savoring. It’s more than just dessert—it’s a little piece of joy I get to share with you.
Health and Nutrition
Why it’s good for your body
Easy Strawberry Cake packs a surprising nutritional punch while satisfying your sweet tooth. First, fresh strawberries bring a burst of antioxidants, which help combat inflammation and support heart health. Additionally, these juicy berries deliver vitamin C, boosting your immune system and promoting glowing skin. Since strawberries naturally sweeten the cake, you can often reduce added sugars without sacrificing flavor.
Moreover, Easy Strawberry Cake can include wholesome ingredients like whole wheat flour or almond flour for extra fiber and protein. Fiber keeps digestion smooth, while protein helps maintain energy levels. If you opt for Greek yogurt in the batter, you’ll also get a dose of probiotics for gut health. Even better, strawberries contain manganese, a mineral that aids metabolism and bone strength.
Finally, Easy Strawberry Cake offers a lighter alternative to heavy desserts. Because it relies on fruit for moisture, you can often cut back on butter or oil. Whether you enjoy a slice as an afternoon pick-me-up or a post-dinner treat, you’re choosing a dessert that nourishes as much as it delights.
How it fits in a healthy lifestyle
Easy Strawberry Cake fits seamlessly into balanced eating habits. For gluten-free diets, simply swap regular flour for a blend like almond or oat flour. If you’re watching your sugar intake, try natural sweeteners like honey or maple syrup. This cake also pairs well with protein-rich toppings, such as a dollop of Greek yogurt or a sprinkle of nuts, making it a smarter dessert choice.
For those focused on heart health, the strawberries in Easy Strawberry Cake provide potassium and flavonoids, which support blood pressure and circulation. If you’re meal prepping, bake a batch and freeze individual slices for portion-controlled treats. Craving more healthy dessert ideas? Explore our gluten-free desserts or discover how to swap sugar in baking for even lighter options. With simple tweaks, this cake becomes a guilt-free part of your routine.
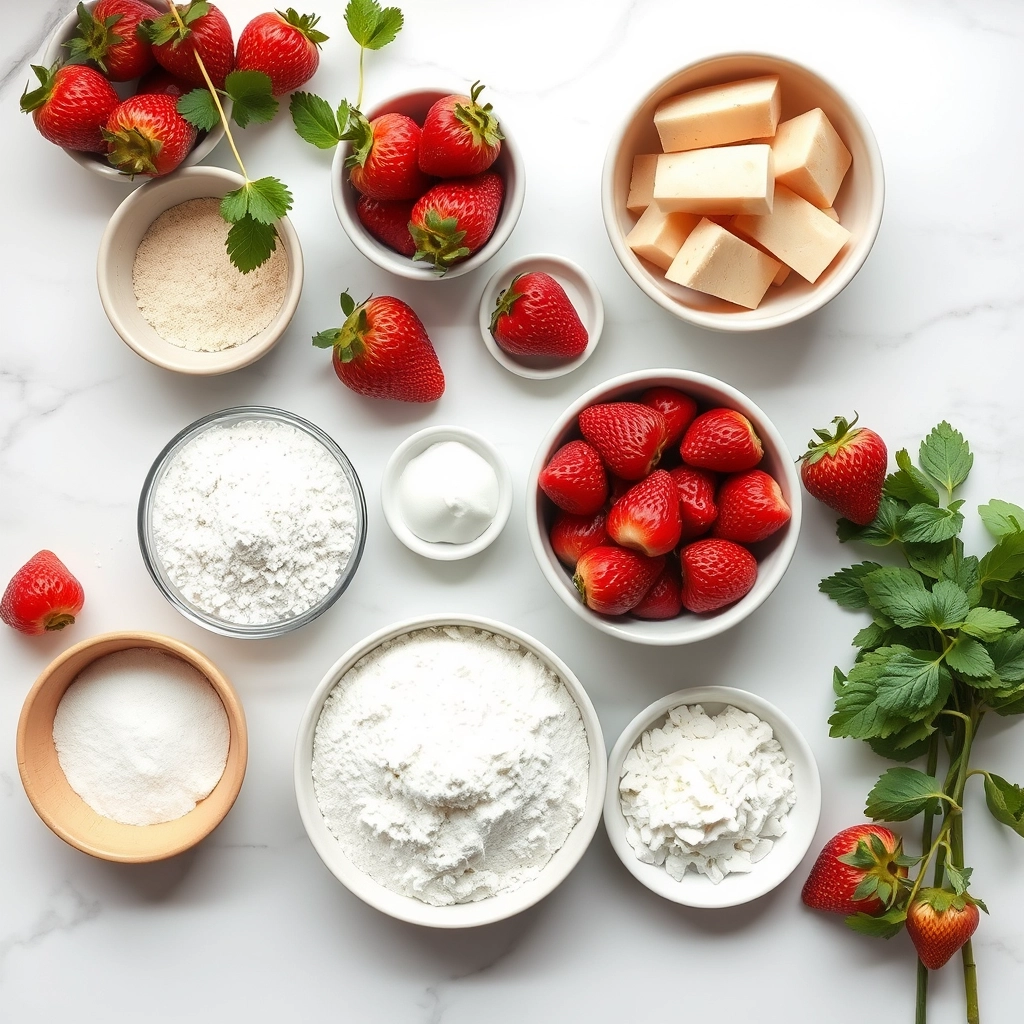
A simple and delicious strawberry cake that’s perfect for any occasion.
Ingredients
Scale
For the Crust:
1 1/2 cups all-purpose flour
1 1/2 teaspoons baking powder
1/2 teaspoon salt
1/2 cup unsalted butter, softened
1 cup granulated sugar
2 large eggs
1 teaspoon vanilla extract
1/2 cup milk
1 1/2 cups fresh strawberries, chopped
Instructions
1. Prepare the Crust:
Preheat oven to 350°F (175°C). Grease and flour a 9-inch round cake pan.
In a medium bowl, whisk together flour, baking powder, and salt.
In a large bowl, beat butter and sugar until light and fluffy. Add eggs one at a time, then stir in vanilla.
Alternately add the flour mixture and milk to the butter mixture, beginning and ending with the flour mixture. Fold in chopped strawberries.
Pour batter into prepared pan and bake for 30-35 minutes, or until a toothpick inserted in the center comes out clean.
Allow cake to cool in pan for 10 minutes, then transfer to a wire rack to cool completely.
Notes
You can customize the seasonings to taste.
How to Prepare This Dish
Steps and time-saving tips
Start by preheating your oven to 350°F and greasing a 9-inch round cake pan. Meanwhile, whisk together the dry ingredients—flour, sugar, baking powder, and a pinch of salt—in a large bowl. In another bowl, beat the eggs lightly before adding melted butter, milk, and vanilla extract. Combine the wet and dry mixtures gently, stirring just until the batter comes together. Overmixing can make the Easy Strawberry Cake dense, so stop as soon as you see no streaks of flour. Fold in diced fresh strawberries, reserving a handful for garnish. Pour the batter into the pan and smooth the top with a spatula. Bake for 25-30 minutes or until a toothpick inserted in the center comes out clean. Let the cake cool slightly before transferring it to a wire rack. For a time-saving twist, use store-bought whipped cream or a dusting of powdered sugar instead of frosting. If you prefer a richer finish, drizzle with homemade glaze while the cake is still warm.
and-learned-from">Mistakes I’ve made and learned from
Early on, I learned the hard way that overloading the batter with strawberries makes the Easy Strawberry Cake soggy. Now, I stick to a measured cup and pat the diced berries dry before folding them in. Another blunder? Pulling the cake out too soon because the top looked golden. A toothpick test is non-negotiable—trust me, a gooey center ruins the texture. If you’re new to baking, check out my guide on common cake mistakes to avoid these pitfalls. Also, if your strawberries aren’t sweet enough, a sprinkle of sugar before adding them helps. For more tips on working with fresh fruit, my baking with berries post breaks it down step by step.
Cultural Connection and Variations
Where this recipe comes from
Easy Strawberry Cake carries the sweet nostalgia of summer picnics and family gatherings. Many trace its roots to Southern U.S. kitchens, where bakers often paired fresh strawberries with simple, buttery cakes. However, variations pop up worldwide. In Japan, for example, they layer strawberries with light sponge cake and whipped cream for a delicate dessert called strawberry shortcake. Meanwhile, in Italy, you might find a rustic crostata filled with strawberry jam.
In my own family, Easy
Strawberry Cake was a rite of passage. My grandmother taught me to fold crushed berries into the batter for extra moisture and flavor. Some cooks prefer topping the cake with fresh slices or a glossy glaze. No matter the method, the goal stays the same: celebrate strawberries at their peak. Whether you grew up picking berries at a farm or grabbing them from the store, this cake turns humble ingredients into something special.
How it fits in today’s cooking
Today, Easy Strawberry Cake still shines as a versatile crowd-pleaser. Busy bakers love it because it works for birthdays, potlucks, or even a cozy weeknight treat. Many now tweak the recipe with gluten-free flour or dairy substitutes, proving it adapts to modern diets. For a summer twist, try pairing it with homemade lemonade—the tartness balances the cake’s sweetness perfectly.
Seasonal cooking also keeps this dessert relevant. When strawberries flood farmers’ markets, bakers whip up Easy Strawberry Cake to showcase their freshness. Others freeze slices for a taste of summer all year. If you need inspiration, check out our seasonal desserts guide for more ways to highlight fruit. No matter how you serve it, this cake bridges tradition and today’s kitchen with every bite.
>Taste and Texture
What makes it delicious
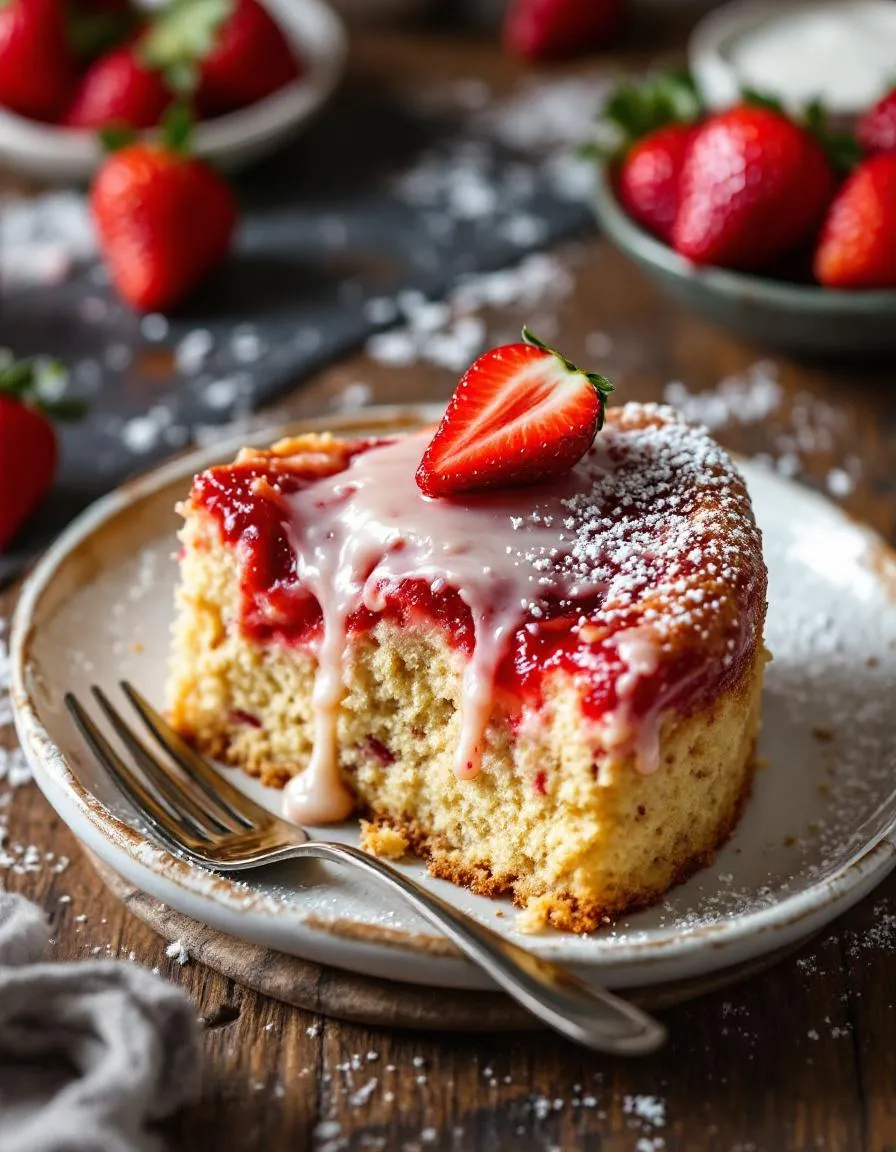
Easy Strawberry Cake bursts with juicy, sun-ripened strawberry flavor in every bite. The tender crumb melts in your mouth, while pockets of fresh strawberries add a soft, jammy texture. A hint of vanilla enhances the natural sweetness, creating a fragrant aroma that fills the kitchen as it bakes. Meanwhile, the golden-brown edges offer a subtle crispness, contrasting the cake’s fluffy interior. Whether served warm or chilled, Easy Strawberry Cake delivers a bright, fruity delight that feels both comforting and refreshing.
Boosting the flavor
For an extra flavor boost, fold in a handful of lemon zest to brighten the strawberries or drizzle the finished cake with a vanilla glaze for added richness. If you love texture, sprinkle toasted almond slices on top for a nutty crunch. Another trick? Swap half the sugar with honey to deepen the sweetness and keep the cake moist. Experiment with these tweaks to make Easy Strawberry Cake even more irresistible.
Tips for Success
Best practices for results
Always use room-temperature ingredients for your Easy Strawberry Cake, as they blend more smoothly and create a lighter texture. Meanwhile, gently fold the strawberries into the batter to prevent crushing them, which can lead to uneven baking. Additionally, check the cake early with a toothpick since oven temperatures vary, and you want to avoid overbaking. For extra flavor, toss the strawberries in a bit of flour before adding them to keep them from sinking.
Mistakes to avoid
Avoid overmixing the batter, as this can make your Easy Strawberry Cake dense instead of fluffy. Instead, mix just until the ingredients combine. Also, don’t skip greasing the pan properly, or the cake might stick. For more on avoiding baking mishaps, check out our guide on common baking mistakes. Finally, resist opening the oven door too often, as temperature fluctuations can cause uneven rising. If you’re unsure about doneness, learn how to test cakes correctly with our testing cake doneness tips.
Serving and Pairing Suggestions
How to serve this dish
For a stunning presentation, slice Easy Strawberry Cake into generous wedges and arrange them on a pastel-colored plate. Top each piece with fresh strawberry slices and a dusting of powdered sugar for a touch of elegance. Alternatively, serve it family-style on a cake stand for brunch gatherings or summer picnics. To make it extra special, add a dollop of whipped cream or a scoop of vanilla ice cream alongside. Whether you’re celebrating a birthday or simply craving a sweet treat, Easy Strawberry Cake shines as the centerpiece of any occasion.
h-it">What goes well with it
Pair Easy Strawberry Cake with a refreshing glass of homemade lemonade or iced tea to balance its sweetness. For a cozy twist, try it with a warm cup of Earl Grey tea, which highlights the fruity notes. If you’re serving it as part of a dessert spread, consider adding our Vanilla Bean Cheesecake or Classic Chocolate Mousse for variety. Each pairing enhances the cake’s vibrant flavor while keeping the menu light and satisfying.
What are the easiest ingredients for a strawberry cake?
An Easy Strawberry Cake typically requires simple ingredients like fresh strawberries, all-purpose flour, sugar, eggs, butter, and baking powder. You can also use strawberry puree or jam for extra flavor without complicated steps. This keeps the recipe accessible for beginners.
rank-math-faq-item">
Can I use frozen strawberries for an Easy Strawberry Cake?
Yes! Frozen strawberries work well for an Easy Strawberry Cake—just thaw and drain them to avoid excess moisture. Chop or puree them before adding to the batter for even distribution. Fresh or frozen, the cake will taste delicious.
How do I keep my strawberry cake from getting soggy?
To prevent a soggy Easy Strawberry Cake, lightly coat strawberry pieces in flour before folding them into the batter. Also, avoid overmixing and bake until a toothpick comes out clean. Proper cooling before slicing helps too.
What frosting pairs best with strawberry cake?
Cream cheese frosting or whipped cream complements an Easy Strawberry Cake perfectly, balancing sweetness with a tangy touch. For a lighter option, try a vanilla glaze. Both options highlight the cake’s fresh strawberry flavor.
>
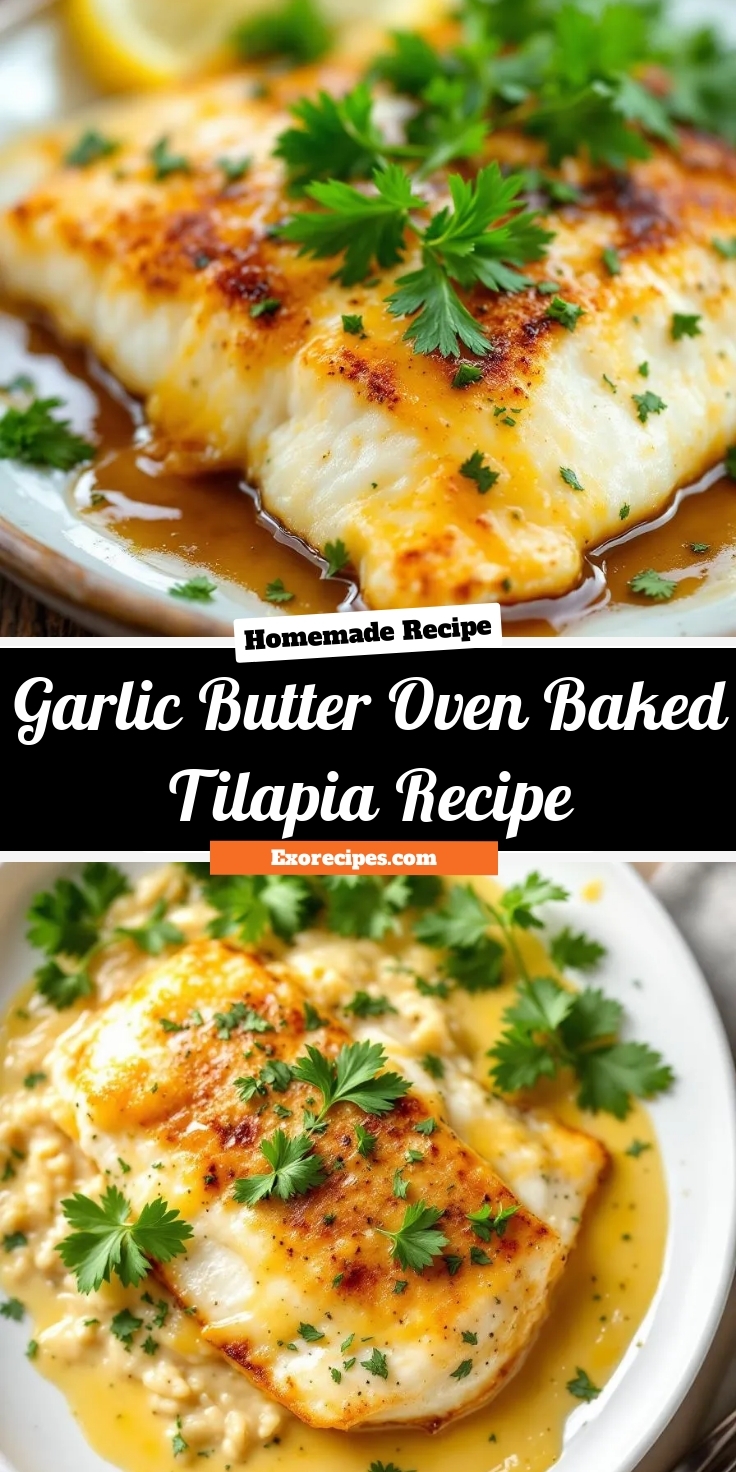
Easy Garlic Butter Oven Baked Tilapia Recipe
Introduction
If you’re looking for a dish that’s both effortless and bursting with flavor, you’ve come to the right place. This Garlic Butter Oven Baked Tilapia Recipe is a game-changer for busy weeknights or lazy Sundays when you crave something delicious without the fuss. Not only does it come together in under 30 minutes, but it also delivers restaurant-quality taste with minimal effort. Whether you’re cooking for one or feeding a family, this recipe promises to become a staple in your kitchen.
Garlic Butter Oven Baked Tilapia Recipe combines tender, flaky fish with a rich, buttery garlic sauce that melts in your mouth. The dish shines because it’s simple yet elegant, making it perfect for both casual dinners and special occasions. Tilapia, a mild and versatile fish, soaks up the bold flavors of garlic, butter, and herbs, creating a harmony of taste in every bite. Plus, baking the fish keeps it moist and healthy, unlike frying. If you love easy seafood recipes, you’ll appreciate how this one aligns with the breezy, approachable vibe of brekcakes.com. For more quick dinner ideas, check out my 15-minute meals collection. And if you’re new to cooking fish, my fish cooking tips will guide you through the basics.
Why I Love This Recipe
This Garlic Butter Oven Baked Tilapia Recipe holds a special place in my heart because it reminds me of family gatherings by the lake. My dad used to grill fish, but on rainy days, we’d bake it instead—and this recipe captures that same cozy, comforting feeling. The aroma of garlic and butter wafting through the kitchen instantly transports me back to those moments. Even now, it’s my go-to when I need a meal that feels like a hug on a plate. Simple, satisfying, and full of memories—that’s what cooking is all about.
Health and Nutrition
Why it’s good for your body
Garlic Butter Oven Baked Tilapia Recipe packs a powerful nutritional punch while keeping flavors light and delicious. First, tilapia serves as an excellent lean protein source, helping you build muscle and stay full longer. Additionally, this dish delivers heart-healthy omega-3 fatty acids, which support brain function and reduce inflammation. The garlic butter not only enhances taste but also provides antioxidants that boost immunity.
Moreover, Garlic Butter Oven Baked Tilapia Recipe keeps calories in check, making it ideal for weight management. Baking instead of frying preserves nutrients while cutting unnecessary fats. Furthermore, tilapia contains essential vitamins like B12 and selenium, which promote energy and thyroid health. The garlic adds a dose of allicin, known for its anti-inflammatory and cholesterol-lowering properties.
Finally, this recipe balances simplicity with nourishment. You get a meal rich in protein, low in carbs, and bursting with flavor. Whether you seek a post-workout dinner or a light yet satisfying option, Garlic Butter Oven Baked Tilapia Recipe fits the bill perfectly.
How it fits in a healthy lifestyle
Garlic Butter Oven Baked Tilapia Recipe effortlessly aligns with various dietary goals. If you follow a gluten-free or low-carb plan, this dish naturally meets those needs without sacrificing taste. For those focused on heart health, the lean protein and healthy fats make it a smart choice. Plus, it’s quick to prepare, fitting seamlessly into busy weeknights.
Pair this recipe with a side of roasted vegetables or a fresh salad for a well-rounded meal. If you’re exploring more high-protein options, check out our Grilled Lemon Herb Chicken for another easy favorite. And if you love seafood, our Garlic Shrimp Zoodles offers a lighter twist with similar bold flavors. With minimal prep and maximum nutrition, Garlic Butter Oven Baked Tilapia Recipe helps you eat well without the hassle.
A simple and flavorful baked tilapia recipe with a rich garlic butter sauce.
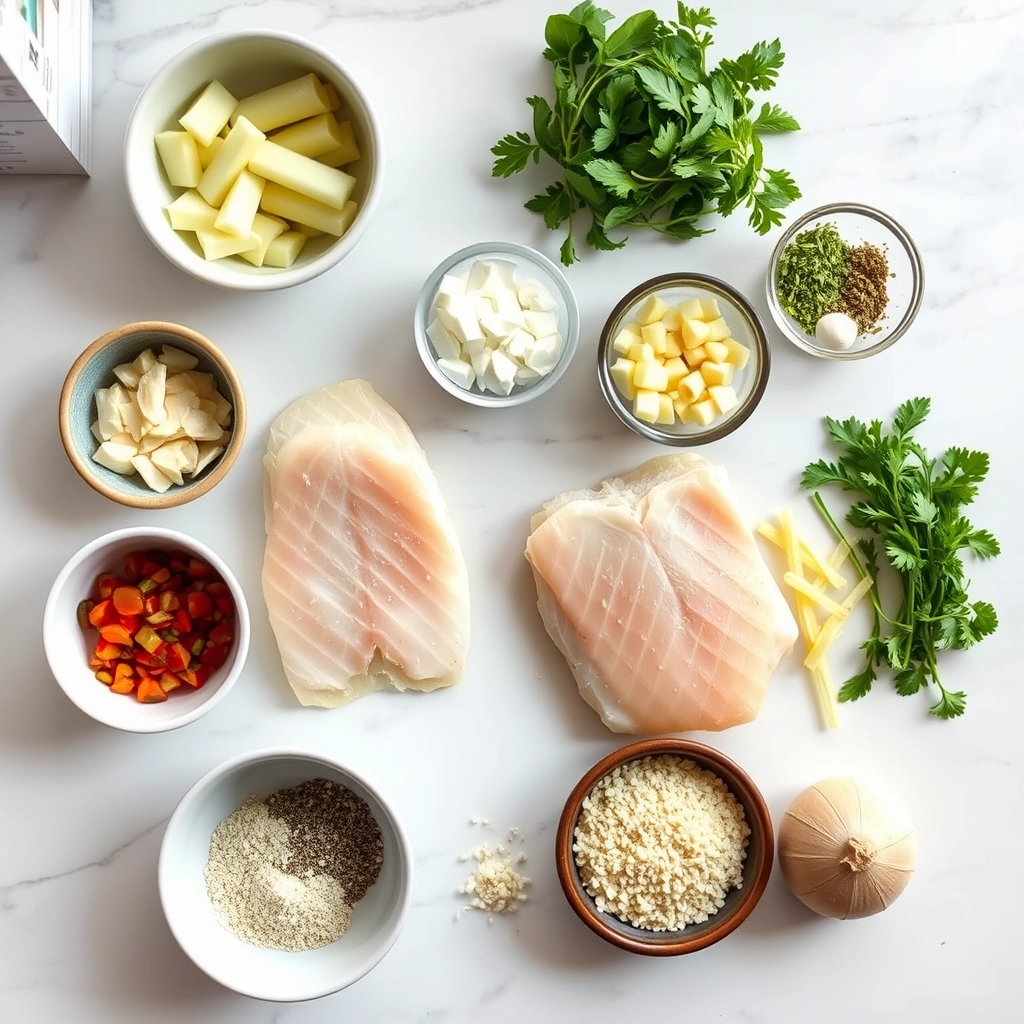
Ingredients
Scale
For the Crust:
4 tilapia fillets
4 tablespoons unsalted butter, melted
4 cloves garlic, minced
1 tablespoon lemon juice
1 teaspoon paprika
1/2 teaspoon salt
1/4 teaspoon black pepper
1 tablespoon fresh parsley, chopped
Instructions
1. Prepare the Crust:
Preheat oven to 375°F (190°C) and line a baking sheet with parchment paper.
In a small bowl, mix melted butter, minced garlic, lemon juice, paprika, salt, and black pepper.
Place tilapia fillets on the prepared baking sheet and brush each fillet generously with the garlic butter mixture.
Bake for 12-15 minutes or until the fish flakes easily with a fork.
Garnish with fresh parsley before serving.
Notes
You can customize the seasonings to taste.
“`html
="how-to-prepare-this-dish">How to Prepare This Dish
Steps and time-saving tips
Preheat your oven to 400°F and line a baking sheet with parchment paper for easy cleanup. Pat the tilapia fillets dry with paper towels to ensure the garlic butter mixture sticks well. In a small bowl, whisk together melted butter, minced garlic, lemon juice, and a pinch of salt and pepper. Drizzle half of this garlic butter mixture over the fillets, making sure to coat them evenly. Bake the tilapia for 10-12 minutes, or until it flakes easily with a fork. While the fish cooks, mix the remaining garlic butter with chopped parsley for a fresh finish. Once the tilapia is done, spoon the herbed butter over the top and serve immediately. For a time-saving twist, prep the garlic butter mixture ahead and store it in the fridge. You can also use frozen tilapia fillets—just thaw them overnight in the refrigerator to save time. Pair this Garlic Butter Oven Baked Tilapia Recipe with a simple side like roasted vegetables or a light salad for a complete meal.
Mistakes I’ve made and learned from
I used to overcrowd the baking sheet, thinking I could fit all the fillets at once. This led to uneven cooking, with some pieces drying out while others stayed underdone. Now, I space them out properly, and if needed, I use two pans. Another mistake was skipping the step of patting the fillets dry, which made the garlic butter slide right off. A quick dab with paper towels fixes this. For more tips on avoiding common kitchen blunders, check out my guide on common cooking mistakes. Also, if you’re new to working with fish, my post on choosing fresh fish will help you pick the best tilapia for this recipe. Trust me, these small adjustments make a big difference in nailing the Garlic Butter Oven Baked Tilapia Recipe every time.
The Garlic Butter Oven Baked Tilapia Recipe carries a simple yet universal appeal, blending flavors that span continents. While tilapia itself thrives in freshwater farms worldwide, the garlic butter method whispers of Mediterranean roots, where cooks often pair fish with rich, aromatic sauces. In the Caribbean, however, you might find tilapia grilled with fiery jerk spices, while in Southeast Asia, it could steam in banana leaves with lemongrass and coconut milk. Yet, the oven-baked version we love today feels distinctly American—a quick, healthy weeknight dinner that fits busy lives.
In my family, the Garli
c Butter Oven Baked Tilapia Recipe became a staple after a trip to Florida, where we tasted something similar at a seaside café. Back home, we tweaked it with extra lemon and parsley, turning it into our go-to Friday meal. Some regions skip the butter for olive oil or swap tilapia for cod, but the heart of the dish stays the same: tender fish, bold garlic, and a golden finish. Whether served with rice, roasted veggies, or crusty bread, it’s a dish that adapts without losing its charm.
How it fits in today’s cooking
Today, the Garlic Butter Oven Baked Tilapia Recipe shines as a versatile favorite for modern cooks. Busy families love it for its 20-minute prep time, while meal preppers batch-cook it alongside easy meal prep ideas like quinoa or steamed greens. It’s also a star during Lent or light summer dinners when heavier dishes feel overwhelming. Plus, with gluten-free and keto diets on the rise, many swap breadcrumbs for almond flour or add a sprinkle of Parmesan for extra crunch.
Food bloggers and home chefs keep reinventing it, too. Some layer it over creamy garlic mashed potatoes, while others toss in cherry tomatoes for a burst of color. Whether you’re cooking for one or hosting a crowd, this recipe proves that comfort food doesn’t need hours—or a complicated ingredient list—to feel special.
>Taste and Texture
What makes it delicious
The Garlic Butter Oven Baked Tilapia Recipe delivers a buttery, savory bite with a melt-in-your-mouth tenderness. Each forkful bursts with rich garlic flavor, balanced by a hint of lemon zest that brightens the dish. The tilapia stays moist and flaky, while the golden edges crisp up just enough for a satisfying contrast. Fragrant parsley and a touch of paprika add depth, making every bite irresistible. Plus, the aroma of garlic butter wafting from the oven will have everyone gathered around the table before it’s even served. Whether you’re a seafood lover or new to tilapia, the Garlic Butter Oven Baked Tilapia Recipe turns simple ingredients into a restaurant-worthy meal.
Boosting the flavor
For an extra flavor kick, try swapping regular butter for garlic herb butter, which amps up the herbal notes. A sprinkle of grated parmesan or a drizzle of lemon dill sauce right before serving adds a creamy, tangy finish. If you love heat, a pinch of red pepper flakes or smoked paprika brings warmth without overpowering the delicate fish. Fresh herbs like thyme or chives also work wonders for a pop of color and freshness. With these easy tweaks, the Garlic Butter Oven Baked Tilapia Recipe becomes even more versatile—and downright addictive.
Tips for Success
Best practices for results
Pat the tilapia fillets dry before seasoning to help the garlic butter stick better. Meanwhile, always preheat your oven to ensure even cooking for your Garlic Butter Oven Baked Tilapia Recipe. For extra flavor, brush the melted garlic butter mixture on both sides of the fish. Additionally, use fresh lemon juice instead of bottled for a brighter taste. Finally, let the fish rest for a few minutes after baking to lock in the juices.
Mistakes to avoid
Avoid overcrowding the baking sheet, as this can steam the fish instead of giving it a perfect bake. Instead, space the fillets at least an inch apart for better results. Also, don’t skip the step of lining your pan with foil or parchment paper, which prevents sticking and makes cleanup easier. If you’re unsure about seasoning, check out our guide on perfect seasoning balance for tips. Lastly, resist the urge to overcook the tilapia—use a meat thermometer to reach 145°F, and learn more about ideal fish cooking times for best results.
Serving and Pairing Suggestions
How to serve this dish
For a stunning presentation, plate your Garlic Butter Oven Baked Tilapia Recipe on a bed of vibrant greens or lemon slices. Meanwhile, drizzle extra garlic butter sauce over the top and sprinkle fresh parsley for a pop of color. Alternatively, serve it family-style on a large platter for casual dinners. This dish shines at weeknight meals but also works beautifully for special occasions like Easter brunch or summer gatherings. Finally, pair it with crusty bread to soak up every last bit of that delicious sauce.
h-it">What goes well with it
Light, citrusy sides like our Lemon Herb Quinoa balance the rich flavors of Garlic Butter Oven Baked Tilapia Recipe perfectly. For a crisp contrast, try roasted asparagus or a simple arugula salad with shaved Parmesan. Additionally, a chilled glass of Sauvignon Blanc or sparkling water with lime enhances the dish’s brightness. If you love dipping sauces, our Creamy Dill Sauce adds a cool, tangy twist that pairs wonderfully with the buttery fish.
How long do you bake tilapia in the oven at 400°F?
For a perfect Garlic Butter Oven Baked Tilapia Recipe, bake the fish at 400°F for 10–12 minutes. The tilapia is done when it flakes easily with a fork and reaches an internal temperature of 145°F. Overcooking can dry it out, so keep an eye on it during the last few minutes.
rank-math-faq-item">
What sides go well with garlic butter tilapia?
This Garlic Butter Oven Baked Tilapia Recipe pairs beautifully with light sides like roasted asparagus, garlic mashed potatoes, or a fresh garden salad. For a heartier meal, try it with quinoa or steamed rice. The buttery flavors complement both veggies and grains.
Can I use frozen tilapia for this recipe?
Yes, but thaw it completely in the fridge overnight first. Pat the tilapia dry before baking to ensure the garlic butter coating sticks properly. Fresh or properly thawed tilapia works best for this Garlic Butter Oven Baked Tilapia Recipe.
Is tilapia a healthy fish to eat?
Tilapia is a lean, low-calorie protein source rich in selenium and vitamin B12. When prepared with olive oil and fresh garlic like in this Garlic Butter Oven Baked Tilapia Recipe, it makes for a nutritious meal. Always choose responsibly sourced tilapia for the best quality.