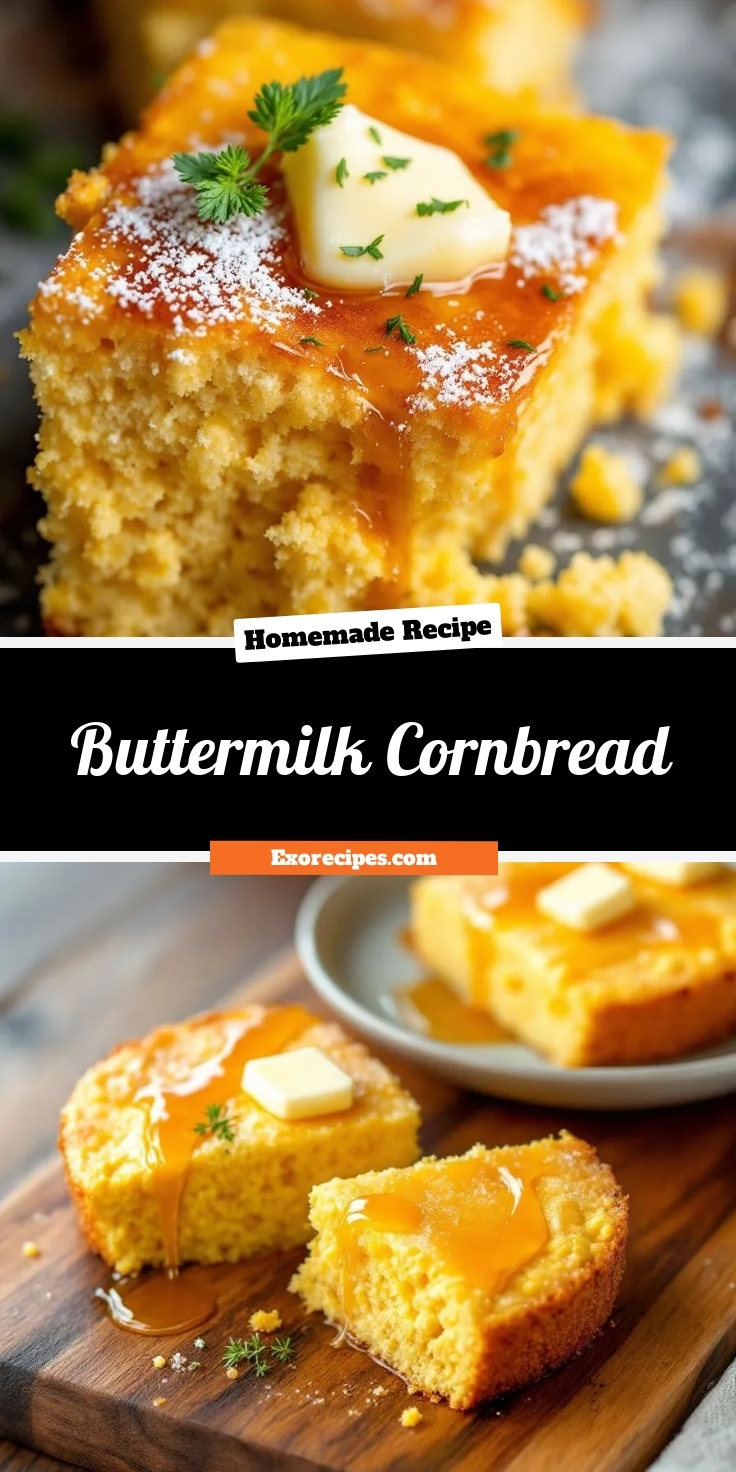
Best Buttermilk Cornbread – Moist and Fluffy Recipe
Introduction
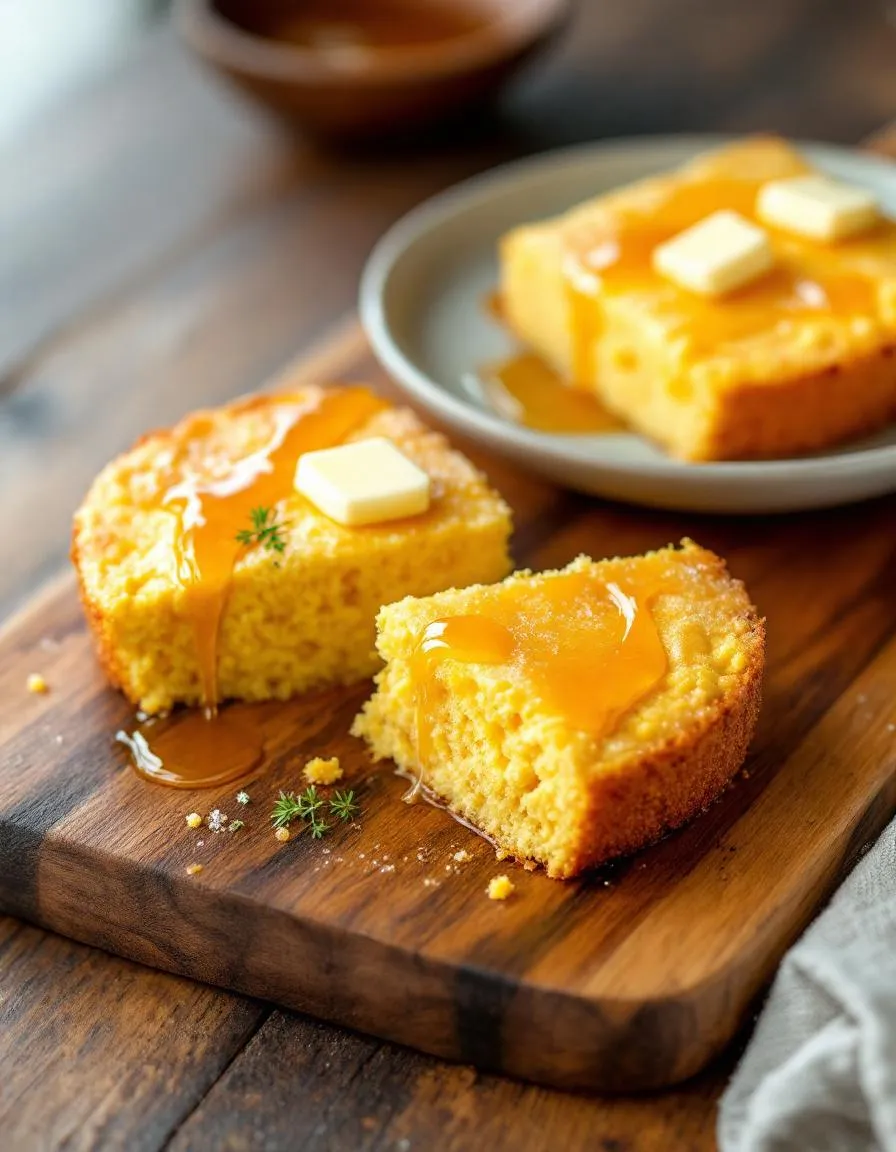
There’s something undeniably comforting about a warm slice of Buttermilk Cornbread fresh from the oven. Whether you’re pairing it with a hearty bowl of chili or enjoying it with a drizzle of honey, this classic Southern staple brings people together. Moreover, its golden crust and tender crumb make it a crowd-pleaser for any occasion. If you’ve ever craved that perfect balance of sweetness and tang, this Buttermilk Cornbread recipe will quickly become your go-to.
Buttermilk Cornbread is more than just a side dish—it’s a celebration of simplicity and tradition. Unlike dry or overly dense versions, this recipe delivers a moist, flavorful bite every time thanks to the magic of buttermilk. Additionally, it’s incredibly versatile. You can serve it at a summer barbecue, a cozy winter dinner, or even as a base for creative dishes like cornbread stuffing. The beauty of Buttermilk Cornbread lies in its ability to adapt while staying true to its roots. For those who love baking, it’s also a great way to explore Southern baking techniques without feeling overwhelmed. Above all, it’s a reminder that the best recipes don’t need to be complicated—just made with care.
Why I Love This Recipe
Buttermilk Cornbread holds a special place in my heart because it reminds me of Sunday dinners at my grandma’s house. She always insisted on using real buttermilk, claiming it made all the difference—and she was right. To this day, the smell of cornbread baking takes me back to her kitchen, where laughter and stories flowed as freely as the melted butter on our plates. That’s why I’ve perfected this recipe over the years, ensuring it captures that same warmth and nostalgia. Every bite feels like coming home.
Health and Nutrition
Why it’s good for your body
Buttermilk Cornbread delivers a satisfying blend of nutrients while keeping flavors rich and comforting. First, the buttermilk adds probiotics, which support gut health and digestion. Additionally, cornmeal provides a solid dose of fiber, helping you stay full longer and promoting steady energy levels. Unlike overly processed breads, Buttermilk Cornbread uses simple, wholesome ingredients that your body recognizes and utilizes efficiently.
Moreover, this recipe often includes eggs, which contribute high-quality protein and essential vitamins like B12. The combination of buttermilk and cornmeal also offers a moderate amount of calcium and iron, both crucial for strong bones and healthy blood circulation. Even better, Buttermilk Cornbread can be easily adapted with whole-grain cornmeal for an extra nutrient boost without sacrificing texture.
Finally, the natural sweetness of corn means you can often reduce added sugars. Whether you enjoy it as a side or a snack, Buttermilk Cornbread provides a balanced mix of carbs, protein, and fats. Its versatility makes it a smart choice for anyone looking to enjoy comfort food without compromising nutrition.
How it fits in a healthy lifestyle
Buttermilk Cornbread fits seamlessly into a balanced diet, especially when paired with protein-rich dishes like chili or grilled chicken. For those following a gluten-free lifestyle, swapping regular flour for a gluten-free blend keeps this classic recipe accessible. You can also boost its heart-healthy profile by using olive oil instead of butter, which adds beneficial monounsaturated fats.
If you’re meal prepping, Buttermilk Cornbread stores well and makes a convenient grab-and-go option. Pair it with a protein-packed soup or salad for a well-rounded meal. For more ideas on balancing comfort food with nutrition, check out our guide on healthy comfort food swaps. And if you’re curious about gluten-free baking, our gluten-free baking tips can help you perfect your technique. With a few tweaks, Buttermilk Cornbread becomes a versatile staple that supports your health goals without skimping on flavor.
Start by preheating your oven to 375°F and greasing a 9-inch cast-iron skillet or baking dish. Meanwhile, whisk together the dry ingredients—cornmeal, flour, sugar, baking powder, baking soda, and salt—in a large bowl. In another bowl, whisk the buttermilk, melted butter, and eggs until smooth. Next, pour the wet ingredients into the dry mixture and gently fold everything together until just combined. Overmixing can make your Buttermilk Cornbread dense, so stop as soon as the batter comes together.
Pour the batter into the prepared skillet and smooth the top with a spatula. Bake for 20-25 minutes until the edges turn golden and a toothpick inserted in the center comes out clean. For extra flavor, drizzle honey over the warm cornbread or serve it with a pat of butter. If you’re short on time, use a preheated skillet to speed up baking, or swap in a boxed cornbread mix and enhance it with buttermilk for a richer taste. Either way, this Buttermilk Cornbread will turn out tender and delicious.
and-learned-from">Mistakes I’ve made and learned from
I’ve learned the hard way that overbaking Buttermilk Cornbread dries it out. Once, I left it in the oven just five minutes too long, and it lost its signature moisture. Now, I set a timer and check early. Another mistake? Skipping the buttermilk substitute test. When I ran out of buttermilk, I used regular milk, and the texture suffered. Now, I either keep powdered buttermilk on hand or make a quick DIY buttermilk substitute with vinegar. For more baking tips, check out my guide on achieving the perfect cornbread texture. Trust me, these small tweaks make all the difference.
Cultural Connection and Variations
Where this recipe comes from
Buttermilk Cornbread carries deep roots in Southern American cuisine, where generations have cherished it as a staple. Originally, Native Americans introduced cornmeal-based dishes, and settlers later adapted them with dairy, creating the moist, tangy version we love today. Meanwhile, in the Southwest, you might find a spicier take with jalapeños or cheddar, while Northern recipes often lean sweeter, almost like cake.
In my family, Buttermil
k Cornbread always meant Sunday supper—crispy edges, steaming from the cast iron, and served with a pat of butter melting into golden cracks. Some folks bake it thin and crispy, while others prefer it thick and fluffy. Across the globe, similar dishes pop up too. For instance, Mexican pan de elote uses fresh corn for sweetness, and Brazilian broa blends cornmeal with wheat flour. Yet, nothing beats the simplicity of classic Buttermilk Cornbread, especially when it soaks up chili or greens.
How it fits in today’s cooking
Today, Buttermilk Cornbread still shines as a versatile favorite. Busy home cooks whip it up for weeknight dinners, while holiday tables feature it alongside turkey or ham. Modern twists, like gluten-free flour or vegan buttermilk swaps, keep it inclusive. Plus, it pairs perfectly with seasonal dishes—think summer barbecues or cozy winter soups.
Many bakers now experiment with mix-ins, from bacon bits to roasted corn, proving this classic never gets old. For inspiration, check out our Southern comfort food roundup or explore how to balance flavors in our baking with cornmeal guide. Whether you stick to tradition or get creative, Buttermilk Cornbread remains a timeless crowd-pleaser.
>Taste and Texture
What makes it delicious
Buttermilk Cornbread delights with its golden, slightly crisp crust and tender, moist crumb that melts in your mouth. The rich tang of buttermilk balances the natural sweetness of cornmeal, while a hint of butter adds a velvety richness. Each bite offers a comforting warmth, with a subtle grainy texture that makes it satisfyingly rustic. Fresh from the oven, Buttermilk Cornbread fills the air with a toasty, buttery aroma that invites you to dig in. Whether served warm or at room temperature, its hearty yet fluffy texture makes it irresistible.
Boosting the flavor
For a bolder twist, try stirring sharp cheddar or diced jalapeños into the batter before baking—their savory kick pairs perfectly with the cornbread’s sweetness. Drizzling honey or spreading a pat of homemade herb butter on top adds a luxurious finish. If you love a touch of smokiness, crumble crispy bacon into the mix or serve it alongside a bowl of spicy chili for a hearty combo. Experiment with spices like paprika or a pinch of cayenne to elevate the flavor even further.
Tips for Success
Best practices for results
Preheat your oven thoroughly before baking Buttermilk Cornbread to ensure even cooking. Meanwhile, use fresh buttermilk for the best tangy flavor and tender crumb. Additionally, avoid overmixing the batter—just stir until the ingredients combine for a light texture. Finally, let the cornbread cool slightly before slicing so it holds its shape perfectly.
Mistakes to avoid
Many bakers skip greasing the pan, which can make Buttermilk Cornbread stick. Instead, lightly coat your baking dish with butter or oil for easy release. Another common error is using cold ingredients, which leads to uneven baking. For better results, bring eggs and buttermilk to room temperature first. If you need more guidance, check out our essential baking tools guide or learn how to adjust bake times for altitude.
Serving and Pairing Suggestions
How to serve this dish
Buttermilk Cornbread shines when served warm straight from the oven, with a pat of butter melting into its golden crust. For a rustic touch, slice it into wedges and arrange them on a wooden board alongside honey or jam. Alternatively, bake it in a cast-iron skillet for a charming presentation that doubles as a serving dish. During holidays or family gatherings, pair it with a drizzle of maple syrup or a sprinkle of flaky sea salt to elevate its flavor. Whether you serve it at brunch, a backyard barbecue, or a cozy weeknight dinner, Buttermilk Cornbread always adds a comforting touch.
h-it">What goes well with it
Buttermilk Cornbread pairs beautifully with hearty soups like our Slow Cooker Chili, as the mild sweetness balances the rich, spicy flavors. For a lighter option, try it with a fresh garden salad or tangy coleslaw to add a delightful contrast in textures. If you’re hosting a brunch, serve it alongside our Fluffy Scrambled Eggs for a satisfying savory-sweet combo. Don’t forget a glass of iced tea or a crisp apple cider to round out the meal.
What makes buttermilk cornbread different from regular cornbread?
Buttermilk cornbread has a tangier, richer flavor and a more tender crumb compared to regular cornbread. The acidity in buttermilk also helps activate baking soda, giving the cornbread a lighter texture. Many Southern recipes swear by buttermilk for the best cornbread.
rank-math-faq-item">
Can I substitute regular milk for buttermilk in cornbread?
You can, but the results won’t be the same. For a close substitute, mix 1 cup regular milk with 1 tablespoon lemon juice or vinegar and let it sit for 5 minutes before using. Authentic buttermilk cornbread relies on the unique tang and texture of real buttermilk.
Why is my buttermilk cornbread dry?
Dry buttermilk cornbread usually results from overmixing the batter or baking too long. For moist cornbread, mix just until combined and bake until a toothpick comes out clean—not bone-dry. Using the right ratio of buttermilk to cornmeal also prevents dryness.
Should buttermilk cornbread be sweet or savory?
Traditional Southern buttermilk cornbread leans savory, but many recipes add a touch of sugar for balance. The buttermilk’s tang pairs well with either style. For authentic flavor, try a savory version with just 1-2 tablespoons of sugar to enhance the corn’s natural sweetness.
>
Easy No-Bake Mini Banana Cream Pies Recipe
Introduction
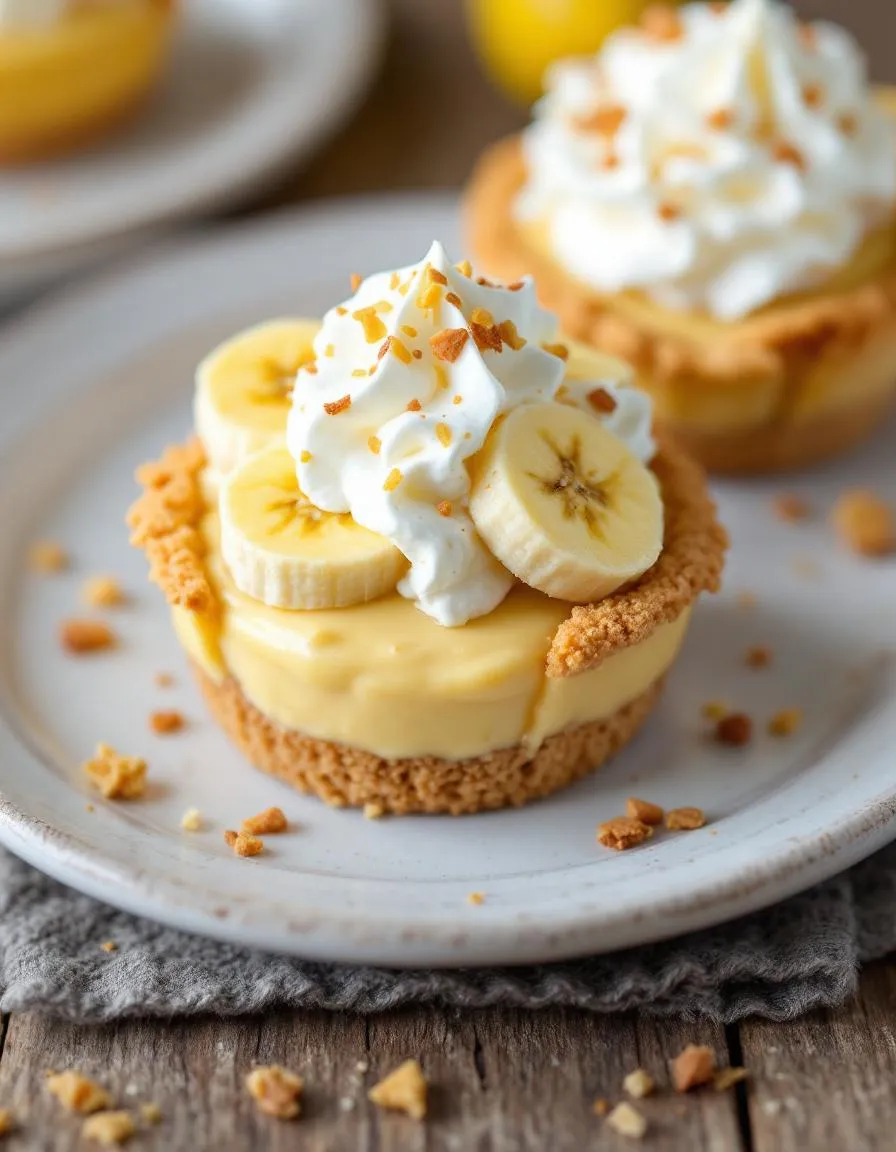
If you’re craving a dessert that’s both effortless and indulgent, you’re in the right place. These No-Bake Mini Banana Cream Pies bring together creamy sweetness and a buttery crust without ever turning on your oven. Whether you’re short on time or simply want a fuss-free treat, this recipe delivers nostalgia in every bite. Plus, it’s perfect for sharing—or keeping all to yourself!
No-Bake Mini Banana Cream Pies are the ultimate solution for dessert lovers who want maximum flavor with minimal effort. Unlike traditional pies, these mini versions skip the baking entirely, relying on a crisp graham cracker crust, velvety banana pudding, and fresh whipped cream. They’re ideal for summer gatherings, last-minute cravings, or even as a fun project with kids. What makes them special? They capture the classic taste of banana cream pie while being incredibly adaptable. For instance, you can swap ingredients for dietary needs or add toppings like caramel drizzle for extra decadence. If you enjoy easy desserts, you’ll love my No-Bake Cheesecake Bites too. This recipe fits the brekcakes.com vibe because it’s approachable, delicious, and designed to make baking feel joyful—not intimidating. And if you’re new to no-bake treats, my 5-Minute Chocolate Mousse is another great place to start.
Why I Love This Recipe
No-Bake Mini Banana Cream Pies hold a special place in my heart because they remind me of lazy Sunday afternoons with my grandma. She’d let me crush the graham crackers while she whipped the cream, and we’d always sneak a spoonful of pudding before assembling the pies. Now, whenever I make them, I’m transported back to those simple, sweet moments. They’re more than just a dessert—they’re a little bite of happiness.
Health and Nutrition
Why it’s good for your body
No-Bake Mini Banana Cream Pies pack a surprising nutritional punch while satisfying your sweet tooth. First, bananas deliver potassium, which helps regulate blood pressure and supports muscle function. Additionally, the natural sweetness of bananas means you can cut back on added sugars without sacrificing flavor. Moreover, the creamy filling often includes dairy or plant-based alternatives, providing calcium for strong bones.
Since No-Bake Mini Banana Cream Pies skip the oven, they retain more of the bananas’ heat-sensitive nutrients like vitamin B6. This vitamin boosts brain health and energy levels. Furthermore, the crust often features whole grains or nuts, adding fiber and healthy fats. These ingredients keep you full longer and support digestion. Finally, portion-controlled mini pies help you enjoy dessert mindfully, so you avoid overindulging.
No-Bake Mini Banana Cream Pies also offer versatility for dietary needs. For example, you can easily swap ingredients to make them vegan or gluten-free. Whether you need a quick energy boost or a post-workout treat, these mini pies deliver both nutrition and convenience.
How it fits in a healthy lifestyle
No-Bake Mini Banana Cream Pies fit seamlessly into balanced eating habits. Their smaller size encourages portion control, making them a smart choice for weight management. You can also customize them with protein-rich Greek yogurt or nut butters to align with high-protein diets. For gluten-free lifestyles, simply opt for an oat or almond flour crust.
These mini pies work well as a post-workout snack or a light dessert after a balanced dinner. If you’re watching sugar intake, try using ripe bananas and natural sweeteners like honey or maple syrup. For more ideas on healthy swaps, check out our guide to healthier dessert alternatives. With simple tweaks, No-Bake Mini Banana Cream Pies can suit almost any dietary goal without compromising taste.
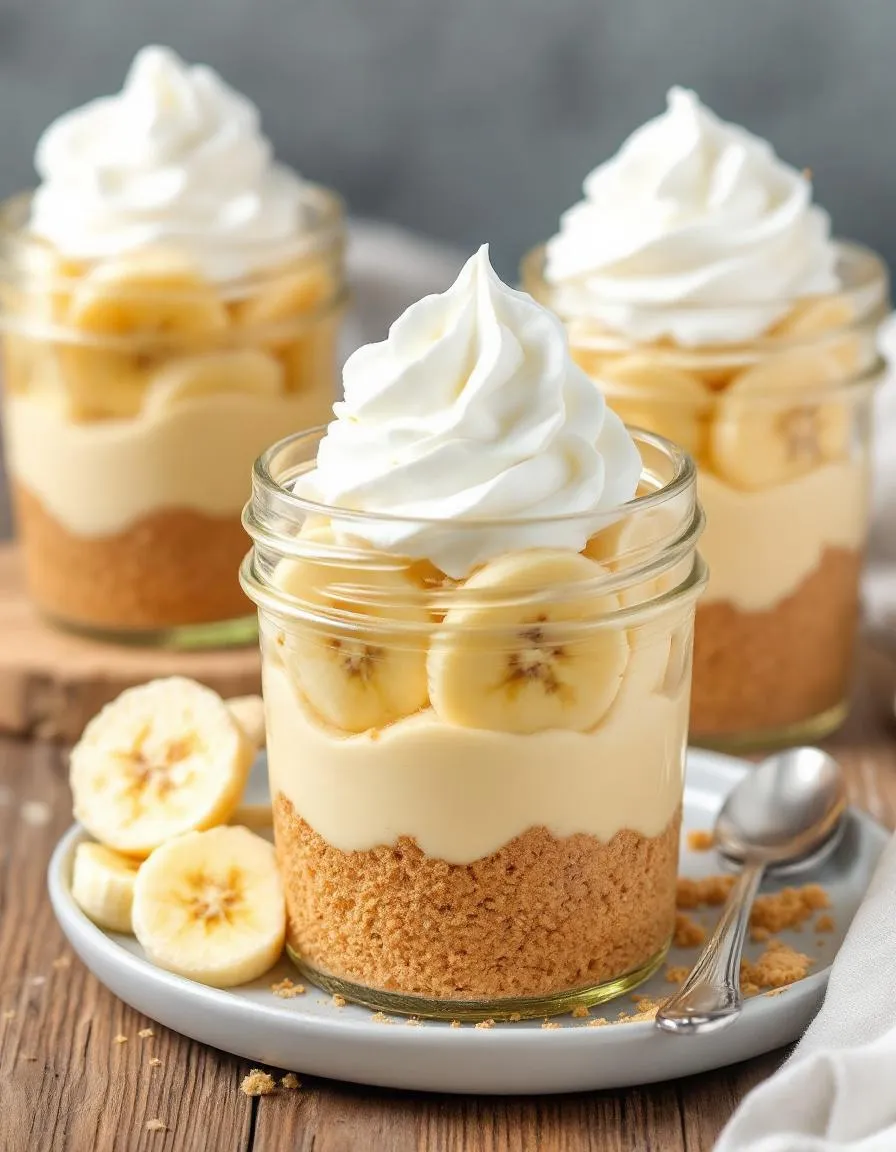
Start by crushing graham crackers into fine crumbs for the crust. Mix them with melted butter and a pinch of salt until the texture resembles wet sand. Press the mixture firmly into mini pie tins or muffin cups, then chill for 10 minutes to set. Meanwhile, whisk together instant pudding mix and cold milk until thick and smooth. Fold in whipped cream for extra lightness, but avoid overmixing to keep it fluffy. Slice ripe bananas thinly and layer them over the chilled crusts. Next, spoon the pudding mixture on top, spreading it evenly. For a quick garnish, drizzle melted chocolate or sprinkle crushed nuts. Finally, refrigerate the No-Bake Mini Banana Cream Pies for at least two hours before serving. If you’re short on time, pop them in the freezer for 30 minutes instead. To save effort, use store-bought whipped cream or pre-crushed graham crackers. Just remember, fresh bananas work best—they add natural sweetness and a creamy texture.
and-learned-from">Mistakes I’ve made and learned from
I once rushed the chilling step and ended up with crumbly crusts that fell apart. Now I always let them set fully, even if it takes longer. Another time, I overmixed the pudding and whipped cream, which turned the filling dense instead of airy. A gentle fold works wonders, as I learned from my no-bake desserts guide. Also, slicing bananas too early causes browning, so I prep them right before assembling. If you’re new to no-bake treats, my kitchen hacks post has more tips to avoid common pitfalls. Trust me, these small adjustments make all the difference for perfect No-Bake Mini Banana Cream Pies every time.
“`
n-and-variations">Cultural Connection and Variations
Where this recipe comes from
No-Bake Mini Banana Cream Pies bring a touch of nostalgia to any table, blending Southern comfort with modern convenience. Originally inspired by classic banana cream pie, this no-bake version likely emerged as a time-saving twist for busy home cooks. In the South, families often serve the traditional baked version at potlucks or Sunday dinners, but the miniaturized, no-bake adaptation has gained popularity for its playful presentation and ease.
Around the world, similar desserts take different forms. For instance, in the Philippines, banana custard pies often include local latundan bananas and a buttery galapong crust. Meanwhile, British cooks might layer bananas with custard in a trifle. No-Bake Mini Banana Cream Pies, however, stand out because they skip the oven entirely, making them perfect for hot summers or last-minute gatherings.
In my family, we add a sprinkle of cinnamon or a drizzle of caramel to personalize these little treats. Some regions swap graham cracker crusts for crushed vanilla wafers or even coconut cookies. No matter the variation, No-Bake Mini Banana Cream Pies always bring people together with their creamy, fruity charm.
ays-cooking">How it fits in today’s cooking
Today, No-Bake Mini Banana Cream Pies fit perfectly into our fast-paced lives. They’re ideal for no-fuss desserts during holidays like Thanksgiving or Fourth of July picnics. Modern cooks love them because they require minimal effort but deliver maximum flavor, especially when paired with a scoop of homemade vanilla ice cream.
Health-conscious bakers also adapt the recipe by using coconut milk or almond flour crusts. Some even turn them into breakfast parfaits by layering yogurt with banana slices. Whether you’re hosting a party or craving a sweet midnight snack, these mini pies stay relevant. For more easy dessert ideas, check out these 5-minute chocolate mug cakes. After all, who can resist a dessert that’s both timeless and adaptable?
Taste and Texture
What makes it delicious
No-Bake Mini Banana Cream Pies deliver a dreamy combination of flavors and textures that make every bite irresistible. The velvety banana cream filling melts in your mouth, while the buttery graham cracker crust adds a satisfying crunch. Fresh banana slices bring a natural sweetness and slight chewiness, contrasting perfectly with the smooth, pudding-like filling. A hint of vanilla and a touch of cinnamon warm up the flavor, making these mini pies fragrant and comforting. Whether you serve them chilled or at room temperature, No-Bake Mini Banana Cream Pies offer a creamy, luscious dessert that feels indulgent yet light.
r">Boosting the flavor
Elevate your No-Bake Mini Banana Cream Pies with easy tweaks that amplify their deliciousness. For extra richness, swap regular whipped cream with homemade vanilla whipped cream, adding a floral depth to each bite. Sprinkle toasted coconut flakes or chopped nuts on top for a nutty crunch. If you love warm spices, a dash of nutmeg or cardamom pairs beautifully with the banana. Drizzle with salted caramel sauce for a sweet-and-salty finish that takes these mini pies to the next level. With these simple upgrades, you’ll create a dessert that’s even more memorable.
Tips for Success
Best practices for results
Always use ripe bananas for the best natural sweetness in your No-Bake Mini Banana Cream Pies. Meanwhile, chill your mixing bowl and beaters before whipping the cream to ensure it holds its shape. For a sturdy crust, press the graham cracker mixture firmly into each cup. Additionally, let the pies set in the fridge for at least two hours so the layers hold together perfectly.
>Mistakes to avoid
Avoid overfilling the mini pie cups, as the filling may spill when you add the topping. Instead, leave a small gap at the top for clean layers. Furthermore, don’t skip the cornstarch in the pudding mixture—it thickens the filling properly. If you need more guidance on perfecting no-bake desserts, check out our no-bake dessert troubleshooting guide. Also, slice the bananas just before assembling to prevent browning, and learn more about banana storage tips for fresher results.
Serving and Pairing Suggestions
How to serve this dish
No-Bake Mini Banana Cream Pies shine when you serve them with a touch of elegance. For a stunning presentation, arrange them on a tiered dessert stand or a rustic wooden board. Top each pie with a dollop of whipped cream, a sprinkle of cinnamon, or a few banana slices for extra flair. Meanwhile, these mini delights make perfect additions to brunch spreads, holiday dessert tables, or even as sweet treats at summer picnics. If you want to impress guests, drizzle a little caramel sauce over the pies just before serving for a glossy finish.
What goes well with it
Pair your No-Bake Mini Banana Cream Pies with a warm cup of coffee to balance their creamy sweetness. Alternatively, a chilled glass of vanilla almond milk enhances the dessert’s smooth texture. For a fuller spread, try serving them alongside our Classic Chocolate Chip Cookies or a scoop of Homemade Vanilla Ice Cream. The cookies add a satisfying crunch, while the ice cream turns this treat into a decadent banana cream pie sundae.
Can I make No-Bake Mini Banana Cream Pies ahead of time?
Yes! No-Bake Mini Banana Cream Pies are perfect for prepping in advance. Store them in the refrigerator for up to 2 days, but add fresh banana slices and whipped cream just before serving to prevent browning and sogginess.
What can I use instead of graham cracker crust for No-Bake Mini Banana Cream Pies?
For a twist, try using crushed vanilla wafers, shortbread cookies, or even Oreos for the crust. These alternatives pair well with the creamy filling in No-Bake Mini Banana Cream Pies and add unique flavor profiles.
rank-math-faq-item">
How do you keep bananas from turning brown in No-Bake Mini Banana Cream Pies?
Lightly brush banana slices with lemon juice or pineapple juice before layering them in No-Bake Mini Banana Cream Pies. The citric acid slows oxidation, keeping the bananas fresh-looking for up to a day.
Can I use instant pudding for No-Bake Mini Banana Cream Pies?
Absolutely! Instant pudding works great for No-Bake Mini Banana Cream Pies because it sets quickly without cooking. For best results, use banana or vanilla flavor and chill the pies for at least 1 hour before serving.
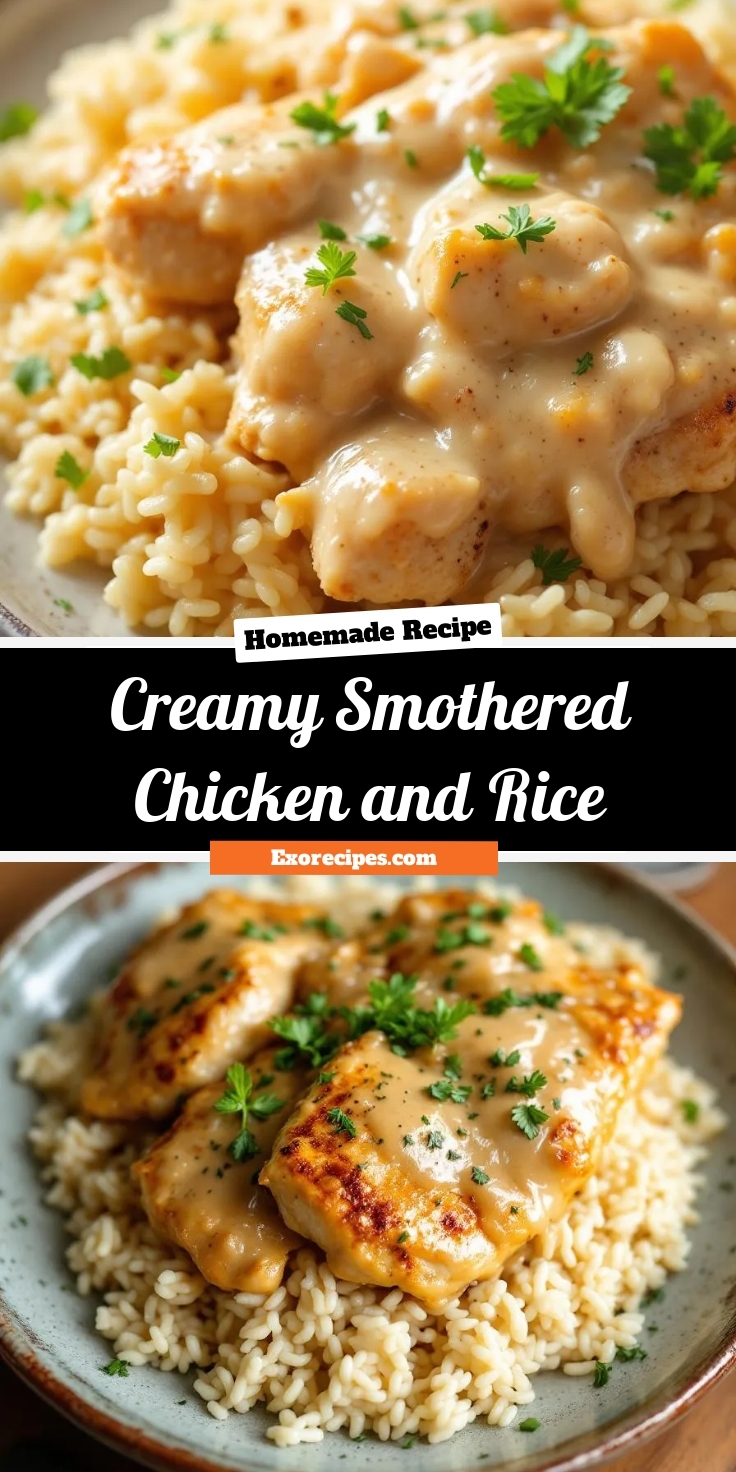
Best Creamy Smothered Chicken and Rice Recipe
Introduction
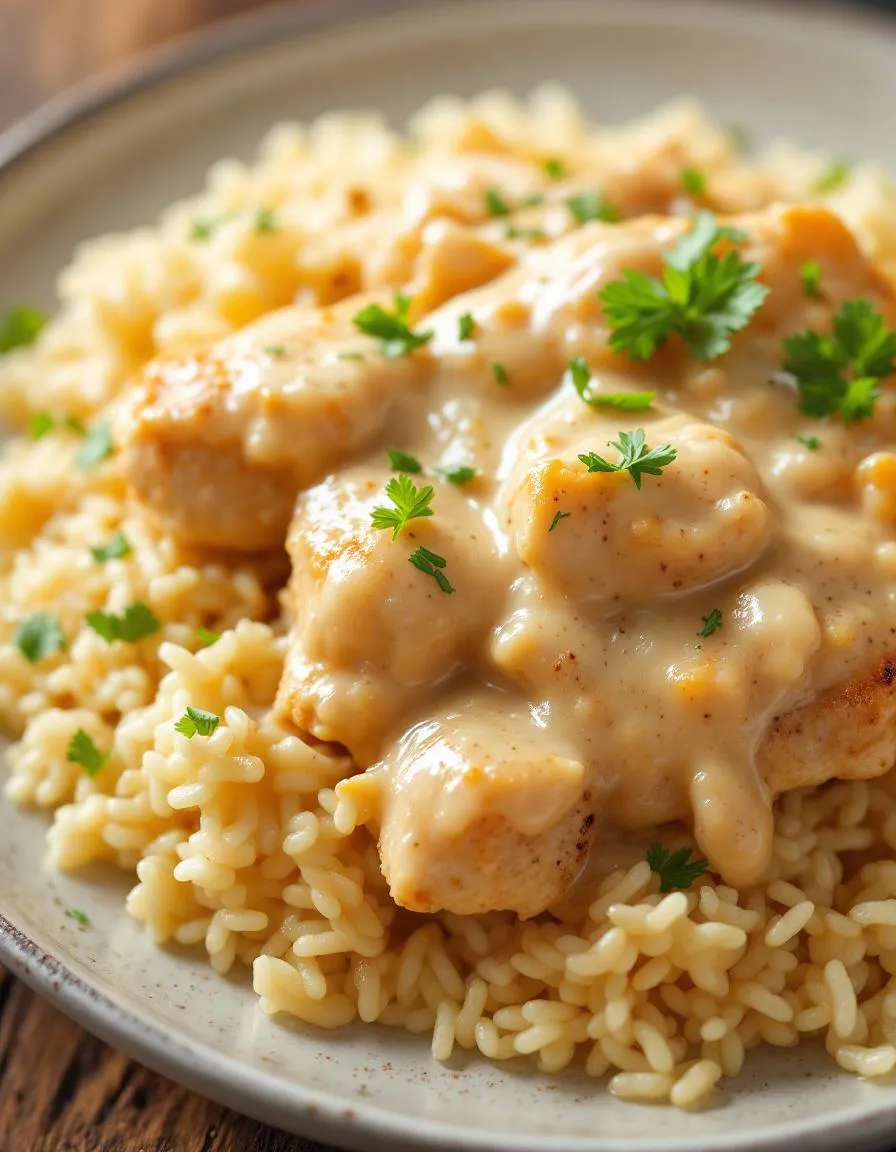
There’s something undeniably comforting about a dish that wraps you in warmth with every bite. That’s exactly what you’ll find with this Creamy Smothered Chicken and Rice recipe. Whether you’re craving a cozy weeknight dinner or need a crowd-pleasing meal for family gatherings, this dish delivers rich flavors and creamy satisfaction. Plus, it’s surprisingly simple to make, proving that comfort food doesn’t have to be complicated.
Creamy Smothered Chicken and Rice is the ultimate comfort meal, blending tender chicken, fluffy rice, and a velvety sauce into one irresistible dish. The secret lies in the harmony of flavors—savory herbs, a touch of garlic, and a creamy base that ties everything together. This recipe matters because it’s more than just food; it’s a hug on a plate, perfect for busy weeknights or lazy Sundays. If you love hearty, soul-warming meals like my Garlic Butter Steak Bites, you’ll adore this one too. It fits the brekcakes.com tone by balancing approachability with bold flavors, just like our Honey Glazed Salmon. Whether you’re a seasoned cook or just starting out, this recipe promises delicious results every time.
Why I Love This Recipe
Creamy Smothered Chicken and Rice holds a special place in my heart because it reminds me of family dinners growing up. My mom used to make a similar version, and the aroma alone would bring everyone to the table. Now, whenever I cook it, I feel that same sense of togetherness. It’s a dish that never fails to comfort, whether I’m sharing it with loved ones or enjoying a quiet night in. The creamy texture, the tender chicken, and the way the rice soaks up all the flavors—it’s pure nostalgia in every bite.
Health and Nutrition
Why it’s good for your body
Creamy Smothered Chicken and Rice delivers a powerhouse of nutrients in every bite. First, the lean chicken breast provides high-quality protein to support muscle repair and keep you full longer. Additionally, the rice offers complex carbohydrates for steady energy, making this dish a balanced meal. Moreover, the creamy sauce often includes ingredients like garlic and herbs, which add antioxidants to boost immunity.
Beyond protein and carbs, Creamy Smothered Chicken and Rice packs essential vitamins and minerals. For instance, chicken contains B vitamins that help convert food into fuel. Meanwhile, the vegetables commonly used in the recipe contribute fiber and vitamins A and C. Furthermore, using wholesome ingredients like olive oil or Greek yogurt in the sauce enhances heart health while keeping the dish flavorful.
Finally, this meal adapts easily to dietary preferences. Whether you use brown rice for extra fiber or opt for a lighter sauce, Creamy Smothered Chicken and Rice remains a nutritious choice. Its versatility ensures you can enjoy it guilt-free while reaping its health benefits.
How it fits in a healthy lifestyle
Creamy Smothered Chicken and Rice fits seamlessly into a balanced diet. If you’re aiming for high-protein meals, the chicken provides a lean source to meet your goals. For those following gluten-free diets, this dish naturally avoids gluten when prepared with the right ingredients. Even better, you can pair it with a side of roasted vegetables for added nutrients.
This recipe also supports heart-healthy eating habits. By using olive oil instead of butter and incorporating herbs for flavor, you reduce saturated fats without sacrificing taste. If you’re meal prepping, Creamy Smothered Chicken and Rice stores well, making it a practical choice for busy weeks. For more gluten-free meal ideas, check out our gluten-free dinner guide.
Whether you’re fueling up post-workout or serving a family dinner, this dish keeps nutrition simple and satisfying. For tips on balancing macros in your meals, explore our meal prep strategies. With its adaptable ingredients and wholesome profile, Creamy Smothered Chicken and Rice makes healthy eating effortless.
A comforting dish featuring tender chicken smothered in a creamy sauce served over fluffy rice.
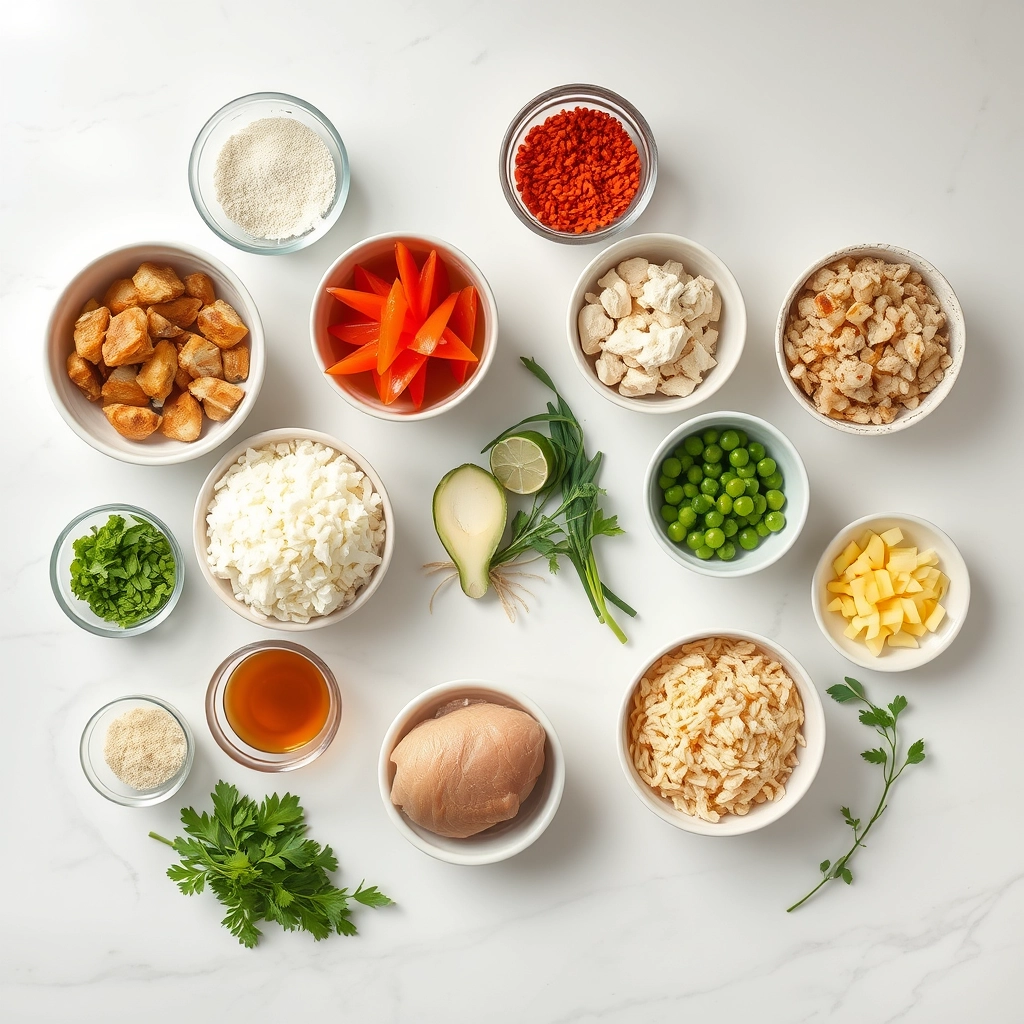
Ingredients
Scale
For the Crust:
4 boneless, skinless chicken breasts
1 cup long-grain white rice
2 cups chicken broth
1 cup heavy cream
1 onion, diced
2 cloves garlic, minced
1 tsp paprika
1 tsp dried thyme
Salt and pepper to taste
2 tbsp olive oil
Instructions
1. Prepare the Crust:
Heat olive oil in a large skillet over medium heat. Season chicken with salt, pepper, paprika, and thyme. Cook until golden brown, about 5 minutes per side. Remove and set aside.
In the same skillet, sauté onion and garlic until softened. Add rice and stir to coat with the oil and onions.
Pour in chicken broth and bring to a simmer. Return chicken to the skillet, cover, and cook for 20 minutes or until rice is tender and chicken is cooked through.
Stir in heavy cream and simmer for another 5 minutes until the sauce thickens slightly. Adjust seasoning if needed.
Notes
You can customize the seasonings to taste.
How to Prepare This Dish
Steps and time-saving tips
Start by seasoning your chicken generously with salt, pepper, and a touch of garlic powder for extra flavor. Heat a large skillet over medium-high heat and drizzle in a bit of olive oil. Once the oil shimmers, add the chicken and sear it for about 4 minutes per side until golden brown. Remove the chicken and set it aside—don’t worry if it’s not fully cooked yet. In the same skillet, toss in diced onions and minced garlic, stirring until they soften and release their aroma. Sprinkle in a tablespoon of flour and whisk it into the drippings to create a roux, which will thicken your sauce later. Slowly pour in chicken broth while stirring constantly to avoid lumps, then add heavy cream for richness. Bring the mixture to a gentle simmer and let it thicken for 3-4 minutes. Return the chicken to the skillet, spooning the creamy sauce over it. Cover and let everything cook together for another 10 minutes until the chicken is tender and fully cooked. Meanwhile, prepare fluffy rice or use leftover rice to save time. Serve the creamy smothered chicken and rice hot, garnished with fresh parsley for a pop of color. If you’re short on time, use pre-cooked rotisserie chicken and skip the searing step—just warm it in the sauce instead.
and-learned-from">Mistakes I’ve made and learned from
One of my biggest blunders was rushing the roux, which left my sauce lumpy and uneven. Now I take my time whisking the flour into the pan drippings before adding liquid, and I always use a flat whisk for smoother results. Another lesson? Overcrowding the skillet. I used to cram in all the chicken at once, which steamed instead of seared. Cooking in batches ensures that perfect golden crust. If you’ve struggled with dry chicken, try brining it first—my guide on how to keep chicken juicy has saved countless dinners. And if your sauce breaks, don’t panic! A splash of warm broth or cream, stirred gently, usually brings it back together. For more sauce-saving tricks, check out my fix broken sauces post. Trust me, even after years of cooking, I still learn something new every time I make this dish.
Cultural Connection and Variations
Where this recipe comes from
Creamy Smothered Chicken and Rice feels like a warm hug from the South, where comfort food reigns supreme. Originally, this dish likely evolved from Cajun and Creole kitchens, where cooks simmered chicken in rich gravies and served it over fluffy rice. Over time, families across the U.S. put their own spin on it—some adding mushrooms, others tossing in bell peppers for a pop of color. Meanwhile, in the Caribbean, you might find a version with coconut milk and Scotch bonnet peppers for a tropical kick.
In my family, Creamy Sm
othered Chicken and Rice was a Sunday staple. My grandma swore by buttermilk in the gravy, while my aunt insisted on a dash of hot sauce. No matter the tweaks, the dish always brought everyone to the table. Even today, I love how versatile it is. Whether you prefer it smoky, spicy, or herby, this recipe adapts to your taste like an old friend.
How it fits in today’s cooking
Creamy Smothered Chicken and Rice still earns its spot in modern kitchens because it’s both nostalgic and practical. Busy cooks lean on it for weeknight dinners, while others save it for cozy weekend feasts. Thanks to meal prep trends, many now make it ahead and reheat it effortlessly—just like these meal prep ideas suggest. Plus, it pairs perfectly with seasonal sides, whether you’re serving it with summer corn or winter greens.
Today’s twists keep it fresh too. Some swap chicken for turkey, while others go gluten-free with almond flour gravy. For a lighter take, try pairing it with a crisp salad from our healthy side dishes collection. No matter how you tweak it, Creamy Smothered Chicken and Rice remains a timeless crowd-pleaser.
>Taste and Texture
What makes it delicious
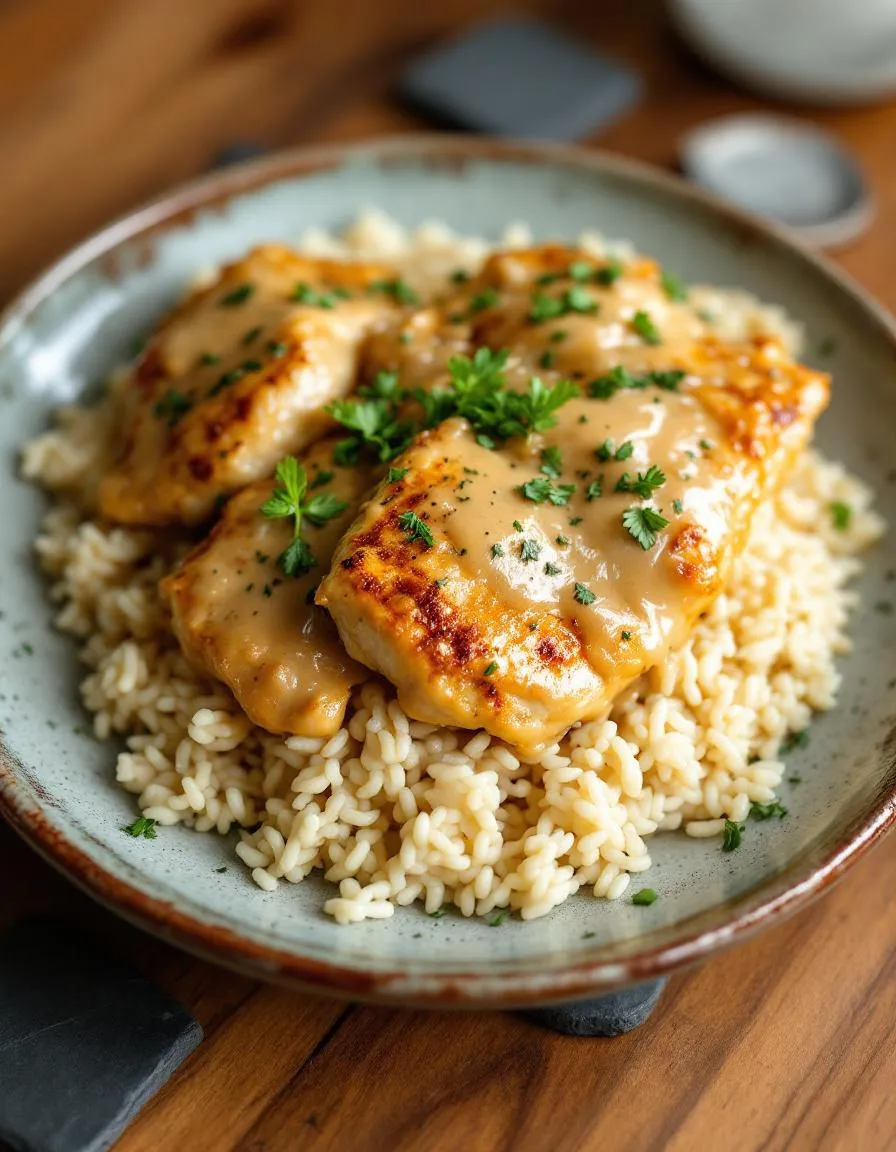
Creamy Smothered Chicken and Rice delivers a comforting, flavor-packed bite every time. The tender chicken melts in your mouth, while the rich, velvety sauce coats each grain of rice for a luscious, creamy texture. Fragrant garlic and savory onions deepen the taste, while a hint of herbs adds a fresh, aromatic finish. Every forkful balances hearty protein with fluffy, buttery rice—making Creamy Smothered Chicken and Rice a dish that satisfies both hunger and cravings. The slight crisp of seared chicken skin contrasts beautifully with the smooth sauce, creating a dynamic mouthfeel you’ll love.
Boosting the flavor
Elevate your Creamy Smothered Chicken and Rice with a few easy tweaks. For extra depth, stir in a splash of lemon juice or a sprinkle of smoked paprika before serving. Crumbled bacon or sautéed mushrooms add a savory punch, while a drizzle of garlic aioli amps up the creaminess. If you love heat, toss in diced jalapeños or a dash of cayenne. Pair it with a bright side like citrus avocado salad to cut through the richness. With these simple upgrades, your dish will taste even more irresistible.
Tips for Success
Best practices for results
First, always pat the chicken dry before seasoning to help the spices stick better. Next, brown the chicken evenly on both sides for maximum flavor in your Creamy Smothered Chicken and Rice. Additionally, use fresh garlic and onions for the best depth of taste. Stir the rice frequently while cooking to prevent sticking, and finally, let the dish rest for 5 minutes before serving so the flavors meld perfectly.
Mistakes to avoid
Avoid overcrowding the pan when browning the chicken, as this steams instead of sears the meat. Instead, cook in batches if needed. Also, don’t skip deglazing the pan after browning—those browned bits add incredible flavor to your Creamy Smothered Chicken and Rice. For more on perfecting pan sauces, check out our guide to deglazing techniques. Lastly, resist the urge to lift the lid while the rice cooks, as this releases steam and can lead to uneven results. Learn more about cooking rice flawlessly for extra help.
Serving and Pairing Suggestions
How to serve this dish
For a stunning presentation, plate Creamy Smothered Chicken and Rice in shallow bowls to showcase the rich sauce. Top with fresh chopped parsley or a sprinkle of paprika for a pop of color. Alternatively, serve it family-style in a large skillet for a cozy, rustic vibe. This dish shines at weeknight dinners but also makes a comforting centerpiece for holiday gatherings. To elevate the experience, pair it with warm crusty bread for soaking up every last bit of the creamy goodness.
h-it">What goes well with it
Balance the richness of Creamy Smothered Chicken and Rice with a crisp, refreshing side like our Garlic Parmesan Roasted Broccoli. The savory crunch cuts through the creaminess perfectly. For a drink pairing, try a chilled glass of citrusy white wine or sparkling water with lemon. If you want to round out the meal, our Honey Glazed Carrots add a touch of sweetness that complements the savory flavors beautifully.
What is the best rice to use for Creamy Smothered Chicken and Rice?
Long-grain white rice or jasmine rice works best for Creamy Smothered Chicken and Rice because it absorbs the creamy sauce well without becoming mushy. Avoid instant rice, as it can turn too soft when simmered in the rich sauce.
rank-math-faq-item">
Can I make Creamy Smothered Chicken and Rice in a slow cooker?
Yes! For slow cooker Creamy Smothered Chicken and Rice, cook the chicken and sauce on low for 4-5 hours, then add the rice during the last 30 minutes to prevent overcooking. Stir occasionally to keep the texture creamy.
How do I prevent my Creamy Smothered Chicken and Rice from drying out?
Keep your Creamy Smothered Chicken and Rice moist by using enough broth or cream in the sauce and covering the pan while simmering. Leftovers store best with an extra splash of broth before reheating.
What sides go well with Creamy Smothered Chicken and Rice?
Creamy Smothered Chicken and Rice pairs perfectly with steamed green beans, roasted Brussels sprouts, or a crisp garden salad. For Southern-style meals, add buttery cornbread or collard greens.
>
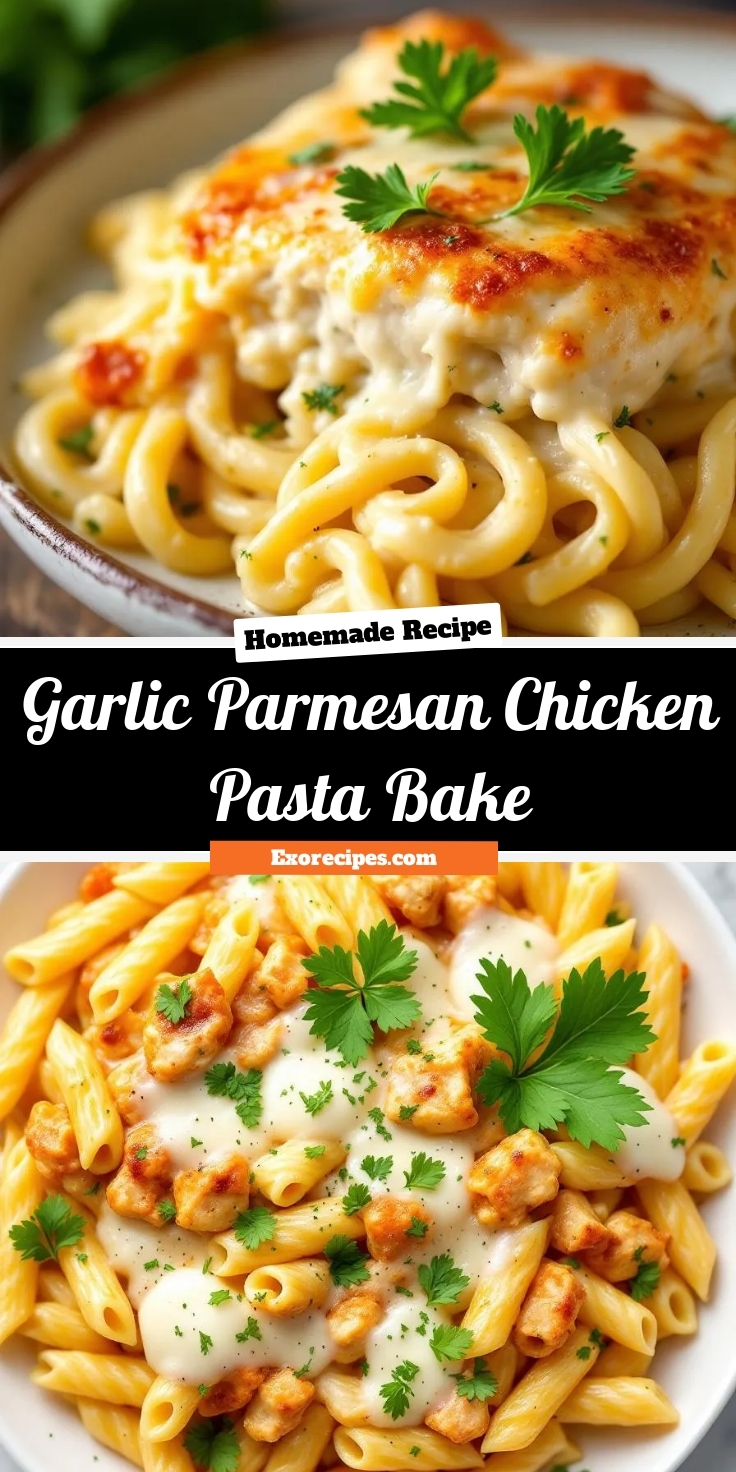
Easy Garlic Parmesan Chicken Pasta Bake Recipe
Introduction
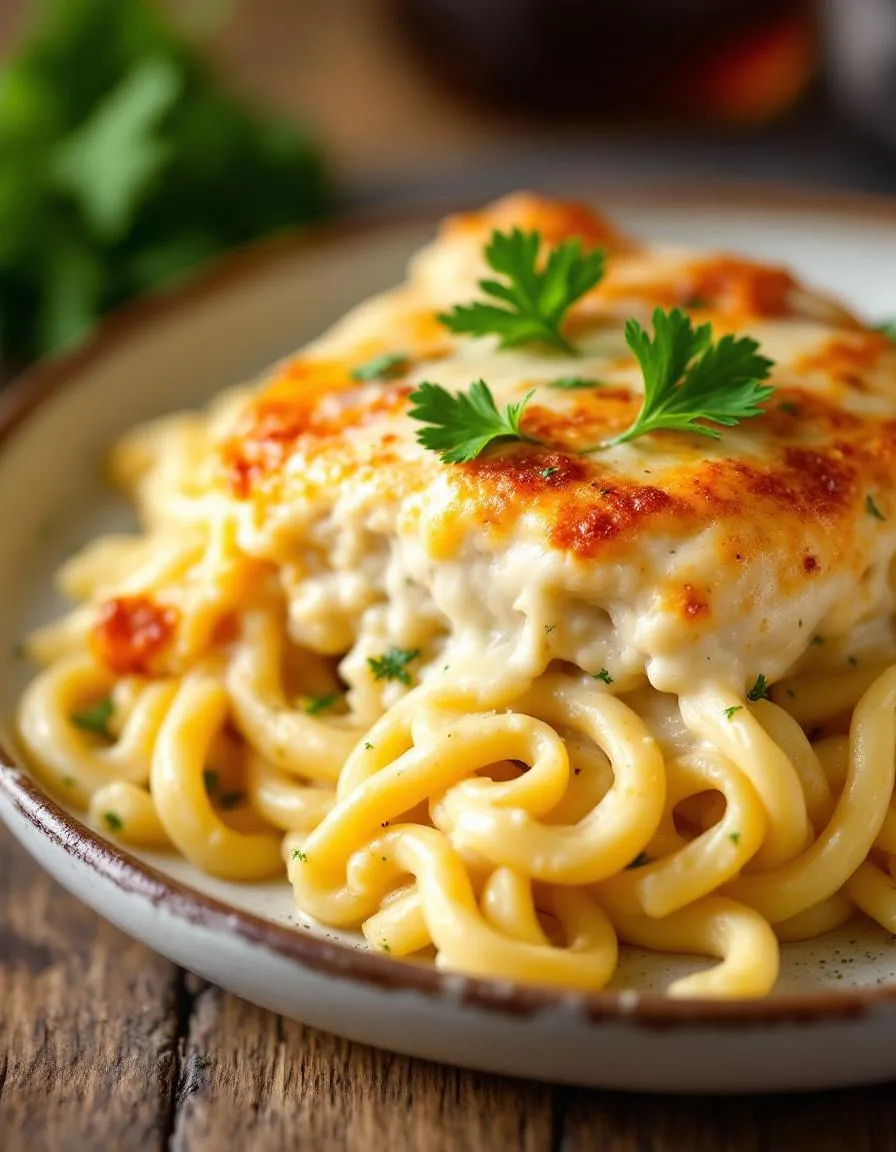
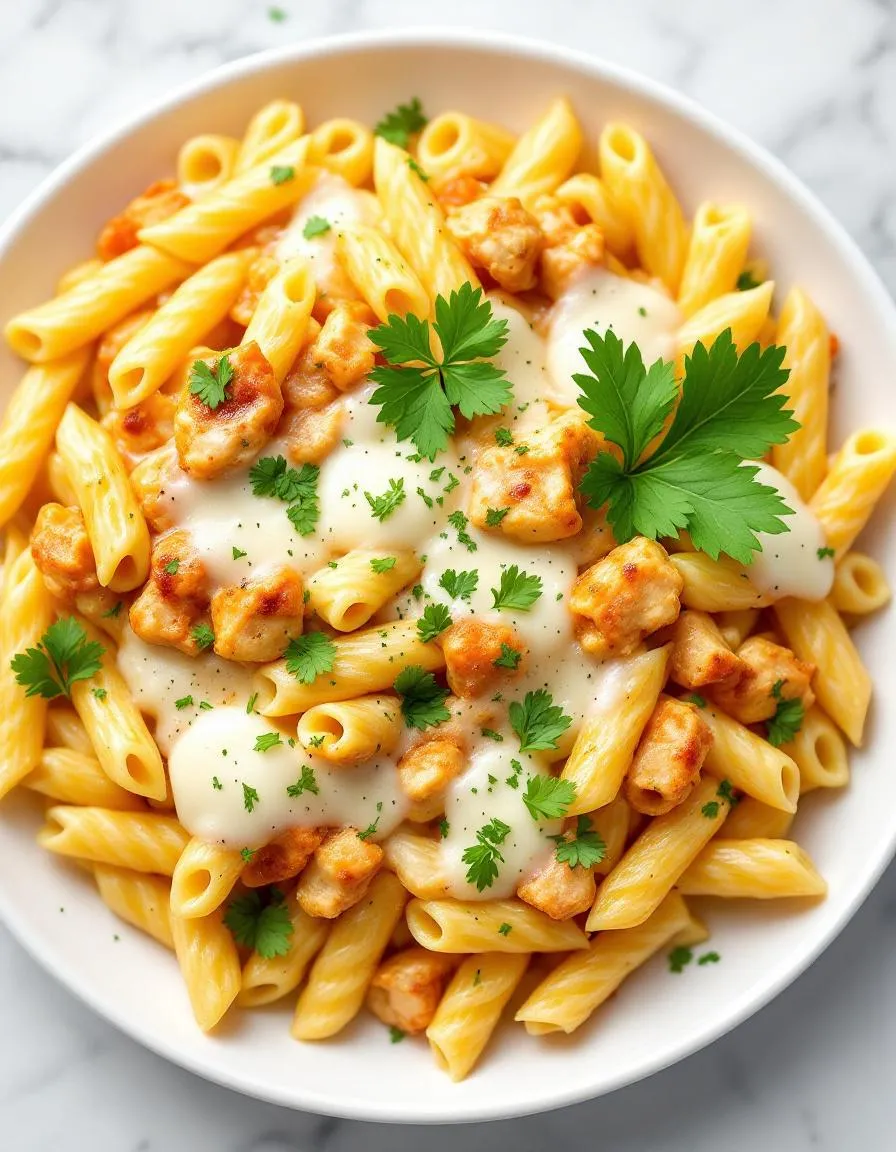
If you’re craving a dish that’s both comforting and bursting with flavor, you’re in the right place. Garlic Parmesan Chicken Pasta Bake is the kind of meal that brings everyone to the table—no excuses. Whether you’re cooking for a busy weeknight or a cozy weekend gathering, this recipe delivers creamy, cheesy goodness with every bite. Plus, it’s incredibly easy to customize, making it a favorite for picky eaters and foodies alike.
Garlic Parmesan Chicken Pasta Bake combines tender chicken, al dente pasta, and a rich, garlicky Parmesan sauce into one irresistible casserole. What sets it apart is its versatility. You can swap ingredients based on what’s in your fridge or pantry, yet it always turns out delicious. This dish also fits perfectly with the brekcakes.com philosophy: approachable recipes that feel special without requiring chef-level skills. If you love hearty meals like my Creamy Tuscan Chicken, you’ll adore this bake. And if you’re new to casseroles, don’t worry—this recipe walks you through every step, just like my Easy Baked Ziti guide.
Why I Love This Recipe
Garlic Parmesan Chicken Pasta Bake holds a special place in my kitchen because it’s the dish my family requests most often. There’s something about the way the golden cheese crust crackles under your fork while the creamy sauce clings to each noodle. It reminds me of Sunday dinners growing up, where the table was always full and the food was always made with care. Every time I pull it out of the oven, I know it’s going to create another warm memory—and that’s why I keep coming back to it.
Health and Nutrition
Why it’s good for your body
Garlic Parmesan Chicken Pasta Bake packs a nutritious punch while delivering rich flavors. First, the chicken provides lean protein, which helps build muscle and keeps you full longer. Meanwhile, the garlic adds more than just taste—it boosts immunity and supports heart health. Additionally, the Parmesan cheese offers calcium for strong bones, along with a savory depth that elevates the dish.
Because this recipe balances carbs, protein, and healthy fats, it fuels your body without spiking blood sugar. The whole-grain pasta option, if used, adds fiber for better digestion. Furthermore, the olive oil in Garlic Parmesan Chicken Pasta Bake contains monounsaturated fats, which promote good cholesterol levels. Together, these ingredients create a meal that satisfies cravings while nourishing your body.
Finally, the dish includes antioxidants from garlic and herbs, fighting inflammation. Whether you need a post-workout meal or a comforting dinner, Garlic Parmesan Chicken Pasta Bake delivers both flavor and nutrition. With each bite, you get a well-rounded dish that supports overall wellness.
How it fits in a healthy lifestyle
Garlic Parmesan Chicken Pasta Bake fits seamlessly into a balanced diet. For protein-focused eaters, the chicken offers a high-quality source to meet daily goals. If you prefer gluten-free meals, simply swap regular pasta for a gluten-free alternative—the dish still shines. Plus, the moderate portion sizes help with mindful eating, making it easy to enjoy without overindulging.
This recipe also aligns with heart-healthy habits, especially if you use whole-grain pasta and limit heavy creams. For more ideas on balancing meals, check out our guide to easy meal prep strategies. And if you’re looking for other high-protein dinner options, our healthy comfort food roundup has plenty of inspiration. Whether you’re cooking for a family or meal-prepping for the week, Garlic Parmesan Chicken Pasta Bake keeps health and taste in harmony.
First, preheat your oven to 375°F and grease a 9×13-inch baking dish to prevent sticking. While the oven heats, cook the pasta al dente—it will finish cooking in the bake, so avoid overcooking. Meanwhile, season the chicken with salt, pepper, and garlic powder, then pan-sear it until golden. Shred or cube the cooked chicken for even distribution. In a large bowl, whisk together heavy cream, minced garlic, and grated Parmesan until smooth. Then, fold in the cooked pasta and chicken, ensuring everything gets coated evenly. Transfer the mixture to the baking dish and top with a generous layer of shredded mozzarella and extra Parmesan for a crispy finish. Bake for 20-25 minutes until bubbly and golden. For a time-saving hack, use rotisserie chicken or pre-shredded cheese. Let the Garlic Parmesan Chicken Pasta Bake rest for 5 minutes before serving—this helps the sauce thicken and makes slicing easier.
and-learned-from">Mistakes I’ve made and learned from
Early on, I rushed the sauce and ended up with a grainy texture because I added Parmesan too quickly over high heat. Now, I whisk it gradually into warm (not boiling) cream for a silky consistency. Another blunder? Skipping the pasta’s al dente stage, which turned my bake mushy. For foolproof pasta, I follow the pasta perfection guide. Also, I once overloaded the dish with cheese, making it overly dense. A balanced layer melts better, as I learned from my cheese secrets post. These tweaks transformed my Garlic Parmesan Chicken Pasta Bake from a trial-and-error mess to a crowd-pleaser every time.
“`
n-and-variations">Cultural Connection and Variations
Where this recipe comes from
Garlic Parmesan Chicken Pasta Bake feels like a warm hug from the Mediterranean, even though its exact origins are a bit of a delicious mystery. Many trace its roots to Italian-American kitchens, where creamy Alfredo-style sauces met hearty baked pasta dishes. However, you’ll find similar variations across Europe—think French coq au vin meets pasta or Greek chicken rigatoni with a feta twist. In my family, we add a splash of white wine and extra garlic, turning it into a Sunday dinner staple that everyone crowds around.
Interestingly, regional twists pop up everywhere. In the American South, some cooks swap Parmesan for sharp cheddar and toss in a pinch of cayenne for heat. Meanwhile, in Australia, they might throw in roasted pumpkin or spinach for a seasonal twist. No matter where you go, Garlic Parmesan Chicken Pasta Bake adapts beautifully, reflecting local tastes while keeping its comforting core. Whether it’s a weeknight lifesaver or a holiday side dish, this recipe carries stories in every cheesy bite.
How it fits in today’s cooking
Today, Garlic Parmesan Chicken Pasta Bake shines as a versatile crowd-pleaser. Busy families love it for meal prep, while food bloggers rave about its Instagram-worthy layers. Modern twists include gluten-free pasta, plant-based chicken, or even a sneaky veggie boost like roasted zucchini. It’s also a star at potlucks, bridging the gap between cozy home cooking and effortless entertaining.
Seasonally, it transiti
ons seamlessly—think spring peas and lemon zest in April or wild mushrooms and thyme in fall. For holiday spreads, it pairs perfectly with easy holiday appetizers or stands alone as a hearty main. And if you’re craving more comfort food magic, try pairing it with decadent chocolate desserts for the ultimate indulgence. No matter how you spin it, this dish keeps earning its spot at the table, one creamy forkful at a time.
Taste and Texture
What makes it delicious
The Garlic Parmesan Chicken Pasta Bake wraps you in a cozy embrace of rich, savory flavors. Tender chunks of chicken mingle with al dente pasta, all smothered in a velvety, garlic-infused Parmesan sauce. Each bite delivers a punch of umami, balanced by the sharp, nutty notes of freshly grated cheese. Meanwhile, the golden, toasted breadcrumb topping adds a satisfying crunch that contrasts beautifully with the creamy base. As it bakes, the aroma of roasted garlic and herbs fills the kitchen, making it impossible to resist. Whether you crave comfort or crave bold flavor, this Garlic Parmesan Chicken Pasta Bake hits all the right notes.
Boosting the flavor
For an extra flavor kick, try stirring a spoonful of sun-dried tomato pesto into the sauce—it adds a sweet, tangy depth that pairs perfectly with the Parmesan. Alternatively, sprinkle crispy bacon bits or toasted pine nuts on top before serving for a salty, nutty crunch. If you love heat, a pinch of red pepper flakes or a drizzle of homemade chili oil will wake up the dish. For a fresh finish, toss in a handful of arugula or basil just before baking. Craving more cheesy goodness? Swap half the Parmesan for sharp aged cheddar, or try this three-cheese pasta bake technique for an even richer result.
Use freshly grated Parmesan for the best flavor in your Garlic Parmesan Chicken Pasta Bake, as pre-shredded cheese often contains anti-caking agents. Meanwhile, cook the pasta just shy of al dente since it will continue softening in the oven. For even browning, broil the dish for the last two minutes while keeping a close eye to prevent burning. Additionally, let the bake rest for five minutes before serving so the sauce thickens perfectly.
Mistakes to avoid
Avoid overcrowding the baking dish, as this leads to uneven cooking and soggy pasta. Instead, use a deep 9×13-inch pan for optimal heat distribution. Many cooks also forget to season the chicken generously before adding it to the dish, resulting in bland flavors. For more seasoning guidance, check out our essential seasoning guide. Finally, resist overmixing the pasta and sauce, which can break down the noodles. For perfectly cooked pasta every time, review our pasta perfection tips.
g-suggestions">Serving and Pairing Suggestions
How to serve this dish
For a stunning presentation, transfer your Garlic Parmesan Chicken Pasta Bake to a rustic ceramic dish or individual cast-iron skillets. Sprinkle extra Parmesan and fresh parsley on top just before serving to add color and freshness. Meanwhile, this dish shines at family dinners, potlucks, or even holiday gatherings because it’s both comforting and elegant. If you’re hosting a casual brunch, pair it with a crisp side salad for a balanced meal. To make it extra inviting, serve Garlic Parmesan Chicken Pasta Bake straight from the oven with a side of warm bread for dipping into the creamy sauce.
What goes well with it
A light, citrusy salad like our Lemon Herb Quinoa Salad cuts through the richness of Garlic Parmesan Chicken Pasta Bake beautifully. Alternatively, roasted vegetables such as asparagus or Brussels sprouts add a crunchy contrast. For drinks, try a chilled glass of Sauvignon Blanc or sparkling water with lemon to refresh the palate. If you’re craving something heartier, our Garlic Rosemary Focaccia makes the perfect companion for soaking up every last bite.
math-faq-block">
What ingredients do I need for Garlic Parmesan Chicken Pasta Bake?
You’ll need chicken breast, pasta (like penne or rotini), garlic, heavy cream, Parmesan cheese, butter, and seasonings like Italian herbs. Garlic Parmesan Chicken Pasta Bake also works well with added veggies like spinach or mushrooms for extra flavor.
How long does it take to bake Garlic Parmesan Chicken Pasta Bake?
Garlic Parmesan Chicken Pasta Bake typically takes 25–30 minutes in a preheated 375°F oven. The dish is ready when the cheese is bubbly and golden, and the chicken reaches an internal temperature of 165°F.
Can I make Garlic Parmesan Chicken Pasta Bake ahead of time?
Yes! Assemble the Garlic Parmesan Chicken Pasta Bake up to 24 hours in advance and refrigerate it covered. Add 5–10 minutes to the baking time if cooking straight from the fridge.
rank-math-faq-item">
What side dishes go well with Garlic Parmesan Chicken Pasta Bake?
A crisp Caesar salad or garlic bread pairs perfectly with Garlic Parmesan Chicken Pasta Bake. For lighter options, try roasted asparagus or a simple tomato bruschetta to balance the rich flavors.
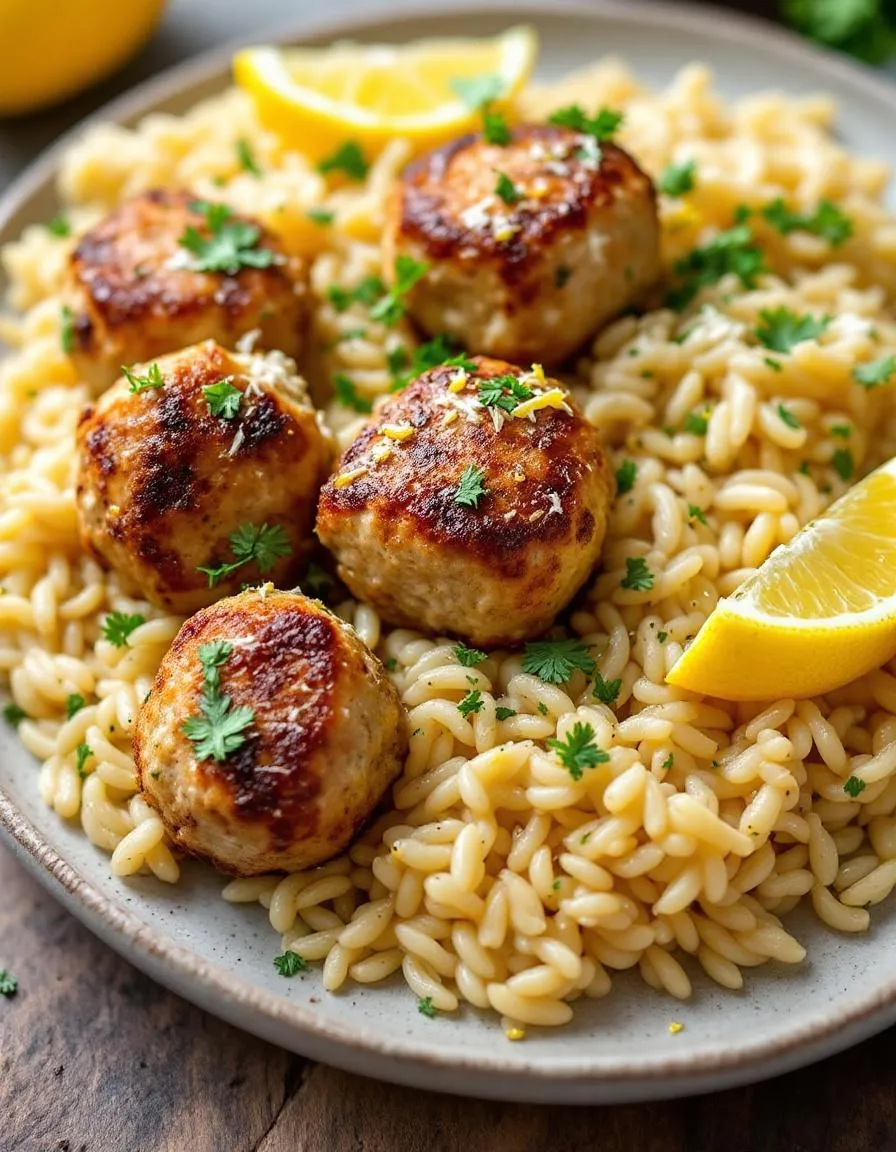
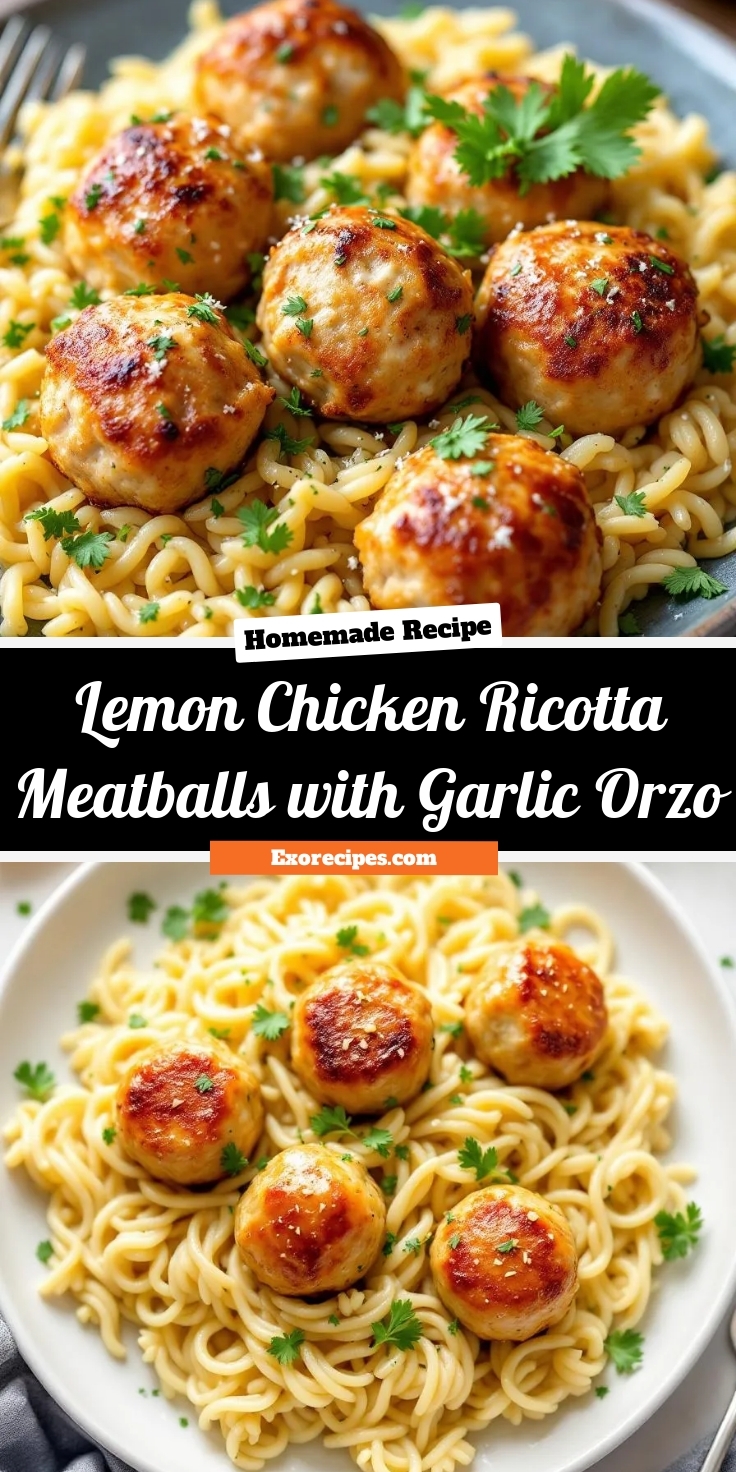
Best Lemon Chicken Ricotta Meatballs with Garlic Orzo
Introduction
There’s something incredibly comforting about a meal that feels like a warm hug, and that’s exactly what Lemon Chicken Ricotta Meatballs with Garlic Orzo delivers. Whether you’re craving a cozy weeknight dinner or need a showstopping dish for guests, this recipe brings brightness, richness, and a touch of elegance to your table. Plus, it’s surprisingly simple to make, proving that gourmet flavors don’t have to come with complicated steps.
Lemon Chicken Ricotta Meatballs with Garlic Orzo combines tender, juicy meatballs infused with zesty lemon and creamy ricotta, served over a bed of fragrant garlic orzo. The dish balances vibrant citrus notes with savory depth, creating a harmony of flavors that’s both refreshing and satisfying. What makes it special? It’s versatile enough for casual family dinners yet impressive enough for entertaining. If you love dishes that feel indulgent without being heavy, like my Creamy Tuscan Chicken, you’ll adore this one. The recipe also reflects my philosophy of cooking with fresh, quality ingredients—something I emphasize in my Kitchen Essentials guide. Every bite tells a story of simplicity meeting sophistication.
Why I Love This Recipe
Lemon Chicken Ricotta Meatballs with Garlic Orzo holds a special place in my heart because it reminds me of Sunday dinners with my family. The bright lemon lifts the dish, while the ricotta keeps the meatballs irresistibly tender. It’s the kind of meal that sparks conversation and leaves everyone reaching for seconds. More importantly, it taught me that cooking isn’t just about feeding people—it’s about creating moments they’ll remember. Every time I make it, I’m reminded why I fell in love with the kitchen in the first place.
Health and Nutrition
Why it’s good for your body
Lemon Chicken Ricotta Meatballs with Garlic Orzo packs a nutritious punch while delighting your taste buds. First, the lean chicken provides high-quality protein to support muscle repair and keep you full longer. Meanwhile, ricotta cheese adds a creamy texture while boosting calcium and probiotics for gut health. Additionally, the bright lemon zest delivers a dose of vitamin C, which strengthens immunity and aids iron absorption.
Furthermore, garlic in the orzo not only enhances flavor but also offers anti-inflammatory benefits. The whole wheat orzo, if used, adds fiber to promote digestion and steady energy levels. Together, these ingredients create a balanced meal that fuels your body without weighing you down. Because Lemon Chicken Ricotta Meatballs with Garlic Orzo combines lean protein, wholesome carbs, and healthy fats, it satisfies cravings while nourishing you from the inside out.
Finally, this dish avoids heavy creams or excessive oils, making it a lighter alternative to traditional pasta dishes. Whether you need a post-workout meal or a family-friendly dinner, Lemon Chicken Ricotta Meatballs with Garlic Orzo delivers flavor and nutrition in every bite.
How it fits in a healthy lifestyle
Lemon Chicken Ricotta Meatballs with Garlic Orzo fits seamlessly into a balanced diet. If you prioritize high-protein meals, the chicken and ricotta provide nearly 30 grams of protein per serving. For those watching carbs, swapping regular orzo for a whole-grain or legume-based version keeps the dish gluten-free and fiber-rich. You can also pair it with a simple side salad for extra veggies without compromising flavor.
This recipe aligns with heart-healthy eating too, thanks to lean poultry and minimal saturated fats. If you love meal prepping, it stores well for quick lunches or dinners throughout the week. For more gluten-free ideas, check out our gluten-free meal prep guide. And if you’re exploring other high-protein dishes, our high-protein dinner roundup offers plenty of inspiration. With simple tweaks, Lemon Chicken Ricotta Meatballs with Garlic Orzo adapts to nearly any dietary goal while keeping meals exciting and satisfying.
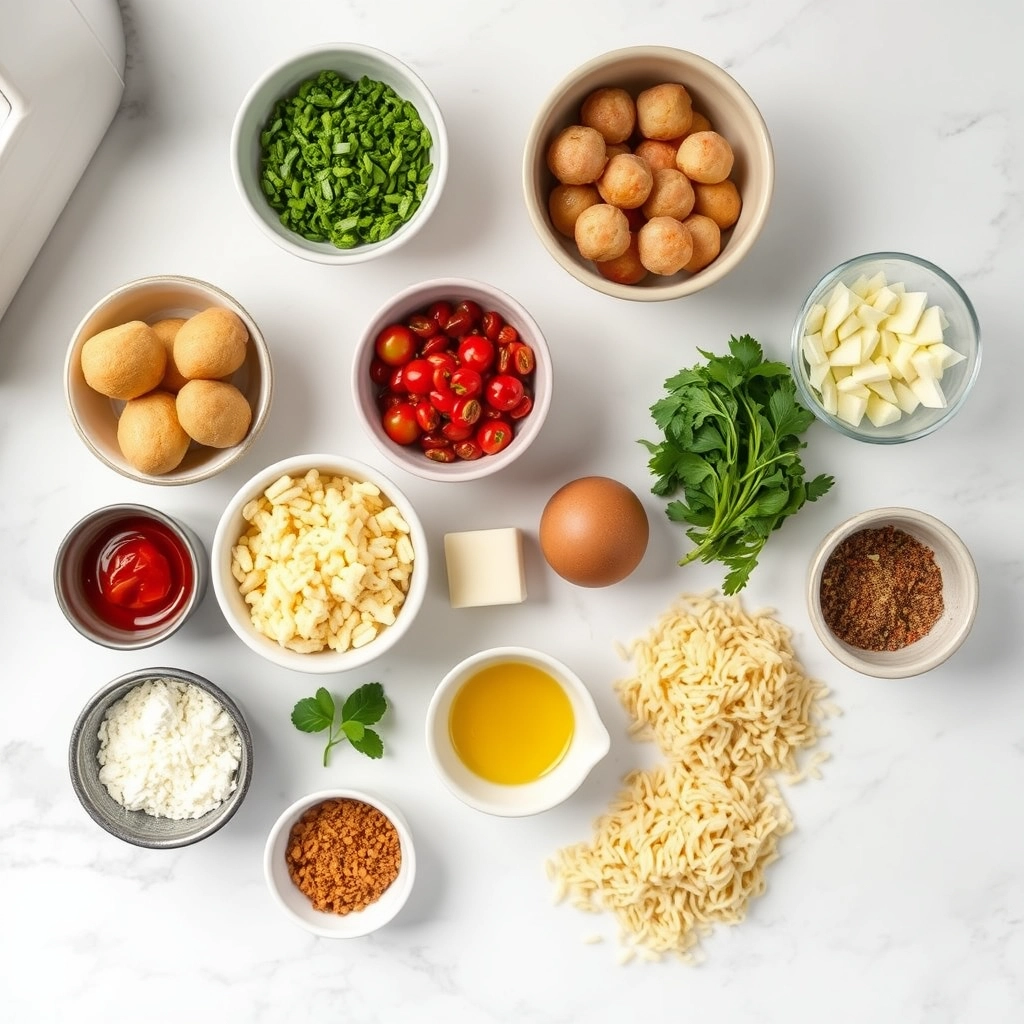
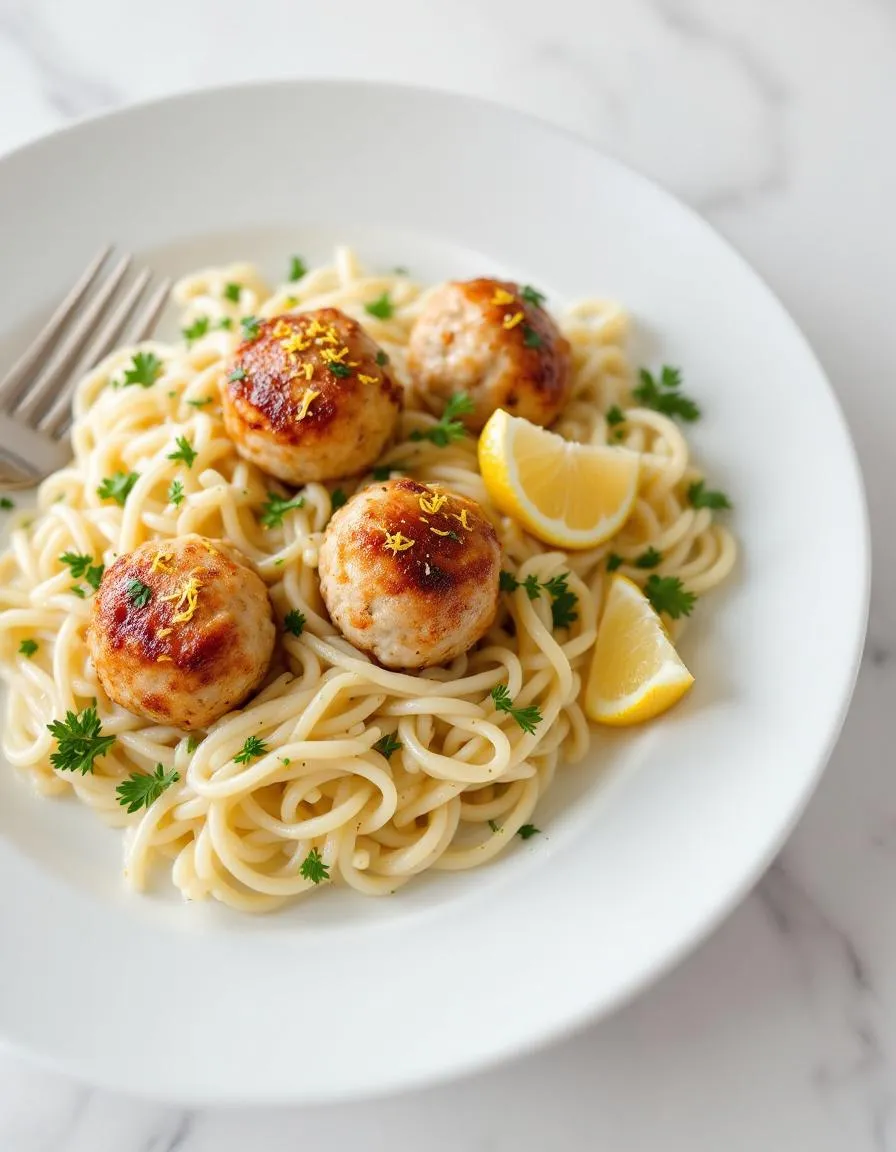
Juicy chicken meatballs with ricotta and lemon zest served over garlic-infused orzo for a comforting meal.
Ingredients
Scale
For the Crust:
1 lb ground chicken
1/2 cup ricotta cheese
1/4 cup breadcrumbs
1 egg
1 tbsp lemon zest
2 cloves garlic, minced
1 tsp dried oregano
Salt and pepper to taste
1 cup orzo
2 tbsp olive oil
2 cups chicken broth
1 tbsp butter
Fresh parsley for garnish
Instructions
1. Prepare the Crust:
In a bowl, mix ground chicken, ricotta, breadcrumbs, egg, lemon zest, half the minced garlic, oregano, salt, and pepper. Form into 1-inch meatballs.
Heat 1 tbsp olive oil in a skillet over medium heat. Cook meatballs until browned and cooked through, about 10-12 minutes. Remove and set aside.
In the same skillet, add remaining olive oil and garlic. Sauté for 30 seconds, then add orzo. Toast for 2 minutes.
Pour in chicken broth, bring to a boil, then reduce heat to simmer. Cover and cook until orzo is tender, about 10 minutes. Stir in butter.
Serve meatballs over garlic orzo, garnished with fresh parsley.
Notes
You can customize the seasonings to taste.
How to Prepare This Dish
Steps and time-saving tips
Start by preheating your oven to 375°F so it’s ready when you are. While it heats, grab a large bowl and mix the ground chicken, ricotta, breadcrumbs, lemon zest, and seasonings until just combined. Overmixing can make the meatballs tough, so stop as soon as everything is evenly distributed. Next, roll the mixture into 1-inch balls and place them on a parchment-lined baking sheet. For extra flavor, drizzle them lightly with olive oil before baking for 20-25 minutes until golden. Meanwhile, cook the orzo in salted boiling water until al dente, then drain and set aside. In the same pot, sauté minced garlic in butter until fragrant, then toss the orzo back in, stirring to coat every strand. Finally, plate the garlic orzo and top with the lemon chicken ricotta meatballs. Garnish with fresh parsley and a squeeze of lemon for brightness. To save time, prep the meatball mixture ahead and refrigerate it overnight—just bake when ready.
and-learned-from">Mistakes I’ve made and learned from
My first attempt at lemon chicken ricotta meatballs ended in dry, crumbly disaster because I skipped the ricotta—rookie mistake! Now I know it’s the key to keeping them tender. Another blunder? Crowding the baking sheet, which steamed the meatballs instead of browning them. Spacing them out fixed that fast. If you’re new to working with ground chicken, check out my guide on handling ground chicken to avoid common pitfalls. And if your orzo turns sticky, a splash of broth or a trick from my pasta texture guide will rescue it every time. Trust me, these tweaks make all the difference.
Cultural Connection and Variations
Where this recipe comes from
Lemon Chicken Ricotta Meatballs with Garlic Orzo feels like a love letter to Mediterranean flavors with a comforting twist. While meatballs appear in countless cultures—from Swedish köttbullar to Middle Eastern kofta—this version leans into Italian-American traditions, where ricotta softens the texture and lemon brightens every bite. In Sicily, cooks often add citrus to savory dishes, balancing richness with acidity. Meanwhile, garlic orzo mirrors the way Greek and Turkish cuisines use pasta in pilafs.
My grandmother made a s
impler version with ground turkey and breadcrumbs, but the ricotta was her secret. Over time, I tweaked it, inspired by a trip to Southern Italy where lemons grow abundantly. Some families skip the orzo entirely, serving these meatballs over creamy polenta or tangled in zucchini noodles. Others fold in herbs like mint or oregano for regional flair. No matter the variation, Lemon Chicken Ricotta Meatballs with Garlic Orzo always feels like a hug on a plate.
How it fits in today’s cooking
Today, this dish bridges weeknight ease and weekend indulgence. Meal preppers bake the meatballs ahead, while food bloggers spotlight them as a lighter alternative to beef-heavy recipes. Since orzo cooks faster than traditional pasta, it fits modern routines perfectly. For busy families, pairing it with a simple roasted vegetable side turns dinner into a balanced feast.
During spring, the lemony notes make it ideal for Easter or Mother’s Day brunches. Some cooks even repurpose leftovers into next-day grain bowls, drizzling them with lemon-tahini dressing. Whether you stick to the classic or experiment with gluten-free orzo, Lemon Chicken Ricotta Meatballs with Garlic Orzo adapts without losing its soul.
>Taste and Texture
What makes it delicious
Lemon Chicken Ricotta Meatballs with Garlic Orzo delivers a bright, comforting bite that balances tangy and savory flavors. The meatballs burst with juicy tenderness, thanks to ricotta’s creamy richness and lemon zest’s zingy freshness. Meanwhile, garlic-infused orzo offers a buttery, slightly chewy base that soaks up every drop of flavor. Each forkful brings a harmony of textures—soft yet firm meatballs, silky pasta, and a hint of crispness from golden-brown edges. Fragrant garlic, herbal parsley, and citrusy brightness make every bite irresistible. Whether served warm or as leftovers, Lemon Chicken Ricotta Meatballs with Garlic Orzo keeps your taste buds dancing.
Boosting the flavor
Elevate your dish by swapping regular parsley for fresh basil or oregano to add an earthy depth. For extra richness, drizzle with a quick lemon-garlic aioli or sprinkle with toasted pine nuts. If you love heat, a pinch of red pepper flakes or a dash of smoked paprika will add warmth without overpowering the lemon’s brightness. A handful of baby spinach stirred into the orzo just before serving introduces a fresh, vibrant contrast. With these tweaks, Lemon Chicken Ricotta Meatballs with Garlic Orzo becomes even more memorable.
Tips for Success
Best practices for results
Always mix the ricotta and ground chicken gently to keep the meatballs tender. For the best texture, chill the mixture for 15 minutes before shaping. Meanwhile, toast the orzo lightly in olive oil to deepen its flavor before adding liquid. Use fresh lemon zest and juice to brighten the dish, and don’t skip the garlic—it’s key for balancing the richness of the Lemon Chicken Ricotta Meatballs with Garlic Orzo. Finally, let the meatballs rest for a few minutes after cooking so they hold their shape when served.
Mistakes to avoid
Overmixing the meatball mixture can make it dense, so fold the ingredients just until combined. Additionally, avoid overcrowding the pan when browning the meatballs, as they’ll steam instead of sear. For perfectly cooked orzo, check out our guide on how to cook orzo to nail the texture every time. Lastly, don’t rush the garlic—burning it will add bitterness. If you’re new to working with garlic, our tips on garlic cooking techniques will help you master the timing.
Serving and Pairing Suggestions
How to serve this dish
For a stunning presentation, plate your Lemon Chicken Ricotta Meatballs with Garlic Orzo on a wide, shallow bowl to showcase the vibrant colors. Top with a sprinkle of fresh parsley or microgreens for a pop of green, and add lemon zest for extra brightness. Meanwhile, this dish shines at family dinners, but it also works beautifully for casual gatherings or even a cozy date night. If you want to elevate it further, serve the meatballs skewered on small appetizer forks alongside the orzo for a fun, interactive twist.
h-it">What goes well with it
A crisp, citrusy white wine like Sauvignon Blanc enhances the lemon notes in Lemon Chicken Ricotta Meatballs with Garlic Orzo, while a light arugula salad with shaved Parmesan adds a peppery contrast. For heartier meals, pair it with roasted vegetables or our Garlic Herb Focaccia to soak up the flavorful juices. Finally, if you love creamy dips, try our Whipped Feta Dip as a tangy starter that sets the stage for the main course.
What makes Lemon Chicken Ricotta Meatballs with Garlic Orzo special?
Lemon Chicken Ricotta Meatballs with Garlic Orzo stands out for its bright citrus flavor and creamy ricotta texture, paired with aromatic garlic-infused orzo. The dish balances tangy lemon zest with savory herbs, creating a restaurant-quality meal at home.
rank-math-faq-item">
Can I substitute ground turkey in Lemon Chicken Ricotta Meatballs?
Yes, ground turkey works well as a leaner alternative in Lemon Chicken Ricotta Meatballs with Garlic Orzo. Adjust cooking time slightly as turkey may dry out faster—keep the ricotta to maintain moisture and flavor.
How do I prevent Lemon Chicken Ricotta Meatballs from falling apart?
Chill the meatball mixture for 20 minutes before shaping, and avoid overmixing. The ricotta and egg in Lemon Chicken Ricotta Meatballs with Garlic Orzo act as binders—cook them gently in a skillet for a perfect sear.
What sides pair well with Garlic Orzo in this dish?
Light salads like arugula with lemon vinaigrette or roasted asparagus complement Lemon Chicken Ricotta Meatballs with Garlic Orzo beautifully. The orzo’s garlicky richness pairs well with crisp, fresh vegetables.