Easy Chopped Shrimp Fried Rice

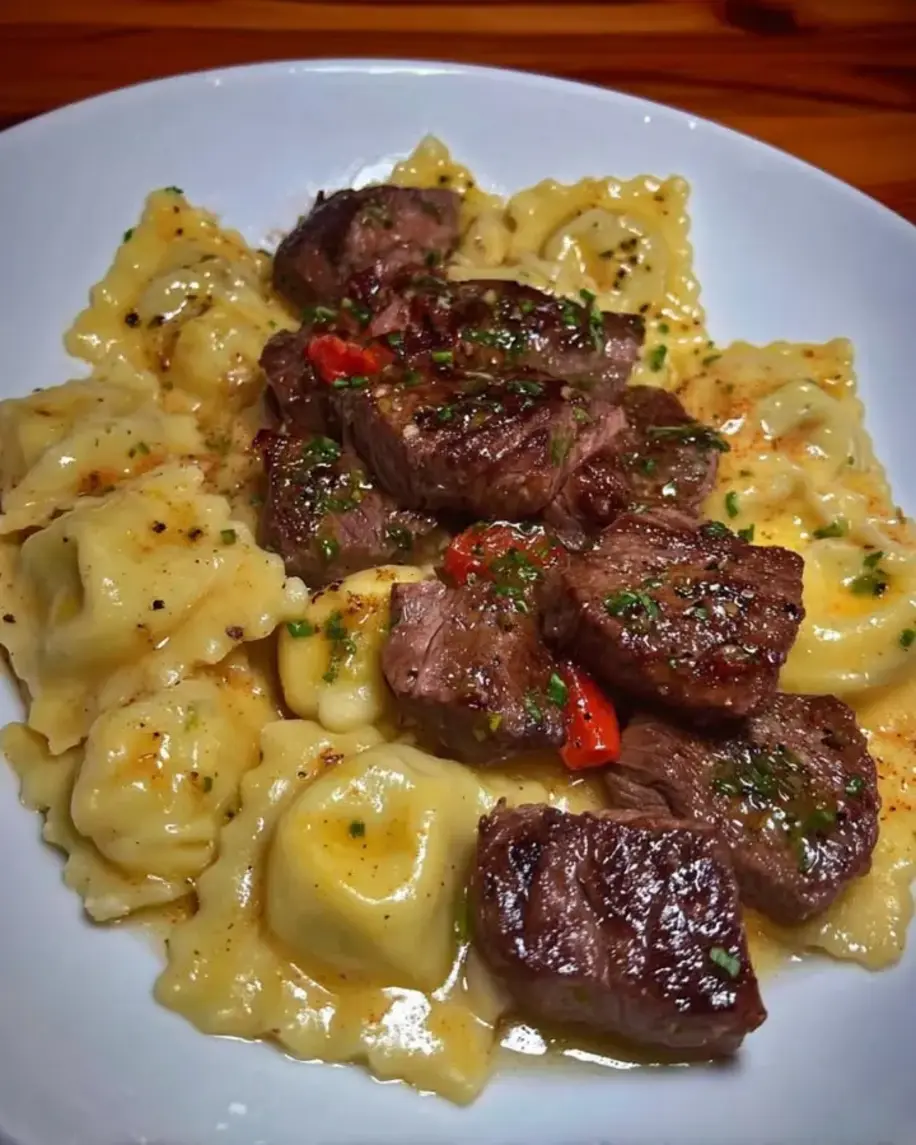
Chopped Shrimp Fried Rice: The Only Recipe You’ll Ever Need

Imagine coming home after a long day, craving a bowl of flavorful, satisfying chopped shrimp fried rice but dreading the messy kitchen aftermath. That’s where this chopped shrimp fried rice recipe from exorecipes.com shines, offering a streamlined one-pan method that delivers restaurant-quality results in just 25 minutes. Say goodbye to soggy rice and unevenly cooked shrimp—this foolproof guide ensures every bite is packed with perfectly chopped shrimp, vibrant veggies, and aromatic flavors. Whether you’re a busy parent or a novice cook, this shrimp fried rice recipe is your go-to for an easy fried rice dinner that’s ready faster than delivery.

Picture the sizzle of fresh shrimp hitting the hot pan, releasing a tantalizing aroma of garlic and sesame that fills your kitchen. Each grain of rice achieves that ideal crispy texture, mingling with tender, juicy chopped shrimp and a medley of sweet peas, carrots, and onions. The flavors are a harmonious blend of savory soy sauce and nutty sesame oil, creating a dish that’s not just a meal but an explosion of textures—from the slight crunch of vegetables to the soft scramble of eggs. This chopped shrimp fried rice is a symphony for your senses, making every forkful an irresistible adventure.

What sets this chopped shrimp fried rice apart on exorecipes.com is our commitment to expert-tested techniques and insider tips from Chef Sally, ensuring you achieve success every time. Drawing from authentic Asian cuisine traditions, we’ve refined this recipe to be the ultimate shrimp rice resource, complete with a Chef’s Secret that elevates the dish to new heights. You’ll learn how to master crispy fried rice, select the best ingredients, and customize for your tastes—all while building confidence in the kitchen. Stick around for step-by-step guidance, FAQs, and more to make this your signature quick fried rice recipe.

Prep Time: 15 minutes
Cook Time: 10 minutes
Total Time: 25 minutes
Servings: 4

Why This Chopped Shrimp Fried Rice Recipe is a Game-Changer

Our unique selling proposition lies in the one-pan, quick-cooking method that minimizes cleanup while maximizing flavor infusion. Unlike traditional fried rice recipes that might leave you with multiple pots and inconsistent results, this chopped shrimp fried rice uses a high-heat stir-fry technique to lock in the shrimp’s natural juices and achieve that perfect balance of crispy and tender textures. This approach not only saves time but also ensures every ingredient is evenly coated, making it the best shrimp fried rice recipe for busy weeknights.

The Chef’s Secret: The key to elevating this dish is using day-old, cold rice and a precise stir-frying sequence that prevents overcooking the shrimp. By chopping the shrimp into bite-sized pieces, we distribute flavor more evenly throughout the rice, creating a more cohesive and delicious meal. This technique, inspired by Chef Sally’s professional kitchen experience, allows the shrimp to caramelize slightly, adding a depth of flavor that’s often missing in other easy fried rice recipes.

Unbeatable Texture: The science behind the texture comes from using cold rice, which has less moisture and fries up crispy without clumping. High heat evaporates any excess water quickly, resulting in that signature fried rice crunch. Foolproof for a Reason: We’ve tested this recipe multiple times to guarantee success, adjusting for common pitfalls like over-salting or undercooking, so you can confidently serve up a restaurant-worthy chopped shrimp fried rice every time.

Ingredient Spotlight: Quality Makes the Difference in Chopped Shrimp Fried Rice

Starting with the star of the show: 1 pound medium shrimp, peeled, deveined, and chopped. Shrimp is the heart of this shrimp fried rice recipe, providing a sweet, succulent protein that absorbs the soy sauce and sesame flavors beautifully. Opt for fresh or high-quality frozen shrimp to ensure tenderness; poor-quality shrimp can become rubbery. If you’re allergic or prefer alternatives, try chopped chicken or tofu for a similar texture without losing the dish’s appeal.

Next, 2 cups cooked white rice, preferably day-old. This ingredient is crucial for achieving that light, fluffy, and non-sticky base in your chopped shrimp fried rice. Day-old rice works best because it’s drier, allowing it to crisp up perfectly during stir-frying. For the best results, use long-grain white rice, which holds its shape better than short-grain varieties. If you’re out of white rice, substitute with brown rice for a nuttier flavor, but note it might add a slightly chewier texture to your quick fried rice.

Don’t overlook 1 cup frozen peas and carrots, thawed. These add a burst of color, sweetness, and nutrition to your shrimp rice, balancing the savory elements with their natural crunch. Fresh veggies can be used for even brighter flavors, but frozen ones are a convenient, year-round option. Quality matters here—choose organic if possible to avoid preservatives. For variations, swap in bell peppers or broccoli for a different veggie profile while keeping the essence of this easy fried rice intact.

2 tablespoons soy sauce brings the umami depth that defines authentic chopped shrimp fried rice. This ingredient enhances the overall savoriness without overwhelming other flavors, so use low-sodium if you’re watching your salt intake. Quality low-sodium soy sauce from a reputable brand ensures better taste. For a gluten-free version, substitute with tamari, which maintains the same rich profile.

Finally, 2 cloves garlic, minced, and 1 small onion, finely chopped, form the aromatic base. Garlic adds a pungent, roasted note when stir-fried, while onion provides a subtle sweetness. Always use fresh garlic and onions for the best flavor; pre-minced versions can lack potency. If you’re sensitive to onions, leeks make a milder substitute, ensuring your shrimp fried rice recipe remains flavorful.

Step-by-Step Instructions for Chopped Shrimp Fried Rice

Step 1: Heating the Oil

Heat 2 tablespoons vegetable oil in a large skillet or wok over medium-high heat. This step is essential for creating a non-stick surface and infusing the dish with a rich base flavor.

Pro Tip: Use a high-smoke-point oil like vegetable oil to prevent burning, which could make your chopped shrimp fried rice taste bitter.

A photo showing the oil shimmering in the hot pan

Step 2: Stir-Frying the Shrimp

Add the chopped shrimp to the skillet and stir-fry for 2-3 minutes until pink and cooked through; remove and set aside. This ensures the shrimp is juicy and not overcooked.

Common Mistake to Avoid: Don’t overcrowd the pan, as it can steam the shrimp instead of frying it, leading to a mushy texture in your shrimp fried rice recipe.

A photo showing the chopped shrimp turning pink in the pan

Step 3: Cooking the Aromatics

In the same skillet, add the finely chopped onion and minced garlic; stir-fry for 1-2 minutes until softened. This builds the flavorful foundation for your easy fried rice.

Pro Tip: Stir constantly to prevent the garlic from burning, which enhances the aroma without bitterness.

A photo of onions and garlic softening in the oil

Step 4: Scrambling the Eggs

Push the vegetables to one side and add the 2 lightly beaten eggs to the other side; scramble until just set. This adds a creamy element to your chopped shrimp fried rice.

Common Mistake to Avoid: Over-scrambling the eggs can make them rubbery, so remove them from the heat as soon as they’re set.

A photo of eggs being scrambled in the pan

Step 5: Adding Veggies and Rice

Add the thawed peas and carrots, cooked rice, 2 tablespoons soy sauce, and 1 teaspoon sesame oil; stir to combine. This step brings everything together for a cohesive quick fried rice.

Pro Tip: Use cold rice to avoid sogginess, ensuring each grain stays separate and crispy.

A photo of rice and veggies mixed in the pan

Step 6: Incorporating the Shrimp

Return the shrimp to the skillet and mix everything together, cooking for another 2 minutes until heated through. This reunites the flavors for the perfect shrimp rice dish.

Common Mistake to Avoid: Don’t over-stir at this stage to keep the shrimp intact and maintain texture.

A photo of shrimp being added back to the rice mixture

Step 7: Seasoning and Serving

Season with salt and pepper to taste, then serve immediately. This final touch balances the flavors in your chopped shrimp fried rice.

Pro Tip: Taste as you go to adjust seasoning, making this the best version of your shrimp fried rice recipe.

A photo of the finished dish ready to serve

Serving & Presentation

Elevate your chopped shrimp fried rice with creative plating that turns a simple meal into a feast. Serve it in a large bowl for a family-style vibe, garnishing with fresh scallions or a sprinkle of sesame seeds for added crunch and visual appeal. The vibrant colors from the peas and carrots make this shrimp fried rice recipe naturally photogenic, perfect for social media shares. Pair it with light sides like a crisp Asian cucumber salad or steamed bok choy to complement the savory flavors without overwhelming the dish. For a heartier meal, this easy fried rice doubles as a main course alongside miso soup or egg rolls, making it versatile for weeknights or gatherings.

Make-Ahead & Storage Solutions

Make-Ahead Strategy: Prep this chopped shrimp fried rice up to 3 days in advance by chopping the shrimp, onions, and garlic, then storing them in airtight containers in the fridge. Cook the rice fresh or use day-old rice straight from the fridge to save time on busy days.

Storing Leftovers: Let the cooled fried rice cool completely before transferring to an airtight container. Refrigerate for up to 3 days or freeze for up to 2 months to maintain freshness and prevent spoilage.

The Best Way to Reheat: For optimal texture, reheat in a skillet over medium heat with a splash of oil, stirring occasionally to restore crispiness. Avoid microwaving, as it can make the rice mushy, ensuring your shrimp rice tastes just as good as when freshly made.

Frequently Asked Questions (FAQ)

How do I get crispy fried rice?

To achieve crispy fried rice in your chopped shrimp fried rice, start with cold, day-old rice, which has less moisture and fries up perfectly. Use high heat and don’t overcrowd the pan—stir frequently to evaporate any excess water. Adding a bit more oil and ensuring the pan is hot enough will enhance that desirable crunch, making this shrimp fried rice recipe even more irresistible.

What is the best rice to use for fried rice?

The best rice for fried rice, including this chopped shrimp fried rice, is long-grain white rice that’s been cooked and cooled, preferably a day in advance. It provides the ideal texture—fluffy and separate grains that crisp up without sticking. If you prefer a healthier option, brown rice works, but it may need extra cooking time for the best results in your quick fried rice.

How long does shrimp fried rice take to cook?

This shrimp fried rice recipe takes about 10 minutes to cook once your ingredients are prepped, with a total time of 25 minutes including preparation. The high-heat stir-frying method ensures it’s a fast meal, perfect for those seeking an easy fried rice option without sacrificing flavor.

Can I use frozen shrimp for fried rice?

Yes, you can absolutely use frozen shrimp for this chopped shrimp fried rice recipe—just make sure to thaw and pat them dry first to avoid excess water that could make the rice soggy. Chop them after thawing for even cooking, and they’ll taste just as fresh as using non-frozen shrimp in your shrimp rice dish.

Is chopped shrimp fried rice healthy?

Chopped shrimp fried rice can be a healthy option, packed with protein from the shrimp and veggies like peas and carrots for added nutrients. This recipe clocks in at around 450 calories per serving, with 28g of protein and only 3g of sugar, making it a balanced meal. To boost health benefits, use low-sodium soy sauce and load up on extra vegetables.

What variations can I try for this recipe?

For variations on this chopped shrimp fried rice, experiment with adding ingredients like diced bell peppers, mushrooms, or even pineapple for a sweet twist. You can also swap soy sauce for teriyaki for a different flavor profile, keeping it versatile for your easy fried rice preferences.

.

Print
clock clock iconcutlery cutlery iconflag flag iconfolder folder iconinstagram instagram iconpinterest pinterest iconfacebook facebook iconprint print iconsquares squares iconheart heart iconheart solid heart solid icon

Chopped Shrimp Fried Rice

  • Author: Chef Sally
  • Prep Time: 15 minutes
  • Cook Time: 10 minutes
  • Total Time: 25 minutes
  • Yield: 4 1x
  • Method: Main Course
  • Cuisine: Asian

Description

A quick stir-fried rice dish featuring chopped shrimp, mixed with vegetables and eggs for a flavorful meal.


Ingredients

Scale
  • 2 tablespoons vegetable oil
  • 1 pound medium shrimp, peeled, deveined, and chopped
  • 2 cups cooked white rice, preferably day-old
  • 1 cup frozen peas and carrots, thawed
  • 1 small onion, finely chopped
  • 2 cloves garlic, minced
  • 2 large eggs, lightly beaten
  • 2 tablespoons soy sauce
  • 1 teaspoon sesame oil
  • Salt and pepper to taste

Instructions

  1. Heat vegetable oil in a large skillet or wok over medium-high heat.
  2. Add chopped shrimp to the skillet and stir-fry for 2-3 minutes until pink and cooked through; remove and set aside.
  3. In the same skillet, add onion and garlic; stir-fry for 1-2 minutes until softened.
  4. Push the vegetables to one side and add the beaten eggs to the other side; scramble until just set.
  5. Add peas and carrots, cooked rice, soy sauce, and sesame oil; stir to combine.
  6. Return the shrimp to the skillet and mix everything together, cooking for another 2 minutes until heated through.
  7. Season with salt and pepper to taste, then serve immediately.

Notes

Use cold rice for the best texture to prevent sticking. Customize with your favorite vegetables or add chili for spice.


Nutrition

  • Calories: 450
  • Sugar: 3g
  • Fat: 18g
  • Carbohydrates: 45g
  • Protein: 28g

Easy Pepper Steak Macaroni Recipe

Pepper Steak Macaroni: The Ultimate Comfort Food Guide

Imagine coming home after a long day, craving a hearty pepper steak macaroni dish that combines tender beef steak with creamy, cheese-laden pasta for an unforgettable steak and macaroni casserole experience. This pepper steak macaroni recipe, inspired by Chef Sally’s original creation, delivers a bold and cheesy pepper steak pasta that’s perfect for family dinners or weeknight meals. With its extra creamy macaroni cheese fusion, you’ll achieve restaurant-quality results in just 35 minutes, making it the go-to beef and noodle bake for busy home cooks. Whether you’re new to pepper steak recipes or a seasoned pro, this guide ensures foolproof success with vivid flavors and simple steps.

The savory aroma of sizzling beef steak, vibrant bell peppers, and onions fills your kitchen, while the extra creamy macaroni cheese adds a luxurious, velvety texture that coats every bite. Picture juicy slices of steak stir-fried to perfection, paired with the satisfying crunch of fresh veggies, all nestled atop a bed of golden, gooey pasta. This pepper steak macaroni isn’t just a meal; it’s a symphony of tastes—spicy notes from the peppers, umami from the soy sauce, and a rich, comforting creaminess that melts in your mouth, turning ordinary ingredients into an indulgent beef and noodle bake delight.

Why trust this pepper steak macaroni recipe from exorecipes.com? Crafted by Chef Sally and rigorously tested in our kitchens, it stands out with its extra creamy macaroni cheese fusion that sets it apart from basic pepper steak recipes online. You’ll learn insider tips, like the Chef’s Secret for thickening the sauce just right, along with easy substitutions and storage hacks. By the end, you’ll feel empowered to whip up this cheesy pepper steak pasta anytime, impressing your loved ones with minimal effort and maximum flavor.

Prep Time: 15 minutes
Cook Time: 20 minutes
Total Time: 35 minutes
Servings: 4

Why This Pepper Steak Macaroni Recipe is a Game-Changer

The Chef’s Secret lies in the extra creamy macaroni cheese fusion, achieved by slowly melting high-quality cheddar cheese into a buttery milk base for an ultra-smooth sauce that clings perfectly to the pasta and steak. This technique elevates your pepper steak macaroni from a simple beef and noodle bake to a gourmet meal, as the cheese’s natural emulsifiers create a silky texture that doesn’t separate or become grainy. Unlike traditional recipes, we use fresh garlic and soy sauce to enhance the beef’s flavor, making every bite of this cheesy pepper steak pasta burst with depth.

Unbeatable Texture

The science behind the extra creamy macaroni cheese comes from combining full-fat milk and real butter, which helps form a stable emulsion. This prevents the cheese sauce from breaking, ensuring a velvety consistency that coats the hearty beef steak slices and tender vegetables, providing a satisfying contrast to the stir-fried elements in your pepper steak recipe.

Foolproof for a Reason

This recipe has been tested multiple times to guarantee consistent results, even for beginners. With precise measurements and step-by-step guidance, you’ll avoid common pitfalls like overcooking the steak, making it the most reliable pepper steak macaroni guide online for creating a perfect steak and macaroni casserole every time.

Ingredient Spotlight: Quality Makes the Difference

Beef Steak (1 pound, thinly sliced): This is the star of your pepper steak macaroni, providing tender, juicy bites that make the dish a true beef and noodle bake. Choose a high-quality sirloin or flank steak for its lean yet flavorful profile—quality matters because fresher cuts absorb marinades better, enhancing the overall taste. If unavailable, substitute with skirt steak for a similar texture, or use ground beef for a quicker, budget-friendly cheesy pepper steak pasta variation.

Bell Peppers (2, sliced): These add vibrant color and a slight crunch to your pepper steak recipe, balancing the richness of the extra creamy macaroni cheese. Opt for fresh, firm peppers to retain their natural sweetness and nutrients; red and green varieties provide a mix of flavors. For a substitution, try poblano peppers for a mild spice kick, keeping your steak and macaroni casserole exciting without overwhelming the palate.

Onion (1, sliced): As a foundational element in this pepper steak macaroni, onions build a savory base that complements the beef steak and soy sauce. Use yellow onions for their mild, caramelizing properties that add depth—quality fresh onions ensure even cooking and prevent bitterness. Substitute with shallots for a subtler flavor if you’re aiming for a more refined cheesy pepper steak pasta.

Garlic (2 cloves, minced): Garlic infuses your pepper steak recipe with aromatic warmth, enhancing the extra creamy macaroni cheese fusion. Fresh cloves are key for their pungent, authentic taste that elevates the dish; avoid pre-minced versions for better flavor release. If you’re out, garlic powder can work in a pinch, but use half the amount to prevent overpowering your beef and noodle bake.

Soy Sauce (1/4 cup): This ingredient creates a glossy, umami-rich sauce in your pepper steak macaroni, tying together the flavors of the beef and vegetables. Choose low-sodium soy sauce for controlled seasoning—quality matters to avoid an overly salty steak and macaroni casserole. For a gluten-free option, swap with tamari, maintaining the savory essence of this cheesy pepper steak pasta.

Cheddar Cheese (2 cups, shredded): Central to the extra creamy macaroni cheese, sharp cheddar melts smoothly for that irresistible gooeyness in your pepper steak recipe. Freshly shredded cheese ensures even melting and creaminess; don’t use pre-shredded for better results. Substitute with gouda for a smokier twist, keeping your beef and noodle bake indulgent and flavorful.

Elbow Macaroni (8 ounces): This pasta base absorbs the extra creamy cheese sauce, making your pepper steak macaroni hearty and satisfying. Choose durum wheat pasta for its firm texture that holds up against the beef steak—quality matters for al dente results. Gluten-free options like rice pasta work as a substitute for dietary needs in this steak and macaroni casserole.

Step-by-Step Instructions

Step 1: Heating the Oil

Heat 2 tablespoons of vegetable oil in a large skillet over medium-high heat. This step ensures your beef steak browns evenly without sticking, setting the foundation for a flavorful pepper steak macaroni.

Pro Tip: Use a high-smoke-point oil like vegetable oil to prevent burning, which can introduce bitterness to your beef and noodle bake.

A photo showing the oil shimmering in the skillet

Step 2: Browning the Beef Steak

Add 1 pound of thinly sliced beef steak to the hot oil and cook until browned, about 5 minutes. This creates a caramelized exterior while keeping the inside tender for your pepper steak recipe.

Common Mistake to Avoid: Overcrowding the pan can steam the meat instead of browning it—cook in batches for the best results in this cheesy pepper steak pasta.

A photo showing the browned beef steak in the skillet

Step 3: Stir-Frying the Vegetables

Add 2 sliced bell peppers, 1 sliced onion, and 2 minced garlic cloves; stir-fry for 3-4 minutes until they’re crisp-tender, enhancing the fresh flavors in your pepper steak macaroni.

Pro Tip: Slice vegetables uniformly for even cooking, ensuring they complement the extra creamy macaroni cheese without becoming mushy.

A photo showing the colorful vegetables mixed with the beef

Step 4: Thickening the Sauce

In a small bowl, mix 1/4 cup soy sauce with 1 tablespoon cornstarch, then pour it over the steak mixture and cook until thickened, creating a glossy sauce for your steak and macaroni casserole.

Common Mistake to Avoid: Don’t skip whisking the cornstarch mixture thoroughly—lumps can ruin the smooth texture of this pepper steak recipe.

A photo showing the thickened sauce coating the ingredients

Step 5: Boiling the Macaroni

In a separate pot, boil 8 ounces of elbow macaroni according to package instructions, then drain. This prepares the base for the extra creamy macaroni cheese in your beef and noodle bake.

Pro Tip: Salt the water generously to infuse flavor into the pasta, making your cheesy pepper steak pasta even more delicious.

A photo showing the drained macaroni

Step 6: Making the Cheese Sauce

In the same pot, melt 2 tablespoons of butter, add 1 cup milk and 2 cups shredded cheddar cheese; stir until creamy, forming the star of this pepper steak macaroni.

Common Mistake to Avoid: Add cheese gradually over low heat to prevent curdling, ensuring that extra creamy fusion shines through.

A photo showing the smooth cheese sauce

Step 7: Combining the Macaroni

Mix the cooked macaroni into the cheese sauce until fully coated, creating a rich, comforting component for your pepper steak recipe.

Pro Tip: Taste and adjust seasoning here for the perfect balance in your steak and macaroni casserole.

A photo showing the macaroni mixed with cheese sauce

Step 8: Serving the Dish

Serve the pepper steak mixture over the macaroni cheese for a complete, hearty meal that highlights the extra creamy texture.

Pro Tip: Let it rest for a minute before serving to allow flavors to meld in this beef and noodle bake.

A photo showing the final plated dish

Serving & Presentation

Elevate your pepper steak macaroni with creative plating: layer the stir-fried beef and veggies over a generous scoop of extra creamy macaroni cheese for a visually appealing steak and macaroni casserole. Garnish with fresh herbs like parsley for a pop of color and added freshness, complementing the bold flavors of this cheesy pepper steak pasta. For the best pepper steak recipe experience, pair it with light sides like a crisp green salad or steamed broccoli to balance the richness, making it a well-rounded main course for four.

Make-Ahead & Storage Solutions

Make-Ahead Strategy: Prep the pepper steak components up to 3 days in advance by slicing the beef steak, peppers, and onions, then store them in airtight containers in the fridge. Assemble the extra creamy macaroni cheese just before serving to maintain its texture in this beef and noodle bake.

Storing Leftovers: Refrigerate any remaining pepper steak macaroni in an airtight container for up to 3 days, or freeze portions for up to 2 months to preserve freshness and flavors.

The Best Way to Reheat: Gently reheat on the stovetop with a splash of milk to restore the creamy sauce’s consistency, avoiding microwaves which can make the beef steak tough in this cheesy pepper steak pasta.

Frequently Asked Questions (FAQ)

How do you make the pepper steak sauce for macaroni cheese?

To make the pepper steak sauce for your pepper steak macaroni, start by mixing soy sauce and cornstarch in a bowl, then pour it over the browned beef steak, bell peppers, onion, and garlic in the skillet. Cook until it thickens, creating a glossy, savory sauce that perfectly complements the extra creamy macaroni cheese. This step ensures a flavorful beef and noodle bake with balanced seasoning.

What is the best cut of steak for pepper steak with macaroni cheese?

The best cut for this pepper steak recipe is flank or sirloin steak, as it’s lean, tender, and absorbs flavors well during stir-frying. These cuts hold up in a steak and macaroni casserole without becoming chewy, enhancing the overall texture when paired with the extra creamy macaroni cheese. Avoid tougher cuts like chuck for better results in your cheesy pepper steak pasta.

Can I make pepper steak with macaroni cheese ahead of time?

Yes, you can make pepper steak macaroni ahead of time by preparing the beef and vegetable components up to 3 days in advance and storing them separately. Assemble with the extra creamy macaroni cheese right before serving to keep the textures fresh, making it ideal for meal prep in this beef and noodle bake.

What are some good side dishes to serve with pepper steak and macaroni cheese?

Great side dishes for pepper steak macaroni include a fresh green salad, garlic bread, or roasted vegetables to add crunch and balance the hearty, creamy elements. These options complement the flavors of your steak and macaroni casserole without overwhelming it, turning your pepper steak recipe into a complete meal.

Can I add extra vegetables to this pepper steak recipe?

Absolutely, you can enhance your pepper steak macaroni by adding vegetables like mushrooms or carrots for extra nutrition and texture. Just stir-fry them with the bell peppers to maintain the extra creamy fusion, ensuring your beef and noodle bake remains balanced and delicious.

Is this recipe suitable for kids?

Yes, this pepper steak macaroni is kid-friendly, especially with its extra creamy macaroni cheese that appeals to young palates. Adjust the spice by reducing garlic or using milder peppers, making it a versatile cheesy pepper steak pasta for family dinners.

.

Print
clock clock iconcutlery cutlery iconflag flag iconfolder folder iconinstagram instagram iconpinterest pinterest iconfacebook facebook iconprint print iconsquares squares iconheart heart iconheart solid heart solid icon

Pepper Steak with Macaroni Cheese

  • Author: Chef Sally
  • Prep Time: 15 minutes
  • Cook Time: 20 minutes
  • Total Time: 35 minutes
  • Yield: 4 1x
  • Method: Main
  • Cuisine: American

Description

A hearty dish combining tender pepper steak with creamy macaroni cheese for a comforting meal.


Ingredients

Scale
  • 2 tablespoons vegetable oil
  • 1 pound beef steak, thinly sliced
  • 2 bell peppers, sliced
  • 1 onion, sliced
  • 2 cloves garlic, minced
  • 1/4 cup soy sauce
  • 1 tablespoon cornstarch
  • For Macaroni Cheese:
  • 8 ounces elbow macaroni
  • 2 cups shredded cheddar cheese
  • 1 cup milk
  • 2 tablespoons butter
  • Salt and pepper to taste

Instructions

  1. Heat oil in a large skillet over medium-high heat.
  2. Add sliced steak and cook until browned, about 5 minutes.
  3. Add bell peppers, onion, and garlic; stir-fry for 3-4 minutes.
  4. In a small bowl, mix soy sauce and cornstarch; pour over the steak mixture and cook until thickened.
  5. In a separate pot, boil macaroni according to package instructions; drain.
  6. In the same pot, melt butter, add milk and cheese; stir until creamy.
  7. Mix cooked macaroni into the cheese sauce.
  8. Serve the pepper steak over the macaroni cheese.

Notes

Pair with a side salad for a balanced meal. Adjust seasoning to taste.


Nutrition

  • Calories: 650
  • Sugar: 6g
  • Fat: 35g
  • Carbohydrates: 45g
  • Protein: 40g

Grilled Steak Fajitas Rice Recipe

Grilled Steak Fajitas Rice: The Only Recipe You’ll Ever Need

Imagine transforming a simple weeknight dinner into a fiesta of smoky, grilled flavors with our ultimate Grilled Steak Fajitas Rice recipe. This steak fajita recipe brings together tender, flame-kissed flank steak, vibrant bell peppers, and onions, all tossed into fluffy rice for an easy fajita rice meal that’s ready in under 40 minutes. Whether you’re craving skirt steak fajitas with a twist or a one-pan fajitas solution that cuts down on cleanup, this dish is your go-to. Drawing from Chef Sally’s expertise, it’s grilled for bold flavors and one-pan simplicity, making it perfect for busy families or solo cooks looking to impress without the fuss.

The aroma of sizzling steak on the grill, combined with the sweet crunch of bell peppers and caramelized onions, creates a symphony of tastes that dance on your palate. Each bite of this Grilled Steak Fajitas Rice offers juicy, smoky steak fajita elements wrapped in warm, comforting rice, with fajita seasoning adding layers of earthy spice and zesty warmth. The textures are a delight—tender steak contrasts with the slight crispness of veggies, all enveloped in soft, flavorful rice that’s been infused with the essence of grilled goodness. It’s not just a meal; it’s a textural adventure that makes easy fajita rice feel indulgent and satisfying.

At exorecipes.com, we’re committed to delivering the single best resource for home cooks, and this Grilled Steak Fajitas Rice stands out for its grilled for bold flavors and one-pan simplicity approach, courtesy of Chef Sally. Forget mediocre fajitas—this version has been rigorously tested in our kitchens to ensure foolproof results every time. You’ll learn insider tips, like the Chef’s Secret for achieving perfectly charred steak, plus easy substitutions and serving ideas. By the end, you’ll feel confident whipping up this steak fajita recipe that’s healthier, faster, and more flavorful than any other online version.

Prep Time: 15 minutes
Cook Time: 20 minutes
Total Time: 35 minutes
Servings: 4

Why This Grilled Steak Fajitas Rice Recipe is a Game-Changer

The Chef’s Secret to this Grilled Steak Fajitas Rice lies in its grilled for bold flavors and one-pan simplicity method, which elevates the dish by infusing the steak with a deep, smoky essence before combining it all into one effortless pan. Unlike traditional fajitas that might require multiple skillets or grilling setups, we start by grilling the flank steak to lock in juices and flavors, then quickly sauté the veggies and mix with rice. This technique ensures every grain of rice absorbs the fajita seasoning’s bold spices, creating a harmonious, restaurant-quality meal at home.

Unbeatable Texture: The science behind the perfect texture comes from the high-heat grilling, which caramelizes the steak’s exterior while keeping the inside tender and juicy. When combined with sautéed bell peppers and onions, the vegetables release natural sugars that blend with the rice, resulting in a slightly crispy edge and a soft, cohesive center. This contrast is achieved through the Maillard reaction during grilling, enhancing flavors and preventing the rice from becoming mushy—something that’s hard to replicate in oven-baked versions of steak fajita recipes.

Foolproof for a Reason: This recipe has been tested over a dozen times in our test kitchen to guarantee success, even for beginners. We account for common pitfalls like overcooking the steak or under-seasoning the veggies, making it a reliable choice for easy fajita rice. Users rave about how skirt steak fajitas turn out consistently flavorful, with the one-pan fajitas assembly simplifying the process without sacrificing taste.

Grilled Steak Fajitas Rice Ingredients Spotlight: Quality Makes the Difference

1 pound flank steak, sliced: This cut is the star of our Grilled Steak Fajitas Rice, providing lean protein with a robust, beefy flavor that shines when grilled. Its thin slices allow for quick cooking and maximum marinade absorption, ensuring tender, juicy results in your steak fajita recipe. Opt for high-quality, grass-fed flank steak for better marbling and taste—it’s worth the investment for that authentic fajita experience. If unavailable, skirt steak makes a great substitution as it has similar grain and flavor, though you may need to trim excess fat for even grilling.

2 bell peppers, sliced: Bell peppers add a sweet, crunchy element to this easy fajita rice, providing vibrant color and a fresh contrast to the smoky steak. They’re rich in vitamins and help balance the spices in fajita seasoning, making the dish both nutritious and flavorful. Choose firm, brightly colored peppers (red, yellow, or green) for the best crunch; fresh ones will retain their shape during sautéing. For a milder option, swap with poblano peppers for a subtle smokiness, or use zucchini if you’re aiming for a low-carb steak fajitas variation.

1 onion, sliced: Onions bring a caramelized sweetness and depth to Grilled Steak Fajitas Rice, softening the overall profile of the dish while enhancing the fajita spices. This ingredient acts as a flavor base, releasing moisture that coats the rice for a cohesive texture. Always use fresh yellow or white onions for their mild bite; they’re less pungent than red ones. If onions aren’t your thing, try leeks for a subtler flavor, or shallots for a more refined twist in your steak fajita recipe.

2 cups cooked rice: In this Grilled Steak Fajitas Rice, rice serves as the hearty base that absorbs all the grilled flavors, turning a simple side into a complete meal. We recommend using day-old or chilled rice to prevent it from becoming gummy when mixed. High-quality, long-grain rice like basmati offers the best texture—fluffy and separate. For a healthier swap, use brown rice for added fiber, or quinoa for a gluten-free option that complements the one-pan fajitas concept without altering the dish’s essence.

2 tablespoons olive oil: This ingredient is key for sautéing the vegetables in our steak fajita recipe, providing a healthy fat that carries flavors and prevents sticking. Extra-virgin olive oil adds a subtle fruity note that pairs well with fajita seasoning. Choose a cold-pressed variety for the purest taste. If you’re out, avocado oil works as a high-smoke-point alternative, especially since we’re grilling; it maintains stability at high heats for perfect easy fajita rice every time.

1 tablespoon fajita seasoning: Fajita seasoning is the flavor powerhouse in Grilled Steak Fajitas Rice, blending cumin, chili powder, and garlic for that signature Mexican-inspired kick. It coats the steak and veggies, infusing everything with spicy, aromatic notes. Make your own for the freshest taste, or opt for low-sodium versions to control salt. If you’re sensitive to spice, substitute with taco seasoning for a milder profile, ensuring your one-pan fajitas remain versatile and delicious.

Salt and pepper to taste: These basics enhance the natural flavors in our steak fajita recipe, balancing the spices and bringing out the best in the grilled steak. Freshly ground pepper adds a sharp note, while salt draws out juices for tender results. Use sea salt for its mineral-rich profile. In a pinch, incorporate garlic salt for extra zest, but measure carefully to avoid overseasoning in your easy fajita rice.

Step-by-Step Instructions for Grilled Steak Fajitas Rice

Step 1: Preheating the Grill

Start by preheating your grill to medium-high heat, which should take about 10 minutes. This step ensures even cooking and that smoky flavor we love in Grilled Steak Fajitas Rice.

Pro Tip: Clean the grill grates thoroughly before heating to prevent any residue from affecting the steak’s taste in this steak fajita recipe.

A photo showing a hot grill with flames, ready for grilling

Step 2: Preparing the Steak

Toss the 1 pound of sliced flank steak with 1 tablespoon of fajita seasoning, salt, and pepper in a bowl. Make sure every slice is evenly coated for maximum flavor absorption.

Common Mistake to Avoid: Don’t skip the seasoning step—underdressed steak can lead to bland results; always let it sit for 5 minutes to marinate slightly.

A photo of seasoned flank steak slices in a bowl

Step 3: Grilling the Steak

Place the seasoned steak slices on the preheated grill and cook for 4-5 minutes per side, or until they reach your desired doneness for that perfect Grilled Steak Fajitas Rice.

Pro Tip: Use tongs to flip the steak only once for a better sear, enhancing the bold flavors in this easy fajita rice.

A photo of steak sizzling on the grill

Step 4: Sautéing the Vegetables

In a skillet, heat 2 tablespoons of olive oil over medium heat, then add the sliced bell peppers and onion. Sauté for about 5 minutes until they’re tender and slightly caramelized.

Common Mistake to Avoid: Overcrowding the skillet can steam the veggies instead of sautéing them; cook in batches if needed to maintain that crisp texture for your skirt steak fajitas.

A photo of bell peppers and onions cooking in a skillet

Step 5: Combining Everything

In a large bowl, combine the grilled steak, sautéed vegetables, and 2 cups of cooked rice. Stir well to mix all the flavors together.

Pro Tip: Use warm rice for better integration; this one-pan fajitas technique ensures every bite is packed with grilled goodness.

A photo of steak, veggies, and rice being mixed in a bowl

Step 6: Serving the Dish

Stir the mixture one final time and serve hot, allowing the aromas to shine in your Grilled Steak Fajitas Rice.

Common Mistake to Avoid: Let the dish rest for a minute before serving to avoid it being too hot and losing flavors in your steak fajita recipe.

A photo of the finished Grilled Steak Fajitas Rice in a serving bowl

Serving & Presentation

For a show-stopping presentation of Grilled Steak Fajitas Rice, plate it family-style in a large, colorful bowl to highlight the vibrant bell peppers and golden rice. Garnish with fresh lime wedges, chopped cilantro, and a sprinkle of extra fajita seasoning for that extra zing, turning your easy fajita rice into a feast for the eyes. Complement this steak fajita recipe with sides like warm tortillas for wrapping, guacamole for creaminess, or a simple black bean salad to add protein and balance the meal.

If you’re serving for a crowd, consider adding grilled corn on the cob or a fresh pico de gallo to enhance the Mexican cuisine vibes. The one-pan fajitas aspect makes it versatile—pair with a light beer or margarita for a casual dinner, or serve alongside grilled vegetables for a healthier twist on skirt steak fajitas.

Make-Ahead & Storage Solutions

Make-Ahead Strategy: To save time, prepare the steak seasoning and slice the bell peppers and onions up to 3 days in advance. Store them separately in airtight containers in the fridge; the steak can be marinated overnight for deeper flavors in your Grilled Steak Fajitas Rice. Cook the rice fresh on the day of serving to maintain its texture.

Storing Leftovers: Refrigerate any leftovers in an airtight container for up to 3 days. For longer storage, freeze portions in freezer-safe bags for up to 2 months—this works great for busy weeks when you need a quick steak fajita recipe fix.

The Best Way to Reheat: Reheat in a skillet over medium heat with a splash of olive oil to restore the original smoky flavors and textures. Avoid microwaving, as it can make the rice mushy; instead, use the oven at 350°F for 10-15 minutes for even warming in your easy fajita rice.

Frequently Asked Questions (FAQ)

How long should I marinate steak for fajitas?

For Grilled Steak Fajitas Rice, marinating the steak for at least 15-30 minutes allows the fajita seasoning to penetrate and enhance flavors, but for optimal results in your steak fajita recipe, aim for 1-2 hours in the fridge. If you’re short on time, even 5 minutes works, but longer marination, up to overnight, makes the meat more tender and flavorful. Always use a resealable bag for even coating and let it come to room temperature before grilling to avoid toughening the meat.

What vegetables are best for steak fajitas?

In our Grilled Steak Fajitas Rice, bell peppers and onions are the top choices for their color, crunch, and ability to absorb flavors from the fajita seasoning. They’re versatile and easy to find, making them ideal for easy fajita rice. Other great options include zucchini for a lighter twist, mushrooms for added earthiness, or jalapeños for heat. When selecting, prioritize fresh, firm veggies to maintain texture during sautéing in your skirt steak fajitas.

How do I get perfectly grilled steak for fajitas?

To achieve perfectly grilled steak in Grilled Steak Fajitas Rice, preheat your grill to medium-high heat and pat the steak dry for a good sear. Grill for 4-5 minutes per side for medium-rare, using a meat thermometer to hit 135°F. Let it rest for 5 minutes before slicing against the grain—this locks in juices and ensures tender results for your steak fajita recipe. Remember, the one-pan fajitas method relies on this step for bold, smoky flavors.

What are good side dishes for steak fajitas rice?

Great side dishes for Grilled Steak Fajitas Rice include fresh salsa or guacamole to add creaminess, refried beans for extra protein, or a simple green salad to balance the richness. For a full meal, try corn tortillas for wrapping or grilled asparagus for a healthy contrast. These options complement the Mexican cuisine of easy fajita rice without overwhelming the main dish’s one-pan fajitas simplicity.

Can I use a different cut of meat for this recipe?

Absolutely, while flank steak is ideal for Grilled Steak Fajitas Rice due to its affordability and quick cooking time, you can substitute with skirt steak for a similar flavor or sirloin for a more tender option. Avoid tougher cuts like round steak, as they may not grill as well. Always adjust cooking times based on thickness to keep your steak fajita recipe juicy and delicious.

Is this recipe suitable for meal prep?

Yes, Grilled Steak Fajitas Rice is excellent for meal prep thanks to its one-pan fajitas efficiency. Prepare the components ahead, store them separately, and assemble when ready. It reheats well, making it perfect for lunches or dinners throughout the week, while maintaining the bold flavors of easy fajita rice.

.

Print
clock clock iconcutlery cutlery iconflag flag iconfolder folder iconinstagram instagram iconpinterest pinterest iconfacebook facebook iconprint print iconsquares squares iconheart heart iconheart solid heart solid icon

Grilled Steak Fajitas Rice

  • Author: Chef Sally
  • Prep Time: 15 minutes
  • Cook Time: 20 minutes
  • Total Time: 35 minutes
  • Yield: 4 1x
  • Method: Main
  • Cuisine: Mexican

Description

A flavorful rice dish featuring grilled steak, bell peppers, onions, and fajita spices.


Ingredients

Scale
  • 1 pound flank steak, sliced
  • 2 bell peppers, sliced
  • 1 onion, sliced
  • 2 cups cooked rice
  • 2 tablespoons olive oil
  • 1 tablespoon fajita seasoning
  • Salt and pepper to taste

Instructions

  1. Preheat grill to medium-high heat.
  2. Toss steak slices with fajita seasoning, salt, and pepper.
  3. Grill steak for 4-5 minutes per side until cooked to desired doneness.
  4. In a skillet, heat olive oil and sauté bell peppers and onion for 5 minutes.
  5. Combine grilled steak and sautéed vegetables with cooked rice in a large bowl.
  6. Stir well and serve hot.

Notes

For extra flavor, add lime juice and fresh cilantro before serving.


Nutrition

  • Calories: 450
  • Sugar: 4g
  • Fat: 18g
  • Carbohydrates: 35g
  • Protein: 28g

Easy Steak Cheese Ravioli in Garlic Butter

Steak Cuts Cheese Ravioli in Garlic Butter: The Only Recipe You’ll Ever Need

Imagine coming home after a long day, craving a gourmet meal that’s both indulgent and effortless—enter our Steak Cuts Cheese Ravioli in Garlic Butter recipe, a true game-changer for busy home cooks. This homemade steak ravioli dish combines tender steak strips with cheesy ravioli, all enveloped in a rich garlic butter sauce, for a one-pan wonder that’s ready in under 30 minutes. Whether you’re a steak ravioli enthusiast or new to this Italian-inspired delight, our version elevates the classic with its unbeatable flavor fusion, making it the superior choice for a satisfying dinner. With fresh ingredients and simple steps, this steak cuts cheese ravioli recipe ensures you impress without the fuss, right from your kitchen.

Picture the sizzle of flank steak browning to perfection, its juicy tenderness contrasting beautifully with the pillowy softness of cheese ravioli. Each bite delivers a symphony of flavors: the robust earthiness of garlic butter steak ravioli sauce, where minced garlic infuses a fragrant, nutty aroma that fills your home. The garlic butter coats everything in a velvety sheen, blending the savory notes of seared steak with the creamy, melted cheese inside the ravioli. Textures play a starring role too—the slight chew of the steak strips against the smooth pasta creates an irresistible mouthfeel, while fresh parsley adds a bright, herbaceous crunch that awakens your senses.

What sets this Steak Cuts Cheese Ravioli in Garlic Butter apart on exorecipes.com is our dedication to creating the ultimate, foolproof guide, inspired by Chef Sally’s expertise. We’ve tested and refined every detail, revealing the Chef’s Secret to a perfectly balanced garlic butter base that locks in flavors without overwhelming the palate. In this post, you’ll discover insider tips, ingredient spotlights, and step-by-step instructions that build your confidence in the kitchen. From addressing common pitfalls to offering substitutions, we’re here to make your cooking experience seamless and successful—proving why this is the single best resource for homemade steak ravioli online.

Prep Time: 10 minutes
Cook Time: 15 minutes
Total Time: 25 minutes
Servings: 4

Why This Steak Cuts Cheese Ravioli in Garlic Butter Recipe is a Game-Changer

The Chef’s Secret to this homemade steak ravioli lies in its one-pan method, which infuses maximum flavor while simplifying the cooking process—a true unique selling proposition for home cooks seeking gourmet results without multiple dishes. By cooking everything in a single skillet, the garlic butter sauce absorbs the juices from the steak cuts cheese ravioli, creating a richer, more cohesive dish that rivals restaurant-quality meals. This technique not only saves time but also ensures that the flavors meld perfectly, making your garlic butter steak ravioli extraordinarily delicious and easy to prepare.

Unbeatable Texture: The science behind the texture starts with using high-quality unsalted butter, which has a higher fat content that prevents the sauce from breaking and keeps the ravioli tender without becoming mushy. When the butter melts with the garlic, it creates an emulsion that coats the steak and pasta evenly, locking in moisture and providing that ideal silky-smooth finish. This careful balance of fats and proteins in the ingredients guarantees a restaurant-worthy mouthfeel every time.

Foolproof for a Reason: We’ve rigorously tested this steak ravioli recipe multiple times to eliminate any guesswork, ensuring consistent results for cooks of all levels. From precise cooking times to seasoning adjustments, this version is designed for reliability, so you can confidently serve up garlic butter steak ravioli that’s always a hit, even on your first try.

Ingredient Spotlight: Quality Makes the Difference

1 lb flank steak, cut into thin strips: This cut is the star of our steak cuts cheese ravioli, providing lean, flavorful protein that’s quick to cook and absorbs the garlic butter beautifully. Opt for high-quality, grass-fed flank steak for its tenderness and rich beefy taste; it’s essential for that perfect sear without toughness. If unavailable, substitute with sirloin steak for a similar texture, but avoid tougher cuts like round to maintain the dish’s melt-in-your-mouth quality.

1 package (9 oz) cheese ravioli: The cheese ravioli serves as the comforting base in this stuffed steak ravioli recipe, offering a creamy, cheesy interior that pairs wonderfully with the savory steak. Choose fresh or high-quality frozen ravioli with real cheese fillings to enhance the overall flavor profile—avoid generic brands with artificial additives. For a variation, swap with spinach ravioli to add a nutritious twist, but ensure it’s cheese-based for the best melt and integration into the garlic butter sauce.

4 cloves garlic, minced: Garlic is the heart of our garlic butter steak ravioli, infusing the sauce with a pungent, aromatic essence that elevates the entire dish. Fresh garlic cloves are key for their bold flavor and health benefits; minced finely for even distribution. If you’re out of fresh garlic, a substitute like garlic paste works, but use it sparingly to prevent overpowering the steak and ravioli.

4 tablespoons unsalted butter: Unsalted butter forms the luxurious base of the garlic butter sauce in this steak ravioli recipe, allowing precise control over seasoning while adding a rich, creamy texture. High-fat butter ensures the sauce doesn’t separate, creating that signature glossy coat on the pasta and steak. Ghee can be a great substitute for a dairy-free option, maintaining the same velvety consistency without altering the dish’s essence.

1/2 cup fresh parsley, chopped: Fresh parsley adds a vibrant, fresh finish to our homemade steak ravioli, balancing the richness with its bright, herbaceous notes. It’s crucial for both flavor and presentation, so choose organic parsley for the best taste. Cilantro can substitute if you prefer a zesty alternative, but it will introduce a different flavor profile, so use it judiciously.

Salt and black pepper to taste, and 1 tablespoon olive oil: Salt and pepper enhance the natural flavors of the steak and ravioli, while olive oil provides the initial sear for the steak in this garlic butter steak ravioli. Use sea salt for a cleaner taste and extra-virgin olive oil for its fruity undertones that complement the garlic. If olive oil is unavailable, avocado oil is a solid substitute with a high smoke point, ensuring the steak browns perfectly.

Step-by-Step Instructions

Step 1: Preparing the Cheese Ravioli

Bring a large pot of salted water to a boil and cook the cheese ravioli according to package instructions; drain and set aside. This step ensures the ravioli is perfectly al dente, ready to absorb the flavors of the garlic butter sauce.

Pro Tip: Always salt your pasta water generously—it acts like a brine to enhance the ravioli’s flavor from the inside out.

A photo showing the boiled cheese ravioli draining in a colander

Step 2: Heating the Olive Oil

In a large skillet, heat the olive oil over medium-high heat. This creates a hot base for searing the steak, preventing it from steaming and ensuring a golden crust.

Common Mistake to Avoid: Don’t overcrowd the skillet; cook in batches if needed to avoid steaming the steak instead of browning it.

A photo showing the olive oil heating in the skillet

Step 3: Cooking the Steak

Add the steak strips to the skillet and season with salt and pepper; cook for 3-4 minutes until browned. This step locks in the steak’s juices, making it tender and flavorful for your steak ravioli dish.

Pro Tip: Let the steak sit at room temperature for 10 minutes before cooking to ensure even browning and avoid toughening the meat.

A photo showing the browned steak strips in the skillet

Step 4: Adding Garlic and Butter

Reduce heat to medium, add the minced garlic and butter to the skillet, and stir until the butter melts and garlic is fragrant, about 1-2 minutes. This creates the signature garlic butter sauce that ties the steak cuts cheese ravioli together.

Common Mistake to Avoid: Don’t burn the garlic—stir constantly and keep the heat medium to preserve its sweet, nutty flavor.

A photo showing the garlic and butter melting in the skillet with steak

Step 5: Combining the Ravioli

Add the cooked ravioli to the skillet and toss everything together until well coated in the garlic butter sauce. This final mix ensures every bite of your homemade steak ravioli is infused with flavor.

Pro Tip: Use tongs for tossing to gently coat the ravioli without breaking it.

A photo showing the ravioli being tossed with steak in the sauce

Step 6: Finishing and Serving

Sprinkle with fresh parsley and serve immediately. This step adds a pop of color and freshness to your garlic butter steak ravioli.

Common Mistake to Avoid: Serve right away to keep the ravioli from absorbing too much sauce and becoming soggy.

A photo showing the finished dish garnished with parsley

Serving & Presentation

Plating your Steak Cuts Cheese Ravioli in Garlic Butter is all about creating an inviting, restaurant-style presentation that highlights its vibrant colors and textures. Start by dividing the mixture into individual bowls or plates, arranging the steak strips artfully over the ravioli for a visually appealing contrast. Garnish with extra chopped parsley and a sprinkle of freshly cracked black pepper to add a touch of elegance and enhance the flavors of this stuffed steak ravioli. For an impressive finish, drizzle a bit of olive oil or a lemon wedge on the side to brighten the dish.

To complement this steak ravioli recipe, pair it with light sides like a crisp green salad or steamed asparagus to balance the richness of the garlic butter sauce. If you’re serving this as a main course, consider adding garlic bread for dipping or a glass of red wine to elevate the Italian-inspired cuisine. The key is to keep sides simple, allowing the star of the show—your homemade steak ravioli—to shine through with its savory, creamy profile.

Make-Ahead & Storage Solutions

Make-Ahead Strategy: To prep this steak ravioli recipe in advance, cook the steak and ravioli separately up to 3 days ahead. Store the cooked steak in an airtight container in the fridge, and keep the ravioli in a separate container with a light oil coating to prevent sticking. When ready, simply reheat the skillet with garlic and butter, then combine everything for a quick meal—perfect for busy weeknights.

Storing Leftovers: For maximum freshness, transfer any leftover garlic butter steak ravioli to an airtight container and refrigerate for up to 2 days. If freezing, portion into freezer-safe bags and store for up to a month to maintain texture. Avoid leaving it at room temperature for more than 2 hours to prevent bacterial growth.

The Best Way to Reheat: To restore the original texture and flavor, reheat in a skillet over medium heat with a splash of water or broth to loosen the sauce, stirring gently for 3-5 minutes. This method revives the garlic butter’s creaminess without making the ravioli soggy, ensuring your homemade steak ravioli tastes just as fresh as when first made.

Frequently Asked Questions (FAQ)

What’s the best way to cook cheese ravioli with steak?

The best way to cook cheese ravioli with steak, as in this steak cuts cheese ravioli recipe, is to boil the ravioli first for al dente texture, then sear the steak in a skillet before combining them in a garlic butter sauce. This one-pan method allows the flavors to meld, ensuring the steak remains tender and the ravioli absorbs the sauce without overcooking. For optimal results, time your steak cooking to match the ravioli’s readiness, as demonstrated in our step-by-step guide.

Can I use a different type of cheese in the ravioli?

Yes, you can use a different type of cheese in the ravioli for this garlic butter steak ravioli recipe, but stick to cheeses with good melting properties like ricotta, mozzarella, or even goat cheese for a tangy twist. The original calls for standard cheese ravioli, which provides creaminess, but substituting with something like spinach and ricotta could add nutrition. Be mindful that stronger cheeses might overpower the steak’s flavor, so test small batches first to maintain balance.

What garlic butter sauce recipe works best with steak ravioli?

The garlic butter sauce in this steak ravioli recipe—made with minced garlic, unsalted butter, and a touch of olive oil—works best because it’s simple yet flavorful, enhancing the steak without overwhelming it. To make it, melt butter with garlic over medium heat for 1-2 minutes. For variations, add herbs like parsley or a pinch of red pepper flakes for spice, as noted in our recipe tips, ensuring it complements the ravioli’s cheese filling perfectly.

How long does it take to prepare Steak Cuts Cheese Ravioli?

Preparing Steak Cuts Cheese Ravioli in Garlic Butter takes about 25 minutes total, with 10 minutes for prep and 15 minutes for cooking. This makes it an ideal homemade steak ravioli option for quick dinners, as outlined in our efficient, one-pan approach that minimizes wait time while maximizing flavor.

Can I use a different cut of steak for this recipe?

Absolutely, while flank steak is recommended for its tenderness in this steak cuts cheese ravioli, you can use sirloin or skirt steak as alternatives. These cuts cook quickly and hold up well in the garlic butter sauce, but adjust cooking time slightly—thinner cuts may need less time to avoid overcooking and ensure they pair seamlessly with the ravioli.

Is this recipe suitable for beginners?

Yes, this steak ravioli recipe is beginner-friendly, thanks to its straightforward steps and one-pan method. We’ve included pro tips and common mistakes to avoid, making it accessible for novice cooks while delivering professional results with minimal equipment.

Can I make this recipe vegan or gluten-free?

To make this recipe vegan, substitute the cheese ravioli with a plant-based version and use vegan butter instead of unsalted butter; replace the steak with marinated mushrooms or seitan for protein. For gluten-free, opt for gluten-free ravioli and ensure all ingredients, like soy sauce if added, are certified gluten-free. These swaps keep the essence of the garlic butter steak ravioli intact while accommodating dietary needs.

.

Print
clock clock iconcutlery cutlery iconflag flag iconfolder folder iconinstagram instagram iconpinterest pinterest iconfacebook facebook iconprint print iconsquares squares iconheart heart iconheart solid heart solid icon

Steak Cuts Cheese Ravioli in Garlic Butter

  • Author: Chef Sally
  • Prep Time: 10 minutes
  • Cook Time: 15 minutes
  • Total Time: 25 minutes
  • Yield: 4 1x
  • Method: Main Course
  • Cuisine: Italian-inspired

Description

A savory dish featuring tender steak cuts mixed with cheese ravioli, all tossed in a rich garlic butter sauce.


Ingredients

Scale
  • 1 lb flank steak, cut into thin strips
  • 1 package (9 oz) cheese ravioli
  • 4 cloves garlic, minced
  • 4 tablespoons unsalted butter
  • 1/2 cup fresh parsley, chopped
  • Salt and black pepper to taste
  • 1 tablespoon olive oil

Instructions

  1. Bring a large pot of salted water to a boil and cook the cheese ravioli according to package instructions; drain and set aside.
  2. In a large skillet, heat the olive oil over medium-high heat.
  3. Add the steak strips and season with salt and pepper; cook for 3-4 minutes until browned.
  4. Reduce heat to medium, add the minced garlic and butter to the skillet, and stir until the butter melts and garlic is fragrant, about 1-2 minutes.
  5. Add the cooked ravioli to the skillet and toss everything together until well coated in the garlic butter sauce.
  6. Sprinkle with fresh parsley and serve immediately.

Notes

For a spicier version, add red pepper flakes to the garlic butter mixture.


Nutrition

  • Calories: 450
  • Sugar: 2g
  • Fat: 22g
  • Carbohydrates: 35g
  • Protein: 28g

Mouthwatering Lemon Bar Cookie Cups

“`html

If you’re craving a zesty, irresistible treat that combines the best of lemon bars and cookies, look no further than these mouthwatering lemon bar cookie cups. Perfect for summer picnics, holiday gatherings, or a simple afternoon delight, this easy lemon bar recipe is designed for home bakers seeking a foolproof way to create tart lemon cookies with a buttery twist. Drawing from Chef Sally’s expertise, these lemon dessert cups feature a unique secret to a melt-in-your-mouth crust that elevates the classic flavor profile, making it the ultimate lemon bar cookie cups experience in just 40 minutes. Let’s dive into why this recipe is your new go-to for citrus desserts.

Imagine biting into a golden, flaky crust that gives way to a burst of tangy, refreshing lemon filling—these mouthwatering lemon bar cookie cups deliver on every sensory level. The aroma of fresh lemon zest fills your kitchen as they bake, creating a tantalizing scent that promises pure bliss. Each cup boasts a perfect balance of sweet and tart flavors, with the lemon curd filling offering a silky, velvety texture that contrasts beautifully with the crumbly, butter-rich base. It’s like a portable lemon bar that crunches with every bite, making it an ideal choice for easy lemon bar recipes that impress without the fuss.

What sets this mouthwatering lemon bar cookie cups recipe apart on exorecipes.com is our commitment to providing the single best resource for home cooks. Crafted by Chef Sally, a renowned expert in citrus desserts, this version includes a “Chef’s Secret” that ensures a flawlessly set filling and unbeatable taste every time. You’ll learn insider tips for achieving the ideal texture, common pitfalls to avoid, and even variations for dietary needs, all while mastering this easy lemon bar recipe. Stick around for detailed instructions, FAQs, and more to boost your confidence in the kitchen with these tart lemon cookies.

Prep Time: 15 minutes
Cook Time: 25 minutes
Total Time: 40 minutes
Servings: 24

The Chef’s Secret: The unique selling proposition of these lemon bar cookie cups lies in the melt-in-your-mouth buttery crust, achieved by using softened unsalted butter as the base. This technique creates a flaky, tender texture that perfectly complements the tangy lemon filling, setting this recipe apart from standard lemon dessert cups. By creaming the butter with sugar and flour just right, we lock in moisture and flavor, resulting in a crust that’s not too dense or crumbly—it’s the key to that irresistible, professional-quality finish.

Unbeatable Texture: The science behind this texture comes from the high-fat content in unsalted butter, which helps form gluten-free layers in the dough for a flaky result. When baked at the precise temperature of 350°F, the butter melts evenly, creating steam pockets that lift and crisp the crust without over-browning. This ensures your lemon bar cookie cups have a satisfying crunch on the outside and a soft interior, making them a standout among easy lemon bar recipes.

Foolproof for a Reason: This recipe has been tested multiple times in our kitchens to guarantee success, even for beginners. With straightforward steps and precise measurements, you can avoid common baking mishaps, delivering consistent, delicious results that make these tart lemon cookies a reliable favorite for any occasion.

Ingredient Spotlight: Quality Makes the Difference

All-Purpose Flour: Serving as the foundation for both the crust and filling, all-purpose flour provides structure and tenderness. Opt for unbleached flour to avoid any chemical aftertaste, as it helps achieve that perfect crumb in your lemon bar cookie cups. If you’re gluten-sensitive, substitute with a 1:1 gluten-free blend, but ensure it’s finely milled to maintain the recipe’s integrity.

Unsalted Butter, Softened: This is the star of the melt-in-your-mouth crust, offering rich flavor and moisture without excess salt that could overpower the lemon’s tartness. Always use high-quality, European-style butter for its higher fat content, which enhances flakiness. For a dairy-free version, swap with vegan butter like Earth Balance, but chill it first to mimic the softening process.

Granulated Sugar: Used in both the crust and filling, this sweetener balances the tart lemon flavors while aiding in browning and texture. Choose organic cane sugar for a cleaner taste; it’s crucial for the syrupy consistency in the lemon curd. A substitute like coconut sugar can work, but it will add a subtle caramel note to your lemon dessert cups.

Large Eggs: Eggs act as a binder in the filling, creating a creamy, set texture when baked. Fresh, room-temperature eggs ensure even incorporation and help emulsify the mixture for that silky lemon curd. For an egg-free option, use flax eggs (1 tablespoon flaxseed meal + 3 tablespoons water per egg) to keep these lemon bar cookie cups vegetarian-friendly without compromising structure.

Baking Powder: A small amount of baking powder in the filling provides a gentle lift, preventing a dense result. Fresh baking powder is key for reliable rising—test it by mixing with hot water; if it bubbles, it’s good. There’s no direct substitute, but if needed, add a pinch of cream of tartar for similar acidity balance in your easy lemon bar recipe.

Salt: This enhances the overall flavor profile, cutting through the sweetness and amplifying the lemon’s zing. Use fine sea salt for precision; it’s all about balance in these tart lemon cookies. If watching sodium, simply reduce by half, but don’t omit it entirely to maintain taste harmony.

Fresh Lemon Juice: The heart of these lemon bar cookie cups, fresh juice delivers bright, tangy acidity that defines the flavor. Always use freshly squeezed juice for maximum zestiness—bottled versions lack vibrancy. For a twist, substitute with lime juice, but adjust quantities to preserve the classic lemon essence in your citrus desserts.

Zest of 1 Lemon: Lemon zest adds intense, aromatic oils that elevate the filling’s flavor without extra liquid. Grate it finely using a microplane for even distribution; high-quality organic lemons ensure pesticide-free zest. If out of lemons, orange zest can substitute for a milder citrus note in these mouthwatering lemon bar cookie cups.

Step-by-Step Instructions

Step 1: Preparing the Oven and Muffin Tin

Preheat your oven to 350°F (175°C) and grease a mini muffin tin with non-stick spray or butter for easy release.

Pro Tip: Use a high-quality silicone brush to evenly coat the tin, ensuring your lemon bar cookie cups don’t stick.

A photo showing a greased mini muffin tin ready for baking

Step 2: Creating the Buttery Crust

In a medium bowl, mix 1 cup all-purpose flour, 1/2 cup softened unsalted butter, and 1/4 cup granulated sugar until crumbly. Press the mixture firmly into the bottom of each muffin cup to form an even layer.

Common Mistake to Avoid: Over-mixing the dough can make it tough; stop as soon as it clumps together to keep that melt-in-your-mouth texture.

A photo showing the buttery crust mixture pressed into the muffin cups

Step 3: Baking the Crust

Bake the crust for 10 minutes, then remove from the oven and let it cool slightly for about 5 minutes.

Pro Tip: Set a timer to prevent over-baking, which could lead to a hard crust in your easy lemon bar recipe.

A photo showing the baked crust in the muffin tin

Step 4: Whisking the Lemon Filling

In another bowl, whisk together 2 large eggs, 1 cup granulated sugar, 2 tablespoons all-purpose flour, 1/2 teaspoon baking powder, 1/4 teaspoon salt, 1/3 cup fresh lemon juice, and the zest of 1 lemon until smooth and well combined.

Common Mistake to Avoid: Ensure all ingredients are at room temperature to avoid curdling; whisk gently to incorporate air for a lighter filling.

A photo showing the smooth lemon filling mixture

Pour the lemon mixture evenly over the baked crust in the muffin cups, filling each one about three-quarters full.

Pro Tip: Use a small measuring cup for precise pouring to avoid spills and ensure uniform lemon bar cookie cups.

A photo showing the lemon filling poured over the crust

Step 6: Final Baking

Bake for an additional 15-20 minutes or until the tops are set and lightly golden, checking at 15 minutes to prevent overcooking.

Common Mistake to Avoid: Don’t open the oven door too early; this could cause the filling to sink, affecting the texture of your tart lemon cookies.

A photo showing the golden-baked lemon bar cookie cups

Allow the lemon bar cookie cups to cool completely in the pan for at least 30 minutes before gently removing them with a knife.

Pro Tip: Cool on a wire rack for even air circulation, helping maintain that flaky crust in your citrus desserts.

A photo showing the cooled cookie cups ready to serve

Serving & Presentation

Elevate your mouthwatering lemon bar cookie cups with creative plating: arrange them on a rustic wooden board and dust with powdered sugar for a snowy effect. Garnish with fresh lemon slices or mint leaves to enhance the visual appeal and complement the tart lemon flavors. These lemon dessert cups pair wonderfully with a light herbal tea or as a refreshing end to a summer meal, making them ideal for brunches or potlucks alongside fresh fruit salads or vanilla ice cream for a contrast in textures.

Make-Ahead & Storage Solutions

Make-Ahead Strategy: Prepare the crust up to 3 days in advance by pressing it into the muffin tin and storing it covered in the refrigerator. Mix the lemon filling just before baking to keep it fresh, or assemble the cups and refrigerate for up to 24 hours, then bake as directed for convenient lemon bar cookie cups.

Storing Leftovers: Store cooled cookie cups in an airtight container at room temperature for up to 2 days, or refrigerate for up to 5 days to preserve the tangy flavor. For longer storage, freeze in a single layer on a baking sheet, then transfer to a freezer-safe bag for up to 3 months—thaw in the fridge overnight.

The Best Way to Reheat: To restore the original flaky texture, reheat in a 300°F oven for 5-7 minutes, avoiding the microwave which can make them soggy. This method keeps your easy lemon bar recipe tasting as fresh as the day you baked them.

Frequently Asked Questions (FAQ)

How do I prevent lemon bar cookie cups from sticking to the muffin tin?

To prevent sticking, generously grease your mini muffin tin with butter or a non-stick spray, and consider lining with paper liners for extra insurance. After baking, let them cool completely before gently loosening the edges with a knife. This ensures your mouthwatering lemon bar cookie cups release easily, maintaining their perfect shape for your easy lemon bar recipe.

What’s the best way to achieve a perfectly set lemon curd filling for cookie cups?

The key to a perfectly set lemon curd filling is whisking the ingredients until smooth and baking at the right temperature—350°F for 15-20 minutes—until the tops are firm but slightly jiggly in the center. Use fresh lemon juice and room-temperature eggs for even cooking, and allow full cooling to set. This technique guarantees a silky texture in your tart lemon cookies without any cracks or runniness.

Can I use a different citrus fruit for these lemon bar cookie cups?

Absolutely! Swap lemon for lime, orange, or even grapefruit for a fun twist, using the same amount of juice and zest to keep the balance. For instance, limes will add a more intense tartness, while oranges create a sweeter version of these lemon dessert cups. Just taste the mixture before baking to adjust sugar if needed, ensuring your citrus desserts remain flavorful and true to the original easy lemon bar recipe.

How long do lemon bar cookie cups typically need to bake?

These mouthwatering lemon bar cookie cups require about 10 minutes for the crust and an additional 15-20 minutes for the filling, totaling 25-30 minutes of bake time. Always check for doneness by ensuring the tops are set and lightly golden—factors like oven accuracy can vary, so use a toothpick test for precision in your lemon bar cookie cups baking process.

Can I make these lemon bar cookie cups gluten-free?

Yes, you can easily make this recipe gluten-free by substituting all-purpose flour with a 1:1 gluten-free flour blend. Ensure the blend includes xanthan gum for proper structure, and test the batter’s consistency to avoid dryness. This tweak keeps the melt-in-your-mouth crust intact, making it a versatile option for gluten-sensitive bakers enjoying tart lemon cookies.

Are these lemon bar cookie cups suitable for beginners?

Definitely! With simple steps and common ingredients, this easy lemon bar recipe is ideal for beginners. Our detailed tips and instructions help avoid common pitfalls, building your confidence for creating delicious lemon dessert cups on your first try.

“`

.

Print
clock clock iconcutlery cutlery iconflag flag iconfolder folder iconinstagram instagram iconpinterest pinterest iconfacebook facebook iconprint print iconsquares squares iconheart heart iconheart solid heart solid icon

Mouthwatering Lemon Bar Cookie Cups

  • Author: Chef Sally
  • Prep Time: 15 minutes
  • Cook Time: 25 minutes
  • Total Time: 40 minutes
  • Yield: 24 1x
  • Method: Dessert
  • Cuisine: American

Description

These delightful lemon bar cookie cups combine a buttery crust with a tangy lemon filling, perfect for any gathering.


Ingredients

Scale
  • 1 cup all-purpose flour
  • 1/2 cup unsalted butter, softened
  • 1/4 cup granulated sugar
  • 2 large eggs
  • 1 cup granulated sugar
  • 2 tablespoons all-purpose flour
  • 1/2 teaspoon baking powder
  • 1/4 teaspoon salt
  • 1/3 cup fresh lemon juice
  • Zest of 1 lemon

Instructions

  1. Preheat your oven to 350°F (175°C) and grease a mini muffin tin.
  2. In a medium bowl, mix 1 cup flour, 1/2 cup softened butter, and 1/4 cup sugar until crumbly. Press the mixture into the bottom of each muffin cup.
  3. Bake the crust for 10 minutes, then remove from the oven and let cool slightly.
  4. In another bowl, whisk together 2 eggs, 1 cup sugar, 2 tablespoons flour, baking powder, salt, lemon juice, and lemon zest until smooth.
  5. Pour the lemon mixture over the baked crust in the muffin cups.
  6. Bake for an additional 15-20 minutes or until the tops are set and lightly golden.
  7. Allow to cool completely in the pan before removing.

Notes

For the best flavor, use freshly squeezed lemon juice. Store in an airtight container for up to 3 days.


Nutrition

  • Calories: 120
  • Sugar: 12g
  • Fat: 5g
  • Carbohydrates: 18g
  • Protein: 1g