20 Low Carb High Protein Meals

low-carb-high-protein-meals

20 Low Carb High Protein Meals to Keep You Full & Happy

There’s something so comforting about a meal that leaves you satisfied without weighing you down—like a warm hug from the inside. I remember the first time I truly fell in love with high-protein, low-carb cooking. It was a chilly Sunday evening, and after a long week of feeling sluggish from too many processed snacks, I craved something wholesome yet indulgent. That’s when I discovered the magic of balancing protein and veggies in a way that doesn’t feel restrictive. Whether you’re looking to fuel your workouts, manage cravings, or simply enjoy delicious food that loves you back, these 20 meals are about to become your new kitchen staples.

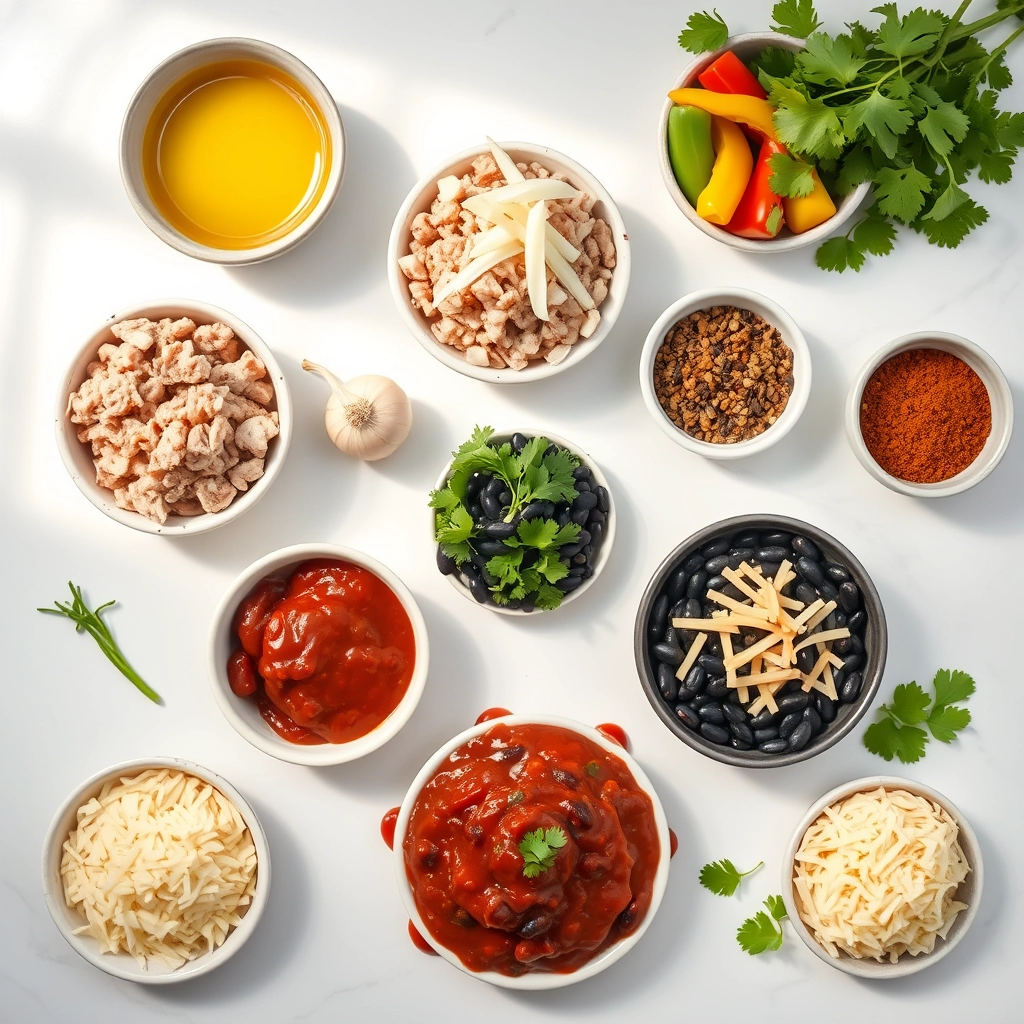
Ingredients You’ll Love (and Why)

  • Chicken breast – Lean, versatile, and a protein powerhouse. I always keep a batch cooked and ready to toss into salads or stir-fries.
  • Eggs – Nature’s perfect protein! Whether scrambled, boiled, or baked into a frittata, they’re a breakfast (or dinner) hero.
  • Greek yogurt – Creamy, tangy, and packed with protein. I love using it as a base for dressings or a substitute for sour cream.
  • Cauliflower rice – A low-carb game-changer that soaks up flavors beautifully. Pro tip: roast it for extra texture!
  • Avocado – Healthy fats that keep you full and add a buttery richness to any dish.
  • Spinach & kale – Nutrient-dense greens that wilt perfectly into omelets or sautéed dishes.
  • Almond flour – My go-to for low-carb baking—great for crusts or coating chicken.

Let’s Get Cooking: Step-by-Step Favorites

1. Garlic Butter Chicken with Zucchini Noodles

  1. Season chicken breasts with salt, pepper, and a pinch of paprika for warmth.
  2. In a skillet, melt butter with minced garlic (don’t skimp—this is the flavor bomb!). Sauté chicken until golden and cooked through.
  3. Spiralize fresh zucchini into noodles (or grab pre-spiralized for convenience). Toss them into the skillet just long enough to soften slightly—they should still have a bite.
  4. Finish with a squeeze of lemon and a sprinkle of parsley. So simple, yet so satisfying!

2. Fluffy Spinach & Feta Omelet

  1. Whisk 3 eggs with a splash of almond milk (or water) for extra fluffiness.
  2. Pour into a non-stick pan over medium heat, letting the edges set slightly before gently pushing them toward the center.
  3. Add a handful of fresh spinach and crumbled feta to one half. Fold the omelet over and let it cook for another minute—the cheese should be delightfully melty.
  4. Serve with a side of cherry tomatoes for a pop of color and freshness.

These meals prove that eating well doesn’t mean sacrificing flavor or joy at the table. Stay tuned for the next 18 recipes—think creamy avocado chicken salads, smoky grilled shrimp skewers, and even a decadent (but guilt-free) chocolate protein mousse!

20 Low Carb High Protein Meals (Continued)

Now that we’ve covered some delicious low-carb, high-protein meal ideas, let’s dive into the details to make your cooking experience even smoother. Whether you’re meal prepping or cooking for a cozy night in, these pro tips and variations will help you customize each dish to your liking.

Pro Tips & Variations

  • Swap the Protein: Most of these recipes work beautifully with chicken, turkey, tofu, or even shrimp. Don’t be afraid to mix it up!
  • Veggie Boost: Sneak in extra greens like spinach, kale, or zucchini for added fiber without the carbs.
  • Spice It Up: Adjust the heat level with chili flakes, cayenne, or a dash of hot sauce for an extra kick.
  • Dairy-Free Options: Use coconut milk or almond milk in creamy dishes, and nutritional yeast for a cheesy flavor.

What to Serve It With

Pair these meals with simple sides to keep things balanced and satisfying:

  • A crisp green salad with lemon vinaigrette
  • Steamed or roasted low-carb veggies (asparagus, broccoli, or cauliflower)
  • Cauliflower rice or zucchini noodles for a grain-free option
  • Avocado slices for a creamy, healthy fat boost

Storage & Reheating Tips

Meal prepping? Here’s how to keep your dishes fresh:

  • Refrigerator: Store in airtight containers for up to 3–4 days.
  • Freezer: Most cooked proteins and casseroles freeze well for up to 2 months. Thaw overnight in the fridge before reheating.
  • Reheating: Warm in the microwave with a splash of water or broth to prevent drying out, or reheat in a skillet over low heat.

FAQs

Can I make these meals vegetarian?
Absolutely! Swap meat for tofu, tempeh, or legumes (if you’re okay with slightly higher carbs).

Are these meals keto-friendly?
Most of them are! Just double-check ingredients like sauces and dairy to ensure they fit your macros.

How can I add more flavor without carbs?
Fresh herbs, garlic, ginger, and spices like cumin or smoked paprika add tons of flavor without extra carbs.

Can I meal prep these recipes?
Yes! Many of these dishes taste even better the next day, making them perfect for weekly meal prep.

Final Thoughts

Eating low-carb and high-protein doesn’t have to mean boring or restrictive meals. With a little creativity, you can enjoy flavorful, satisfying dishes that keep you energized and on track with your goals. Whether you’re cooking for one or feeding the whole family, these recipes are sure to become staples in your kitchen. Happy cooking—and even happier eating!

Print
clock clock iconcutlery cutlery iconflag flag iconfolder folder iconinstagram instagram iconpinterest pinterest iconfacebook facebook iconprint print iconsquares squares iconheart heart iconheart solid heart solid icon

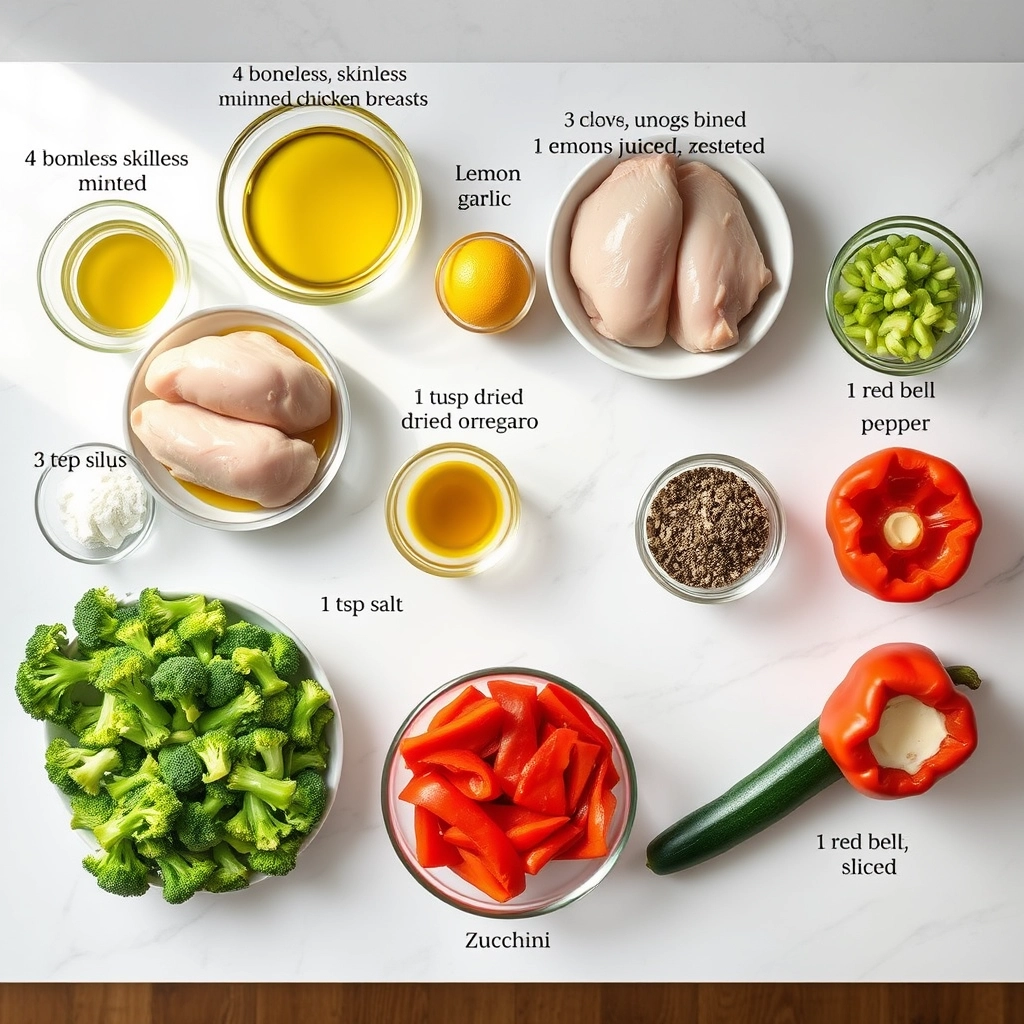
Grilled Lemon Garlic Chicken with Roasted Vegetables

  • Author: Trusted Blog

Description

A flavorful and healthy low-carb, high-protein meal featuring juicy grilled chicken and roasted vegetables.
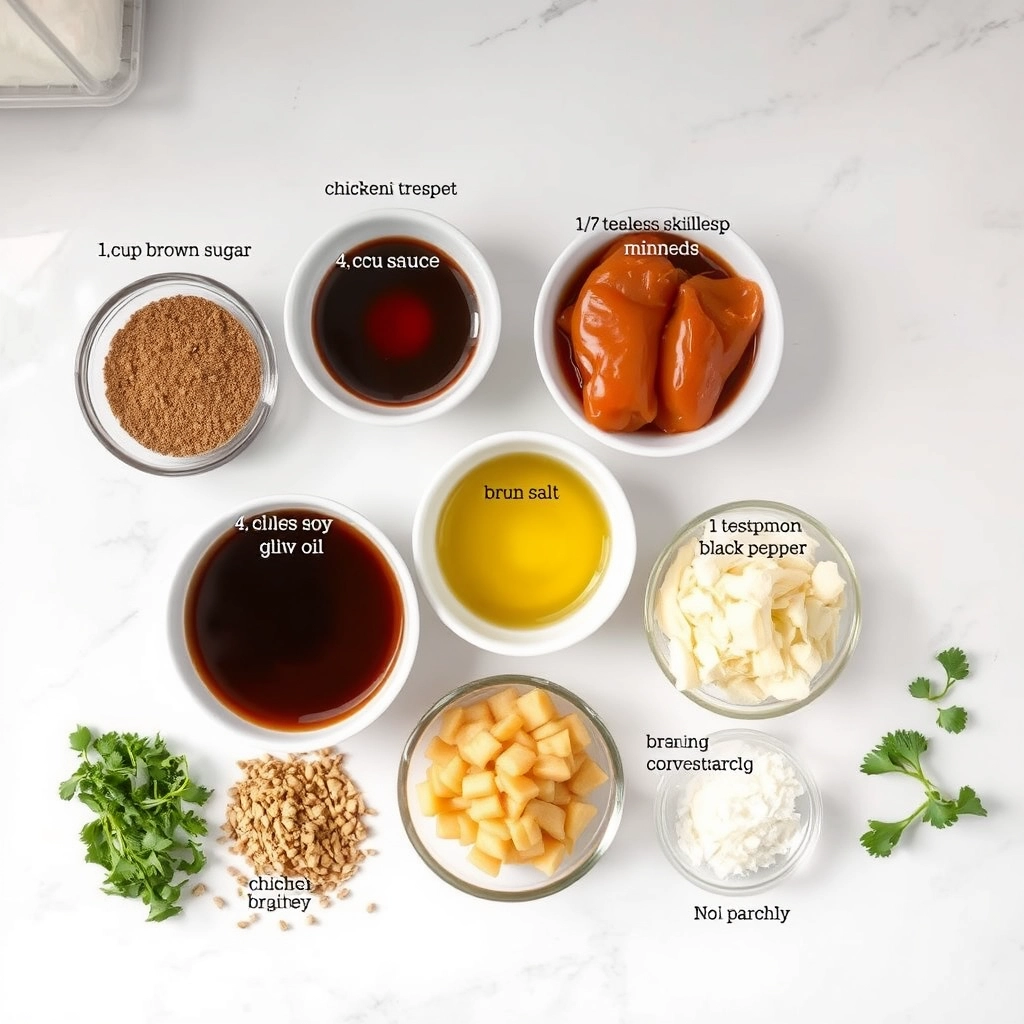

Ingredients

Scale

For the Crust:

  • 4 boneless, skinless chicken breasts
  • 2 tbsp olive oil
  • 3 cloves garlic, minced
  • 1 lemon, juiced and zested
  • 1 tsp dried oregano
  • 1 tsp salt
  • 1/2 tsp black pepper
  • 2 cups broccoli florets
  • 1 red bell pepper, sliced
  • 1 zucchini, sliced

Instructions

1. Prepare the Crust:

  1. Preheat grill to medium-high heat and preheat oven to 400°F (200°C).
  2. In a bowl, mix olive oil, garlic, lemon juice, lemon zest, oregano, salt, and pepper. Coat chicken breasts with half of the mixture.
  3. Grill chicken for 6-7 minutes per side or until internal temperature reaches 165°F (74°C).
  4. Toss vegetables with remaining marinade and spread on a baking sheet. Roast for 20-25 minutes until tender.
  5. Serve grilled chicken with roasted vegetables.

Notes

You can customize the seasonings to taste.

Healthy Enchilada Skillet

healthy-enchilada-skillet

A Cozy Night In with Healthy Enchilada Skillet

There’s something magical about a dish that brings warmth to the table without demanding hours in the kitchen. Last week, as the rain tapped gently against my kitchen window and the scent of cumin and garlic filled the air, I found myself craving comfort—but not the kind that leaves me sluggish. Enter this Healthy Enchilada Skillet: all the bold, zesty flavors of classic enchiladas, but lighter, simpler, and ready in under 30 minutes. It’s become my go-to for busy weeknights when I want something nourishing but still packed with soul.

Ingredients You’ll Love

This recipe is all about balance—colorful veggies, lean protein, and just enough cheese to make it irresistible. Here’s what you’ll need:

  • 1 tablespoon olive oil – A good glug to sauté everything to perfection.
  • 1 bell pepper (any color!), diced – I love using red for sweetness, but green adds a lovely earthiness.
  • 1 small onion, finely chopped – White or yellow, whatever’s in your pantry.
  • 2 cloves garlic, minced – Because no skillet is complete without garlic’s golden aroma.
  • 1 pound ground turkey or chicken – Lean yet juicy, but you could swap in black beans for a vegetarian twist.
  • 1 tablespoon taco seasoning – Homemade or store-bought—just check for low sodium if you’re watching salt.
  • 1 (15-ounce) can diced tomatoes – Fire-roasted add a smoky depth, but plain works beautifully too.
  • 1 (10-ounce) can red enchilada sauce – Mild or spicy, depending on your mood (I’m team medium heat!).
  • 1 cup shredded cheese – A blend of cheddar and Monterey Jack melts like a dream.
  • Fresh cilantro, avocado slices, and lime wedges – For that bright, finishing touch.

Let’s Make It Together

This skillet comes together like a cozy hug—simple, satisfying, and full of love. Here’s how:

  1. Sizzle the aromatics: Heat the olive oil in a large skillet over medium heat. Add the bell pepper and onion, sautéing until they soften—about 5 minutes. Toss in the garlic and stir just until fragrant (about 30 seconds). Tip: Don’t rush this step! Letting the veggies caramelize slightly builds so much flavor.
  2. Brown the protein: Push the veggies to one side of the skillet and add the ground turkey. Break it up with a wooden spoon as it cooks, stirring occasionally until no pink remains—about 6 minutes. Sprinkle the taco seasoning over everything and stir to coat evenly.
  3. Simmer the magic: Pour in the diced tomatoes (with their juices) and enchilada sauce. Give it all a good stir, then let it bubble gently for 5 minutes to meld the flavors. If it looks too thick, add a splash of water or broth. Taste and adjust seasoning—sometimes I add a pinch of smoked paprika for extra depth.

At this point, your kitchen will smell unreal. But we’re not done yet—next comes the cheesy finish and all those dreamy toppings. Stay tuned for the second half of this recipe, where I’ll share my favorite serving suggestions and secret tricks for leftovers (hint: they make the best breakfast tacos).

Pro Tips, Variations, and Substitutions

This Healthy Enchilada Skillet is wonderfully adaptable to suit your taste and pantry staples. Here are some ways to make it your own:

  • Protein Swap: Ground turkey or shredded chicken work beautifully in place of beef. For a vegetarian version, try black beans or crumbled tofu.
  • Cheese Choices: While cheddar is classic, pepper jack adds a nice kick, or try a Mexican blend for extra flavor.
  • Veggie Boost: Stir in diced bell peppers, zucchini, or spinach when sautéing the onions for extra nutrition.
  • Heat Level: Control the spice by using mild enchilada sauce or adding diced jalapeños for more kick.
  • Shortcut Tip: Use pre-shredded cheese and store-bought enchilada sauce to save time without sacrificing flavor.

What to Serve With Your Enchilada Skillet

This hearty dish is satisfying on its own, but here are some perfect pairings:

  • A simple green salad with lime vinaigrette
  • Warm corn tortillas or tortilla chips for scooping
  • Cooling toppings like avocado slices, sour cream, or Greek yogurt
  • Cilantro lime rice for a more substantial meal
  • Refried beans or charro beans on the side

Storage and Reheating Tips

This skillet meal keeps beautifully for busy weeknights:

  • Refrigerator: Store in an airtight container for 3-4 days.
  • Freezer: Freeze portions in freezer-safe containers for up to 3 months. Thaw overnight in the refrigerator before reheating.
  • Reheating: Warm in a skillet over medium heat with a splash of water or broth to prevent drying out. Microwave works too – cover and heat in 30-second intervals, stirring between.
  • Pro Tip: Wait to add fresh toppings like avocado or cilantro until just before serving reheated portions.

Frequently Asked Questions

Can I make this dish ahead of time?
Absolutely! Prepare the skillet through step 4 (before adding cheese), then refrigerate. When ready to serve, heat through and add the cheese topping.

Is there a way to make this gluten-free?
Yes! Just ensure your enchilada sauce and any other packaged ingredients are certified gluten-free. Corn tortillas are naturally gluten-free.

Can I use flour tortillas instead of corn?
You can, but corn tortillas hold up better to the sauce and provide more authentic flavor. If using flour, reduce cooking time slightly.

How can I make this dairy-free?
Simply omit the cheese or use your favorite dairy-free alternative. The dish will still be flavorful from the spices and sauce.

Final Thoughts

This Healthy Enchilada Skillet is more than just dinner—it’s a warm hug in a pan that brings everyone to the table. With its perfect balance of comfort and nutrition, it’s become a staple in our home, and I hope it finds its way into your regular rotation too. The best part? Every bite is packed with flavor, love, and the satisfaction of knowing you’re feeding your family something wholesome. Don’t be surprised if they ask for seconds!

Print
clock clock iconcutlery cutlery iconflag flag iconfolder folder iconinstagram instagram iconpinterest pinterest iconfacebook facebook iconprint print iconsquares squares iconheart heart iconheart solid heart solid icon

Healthy Enchilada Skillet

  • Author: Trusted Blog

Description

A quick and easy one-pan enchilada skillet packed with protein and veggies for a healthy twist on a classic dish.


Ingredients

Scale

For the Crust:

  • 1 tbsp olive oil
  • 1 lb ground turkey (or chicken)
  • 1 bell pepper, diced
  • 1 small onion, diced
  • 2 cloves garlic, minced
  • 1 can (15 oz) black beans, drained and rinsed
  • 1 can (10 oz) red enchilada sauce
  • 1 cup shredded cheese (cheddar or Mexican blend)
  • 1 tsp cumin
  • 1 tsp chili powder
  • Salt and pepper to taste
  • Fresh cilantro for garnish (optional)

Instructions

1. Prepare the Crust:

  1. Heat olive oil in a large skillet over medium heat. Add ground turkey and cook until browned, breaking it apart with a spoon.
  2. Add diced bell pepper, onion, and garlic. Sauté for 3-4 minutes until vegetables soften.
  3. Stir in black beans, enchilada sauce, cumin, chili powder, salt, and pepper. Simmer for 5 minutes.
  4. Sprinkle shredded cheese evenly over the top. Cover and let it melt for 2-3 minutes.
  5. Garnish with fresh cilantro if desired and serve warm.

Notes

You can customize the seasonings to taste.

Slow Cooker Brown Sugar Garlic Chicken

slow-cooker-brown-sugar-chicken

Slow Cooker Brown Sugar Garlic Chicken: A Hug in Every Bite

There’s something magical about walking into a home that smells like caramelized garlic and sweet brown sugar—it wraps around you like a well-worn sweater on a chilly afternoon. This recipe was born on one of those hectic weeknights when the laundry pile threatened to topple over and my to-do list laughed at me from the counter. I needed dinner to practically make itself, and friends, this sticky, savory-sweet chicken answered the call. Now it’s my go-to when life feels like it’s moving too fast, a reminder that good things come to those who… let the slow cooker do the work.

Ingredients You’ll Want to Hug

  • 4 boneless, skinless chicken thighs (or breasts, but thighs stay juicier—trust me)
  • 1/2 cup packed brown sugar (dark or light, depending on how deep you want that molasses kiss)
  • 1/3 cup honey (local if you have it—it makes the sauce sing)
  • 1/4 cup soy sauce (or tamari for gluten-free friends)
  • 8 garlic cloves, minced (yes, eight! They mellow into golden sweetness)
  • 2 tbsp ketchup (the secret tangy backbone)
  • 1 tbsp apple cider vinegar (balances the sweetness like a good best friend)
  • 1 tsp crushed red pepper flakes (optional, but life’s better with a little spark)
  • 1 tbsp cornstarch + 2 tbsp water (for that glossy, cling-to-your-rice sauce)
  • Sesame seeds & sliced green onions (because we eat with our eyes first)

Let’s Make Magic (With Minimal Effort)

Step 1: Nestle your chicken into the slow cooker like you’re tucking in a napping toddler—no need to pre-brown, that’s the beauty of this. Arrange them in a single layer if you can, but don’t stress if they overlap a little.

Step 2: In a bowl, whisk together the brown sugar, honey, soy sauce, garlic, ketchup, vinegar, and red pepper flakes. Taste it (you know you want to) and imagine how it’ll deepen after hours of slow simmering. Pour this liquid gold over the chicken, making sure each piece gets a little love.

Step 3: Cover and cook on low for 4-5 hours (or high for 2-3, but low and slow is where the tenderness happens). Resist the urge to peek—every lift of the lid adds 15 minutes to your wait time, according to slow cooker science.

Step 4: When the chicken is fork-tender, transfer it to a plate and tent with foil. Now, the grand finale: turn the slow cooker to high and whisk the cornstarch slurry into the sauce. Let it bubble and thicken for 10-15 minutes while you cook rice or roast some broccoli…

Pro Tips, Variations, and Substitutions

This Slow Cooker Brown Sugar Garlic Chicken is wonderfully adaptable to suit your tastes or pantry staples. Here are some ways to make it your own:

  • Sweetness Level: Reduce the brown sugar by half if you prefer a less sweet dish, or substitute with honey or maple syrup for a different flavor profile.
  • Spice It Up: Add a pinch of red pepper flakes or a tablespoon of sriracha for a subtle kick.
  • Protein Swap: This sauce works beautifully with pork chops or even meatballs if you want to switch things up.
  • Fresh Herbs: Stir in some chopped fresh basil or parsley at the end for a bright, herby finish.

What to Serve With Brown Sugar Garlic Chicken

This saucy, flavorful chicken pairs perfectly with so many sides! Here are our favorites:

  • Fluffy white or brown rice to soak up all that delicious sauce
  • Garlic mashed potatoes for ultimate comfort food vibes
  • Steamed broccoli or roasted green beans for a healthy veggie side
  • Crusty bread to mop up every last bit of the glaze

Storage and Reheating Tips

Leftovers? Lucky you! Here’s how to keep them tasting fresh:

  • Refrigerator: Store in an airtight container for up to 4 days.
  • Freezer: Freeze portions in freezer-safe bags for up to 3 months. Thaw overnight in the refrigerator before reheating.
  • Reheating: Warm gently in a saucepan over low heat with a splash of water or broth to keep the chicken moist. Microwave works too – just cover and heat in 30-second intervals.

Frequently Asked Questions

Can I use chicken breasts instead of thighs?
Absolutely! Chicken breasts will work, though they may be slightly less juicy. Reduce cooking time to 3-4 hours on low to prevent drying out.

Can I make this in the Instant Pot?
Yes! Use the sauté function to brown the chicken first, then pressure cook on high for 8 minutes with a quick release.

Is there a way to thicken the sauce more?
For a thicker glaze, remove the chicken when done and simmer the sauce on high for 10-15 minutes uncovered. You can also mix 1 tablespoon cornstarch with 2 tablespoons cold water and stir it in during the last 30 minutes of cooking.

Can I prep this ahead?
You sure can! Combine all sauce ingredients in a zip-top bag with the chicken and freeze. Thaw overnight in the fridge, then dump everything in the slow cooker in the morning.

Cozy Comfort in Every Bite

There’s something magical about coming home to the aroma of this sweet and savory chicken simmering away in your slow cooker. It’s the kind of meal that feels like a warm hug after a long day – simple enough for busy weeknights but special enough for Sunday dinner with the family. I hope this recipe becomes one of your go-to comfort foods, just like it has in our home. Don’t be surprised if you find yourself making it again and again – it’s that good!

Print
clock clock iconcutlery cutlery iconflag flag iconfolder folder iconinstagram instagram iconpinterest pinterest iconfacebook facebook iconprint print iconsquares squares iconheart heart iconheart solid heart solid icon

Slow Cooker Brown Sugar Garlic Chicken

  • Author: Trusted Blog

Description

A sweet and savory chicken dish with a sticky brown sugar garlic glaze, cooked to perfection in the slow cooker.


Ingredients

Scale

For the Crust:

  • 4 boneless, skinless chicken breasts
  • 1/2 cup brown sugar
  • 1/4 cup soy sauce
  • 1/4 cup ketchup
  • 2 tablespoons olive oil
  • 4 cloves garlic, minced
  • 1/2 teaspoon salt
  • 1/4 teaspoon black pepper
  • 1 tablespoon cornstarch (optional, for thickening)
  • 1 tablespoon water (optional, for thickening)
  • Fresh parsley, chopped (for garnish)

Instructions

1. Prepare the Crust:

  1. In a bowl, whisk together brown sugar, soy sauce, ketchup, olive oil, minced garlic, salt, and pepper.
  2. Place chicken breasts in the slow cooker and pour the sauce mixture over them, ensuring they are well coated.
  3. Cover and cook on LOW for 4-5 hours or HIGH for 2-3 hours, until chicken is tender and cooked through.
  4. If desired, remove chicken and thicken the sauce by mixing cornstarch and water in a small bowl, then stirring into the slow cooker. Cook for an additional 10-15 minutes until sauce thickens.
  5. Return chicken to the slow cooker and coat with the thickened sauce.
  6. Garnish with fresh parsley before serving.

Notes

You can customize the seasonings to taste.

Garlic Butter Steak Bites and Potatoes

garlic-butter-steak-bites-potatoes

Garlic Butter Steak Bites and Potatoes: A Cozy One-Pan Wonder

There’s something deeply comforting about the sizzle of steak hitting a hot pan, the way the aroma of garlic and butter fills the kitchen, and the promise of a meal that feels indulgent yet effortless. This recipe for Garlic Butter Steak Bites and Potatoes is my go-to on evenings when I crave something hearty but don’t want to fuss over multiple dishes. It’s the kind of meal that makes you pause, take a deep breath, and savor every bite—especially when shared with someone you love.

I first stumbled upon this dish during a particularly chaotic week. The fridge was nearly bare, save for a small sirloin steak and a handful of baby potatoes. Desperation led to inspiration, and before I knew it, I was swirling butter, garlic, and herbs into a golden pool of deliciousness. The result? A one-pan wonder that’s since earned a permanent spot in my dinner rotation.

Ingredients You’ll Need

  • 1 lb sirloin steak – Cut into bite-sized pieces. Sirloin is tender and flavorful, but feel free to use ribeye or filet mignon if you’re feeling fancy.
  • 1 lb baby potatoes – Halved or quartered depending on size. Their creamy texture is perfect for soaking up all that garlic butter goodness.
  • 4 tbsp unsalted butter – Because everything is better with butter, especially when it’s melted and infused with garlic.
  • 4 cloves garlic – Minced. Don’t skimp—this is the star of the show!
  • 1 tbsp olive oil – For searing the steak and potatoes to golden perfection.
  • 1 tsp smoked paprika – Adds a subtle warmth and depth of flavor.
  • 1 tsp dried thyme – Or fresh if you have it! Rosemary works beautifully too.
  • Salt and freshly ground black pepper – To taste. Season generously—this is key to building layers of flavor.
  • Fresh parsley – Chopped, for a bright, fresh finish.

Let’s Get Cooking

1. Prep the potatoes: Start by parboiling your baby potatoes. Bring a pot of salted water to a boil, add the potatoes, and cook for about 8-10 minutes until just fork-tender. Drain and set aside. This step ensures they’ll crisp up beautifully in the pan later.

2. Sear the steak bites: Heat a large skillet (I love using cast iron for this) over medium-high heat and add a drizzle of olive oil. Pat the steak bites dry with a paper towel—this helps them sear, not steam—then season generously with salt, pepper, and smoked paprika. Add them to the hot skillet in a single layer, letting them develop a deep golden crust for about 2 minutes per side. Remove and set aside on a plate. Don’t worry if they’re not fully cooked yet; they’ll finish later.

3. Cook the potatoes: In the same skillet, add a bit more oil if needed, then toss in the parboiled potatoes. Let them cook undisturbed for a few minutes to develop a crispy exterior, then sprinkle with thyme, salt, and pepper. Stir occasionally until they’re golden and irresistible.

4. Bring it all together: Reduce the heat to medium and add the butter and minced garlic to the skillet with the potatoes. Let the butter melt and the garlic become fragrant—about 30 seconds—then return the steak bites to the pan. Toss everything together, letting the steak soak up all that garlicky, buttery goodness for another minute or two until cooked to your desired doneness.

Pro Tips, Variations, and Substitutions

Making the perfect garlic butter steak bites and potatoes is all about personalization! Here are some ways to tweak this dish to make it your own:

  • Cut of Steak: While sirloin is budget-friendly and delicious, you can also use ribeye or filet mignon for extra tenderness.
  • Potato Swap: Not a fan of baby potatoes? Try sweet potatoes or even cauliflower for a low-carb twist.
  • Herb Boost: Fresh rosemary or thyme can add an earthy depth to the garlic butter sauce.
  • Spice It Up: A pinch of red pepper flakes will give this dish a subtle kick.

What to Serve With Garlic Butter Steak Bites and Potatoes

This dish is hearty on its own, but pairing it with the right sides can turn it into a full feast. Here are a few favorites:

  • Crisp Green Salad: A simple arugula or spinach salad with lemon vinaigrette balances the richness.
  • Garlic Bread: Because you can never have too much garlic!
  • Roasted Veggies: Asparagus or Brussels sprouts roasted in the same pan add color and nutrition.
  • Glass of Red Wine: A bold Cabernet Sauvignon or Malbec pairs beautifully with the savory steak.

Storage and Reheating Tips

Leftovers? No problem! Here’s how to keep your steak bites and potatoes tasting fresh:

  • Storage: Place in an airtight container and refrigerate for up to 3 days.
  • Reheating: Warm in a skillet over medium heat with a splash of broth or water to keep the steak tender. Avoid the microwave, as it can make the meat rubbery.
  • Freezing: While possible, the potatoes may lose some texture. If freezing, store in a freezer-safe bag for up to 2 months.

Frequently Asked Questions

Can I use frozen steak for this recipe?
Yes, but thaw it completely and pat it dry before cooking to ensure a good sear.

Can I make this dish ahead of time?
The potatoes can be par-cooked in advance, but the steak is best cooked fresh for optimal tenderness.

What if I don’t have fresh garlic?
Garlic powder (about ½ teaspoon) can work in a pinch, but fresh garlic delivers the best flavor.

How do I prevent the steak from overcooking?
Use a meat thermometer—130°F for medium-rare, 140°F for medium—and let the steak rest before serving.

Final Thoughts

There’s something undeniably comforting about tender steak bites and golden potatoes swimming in garlic butter. Whether you’re cooking for a weeknight dinner or impressing guests, this dish is a guaranteed crowd-pleaser. The best part? It’s simple enough for beginners but feels indulgent every time. So grab your skillet, pour yourself a glass of wine, and savor every bite—you deserve it!

Print
clock clock iconcutlery cutlery iconflag flag iconfolder folder iconinstagram instagram iconpinterest pinterest iconfacebook facebook iconprint print iconsquares squares iconheart heart iconheart solid heart solid icon

Garlic Butter Steak Bites and Potatoes

  • Author: Trusted Blog

Description

Juicy steak bites and crispy potatoes cooked in a rich garlic butter sauce for a flavorful and satisfying meal.


Ingredients

Scale

For the Crust:

  • 1.5 lbs sirloin steak, cut into bite-sized pieces
  • 1.5 lbs baby potatoes, halved
  • 4 tbsp unsalted butter
  • 4 cloves garlic, minced
  • 1 tbsp olive oil
  • 1 tsp dried thyme
  • 1 tsp dried rosemary
  • Salt and pepper to taste
  • Fresh parsley, chopped (for garnish)

Instructions

1. Prepare the Crust:

  1. Preheat oven to 400°F (200°C). Toss potatoes with olive oil, thyme, rosemary, salt, and pepper. Spread on a baking sheet and roast for 20 minutes.
  2. While potatoes roast, season steak bites with salt and pepper. Heat a large skillet over medium-high heat and sear steak bites for 2-3 minutes per side until browned. Remove from skillet and set aside.
  3. In the same skillet, melt butter over medium heat. Add minced garlic and sauté for 1 minute until fragrant.
  4. Return steak bites to the skillet and toss in the garlic butter. Add roasted potatoes and stir to coat everything evenly.
  5. Garnish with fresh parsley and serve immediately.

Notes

You can customize the seasonings to taste.

Garlic Parmesan Chicken

garlic-parmesan-chicken

The Coziest Garlic Parmesan Chicken You’ll Ever Make

There’s something magical about the way garlic and Parmesan come together—like they were always meant to be. I discovered this recipe on a rainy Sunday when all I wanted was something warm, comforting, and just a little indulgent. The kind of dish that fills your kitchen with the kind of aroma that makes everyone wander in, asking, “What’s cooking?” with hopeful eyes. This Garlic Parmesan Chicken is exactly that—a golden, crispy, flavor-packed hug on a plate. It’s become a weeknight hero in our house, and I have a feeling it’ll earn a permanent spot in yours too.

Ingredients You’ll Need

  • 4 boneless, skinless chicken breasts – I like to pound them to an even thickness so they cook evenly and stay juicy.
  • 1/2 cup grated Parmesan cheese – Freshly grated is best for that melt-in-your-mouth texture, but pre-grated works in a pinch.
  • 1/2 cup breadcrumbs – Panko adds extra crunch, but regular breadcrumbs work beautifully too.
  • 4 cloves garlic, minced – Because when a recipe says “garlic,” we always add a little extra, right?
  • 1/2 teaspoon salt – Just enough to enhance all those lovely flavors.
  • 1/4 teaspoon black pepper – Freshly cracked, if you have it.
  • 1 teaspoon dried Italian seasoning – A little herbaceous magic to tie everything together.
  • 1/4 cup melted butter – This is what gives the coating that irresistible golden crispiness.
  • 1 tablespoon olive oil – For that perfect sear.
  • Fresh parsley, chopped (for garnish) – A pop of color and freshness to finish.

Let’s Get Cooking

First, preheat your oven to 375°F (190°C). There’s something so comforting about the hum of an oven warming up, isn’t there?

  1. Prep the chicken: Place your chicken breasts between two sheets of parchment paper and gently pound them to an even thickness—about 1/2 inch works perfectly. This little step ensures every bite is tender and cooks evenly.
  2. Mix the coating: In a shallow bowl, combine the breadcrumbs, Parmesan, minced garlic, salt, pepper, and Italian seasoning. Stir it all together until the garlic is evenly distributed—this is where the magic starts!
  3. Dip and coat: Brush each chicken breast with melted butter, then press it into the breadcrumb mixture, making sure both sides are well coated. I like to really press the crumbs in so they stick and form a delicious crust.
  4. Sear to perfection: Heat olive oil in an oven-safe skillet over medium-high heat. Once it’s shimmering, add the chicken and cook for 2-3 minutes per side, just until golden brown. Don’t rush this step—that golden crust is everything!

Now, we’re ready to pop it in the oven to finish cooking, but I’ll save the rest for part two—because every good story deserves a little suspense, don’t you think?

Pro Tips, Variations, and Substitutions

Making Garlic Parmesan Chicken is wonderfully simple, but a few little tricks can take it from good to unforgettable:

  • Freshly grated Parmesan makes all the difference—pre-shredded cheese often contains anti-caking agents that prevent it from melting as smoothly.
  • Butter vs. olive oil: Butter adds richness, but olive oil works beautifully for a lighter version. Or use half of each for the best of both worlds!
  • Spice it up: Add a pinch of red pepper flakes or smoked paprika for a subtle kick.
  • Herb lovers: Stir in a tablespoon of fresh chopped parsley, basil, or thyme at the end for a pop of color and freshness.

What to Serve With Garlic Parmesan Chicken

This dish is a team player—it pairs beautifully with so many sides! Here are a few favorites:

  • Creamy mashed potatoes to soak up that delicious garlicky sauce
  • Roasted asparagus or green beans for a crisp, fresh contrast
  • Buttered noodles or fettuccine Alfredo for a comforting, carb-loaded meal
  • A simple garden salad with a lemony vinaigrette to balance the richness

Storage and Reheating Tips

Leftovers? Lucky you! Here’s how to keep them tasting great:

  • Storage: Place cooled chicken and sauce in an airtight container in the fridge for up to 3 days.
  • Reheating: Warm gently in a skillet over low heat with a splash of chicken broth to revive the sauce. Microwaving works too, but cover with a damp paper towel to prevent drying out.
  • Freezing: While possible, the sauce may separate slightly when thawed. If freezing, store without sauce for best results.

Frequently Asked Questions

Can I use chicken thighs instead of breasts?

Absolutely! Thighs stay juicier and add extra flavor. Just adjust cooking time as needed—they may take a few minutes longer.

Is there a dairy-free alternative for the Parmesan?

Nutritional yeast or a vegan Parmesan substitute can work, though the flavor will be slightly different. For richness, try a sprinkle of toasted breadcrumbs with garlic powder.

Can I make this dish ahead of time?

You can prep the chicken and sauce separately, then combine and reheat before serving. Fresh is best, but it’ll still be tasty!

Why is my sauce clumping?

If the heat is too high, cheese can seize up. Keep the temperature low and stir constantly for a silky-smooth sauce.

Final Thoughts

There’s something so comforting about a dish that’s both elegant and effortless. Garlic Parmesan Chicken is one of those rare recipes that feels like a warm hug at the end of a long day—simple enough for weeknights, yet special enough for company. Whether you stick to the classic or make it your own with fun twists, I hope it becomes a beloved staple in your kitchen. Now go grab that skillet and let the aroma of garlic and Parmesan fill your home. Happy cooking!

Print
clock clock iconcutlery cutlery iconflag flag iconfolder folder iconinstagram instagram iconpinterest pinterest iconfacebook facebook iconprint print iconsquares squares iconheart heart iconheart solid heart solid icon

Garlic Parmesan Chicken

  • Author: Trusted Blog

Description

Juicy chicken breasts coated in a crispy garlic parmesan crust, perfect for a quick and flavorful dinner.


Ingredients

Scale

For the Crust:

  • 4 boneless, skinless chicken breasts
  • 1/2 cup grated parmesan cheese
  • 1/2 cup breadcrumbs
  • 2 cloves garlic, minced
  • 1 teaspoon dried parsley
  • 1/2 teaspoon salt
  • 1/4 teaspoon black pepper
  • 1/4 cup melted butter
  • 1 tablespoon olive oil

Instructions

1. Prepare the Crust:

  1. Preheat oven to 375°F (190°C).
  2. In a bowl, mix parmesan cheese, breadcrumbs, garlic, parsley, salt, and pepper.
  3. Dip each chicken breast in melted butter, then coat evenly with the parmesan mixture.
  4. Heat olive oil in an oven-safe skillet over medium heat. Sear chicken for 2-3 minutes per side until golden.
  5. Transfer skillet to the oven and bake for 20-25 minutes, or until chicken reaches 165°F (74°C).
  6. Let rest for 5 minutes before serving.

Notes

You can customize the seasonings to taste.