Table of Contents
Raspberry-Filled Almond Snow Cookies: The Only Recipe You’ll Ever Need
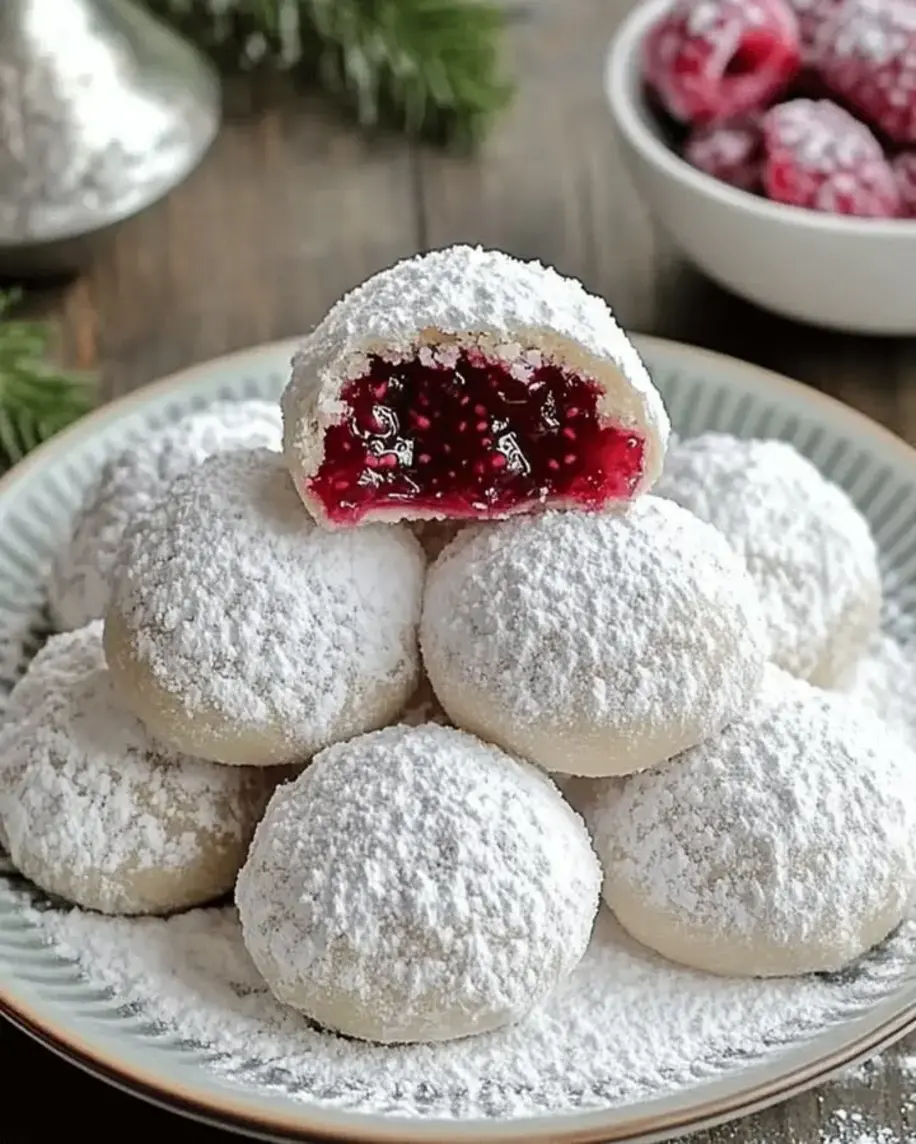
Imagine the festive joy of holiday baking, where the air fills with the nutty aroma of almonds and the sweet tang of fresh raspberries. Raspberry-Filled Almond Snow Cookies are not just a simple cookie recipe; they’re a delightful fusion of buttery dough, vibrant raspberry jam, and a snowy powdered sugar finish that makes them irresistible for any occasion. As the ultimate raspberry almond cookies, these treats combine the best of almond snow cookies with a burst of fruity filling, perfect for holiday gatherings or everyday indulgence. Drawing from Chef Sally’s expertise, this recipe ensures a flaky almond texture that sets it apart, making it easier than ever to create bakery-quality results at home.
Each bite of these raspberry filled cookies delivers a symphony of textures and flavors that will transport you to a winter wonderland. The buttery almond dough offers a tender, melt-in-your-mouth crumb, contrasted beautifully by the gooey raspberry jam center that provides a tart, juicy surprise. As you pull them from the oven, the warm, nutty scent mingles with the sweet dusting of powdered sugar, creating a visual and olfactory masterpiece that evokes holiday magic. These almond snow cookies aren’t just baked goods; they’re an experience, with their delicate crunch giving way to a soft interior that’s both satisfying and sophisticated.
What makes this version from exorecipes.com the single best resource on the internet? Crafted by Chef Sally and rigorously tested for foolproof results, we’ve incorporated the Chef’s Secret: a simple chilling technique that locks in moisture and enhances the flaky almond texture for superior taste and structure. In this post, you’ll discover step-by-step guidance, expert tips, and answers to common questions, empowering you to bake with confidence. Whether you’re a novice or a pro, this comprehensive guide to raspberry almond cookies will equip you with everything needed to impress family and friends.
Why This Raspberry-Filled Almond Snow Cookies Recipe is a Game-Changer
The Chef’s Secret lies in the chilled dough technique, which elevates these raspberry almond cookies to new heights. By chilling the dough for at least 30 minutes before baking, as recommended in the recipe notes, you allow the almond flour and butter to firm up, preventing the cookies from spreading too much and ensuring a perfect, flaky almond texture. This step minimizes over-baking and preserves the moist interior, making your holiday cookies stand out from ordinary ones.
Unbeatable Texture: The science behind this is simple—the fats in the almond flour and butter solidify during chilling, creating air pockets that result in a tender, snow-like crumb when baked. This high-fat base, combined with the powdered sugar, delivers that signature almond snow cookies experience without any toughness, thanks to the careful balance of ingredients.
Foolproof for a Reason: This recipe has been tested multiple times in our kitchen to guarantee success, even for beginners. With precise measurements and clear instructions, you’ll avoid common pitfalls and achieve consistent results every time, making it the go-to simple cookie recipe for holiday baking or any day treats.
Ingredient Spotlight: Quality Makes the Difference in Raspberry Almond Cookies
Almond Flour: As the star of these almond snow cookies, almond flour provides a nutty flavor and tender texture that’s naturally gluten-free. High-quality, finely ground almond flour ensures the dough holds together without crumbling, contributing to the flaky almond base. If you’re using a coarser grind, the cookies might turn out denser, so opt for blanched almond flour. For substitutions, try an equal amount of hazelnut flour for a twist, but note it will add a different nutty profile.
Unsalted Butter, Softened: This ingredient is key for creating a rich, buttery dough in your raspberry filled cookies. High-fat, European-style butter works best as it blends seamlessly with the almond flour, resulting in that melt-in-your-mouth quality. Always use unsalted to control salt levels; if substituting, margarine can work for a dairy-free option, but it may slightly alter the flavor and texture.
Powdered Sugar: Used both in the dough and for the final snowy coating, powdered sugar adds sweetness and helps achieve the signature look of holiday cookies. Its fine texture dissolves easily, preventing graininess. For best results, sift it to avoid lumps—substitute with coconut sugar if you need a lower-glycemic option, though it won’t provide the same powdery finish.
Vanilla Extract: A teaspoon of pure vanilla extract enhances the overall flavor, balancing the nuttiness of the almonds with a warm, aromatic note in these raspberry almond cookies. Quality matters here; use pure extract over imitation for authentic taste. If you’re out, almond extract can substitute for an intensified nutty flavor, but use half the amount to avoid overpowering the dough.
Raspberry Jam: The heart of these raspberry filled cookies, this jam delivers a burst of tart sweetness that contrasts the almond base. Choose a high-quality, seedless jam for smooth filling and to prevent leakage—opt for one with real fruit for the best flavor. You can substitute with strawberry or blueberry jam for variety, as long as it’s thick to hold its shape during baking.
Additional Powdered Sugar for Rolling: This final touch creates the “snow” effect on your almond snow cookies, making them visually appealing for holiday displays. Using fresh, fine sugar ensures even coating without clumping. No direct substitutions needed, but if you’re watching sugar intake, a light dusting of cocoa powder could add a fun variation for a different holiday twist.
Step-by-Step Instructions
Step 1: Creaming the Butter and Sugar
In a large bowl, cream together the softened butter and 1/2 cup powdered sugar until light and fluffy, about 2-3 minutes with an electric mixer.
Pro Tip: Ensure your butter is at room temperature for even creaming; this helps incorporate air for a lighter texture in your raspberry almond cookies.

Step 2: Mixing the Dough
Add the almond flour, vanilla extract, and salt to the mixture; stir until a dough forms, which should take about 1-2 minutes by hand or with a mixer on low speed.
Common Mistake to Avoid: Overmixing can make the dough tough, so stop as soon as it’s combined to maintain that delicate almond texture.
Step 3: Shaping the Cookies
Roll the dough into 1-inch balls and use your thumb to make an indentation in the center of each ball, being gentle to avoid cracking.
Pro Tip: Lightly flour your hands to prevent sticking, ensuring perfectly shaped balls for your holiday cookies.
Step 4: Filling the Indentations
Fill each indentation with about 1/2 teaspoon of raspberry jam, making sure not to overfill to prevent leakage during baking.
Common Mistake to Avoid: Use a thick jam and chill the filled cookies for 10 minutes before baking, as per the Chef’s Secret, to keep the filling contained.
Step 5: Baking the Cookies
Bake the cookies at 350°F for 12-15 minutes, or until lightly golden around the edges.
Pro Tip: Preheat your oven accurately; this ensures even baking for the best almond snow cookies texture.
Step 6: Finishing Touches
Allow the cookies to cool on a wire rack for 10 minutes, then roll them in additional powdered sugar to coat for that snowy effect.
Common Mistake to Avoid: Roll while still warm for better adhesion, but not too hot, to avoid the sugar melting unevenly.
Serving & Presentation
To make your raspberry filled cookies truly shine, arrange them on a festive platter with a dusting of extra powdered sugar for a snowy holiday vibe. Pair these almond snow cookies with a hot cup of coffee or herbal tea to complement their nutty sweetness and tart raspberry center. For creative plating, add fresh raspberries or mint leaves as garnishes to enhance visual appeal and tie in the fruit theme. These simple cookie recipes are perfect as a dessert course alongside a light meal, or as part of a holiday cookie platter with complementary treats like chocolate truffles for a balanced flavor profile.
Make-Ahead & Storage Solutions
Make-Ahead Strategy: Prepare the dough up to 3 days in advance by mixing it as directed, shaping the balls, and storing them in an airtight container in the fridge. Fill with jam just before baking to keep the filling fresh and prevent sogginess.
Storing Leftovers: Once cooled, store these raspberry almond cookies in an airtight container at room temperature for up to a week, or refrigerate for up to two weeks to maintain their flaky texture. For longer storage, freeze the baked cookies in a freezer-safe bag for up to three months, ensuring they’re separated by parchment paper.
The Best Way to Reheat: To restore the original texture, thaw frozen cookies at room temperature and warm them in a 300°F oven for 5 minutes. This gently revives the powdered sugar coating and soft interior without making them overly crisp.
Frequently Asked Questions (FAQ)
How do I prevent the raspberry filling from leaking out of the almond snow cookies?
To prevent leakage in your raspberry filled cookies, always chill the dough for at least 30 minutes before baking, as this firms up the structure and helps the indentation hold the jam. Use a thick, high-quality jam and fill the centers sparingly—about 1/2 teaspoon per cookie. Additionally, avoid over-baking, as excessive heat can cause the filling to bubble over. Following these steps will ensure your holiday cookies come out picture-perfect.
Can I use a different fruit jam or preserve for the cookie filling?
Yes, you can absolutely substitute raspberry jam with other fruit preserves in this simple cookie recipe. Options like strawberry, blueberry, or even apricot jam work well, adding a unique twist to your raspberry almond cookies. Just ensure the jam is thick and not too runny to maintain the cookie’s texture. For best results, choose preserves with similar tartness to raspberry, and remember that fruitier jams might alter the flavor profile slightly but will still complement the almond base beautifully.
What is the best temperature to bake almond snow cookies for a delicate texture?
The ideal baking temperature for achieving a delicate texture in almond snow cookies is 350°F. This moderate heat allows the cookies to bake evenly without browning too quickly, preserving the flaky almond interior. Baking at a higher temperature could lead to a harder exterior, so stick to this setting and monitor closely around the 12-minute mark for that perfect, tender result.
How long do raspberry-filled almond snow cookies typically stay fresh?
Raspberry-filled almond snow cookies can stay fresh for up to a week when stored properly in an airtight container at room temperature. For extended freshness, refrigerate them for up to two weeks or freeze for up to three months. Always let them come to room temperature before serving to enjoy the full flavor and texture of your holiday cookies.
Are these raspberry almond cookies suitable for people with nut allergies?
Unfortunately, these cookies rely heavily on almond flour, so they’re not suitable for those with nut allergies. However, you can experiment with substituting almond flour with sunflower seed flour or a gluten-free all-purpose blend, though this may affect the texture and flavor. Always consult with an allergist and test a small batch first.
What dietary variations can I make to this recipe?
This recipe can be adapted for various diets. For a vegan version, swap the unsalted butter with a plant-based alternative like coconut oil or vegan butter. To make it gluten-free, ensure your almond flour is certified gluten-free, as it already is by nature. Keep in mind that changes might slightly alter the texture, so adjust as needed for the best results in your raspberry almond cookies.
Tried This Recipe? Leave a Comment!
Did you make this recipe? I’d love to hear how it turned out! Please leave a comment and a rating below. Your feedback helps other home cooks and supports exorecipes!
For more delicious inspiration, follow me on Pinterest!
.
Print
Raspberry-Filled Almond Snow Cookies
- Prep Time: 20 minutes
- Cook Time: 15 minutes
- Total Time: 35 minutes
- Yield: 24 cookies 1x
- Method: Dessert
- Cuisine: American
Description
These delightful cookies feature a buttery almond dough filled with sweet raspberry jam and dusted with powdered sugar for a snowy finish.
Ingredients
- 2 cups almond flour
- 1/2 cup unsalted butter, softened
- 1/2 cup powdered sugar
- 1 teaspoon vanilla extract
- 1/4 teaspoon salt
- 1/2 cup raspberry jam
- Additional powdered sugar for rolling
Instructions
- In a large bowl, cream together the softened butter and 1/2 cup powdered sugar until light and fluffy.
- Add the almond flour, vanilla extract, and salt to the mixture; stir until a dough forms.
- Roll the dough into 1-inch balls and use your thumb to make an indentation in the center of each ball.
- Fill each indentation with about 1/2 teaspoon of raspberry jam.
- Bake the cookies at 350°F for 12-15 minutes, or until lightly golden.
- Allow the cookies to cool, then roll them in additional powdered sugar to coat.
Notes
For best results, chill the dough for 30 minutes before baking. Store in an airtight container for up to a week.
Nutrition
- Calories: 120
- Sugar: 10g
- Fat: 7g
- Carbohydrates: 15g
- Protein: 2g