Healthy Steak Burrito Bowls

healthy-steak-burrito-bowls

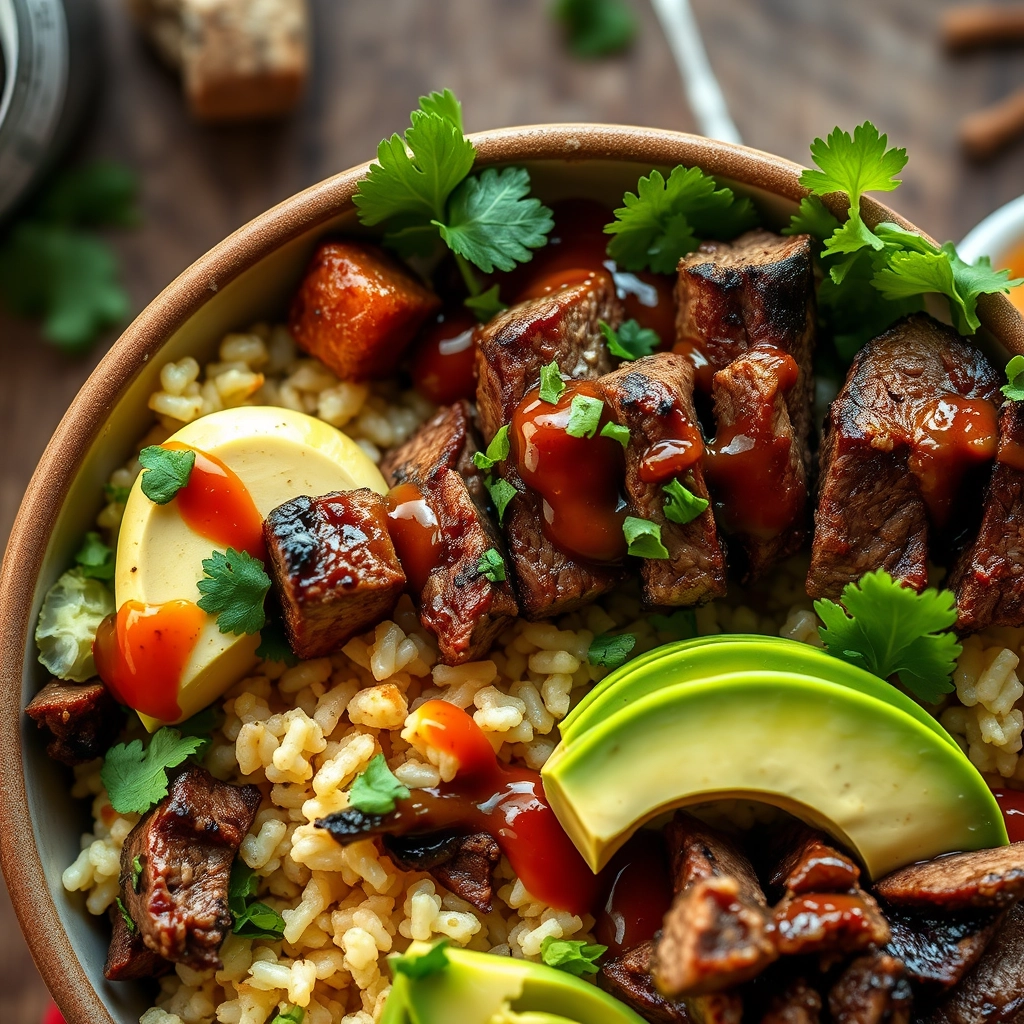
Healthy Steak Burrito Bowls: A Weeknight Hero

There’s something deeply comforting about a burrito bowl—the kind of meal that feels indulgent but leaves you energized instead of weighed down. I first fell in love with them during a chaotic week when my fridge was nearly empty, save for a lone steak, half an avocado, and a handful of cilantro. Desperation led to inspiration, and what unfolded was a vibrant, protein-packed bowl that’s since become a staple in our home. No fuss, no elaborate prep—just honest, nourishing food that tastes like a hug in a bowl.

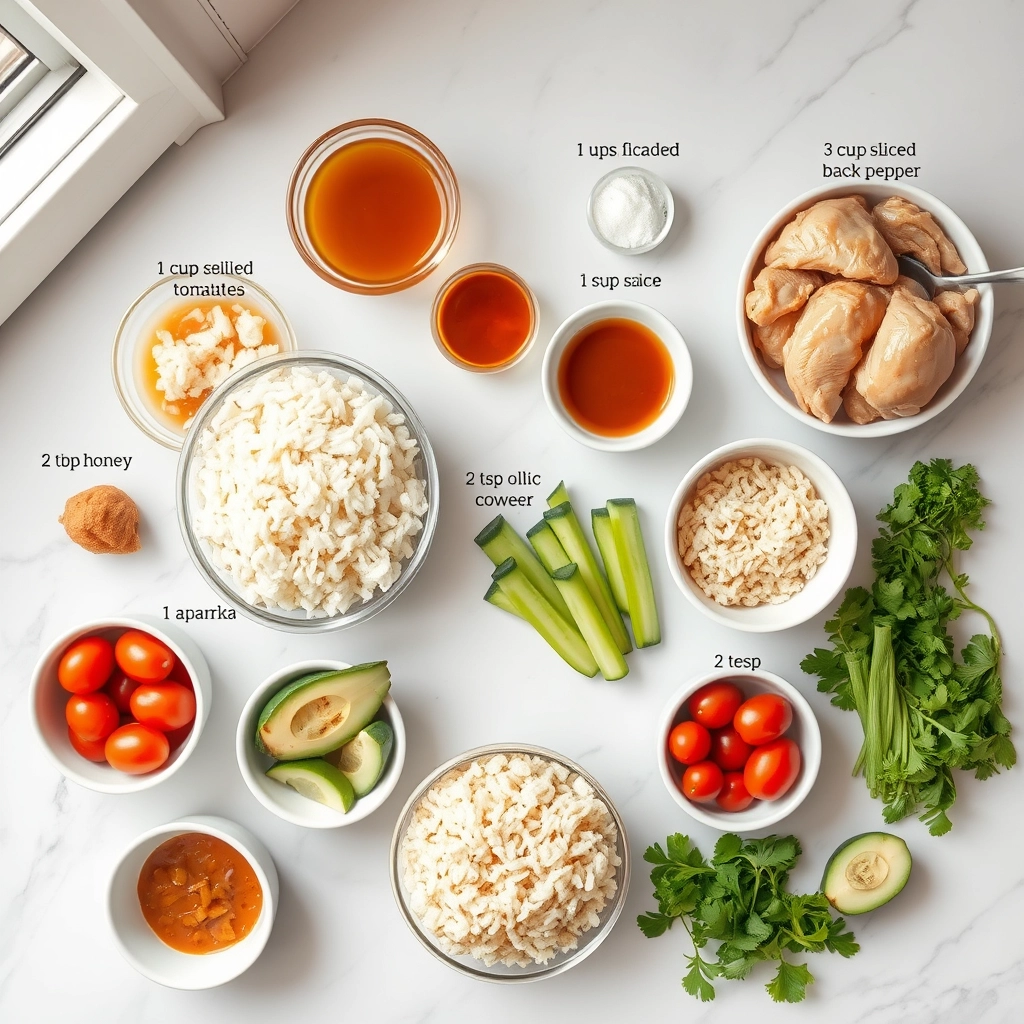
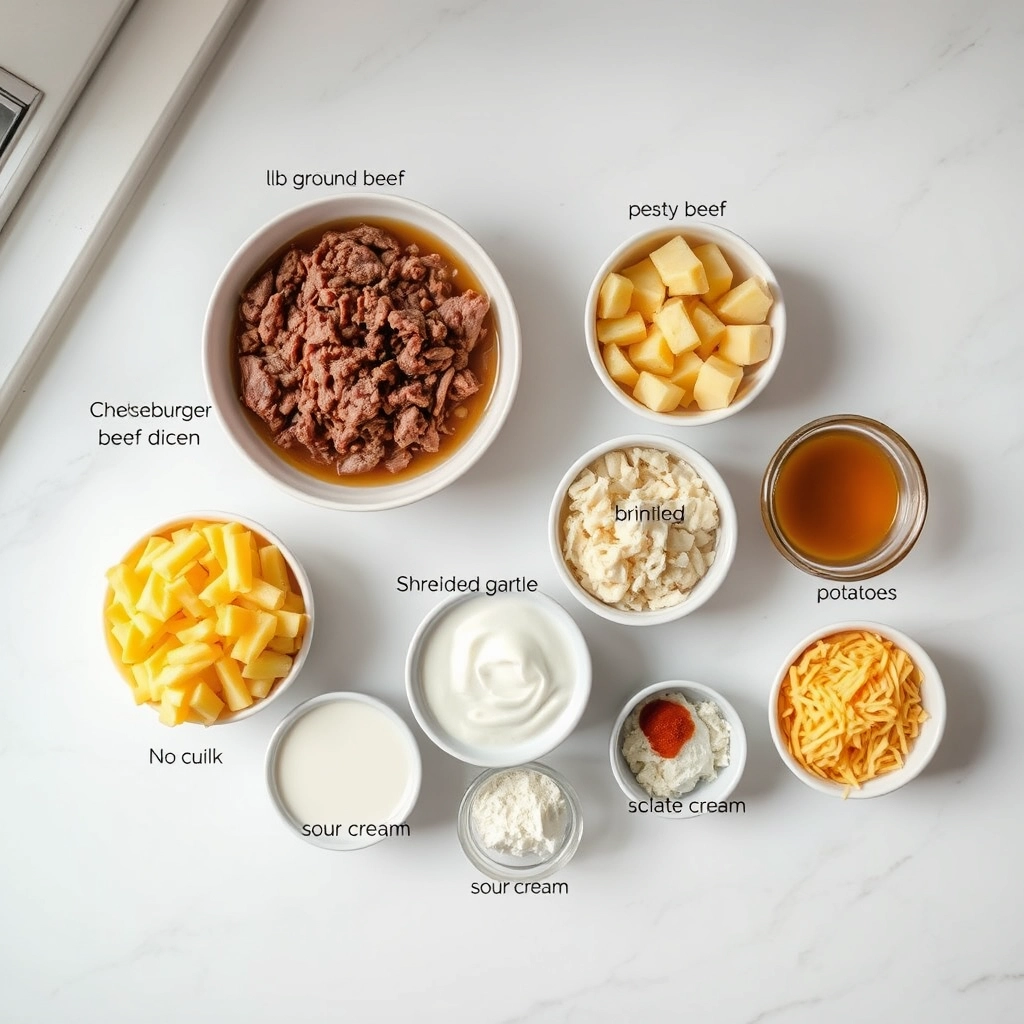
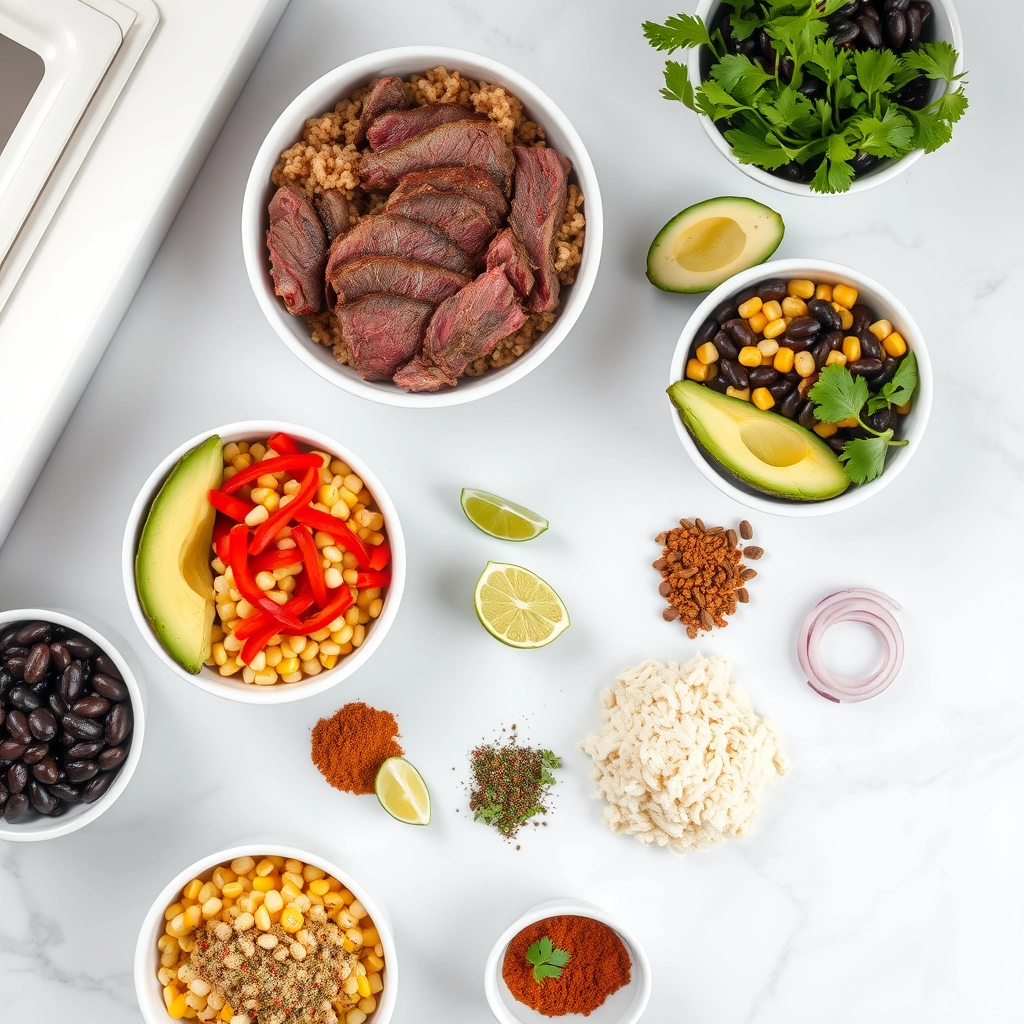
Ingredients You’ll Love

  • 1 lb flank or skirt steak – Thinly sliced against the grain for maximum tenderness. A quick marinade works wonders here!
  • 2 cups cooked brown rice or quinoa – I adore the nuttiness of brown rice, but quinoa adds a lovely protein boost.
  • 1 bell pepper (any color) – Sliced into strips for a sweet crunch. Red peppers are my go-to for their natural sweetness.
  • 1 small red onion – Thinly sliced. Soaking them in ice water for 5 minutes tames the sharpness if you’re sensitive to raw onion.
  • 1 ripe avocado – Creamy, dreamy, and non-negotiable. A squeeze of lime keeps it bright green.
  • 1 cup black beans – Rinsed and warmed with a pinch of cumin for extra depth.
  • Handful of fresh cilantro – Because everything’s better with cilantro (unless you’re team “it tastes like soap,” then parsley works too!).
  • Juice of 1 lime + zest – The zing that ties it all together.
  • Spice blend – 1 tsp each smoked paprika, cumin, garlic powder, and a pinch of chili flakes for warmth.

Let’s Build Those Bowls

Step 1: Marinate the steak. In a bowl, whisk together 2 tbsp olive oil, lime juice, zest, and all the spices. Toss the steak slices in this mixture and let them sit for at least 15 minutes (or up to an hour if you’ve got time). Pro tip: If you’re in a rush, poke the steak lightly with a fork—it helps the flavors penetrate faster.

Step 2: Cook your grain. While the steak marinates, reheat your rice or quinoa with a splash of water to fluff it up. I like to stir in a tiny knob of butter or a drizzle of olive oil for richness.

Step 3: Sauté the peppers. Heat a skillet over medium-high, add a touch of oil, and toss in the bell peppers. Let them char slightly at the edges—about 3 minutes—for that irresistible smoky sweetness. Set aside.

Step 4: Cook the steak. In the same skillet (no need to wash it—those pepper bits add flavor!), sear the steak slices for 1-2 minutes per side until just cooked through. Overcooking = tough steak, so keep an eye on it!

Pro Tips, Variations, and Substitutions

Making the perfect steak burrito bowl is all about customization! Here are some ways to make it your own:

  • Protein Swap: Not a fan of steak? Try grilled chicken, shrimp, or even black beans for a vegetarian twist.
  • Grain Alternatives: Swap brown rice for quinoa, cauliflower rice, or cilantro-lime rice for extra flavor.
  • Spice It Up: Add a dash of cayenne pepper or a drizzle of hot sauce if you like a little heat.
  • Extra Veggies: Toss in roasted bell peppers, zucchini, or sautéed mushrooms for more texture and nutrients.

What to Serve It With

These burrito bowls are hearty enough to stand alone, but if you want to round out the meal, here are a few delicious pairings:

  • A side of warm tortilla chips and fresh guacamole.
  • A crisp green salad with a tangy lime vinaigrette.
  • A cold glass of horchata or a refreshing agua fresca.

Storage and Reheating Tips

Leftovers? No problem! Here’s how to keep your burrito bowls tasting fresh:

  • Storage: Store components separately in airtight containers in the fridge for up to 3 days.
  • Reheating: Warm the steak and rice in the microwave or on the stovetop with a splash of water to keep them moist. Add fresh toppings like avocado and salsa after reheating.
  • Freezing: While the rice and steak can be frozen, fresh toppings like lettuce and avocado are best added fresh.

Frequently Asked Questions

Can I make this ahead of time?
Absolutely! Prep the steak, rice, and beans ahead, then assemble when ready to eat for the freshest taste.

What’s the best cut of steak for burrito bowls?
Flank steak or skirt steak works great—they’re flavorful and cook quickly. Just be sure to slice against the grain for tenderness.

Can I make this gluten-free?
Yes! Just double-check that your seasonings and sauces are gluten-free, and skip any flour tortillas if serving as a side.

How can I make it spicier?
Add diced jalapeños, a sprinkle of chili flakes, or a spicy salsa to kick up the heat.

Final Thoughts

There’s something so satisfying about digging into a colorful, flavorful steak burrito bowl—it’s a meal that’s as nourishing as it is delicious. Whether you’re meal-prepping for the week or serving it up for a cozy dinner, this dish is sure to become a favorite. Happy cooking, and enjoy every bite!

Print
clock clock iconcutlery cutlery iconflag flag iconfolder folder iconinstagram instagram iconpinterest pinterest iconfacebook facebook iconprint print iconsquares squares iconheart heart iconheart solid heart solid icon

Healthy Steak Burrito Bowls

  • Author: Trusted Blog

Description

A nutritious and flavorful burrito bowl packed with grilled steak, fresh veggies, and wholesome grains.


Ingredients

Scale

For the Crust:

  • 1 lb flank steak
  • 1 cup cooked brown rice
  • 1 cup black beans, drained and rinsed
  • 1 cup corn kernels
  • 1 avocado, sliced
  • 1 red bell pepper, diced
  • 1/2 red onion, thinly sliced
  • 1 lime, juiced
  • 2 tbsp olive oil
  • 1 tsp cumin
  • 1 tsp chili powder
  • 1/2 tsp garlic powder
  • Salt and pepper to taste
  • Fresh cilantro for garnish

Instructions

1. Prepare the Crust:

  1. Season the flank steak with cumin, chili powder, garlic powder, salt, and pepper. Let it marinate for at least 10 minutes.
  2. Heat 1 tbsp olive oil in a skillet over medium-high heat. Cook the steak for 4-5 minutes per side or until desired doneness. Let it rest for 5 minutes, then slice thinly.
  3. In a bowl, toss the red bell pepper and red onion with the remaining olive oil, lime juice, salt, and pepper.
  4. Assemble the bowls by dividing the brown rice, black beans, corn, avocado, and sautéed veggies among four bowls.
  5. Top each bowl with sliced steak and garnish with fresh cilantro.

Notes

You can customize the seasonings to taste.

10 Minute Sesame Garlic Ramen Noodles

10-minute-sesame-garlic-ramen

A Bowl of Comfort in 10 Minutes: Sesame Garlic Ramen Noodles

There are days when the world feels heavy, when the rain won’t stop tapping at the window, and all you crave is something warm, savory, and ready in minutes. That’s when these Sesame Garlic Ramen Noodles become my kitchen’s little miracle. I first stumbled upon this recipe during a particularly frazzled week—work deadlines piling up, laundry forgotten in the washer (again), and a fridge that seemed to echo with emptiness. But tucked away in the pantry? A humble packet of ramen and a few trusty condiments. Ten minutes later, I was curled up on the couch with a bowl of glossy, garlicky noodles, and just like that, the world felt a little kinder.

Ingredients You’ll Need

  • 2 packets of ramen noodles – Discard the seasoning packets (or save them for another use). We’re making magic from scratch!
  • 3 cloves garlic, minced – Fresh is best here, but in a pinch, 1 teaspoon of jarred minced garlic works too.
  • 1 tablespoon sesame oil – That toasty, nutty fragrance is the soul of this dish.
  • 2 tablespoons soy sauce – I use low-sodium to control the saltiness, but any will do.
  • 1 tablespoon honey – A touch of sweetness to balance the savory. Maple syrup works beautifully for a vegan twist.
  • 1 teaspoon rice vinegar – Just a splash for brightness. No rice vinegar? A squeeze of lime will do in a pinch.
  • 1/2 teaspoon crushed red pepper flakes – Adjust to your heat preference, or omit if you’re sensitive to spice.
  • 2 green onions, thinly sliced – For that fresh, crisp finish.
  • 1 tablespoon toasted sesame seeds – Because everything’s better with a little crunch.

Let’s Make the Magic Happen

1. Cook the noodles: Bring a pot of water to a boil and cook the ramen noodles according to the package instructions (usually about 3 minutes). Drain and set aside—no need to rinse. Pro tip: Save a splash of the starchy noodle water to adjust the sauce consistency later if needed.

2. Toast the garlic: While the noodles cook, heat the sesame oil in a large skillet over medium-low heat. Add the minced garlic and sauté for just 30 seconds to a minute—until fragrant but not browned. Burnt garlic is bitter, and we want sweet, mellow warmth here.

3. Whisk the sauce: To the skillet, add the soy sauce, honey, rice vinegar, and red pepper flakes. Stir well to combine and let it simmer for another minute until slightly thickened. Your kitchen should smell absolutely divine by now.

4. Toss it all together: Add the drained noodles to the skillet and toss gently to coat them in the glossy sauce. If the mixture feels too thick, add a tablespoon of the reserved noodle water to loosen it up. Taste and adjust—maybe an extra drizzle of honey or a pinch of pepper flakes?

Pro Tips, Variations, and Substitutions

This sesame garlic ramen noodles recipe is wonderfully adaptable to whatever you have in your pantry or fridge. Here are some ways to make it your own:

  • Protein boost: Add shredded rotisserie chicken, pan-seared shrimp, or crispy tofu cubes for extra staying power.
  • Veggie lovers: Toss in sautéed mushrooms, baby bok choy, or snap peas during the last minute of cooking.
  • Spice it up: A drizzle of chili oil or sprinkle of red pepper flakes adds a nice kick.
  • Noodle swap: Can’t find ramen? Udon, soba, or even spaghetti work beautifully.
  • Toasted sesame oil is key for depth of flavor – don’t skip it!

Perfect Pairings

While these noodles are satisfying on their own, here are some delicious ways to round out your meal:

  • A simple cucumber salad with rice vinegar dressing
  • Steamed or roasted broccoli with a sprinkle of sesame seeds
  • Miso soup for that authentic ramen shop experience
  • A soft-boiled egg with a jammy yolk (my personal favorite!)

Storage and Reheating Tips

Leftovers? No problem! Here’s how to keep your noodles tasting fresh:

  • Store in an airtight container in the refrigerator for up to 3 days
  • The noodles will absorb sauce as they sit – add a splash of water or broth when reheating
  • Best reheated in a skillet over medium heat with a little extra oil to prevent sticking
  • Microwave works too – cover and heat in 30-second intervals, stirring between

Frequently Asked Questions

Can I use the seasoning packet that comes with instant ramen?
You can, but I recommend using just half as they tend to be very salty. The homemade sauce in this recipe creates much better flavor balance.

My sauce seems too thick – what should I do?
Simply add a tablespoon of warm water at a time until you reach your desired consistency. The noodles will continue to absorb liquid as they sit.

Can I make this gluten-free?
Absolutely! Use gluten-free ramen noodles (like those made from rice or sweet potato starch) and tamari instead of soy sauce.

How can I make this more filling?
Try adding a soft-boiled egg, extra veggies, or your protein of choice. A handful of roasted peanuts or cashews adds great crunch too!

Cozy Noodles for Busy Days

There’s something so comforting about a bowl of garlicky, sesame-kissed noodles that comes together in minutes. Whether you’re cooking for one after a long day or need a quick family meal, this recipe delivers big flavor with minimal effort. The best part? That first twirl of noodles around your fork, releasing all those aromatic sesame and garlic notes. I hope this becomes your new go-to when you need something satisfying fast – it’s certainly earned a permanent spot in my weeknight rotation. Happy slurping!

Print
clock clock iconcutlery cutlery iconflag flag iconfolder folder iconinstagram instagram iconpinterest pinterest iconfacebook facebook iconprint print iconsquares squares iconheart heart iconheart solid heart solid icon

10 Minute Sesame Garlic Ramen Noodles

  • Author: Trusted Blog

Description

Quick and flavorful sesame garlic ramen noodles ready in just 10 minutes.


Ingredients

Scale

For the Crust:

  • 2 packs instant ramen noodles (seasoning packets discarded)
  • 2 tbsp soy sauce
  • 1 tbsp sesame oil
  • 1 tbsp honey
  • 2 cloves garlic, minced
  • 1 tsp grated ginger
  • 1 tbsp rice vinegar
  • 1 tbsp sesame seeds
  • 2 green onions, sliced
  • 1 tsp chili flakes (optional)

Instructions

1. Prepare the Crust:

  1. Cook ramen noodles according to package instructions, then drain and set aside.
  2. In a small bowl, whisk together soy sauce, sesame oil, honey, garlic, ginger, and rice vinegar.
  3. Heat a large pan over medium heat and add the cooked noodles.
  4. Pour the sauce over the noodles and toss to coat evenly.
  5. Cook for 1-2 minutes until the sauce thickens slightly.
  6. Garnish with sesame seeds, green onions, and chili flakes if desired.

Notes

You can customize the seasonings to taste.

Hot Honey Chicken Bowls

hot-honey-chicken-bowls

Hot Honey Chicken Bowls: Sweet, Spicy & Oh-So-Satisfying

There’s something magical about the way sweet and spicy flavors dance together on your tongue, isn’t there? I discovered this beautiful balance one chilly evening when I was craving comfort food with a kick. As I rummaged through my pantry, a bottle of honey caught my eye next to my trusty chili flakes – and just like that, these Hot Honey Chicken Bowls were born. Now they’re my go-to when I need a meal that’s equal parts cozy and exciting, like a warm hug with a playful wink.

Ingredients You’ll Need

  • 1.5 lbs chicken thighs – I prefer thighs for their juicy tenderness, but breasts work too if you’re watching calories
  • 1/3 cup honey – local honey adds such lovely floral notes if you can find it
  • 2 tbsp hot sauce – I adore Cholula’s garlicky heat, but use your favorite!
  • 1 tbsp apple cider vinegar – this little splash brightens the whole dish
  • 2 cloves garlic, minced – because what’s life without garlic?
  • 1 tsp smoked paprika – for that irresistible campfire aroma
  • 1/2 tsp cayenne pepper – adjust to your heat tolerance, my dears
  • Cooked rice or quinoa – the perfect fluffy base to soak up all that glorious sauce
  • Avocado & cilantro – fresh toppings make everything better

Let’s Make the Magic Happen

First, let’s give our chicken some love. Pat those thighs dry with paper towels – this helps them get beautifully crispy later. While they’re drying, whisk together the honey, hot sauce, vinegar, garlic, and spices in a small bowl. Take a little taste (I won’t tell!) and adjust the heat to your liking.

Now, heat a large skillet over medium-high and add a drizzle of oil. When it shimmers, add the chicken skin-side down if using skin-on thighs. Here’s my secret: don’t peek for at least 5 minutes! Let that golden crust form undisturbed. Flip when deeply browned, then reduce heat to medium and cook through.

As the chicken rests (so important for juicy meat!), pour our honey mixture into the same skillet. It’ll bubble and thicken into the most glorious glaze in just 2-3 minutes. The smell at this point is absolutely intoxicating – all caramelized honey and smoky spices.

Hot Honey Chicken Bowls: Pro Tips & Variations

This recipe is wonderfully flexible, so don’t be afraid to make it your own! Here are some ways to customize your hot honey chicken bowls:

  • Spice lovers: Double the cayenne or add a dash of hot sauce to the honey glaze
  • Vegetarian twist: Swap chicken for crispy tofu or roasted chickpeas
  • Extra crunch: Add toasted nuts or sesame seeds as garnish
  • Shortcut: Use pre-cooked rotisserie chicken and just toss with the hot honey sauce

The Perfect Pairings

While these bowls are satisfying on their own, here are my favorite accompaniments:

  • A simple cucumber salad with rice vinegar dressing
  • Steamed edamame sprinkled with flaky salt
  • Cooling avocado slices or guacamole
  • Warm cornbread muffins for dipping in extra honey glaze

Storing & Reheating Like a Pro

Leftovers? Lucky you! Here’s how to keep them tasting fresh:

  • Storage: Keep components separate in airtight containers for up to 3 days
  • Reheating: Microwave chicken with a damp paper towel to retain moisture, or crisp in a 350°F oven for 10 minutes
  • Freezing: The chicken freezes well for up to 2 months – thaw overnight before reheating

Your Hot Honey Chicken Questions Answered

Can I make this gluten-free?

Absolutely! Just use tamari instead of soy sauce and ensure your hot sauce is gluten-free.

What if my honey sauce is too spicy?

Balance it out with a tablespoon of maple syrup or brown sugar until it reaches your perfect heat level.

Can I prep components ahead?

Yes! The chicken marinades beautifully overnight, and you can chop veggies 2 days in advance.

What’s the best rice alternative?

Quinoa, cauliflower rice, or even roasted sweet potatoes make excellent bases.

Final Thoughts

There’s something magical about that sweet-spicy combination that makes these bowls feel like a warm hug. Whether it’s a busy weeknight or a lazy weekend lunch, this recipe has become my go-to for satisfying cravings without complicated steps. I hope it brings as much joy to your table as it does to mine – don’t forget to drizzle that extra honey sauce with abandon!

Print
clock clock iconcutlery cutlery iconflag flag iconfolder folder iconinstagram instagram iconpinterest pinterest iconfacebook facebook iconprint print iconsquares squares iconheart heart iconheart solid heart solid icon

Hot Honey Chicken Bowls

  • Author: Trusted Blog

Description

Sweet and spicy chicken served over rice with fresh vegetables for a balanced meal.


Ingredients

Scale

For the Crust:

  • 1 lb boneless, skinless chicken thighs
  • 1/4 cup honey
  • 2 tbsp hot sauce
  • 1 tbsp olive oil
  • 1 tsp garlic powder
  • 1 tsp paprika
  • 1/2 tsp salt
  • 1/2 tsp black pepper
  • 2 cups cooked rice
  • 1 avocado, sliced
  • 1 cup cherry tomatoes, halved
  • 1/2 cup sliced cucumber
  • 1/4 cup chopped cilantro

Instructions

1. Prepare the Crust:

  1. In a bowl, mix honey, hot sauce, garlic powder, paprika, salt, and pepper.
  2. Add chicken thighs to the bowl and coat evenly. Let marinate for 10 minutes.
  3. Heat olive oil in a skillet over medium-high heat. Add chicken and cook for 6-7 minutes per side until fully cooked.
  4. Remove chicken from skillet and let rest for 5 minutes before slicing.
  5. Assemble bowls with cooked rice, sliced chicken, avocado, cherry tomatoes, cucumber, and cilantro.
  6. Drizzle with extra hot honey sauce if desired.

Notes

You can customize the seasonings to taste.

This Cheeseburger Soup is OMG Delicious!

cheeseburger-soup-omg-delicious

This Cheeseburger Soup is OMG Delicious!

There’s something about a chilly evening that makes me crave comfort in a bowl—something hearty, cheesy, and just a little nostalgic. Last week, as the rain tapped against my kitchen window, I found myself dreaming of a cheeseburger… but not just any cheeseburger. I wanted all those familiar flavors—savory beef, melty cheese, a hint of pickle tang—but wrapped up in a cozy, spoonable hug. And that’s how this Cheeseburger Soup was born. One bite, and my family declared it an instant favorite. Spoiler: You’ll want seconds.

What You’ll Need

Gather these ingredients, and let’s make magic happen:

  • 1 lb ground beef – I prefer 80/20 for that perfect juicy richness, but leaner works too.
  • 1 small yellow onion, diced – The sweet backbone of our soup.
  • 2 cloves garlic, minced – Because everything’s better with garlic.
  • 3 tbsp butter – For that velvety base. Trust me, it’s worth it.
  • ¼ cup all-purpose flour – Our thickening hero.
  • 4 cups chicken broth – Homemade if you have it, but store-bought works beautifully.
  • 2 cups whole milk – Creaminess is key here—don’t skimp!
  • 2 cups shredded cheddar cheese – Sharp cheddar brings the flavor, but feel free to mix in some Monterey Jack for extra meltiness.
  • 1 tbsp Worcestershire sauce – That umami punch that makes burgers irresistible.
  • 1 tsp paprika – A whisper of smokiness.
  • Salt & black pepper to taste – Season as you go!
  • Optional toppings – Crumbled bacon, diced pickles, extra cheese, or a dollop of sour cream. Go wild!

Let’s Get Cooking

Now, let’s turn these humble ingredients into a bowl of pure comfort:

  1. Brown the beef. In a large pot or Dutch oven over medium heat, cook the ground beef until no pink remains, breaking it up with a spoon as it cooks. Drain any excess grease, but leave a little for flavor—this is a cheeseburger in soup form, after all!
  2. Sweat the onions. Push the beef to one side of the pot and add the diced onion to the other. Let it soften for 3-4 minutes until translucent, then stir in the garlic for just 30 seconds until fragrant. (Pro tip: Don’t let the garlic brown, or it’ll turn bitter!)
  3. Make the roux. Melt the butter into the beef and onion mixture, then sprinkle the flour over everything. Stir constantly for 1-2 minutes—this cooks out the raw flour taste and ensures our soup thickens up beautifully.
  4. Simmer to perfection. Slowly pour in the chicken broth and milk, stirring constantly to avoid lumps. Bring the soup to a gentle simmer, letting it thicken for 5-7 minutes. You’ll know it’s ready when it coats the back of a spoon.

Stay tuned for the next steps—where we add the cheese (the best part!) and all those finishing touches that make this soup truly unforgettable. But if you can’t wait, just know this: Your kitchen is about to smell amazing.

Pro Tips, Variations, and Substitutions

This cheeseburger soup is already a winner, but here are a few ways to make it even more delicious—or tweak it to fit your preferences:

  • Extra Cheesy: Stir in an extra handful of sharp cheddar or a sprinkle of Parmesan at the end for an even richer flavor.
  • Vegetarian Twist: Swap the ground beef for plant-based crumbles and use vegetable broth instead of beef broth.
  • Spice It Up: Add a dash of hot sauce, diced jalapeños, or a pinch of red pepper flakes for a little kick.
  • Lighter Option: Use ground turkey instead of beef and low-fat cheese to cut calories without sacrificing taste.
  • Extra Veggies: Toss in some diced bell peppers, mushrooms, or spinach for added nutrition.

What to Serve With Cheeseburger Soup

This soup is hearty enough to stand on its own, but pairing it with the right sides can make it a full meal:

  • Crunchy Bread: A warm, crusty baguette or buttery garlic bread is perfect for dipping.
  • Side Salad: A simple green salad with a tangy vinaigrette balances the richness of the soup.
  • Pickles: A few dill pickle slices on the side add that classic burger bite.
  • French Fries: For the ultimate burger experience, serve with crispy fries or tater tots.

Storage and Reheating Tips

This soup keeps well, making it great for meal prep or leftovers:

  • Refrigerator: Store in an airtight container for up to 4 days.
  • Freezer: Freeze in portion-sized containers for up to 3 months. Thaw overnight in the fridge before reheating.
  • Reheating: Warm gently on the stovetop over low heat, stirring occasionally. If the soup thickens, add a splash of broth or milk to loosen it up.

Frequently Asked Questions

Can I make this soup in a slow cooker?

Absolutely! Brown the beef and sauté the veggies first, then transfer everything to a slow cooker. Cook on low for 4–6 hours, stirring in the cheese and cream at the end.

What kind of potatoes work best?

Yukon Gold or Russet potatoes are ideal—they hold their shape well and add a creamy texture.

Can I use pre-shredded cheese?

You can, but freshly grated cheese melts smoother and tastes better. Pre-shredded cheese often contains anti-caking agents that can make the soup slightly grainy.

Is this soup kid-friendly?

Yes! Kids love the cheesy, comforting flavors. For picky eaters, you can blend the soup slightly to make it smoother.

Final Thoughts

There’s something magical about a bowl of cheeseburger soup—it’s nostalgic, comforting, and downright delicious. Whether you’re serving it on a chilly evening or prepping it for easy weeknight meals, this recipe is sure to become a family favorite. So grab a spoon, dig in, and enjoy every cheesy, savory bite. Happy cooking!

Print
clock clock iconcutlery cutlery iconflag flag iconfolder folder iconinstagram instagram iconpinterest pinterest iconfacebook facebook iconprint print iconsquares squares iconheart heart iconheart solid heart solid icon

This Cheeseburger Soup is OMG Delicious!

  • Author: Trusted Blog

Description

A creamy, cheesy soup that tastes just like a cheeseburger in a bowl.


Ingredients

Scale

For the Crust:

  • 1 lb ground beef
  • 1 small onion, diced
  • 2 cloves garlic, minced
  • 3 cups chicken broth
  • 2 cups peeled and diced potatoes
  • 1/4 cup all-purpose flour
  • 2 cups milk
  • 2 cups shredded cheddar cheese
  • 1/4 cup sour cream
  • 1 tsp Worcestershire sauce
  • 1/2 tsp paprika
  • Salt and pepper to taste

Instructions

1. Prepare the Crust:

  1. In a large pot, brown the ground beef with onion and garlic over medium heat until fully cooked. Drain excess fat.
  2. Add chicken broth and potatoes to the pot. Bring to a boil, then reduce heat and simmer until potatoes are tender (about 10-12 minutes).
  3. In a separate bowl, whisk flour into milk until smooth. Gradually stir into the soup and cook until slightly thickened.
  4. Reduce heat to low. Stir in cheese, sour cream, Worcestershire sauce, and paprika until cheese is melted and soup is creamy.
  5. Season with salt and pepper to taste. Serve hot.

Notes

You can customize the seasonings to taste.

Chicken Egg Roll Bowls

chicken-egg-roll-bowls

Chicken Egg Roll Bowls: All the Crunch, None of the Fuss

There’s something about the sizzle of garlic hitting a hot pan that feels like a promise—something delicious is coming. I’ll admit, I used to be the person who’d order egg rolls as an appetizer every single time we got takeout, just for that crispy, savory bite. But one rainy evening, craving those flavors without the deep-fry mess (or the inevitable oil splatters on my favorite apron), I decided to deconstruct my favorite appetizer into a hearty, wholesome bowl. The result? These Chicken Egg Roll Bowls—a one-pan wonder that’s become a weeknight hero in our house.

Ingredients You’ll Need

  • 1 lb ground chicken – Lean but flavorful, though you could swap in turkey or pork if you prefer.
  • 1 tbsp sesame oil – That toasty, nutty aroma is non-negotiable for authentic egg roll vibes.
  • 3 cloves garlic, minced – Because more garlic is always the answer.
  • 1 tbsp fresh ginger, grated – A little zing to brighten up the dish.
  • ½ head green cabbage, thinly sliced – The star of the show! It wilts down beautifully.
  • 2 carrots, julienned – For color and a subtle sweetness.
  • 3 green onions, sliced – Save the green tops for a fresh garnish.
  • 2 tbsp soy sauce – I use low-sodium to control the saltiness.
  • 1 tbsp rice vinegar – A splash of acidity balances the richness.
  • 1 tsp honey or maple syrup – Just a hint of sweetness to round it all out.
  • Crushed red pepper flakes (optional) – For those who like a gentle kick.
  • Toasted sesame seeds & extra green onions – Because pretty bowls taste better.

Let’s Make the Magic Happen

1. Heat the sesame oil in a large skillet or wok over medium-high heat. There’s no going back once that oil starts shimmering—it’s time to cook!

2. Brown the chicken, breaking it up with a wooden spoon as it cooks. Don’t stir too much; let it get a little golden for extra flavor. Tip: If your chicken releases a lot of liquid, drain a bit before moving to the next step.

3. Add the garlic and ginger, stirring for just 30 seconds until fragrant. You’ll know it’s ready when your kitchen smells like your favorite takeout spot.

4. Toss in the cabbage and carrots. It’ll look like a mountain at first, but trust me—it wilts down! Stir occasionally for about 5-7 minutes until tender-crisp. I like mine with a bit of bite, but cook longer if you prefer softer veggies.

5. Drizzle in the soy sauce, rice vinegar, and honey, tossing everything to coat. Taste and adjust—maybe an extra splash of vinegar or a pinch of red pepper flakes? This is your bowl, after all.

Pro Tips, Variations, and Substitutions

One of the best things about these Chicken Egg Roll Bowls is how adaptable they are! Here are some ways to make them your own:

  • Protein swap: Ground turkey, pork, or even crumbled tofu work beautifully in place of chicken.
  • Veggie variations: Try adding mushrooms, water chestnuts, or bell peppers for extra crunch.
  • Low-carb option: Serve over cauliflower rice instead of regular rice for a lighter meal.
  • Extra crispy: For that authentic egg roll texture, top with crispy wonton strips or chow mein noodles.

What to Serve With Chicken Egg Roll Bowls

While these bowls are satisfying on their own, here are some delicious pairings:

  • A simple cucumber salad with rice vinegar dressing
  • Steamed edamame with sea salt
  • Hot and sour soup or miso soup
  • Crispy spring rolls (for those who miss the wrapper!)

Storage and Reheating Tips

These bowls make fantastic leftovers! Here’s how to keep them tasting fresh:

  • Store components separately in airtight containers for up to 4 days
  • Reheat the chicken and veggie mixture in a skillet over medium heat with a splash of water or broth
  • Fresh rice is best, but you can refresh leftover rice by sprinkling with water and microwaving covered for 1-2 minutes
  • Garnishes like green onions and sesame seeds should always be added fresh

Frequently Asked Questions

Can I make this vegetarian?

Absolutely! Swap the chicken for crumbled firm tofu or tempeh, and use vegetarian oyster sauce or hoisin sauce.

Is there a way to make this spicier?

For extra heat, add sriracha or chili garlic sauce to taste, or garnish with sliced fresh jalapeños.

Can I meal prep these bowls?

Yes! These are perfect for meal prep. Just store components separately and assemble when ready to eat.

What if I can’t find coleslaw mix?

No problem! Simply shred green cabbage and carrots in a 3:1 ratio – about 3 cups cabbage to 1 cup carrots.

Final Thoughts

There’s something so comforting about digging into a warm bowl filled with all the flavors you love from egg rolls, without any of the fuss. Whether you’re looking for a quick weeknight dinner, a healthy lunch option, or just craving those takeout flavors at home, these Chicken Egg Roll Bowls deliver every time. The best part? You can customize them endlessly to suit your mood and pantry. I hope this becomes a regular in your dinner rotation – it’s certainly earned its place in mine!

Print
clock clock iconcutlery cutlery iconflag flag iconfolder folder iconinstagram instagram iconpinterest pinterest iconfacebook facebook iconprint print iconsquares squares iconheart heart iconheart solid heart solid icon

Chicken Egg Roll Bowls

  • Author: Trusted Blog

Description

A deconstructed version of classic egg rolls with all the flavors in a simple bowl format.


Ingredients

Scale

For the Crust:

  • 1 lb ground chicken
  • 1 tbsp sesame oil
  • 3 cloves garlic, minced
  • 1 tbsp ginger, grated
  • 1/2 cup onion, diced
  • 4 cups coleslaw mix
  • 2 tbsp soy sauce
  • 1 tbsp rice vinegar
  • 1 tsp sriracha
  • 2 green onions, sliced
  • 1 tsp sesame seeds

Instructions

1. Prepare the Crust:

  1. Heat sesame oil in a large skillet over medium-high heat.
  2. Add ground chicken and cook until browned, breaking it apart as it cooks.
  3. Add garlic, ginger, and onion. Cook for 2-3 minutes until fragrant.
  4. Stir in coleslaw mix and cook until slightly softened, about 5 minutes.
  5. Add soy sauce, rice vinegar, and sriracha. Stir to combine.
  6. Cook for another 2-3 minutes until flavors meld.
  7. Garnish with green onions and sesame seeds before serving.

Notes

You can customize the seasonings to taste.