Easy Beef and Noodles

easy-beef-and-noodles

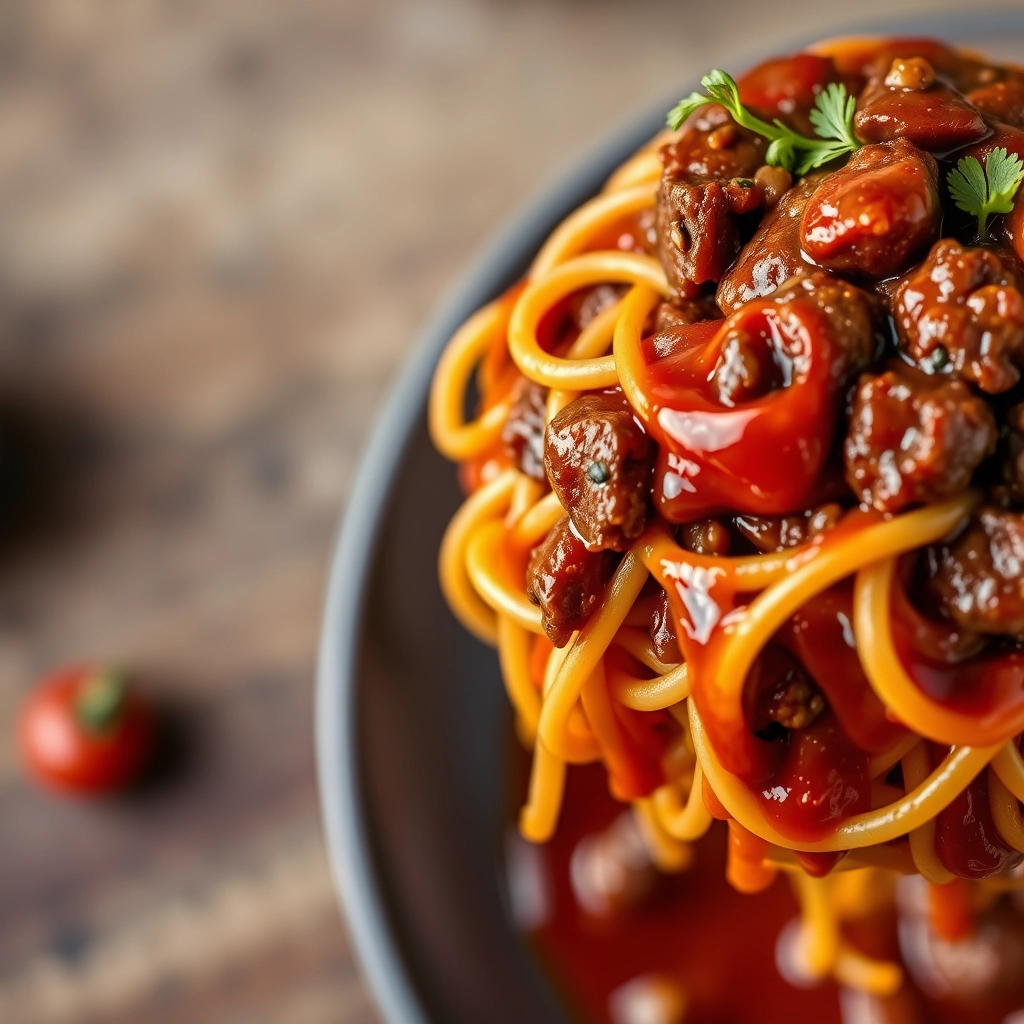
Easy Beef and Noodles: A Bowl of Comfort on Busy Nights

There’s something about a steaming bowl of beef and noodles that feels like a warm hug after a long day. I remember my grandmother stirring a pot of this simple, savory dish on chilly evenings, the aroma of tender beef and buttery noodles filling her tiny kitchen. Life moves fast these days, but this recipe—passed down with a few of my own tweaks—still brings that same cozy comfort in under an hour. Whether you’re juggling work, kids, or just craving a no-fuss meal that tastes like home, this one’s for you.
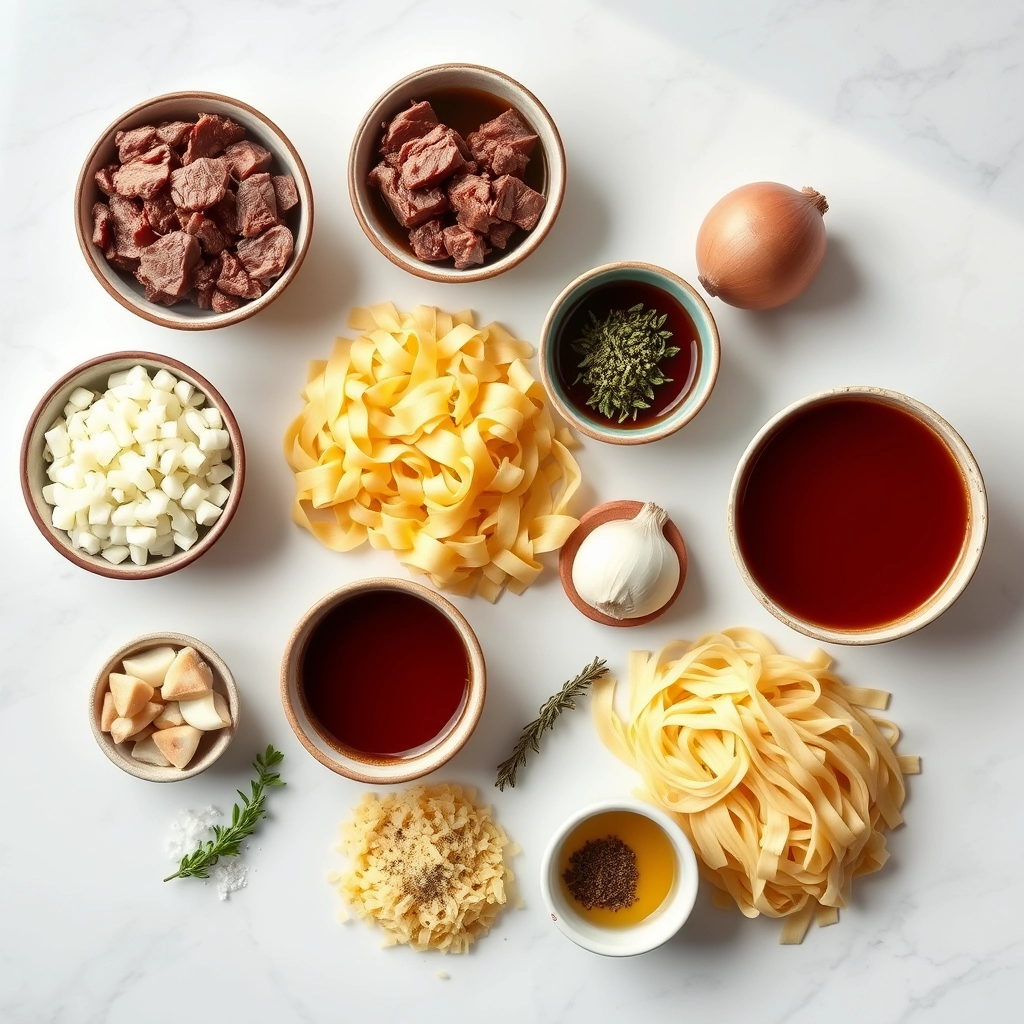
What You’ll Need

Gather these simple ingredients—most might already be in your pantry or fridge! Here’s what makes this dish sing:

  • 1 lb stew beef or chuck roast, cubed – Trim off excess fat, but don’t go lean-crazy; a little marbling keeps the meat juicy.
  • 1 yellow onion, diced – The sweet caramelization is key for depth of flavor.
  • 2 cloves garlic, minced – Because what’s a savory dish without garlic?
  • 4 cups beef broth – Homemade if you have it, but a good-quality store-bought works too.
  • 2 tablespoons Worcestershire sauce – Our secret umami booster!
  • 1 teaspoon dried thyme – Earthy and warm, it pairs perfectly with beef.
  • 12 oz wide egg noodles – The classic choice, but feel free to swap with pappardelle or even homemade pasta if you’re feeling fancy.
  • 2 tablespoons butter – For richness and that silky finish.
  • Salt and pepper to taste – Season as you go—trust your tastebuds.

Let’s Get Cooking

This recipe is as forgiving as it is delicious. Here’s how to bring it all together:

  1. Brown the beef: Heat a large pot or Dutch oven over medium-high heat. Pat the beef cubes dry (this ensures a good sear!), then season generously with salt and pepper. Add a drizzle of oil and sear the beef in batches until deeply browned—about 3-4 minutes per side. Don’t rush this step! Those crispy bits equal flavor gold.
  2. Sweat the aromatics: Reduce the heat to medium and toss in the diced onion, stirring until translucent and fragrant, about 5 minutes. Add the garlic and thyme, stirring for just 30 seconds to wake up their flavors without burning.
  3. Simmer to tenderness: Return the beef to the pot and pour in the beef broth and Worcestershire sauce. Scrape up any browned bits from the bottom—that’s free flavor! Bring to a gentle boil, then reduce heat to low, cover, and let it simmer for 30-40 minutes until the beef is fork-tender. (Tip: If you’re short on time, a pressure cooker cuts this step to 15 minutes!)

At this point, your kitchen will smell like a cozy bistro, and the hardest part is waiting. But trust me, the tender beef and rich broth are worth every minute. Stay tuned for the final steps—where buttery noodles and a few finishing touches turn this humble dish into a weeknight superstar!

Pro Tips, Variations, and Substitutions

This easy beef and noodles recipe is wonderfully adaptable to suit your tastes or what you have on hand. Here are some ways to make it your own:

  • Protein swap: Try using ground turkey or shredded chicken instead of beef for a lighter version.
  • Vegetable boost: Stir in mushrooms, bell peppers, or spinach for extra nutrition and color.
  • Creamier sauce: Add a splash of heavy cream or a dollop of sour cream at the end for extra richness.
  • Gluten-free option: Use your favorite gluten-free noodles and ensure your broth is gluten-free.
  • Slow cooker method: Brown the beef first, then combine all ingredients in a slow cooker on low for 4-6 hours.

What to Serve With Beef and Noodles

This comforting dish pairs beautifully with:

  • A crisp green salad with vinaigrette to cut through the richness
  • Buttered dinner rolls or crusty bread for soaking up the sauce
  • Steamed green beans or roasted carrots for a pop of color
  • A glass of red wine or iced tea, depending on the season

Storage and Reheating Tips

Leftovers (if you’re lucky enough to have any!) store beautifully:

  • Store in an airtight container in the refrigerator for 3-4 days.
  • For longer storage, freeze for up to 3 months. Thaw overnight in the refrigerator before reheating.
  • Reheat gently on the stovetop with a splash of broth to loosen the sauce.
  • Microwave in 30-second intervals, stirring between each, until heated through.

Frequently Asked Questions

Can I use egg noodles instead of the noodles listed?
Absolutely! Egg noodles are a classic choice for this dish and will work beautifully.

What if my sauce is too thin?
Let it simmer uncovered for a few extra minutes to thicken, or mix 1 tablespoon cornstarch with 2 tablespoons cold water and stir it in.

Can I make this ahead of time?
Yes! Prepare the dish through step 4, then refrigerate. When ready to serve, gently reheat and add the noodles.

Is this recipe kid-friendly?
Most kids love this comforting dish! For picky eaters, you can reduce the seasonings slightly or serve the components separately.

Final Thoughts

There’s something so comforting about a steaming bowl of beef and noodles that just feels like home. Whether you’re cooking for a busy weeknight dinner or preparing a meal to share with loved ones, this recipe is sure to satisfy. The best part? It leaves plenty of room for your personal touch – maybe an extra sprinkle of herbs from your garden or that special ingredient your family always loves. However you make it, I hope this dish brings warmth and joy to your table. Happy cooking!

Print
clock clock iconcutlery cutlery iconflag flag iconfolder folder iconinstagram instagram iconpinterest pinterest iconfacebook facebook iconprint print iconsquares squares iconheart heart iconheart solid heart solid icon

Easy Beef and Noodles

  • Author: Trusted Blog

Description

A comforting and hearty dish featuring tender beef and egg noodles in a rich, savory sauce.


Ingredients

Scale

For the Crust:

  • 1 lb beef stew meat, cubed
  • 2 cups egg noodles, uncooked
  • 4 cups beef broth
  • 1 small onion, diced
  • 2 cloves garlic, minced
  • 1 tbsp Worcestershire sauce
  • 1 tsp dried thyme
  • 1 tsp dried rosemary
  • Salt and pepper to taste
  • 2 tbsp olive oil

Instructions

1. Prepare the Crust:

  1. Heat olive oil in a large pot over medium-high heat. Add the beef cubes and brown on all sides, about 5 minutes.
  2. Add the diced onion and minced garlic to the pot. Cook until the onion is translucent, about 3 minutes.
  3. Pour in the beef broth, Worcestershire sauce, thyme, and rosemary. Bring to a boil, then reduce heat to low and simmer for 20 minutes.
  4. Add the egg noodles to the pot and cook according to package instructions, about 8-10 minutes, until tender.
  5. Season with salt and pepper to taste. Serve hot.

Notes

You can customize the seasonings to taste.

Beef Enchilada Casserole

beef-enchilada-casserole

Beef Enchilada Casserole: A Cozy, Cheesy Hug in Every Bite

There’s something magical about the way a bubbling casserole fills the kitchen with warmth—especially on those evenings when the wind howls outside, and all you crave is a dish that feels like a hug. This Beef Enchilada Casserole is my go-to for those nights. It’s layers of tender beef, melty cheese, and smoky enchilada sauce, all baked into a comforting masterpiece. No rolling tortillas required! Just hearty, messy, delicious layers that come together with minimal fuss. It’s the kind of meal that makes everyone at the table lean in for seconds—and maybe even thirds.

Gathering Your Ingredients: A Symphony of Flavor

Before we dive into the cooking, let’s talk ingredients. This recipe is flexible, so feel free to tweak it to your taste—but here’s what makes it sing:

  • Ground beef (1 lb): I prefer 85% lean for the perfect balance of flavor and tenderness. If you’re feeling adventurous, ground turkey or chicken works too!
  • Yellow onion (1 medium): Diced finely—it’ll melt into the beef, adding sweetness and depth.
  • Garlic (3 cloves): Minced. Because what’s a cozy dish without garlic’s warm embrace?
  • Enchilada sauce (2 cups): Homemade or store-bought—I won’t judge! Just pick one with a smoky, rich flavor.
  • Corn tortillas (10-12): Slightly stale ones work best—they hold up better in the casserole.
  • Shredded cheese (3 cups): A mix of Monterey Jack and sharp cheddar is my dream team, but use what you love.
  • Black beans (1 can, drained): For a little extra protein and texture.
  • Spices (1 tbsp chili powder, 1 tsp cumin, 1/2 tsp smoked paprika): These bring the warmth and earthiness that make this dish unforgettable.
  • Fresh cilantro & sour cream (for serving): Because every great casserole deserves a fresh, creamy finish.

Let’s Get Layering: The Cozy Assembly

Now, the fun part! This casserole comes together like a delicious puzzle—layer by layer, with plenty of room for love (and cheese). Here’s how:

  1. Brown the beef: In a large skillet over medium heat, cook the ground beef with the diced onion until the beef is no longer pink and the onions are soft and translucent. Add the garlic and spices, stirring until fragrant—about 1 minute. Drain any excess grease, then stir in half the enchilada sauce and the black beans. Let it simmer for 2-3 minutes, just to let the flavors marry.
  2. Prep your baking dish: Lightly grease a 9×13-inch baking dish. Spread a thin layer of enchilada sauce on the bottom—this keeps the tortillas from sticking and adds extra flavor.
  3. First layer: Arrange half the tortillas in the dish, overlapping slightly. Don’t worry about perfection—rustic is charming! Spoon half the beef mixture over the tortillas, then sprinkle with a generous handful of cheese.
  4. Repeat: Add another layer of tortillas, the remaining beef mixture, and another mountain of cheese. Finish with a final drizzle of enchilada sauce—because we believe in saucy goodness.

At this point, your kitchen should smell like a Mexican cantina in the best possible way. Now, just pop it in the oven (covered with foil) at 375°F for 20 minutes, then uncover and bake for another 10 until the cheese is gloriously golden and bubbly. But we’ll get to that in the next half—trust me, the wait is worth it!

Pro Tips for the Perfect Beef Enchilada Casserole

This casserole is wonderfully forgiving, but a few extra touches can take it from good to amazing:

  • Toast your spices: Lightly toast the cumin and chili powder in a dry pan before adding to the beef for deeper flavor.
  • Warm your tortillas: Briefly microwave corn tortillas wrapped in a damp towel to prevent cracking when layering.
  • Rest before serving: Let the casserole sit 10 minutes after baking – it slices cleaner and the flavors meld beautifully.

Delicious Variations & Substitutions

This recipe is a canvas for creativity! Try these twists:

  • Protein swap: Ground turkey, shredded chicken, or black beans for a vegetarian version.
  • Cheese lovers: Add a layer of pepper jack or crumbled queso fresco between tortillas.
  • Extra veggies: Sautéed bell peppers, zucchini, or spinach mixed into the beef filling.
  • Spice level: Adjust with mild or hot enchilada sauce, or add diced jalapeños.

What to Serve With Your Enchilada Casserole

This hearty dish pairs perfectly with:

  • Cooling sides: Mexican crema, guacamole, or a crisp cabbage slaw
  • Classic accompaniments: Cilantro lime rice, charro beans, or warm flour tortillas
  • For drinks: A cold Mexican beer, horchata, or tangy margaritas

Storage & Reheating Tips

Leftovers taste even better the next day! Here’s how to keep them perfect:

  • Refrigerate: Store covered for 3-4 days.
  • Freeze: Portion and freeze for up to 3 months (thaw overnight before reheating).
  • Reheat: 350°F oven for 20 minutes (covered) or microwave individual portions with a damp paper towel to prevent drying.

Frequently Asked Questions

Can I use flour tortillas instead of corn?
Yes! Flour tortillas create a softer texture. Reduce baking time by 5 minutes as they brown faster.

How can I make this gluten-free?
Use certified GF corn tortillas and check your enchilada sauce labels. Most major brands are naturally gluten-free.

Why is my casserole watery?
This usually means the sauce wasn’t reduced enough. Next time, simmer your sauce 5 extra minutes or blot tortillas with a paper towel before layering.

Can I assemble this ahead?
Absolutely! Prep up to 24 hours in advance, cover, and refrigerate. Add 10-15 minutes to baking time if going straight from fridge to oven.

Final Thoughts

There’s something magical about how simple ingredients transform into this comforting, flavor-packed casserole. Whether it’s a busy weeknight dinner or the star of your next potluck, this beef enchilada casserole is guaranteed to bring everyone to the table with smiles. The best part? That first bite of melty cheese, tender beef, and just-right spice that tastes like a warm hug. Don’t be surprised when requests for seconds – and the recipe – start coming your way!

Print
clock clock iconcutlery cutlery iconflag flag iconfolder folder iconinstagram instagram iconpinterest pinterest iconfacebook facebook iconprint print iconsquares squares iconheart heart iconheart solid heart solid icon

Beef Enchilada Casserole

  • Author: Trusted Blog

Description

A delicious and easy-to-make layered casserole with all the flavors of traditional beef enchiladas.


Ingredients

Scale

For the Crust:

  • 1 lb ground beef
  • 1 small onion, diced
  • 1 packet taco seasoning
  • 1 can (10 oz) red enchilada sauce
  • 6 corn tortillas, cut into quarters
  • 1 can (15 oz) black beans, drained and rinsed
  • 1 cup shredded cheddar cheese
  • 1 cup shredded Monterey Jack cheese
  • 1/2 cup sour cream
  • 1/4 cup chopped fresh cilantro

Instructions

1. Prepare the Crust:

  1. Preheat oven to 375°F (190°C).
  2. In a skillet over medium heat, cook ground beef and onion until beef is browned. Drain excess fat.
  3. Stir in taco seasoning and 1/4 cup water. Simmer for 5 minutes.
  4. Spread 1/4 cup enchilada sauce in the bottom of a 9×13 baking dish.
  5. Layer half the tortilla pieces, half the beef mixture, half the black beans, and half the cheeses. Repeat layers.
  6. Pour remaining enchilada sauce over the top and spread evenly.
  7. Bake uncovered for 25-30 minutes until bubbly and cheese is melted.
  8. Let cool for 5 minutes before serving. Top with sour cream and cilantro.

Notes

You can customize the seasonings to taste.

Honey Glazed Salmon

honey-glazed-salmon

The Sweet Simplicity of Honey Glazed Salmon

There’s something magical about a dish that feels both indulgent and effortless—like the kind of meal you can whip up on a busy weeknight but still serve with pride to guests. That’s exactly how I feel about honey glazed salmon. I first fell in love with this recipe during a cozy dinner at my aunt’s house years ago. The way the sticky-sweet glaze caramelized on the tender salmon, the hint of garlic and lemon cutting through the richness—it was love at first bite. Since then, it’s become my go-to when I want something quick, healthy, and utterly satisfying. And today, I’m sharing my tried-and-true version with you.

Ingredients You’ll Need

Gathering the right ingredients is half the battle, but luckily, this recipe keeps things simple with pantry staples and a few fresh touches:

  • 4 salmon fillets (about 6 oz each) – Look for wild-caught if possible; the flavor is richer and more nuanced.
  • 3 tbsp honey – Use local honey if you can—it adds a lovely floral note.
  • 2 tbsp soy sauce – This brings the perfect salty depth to balance the sweetness.
  • 1 tbsp olive oil – A good glug for cooking and a bit of richness.
  • 2 cloves garlic, minced – Because garlic makes everything better.
  • 1 tbsp lemon juice – Freshly squeezed, please! It brightens the whole dish.
  • 1 tsp Dijon mustard – A little secret weapon for tang and depth.
  • ½ tsp black pepper – Freshly cracked is ideal.
  • Pinch of red pepper flakes (optional) – For those who like a gentle kick.
  • Fresh parsley or dill, for garnish – A sprinkle of green makes it pretty and fresh.

Let’s Get Cooking: Step-by-Step

Now, onto the fun part! This recipe comes together in under 30 minutes, but the flavors taste like you spent hours. Here’s how to make it:

  1. Prep the salmon. Pat the fillets dry with a paper towel—this helps the glaze stick better. Season lightly with a pinch of salt and pepper on both sides.
  2. Make the glaze. In a small bowl, whisk together the honey, soy sauce, olive oil, minced garlic, lemon juice, Dijon mustard, black pepper, and red pepper flakes (if using). Taste and adjust—you might want a touch more honey or lemon depending on your preference.
  3. Marinate (just a little!). Place the salmon in a shallow dish and pour half of the glaze over it, turning to coat. Let it sit for 10 minutes—no longer, or the acidity in the lemon juice will start to “cook” the fish.
  4. Heat the pan. While the salmon marinates, heat a large skillet (I love using cast iron for this) over medium-high heat. A quick tip: Make sure the pan is nice and hot before adding the salmon to get that beautiful sear.

And just like that, we’re halfway to honey-glazed perfection! The next steps—searing, glazing, and serving—are where the magic really happens. But I’ll save those for the second half of this post. For now, take a moment to savor the aroma of garlic and honey mingling in your kitchen. Trust me, it’s the best kind of anticipation.

Honey Glazed Salmon: A Sweet and Savory Delight

There’s something magical about the way honey caramelizes on salmon, creating a sticky-sweet glaze that’s impossible to resist. Whether you’re cooking for a weeknight dinner or impressing guests, this honey glazed salmon recipe is a guaranteed crowd-pleaser. Below, I’ve included some pro tips, serving suggestions, and answers to common questions to help you make the most of this dish.

Pro Tips, Variations, and Substitutions

Every home cook has their own twist on a classic, and honey glazed salmon is no exception. Here are some ways to make it your own:

  • Swap the honey: If you prefer a deeper flavor, try maple syrup or agave nectar instead of honey. For a touch of smokiness, add a teaspoon of bourbon or whiskey to the glaze.
  • Spice it up: A pinch of red pepper flakes or a dash of sriracha in the glaze adds a subtle kick.
  • Citrus boost: A squeeze of fresh lemon or orange juice brightens the glaze beautifully.
  • Alternative proteins: This glaze works wonderfully on chicken or shrimp if salmon isn’t your thing.

What to Serve with Honey Glazed Salmon

This dish pairs beautifully with a variety of sides. Here are a few of my favorites:

  • Roasted vegetables: Asparagus, Brussels sprouts, or sweet potatoes complement the sweetness of the glaze.
  • Grains: Quinoa, rice, or couscous soak up the extra glaze and add heartiness.
  • Fresh salads: A crisp arugula salad with a light vinaigrette balances the richness of the salmon.

Storage and Reheating Tips

Leftovers? No problem! Here’s how to keep your honey glazed salmon tasting fresh:

  • Storage: Place cooled salmon in an airtight container and refrigerate for up to 2 days.
  • Reheating: To avoid drying out the salmon, gently warm it in a covered skillet over low heat with a splash of water or broth. Alternatively, microwave at 50% power for short intervals.
  • Freezing: While possible, the texture may change slightly. If freezing, wrap tightly and use within 1 month.

Frequently Asked Questions

Can I use frozen salmon?

Absolutely! Just thaw it completely in the refrigerator before cooking to ensure even glazing.

How do I know when the salmon is done?

The salmon should flake easily with a fork and reach an internal temperature of 145°F (63°C).

Can I make the glaze ahead of time?

Yes! The glaze can be prepared up to 3 days in advance and stored in the fridge. Just warm it slightly before brushing onto the salmon.

What if I don’t have soy sauce?

Coconut aminos or tamari make great substitutes, or you can use a pinch of salt for a simpler version.

Final Thoughts

Honey glazed salmon is one of those dishes that feels both indulgent and wholesome—a perfect balance of sweet, savory, and satisfying. Whether you’re cooking for yourself or sharing with loved ones, I hope this recipe brings warmth and joy to your table. Happy cooking, and may every bite be as delightful as the last!

Print
clock clock iconcutlery cutlery iconflag flag iconfolder folder iconinstagram instagram iconpinterest pinterest iconfacebook facebook iconprint print iconsquares squares iconheart heart iconheart solid heart solid icon

Honey Glazed Salmon

  • Author: Trusted Blog

Description

A delicious and easy-to-make honey glazed salmon that’s perfect for a weeknight dinner.


Ingredients

Scale

For the Crust:

  • 4 salmon fillets (6 oz each)
  • 1/4 cup honey
  • 2 tablespoons soy sauce
  • 1 tablespoon olive oil
  • 1 teaspoon minced garlic
  • 1/2 teaspoon ground ginger
  • 1/4 teaspoon black pepper
  • 1 tablespoon lemon juice
  • 1 tablespoon chopped fresh parsley (for garnish)

Instructions

1. Prepare the Crust:

  1. Preheat oven to 375°F (190°C). Line a baking sheet with parchment paper.
  2. In a small bowl, whisk together honey, soy sauce, olive oil, garlic, ginger, black pepper, and lemon juice.
  3. Place salmon fillets on the prepared baking sheet. Brush each fillet generously with the honey glaze.
  4. Bake for 12-15 minutes, or until salmon flakes easily with a fork. Baste with remaining glaze halfway through cooking.
  5. Garnish with chopped parsley and serve immediately.

Notes

You can customize the seasonings to taste.

Honey Garlic Steak Bites

honey-garlic-steak-bites

Honey Garlic Steak Bites: A Little Bite of Heaven

There’s something about bite-sized food that just feels indulgent, isn’t there? Maybe it’s the way you can pop one into your mouth without a second thought, or perhaps it’s the sheer joy of savoring every tiny, flavorful morsel. These Honey Garlic Steak Bites are exactly that—little pockets of juicy, caramelized perfection that disappear far too quickly. I first made them on a cozy Sunday evening when my husband and I were craving something hearty but didn’t want to fuss with a full steak dinner. One bite, and we were smitten. Now, they’re a regular in our weeknight rotation, and I have a feeling they’ll become a favorite in your home too.

Ingredients You’ll Need

  • 1.5 lbs sirloin steak – Cut into 1-inch cubes. Sirloin is my go-to for its balance of tenderness and flavor, but ribeye or tenderloin work beautifully too.
  • 3 tbsp soy sauce – For that deep, savory umami base. If you’re gluten-free, tamari is a great substitute.
  • 2 tbsp honey – The star of the show! It caramelizes into the most glorious sticky-sweet glaze.
  • 4 cloves garlic – Minced. Because is there anything better than garlic sizzling in a pan?
  • 1 tbsp olive oil – For searing those steak bites to golden perfection.
  • 1 tsp red pepper flakes – Just a pinch for a gentle kick. Feel free to adjust to your spice preference.
  • 1 tbsp butter – Because everything’s better with butter, especially when it melts into that honey garlic sauce.
  • Salt & black pepper – To taste. Don’t be shy—seasoning is key!
  • Fresh parsley (optional) – For a pop of color and freshness.

Let’s Get Cooking

1. Prep the steak. Pat your steak cubes dry with a paper towel—this helps them sear beautifully instead of steaming. Season generously with salt and black pepper. Trust me, this step makes all the difference!

2. Whisk the sauce. In a small bowl, combine the soy sauce, honey, minced garlic, and red pepper flakes. Give it a good stir until the honey dissolves into the mixture. The smell alone will have you swooning.

3. Sear the steak. Heat olive oil in a large skillet over medium-high heat. Once the oil is shimmering (but not smoking!), add the steak bites in a single layer. Don’t overcrowd the pan—work in batches if needed. Let them sear undisturbed for about 2 minutes per side until they develop a gorgeous crust. This is where the magic happens!

4. Add the sauce. Reduce the heat to medium and pour that luscious honey garlic mixture over the steak bites. Toss everything together, letting the sauce bubble and thicken for another minute or two. The aroma will be absolutely intoxicating.

5. Finish with butter. Right before taking the pan off the heat, swirl in that tablespoon of butter. It adds a silky richness that ties everything together. Give one last toss, and you’re done!

Honey Garlic Steak Bites: The Perfect Bite-Sized Comfort Food

There’s something undeniably satisfying about tender, juicy steak bites coated in a sticky-sweet honey garlic glaze. Whether you’re whipping up a quick weeknight dinner or impressing guests with an easy yet elegant appetizer, these Honey Garlic Steak Bites are a guaranteed crowd-pleaser. Let’s dive into some pro tips, serving ideas, and more to make this dish shine!

Pro Tips for the Best Honey Garlic Steak Bites

  • Cut against the grain: Slicing your steak against the grain ensures each bite is tender and easy to chew.
  • Don’t overcrowd the pan: Cooking in batches prevents steaming and ensures a perfect sear.
  • Let the steak rest: After cooking, give the steak bites a few minutes to rest so the juices redistribute.
  • Adjust sweetness: If you prefer a less sweet glaze, reduce the honey by half and add a splash of soy sauce for balance.

Variations & Substitutions

This recipe is wonderfully adaptable! Here are some ways to make it your own:

  • Protein swap: Not a beef fan? Try chicken breast, shrimp, or even tofu for a vegetarian twist.
  • Spice it up: Add a pinch of red pepper flakes or a dash of sriracha to the glaze for a little heat.
  • Herb boost: Stir in fresh thyme, rosemary, or cilantro at the end for an aromatic touch.
  • Gluten-free option: Use tamari or coconut aminos instead of soy sauce.

What to Serve With Honey Garlic Steak Bites

These flavorful bites pair beautifully with so many sides! Here are a few favorites:

  • Rice or quinoa: A simple bed of fluffy rice or quinoa soaks up the delicious sauce.
  • Roasted veggies: Try asparagus, broccoli, or Brussels sprouts for a healthy balance.
  • Mashed potatoes: Creamy mashed potatoes make this dish extra comforting.
  • Salad: A crisp green salad with a light vinaigrette cuts through the richness.

Storage & Reheating Tips

Leftovers? No problem! Here’s how to keep them tasting fresh:

  • Storage: Place cooled steak bites in an airtight container and refrigerate for up to 3 days.
  • Reheating: Warm them gently in a skillet over low heat or in the microwave at 30-second intervals to prevent overcooking.
  • Freezing: While possible, the texture may change slightly. Store in a freezer-safe container for up to 1 month and thaw in the fridge before reheating.

Frequently Asked Questions

Can I use a different cut of steak?

Absolutely! While sirloin or ribeye work best for tenderness, flank or skirt steak can also be used—just be sure to slice them thinly against the grain.

Can I make this dish ahead of time?

Yes! You can marinate the steak ahead of time (up to 24 hours) for extra flavor, but cook the bites just before serving for the best texture.

Is there a way to make this less sweet?

Of course! Reduce the honey by half and add a splash of balsamic vinegar or extra soy sauce for a more savory profile.

Can I cook these in the oven?

While stovetop is best for searing, you can broil them on a baking sheet for 3–4 minutes per side—just keep an eye on them to avoid burning.

Final Thoughts

Honey Garlic Steak Bites are one of those dishes that feel indulgent yet come together in minutes. Whether you’re serving them as an appetizer, tossing them over rice for dinner, or sneaking a few straight from the pan (we won’t judge), they’re sure to become a regular in your recipe rotation. The combination of savory garlic, sweet honey, and perfectly seared steak is simply irresistible. So grab your skillet, and let’s make dinner deliciously easy tonight!

Print
clock clock iconcutlery cutlery iconflag flag iconfolder folder iconinstagram instagram iconpinterest pinterest iconfacebook facebook iconprint print iconsquares squares iconheart heart iconheart solid heart solid icon

Honey Garlic Steak Bites

  • Author: Trusted Blog

Description

Juicy steak bites coated in a sweet and savory honey garlic sauce, perfect for a quick and flavorful meal.


Ingredients

Scale

For the Crust:

  • 1.5 lbs sirloin steak, cut into bite-sized pieces
  • 3 tbsp soy sauce
  • 2 tbsp honey
  • 4 cloves garlic, minced
  • 1 tbsp olive oil
  • 1 tsp black pepper
  • 1/2 tsp red pepper flakes (optional)
  • 1 tbsp butter
  • 1 tbsp chopped parsley (for garnish)

Instructions

1. Prepare the Crust:

  1. In a bowl, mix soy sauce, honey, minced garlic, black pepper, and red pepper flakes (if using). Set aside.
  2. Heat olive oil in a large skillet over medium-high heat. Add steak bites and cook for 3-4 minutes until browned on all sides.
  3. Reduce heat to medium and pour the honey garlic sauce over the steak bites. Stir well to coat.
  4. Add butter and continue cooking for another 2-3 minutes until the sauce thickens slightly.
  5. Garnish with chopped parsley and serve hot.

Notes

You can customize the seasonings to taste.

Healthy Enchilada Skillet

healthy-enchilada-skillet

A Cozy Night In with My Healthy Enchilada Skillet

There’s something about a chilly evening that makes me crave the warmth of a bubbling, spice-filled skillet. Last week, as rain tapped gently against the kitchen window, I found myself rummaging through the pantry, dreaming of enchiladas—but without the fuss of rolling tortillas. That’s when this Healthy Enchilada Skillet was born. It’s everything you love about the classic dish—smoky, saucy, and packed with flavor—but lighter, simpler, and ready in a fraction of the time. Perfect for those nights when you want comfort without the guilt (or the extra dishes!).

Ingredients You’ll Love

  • 1 tablespoon olive oil – Just enough to sauté our veggies without weighing things down.
  • 1 bell pepper (any color!), diced – I love using red for sweetness, but green adds a lovely earthiness.
  • 1 small onion, finely chopped – The humble onion is the backbone of so much flavor here.
  • 2 cloves garlic, minced – Because what’s a skillet dish without garlic’s cozy aroma?
  • 1 lb ground turkey (or chicken) – Lean, protein-packed, and soaks up spices beautifully. For a vegetarian twist, black beans work wonders!
  • 1 tablespoon taco seasoning – Homemade or store-bought—both bring that smoky depth we crave.
  • 1 (15 oz) can diced tomatoes – Juicy, tangy, and the base of our “sauce.”
  • 1 (4 oz) can diced green chiles – Mild heat and a touch of brightness. Don’t skip these!
  • 6 corn tortillas, cut into strips – They soften into the skillet like little pockets of comfort.
  • 1 cup shredded cheese (I use a blend of cheddar and Monterey Jack) – Because melty cheese is non-negotiable.
  • Fresh cilantro, avocado, and lime wedges for serving – The fresh finish that makes every bite sing.

Let’s Make Magic in the Skillet

  1. Sizzle the veggies. Heat olive oil in a large skillet over medium heat. Add the bell pepper and onion, sautéing until they’re just tender—about 5 minutes. Toss in the garlic and let it dance in the pan for 30 seconds until fragrant. (Tip: Don’t let the garlic brown, or it’ll turn bitter!)
  2. Brown the turkey. Push the veggies to one side and add the ground turkey, breaking it up with a wooden spoon. Sprinkle the taco seasoning over everything and stir well, letting the spices coat every bit. Cook until the turkey is no longer pink—about 6-7 minutes.
  3. Bring on the saucy goodness. Stir in the diced tomatoes and green chiles, juices and all. Let the mixture simmer for 3-4 minutes, allowing the flavors to mingle. You’ll know it’s ready when the kitchen smells like your favorite taqueria.
  4. Fold in the tortillas. Gently stir in the tortilla strips, letting them soften and soak up the sauce for 2-3 minutes. They’ll thicken the skillet beautifully—like a deconstructed enchilada!

At this point, your skillet should be bubbling with promise. But we’re not done yet—next comes the cheesiest, most irresistible part… (Stay tuned for the second half, where we’ll finish it off and talk toppings!)

Pro Tips, Variations & Substitutions

This Healthy Enchilada Skillet is wonderfully adaptable! Here are some ways to make it your own:

  • Protein Swap: Ground turkey, shredded chicken, or black beans work beautifully if you want to skip the beef
  • Veggie Boost: Stir in diced zucchini, bell peppers, or spinach for extra nutrition
  • Heat Level: Control the spice by using mild enchilada sauce or adding a diced jalapeño
  • Cheese Choices: Pepper jack adds a kick, while queso fresco gives a lovely creamy texture
  • Shortcut Tip: Use pre-shredded coleslaw mix instead of chopping cabbage to save time

What to Serve With Your Enchilada Skillet

This hearty dish stands on its own, but here are some delicious pairings:

  • Warm corn tortillas or crispy tortilla chips for scooping
  • Cooling avocado slices or homemade guacamole
  • A simple green salad with lime vinaigrette
  • Mexican-style cauliflower rice for a low-carb option
  • A dollop of Greek yogurt or sour cream to balance the spices

Storage & Reheating Tips

Leftovers taste even better the next day! Here’s how to keep them fresh:

  • Refrigerator: Store in an airtight container for 3-4 days
  • Freezer: Freeze portions for up to 3 months (thaw overnight before reheating)
  • Reheating: Warm in a skillet over medium heat with a splash of water, or microwave in 30-second intervals, stirring between
  • Pro Tip: Add fresh toppings like cilantro or avocado after reheating for bright flavor

Frequently Asked Questions

Can I make this vegetarian?
Absolutely! Swap the ground beef for black beans, pinto beans, or meatless crumbles. You’ll still get that satisfying texture and protein.

What if I don’t have an oven-safe skillet?
No problem! Simply transfer the mixture to a baking dish before adding the cheese and broiling.

How can I make this dairy-free?
Skip the cheese or use your favorite dairy-free alternative. The enchilada sauce and spices provide plenty of flavor on their own.

Is this recipe gluten-free?
Yes, as long as you use gluten-free enchilada sauce (many store-bought varieties are naturally GF).

Cozy Comfort in Every Bite

There’s something so comforting about this one-skillet wonder – the melty cheese, the savory spices, the way the cabbage stays just crisp enough to give each bite texture. It’s the kind of meal that fills your kitchen with the most delicious aromas and your belly with wholesome goodness. Whether you’re feeding a crowd or meal prepping for the week, this Healthy Enchilada Skillet is sure to become a regular in your rotation. Don’t be surprised when everyone asks for seconds!

Print
clock clock iconcutlery cutlery iconflag flag iconfolder folder iconinstagram instagram iconpinterest pinterest iconfacebook facebook iconprint print iconsquares squares iconheart heart iconheart solid heart solid icon

Healthy Enchilada Skillet

  • Author: Trusted Blog

Description

A quick and healthy one-pan enchilada skillet packed with protein and flavor.


Ingredients

Scale

For the Crust:

  • 1 tbsp olive oil
  • 1 lb ground turkey or chicken
  • 1 small onion, diced
  • 1 bell pepper, diced
  • 2 cloves garlic, minced
  • 1 can (15 oz) black beans, drained and rinsed
  • 1 can (10 oz) red enchilada sauce
  • 1 cup shredded cheese (cheddar or Mexican blend)
  • 1 tsp cumin
  • 1 tsp chili powder
  • Salt and pepper to taste
  • Fresh cilantro for garnish

Instructions

1. Prepare the Crust:

  1. Heat olive oil in a large skillet over medium heat. Add ground turkey or chicken and cook until browned, breaking it apart with a spoon.
  2. Add onion, bell pepper, and garlic. Sauté for 3-4 minutes until vegetables soften.
  3. Stir in black beans, enchilada sauce, cumin, chili powder, salt, and pepper. Simmer for 5 minutes.
  4. Sprinkle shredded cheese evenly over the top. Cover and cook for 2-3 minutes until cheese melts.
  5. Garnish with fresh cilantro and serve warm.

Notes

You can customize the seasonings to taste.