30 High Protein Anti-Inflammatory Dinners

high-protein-anti-inflammatory-dinners

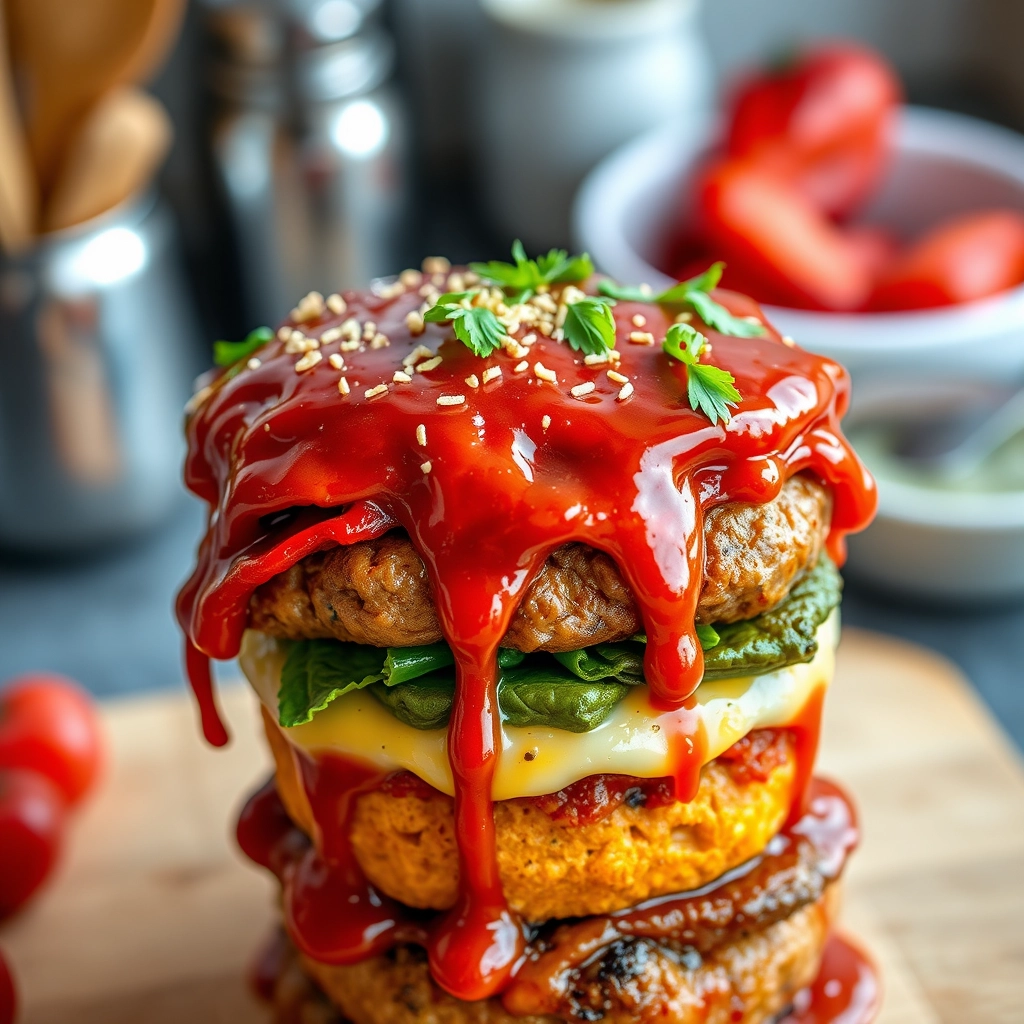
30 High Protein Anti-Inflammatory Dinners to Nourish Your Body & Soul

There’s something deeply comforting about a meal that not only satisfies your hunger but also makes you feel good from the inside out. I remember the first time I truly understood the power of anti-inflammatory eating—it was after a long week of feeling sluggish, achy, and just… off. A dear friend, who happens to be a nutritionist, gently nudged me toward meals rich in protein and inflammation-fighting ingredients. The difference? Like night and day. Now, I keep a rotation of these nourishing dinners in my back pocket—because good food should heal as much as it delights.

Ingredients That Do Double Duty

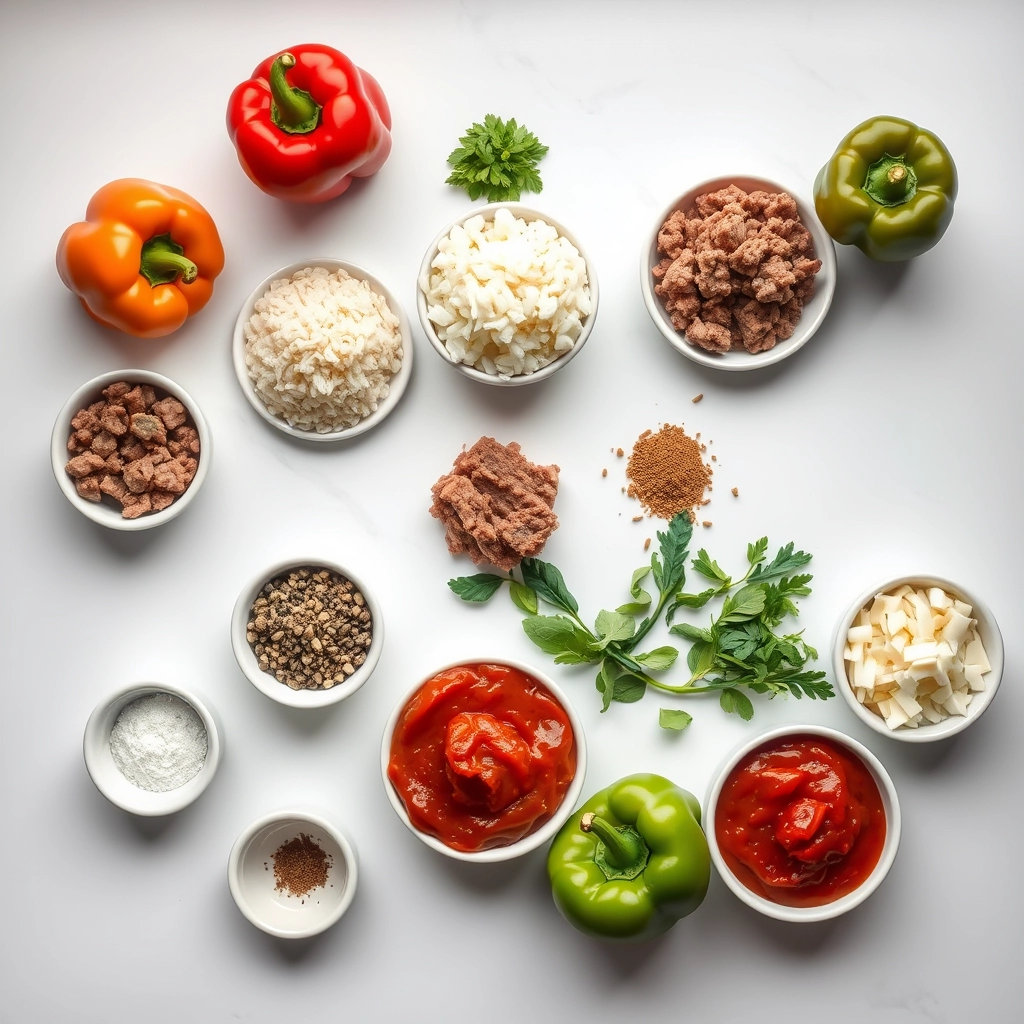
These dinners are built on ingredients that pack a punch—both in flavor and wellness benefits. Here’s what you’ll often find in my kitchen for these recipes:

  • Wild-caught salmon – A superstar for omega-3s and lean protein. I opt for wild-caught when possible—it’s richer in nutrients and has a cleaner flavor.
  • Turmeric & ginger – My golden duo for fighting inflammation. Fresh ginger adds a lovely zing, while turmeric (paired with black pepper for absorption) brings warmth.
  • Leafy greens (kale, spinach, Swiss chard) – I toss them into everything! They’re packed with antioxidants and fiber, and they wilt beautifully into soups and stir-fries.
  • Lentils & chickpeas – Plant-based protein powerhouses that keep meals hearty. I love how versatile they are—creamy in curries, crispy in salads.
  • Extra virgin olive oil – A drizzle of good-quality EVOO not only enhances flavor but also delivers healthy fats that help reduce inflammation.

Let’s Get Cooking: A Cozy Step-by-Step

One of my go-to weeknight favorites is a Turmeric-Ginger Salmon Bowl—it’s quick, vibrant, and packed with all the good stuff. Here’s how I make it:

  1. Marinate the salmon: In a small bowl, whisk together 1 tbsp grated ginger, 1 tsp turmeric, 1 minced garlic clove, 1 tbsp olive oil, and a squeeze of lemon. Coat two salmon fillets and let them sit for 10 minutes (or up to 30 if you have time). Tip: This is when I prep the rest of my ingredients—multitasking magic!
  2. Roast to perfection: Preheat your oven to 400°F (200°C). Place the salmon on a parchment-lined tray and roast for 12-15 minutes, depending on thickness. You’ll know it’s done when it flakes easily with a fork.
  3. Sauté your greens: While the salmon cooks, heat a drizzle of olive oil in a pan. Add a big handful of chopped kale or spinach and a pinch of salt. Sauté just until wilted—about 2 minutes. Personal touch: A sprinkle of red pepper flakes here adds a lovely warmth.

And just like that, you’re halfway to a bowl of vibrant, healing goodness. But wait—there’s more! The next steps (think: fluffy quinoa, creamy avocado, and a drizzle of tahini) will turn this into a meal you’ll crave. Stay tuned for the rest of the recipe and 29 more dinners that’ll make your body sing.

Pro Tips, Variations, and Substitutions

One of the best things about high-protein, anti-inflammatory dinners is how adaptable they can be! Here are a few ways to tweak these meals to suit your taste or dietary needs:

  • Protein Swaps: If a recipe calls for salmon but you’re not a fan, try wild-caught cod or even grilled chicken for a different flavor profile.
  • Vegetable Variations: Swap out spinach for kale or Swiss chard in sautéed dishes—just adjust cooking times slightly.
  • Spice Adjustments: If turmeric isn’t your thing, ginger and cinnamon also offer anti-inflammatory benefits and add warmth to dishes.
  • Dairy-Free Options: Use coconut milk or almond yogurt in place of dairy to keep things creamy without the inflammation.

What to Serve It With

Pairing your high-protein dinner with the right sides can elevate the meal and boost nutrition. Here are some perfect accompaniments:

  • Quinoa or Brown Rice: These whole grains add fiber and make the meal more filling.
  • Roasted Sweet Potatoes: A delicious source of complex carbs and beta-carotene.
  • Steamed Greens: Broccoli, asparagus, or Brussels sprouts add crunch and extra anti-inflammatory benefits.
  • Avocado Salad: A simple mix of avocado, cherry tomatoes, and lemon juice adds healthy fats and freshness.

Storage and Reheating Tips

Meal prepping these dinners? Here’s how to keep them tasting great:

  • Refrigerate: Store leftovers in airtight containers for up to 3–4 days.
  • Freeze: Most cooked proteins and stews freeze well for up to 3 months—just thaw overnight before reheating.
  • Reheating: Gently warm soups and stews on the stovetop with a splash of broth to maintain moisture. For grilled proteins, use an oven at 300°F to prevent drying out.

Frequently Asked Questions

Can I make these meals ahead of time?

Absolutely! Many of these dinners, like soups, stews, and roasted proteins, taste even better the next day as flavors meld. Just store them properly and reheat gently.

Are these recipes suitable for meal prep?

Yes! These meals are perfect for meal prep—just portion them into containers and refrigerate or freeze for easy weeknight dinners.

What if I don’t eat meat?

No problem! Swap animal proteins for plant-based options like lentils, chickpeas, or tempeh. They’re just as high in protein and anti-inflammatory benefits.

How can I make these meals more kid-friendly?

Try milder spices, smaller portions, or fun shapes (like turkey meatballs) to make these dinners appealing to little ones. Pairing them with familiar sides like whole-grain pasta or roasted carrots helps too!

Final Thoughts

Eating well doesn’t have to mean sacrificing flavor or comfort. These high-protein, anti-inflammatory dinners are designed to nourish your body while keeping your taste buds happy. Whether you’re meal prepping for the week or cooking a special dinner tonight, these recipes are here to make life a little easier—and a lot more delicious. Here’s to happy, healthy eating!

Print
clock clock iconcutlery cutlery iconflag flag iconfolder folder iconinstagram instagram iconpinterest pinterest iconfacebook facebook iconprint print iconsquares squares iconheart heart iconheart solid heart solid icon

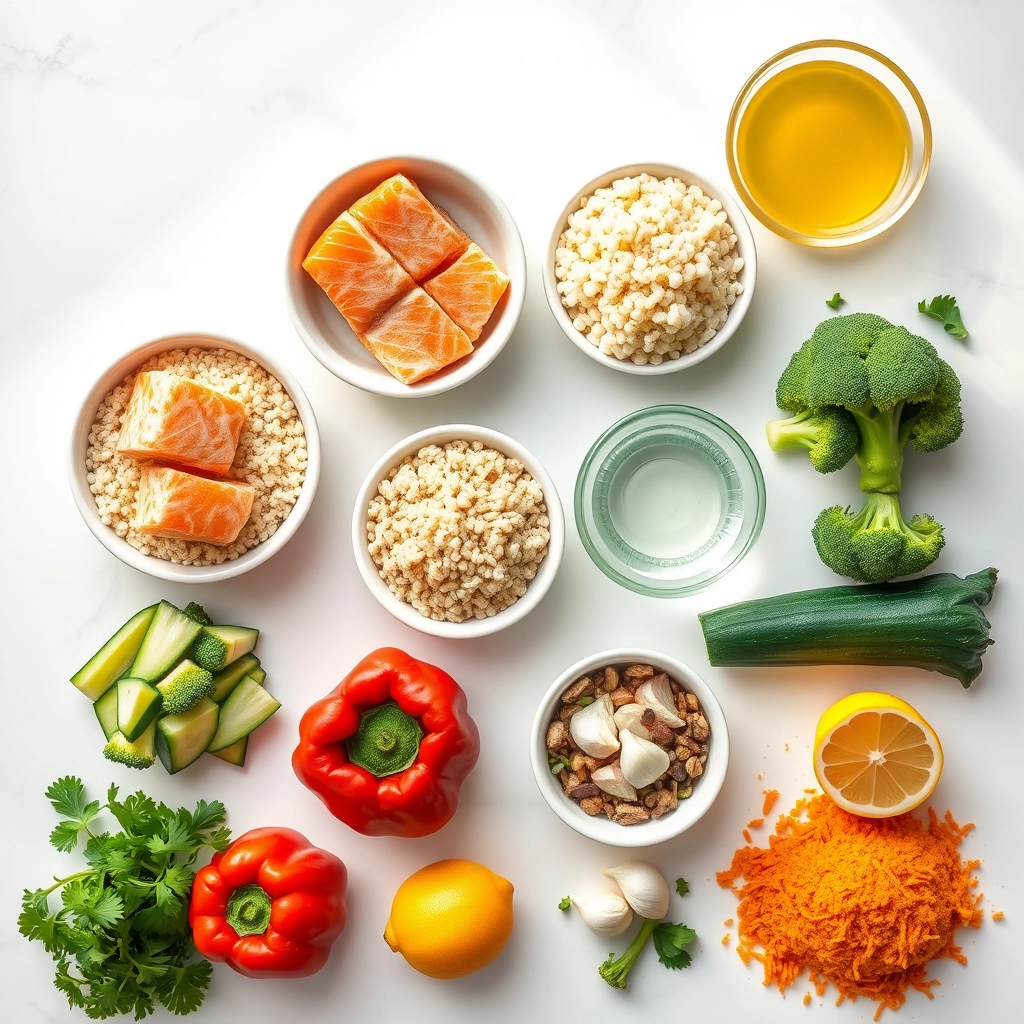
Lemon Garlic Salmon with Quinoa and Roasted Vegetables

  • Author: Trusted Blog

Description

A high-protein, anti-inflammatory dinner featuring omega-3 rich salmon, fiber-packed quinoa, and nutrient-dense roasted vegetables.


Ingredients

Scale

For the Crust:

  • 4 salmon fillets (6 oz each)
  • 1 cup quinoa, rinsed
  • 2 cups water or vegetable broth
  • 2 cups broccoli florets
  • 1 red bell pepper, sliced
  • 1 zucchini, sliced
  • 2 tbsp olive oil
  • 3 cloves garlic, minced
  • 1 lemon, juiced and zested
  • 1 tsp turmeric
  • 1/2 tsp black pepper
  • 1/2 tsp sea salt
  • 1 tbsp fresh parsley, chopped

Instructions

1. Prepare the Crust:

  1. Preheat oven to 400°F (200°C). Line a baking sheet with parchment paper.
  2. Toss broccoli, bell pepper, and zucchini with 1 tbsp olive oil, 1/2 tsp turmeric, and 1/4 tsp each salt and pepper. Spread on baking sheet.
  3. Roast vegetables for 20 minutes, stirring halfway through.
  4. While vegetables roast, cook quinoa in water or broth according to package instructions.
  5. In a small bowl, mix remaining olive oil, garlic, lemon juice, zest, turmeric, salt, and pepper. Brush over salmon fillets.
  6. After vegetables have roasted for 20 minutes, push to one side of pan and add salmon. Roast for 10-12 more minutes until salmon flakes easily.
  7. Fluff quinoa with fork and divide among plates. Top with salmon and vegetables. Garnish with fresh parsley.

Notes

You can customize the seasonings to taste.

Easy Mongolian Meatballs

easy-mongolian-meatballs

A Cozy Night In with Easy Mongolian Meatballs

There’s something about a chilly evening that makes me crave the kind of meal that wraps you in warmth—something savory, a little sweet, and utterly comforting. Last week, as rain tapped gently against the window, I found myself longing for the bold flavors of Mongolian beef but wanted something a bit more playful. That’s when these Easy Mongolian Meatballs were born. Tender, juicy meatballs glazed in a sticky, garlicky sauce—they’re the kind of dish that disappears before you’ve even set the table properly. And the best part? They come together in just about 30 minutes, making them perfect for busy weeknights or last-minute gatherings.

Ingredients You’ll Need

Before we dive into the recipe, let’s gather our ingredients. These meatballs are simple but packed with flavor, and the sauce? Oh, it’s downright addictive.

  • For the Meatballs:
    • 1 lb ground beef (I prefer 85/15 for juiciness, but leaner works too)
    • 1/2 cup breadcrumbs (Panko gives a lovely crunch!)
    • 1 large egg (our trusty binder)
    • 2 cloves garlic, minced (because more garlic is always better)
    • 1 tsp ginger, freshly grated (it adds such a bright, warm note)
    • 2 green onions, finely chopped (for a little freshness)
    • 1 tbsp soy sauce (the umami backbone)
    • 1/2 tsp black pepper (just a gentle kick)
  • For the Mongolian Sauce:
    • 1/2 cup soy sauce (low-sodium if you prefer)
    • 1/2 cup brown sugar (for that caramelized sweetness)
    • 1/4 cup water (to balance the richness)
    • 3 cloves garlic, minced (yes, again—it’s essential!)
    • 1 tsp ginger, grated (double the ginger, double the joy)
    • 1 tbsp hoisin sauce (for depth and a hint of spice)
    • 1 tbsp cornstarch (to thicken the sauce to glossy perfection)
    • 1 tbsp sesame oil (for that nutty finish)

Let’s Make the Meatballs

Now, onto the fun part—bringing these little flavor bombs to life! Don’t worry if you’re not a meatball pro; this recipe is forgiving and fuss-free.

  1. Prep the Meatball Mixture: In a large bowl, combine the ground beef, breadcrumbs, egg, minced garlic, grated ginger, chopped green onions, soy sauce, and black pepper. Use your hands to gently mix everything together—just until combined. Overworking the meat can make the meatballs tough, so a light touch is key.
  2. Shape the Meatballs: Roll the mixture into 1-inch balls (about the size of a walnut). If the mixture sticks to your hands, lightly dampen them with water. This batch should make around 20-24 meatballs, perfect for sharing (or not!).
  3. Cook to Golden Perfection: Heat a large skillet over medium-high heat and add a drizzle of oil. Once hot, add the meatballs in a single layer, leaving a little space between them. Let them cook undisturbed for about 2-3 minutes per side, until they’re beautifully browned all over. They don’t need to be fully cooked through yet—we’ll finish them in the sauce. Transfer them to a plate and set aside.

At this point, your kitchen will smell incredible—garlic, ginger, and savory beef mingling in the air. But trust me, the best is yet to come. Next, we’ll whip up that luscious Mongolian sauce and bring everything together in a sticky, sweet, and savory embrace.

Pro Tips, Variations, and Substitutions

Making these Mongolian meatballs is wonderfully flexible—here are some ways to make them your own:

  • Protein Swap: Ground turkey or chicken works just as well as beef for a lighter version.
  • Gluten-Free Option: Swap soy sauce for tamari or coconut aminos to keep it gluten-free.
  • Extra Veggies: Finely grated carrots or zucchini can be mixed into the meatballs for added nutrition.
  • Spice It Up: Add a pinch of red pepper flakes or a drizzle of sriracha to the sauce for heat.

What to Serve with Mongolian Meatballs

These flavorful meatballs pair beautifully with so many sides! Here are a few favorites:

  • Steamed jasmine rice or fluffy quinoa to soak up the sauce
  • Stir-fried vegetables like bell peppers, broccoli, or snap peas
  • Crisp sesame green beans or a simple cucumber salad
  • Buttery egg noodles for a comforting twist

Storage and Reheating Tips

Leftovers? No problem! Here’s how to keep them tasting fresh:

  • Refrigerator: Store in an airtight container for up to 3 days.
  • Freezer: Freeze cooked meatballs (without sauce) for up to 2 months. Thaw overnight before reheating.
  • Reheating: Warm in a skillet over medium heat with a splash of water or broth to revive the sauce.

Frequently Asked Questions

Can I make these meatballs ahead of time?
Absolutely! Prepare the meatballs and sauce separately, then combine and reheat when ready to serve.

Can I bake the meatballs instead of pan-frying?
Yes! Bake at 375°F (190°C) for 18–20 minutes until cooked through.

What’s the best way to keep meatballs tender?
Avoid overmixing the meat—gently combine ingredients just until incorporated.

Can I use frozen meatballs?
You can, but homemade will have better texture and flavor. If using frozen, thaw first and simmer in the sauce longer.

Final Thoughts

There’s something so comforting about these Mongolian meatballs—tender, saucy, and packed with flavor. Whether you’re serving them over rice for a weeknight dinner or bringing them to a potluck, they’re sure to be a hit. I hope this recipe becomes a staple in your kitchen, just like it is in mine. Happy cooking, friends!

Print
clock clock iconcutlery cutlery iconflag flag iconfolder folder iconinstagram instagram iconpinterest pinterest iconfacebook facebook iconprint print iconsquares squares iconheart heart iconheart solid heart solid icon

Easy Mongolian Meatballs

  • Author: Trusted Blog

Description

Juicy meatballs coated in a sweet and savory Mongolian sauce, perfect for a quick weeknight dinner.


Ingredients

Scale

For the Crust:

  • 1 lb ground beef
  • 1/2 cup breadcrumbs
  • 1 egg
  • 2 cloves garlic, minced
  • 1 tsp ginger, grated
  • 1/4 cup green onions, chopped
  • 1/2 cup soy sauce
  • 1/2 cup brown sugar
  • 1/4 cup water
  • 1 tbsp cornstarch
  • 1 tsp sesame oil
  • 1 tbsp vegetable oil

Instructions

1. Prepare the Crust:

  1. Preheat oven to 400°F (200°C). Line a baking sheet with parchment paper.
  2. In a large bowl, mix ground beef, breadcrumbs, egg, minced garlic, grated ginger, and half of the chopped green onions until well combined.
  3. Shape the mixture into 1-inch meatballs and place them on the prepared baking sheet.
  4. Bake for 15-20 minutes, or until the meatballs are cooked through.
  5. While the meatballs bake, prepare the sauce: In a saucepan over medium heat, combine soy sauce, brown sugar, water, and cornstarch. Stir until the sauce thickens, about 5 minutes. Remove from heat and stir in sesame oil.
  6. Heat vegetable oil in a large skillet over medium heat. Add the baked meatballs and pour the sauce over them. Toss gently to coat.
  7. Garnish with remaining green onions and serve hot over rice or noodles.

Notes

You can customize the seasonings to taste.

Creamy Rotel Pasta with Ground Beef

creamy-rotel-pasta-ground-beef

The Comforting Magic of Creamy Rotel Pasta with Ground Beef

There’s something about a busy weeknight that makes me crave a meal that’s both effortless and deeply satisfying. You know the kind—where the aroma alone wraps around you like a cozy blanket, and every bite feels like a warm hug. That’s exactly what this Creamy Rotel Pasta with Ground Beef delivers. I first stumbled upon this dish during one of those chaotic evenings when my pantry was looking sparse, but my hunger was anything but. A can of Rotel tomatoes, some ground beef, and a handful of pasta later, and voilà—dinner was saved. Now, it’s a regular in our rotation, and I have a feeling it’ll become one of yours too.

Ingredients You’ll Need

  • 1 lb ground beef – I like using 80/20 for the perfect balance of flavor, but lean beef works just as well if you prefer.
  • 1 small onion, diced – Yellow or white onions add a subtle sweetness that balances the spices.
  • 2 cloves garlic, minced – Because what’s a comforting pasta without garlic?
  • 1 (10 oz) can Rotel tomatoes – The star of the show! I use the original for a mild kick, but feel free to go spicy if you’re feeling bold.
  • 1 (8 oz) block cream cheese – Softened and cubed for easy melting. This is what gives the sauce its dreamy, velvety texture.
  • 2 cups chicken broth – Homemade or store-bought, it adds depth to the sauce.
  • 2 cups uncooked pasta – Penne or rotini work beautifully here—anything that holds onto that creamy sauce.
  • 1 tsp chili powder – Just enough to warm things up without overpowering.
  • ½ tsp cumin – A little earthiness to round out the flavors.
  • Salt and pepper to taste – Don’t skimp on seasoning—it makes all the difference!
  • Fresh cilantro or parsley (optional) – For a bright, herby finish.

Let’s Get Cooking

First, let’s brown that beautiful ground beef. Heat a large skillet over medium heat and add the ground beef, breaking it apart with a wooden spoon as it cooks. I like to let it get a little crispy around the edges—those browned bits add so much flavor! Once the beef is no longer pink, toss in the diced onion and minced garlic. Stir everything together and let it cook until the onions soften and turn translucent, about 3-4 minutes. The smell at this point is downright intoxicating.

Next, it’s time to bring in the Rotel. Pour in the entire can (juice and all!), along with the chili powder and cumin. Give it a good stir, letting the tomatoes mingle with the beef and spices. Now, here’s where the magic happens—add the cubed cream cheese and chicken broth. Stir gently as the cream cheese melts into the broth, creating a luscious, creamy sauce that’ll make your spoon stand up straight. If the sauce seems too thick, a splash more broth or even a little milk will loosen it right up.

Finally, stir in the uncooked pasta. Yes, you read that right—no boiling noodles separately here! The pasta cooks right in the sauce, soaking up all that incredible flavor. Cover the skillet and let it simmer for about 12-15 minutes, stirring occasionally, until the pasta is tender and the sauce has thickened beautifully. A little patience goes a long way here—trust me, it’s worth the wait.

Pro Tips for the Creamiest Rotel Pasta

This dish is wonderfully forgiving, but here are some tricks I’ve learned over the years to make it extra special:

  • Brown your beef well – Let it get some crispy edges for maximum flavor
  • Reserve pasta water – The starchy liquid helps create a silky sauce
  • Low and slow – Simmer your sauce gently to prevent the dairy from breaking

Delicious Variations to Try

One of my favorite things about this recipe is how easily it adapts to different tastes:

  • Protein swap: Ground turkey, chicken, or Italian sausage work beautifully
  • Vegetarian version: Skip the meat and add mushrooms or black beans
  • Extra kick: Stir in a tablespoon of taco seasoning or diced jalapeños
  • Cheese lovers: Mix in extra sharp cheddar or pepper jack

Perfect Pairings

This hearty pasta stands well on its own, but here’s what I love serving alongside it:

  • A crisp green salad with avocado and lime dressing
  • Warm garlic bread or buttery dinner rolls
  • Roasted vegetables like zucchini or bell peppers
  • For gatherings, I’ll often set out toppings like sour cream, green onions, and extra cheese

Keeping and Reheating Leftovers

This dish makes fantastic leftovers! Here’s how to enjoy it later:

  • Storage: Keep in an airtight container in the fridge for 3-4 days
  • Freezing: Portion into freezer bags (it keeps well for 2-3 months)
  • Reheating: Add a splash of milk when warming on the stove to restore creaminess
  • Pro tip: The flavors actually deepen overnight – it might taste even better the next day!

Frequently Asked Questions

Can I use fresh tomatoes instead of Rotel?
Absolutely! Use about 1 1/2 cups diced fresh tomatoes and add a small can of green chiles for that signature Rotel flavor.

What pasta shape works best?
I love rotini or penne because they hold the sauce so well, but any short pasta will do. Even elbow macaroni makes a fun, kid-friendly version!

Is there a way to make this less spicy?
Yes! Simply use mild Rotel or substitute with a can of regular diced tomatoes with green chiles. You can also reduce or omit the cayenne pepper.

Can I make this in the slow cooker?
You sure can! Brown the beef first, then combine everything except the pasta in the slow cooker. Cook on low for 4-5 hours, stir in cooked pasta just before serving.

Final Thoughts

There’s something so comforting about a big bowl of this creamy, slightly spicy pasta. It’s the kind of meal that brings everyone to the table – whether it’s a busy weeknight or a casual weekend gathering. The best part? It leaves you with a full belly and happy memories. I hope this recipe becomes a regular in your rotation, just like it is in mine. Don’t forget to save some for lunch tomorrow – it’s one of those rare dishes that might taste even better the second day!

Print
clock clock iconcutlery cutlery iconflag flag iconfolder folder iconinstagram instagram iconpinterest pinterest iconfacebook facebook iconprint print iconsquares squares iconheart heart iconheart solid heart solid icon

Creamy Rotel Pasta with Ground Beef

  • Author: Trusted Blog

Description

A rich and flavorful pasta dish with ground beef, creamy cheese, and zesty Rotel tomatoes.


Ingredients

Scale

For the Crust:

  • 1 lb ground beef
  • 8 oz pasta (such as penne or rotini)
  • 1 can (10 oz) Rotel diced tomatoes with green chilies
  • 1 cup heavy cream
  • 1 cup shredded cheddar cheese
  • 1/2 tsp garlic powder
  • 1/2 tsp onion powder
  • 1/2 tsp salt
  • 1/4 tsp black pepper
  • 1 tbsp olive oil

Instructions

1. Prepare the Crust:

  1. Cook pasta according to package instructions. Drain and set aside.
  2. In a large skillet, heat olive oil over medium heat. Add ground beef and cook until browned, breaking it into small pieces.
  3. Drain excess fat from the beef, then stir in Rotel tomatoes, heavy cream, garlic powder, onion powder, salt, and pepper.
  4. Simmer for 5 minutes, then stir in shredded cheddar cheese until melted and smooth.
  5. Add cooked pasta to the skillet and toss until well coated with the creamy sauce.
  6. Serve hot, garnished with extra cheese if desired.

Notes

You can customize the seasonings to taste.

EASY STUFFED BELL PEPPERS

easy-stuffed-bell-peppers

Easy Stuffed Bell Peppers: A Cozy Weeknight Savior

There’s something so comforting about a dish that feels like a hug—especially on those evenings when the day has been long, and the couch is calling your name. That’s exactly what these Easy Stuffed Bell Peppers are for me. I remember the first time I made them—it was a chilly autumn night, and I had a handful of colorful peppers sitting in my fridge, begging to be turned into something warm and satisfying. With a little rice, some ground beef, and a sprinkle of cheese, I created a meal that’s become a staple in our home. Simple, hearty, and packed with flavor, these stuffed peppers are the kind of dish that makes weeknight cooking feel effortless (and maybe even a little magical).

What You’ll Need

Gather these ingredients, and let’s make something delicious together:

  • 4 large bell peppers – Any color works, but I love the sweetness of red or yellow ones. They’re like little edible bowls!
  • 1 lb ground beef – Lean or regular, whatever you prefer. You could also swap in ground turkey or plant-based crumbles for a lighter twist.
  • 1 cup cooked rice – White, brown, or even quinoa—whatever you have on hand. Day-old rice works perfectly here.
  • 1 small onion, diced – The humble onion adds such depth of flavor. Don’t skip it!
  • 2 cloves garlic, minced – Because everything tastes better with garlic.
  • 1 (15 oz) can diced tomatoes – I like the ones with Italian seasoning for extra flavor, but plain works too.
  • 1 tsp dried oregano – A little herbaceous magic.
  • 1 tsp smoked paprika – This adds a subtle warmth that makes the filling irresistible.
  • 1 cup shredded cheese – Mozzarella, cheddar, or a blend—go with your favorite melty variety.
  • Salt and pepper to taste – The essentials!

Let’s Get Cooking

Now, let’s turn these simple ingredients into a meal that’ll have everyone asking for seconds. Here’s how to make it happen:

  1. Prep the peppers. Slice the tops off the bell peppers and remove the seeds and membranes. If they’re a bit wobbly, you can trim a tiny bit off the bottom to help them sit flat—just be careful not to cut through! I like to give the insides a quick rinse to make sure no stray seeds are hiding.
  2. Par-cook the peppers. Place them in a baking dish and pop them in a 375°F oven for about 10 minutes while you prepare the filling. This softens them just enough so they’re tender but still hold their shape.
  3. Brown the beef. In a large skillet over medium heat, cook the ground beef until it’s no longer pink, breaking it up as it cooks. Drain any excess fat—unless you love that richness, in which case, leave a little in for flavor!
  4. Sauté the aromatics. Add the diced onion to the skillet and cook until it’s soft and translucent, about 3-4 minutes. Toss in the garlic and stir for another 30 seconds—just until it’s fragrant. (Pro tip: Don’t let the garlic brown too much, or it’ll turn bitter.)
  5. Bring it all together. Stir in the cooked rice, diced tomatoes, oregano, smoked paprika, salt, and pepper. Let everything simmer together for a few minutes so the flavors can mingle. Taste and adjust the seasoning—this is your chance to make it perfect!

At this point, your kitchen should smell absolutely heavenly. Now comes the fun part—stuffing those peppers!

Pro Tips, Variations, and Substitutions

Stuffed bell peppers are wonderfully versatile, so don’t be afraid to get creative! Here are some ideas to make them your own:

  • Protein Swap: Ground turkey, chicken, or even plant-based crumbles work just as well as beef.
  • Cheese Lover’s Twist: Swap cheddar for mozzarella, pepper jack, or feta for a different flavor profile.
  • Grain-Free Option: Skip the rice and add quinoa, cauliflower rice, or extra veggies like zucchini.
  • Spice It Up: Add a pinch of cayenne, diced jalapeños, or a dash of smoked paprika for extra heat.
  • Vegetarian-Friendly: Use lentils or black beans instead of meat for a hearty plant-based version.

What to Serve With Stuffed Bell Peppers

These colorful peppers are a meal on their own, but they pair beautifully with a few simple sides:

  • A crisp green salad with a tangy vinaigrette
  • Garlic bread or warm crusty rolls
  • Roasted potatoes or a light quinoa salad
  • A dollop of sour cream or fresh avocado slices for extra creaminess

Storage and Reheating Tips

Leftovers? No problem! Stuffed bell peppers keep well and taste just as delicious the next day.

  • Refrigerator: Store in an airtight container for up to 3–4 days.
  • Freezer: Wrap cooled peppers individually in foil and freeze for up to 3 months. Thaw in the fridge before reheating.
  • Reheating: Warm in the oven at 350°F (175°C) for 15–20 minutes or microwave for 2–3 minutes until heated through.

Frequently Asked Questions

Can I make stuffed bell peppers ahead of time?
Absolutely! Assemble them, cover, and refrigerate for up to 24 hours before baking. Add a few extra minutes to the cooking time if they go into the oven cold.

Do I have to pre-cook the rice?
Yes, the rice should be cooked before stuffing the peppers to ensure it softens properly in the oven. Leftover rice works great here!

How do I keep the peppers from getting soggy?
Blanching them briefly before stuffing helps, but you can also bake them uncovered for the last 10 minutes to crisp up the tops.

Can I use mini bell peppers?
Definitely! Mini peppers make adorable appetizers—just reduce the baking time to 20–25 minutes.

Final Thoughts

Stuffed bell peppers are one of those comforting dishes that feel like a warm hug on a plate. Whether you stick to the classic recipe or put your own spin on it, they’re sure to become a family favorite. The best part? They’re as fun to make as they are to eat—so grab those peppers, get stuffing, and enjoy every delicious bite!

Print
clock clock iconcutlery cutlery iconflag flag iconfolder folder iconinstagram instagram iconpinterest pinterest iconfacebook facebook iconprint print iconsquares squares iconheart heart iconheart solid heart solid icon

Easy Stuffed Bell Peppers

  • Author: Trusted Blog

Description

A simple and delicious recipe for bell peppers stuffed with a flavorful mixture of ground beef, rice, and seasonings.


Ingredients

Scale

For the Crust:

  • 4 large bell peppers (any color)
  • 1 lb ground beef
  • 1 cup cooked rice
  • 1 small onion, diced
  • 2 cloves garlic, minced
  • 1 can (15 oz) tomato sauce
  • 1 tsp salt
  • 1/2 tsp black pepper
  • 1 tsp dried oregano
  • 1 cup shredded cheese (cheddar or mozzarella)

Instructions

1. Prepare the Crust:

  1. Preheat oven to 375°F (190°C). Cut the tops off the bell peppers and remove seeds and membranes.
  2. In a skillet, brown the ground beef over medium heat. Drain excess fat.
  3. Add diced onion and minced garlic to the skillet. Cook until onion is translucent.
  4. Stir in cooked rice, tomato sauce, salt, pepper, and oregano. Simmer for 5 minutes.
  5. Stuff the bell peppers with the beef and rice mixture. Place in a baking dish.
  6. Top each pepper with shredded cheese. Cover with foil and bake for 25 minutes.
  7. Remove foil and bake for an additional 5 minutes until cheese is bubbly and golden.

Notes

You can customize the seasonings to taste.

Cheesy Garlic Chicken Wraps

cheesy-garlic-chicken-wraps

Cheesy Garlic Chicken Wraps: The Ultimate Comfort Food Hug

There’s something about a warm, cheesy wrap that feels like a cozy blanket on a rainy day—or in my case, a much-needed pick-me-up after a whirlwind week of school runs and deadlines. Last Thursday, as I stood in my kitchen with a craving for something indulgent yet simple, these Cheesy Garlic Chicken Wraps came to life. The aroma of garlic butter sizzling in the pan alone was enough to make my little ones peek in, noses twitching like curious bunnies. By the time the cheese melted into golden gooeyness, we were all gathered around the stove, forks at the ready. And just like that, a new family favorite was born.

Ingredients You’ll Need (and Why You’ll Love Them)

  • 2 boneless, skinless chicken breasts – Tender, lean, and the perfect protein canvas for all that garlicky goodness. I like to slice them thinly for quicker cooking.
  • 3 cloves garlic, minced – Because life’s too short for timid flavors. Fresh is best here—trust me.
  • 2 tbsp butter – The rich base that’ll make your kitchen smell like a French bistro.
  • 1 tsp smoked paprika – A whisper of warmth and depth. If you don’t have smoked, regular paprika will do, but the smokiness is *chef’s kiss*.
  • 1 cup shredded mozzarella – The meltiest, stretchiest hug for your chicken. A blend of cheddar and mozzarella works wonders too.
  • 4 large flour tortillas – Soft, pliable, and ready to cradle all that cheesy goodness. For a crispier bite, try lightly toasting them first.
  • Handful of fresh spinach or arugula – A pop of green for balance (and to pretend we’re being virtuous).
  • Salt & pepper to taste – The unsung heroes of every great dish.

Let’s Make the Magic Happen

Step 1: Start by butterflying your chicken breasts—slice them horizontally so they cook evenly and stay juicy. Season both sides generously with salt, pepper, and that glorious smoked paprika. If you’ve got time, let them sit for 10 minutes to soak up the flavors (but no stress if you’re hangry—I’ve been there).

Step 2: Melt the butter in a large skillet over medium heat. Add the minced garlic and let it sizzle for just 30 seconds until fragrant (but not browned—burnt garlic is a tragedy we shall avoid). This is when your kitchen starts smelling like heaven.

Step 3: Add the chicken to the skillet, letting it sear for about 4-5 minutes per side until golden and cooked through. Pro tip: Resist the urge to move it around too much! Letting it sit ensures a beautiful crust. Once done, transfer the chicken to a cutting board and slice it into tender strips.

Step 4: Now, the fun part—assembly! Lay out your tortillas and divide the chicken strips evenly among them. Sprinkle each with a generous handful of mozzarella (this is no time for restraint) and a few leaves of spinach. The residual heat from the chicken will start melting the cheese dreamily.

Pro Tips, Variations, and Substitutions

These Cheesy Garlic Chicken Wraps are wonderfully adaptable to suit your tastes or what you have on hand. Here are some ideas to make them your own:

  • Protein Swap: Not a chicken fan? Try ground turkey, shredded beef, or even black beans for a vegetarian twist.
  • Cheese Choices: While mozzarella melts beautifully, cheddar, pepper jack, or even feta can add exciting flavor variations.
  • Wrap Alternatives: Use whole wheat tortillas for extra fiber, or lettuce leaves for a low-carb option.
  • Extra Veggies: Sneak in some spinach, bell peppers, or mushrooms for added nutrition.
  • Spice It Up: Add a pinch of red pepper flakes or a dash of hot sauce for those who like it spicy.

What to Serve With Cheesy Garlic Chicken Wraps

These wraps are satisfying on their own, but they pair beautifully with:

  • A crisp green salad with lemon vinaigrette
  • Roasted sweet potato wedges
  • Fresh vegetable sticks with ranch dip
  • A bowl of tomato soup for cozy comfort
  • Sweet corn on the cob in summer months

Storage and Reheating Tips

These wraps taste best fresh, but here’s how to enjoy leftovers:

  • Refrigeration: Store assembled wraps tightly wrapped in foil or plastic for up to 2 days.
  • Freezing: Freeze before cooking (without fresh veggies) for up to 1 month. Thaw overnight before heating.
  • Reheating: Warm in a 350°F oven for 10-15 minutes until heated through. The microwave works in a pinch but may soften the tortilla.
  • Make-Ahead: Prep the chicken filling up to 3 days ahead for quick assembly.

Frequently Asked Questions

Can I make these wraps ahead for meal prep?

Absolutely! Prepare the filling and store separately from tortillas. Assemble just before eating to prevent soggy wraps.

How can I make these wraps gluten-free?

Simply use your favorite gluten-free tortillas and double-check that your garlic sauce ingredients are GF.

What’s the best way to prevent the wraps from falling apart?

Don’t overfill them, and be sure to fold in the sides before rolling tightly. A quick toast in the pan helps seal them too.

Can I use pre-cooked chicken?

Yes! Rotisserie chicken works wonderfully here – just shred it and mix with the garlic sauce.

Final Thoughts

There’s something so comforting about pulling apart a warm, cheesy wrap and seeing that stretchy melted cheese. These Cheesy Garlic Chicken Wraps have become a regular in our meal rotation because they’re just as perfect for busy weeknights as they are for casual weekend lunches. Whether you stick to the classic recipe or try one of the fun variations, I hope these wraps bring as much joy to your table as they do to mine. Don’t forget to have napkins ready – the best meals are often the messiest!

Print
clock clock iconcutlery cutlery iconflag flag iconfolder folder iconinstagram instagram iconpinterest pinterest iconfacebook facebook iconprint print iconsquares squares iconheart heart iconheart solid heart solid icon

Cheesy Garlic Chicken Wraps

  • Author: Trusted Blog

Description

Delicious and easy-to-make chicken wraps loaded with cheese and garlic flavor.


Ingredients

Scale

For the Crust:

  • 2 boneless, skinless chicken breasts
  • 4 large flour tortillas
  • 1 cup shredded mozzarella cheese
  • 1/2 cup grated parmesan cheese
  • 3 cloves garlic, minced
  • 2 tbsp butter, melted
  • 1 tsp dried oregano
  • 1/2 tsp salt
  • 1/4 tsp black pepper
  • 1 tbsp olive oil
  • 1/2 cup chopped fresh parsley

Instructions

1. Prepare the Crust:

  1. Preheat oven to 375°F (190°C).
  2. Cut chicken breasts into thin strips. Season with salt and pepper.
  3. Heat olive oil in a pan over medium heat. Cook chicken until no longer pink, about 6-8 minutes. Remove from heat.
  4. In a small bowl, mix melted butter, minced garlic, and oregano.
  5. Brush tortillas with garlic butter mixture, leaving a 1-inch border.
  6. Divide cooked chicken, mozzarella, and parmesan among tortillas. Sprinkle with parsley.
  7. Roll up tortillas tightly and place seam-side down on a baking sheet.
  8. Bake for 10-12 minutes until cheese is melted and tortillas are golden.
  9. Let cool for 2 minutes before serving.

Notes

You can customize the seasonings to taste.