Table of Contents
Best Creamy Pistachio Cake: The Only Recipe You’ll Ever Need
Imagine craving a slice of the ultimate creamy pistachio cake that transforms your everyday dessert into a luxurious treat. This Best Creamy Pistachio Cake recipe from exorecipes.com is your go-to pistachio cake recipe, packed with an irresistibly creamy pistachio infusion that makes every bite melt in your mouth. Whether you’re a baking novice or a seasoned pro, this homemade pistachio cake is easy to whip up, delivering moist layers infused with rich pistachio flavor and topped with fluffy whipped frosting. Say goodbye to dry cakes and hello to the best pistachio cake that’s perfect for family gatherings or a simple weeknight indulgence.
This Best Creamy Pistachio Cake boasts a symphony of textures and flavors that will tantalize your taste buds. Picture the nutty crunch of fresh pistachios blending seamlessly with the velvety smoothness of the pudding-infused batter, creating a moist, tender crumb that’s impossible to resist. The aroma of baking fills your kitchen with hints of sweet vanilla and earthy pistachios, evoking memories of cozy afternoons. Topped with a light, airy whipped cream frosting, each forkful offers a delightful contrast—cool, creamy sweetness balanced by the subtle, toasted notes of pistachios, making this easy pistachio cake a standout homemade dessert.
What sets this Best Creamy Pistachio Cake recipe apart on exorecipes.com is our commitment to providing a foolproof, chef-tested guide that’s been perfected for home cooks. Drawing from the expertise of Chef Sally, we’ll reveal the “Chef’s Secret” that elevates this pistachio cake recipe to new heights, ensuring you achieve professional results every time. You’ll learn insider tips on achieving the creamiest texture, simple substitutions, and answers to common questions like how to maximize pistachio flavor. Stick around for a comprehensive resource that makes baking this homemade pistachio cake not just easy, but incredibly rewarding.
Why This Best Creamy Pistachio Cake Recipe is a Game-Changer
The secret behind this Best Creamy Pistachio Cake lies in the irresistibly creamy pistachio infusion from the instant pistachio pudding mix, which we weave into the batter for an unparalleled moistness and flavor depth. This unique angle ensures the cake remains extra creamy without the need for excessive fats, making it lighter yet luxuriously textured. Chef Sally’s technique involves fully dissolving the pudding mix into the batter, allowing it to release its natural oils and essences for a vibrant green hue and intense nutty taste that sets this pistachio cake recipe apart from ordinary versions.
For unbeatable texture, the science is simple: the combination of eggs and oil creates a stable emulsion that traps air during beating, resulting in a fluffy yet dense crumb. This high-hydration batter from the water and pudding mix prevents dryness, ensuring every slice of this easy pistachio cake is perfectly tender. We’ve tested this recipe multiple times to guarantee foolproof results, even for beginners, with consistent feedback highlighting its reliability and superior homemade pistachio cake quality.
Ingredient Spotlight: Quality Makes the Difference
Yellow Cake Mix: This base provides a reliable foundation for our Best Creamy Pistachio Cake, offering a light and airy structure that absorbs the pistachio flavors beautifully. Opt for a high-quality brand without artificial preservatives to enhance the overall taste—think of it as the canvas for your pistachio masterpiece. If you’re avoiding mixes, substitute with 2 cups of all-purpose flour, 1.5 cups sugar, 3 tsp baking powder, and a pinch of salt for a from-scratch version that still keeps this pistachio cake recipe easy and fluffy.
Instant Pistachio Pudding Mix: The star of this homemade pistachio cake, this ingredient delivers the creamy pistachio infusion that makes our recipe unbeatable. Its powdered base thickens the batter and infuses intense nutty flavor, creating that signature creaminess. Always choose a fresh box for the best results; if unavailable, pistachio paste can be a substitute, but use half the amount and adjust for sweetness to maintain the balance in this Best Creamy Pistachio Cake.
Eggs: Fresh large eggs act as binders and emulsifiers in this pistachio cake recipe, contributing to the moist texture and rise. They help incorporate air for a lighter crumb, so use room-temperature eggs for better blending. For an egg-free version, try flax eggs (1 tbsp ground flaxseed mixed with 3 tbsp water per egg) to keep this easy pistachio cake vegan-friendly without sacrificing structure.
Vegetable Oil: This neutral oil ensures a tender, moist Best Creamy Pistachio Cake by coating the flour particles and preventing gluten development. It’s key for that melt-in-your-mouth feel, but you can swap it with melted coconut oil for a subtle tropical twist that complements the pistachios in this homemade pistachio cake.
Chopped Pistachios: Adding texture and authentic pistachio flavor, these nuts are folded in for a delightful crunch. Use unsalted, freshly shelled pistachios for the best taste and to control salt levels in your Best Creamy Pistachio Cake. If you’re allergic, chopped almonds can mimic the crunch while keeping this pistachio cake recipe accessible.
For Frosting: Heavy Cream, Powdered Sugar, and Vanilla Extract: Heavy cream whips into a stable, creamy topping that enhances the pistachio theme. Powdered sugar sweetens without graininess, and pure vanilla extract adds depth—avoid imitation for a more natural flavor. For a dairy-free option, use coconut cream instead of heavy cream to adapt this easy pistachio cake for various dietary needs.
Step-by-Step Instructions
Step 1: Preparing the Pan
Preheat your oven to 350°F (175°C) and generously grease a 9×13 inch baking pan with butter or non-stick spray. This ensures your Best Creamy Pistachio Cake releases easily and maintains its shape.
Pro Tip: Line the pan with parchment paper for effortless removal, preventing any sticking that could mar the cake’s perfect edges.
Step 2: Combining the Ingredients
In a large bowl, combine the yellow cake mix, instant pistachio pudding mix, eggs, water, and vegetable oil. Beat on medium speed for 2 minutes until smooth and well-incorporated, creating the creamy base for your homemade pistachio cake.
Common Mistake to Avoid: Don’t overmix the batter, as this can make the cake tough; stop once it’s blended to preserve that light, airy texture in this pistachio cake recipe.
Step 3: Folding in Pistachios
Gently fold in the 1 cup of chopped pistachios into the batter, then pour it evenly into the prepared pan. This step adds the signature crunch that elevates your Best Creamy Pistachio Cake.
Pro Tip: Use a spatula for folding to keep the pistachios evenly distributed without deflating the batter, ensuring every slice of this easy pistachio cake has balanced flavor.
Step 4: Baking the Cake
Bake for 30-35 minutes, or until a toothpick inserted in the center comes out clean. This step locks in the moist, creamy pistachio infusion that makes this homemade pistachio cake irresistible.
Common Mistake to Avoid: Overbaking can dry out the cake, so check at 30 minutes to maintain that perfect, tender crumb in your Best Creamy Pistachio Cake.
Step 5: Cooling and Frosting
Allow the cake to cool completely in the pan. For the frosting, whip the heavy cream, powdered sugar, and vanilla extract until stiff peaks form, then spread it evenly over the cooled cake for a luscious finish on your pistachio cake recipe.
Pro Tip: Chill your mixing bowl and beaters before whipping for firmer peaks, enhancing the creamy texture of this easy pistachio cake.
Step 6: Refrigerating
Refrigerate the frosted cake for at least 1 hour before serving to set the flavors and achieve the ultimate creaminess in your Best Creamy Pistachio Cake.
Common Mistake to Avoid: Skipping this chill time can make the frosting runny, so patience is key for the best results in this homemade pistachio cake.
Serving & Presentation
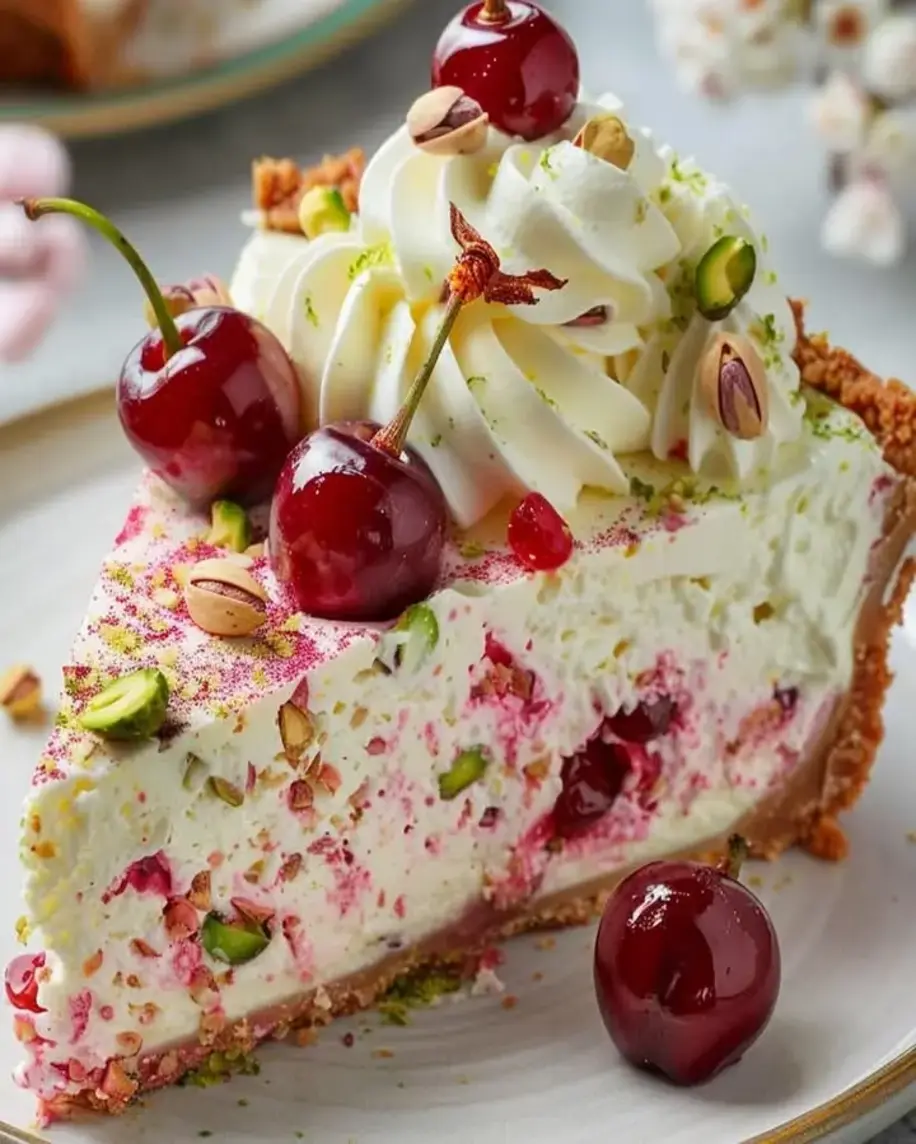
Elevate your Best Creamy Pistachio Cake with creative plating by slicing it into generous portions and garnishing with extra chopped pistachios or edible flowers for a pop of color. The whipped frosting pairs beautifully with fresh berries or a dollop of yogurt, complementing the nutty pistachio flavors. This easy pistachio cake shines as a standalone dessert or alongside a light fruit salad, making it ideal for brunches, parties, or even as a decadent end to a homemade dinner.
Make-Ahead & Storage Solutions
Make-Ahead Strategy: Prepare the batter up to 2 days in advance and store it in the fridge, or bake the cake ahead and frost it the day of serving for freshness in this pistachio cake recipe.
Storing Leftovers: Keep leftovers in an airtight container in the refrigerator for up to 3 days to preserve the creamy texture of your Best Creamy Pistachio Cake; for longer storage, freeze unfrosted slices for up to 2 months.
The Best Way to Reheat: Thaw frozen slices in the fridge overnight, then warm gently in the microwave for 10-15 seconds to restore the moist, homemade pistachio cake’s original flavor and texture without melting the frosting.
Frequently Asked Questions (FAQ)
What makes a pistachio cake creamy?
A pistachio cake achieves its creaminess through ingredients like instant pistachio pudding mix, which adds moisture and a rich, velvety texture, as seen in our Best Creamy Pistachio Cake recipe. The pudding infuses the batter with fats and stabilizers, preventing dryness and enhancing the overall mouthfeel. In this easy pistachio cake, whipping the frosting to stiff peaks also contributes to that luxurious creaminess, making it a standout homemade pistachio cake.
How do you get the best pistachio flavor in a cake?
To maximize pistachio flavor in a cake, use fresh, high-quality pistachios and incorporate them both in the batter and as a topping, like in our pistachio cake recipe. Toasting the nuts briefly before adding them releases their oils for a deeper taste, while using pistachio pudding mix ensures an authentic infusion. For this Best Creamy Pistachio Cake, we recommend avoiding imitation extracts and focusing on real ingredients to elevate your homemade pistachio cake’s flavor profile.
Can I use pistachio paste instead of crushed pistachios for this cake?
Yes, you can substitute pistachio paste for crushed pistachios in this Best Creamy Pistachio Cake, but use it sparingly—about half the amount—to avoid overpowering the batter. Pistachio paste provides a concentrated flavor and creamier texture, making it a great swap for a more intense pistachio experience in your easy pistachio cake. Adjust sweetness as needed, since paste is often sweeter, ensuring your homemade pistachio cake remains balanced.
What is the best frosting for a creamy pistachio cake?
The best frosting for a creamy pistachio cake is a simple whipped cream frosting, as featured in our pistachio cake recipe, because it complements the nutty flavors without overwhelming them. Made with heavy cream, powdered sugar, and vanilla, it adds lightness and creaminess. For variations in this Best Creamy Pistachio Cake, consider adding a hint of pistachio extract to the frosting for an extra layer of flavor in your homemade pistachio cake.
Can this recipe be made gluten-free?
Absolutely, you can make this Best Creamy Pistachio Cake gluten-free by swapping the yellow cake mix for a gluten-free alternative, such as one made from almond or rice flour. Ensure all other ingredients, like the pudding mix, are certified gluten-free to avoid cross-contamination, keeping the moist texture intact for a delicious homemade pistachio cake that’s accessible to everyone.
Is this pistachio cake suitable for beginners?
Yes, this easy pistachio cake recipe is perfect for beginners due to its straightforward steps and common ingredients. With clear instructions and tips, even novice bakers can achieve success with our Best Creamy Pistachio Cake, building confidence in the kitchen while creating a flavorful homemade treat.
Tried This Recipe? Leave a Comment!
Did you make this recipe? I’d love to hear how it turned out! Please leave a comment and a rating below. Your feedback helps other home cooks and supports exorecipes!
For more delicious inspiration, follow me on Pinterest!
.
Print
Best Creamy Pistachio Cake
- Prep Time: 15 minutes
- Cook Time: 35 minutes
- Total Time: 50 minutes
- Yield: 12 1x
- Method: Dessert
- Cuisine: American
Description
A moist and flavorful cake infused with creamy pistachio pudding, topped with whipped frosting for a delightful dessert.
Ingredients
- 1 package yellow cake mix
- 1 package (3.4 oz) instant pistachio pudding mix
- 4 large eggs
- 1 cup water
- 1/2 cup vegetable oil
- 1 cup chopped pistachios
- For frosting: 1 cup heavy cream, 1/4 cup powdered sugar, 1 tsp vanilla extract
Instructions
- Preheat oven to 350°F (175°C) and grease a 9×13 inch baking pan.
- In a large bowl, combine cake mix, pistachio pudding mix, eggs, water, and oil; beat on medium speed for 2 minutes.
- Fold in chopped pistachios and pour batter into the prepared pan.
- Bake for 30-35 minutes or until a toothpick inserted in the center comes out clean.
- Allow cake to cool completely. For frosting, whip heavy cream, powdered sugar, and vanilla until stiff peaks form, then spread over the cake.
- Refrigerate for at least 1 hour before serving.
Notes
Use fresh pistachios for the best flavor and texture. Store leftovers in an airtight container in the refrigerator for up to 3 days.
Nutrition
- Calories: 350
- Sugar: 28g
- Fat: 18g
- Carbohydrates: 45g
- Protein: 5g