Easy No-Bake Oats Energy Balls Recipe

easy-no-bake-oats-energy-balls

The Day I Fell in Love With No-Bake Energy Balls

It was one of those chaotic Tuesday mornings when my toddler had hidden my car keys in his toy bin (again) and I was running late for a playdate. As I rummaged through the pantry for something quick yet nourishing to grab, my eyes landed on a jar of oats, a half-empty peanut butter jar, and some lonely honey bear sitting at the back. In that moment, my first batch of no-bake energy balls was born – sticky, imperfect, but absolutely life-saving. Now they’re my secret weapon for busy days, hiking snacks, and that inevitable 3pm slump when even the strongest coffee can’t compete with a sugar crash.

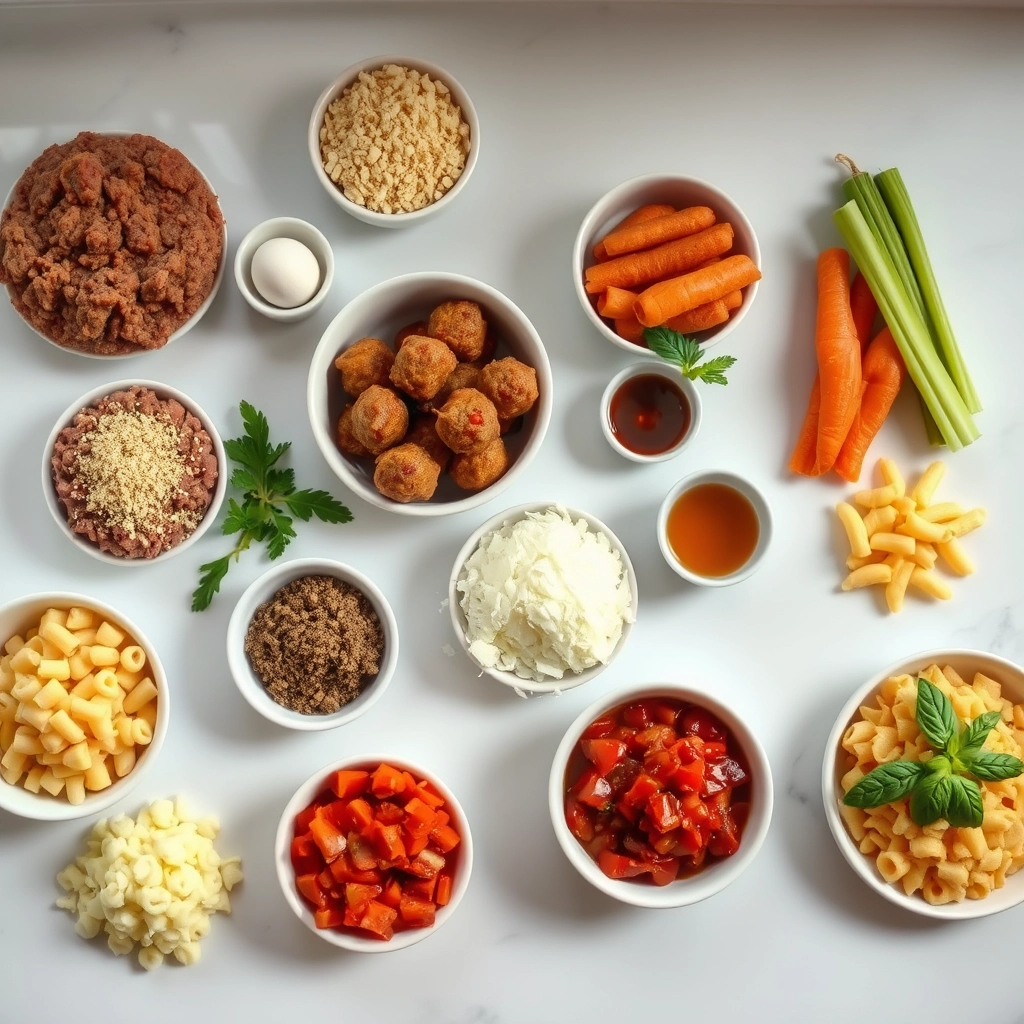
Ingredients That Feel Like a Warm Hug

What I adore about this recipe is how forgiving it is – you probably have most of these ingredients already whispering to each other in your pantry:

  • Rolled oats (1 1/2 cups) – The hearty base that makes these balls satisfying. Not quick oats though – we want that wholesome texture!
  • Creamy peanut butter (1/2 cup) – The glue that holds everything together with its nutty magic. Almond butter works beautifully too.
  • Honey (1/3 cup) – Nature’s golden sweetener that adds the perfect stickiness. Maple syrup is a lovely vegan alternative.
  • Ground flaxseed (2 tbsp) – My little nutritional powerhouse addition that no one will detect but your body will thank you for.
  • Chia seeds (1 tbsp) – These tiny wonders add a delightful crunch and omega-3s.
  • Vanilla extract (1 tsp) – That whisper of warmth that makes everything taste homemade.
  • Dark chocolate chips (1/4 cup) – Because every energy boost deserves a chocolatey surprise. I like to chop mine roughly for better distribution.
  • Pinch of sea salt – The secret weapon that makes all the flavors pop!

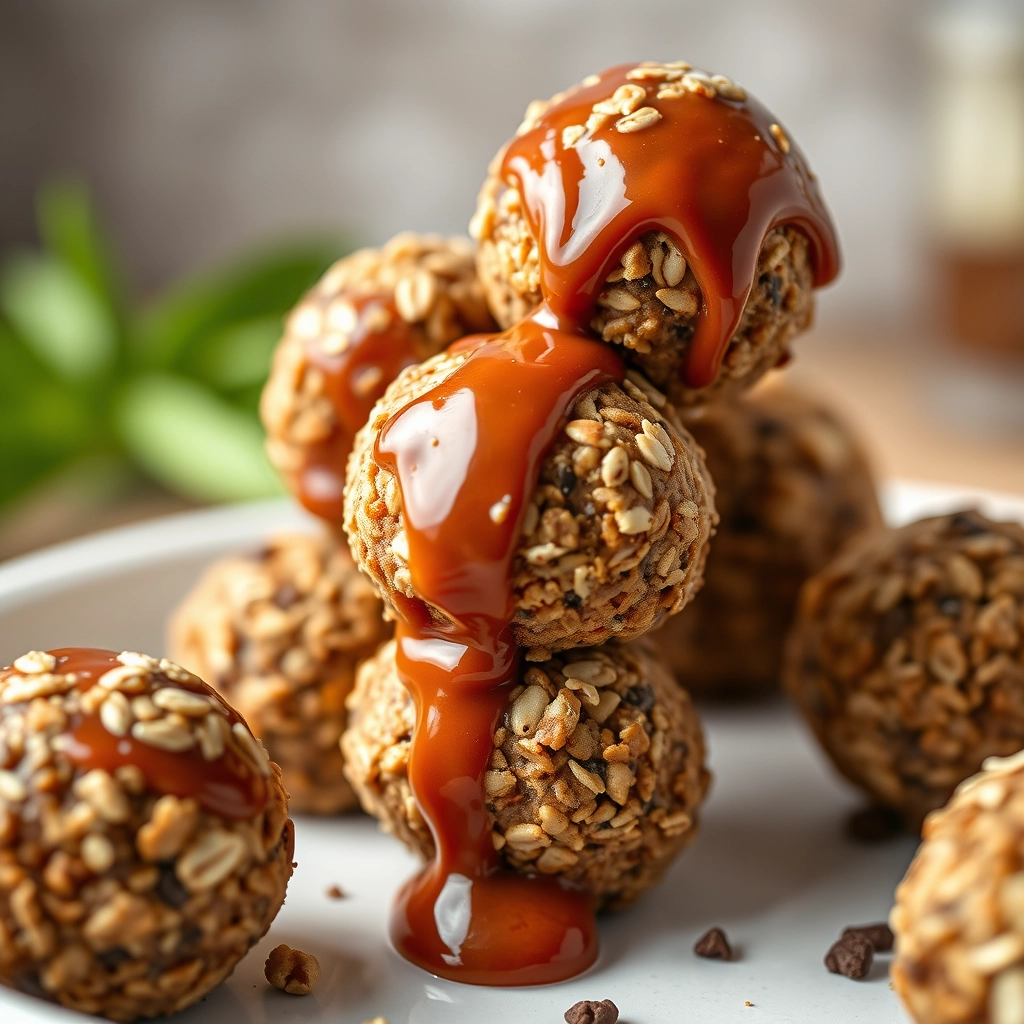
Let’s Get Our Hands Sticky (The Best Part!)

There’s something wonderfully therapeutic about mixing these with your hands – it takes me back to childhood playdough days, but with edible (and far more delicious) results!

  1. The Great Mix-Off: In a large bowl, combine your oats, flaxseed, chia seeds, and that all-important pinch of salt. Give it a good stir with a wooden spoon – I like to pretend I’m a witch mixing a potion at this stage.
  2. Sticky Situation Ahead: Add the peanut butter, honey, and vanilla extract. Now roll up your sleeves and dive in with clean hands! The warmth from your hands helps everything meld together beautifully. If the mixture feels too dry, add a teaspoon more honey; too wet? A sprinkle more oats.
  3. Chocolate Therapy: Gently fold in your chocolate chips. Pro tip: if your kitchen is warm, pop the mixture in the fridge for 10 minutes first so the chocolate doesn’t melt everywhere when you mix.

Pro Tips, Variations, and Substitutions

These no-bake oats energy balls are wonderfully forgiving, so feel free to get creative! Here are some ideas to make them your own:

  • Nut-free option: Swap peanut butter for sunflower seed butter and omit the nuts
  • Chocolate lovers: Add 2 tablespoons cocoa powder or mini chocolate chips
  • Protein boost: Stir in a scoop of your favorite protein powder
  • Fruity twist: Mix in dried cranberries or chopped apricots instead of raisins
  • Extra crunch: Roll the finished balls in shredded coconut or crushed nuts

What to Serve With Energy Balls

These wholesome bites are perfect on their own, but they also pair beautifully with:

  • A warm cup of chai tea or coffee for breakfast
  • Fresh fruit like apple slices or banana
  • Greek yogurt for a protein-packed snack
  • As part of a lunchbox with cheese cubes and veggie sticks

Storage and Reheating Tips

To keep your energy balls fresh and delicious:

  • Store in an airtight container in the refrigerator for up to 2 weeks
  • For longer storage, freeze for up to 3 months (they thaw quickly at room temperature)
  • If they soften too much, pop them in the fridge for 30 minutes to firm up
  • No reheating needed – they’re perfect straight from the fridge!

Frequently Asked Questions

Can I use quick oats instead of rolled oats?
Yes! Quick oats will work, though the texture will be slightly softer. If using quick oats, you might want to reduce the honey by 1 tablespoon as they absorb moisture differently.

My mixture is too dry – what should I do?
Add more nut butter 1 teaspoon at a time until the mixture holds together. Alternatively, a splash of milk (dairy or plant-based) can help bind it.

Are these suitable for meal prep?
Absolutely! They’re perfect for meal prep. Make a double batch on Sunday and you’ll have healthy snacks ready all week.

Can I make these without honey?
Yes! Maple syrup or agave nectar work well as substitutes. For sugar-free options, try date paste or mashed ripe banana.

A Sweet Ending

There’s something so comforting about having a jar of these wholesome energy balls waiting for you in the fridge. Whether you’re rushing out the door in the morning, needing an afternoon pick-me-up, or craving a little something sweet after dinner, these no-bake bites are there for you. I love how such simple ingredients can come together to create something so nourishing and delicious. Here’s to many happy snacking moments ahead – may your energy be high and your hunger at bay!

Print
clock clock iconcutlery cutlery iconflag flag iconfolder folder iconinstagram instagram iconpinterest pinterest iconfacebook facebook iconprint print iconsquares squares iconheart heart iconheart solid heart solid icon

No-Bake Oats Energy Balls

  • Author: Trusted Blog

Description

Quick and easy no-bake energy balls packed with oats, nut butter, and honey for a healthy snack.


Ingredients

Scale

For the Crust:

  • 1 cup rolled oats
  • 1/2 cup peanut butter or almond butter
  • 1/3 cup honey
  • 1/4 cup mini chocolate chips
  • 1/4 cup ground flaxseed
  • 1 tsp vanilla extract
  • 1/2 tsp cinnamon

Instructions

1. Prepare the Crust:

  1. In a large bowl, mix together the oats, peanut butter, honey, chocolate chips, flaxseed, vanilla extract, and cinnamon until well combined.
  2. Roll the mixture into 1-inch balls using your hands.
  3. Place the balls on a baking sheet lined with parchment paper and refrigerate for at least 30 minutes to firm up.

Notes

You can customize the seasonings to taste.

Best Low-Carb Fried Rice – Easy and Healthy Recipe

best-low-carb-fried-rice

The Secret to Guilt-Free Fried Rice (That Actually Tastes Good!)

There’s something deeply comforting about a steaming plate of fried rice, isn’t there? That perfect balance of savory, slightly smoky flavors with just the right amount of chewiness. But lately, whenever I’d make traditional fried rice, I’d find myself staring at my empty plate with that familiar pang of regret – all those carbs sitting heavy in my stomach. That is, until I discovered this magical low-carb version that’s become my weekly staple.

It all started when my dear friend Sarah came over for lunch last month. She’d recently started a low-carb lifestyle but confessed she missed her favorite takeout dishes. “I’d kill for some good fried rice,” she sighed. Challenge accepted! After some delicious experimentation (and a few not-so-great attempts), we landed on this recipe that’s become our shared favorite. The secret? Cauliflower rice that actually tastes indulgent when prepared just right.

What You’ll Need

  • 1 large head of cauliflower – or about 4 cups pre-riced to save time (look for the freshest, firmest head you can find)
  • 2 tablespoons avocado oil – my favorite for high-heat cooking, but coconut oil works beautifully too
  • 3 eggs – pasture-raised if possible, that golden yolk makes all the difference
  • 1 cup diced mixed vegetables – I use a colorful mix of red bell peppers, carrots, and peas (yes, peas are slightly higher carb but so worth it for that pop of sweetness)
  • 2 cloves garlic, minced – because what’s fried rice without that aromatic punch?
  • 1 tablespoon fresh ginger, grated – don’t even think about using powdered here
  • 3 tablespoons coconut aminos – my favorite soy sauce alternative with a touch of natural sweetness
  • 1 teaspoon sesame oil – just a drizzle at the end for that authentic takeout flavor
  • Green onions and sesame seeds – for that perfect finishing touch

Let’s Get Cooking

First, let’s prepare our star ingredient – the cauliflower rice. If you’re starting with a whole head, simply chop it into florets and pulse in your food processor until it reaches a rice-like consistency. Pro tip: Don’t overprocess or you’ll end up with cauliflower mush! Spread the riced cauliflower on a clean kitchen towel and gently press to remove excess moisture – this step is crucial for getting that perfect fried rice texture.

Heat a large wok or skillet over medium-high heat and add 1 tablespoon of avocado oil. When the oil shimmers, pour in your beaten eggs and scramble them until just set. I like to make mine slightly runny at this stage because they’ll cook more later. Transfer to a plate and set aside – this is when my kitchen starts smelling absolutely heavenly.

Add the remaining oil to the same pan (no need to wash it – those browned bits add flavor!) and toss in your garlic and ginger. The moment you smell that fragrant aroma rising up (about 30 seconds), it’s time to add your diced vegetables. Stir-fry them until they’re crisp-tender – I love when the carrots still have a bit of crunch to contrast the soft cauliflower.

Pro Tips, Variations, and Substitutions

This low-carb fried rice is wonderfully adaptable to whatever you have on hand! Here are some of my favorite ways to tweak the recipe:

  • Protein Power: Swap the chicken for shrimp, tofu, or thinly sliced beef for different flavor profiles.
  • Veggie Boost: Add mushrooms, zucchini, or bell peppers for extra color and nutrients.
  • Spice It Up: A dash of sriracha or red pepper flakes gives this dish a nice kick.
  • Cauliflower Shortcut: Use pre-riced cauliflower from the freezer section to save time.
  • Egg-Free Option: Simply omit the eggs for a vegan version (though you’ll miss that lovely richness!).

What to Serve With Low-Carb Fried Rice

This dish is satisfying enough to enjoy on its own, but here are some delicious pairings:

  • Asian-inspired lettuce wraps
  • Miso soup or hot and sour soup
  • Grilled teriyaki salmon
  • Steamed or stir-fried Asian greens
  • Kimchi for probiotic goodness

Storage and Reheating Tips

Leftovers keep beautifully for quick meals throughout the week:

  • Refrigerator: Store in an airtight container for 3-4 days.
  • Freezer: Portion and freeze for up to 2 months (thaw overnight before reheating).
  • Reheating: Warm in a skillet over medium heat with a splash of water or coconut aminos to refresh the texture. The microwave works too, but the skillet method keeps it from getting soggy.

Frequently Asked Questions

Q: Can I use frozen cauliflower rice?
A: Absolutely! Just be sure to thaw and pat it dry first to prevent excess moisture in your dish.

Q: Is this recipe keto-friendly?
A: Yes! With about 6g net carbs per serving, it fits perfectly into a keto lifestyle.

Q: Can I make this ahead for meal prep?
A: Definitely – it reheats beautifully and makes for excellent lunches all week.

Q: What can I use instead of coconut aminos?
A: Tamari or liquid aminos work well, or use reduced-sodium soy sauce if you’re not strictly gluten-free.

Final Thoughts

This low-carb fried rice has become such a comforting staple in my kitchen – the kind of meal that satisfies those takeout cravings while keeping me feeling my best. What I love most is how easily it comes together with simple ingredients, proving that healthy eating doesn’t have to be complicated or bland. Whether you’re watching carbs or just looking for a lighter way to enjoy classic flavors, I hope this recipe brings as much joy to your table as it does to mine. Don’t forget to tag me on Instagram if you try it – I love seeing your kitchen creations!

Print
clock clock iconcutlery cutlery iconflag flag iconfolder folder iconinstagram instagram iconpinterest pinterest iconfacebook facebook iconprint print iconsquares squares iconheart heart iconheart solid heart solid icon

Low-Carb Fried Rice

  • Author: Trusted Blog

Description

A delicious low-carb alternative to traditional fried rice using cauliflower rice.


Ingredients

Scale

For the Crust:

  • 1 head cauliflower, riced
  • 2 tbsp sesame oil
  • 2 eggs, beaten
  • 1/2 cup diced carrots
  • 1/2 cup frozen peas
  • 3 tbsp soy sauce
  • 2 cloves garlic, minced
  • 1 tsp ginger, grated
  • 2 green onions, sliced

Instructions

1. Prepare the Crust:

  1. Heat 1 tbsp sesame oil in a large skillet over medium heat.
  2. Add beaten eggs and scramble until cooked. Remove from skillet and set aside.
  3. Add remaining oil to the skillet. Sauté garlic and ginger for 30 seconds until fragrant.
  4. Add carrots and peas, cooking for 2-3 minutes until softened.
  5. Stir in cauliflower rice and cook for 5-7 minutes until tender.
  6. Add cooked eggs back to the skillet along with soy sauce. Mix well.
  7. Garnish with green onions before serving.

Notes

You can customize the seasonings to taste.

Best Slow Cooker Pot Roast – Tender and Flavorful

best-slow-cooker-pot-roast

The Coziest Slow Cooker Pot Roast You’ll Ever Make

There’s something magical about walking into a house that smells like slow-cooked pot roast. It wraps around you like a warm hug, promising comfort and nourishment. I remember my grandmother’s kitchen on Sunday afternoons—the way the savory aroma would drift through the house as we set the table, the way the meat would practically melt at the touch of a fork. That’s the kind of magic I wanted to recreate in my own kitchen, and after years of tweaking, I’ve finally perfected my slow cooker version.

Ingredients You’ll Need

  • 3-4 lb chuck roast – Look for one with good marbling for maximum tenderness
  • 2 tbsp olive oil – For that perfect sear that locks in flavor
  • 1 large yellow onion, sliced into half moons – They’ll caramelize beautifully
  • 4 cloves garlic, minced – Because everything’s better with garlic
  • 4 carrots, cut into 2-inch chunks – The classic pot roast companion
  • 3 celery stalks, chopped – Adds wonderful depth to the broth
  • 1 lb baby potatoes – I love the creamy texture they develop
  • 2 cups beef broth – Homemade if you have it, but good quality store-bought works too
  • 1 tbsp Worcestershire sauce – Our secret umami booster
  • 1 tbsp tomato paste – Adds richness and helps tenderize the meat
  • 2 tsp dried thyme + 1 tsp rosemary – The perfect herb pairing
  • Salt and pepper – To taste, but don’t be shy!

Let’s Get Cooking

First, take your chuck roast out of the fridge about 30 minutes before cooking. This helps it cook more evenly. While it’s coming to room temperature, prep all your vegetables—this is when I put on some jazz and pour myself a cup of tea.

  1. Sear the meat: Heat olive oil in a large skillet over medium-high heat. Pat your roast dry with paper towels (this is crucial for a good sear!), then generously season all sides with salt and pepper. Sear for about 4-5 minutes per side until you get a beautiful brown crust. Transfer to your slow cooker.
  2. Sauté the aromatics: In the same skillet, add your onions and cook until they start to soften, about 3 minutes. Add the garlic and cook for another 30 seconds until fragrant. Spread this mixture over the roast in the slow cooker.
  3. Build the flavors: Arrange the carrots, celery, and potatoes around the roast. In a small bowl, whisk together the beef broth, Worcestershire sauce, tomato paste, thyme, and rosemary. Pour this liquid over everything—it should come about halfway up the sides of the roast.

At this point, your kitchen should already smell incredible. I always take a moment to appreciate how simple ingredients transform into something so comforting. Now comes the hardest part—waiting!

Pro Tips for the Perfect Slow Cooker Pot Roast

Every home cook has their own tricks for making pot roast extra special. Here are a few of my favorites:

  • Brown the meat first: While you can skip this step, taking 5 minutes to sear the roast in a hot skillet creates incredible flavor.
  • Layer wisely: Place heartier vegetables like potatoes and carrots on the bottom where they’ll get more direct heat.
  • Don’t peek! Resist lifting the lid – each time you do, you add 15-20 minutes to the cooking time.
  • Use the right cut: Chuck roast is ideal with its perfect marbling that melts into tenderness.

Delicious Variations to Try

This recipe is wonderfully adaptable to different tastes and occasions:

  • Red wine version: Substitute 1 cup of the broth for dry red wine
  • Mushroom lovers: Add 8 oz sliced cremini mushrooms in the last hour
  • Spicy kick: Include 1-2 chopped chipotle peppers in adobo sauce
  • Italian style: Use rosemary and oregano, plus sun-dried tomatoes

What to Serve with Your Pot Roast

This comforting main dish pairs beautifully with:

  • Creamy mashed potatoes (the classic choice!)
  • Buttered egg noodles or polenta
  • Roasted Brussels sprouts or green beans
  • Freshly baked dinner rolls to sop up the juices
  • A simple green salad with vinaigrette

Storing and Reheating Your Leftovers

One of the best things about pot roast is how well it keeps:

  • Refrigerator: Store in an airtight container for 3-4 days
  • Freezer: Portion and freeze for up to 3 months (thaw overnight in fridge)
  • Reheating: Warm gently in a covered saucepan with a splash of broth, or microwave in 30-second intervals
  • Next-day tip: The flavors deepen overnight – leftovers make amazing sandwiches!

Frequently Asked Questions

Can I use a different cut of beef?
While chuck roast is ideal, you can use brisket or bottom round. Avoid lean cuts as they won’t become as tender.

My roast is still tough – what happened?
It likely needs more time. Continue cooking in 30-minute increments until fork-tender. Tough meat usually means undercooked, not overcooked.

Can I make this in an Instant Pot?
Absolutely! Use the pressure cook function for about 60 minutes with natural pressure release for a 3-lb roast.

Why is my gravy thin?
Remove the roast and vegetables, then simmer the juices uncovered to reduce. You can also mix 1 tbsp cornstarch with 2 tbsp cold water and stir it in.

The Comfort of a Perfect Pot Roast

There’s something magical about coming home to the aroma of slow-cooked pot roast filling your kitchen. This humble dish represents so much more than just a meal – it’s the warmth of home, the comfort of tradition, and the joy of gathering around the table with loved ones. Whether it’s a busy weekday or a lazy Sunday, this recipe promises tender, flavorful results every time. I hope it becomes one of your family’s cherished favorites, just as it has in mine. Happy slow cooking!

Print
clock clock iconcutlery cutlery iconflag flag iconfolder folder iconinstagram instagram iconpinterest pinterest iconfacebook facebook iconprint print iconsquares squares iconheart heart iconheart solid heart solid icon

Slow Cooker Pot Roast

  • Author: Trusted Blog

Description

A tender and flavorful pot roast cooked to perfection in a slow cooker with vegetables and savory seasonings.


Ingredients

Scale

For the Crust:

  • 3 lbs chuck roast
  • 1 lb baby potatoes, halved
  • 3 large carrots, chopped
  • 1 onion, sliced
  • 3 cloves garlic, minced
  • 2 cups beef broth
  • 2 tbsp Worcestershire sauce
  • 1 tsp dried thyme
  • 1 tsp dried rosemary
  • 1 tsp salt
  • 1/2 tsp black pepper
  • 2 tbsp cornstarch (optional, for thickening)

Instructions

1. Prepare the Crust:

  1. Place the chuck roast in the slow cooker and season with salt, pepper, thyme, and rosemary.
  2. Add the potatoes, carrots, onion, and garlic around the roast.
  3. Pour the beef broth and Worcestershire sauce over the roast and vegetables.
  4. Cover and cook on low for 8 hours or high for 5 hours, until the meat is tender.
  5. If desired, remove the roast and vegetables, then whisk cornstarch with a little broth to thicken the gravy.
  6. Serve the pot roast with vegetables and gravy.

Notes

You can customize the seasonings to taste.

Best Italian Meatball Soup – Classic Comfort Food

best-italian-meatball-soup

The Best Italian Meatball Soup – A Bowl Full of Love

There’s something magical about a simmering pot of soup on a chilly evening—the way the aroma fills the kitchen, promising warmth and comfort with every spoonful. This Italian Meatball Soup is one of those recipes that feels like a hug from the inside out. I first had it at my Nonna’s house years ago, where she’d ladle it into big, mismatched bowls with a sprinkle of Parmesan and a hunk of crusty bread on the side. It was simple, hearty, and utterly unforgettable. Now, it’s my go-to when I need a little extra coziness (or when my family starts dropping not-so-subtle hints).

Gather Your Ingredients – The Heart of the Soup

Every great soup starts with great ingredients, and this one is no exception. Here’s what you’ll need to make this soul-warming dish:

  • For the meatballs: 1 lb ground beef (I like 80/20 for juiciness), ½ lb ground pork (for extra flavor), ½ cup breadcrumbs (Panko works beautifully), ¼ cup grated Parmesan (the real stuff, please!), 1 egg (to bind it all together), 2 cloves garlic (minced), 1 tsp dried oregano, ½ tsp salt, and a pinch of red pepper flakes (for a subtle kick).
  • For the soup: 1 tbsp olive oil (extra virgin, if you have it), 1 small onion (diced), 2 carrots (peeled and sliced into coins), 2 celery stalks (chopped—don’t skip these, they add such depth!), 4 cloves garlic (minced), 6 cups chicken broth (homemade if you’re fancy, but store-bought works too), 1 (28 oz) can crushed tomatoes (San Marzano are my favorite), 1 tsp dried basil, 1 bay leaf (remove it before serving—trust me), and 1 cup ditalini pasta (or any small pasta you love).
  • For serving: Freshly grated Parmesan, chopped parsley (for that pop of green), and crusty bread (mandatory for dunking).

Let’s Make Some Magic – Step by Step

Now that we’ve got everything ready, it’s time to bring this soup to life. Follow these steps, and don’t forget to breathe in that incredible smell as it cooks!

  1. Make the meatballs: In a large bowl, combine the ground beef, ground pork, breadcrumbs, Parmesan, egg, garlic, oregano, salt, and red pepper flakes. Use your hands to mix gently—overworking the meat will make the meatballs tough. Roll into 1-inch balls (about the size of a walnut) and set aside on a plate.
  2. Brown the meatballs: Heat the olive oil in a large Dutch oven or soup pot over medium heat. Working in batches, add the meatballs and brown them on all sides—about 2 minutes per side. They don’t need to be fully cooked yet; we’re just building flavor here. Remove them and set aside.
  3. Sauté the veggies: In the same pot, add the onion, carrots, and celery. Cook until softened, about 5 minutes, stirring occasionally. Add the garlic and cook for another 30 seconds—just until fragrant (don’t let it burn!).
  4. Simmer the soup base: Pour in the chicken broth and crushed tomatoes, then stir in the basil and bay leaf. Bring to a gentle boil, then reduce the heat to low and let it simmer for 10 minutes to let the flavors meld.

At this point, your kitchen should smell like an Italian trattoria, and your stomach might be growling—hang in there, we’re almost done! (Stay tuned for the second half, where we finish the soup and talk about the best ways to serve it.)

Pro Tips, Variations, and Substitutions

This Italian meatball soup is wonderfully adaptable to your taste and what you have on hand. Here are some ways to make it your own:

  • Meatball magic: Swap beef for ground turkey, chicken, or a plant-based alternative. For extra flavor, mix in grated Parmesan or chopped fresh herbs like parsley or basil.
  • Veggie boost: Add chopped zucchini, bell peppers, or kale in the last 10 minutes of cooking for extra nutrition.
  • Pasta possibilities: Small pasta like ditalini or orzo works beautifully, but feel free to use whatever you have. Just adjust cooking time accordingly.
  • Broth basics: Chicken or vegetable broth can stand in for beef broth if needed. For richer flavor, use half broth and half tomato juice.

What to Serve With Italian Meatball Soup

This soup is a meal in itself, but these accompaniments make it even more special:

  • Crusty Italian bread or garlic toast for dipping
  • A simple green salad with balsamic dressing
  • Grated Parmesan or pecorino cheese for sprinkling
  • A glass of Chianti or Sangiovese wine

Storage and Reheating Tips

Like many soups, this one gets even better the next day! Here’s how to keep it tasting fresh:

  • Refrigerator: Store in airtight containers for up to 4 days. The pasta will absorb liquid, so you may need to add a splash of broth when reheating.
  • Freezer: Freeze without pasta for up to 3 months. Add freshly cooked pasta when reheating.
  • Reheating: Warm gently on the stovetop over medium-low heat, stirring occasionally. Microwave in 1-minute intervals, stirring between each.

Frequently Asked Questions

Can I make the meatballs ahead of time?
Absolutely! Form the meatballs and refrigerate for up to 24 hours before cooking. You can also freeze raw meatballs on a baking sheet, then transfer to a freezer bag once solid.

How can I make this soup gluten-free?
Use gluten-free breadcrumbs in the meatballs and substitute your favorite gluten-free pasta. Check that your broth is gluten-free as well.

Why do my meatballs sometimes fall apart in the soup?
Make sure your meatball mixture isn’t too wet (drain any excess liquid from ingredients), and gently simmer rather than boil the soup. Chilling the formed meatballs for 30 minutes before cooking also helps them hold together.

Can I make this in a slow cooker?
Yes! Brown the meatballs first, then add all ingredients except pasta to the slow cooker. Cook on low 6-8 hours or high 3-4 hours. Add cooked pasta just before serving.

Warm Comfort in Every Bowl

There’s something truly special about this Italian meatball soup – the way the savory broth wraps around tender meatballs, the comforting texture of pasta, and the way the aroma fills your kitchen with warmth. It’s the kind of meal that brings people together, perfect for chilly evenings, family gatherings, or when you just need a hug in a bowl. However you choose to make it, I hope this soup becomes a cherished recipe in your home, creating delicious memories one spoonful at a time.

Print
clock clock iconcutlery cutlery iconflag flag iconfolder folder iconinstagram instagram iconpinterest pinterest iconfacebook facebook iconprint print iconsquares squares iconheart heart iconheart solid heart solid icon

Italian Meatball Soup

  • Author: Trusted Blog

Description

A hearty and flavorful soup with tender meatballs, vegetables, and Italian herbs.


Ingredients

Scale

For the Crust:

  • 1 lb ground beef
  • 1/2 cup breadcrumbs
  • 1 egg
  • 1/4 cup grated Parmesan cheese
  • 1 tsp Italian seasoning
  • 1 tbsp olive oil
  • 1 onion, diced
  • 2 carrots, sliced
  • 2 celery stalks, chopped
  • 4 cups beef broth
  • 1 can (14 oz) diced tomatoes
  • 1 tsp garlic powder
  • 1 tsp dried basil
  • Salt and pepper to taste
  • 1 cup small pasta (like ditalini)

Instructions

1. Prepare the Crust:

  1. In a bowl, mix ground beef, breadcrumbs, egg, Parmesan cheese, and Italian seasoning. Form into small meatballs.
  2. Heat olive oil in a large pot over medium heat. Add onion, carrots, and celery. Cook until softened, about 5 minutes.
  3. Add beef broth, diced tomatoes, garlic powder, basil, salt, and pepper. Bring to a boil.
  4. Gently drop meatballs into the boiling soup. Reduce heat and simmer for 15 minutes.
  5. Add pasta and cook for an additional 10 minutes or until pasta is tender.
  6. Serve hot, garnished with extra Parmesan if desired.

Notes

You can customize the seasonings to taste.

Best Slow Cooker Chicken Wild Rice Soup Recipe

best-slow-cooker-chicken-rice-soup

The Coziest Slow Cooker Chicken Wild Rice Soup for Soul-Warming Evenings

There’s something almost magical about the way a slow cooker transforms humble ingredients into a meal that feels like a hug in a bowl. Last Sunday, as the first crisp whispers of autumn curled through my kitchen window, I found myself craving that exact kind of comfort—something hearty, nourishing, and utterly effortless. That’s when this Slow Cooker Chicken Wild Rice Soup came to the rescue. It’s the kind of recipe that simmers quietly while you go about your day, filling the house with the kind of aroma that makes everyone pause and ask, “When’s dinner?”

Gathering Your Ingredients: A Symphony of Comfort

What I love most about this soup is how simple, wholesome ingredients come together to create something extraordinary. Here’s what you’ll need:

  • 1 lb boneless, skinless chicken thighs – Thighs stay juicy and tender during the long cook time, but breasts work too if you prefer.
  • 1 cup wild rice blend – The nutty, chewy texture is key! I adore the mix of wild and brown rice for depth.
  • 3 carrots, diced – Sweet, earthy, and packed with color.
  • 3 celery stalks, chopped – For that classic, comforting base.
  • 1 yellow onion, finely diced – It melts into the broth, adding a subtle sweetness.
  • 4 garlic cloves, minced – Because no cozy soup is complete without garlic.
  • 6 cups chicken broth – Homemade if you have it, but store-bought works beautifully.
  • 1 tsp dried thyme – A whisper of herbal warmth.
  • 1 bay leaf – The secret behind so many great soups.
  • 1 cup heavy cream (or half-and-half) – Added at the end for luxurious silkiness.
  • Salt and pepper to taste – Don’t be shy—season as you go!

Let’s Get Cooking: Slow and Steady Wins the Flavor Race

This recipe is as easy as layering ingredients and letting time work its magic. Here’s how I do it:

  1. Prep your veggies. Give the carrots, celery, and onion a rough chop—no need for perfection here. The slow cooker softens everything into tender goodness. (A little tip: I often do this the night before and store them in the fridge for an even quicker morning.)
  2. Layer it all in. Place the chicken thighs at the bottom of your slow cooker, then add the wild rice, veggies, garlic, thyme, and bay leaf. Pour the broth over everything—it should just cover the ingredients. If not, add a splash more water.
  3. Set it and (almost) forget it. Cook on low for 6-7 hours or high for 3-4. The soup is ready when the rice is tender and the chicken shreds effortlessly with a fork.
  4. Shred the chicken. Use two forks to pull the thighs apart right in the pot—they’ll be so tender, they’ll practically fall apart on their own.

At this point, your kitchen will smell like everything good in the world. But we’re not done yet—the final touches make all the difference…

Pro Tips, Variations, and Substitutions

This slow cooker chicken wild rice soup is wonderfully forgiving—just like your favorite cozy sweater. Here are some ways to make it your own:

  • For extra richness: Stir in 1/2 cup heavy cream during the last 30 minutes of cooking
  • Vegetable lovers: Add diced carrots or celery with the onions for more texture
  • Gluten-free option: Use cornstarch instead of flour to thicken (mix 2 tbsp cornstarch with 1/4 cup cold water before adding)
  • Herb variations: Fresh thyme or rosemary make lovely additions to the seasoning blend
  • Short on time? Use 2 cups cooked wild rice blend instead of uncooked (add during last hour)

The Perfect Pairings

This soul-warming soup deserves equally comforting companions:

  • Crusty artisan bread for dipping (try a warm baguette or sourdough)
  • A simple green salad with vinaigrette to brighten up the meal
  • Buttery garlic knots for when you want extra indulgence
  • A crisp white wine like Chardonnay or Pinot Grigio

Storing Your Soup for Future Comfort

One of the best things about this recipe is how beautifully it keeps:

  • Refrigerator: Store in airtight containers for 3-4 days
  • Freezer: Portion into freezer-safe containers (leave 1-inch headspace) for up to 3 months
  • Reheating: Thaw frozen soup overnight in fridge. Warm gently on stove over medium-low heat, adding a splash of broth if needed
  • Pro tip: The rice will continue absorbing liquid—just stir in extra broth when reheating

Frequently Asked Questions

Can I use brown rice instead of wild rice?
Absolutely! Brown rice will work, though the texture and cooking time will differ. Use precooked brown rice (add during last hour) or extend cooking time by 1-2 hours.

My soup turned out too thick—how can I fix it?
No worries! Simply stir in additional chicken broth (or even water) until you reach your desired consistency. The soup thickens as it sits, so you may need to do this when reheating leftovers too.

Can I make this vegetarian?
Yes! Substitute vegetable broth for chicken broth and omit the chicken (or use plant-based chicken alternatives). For protein, add white beans during the last hour of cooking.

Why is my wild rice still crunchy?
Wild rice can vary in cooking time. If your rice isn’t tender after 6 hours, continue cooking in 30-minute increments until done. Older wild rice may take longer to soften.

A Bowl Full of Comfort

There’s something magical about coming home to the aroma of this soup simmering away in your slow cooker. Whether you’re serving it to soothe a winter chill, nourish a loved one under the weather, or simply because your soul needs some warmth, this chicken wild rice soup is like a hug in a bowl. The tender chicken, nutty wild rice, and creamy broth come together in perfect harmony—a reminder that the simplest meals often bring the greatest comfort. May your kitchen be filled with good smells, your bowls with steaming soup, and your heart with the joy of sharing something made with love.

Print
clock clock iconcutlery cutlery iconflag flag iconfolder folder iconinstagram instagram iconpinterest pinterest iconfacebook facebook iconprint print iconsquares squares iconheart heart iconheart solid heart solid icon

Slow Cooker Chicken Wild Rice Soup

  • Author: Trusted Blog

Description

A hearty and comforting soup made with tender chicken, wild rice, and vegetables, all cooked to perfection in a slow cooker.


Ingredients

Scale

For the Crust:

  • 1 lb boneless, skinless chicken breasts
  • 1 cup wild rice, uncooked
  • 1 medium onion, diced
  • 2 carrots, diced
  • 2 celery stalks, diced
  • 3 cloves garlic, minced
  • 6 cups chicken broth
  • 1 tsp dried thyme
  • 1 tsp dried rosemary
  • 1/2 tsp salt
  • 1/4 tsp black pepper
  • 1 cup half-and-half
  • 2 tbsp all-purpose flour

Instructions

1. Prepare the Crust:

  1. Place chicken breasts, wild rice, onion, carrots, celery, garlic, chicken broth, thyme, rosemary, salt, and pepper in the slow cooker.
  2. Cover and cook on low for 6-7 hours or on high for 3-4 hours, until chicken is cooked through and rice is tender.
  3. Remove chicken from the slow cooker and shred it using two forks. Return shredded chicken to the slow cooker.
  4. In a small bowl, whisk together half-and-half and flour until smooth. Stir into the soup.
  5. Cover and cook on high for an additional 15-20 minutes, until soup has thickened slightly.
  6. Serve hot, garnished with fresh herbs if desired.

Notes

You can customize the seasonings to taste.