“`html
Table of Contents
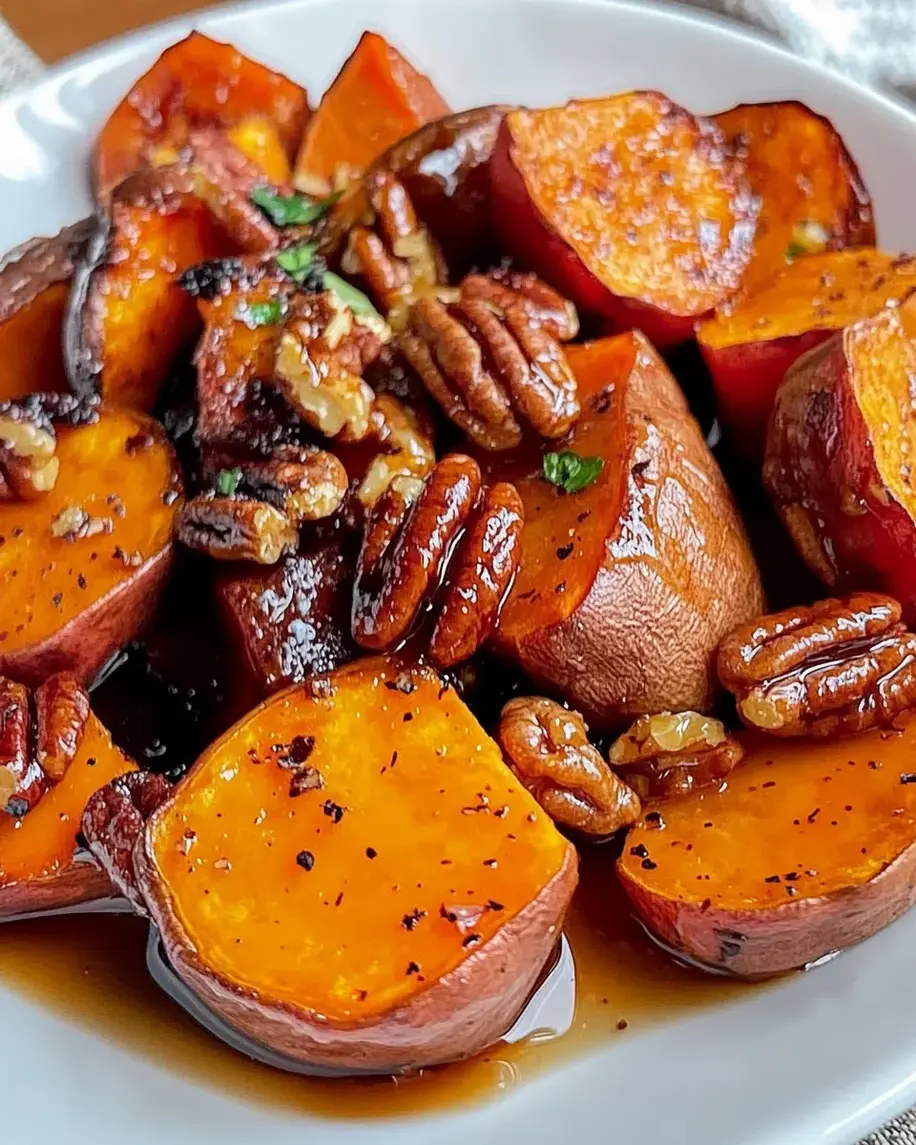
One-Pan Roasted Sweet Potatoes with Maple Dijon Glaze & Pecans
Are Your Sides Lacking That “Wow” Factor?
If you find yourself asking “What can I make to elevate my weeknight dinner or impress guests at a potluck?”, you’re not alone. We all crave those dishes that are both incredibly delicious and surprisingly simple. This One-Pan Roasted Sweet Potatoes with Maple Dijon Glaze & Pecans recipe is designed to be just that – a culinary game-changer that requires minimal effort but delivers maximum flavor. It masterfully balances the inherent sweetness of roasted sweet potatoes with the tangy zing of Dijon mustard and the comforting richness of maple syrup, all crowned with the delightful crunch of toasted pecans. It’s the kind of side dish that doesn’t just accompany a meal; it *makes* the meal, proving that vegetarian, gluten-free, and healthy can also be absolutely spectacular.
What Makes These Sweet Potatoes Sing?
The magic of this recipe lies in its high-quality ingredients and their harmonious interplay. We’ll be looking for:
- Sweet Potatoes: Choose medium-sized sweet potatoes, about 8-10 ounces each. Their natural sweetness caramelizes beautifully when roasted, creating tender, melt-in-your-mouth morsels. Look for firm, smooth skin. Substitutions: Yams are a close relative and can be used interchangeably. Regular potatoes can also be used, but the sweetness profile will differ.
- Olive Oil: A good quality extra virgin olive oil lends a subtle fruity note and ensures even browning. Substitutions: Avocado oil or melted coconut oil work well.
- Maple Syrup: Pure maple syrup is key for that distinct, warm sweetness. It’s less processed than most sugars and offers a complex flavor. Substitutions: Honey or agave nectar can be used, though the flavor will be slightly different. Brown sugar can also work in a pinch.
- Dijon Mustard: The secret weapon that cuts through the sweetness with its sharp, piquant flavor. It adds depth and a sophisticated tang. Substitutions: Whole grain mustard offers a similar tang with added texture. Spicy brown mustard can also be used for a bit more heat.
- Apple Cider Vinegar: A splash adds a touch of acidity to brighten the glaze and balance the richness. Substitutions: White wine vinegar or even lemon juice can be used.
- Pecans: Toasted pecans bring a wonderful nutty crunch and earthy flavor. Substitutions: Walnuts, almonds, or even pumpkin seeds would be delicious alternatives.
- Salt: Essential for enhancing all the other flavors. Use sea salt or kosher salt.
- Black Pepper: Freshly ground for the best aroma and bite.
- Optional additions: A pinch of cayenne pepper for a little heat, or some fresh rosemary or thyme for an herbaceous note.
Perfect Timing for a Perfect Dish
This recipe is designed for efficiency, making it ideal for busy weeknights or when you want a show-stopping side with minimal fuss. Unlike many complex roasting recipes, this one-pan wonder streamlines the process.
Compared to average roasted vegetable recipes which can sometimes involve multiple pans or longer marinating times, this one-pan approach shaves off precious minutes without compromising on flavor or texture. It’s a testament to smart cooking!
Let’s Get Roasting! Step-by-Step to Deliciousness
Step 1: Preheat and Prep
First things first, let’s get our oven and ingredients ready. Preheat your oven to 400°F (200°C). While the oven heats up, wash your sweet potatoes thoroughly. You can peel them if you prefer a smoother texture, but leaving the skin on adds nutrients and a more rustic feel. Cut the sweet potatoes into uniform 1-inch cubes. Uniformity is key here to ensure they all roast evenly. Don’t worry if some pieces are slightly irregular; it’s a home-cooked meal, after all!
Step 2: Roast the Sweet Potatoes
In a large bowl, toss the sweet potato cubes with 2 tablespoons of olive oil, a generous pinch of salt, and freshly ground black pepper. Make sure each piece is lightly coated. Spread the seasoned sweet potatoes in a single layer on a large baking sheet. Overcrowding the pan will steam the potatoes instead of roasting them, so use two pans if necessary. Roast for 20-25 minutes, or until they are tender when pierced with a fork and starting to brown at the edges.
Step 3: Make the Glaze
While the sweet potatoes are roasting, it’s time to whip up that irresistible glaze. In a small bowl, whisk together 2 tablespoons of maple syrup, 1 tablespoon of Dijon mustard, and 1 teaspoon of apple cider vinegar. If you’re feeling adventurous, add a pinch of cayenne pepper for a subtle kick. This simple mixture is going to transform our humble sweet potatoes into something truly special.
Step 4: Glaze and Roast Again
Once the sweet potatoes have had their initial roast and are fork-tender, carefully remove the baking sheet from the oven. Drizzle the prepared maple Dijon glaze over the roasted sweet potatoes. Gently toss them on the pan to ensure each cube is coated. Return the pan to the oven and roast for another 10-15 minutes. This second roasting phase allows the glaze to caramelize and create a beautiful, sticky coating on the sweet potatoes.
Step 5: Add Pecans
In the last 5 minutes of roasting, sprinkle the pecans over the glazed sweet potatoes. This allows them to toast gently without burning, releasing their wonderful aroma and achieving a perfect crispness. Keep an eye on them; nuts can go from toasted to burnt quickly! Once the pecans are fragrant and the sweet potatoes are beautifully caramelized and tender, remove the pan from the oven. Let them cool for just a few minutes before serving. The aroma will be absolutely divine!
The Nourishing Details
This recipe is not only a delight for the taste buds but also a good source of vitamins and fiber. A typical serving (about 1/4 of the recipe, excluding pecans) is approximately:
- Calories: Around 250-300 kcal
- Carbohydrates: ~35-45g
- Fiber: ~5-7g
- Sugar: ~15-20g (mostly natural from sweet potatoes and maple syrup)
- Fat: ~10-15g (from olive oil and pecans)
- Protein: ~3-5g
These are estimates and can vary based on exact ingredient measurements and potato size. Adding the pecans will slightly increase the fat and calorie count.
Healthier Twists, Same Great Flavor
Looking to make this recipe even lighter or cater to specific dietary needs? Here are some simple, flavor-preserving swaps:
- Reduced Sugar: Use half the maple syrup and supplement with a sugar-free maple syrup alternative or a touch of stevia. The tang from the Dijon will still provide plenty of flavor.
- Lower Fat: Opt for a lighter olive oil or even a mist of cooking spray. Baking the sweet potatoes until tender before tossing with a little glaze can also reduce the need for added oil.
- Nut-Free: Omit the pecans entirely or replace them with toasted sunflower seeds or pepitas (pumpkin seeds) for a similar crunch.
- Spice it Up: Instead of cayenne, add a finely minced jalapeño or a dash of your favorite hot sauce to the glaze for a different kind of heat.
Serving Suggestions: Where Do These Sweet Potatoes Belong?
These One-Pan Roasted Sweet Potatoes are incredibly versatile. They make a fantastic side dish for:
- Holiday Meals: A more exciting alternative to traditional mashed potatoes or candied yams.
- Weeknight Dinners: Pair with roasted chicken, pan-seared salmon, or a hearty vegetarian chili.
- Brunch Buffets: Their sweet and savory profile complements eggs, bacon, and pancakes beautifully.
- Salads: Add a handful of cooled roasted sweet potatoes to a green salad for a boost of flavor and texture.
Avoiding Pitfalls: Common Mistakes to Dodge
To ensure your sweet potatoes turn out perfectly every time, be mindful of these common mistakes:
- Overcrowding the Pan: This is the biggest culprit for soggy, roasted vegetables. Ensure a single layer for optimal crispness.
- Uneven Cutting: Cutting potatoes into inconsistent sizes means some will be mushy while others remain undercooked. Aim for uniform cubes.
- Burning the Glaze Too Soon: Adding the glaze too early in the roasting process can cause the sugars to burn before the potatoes are fully cooked. Follow the timing for the second roast.
- Not Seasoning Enough: Sweet potatoes are delicious, but they need salt and pepper to truly shine. Don’t be shy with the seasoning!
Storing Your Delicious Leftovers
Leftover roasted sweet potatoes can be stored in an airtight container in the refrigerator for up to 3-4 days. Reheat them in a skillet over medium heat with a touch of oil for best results, or in the oven at 350°F (175°C) until warmed through. Microwaving is also an option, though they may lose some crispness.
Frequently Asked Questions (FAQs)
Got questions? We’ve got answers!
***_Can I make this recipe ahead of time?_***
Yes, you can roast the sweet potatoes until they are tender (Step 2) and store them in the refrigerator. When ready to serve, reheat them, toss with the glaze, and add the pecans for the final roast. This will save you time on assembly.
***_What if I don’t have pecans?_***
No problem! You can substitute walnuts, almonds, or even toasted pumpkin seeds (pepitas) for a similar crunchy texture. For a nut-free option, skip the nuts altogether or try toasted sunflower seeds.
***_Can I use sweet potato fries instead of cubes?_***
Absolutely! Cut your sweet potatoes into fry shapes. The baking time might need slight adjustment, so keep an eye on them. They’ll be delicious!}
***_My glaze seems too thin. What should I do?_***
If your glaze seems too thin, you can let it simmer gently in a small saucepan for a few minutes to reduce and thicken slightly. Alternatively, you can mix in a tiny bit of cornstarch (about 1/4 teaspoon) before adding it to the potatoes. Just be sure to not overcook it.
***_Can I use dried herbs in this recipe?_***
Yes, you can add dried herbs like rosemary or thyme. Add about half the amount you would use fresh (e.g., 1/2 teaspoon dried instead of 1 teaspoon fresh) and toss them with the sweet potatoes in Step 2.
A Sweet Finish to Any Meal
There you have it – a simple, elegant, and incredibly flavorful dish that proves healthy eating doesn’t mean sacrificing taste. The combination of sweet, savory, and crunchy makes these One-Pan Roasted Sweet Potatoes with Maple Dijon Glaze & Pecans a recipe that will become a staple in your kitchen. Don’t just take our word for it; try it yourself and let the rave reviews begin! We guarantee you’ll be making this dish again and again.

One-Pan Roasted Sweet Potatoes with Maple Dijon Glaze & Pecans
Description
ThisOne-Pan Roasted Sweet Potatoes with Maple Dijon Glaze & Pecansrecipe is a must-try! It’s the perfect balance ofsweet, savory, and nutty,
Ingredients
- 2large sweet potatoes, peeled and cut into1-inch cubes
- 2 tbspolive oil
- 2 tbsppure maple syrup
- 1 tbspDijon mustard
- 1 tspapple cider vinegar
- ½ tspcinnamon
- ½ tspsmoked paprika(optional, for a smoky kick)
- ½ tspsea salt
- ¼ tspblack pepper
- ⅓ cuppecans, roughly chopped
- Fresh thyme, for garnish (optional)
Instructions
- Preheat your oven to400°F (200°C). Line a baking sheet with parchment paper for easy cleanup.
- In a small bowl, whisk togetherolive oil, maple syrup, Dijon mustard, apple cider vinegar, cinnamon, smoked paprika, salt, and black pepperuntil well combined.
- Place the sweet potato cubes on the prepared baking sheet. Drizzle with the maple Dijon glaze and toss to coat evenly. Spread them out in a single layer to ensure even roasting.
- Roast in the oven for20 minutes. Remove the tray, sprinkle thechopped pecansover the potatoes, and give everything a quick toss. Return to the oven and roast for another10-15 minutes, until the potatoes are caramelized and fork-tender.
- Remove from the oven and let them cool for a couple of minutes. Garnish with fresh thyme if desired and serve warm!
Notes
For extra crispiness, broil for the last2 minutes—just keep an eye on them!
Love heat?Add a pinch of cayenne to the glaze.
Don’t skip tossing halfway!It ensures even roasting and prevents burning.
“`