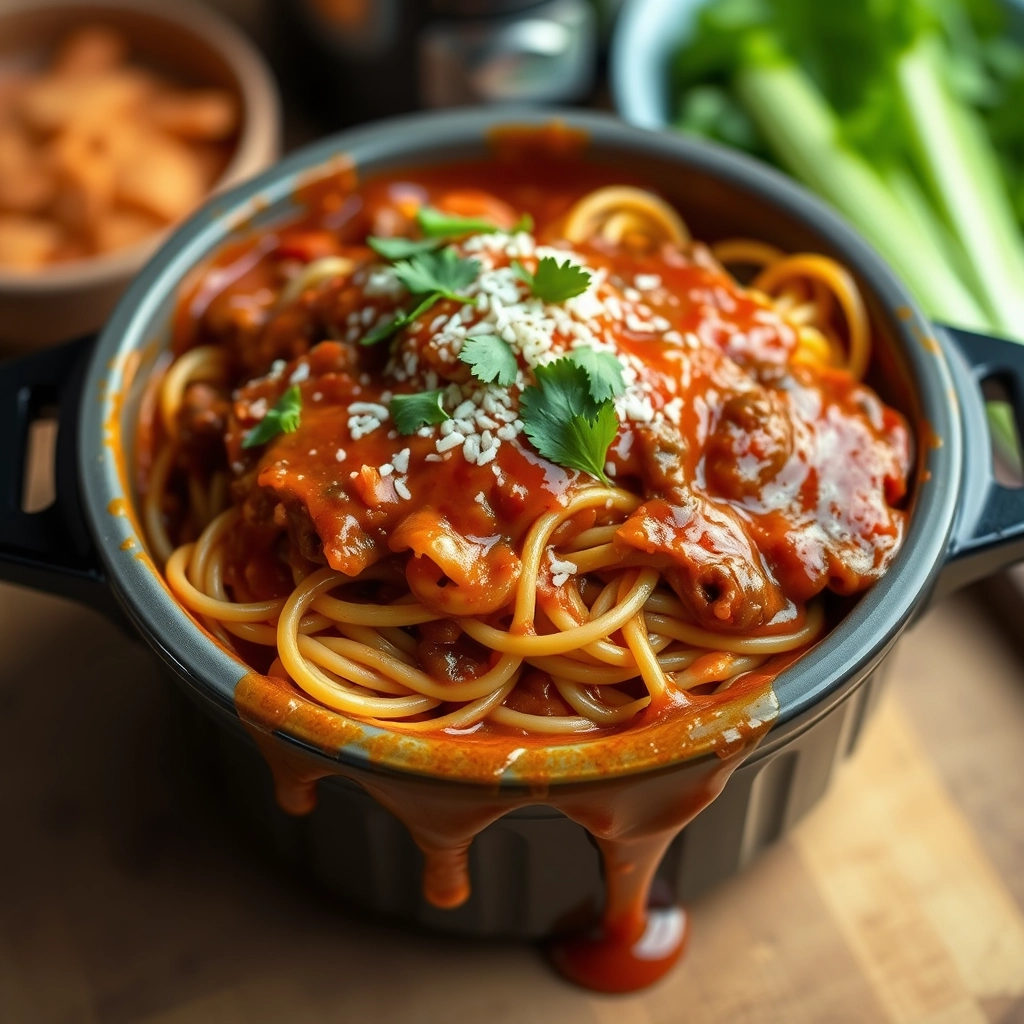
When Life Calls for Cozy, Comforting Dinners
There are evenings when the world feels a little too heavy, when the rain taps insistently against the window, and all you crave is a meal that wraps you up like a warm hug. That’s when my Crockpot Taco Spaghetti comes to the rescue—a dish born from the beautiful collision of two comfort food classics. It’s the kind of recipe that simmers away while you curl up with a book or tend to little ones, filling the house with the irresistible scent of spices and melted cheese. No fuss, no endless stirring—just simplicity and soul in every bite.
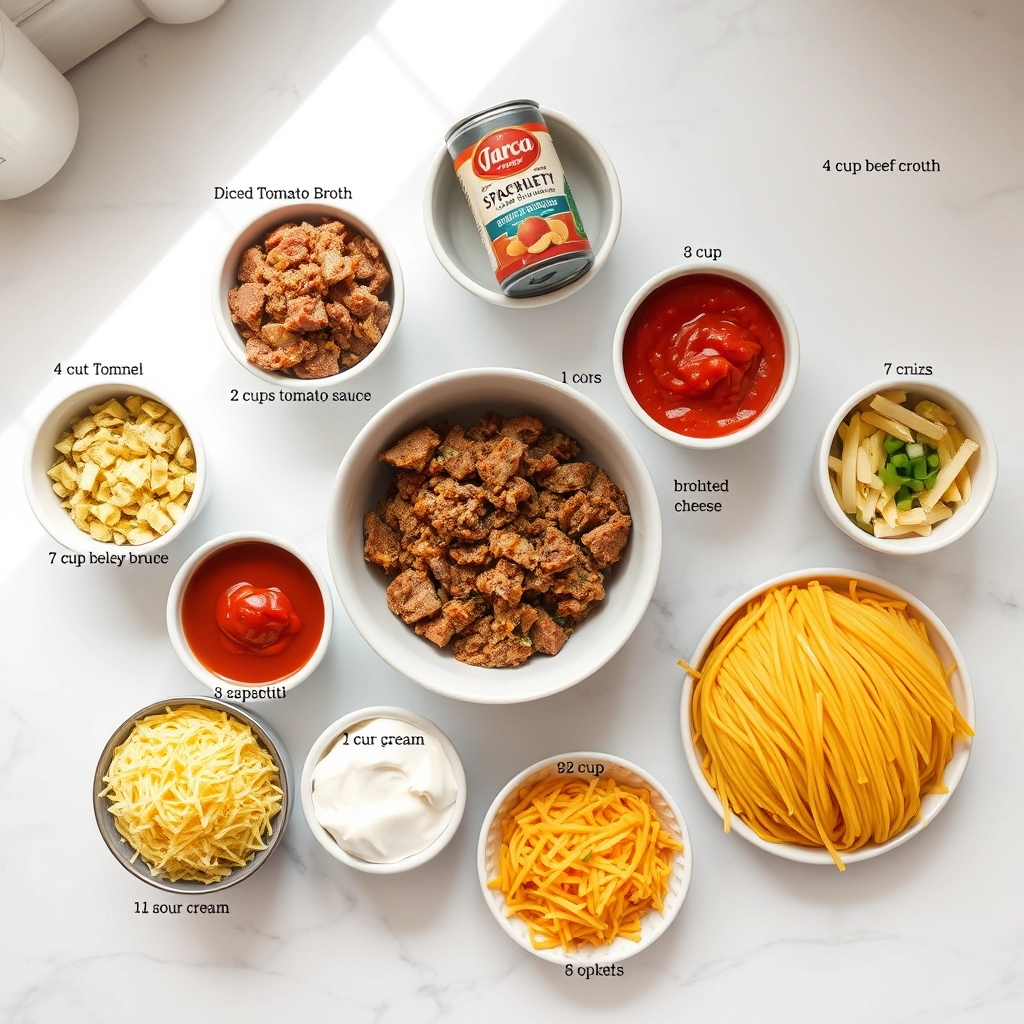
Ingredients You’ll Need
- 1 lb ground beef – I like 85/15 for the perfect balance of flavor without too much grease.
- 1 small onion, diced – The humble onion is the quiet hero here, adding sweetness to balance the spices.
- 1 packet taco seasoning – Store-bought is fine (no judgment!), but if you have homemade, even better.
- 1 can (10 oz) diced tomatoes with green chiles – Rotel is my go-to for that gentle kick.
- 1 can (15 oz) tomato sauce – This creates the luscious, saucy base that clings to every noodle.
- 8 oz spaghetti, broken in half – Breaking the noodles makes them fit perfectly in the crockpot—and easier to scoop later!
- 2 cups beef broth – Use low-sodium if your taco seasoning is already salty.
- 1 cup shredded cheddar cheese – Because what’s taco night without a melty cheese blanket?
- Toppings of choice – Think diced avocado, sour cream, fresh cilantro—the more color, the merrier!
Let’s Get Cooking
First, let’s talk about browning the beef. I know some crockpot recipes skip this step, but trust me—taking those extra 10 minutes to sauté the beef and onions together builds layers of flavor you’ll taste in every forkful. Plus, it gives you a chance to sneak a few bites straight from the pan (chef’s privilege!).
- Brown the beef and onions: In a skillet over medium heat, cook the ground beef and diced onions until the meat is no longer pink and the onions are soft and translucent. Drain any excess grease, then stir in the taco seasoning until everything is well coated.
- Layer with love: Transfer the beef mixture to your crockpot. Add the diced tomatoes, tomato sauce, broken spaghetti, and beef broth. Give it a gentle stir—just enough to combine, but don’t overmix. The noodles will settle into the liquid as they cook.
- Let time work its magic: Cover and cook on LOW for 2-3 hours (or HIGH for 1-1.5 hours). About 10 minutes before serving, sprinkle the shredded cheese over the top and let it melt into gooey perfection.
Now, here’s my favorite part: the toppings. Don’t skip them! A dollop of cool sour cream, a handful of crisp lettuce, or even a squeeze of lime can take this from cozy to extraordinary. And if you’re anything like me, you’ll be standing over the crockpot with a fork, stealing bites straight from the pot before it even hits the table.
Pro Tips, Variations, and Substitutions
This Crockpot Taco Spaghetti is wonderfully forgiving, so don’t be afraid to make it your own! Here are a few ideas to customize it:
- Protein Swap: Ground turkey or chicken works just as well as beef for a lighter option. Vegetarian? Try plant-based crumbles or black beans.
- Spice Level: Adjust the heat by using mild or hot taco seasoning, or add a diced jalapeño for extra kick.
- Pasta Choices: No spaghetti? Use rotini, penne, or even broken-up lasagna noodles—they’ll all soak up that delicious taco flavor.
- Cheese Lovers: Stir in a handful of cream cheese or a dollop of sour cream at the end for extra creaminess.
What to Serve With Taco Spaghetti
This dish is hearty on its own, but a few simple sides can round out the meal:
- A crisp green salad with avocado and lime dressing
- Warm garlic bread or buttery tortilla chips
- Pickled jalapeños or fresh pico de gallo for brightness
- A cold glass of horchata or your favorite Mexican soda
Storage and Reheating Tips
Leftovers? No problem! This taco spaghetti keeps beautifully:
- Fridge: Store in an airtight container for up to 4 days.
- Freezer: Portion into freezer-safe bags or containers for up to 3 months. Thaw overnight in the fridge before reheating.
- Reheating: Warm on the stovetop with a splash of broth or water to loosen the sauce, or microwave in 30-second intervals, stirring in between.
Frequently Asked Questions
Can I make this on the stovetop instead?
Absolutely! Brown the meat first, then simmer everything (except the pasta) for 10 minutes before adding the noodles. Cook until the pasta is tender, stirring occasionally.
Is there a way to make this less saucy?
If you prefer a thicker consistency, reduce the broth by ½ cup or let the spaghetti sit uncovered in the Crockpot for the last 15 minutes of cooking.
Can I use fresh tomatoes instead of canned?
Yes! Swap the canned tomatoes for 2 cups of diced fresh tomatoes. You may need to add a little extra broth since fresh tomatoes release less liquid.
What if I don’t have taco seasoning?
Make your own blend with 1 tbsp chili powder, 1 tsp each of cumin, garlic powder, and paprika, plus ½ tsp salt and a pinch of cayenne.
Warm and Satisfying to the Last Bite
There’s something so comforting about a meal that brings together the best of two worlds—taco night and spaghetti night—in one effortless dish. Whether you’re feeding a crowd, meal prepping for the week, or just craving something cozy, this Crockpot Taco Spaghetti is sure to hit the spot. The flavors meld together beautifully, the kitchen stays cool, and you’re left with a dinner that feels like a hug in a bowl. So grab your slow cooker and let it do the work while you relax. Dinner is handled!
Print
Crockpot Taco Spaghetti
Description
A delicious fusion of tacos and spaghetti made easy in the crockpot.
Ingredients
For the Crust:
- 1 lb ground beef
- 1 packet taco seasoning
- 1 can (10 oz) diced tomatoes with green chilies
- 1 can (8 oz) tomato sauce
- 8 oz spaghetti, broken into thirds
- 2 cups beef broth
- 1 cup shredded cheddar cheese
- 1/2 cup sour cream
- 1/4 cup chopped green onions
Instructions
1. Prepare the Crust:
- Brown the ground beef in a skillet over medium heat. Drain excess fat.
- Transfer the beef to the crockpot and stir in taco seasoning, diced tomatoes, tomato sauce, spaghetti, and beef broth.
- Cover and cook on low for 4 hours or until spaghetti is tender.
- Stir in shredded cheese and sour cream until well combined.
- Garnish with chopped green onions before serving.
Notes
You can customize the seasonings to taste.