“`html
Table of Contents
- Introduction: The Irresistible Appeal of Deviled Eggs
- Ingredients: The Heart of Your Deviled Eggs
- Timing: From Prep to Plate
- Step-by-Step Instructions
- Nutritional Highlights
- Healthier Alternatives for a Lighter Bite
- Serving Suggestions
- Common Mistakes to Avoid
- Storing Your Deviled Eggs
- Conclusion: Your Go-To Deviled Eggs Recipe
- Frequently Asked Questions
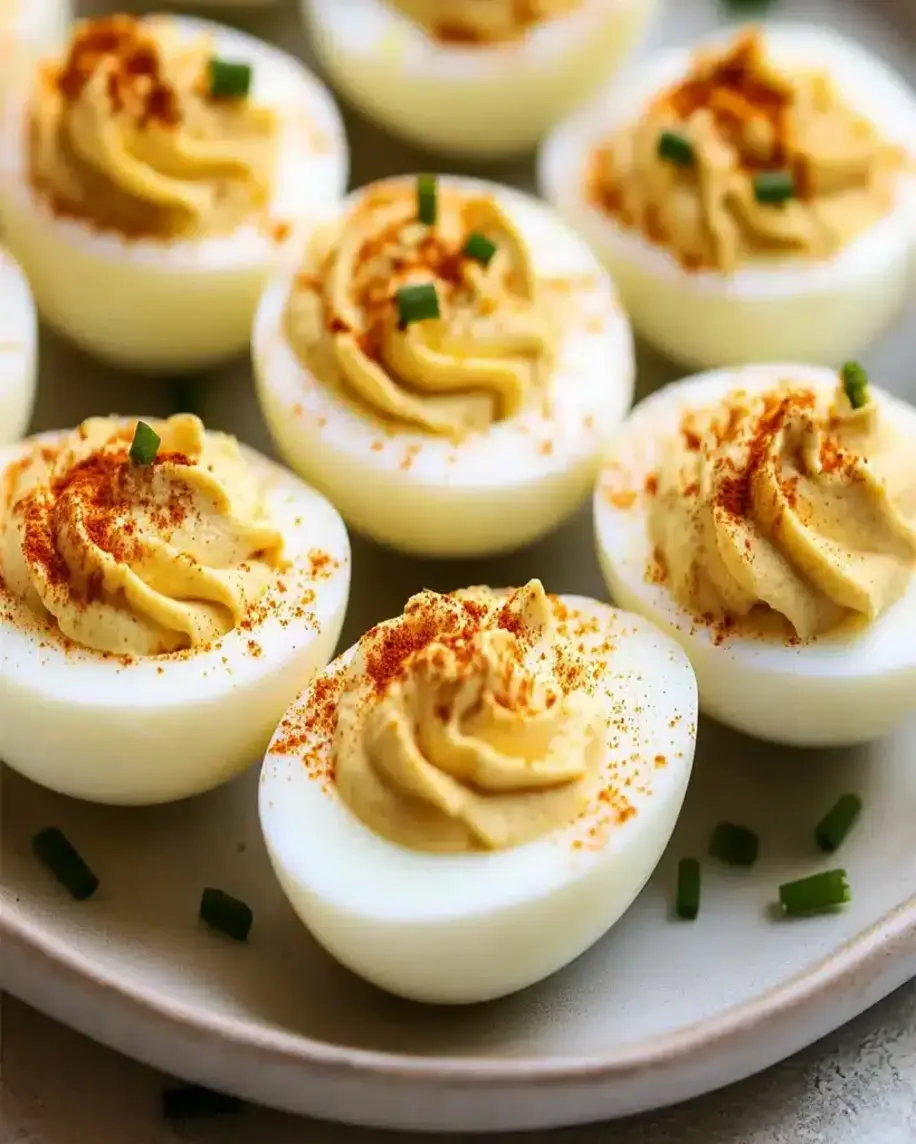
Classic Deviled Eggs 🥚 Perfect for Any Occasion!
Introduction: The Irresistible Appeal of Deviled Eggs
Are you searching for a recipe that’s universally loved, incredibly easy to make, and always a showstopper at gatherings? If so, you’re in the right place! Welcome to our delicious Classic Deviled Eggs recipe. This recipe is more than just an appetizer; it’s a symbol of hospitality and comfort food that graces tables at family reunions, holiday feasts, potlucks, and casual get-togethers. The combination of creamy, tangy, and slightly spicy flavors makes these deviled eggs an absolute go-to crowd-pleaser. Whether you’re a seasoned cook or just starting in the kitchen, this Classic Deviled Eggs Recipe is designed to be foolproof and yield consistently delightful results, quickly becoming a staple in your culinary repertoire. Let’s dive into the simple steps of making these perfectly seasoned, irresistible treats that are sure to disappear fast!
Ingredients: The Heart of Your Deviled Eggs
The magic of classic deviled eggs lies in its simple, high-quality ingredients. Each component plays a crucial role in creating that harmonious blend of flavors and textures we all adore. Here’s what you’ll need:
Eggs
12 large eggs. The foundation of our dish! For easier peeling, opt for eggs that are a few days old rather than super fresh.
Mayonnaise
1/2 cup good quality mayonnaise. This provides the rich, creamy base for the filling.
Substitution: For a lighter option, you can use Greek yogurt or a blend of mayonnaise and sour cream. Ensure it’s full-fat for the best texture and flavor, similar to traditional mayonnaise.
Mustard
1 tablespoon Dijon mustard. Adds a subtle tang and a little kick.
Substitution: Yellow mustard or even a touch of spicy brown mustard can be used, but Dijon offers a more refined, complex flavor that pairs beautifully.
Vinegar
1 teaspoon white vinegar or apple cider vinegar. This brightens the flavor of the yolk mixture.
Substitution: Lemon juice can be used as a substitute for a slightly different zesty note.
Seasonings
Salt and freshly ground black pepper to taste. Crucial for enhancing all the other flavors.
Optional additions: A pinch of paprika, a dash of hot sauce, or a tiny pinch of cayenne pepper can add extra depth and a hint of warmth.
Garnish
Paprika for dusting. This adds a beautiful pop of color and a mild, earthy flavor.
Creative garnishes: Finely chopped chives, fresh parsley, a tiny slice of pimento, or even a small caper can elevate the presentation.
Timing: From Prep to Plate
One of the best things about classic deviled eggs is their efficiency. They come together quickly, making them perfect for last-minute entertaining or a delightful snack!
Compared to many appetizer recipes that can take an hour or more, deviled eggs are remarkably swift. The cooking time is fixed, but the prep time is manageable, and a significant portion of the total time involves the eggs cooling, which is hands-off time. This makes it an excellent candidate for when you need a delicious dish without spending all day in the kitchen.

Step-by-Step Instructions
Creating the perfect deviled eggs is a straightforward process. Follow these simple steps for delicious results every time!
Step 1: Perfectly Boil the Eggs
Place your eggs in a single layer in a saucepan. Cover them with about an inch of cold water. Bring the water to a rolling boil over high heat. Once boiling, immediately remove the pan from the heat, cover it tightly, and let it stand for 10-12 minutes. This method ensures the yolks are cooked through without becoming rubbery.
Step 2: Cool and Peel with Precision
After the standing time, carefully drain the hot water and immediately plunge the eggs into a bowl of ice water. Let them chill for at least 10-15 minutes. This shocking process helps stop the cooking and makes peeling much easier. To peel, gently tap the egg on a hard surface to crack the shell all over, then start peeling from the wider end, using your thumb to ease the shell away. If you used slightly older eggs, they should peel like a dream!
Step 3: Mash the Yolk Mixture
Slice each cooled, peeled egg in half lengthwise. Carefully scoop out the yolks into a medium bowl. Using a fork or a potato masher, thoroughly mash the yolks until they are finely crumbly with no large lumps. This is key for a smooth, creamy filling.
Step 4: Fill the Egg White Halves
To the mashed yolks, add the mayonnaise, Dijon mustard, and vinegar. Season generously with salt and freshly ground black pepper. Stir everything together until it’s smooth and creamy. Taste and adjust seasonings as needed – this is your chance to perfect the flavor! For a super-smooth filling, you can even transfer the mixture to a food processor and blend until perfectly creamy. Then, spoon or pipe the yolk mixture back into the hollows of the egg white halves. Using a piping bag with a star tip adds a lovely decorative touch, but a spoon works just as well.
Step 5: Garnish and Serve with Flair
Arrange the filled egg white halves on a serving platter. Dust the tops generously with paprika for a classic, appealing look. You can also add a sprinkle of finely chopped chives or parsley for extra color and freshness. Cover loosely and refrigerate until ready to serve. Deviled eggs are best served chilled!
Nutritional Highlights
While deviled eggs are a treat, they also offer some nutritional benefits. They are a good source of protein and contain essential vitamins and minerals. A typical serving (2 deviled egg halves) provides approximately:
- Calories: 100-150 kcal
- Protein: 5-7g
- Fat: 8-12g
- Carbohydrates: 1-2g
*Note: Exact nutritional values can vary based on the size of the eggs and the specific brands and quantities of mayonnaise and other ingredients used.
Healthier Alternatives for a Lighter Bite
Looking for ways to make this classic a bit lighter without sacrificing flavor? Here are some smart swaps:
- Creamier Base: Replace half to all of the mayonnaise with plain Greek yogurt (full-fat or 2%) or light sour cream. This reduces fat and adds a protein boost.
- Avocado Mash: For a dairy-free and heart-healthy option, mash ripe avocado with the egg yolks instead of mayonnaise. It provides a wonderfully creamy texture and healthy fats.
- Reduced Fat Mayo: If using mayonnaise, opt for a reduced-fat version, but be mindful that some can affect the taste and texture.
- Flavor Boosters: Enhance flavor with herbs like dill or chives, a touch of hot sauce, or lemon zest instead of relying solely on fat for richness.
- Mustard Variety: Experiment with different mustards (like a honey mustard for a touch of sweetness or a spicy brown) to add complexity without extra fat.
Serving Suggestions
Deviled eggs are incredibly versatile! Serve them as:
- Appetizer: A quintessential party starter for any occasion.
- Snack: A satisfying and flavorful treat any time of day.
- Brunch Addition: A delightful component of a brunch spread.
- Picnic Staple: Easy to transport and always a hit at outdoor events.
- Potluck Favorite: They’re consistently requested at shared meals.
Pair them with a glass of crisp white wine, a light beer, or sparkling water for a refreshing combination.
Common Mistakes to Avoid
- Over-boiling Eggs: This leads to rubbery whites and chalky, green-ringed yolks, which are harder to mash smoothly.
- Difficulty Peeling: Use slightly older eggs and an ice bath for easier peeling.
- Lumpy Filling: Ensure the yolks are mashed very finely before adding other ingredients. A fork or masher is sufficient, but a food processor guarantees smoothness.
- Bland Flavor: Don’t be shy with salt and pepper! Tasting and adjusting the seasoning is crucial.
- Warm Serving: Deviled eggs are best served chilled for optimal texture and flavor.
Storing Your Deviled Eggs
Proper storage is key to keeping your deviled eggs delicious and safe to eat. Once prepared, arrange them on a platter or in an airtight container. Cover them loosely with plastic wrap or the container lid. Refrigerate immediately. They are best enjoyed within 1-2 days. If you need to transport them, a deviled egg carrier is a great investment!
Conclusion: Your Go-To Deviled Eggs Recipe
There you have it – the ultimate guide to crafting perfect, Classic Deviled Eggs! This recipe is designed for simplicity and maximum flavor, proving that sometimes, the most beloved dishes are the easiest to make. Whether you’re hosting a large event or just craving a delightful snack, these deviled eggs are sure to impress. They represent comfort, celebration, and deliciousness all rolled into one bite. Give this recipe a try, and let us know how it turns out in the comments below! We’d love to hear your variations and serving ideas.
Loved this recipe? Share it with friends and family!
Frequently Asked Questions
What makes deviled eggs “deviled”?
The term “deviled” historically refers to foods that are highly seasoned or spiced, particularly with ingredients like mustard, pepper, or paprika. It became associated with dishes in the 18th century and has since been a delightful descriptor for this popular appetizer.
Why are my deviled eggs hard to peel?
The most common reason is using very fresh eggs. The membrane inside the eggshell adheres more strongly to fresh eggs. Using eggs that are at least a week old, boiling them correctly, and chilling them rapidly in an ice bath will significantly improve peeling ease.
Can I make the filling ahead of time?
Yes! You can prepare the yolk filling and store it in an airtight container in the refrigerator for up to 2 days. It’s best to fill the egg white halves just before serving to prevent the filling from drying out or absorbing fridge odors.
How do I get a smooth filling?
Mash the yolks thoroughly until they are very fine and crumbly before adding any wet ingredients. For ultimate smoothness, transfer the yolk mixture, mayonnaise, mustard, and seasonings to a food processor and blend until creamy. A potato ricer can also be used to mash the yolks initially.
Can I freeze deviled eggs?
No, deviled eggs do not freeze well. The texture of the egg whites can become watery and rubbery upon thawing, and the creamy filling can separate. They are best enjoyed fresh.
How long do deviled eggs last in the refrigerator?
Deviled eggs are at their best for eating within 1 to 2 days of preparation when stored properly in the refrigerator.

Classic Deviled Eggs Recipe – Easy & Delicious Appetizer
Description
Welcome to our deliciousClassic Deviled Eggsrecipe! Whether you’re preparing for a family gathering, holiday celebration, or just want a savory snack, this dish is a go-to crowd-pleaser. If you love creamy, tangy, and slightly spicy flavors, then thisClassic Deviled Eggs Recipewill become a staple in your kitchen. Let’s dive into making these perfectly seasoned treats!
Ingredients
- 12large hard-boiled eggs– Peeled and halved.
- ½ cupmayonnaise– Adds creaminess to the filling.
- 2 teaspoonswhite vinegar– Provides a slight tang.
- 2 teaspoonsyellow mustard– For a hint of sharpness.
- ¼ teaspoonkosher salt– Balances the flavors.
- ¼ teaspoonground black pepper– Adds a mild heat.
- Smoked paprika(optional) – For garnish and a smoky flavor.
- For a healthier twist, substituteGreek yogurtfor half of the mayonnaise.
- Add a touch ofdijon mustardinstead of yellow mustard for a more refined taste.
- Useapple cider vinegaras an alternative to white vinegar for a slightly sweeter flavor.
Instructions
- Place the eggs in a large saucepan and cover them with cold water, about two inches above the eggs.
- Heat the saucepan over high heat and bring the water to a full rolling boil.
- Once boiling, turn off the heat, cover the pan, and let it sit for10-12 minutes.
- Strain the water and immediately place the eggs in an ice bath for5 minutesto stop the cooking process.
- Gently crack the cooled eggs and peel off the shells under running water to ease the process.
- Slice each egg in half lengthwise, and carefully scoop out the yolks into a medium mixing bowl.
- Addmayonnaise,vinegar,mustard,salt, andpepperto the yolks.
- Use a fork or whisk to mash and blend the ingredients until the mixture is smooth and creamy.
- Spoon or pipe the yolk mixture back into the egg white halves.
- Sprinkle withsmoked paprikafor a touch of color and added flavor.
- Arrange the deviled eggs on a serving platter.
- Serve immediately or refrigerate until ready to serve.
Notes
Perfect Boiling Method: To avoid green yolks, be sure not to overcook the eggs. Use the ice bath to halt cooking instantly.
Smooth and Creamy Filling: For an extra creamy texture, use a hand blender to whip the yolk mixture.
Make-Ahead Tip: Prepare the filling and egg whites separately. Assemble right before serving to maintain freshness.
“`