There’s something undeniably comforting about a warm bowl of Cozy Chicken Soup Recipe, especially when the weather turns chilly or you need a little extra TLC. Whether you’re fighting off a cold or simply craving a hearty, homemade meal, this recipe wraps you in warmth from the first spoonful. Plus, it’s packed with wholesome ingredients that nourish both body and soul. Let’s dive into why this dish deserves a spot in your weekly rotation.
The Cozy Chicken Soup Recipe is a timeless classic, blending tender chicken, savory broth, and fresh vegetables into a dish that feels like a hug in a bowl. Unlike store-bought versions, this homemade recipe lets you control the flavors and quality of ingredients, ensuring every bite is both delicious and nutritious. Moreover, it’s incredibly versatile—you can easily customize it with your favorite herbs, noodles, or even a splash of lemon for brightness. If you love comforting meals, you’ll also enjoy our Hearty Beef Stew or Creamy Tomato Soup, which share the same soul-warming appeal.
What makes this recipe stand out is its simplicity. You don’t need fancy techniques or hard-to-find ingredients to create a pot of Cozy Chicken Soup Recipe that tastes like it simmered all day. In fact, it’s perfect for busy weeknights or lazy Sundays when you want minimal effort with maximum reward. The aroma alone will draw your family to the kitchen, and the flavors will keep them coming back for seconds. It’s the kind of meal that turns an ordinary day into something special.
Why I Love This Recipe
This Cozy Chicken Soup Recipe holds a special place in my heart because it reminds me of my grandmother’s kitchen. She used to make it whenever I visited, and the scent of simmering broth and herbs instantly made me feel at home. Now, whenever I whip up a batch, it’s like carrying on her tradition of love and care. Plus, seeing my own family gather around the table, bowls in hand, makes all the chopping and stirring worth it. It’s more than just a meal—it’s a reminder of connection, comfort, and the simple joys of cooking for those you love.
Health and Nutrition
Why it’s good for your body
Cozy Chicken Soup Recipe packs a powerful nutritional punch while warming you from the inside out. First, the lean chicken breast delivers high-quality protein to support muscle repair and keep you full longer. Additionally, the slow-simmered broth absorbs collagen from the bones, which may promote joint health and glowing skin. Moreover, the carrots, celery, and onions add fiber, vitamins A and C, and antioxidants to boost immunity.
Since the ingredients simmer together, Cozy Chicken Soup Recipe becomes an easy way to hydrate while nourishing your body. The broth also contains electrolytes like potassium, which helps maintain fluid balance. Furthermore, garlic and herbs like thyme offer anti-inflammatory benefits, making this soup a soothing choice when you feel under the weather. With minimal added fats and no refined sugars, it’s a light yet satisfying meal.
Finally, Cozy Chicken Soup Recipe adapts well to dietary needs. You can easily swap noodles for quinoa or zucchini if you prefer lower-carb options. Whether you need a post-workout recovery meal or a comforting dish on a chilly day, this soup delivers both flavor and nutrition in every spoonful.
How it fits in a healthy lifestyle
Cozy Chicken Soup Recipe fits seamlessly into balanced eating habits. If you’re watching your carb intake, skip the noodles and load up on extra veggies instead. The high-protein base makes it ideal for fueling active days or supporting weight management goals. For heart-healthy eating, the broth’s low sodium content and lean protein help maintain blood pressure and cholesterol levels.
Busy weeknights call for simple, nourishing meals, and this soup delivers. Pair it with a crisp kale salad for extra greens or serve it alongside whole-grain rolls for a satisfying dinner. Since it reheats beautifully, you can batch-cook it for quick lunches all week. Whether you prioritize gut health, immunity, or just wholesome comfort food, Cozy Chicken Soup Recipe checks all the boxes.
A comforting and hearty chicken soup perfect for chilly days.
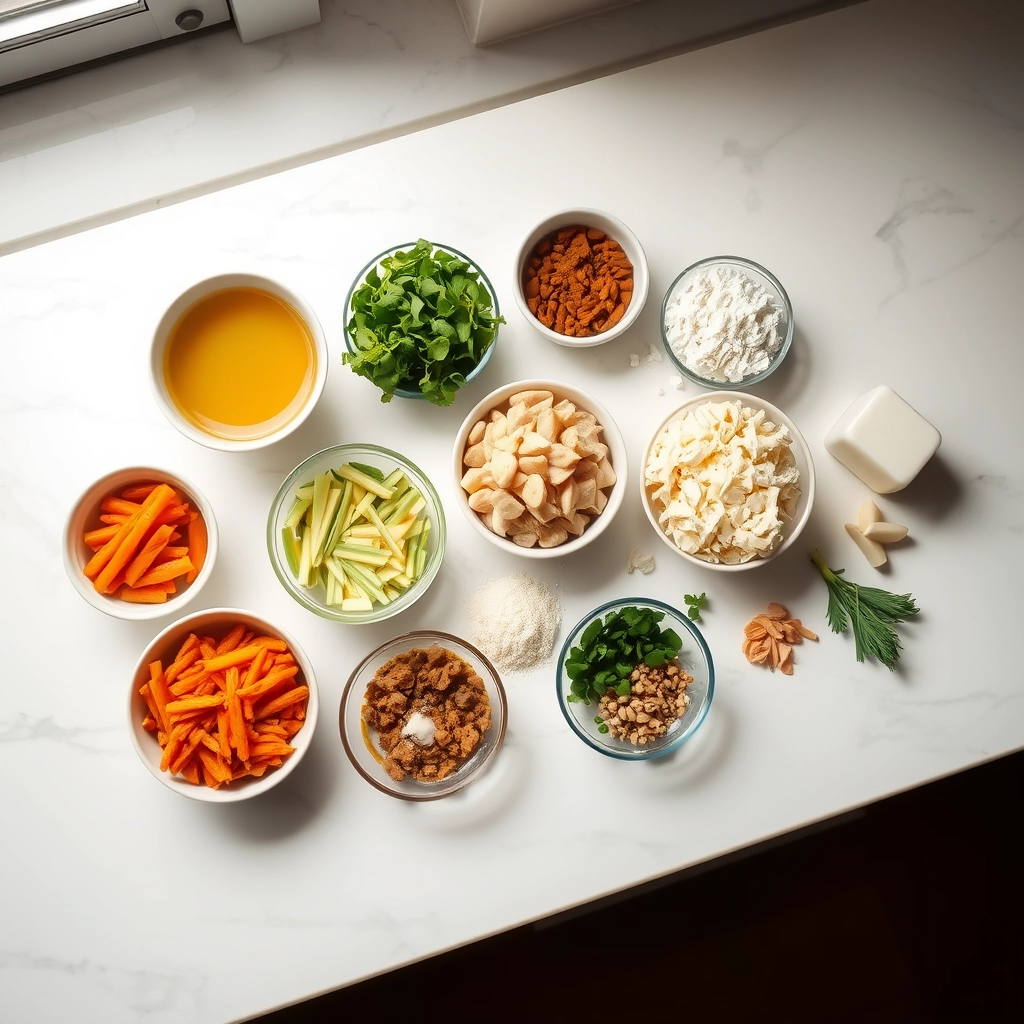
Ingredients
Scale
For the Crust:
1 lb boneless, skinless chicken breasts
8 cups chicken broth
2 carrots, sliced
2 celery stalks, chopped
1 onion, diced
2 cloves garlic, minced
1 tsp dried thyme
1 tsp dried rosemary
Salt and pepper to taste
1 cup egg noodles
Instructions
1. Prepare the Crust:
In a large pot, bring chicken broth to a boil.
Add chicken breasts, carrots, celery, onion, garlic, thyme, and rosemary. Reduce heat and simmer for 20 minutes.
Remove chicken, shred it, and return to the pot.
Add egg noodles and cook for an additional 10 minutes or until noodles are tender.
Season with salt and pepper to taste.
Notes
You can customize the seasonings to taste.
“`html
How to Prepare This Dish
Steps and time-saving tips
Start by heating a large pot over medium heat and drizzle in a bit of olive oil. Toss in diced onions, carrots, and celery, then stir them until they soften, about 5 minutes. Next, add minced garlic and sauté for another minute until fragrant. Pour in low-sodium chicken broth, then drop in boneless, skinless chicken thighs for richer flavor. Bring the mixture to a gentle boil, then reduce the heat and let it simmer for 20 minutes. Meanwhile, shred pre-cooked rotisserie chicken if you’re short on time—this cuts cooking down significantly. Once the thighs cook through, remove them, shred the meat, and return it to the pot. Stir in egg noodles and cook until tender, about 8 minutes. Finally, season with salt, pepper, and fresh parsley. For a creamier texture, whisk in a splash of heavy cream at the end. Serve hot with crusty bread, and enjoy your Cozy Chicken Soup Recipe without the fuss.
and-learned-from">Mistakes I’ve made and learned from
I once rushed the sauté step, skipping the onion’s caramelization, and my Cozy Chicken Soup Recipe tasted bland. Now, I patiently let the veggies soften fully—it builds depth. Another time, I overcooked the noodles by adding them too early, turning them mushy. Lesson learned: add pasta last, or cook it separately if meal prepping. For more on balancing flavors, check out my guide on seasoning secrets. Also, if you’re new to soups, my soup basics post breaks down common pitfalls. Trust me, a little patience and timing make all the difference.
“`
n-and-variations">Cultural Connection and Variations
Where this recipe comes from
Every culture has its own version of Cozy Chicken Soup Recipe, and each one tells a story. In many households, this dish is more than just food—it’s a warm hug in a bowl. For instance, Jewish matzo ball soup transforms the classic recipe with fluffy dumplings, while Mexican sopa de lima brightens it with citrus and spices. Meanwhile, in China, ginger and goji berries often star in their healing chicken soups.
My grandmother’s Cozy Chicken Soup Recipe always included a handful of fresh dill and a splash of lemon juice. She swore it warded off colds, and honestly, it worked like magic. Across the South, cooks might add a dash of hot sauce or a scoop of rice for extra heartiness. No matter the variation, the goal stays the same: comfort, nourishment, and connection.
How it fits in today’s cooking
Today, Cozy Chicken Soup Recipe still holds its place as a timeless staple. Busy parents love it for quick weeknight dinners, while meal preppers stash batches in the freezer for hectic days. Some modern twists, like adding quinoa or spiralized zucchini, keep it fresh for health-conscious eaters. And let’s not forget its starring role during cold season—nothing soothes a sore throat faster.
Holidays also give this
dish a spotlight. Many families serve it as a starter during Thanksgiving or Christmas, pairing it with fluffy dinner rolls for the ultimate comfort meal. Others lean into its simplicity, like pairing it with a crisp green salad for a light yet satisfying lunch. No matter how you enjoy it, Cozy Chicken Soup Recipe remains a beloved tradition in kitchens everywhere.
Taste and Texture
What makes it delicious
Every spoonful of Cozy Chicken Soup Recipe wraps you in warmth, thanks to its rich, savory broth and tender chunks of chicken. The aroma alone—a blend of garlic, thyme, and slow-simmered onions—will make your kitchen smell like comfort. Meanwhile, the carrots and celery add a subtle sweetness and just the right amount of crunch. Whether you savor the silky broth or the hearty bites of chicken and veggies, this Cozy Chicken Soup Recipe delivers a perfectly balanced meal that feels like a hug in a bowl.
Boosting the flavor
For an extra layer of depth, try stirring in a splash of lemon juice or a sprinkle of fresh parsley just before serving. If you love a bit of heat, a pinch of red pepper flakes or a drizzle of homemade chili oil will elevate the flavors. Crusty bread or garlic herb dinner rolls make the perfect side, soaking up every last drop of the delicious broth. With these simple tweaks, your Cozy Chicken Soup Recipe will taste even more irresistible.
For the best Cozy Chicken Soup Recipe, always use fresh vegetables to build a rich flavor base. Simmer the broth gently to keep the chicken tender and avoid overcooking. Additionally, season in layers by adding herbs early and adjusting salt just before serving. Finally, let the soup rest for 10 minutes off the heat to let the flavors meld perfectly.
Mistakes to avoid
One common mistake is boiling the soup too vigorously, which can make the chicken tough. Instead, keep the heat low for a silky texture. Another error is skipping the step of skimming excess fat from the broth, which can result in a greasy finish. For more tips on balancing flavors, check out our guide on seasoning soups. Also, if your broth tastes bland, learn how to fix it with our soup troubleshooting tips.
g-suggestions">Serving and Pairing Suggestions
How to serve this dish
For a comforting presentation, ladle the Cozy Chicken Soup Recipe into warm bowls to keep it piping hot. Top with fresh parsley or a sprinkle of grated Parmesan for a pop of color and flavor. Meanwhile, serve it with crusty bread on the side for dipping, making it perfect for chilly evenings or casual family dinners. If you’re hosting a gathering, consider pairing it with a simple green salad for a balanced meal. Additionally, this soup shines during holiday potlucks or as a starter for Sunday brunch.
What goes well with it
First, try pairing the Cozy Chicken Soup Recipe with a crisp, buttery Chardonnay to enhance its rich flavors. Alternatively, a warm slice of our Honey Oat Bread makes an ideal side for soaking up every last drop. For a heartier meal, serve it alongside our Garlic Herb Roasted Potatoes, which add a savory crunch. Finally, a light citrus salad cuts through the soup’s warmth, creating a refreshing contrast.
math-faq-block">
What’s the secret to making cozy chicken soup taste rich and flavorful?
The key to a rich, flavorful Cozy Chicken Soup Recipe is simmering the broth with aromatics like onions, garlic, and herbs for at least 30 minutes. Adding a splash of lemon juice or apple cider vinegar at the end brightens the flavors, while a parmesan rind or bay leaf deepens the savory notes.
Can I make cozy chicken soup in a slow cooker?
Absolutely! A slow cooker simplifies the Cozy Chicken Soup Recipe—just add chicken, veggies, broth, and seasonings, then cook on low for 6–8 hours. Shred the chicken before serving for tender, melt-in-your-mouth results.
What vegetables work best in cozy chicken soup?
Classic choices for Cozy Chicken Soup Recipe include carrots, celery, and onions, but you can also add leeks, parsnips, or kale for extra depth. Avoid overcooking veggies—add delicate greens like spinach just before serving.
ank-math-faq-item">
How do I thicken cozy chicken soup without cream?
For a thicker Cozy Chicken Soup Recipe, mash a few cooked potatoes or blend a portion of the soup and stir it back in. A roux (butter and flour paste) or a cornstarch slurry also works well for a creamy texture without dairy.
Best Irish Colcannon Recipe – Creamy Comfort Food
Introduction
There’s something magical about a dish that wraps you in warmth like a cozy blanket on a chilly evening. If you’re craving comfort food that feels like a hug from the inside out, this Irish Colcannon Recipe for Comfort Food Lovers is your answer. Creamy mashed potatoes, tender greens, and a hint of butter come together in a dish that’s as nostalgic as it is delicious. Whether you’re celebrating St. Patrick’s Day or simply need a hearty side to brighten your week, this recipe delivers soul-satisfying flavor in every bite.
Irish Colcannon Recipe for Comfort Food Lovers is a traditional Irish dish that transforms humble ingredients into something extraordinary. At its core, colcannon combines buttery mashed potatoes with kale or cabbage, creating a creamy yet textured dish that’s both rustic and comforting. Historically, families served it during Halloween with hidden charms for good luck, but today, it’s a year-round favorite for its simplicity and heartiness. What makes this recipe stand out is its versatility. You can pair it with roasted meats, serve it as a standalone meal, or even top it with a fried egg for extra richness. Moreover, if you love exploring global comfort foods, you’ll appreciate how this dish fits alongside classics like our Creamy Garlic Mashed Potatoes or Slow-Cooked Corned Beef. The blog’s tone celebrates approachable, flavorful cooking, and this Irish Colcannon Recipe for Comfort Food Lovers perfectly aligns with that mission—offering a taste of tradition without fuss.
Why I Love This Recipe
Irish Colcannon Recipe for Comfort Food Lovers holds a special place in my heart because it reminds me of family gatherings where laughter and good food went hand in hand. My grandmother used to make it with garden-fresh kale, and the smell of butter melting into hot potatoes still brings back those cherished moments. Beyond nostalgia, I adore how forgiving this dish is. Even on busy nights, it comes together effortlessly, yet it always feels like a celebration. Whether I’m serving it at a holiday table or enjoying a quiet bowl by the fire, it never fails to deliver comfort and joy.
Health and Nutrition
Why it’s good for your body
Irish Colcannon Recipe for Comfort Food Lovers packs a nutritious punch while delivering cozy flavors. First, it combines potassium-rich potatoes with fiber-filled kale or cabbage, supporting digestion and heart health. Additionally, the dish includes butter or milk, which provide healthy fats and calcium for strong bones. Because it balances carbs, veggies, and dairy, Irish Colcannon Recipe for Comfort Food Lovers keeps you full and energized.
Moreover, kale or cabbage adds antioxidants that fight inflammation and boost immunity. Meanwhile, the potatoes offer vitamin C and B6, which help your body convert food into energy. Since this recipe uses simple, whole ingredients, you avoid processed additives. For example, Irish Colcannon Recipe for Comfort Food Lovers skips artificial preservatives, making it a cleaner choice than many store-bought comfort foods.
Finally, the dish adapts easily to dietary needs. You can swap butter for olive oil or use lactose-free milk without losing flavor. Whether you enjoy it as a side or main dish, Irish Colcannon Recipe for Comfort Food Lovers nourishes your body while satisfying cravings.
How it fits in a healthy lifestyle
Irish Colcannon Recipe for Comfort Food Lovers fits perfectly into balanced eating habits. For a heart-healthy twist, try using olive oil instead of butter and load up on extra greens. If you follow a gluten-free diet, this dish naturally meets your needs since it relies on potatoes and vegetables. Pair it with a lean protein like grilled chicken or baked salmon for a complete meal.
Planning meals ahead? This recipe stores well, so you can prep it for quick weekday lunches. For more gluten-free ideas, check out our gluten-free meal prep guide. Craving other comfort foods with a healthy spin? Explore our healthy comfort food swaps to keep your diet on track without sacrificing flavor. Irish Colcannon Recipe for Comfort Food Lovers proves that wholesome ingredients can still deliver warmth and satisfaction.
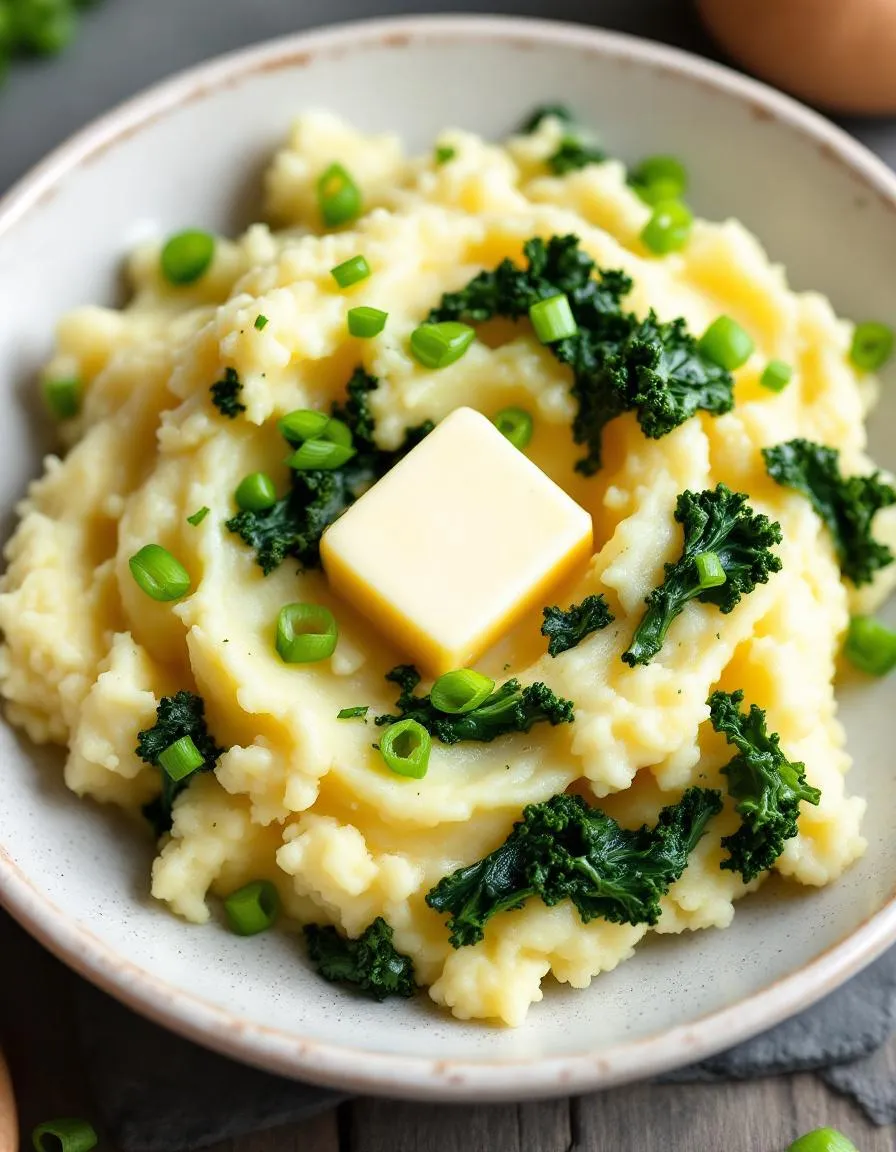
A traditional Irish dish combining creamy mashed potatoes with tender cabbage or kale, perfect for a comforting meal.
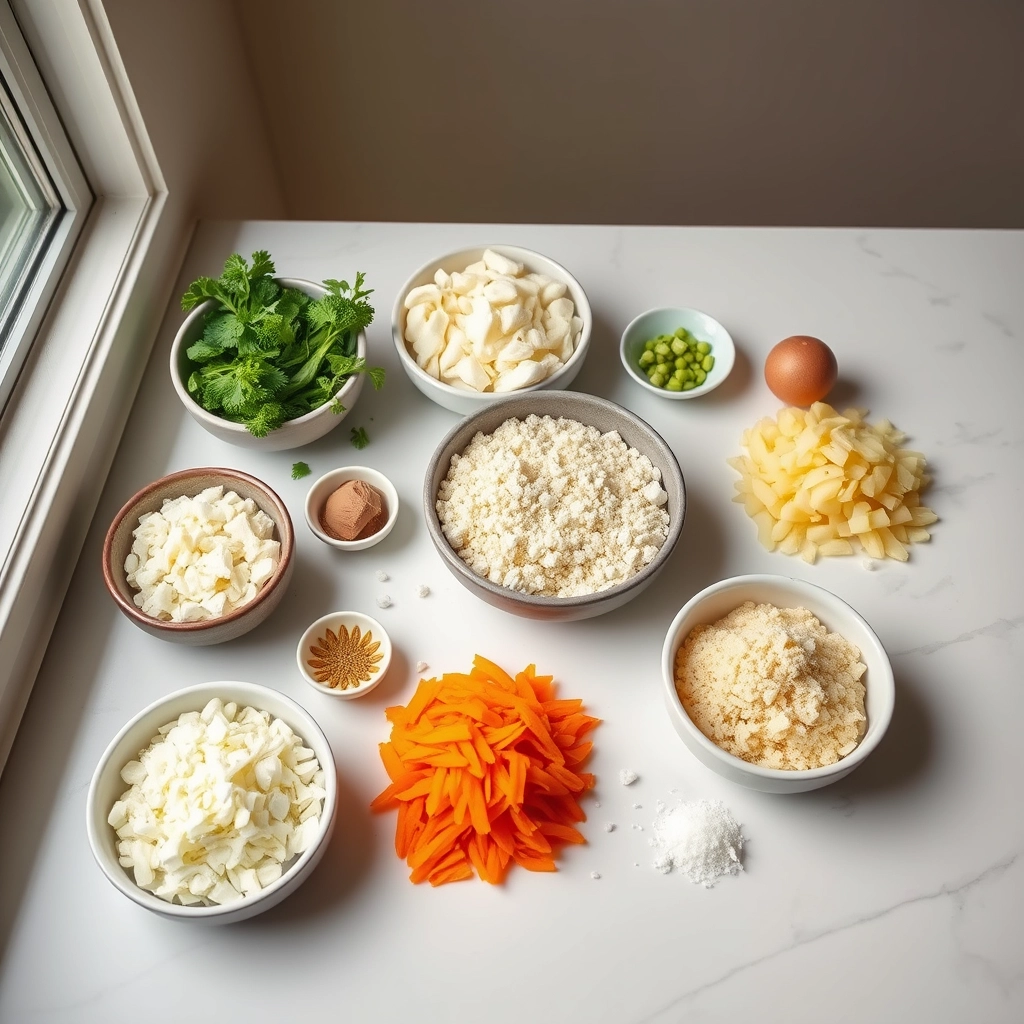
Ingredients
Scale
For the Crust:
2 lbs potatoes, peeled and quartered
4 cups cabbage or kale, finely chopped
1/2 cup butter, divided
1/2 cup milk or cream
4 green onions, chopped
Salt and pepper to taste
Instructions
1. Prepare the Crust:
Boil the potatoes in salted water until tender, about 15-20 minutes. Drain and set aside.
In a large skillet, melt 1/4 cup of butter over medium heat. Add the cabbage or kale and cook until tender, about 5-7 minutes.
Mash the potatoes with the remaining butter and milk or cream until smooth. Stir in the cooked cabbage or kale and green onions. Season with salt and pepper to taste.
Serve warm with an extra pat of butter on top if desired.
Notes
You can customize the seasonings to taste.
How to Prepare This Dish
Steps and time-saving tips
Start by peeling and chopping the potatoes into even chunks so they cook uniformly. Toss them into a pot of salted boiling water and let them simmer until fork-tender, about 15 minutes. Meanwhile, thinly slice the kale or cabbage and sauté it in butter with a pinch of salt until just wilted. Drain the potatoes thoroughly, then mash them with warm milk, a generous knob of butter, and a dash of black pepper for extra richness. Fold in the sautéed greens and mix everything gently to avoid overworking the potatoes. For a creamy texture, warm the milk before adding it—this prevents the mash from turning gluey. If you’re short on time, use pre-shredded kale or bagged coleslaw mix to skip the chopping. Serve the Irish Colcannon Recipe for Comfort Food Lovers hot, topped with an extra pat of butter that melts into the fluffy peaks. Leftovers reheat beautifully in the microwave with a splash of milk to revive the creaminess.
Mistakes I’ve made and learned from
Early on, I rushed the potato-mashing step and ended up with a gummy texture—turns out, overworking the potatoes releases too much starch. Now I use a ricer or hand masher and stop as soon as the lumps disappear. Another blunder? Underseasoning. The Irish Colcannon Recipe for Comfort Food Lovers needs bold flavor, so I taste and adjust the salt and pepper after each addition. If your dish feels bland, try folding in crispy bacon bits or caramelized onions for depth, like in my Savory Mashed Potato Upgrades. And don’t skip wilting the greens properly; once I added raw kale, and the tough texture ruined the dish. For more foolproof veggie prep, check out my Perfect Sautéed Greens guide. Trust me, these tweaks make all the difference.
Irish Colcannon Recipe for Comfort Food Lovers has deep roots in Ireland’s rural traditions, where families relied on hearty, affordable ingredients to feed hungry mouths. Originally, cooks mashed potatoes with kale or cabbage, then stirred in butter and milk for richness. Some versions even hid a coin inside for luck during Halloween celebrations. Today, this dish still warms hearts as a symbol of home and heritage.
Across Ireland, regional twists make the recipe unique. In Cork, they might swap kale for tender spring greens, while coastal towns add a handful of scallions for extra bite. Beyond Ireland, global kitchens put their own spin on it. For instance, American cooks often fold in crispy bacon or swap dairy for plant-based alternatives. Meanwhile, my family adds a pinch of nutmeg for warmth, proving how versatile Irish Colcannon Recipe for Comfort Food Lovers truly is.
ays-cooking">How it fits in today’s cooking
Modern cooks love Irish Colcannon Recipe for Comfort Food Lovers because it’s both nostalgic and adaptable. Whether you’re serving it on St. Patrick’s Day or as a cozy weeknight side, it fits effortlessly into today’s meals. Many home chefs now pair it with roasted meats or even top it with a fried egg for a hearty brunch. Others lighten it up with Greek yogurt instead of butter, keeping the comfort without the guilt.
Seasonal variations keep it fresh year-round. In fall, try adding roasted garlic or caramelized onions for depth. For a spring twist, blend in fresh herbs like chives or parsley. If you’re exploring other comfort classics, check out our Classic Shepherd’s Pie or Creamy Potato Soup for more inspiration. After all, Irish Colcannon Recipe for Comfort Food Lovers isn’t just a dish—it’s a delicious tradition that keeps evolving.
Taste and Texture
What makes it delicious
Irish Colcannon Recipe for Comfort Food Lovers delivers a rich, velvety bite that wraps you in warmth. Creamy mashed potatoes blend with tender kale or cabbage, creating a lush, buttery base with just the right hint of earthy sweetness. Fragrant scallions or leeks add a mild oniony sharpness, while crispy bacon bits (if you use them) bring a smoky crunch. Every forkful feels indulgent yet wholesome, like a cozy hug for your taste buds. The Irish Colcannon Recipe for Comfort Food Lovers balances comfort and simplicity, making it a dish you’ll crave again and again.
r">Boosting the flavor
For an extra flavor kick, try stirring in roasted garlic or a dollop of sour cream for tangy depth. Crispy fried shallots or a sprinkle of aged cheddar also elevate the dish beautifully. If you love herbs, fresh chives or parsley brighten each bite. Pair it with a drizzle of herb-infused oil or a side of savory soda bread to round out the meal. With these tweaks, Irish Colcannon Recipe for Comfort Food Lovers becomes even more irresistible.
Tips for Success
Best practices for results
For the best Irish Colcannon Recipe for Comfort Food Lovers, always use fresh, high-quality potatoes like Yukon Gold or Russet. Meanwhile, steam the cabbage or kale just until tender to keep its vibrant color and texture. Additionally, warm the milk and butter before mixing them into the mashed potatoes for a smoother, creamier consistency. Finally, taste and adjust the seasoning just before serving to ensure a perfectly balanced dish every time.
>Mistakes to avoid
Avoid overcooking the potatoes, as they can become watery and ruin the texture of your Irish Colcannon Recipe for Comfort Food Lovers. Instead, boil them until just fork-tender. Also, don’t skip rinsing the cabbage or kale after chopping, as this removes any bitterness. For more tips on perfecting mashed potatoes, check out our guide on fluffy mashed potatoes. Furthermore, resist the urge to overmix the colcannon, or it may turn gluey. If you’re unsure about seasoning, our seasoning basics can help you nail the flavor.
Serving and Pairing Suggestions
How to serve this dish
For a cozy family dinner, scoop the Irish Colcannon Recipe for Comfort Food Lovers into a large serving bowl and top it with a generous pat of butter. As it melts, the rich aroma will draw everyone to the table. Alternatively, shape individual portions into ramekins for an elegant twist at holiday gatherings. Garnish with fresh chives or crispy bacon bits to add color and texture. Whether you serve it at St. Patrick’s Day feasts or weeknight meals, this dish brings warmth to any occasion.
What goes well with it
Pair the Irish Colcannon Recipe for Comfort Food Lovers with roasted meats like honey-glazed ham or garlic butter steak for a hearty meal. The creamy potatoes balance savory flavors perfectly. For a lighter option, try it alongside a crisp apple walnut salad, which adds a refreshing crunch. Don’t forget a pint of Irish stout or a warm cup of spiced chai latte to round out the experience. If you’re hosting brunch, serve it with fluffy buttermilk pancakes or our savory herb roasted potatoes for a satisfying spread.
What is the traditional way to make Irish colcannon?
The traditional Irish Colcannon Recipe for Comfort Food Lovers combines mashed potatoes with kale or cabbage, butter, milk, and scallions. Some versions include crispy bacon or ham for extra flavor. It’s a hearty dish perfect for St. Patrick’s Day or cozy winter meals.
Can I make colcannon ahead of time?
Yes, you can prepare this Irish Colcannon Recipe for Comfort Food Lovers 1-2 days in advance. Store it in an airtight container in the fridge and reheat gently with extra butter or milk to restore creaminess. Avoid freezing as the texture may become grainy.
ank-math-faq-item">
What’s the difference between colcannon and champ?
While both are Irish potato dishes, colcannon typically includes cabbage or kale, while champ uses scallions or green onions. The Irish Colcannon Recipe for Comfort Food Lovers often has a richer texture from added butter and sometimes meat, making it heartier than champ.
What protein goes well with colcannon?
This Irish Colcannon Recipe for Comfort Food Lovers pairs perfectly with corned beef, roasted chicken, or Irish sausages. For a vegetarian option, try it with pan-seared mushrooms or a fried egg on top. The creamy potatoes complement both lean and rich proteins beautifully.
Best Refreshing Rose Water Recipe – Easy Homemade
Introduction
There’s something magical about the delicate aroma of roses—it instantly lifts your mood and transports you to a serene garden. If you’ve ever longed to capture that blissful feeling in a bottle, this Refreshing Rose Water Recipe is your answer. Whether you want a natural skincare toner, a soothing drink, or a fragrant room spray, this versatile creation brings elegance and simplicity to your daily routine. Plus, it’s easier to make than you might think, using just a handful of fresh, organic ingredients.
Rose water has graced beauty rituals and culinary traditions for centuries, prized for its gentle yet powerful properties. This Refreshing Rose Water Recipe honors that legacy while adapting it for modern lifestyles. Unlike store-bought versions packed with preservatives, homemade rose water lets you control the purity and intensity of the floral essence. It’s perfect for spritzing on your face after a long day, adding a floral twist to desserts like our Homemade Rose Petal Ice Cream, or even enhancing cocktails. Beyond its uses, the process itself feels like a mindful ritual—a chance to slow down and connect with nature’s gifts.
At Exo Recipes, we celebrate recipes that blend tradition with practicality, and this Refreshing Rose Water Recipe fits seamlessly into that philosophy. It’s a gateway to exploring floral-infused creations, much like our Lavender Lemonade, but with the timeless charm of roses. Whether you’re a skincare enthusiast, a home chef, or someone who simply appreciates natural fragrances, this recipe invites you to experiment and indulge in a little self-care.
Why I Love This Recipe
My love for this Refreshing Rose Water Recipe began during a summer visit to my grandmother’s garden, where she taught me to harvest petals for her signature rose water. The ritual of steaming the blossoms and watching the fragrant liquid drip felt almost alchemical. Now, every time I make it, I’m reminded of her patience and the joy of creating something beautiful from scratch. It’s more than a recipe—it’s a sensory experience that ties me to memories, seasons, and the quiet pleasure of homemade simplicity.
Health and Nutrition
Why it’s good for your body
Refreshing Rose Water Recipe offers a delightful way to hydrate while delivering natural benefits. First, rose water contains antioxidants that help combat free radicals, which means it supports healthy skin and reduces inflammation. Additionally, the subtle floral notes make it a soothing alternative to sugary drinks, so you can enjoy hydration without empty calories.
Moreover, Refreshing Rose Water Recipe may aid digestion. Rose water has been used for centuries to ease stomach discomfort, and sipping it after meals can promote a calm digestive system. Since it’s caffeine-free, it also won’t disrupt your sleep, unlike many other beverages.
Finally, this recipe provides a gentle mood boost. The aroma of roses has been linked to reduced stress levels, making Refreshing Rose Water Recipe a perfect choice for relaxation. Whether you drink it chilled or at room temperature, it’s a simple way to add a touch of wellness to your day.
How it fits in a healthy lifestyle
Refreshing Rose Water Recipe fits seamlessly into a balanced diet. If you’re cutting back on sugar, it’s a flavorful swap for sodas or sweetened teas. Plus, it’s naturally gluten-free and vegan, so it aligns with many dietary preferences. For those focusing on heart health, staying hydrated with rose water can help maintain healthy blood pressure levels.
You can also incorporate Refreshing Rose Water Recipe into your daily routine. Try pairing it with a light snack like our almond flour cookies for a satisfying yet wholesome treat. If you’re exploring more gut-friendly options, check out our guide to fermented foods to complement the digestive benefits of rose water. Small choices like these add up to a healthier lifestyle without feeling restrictive.
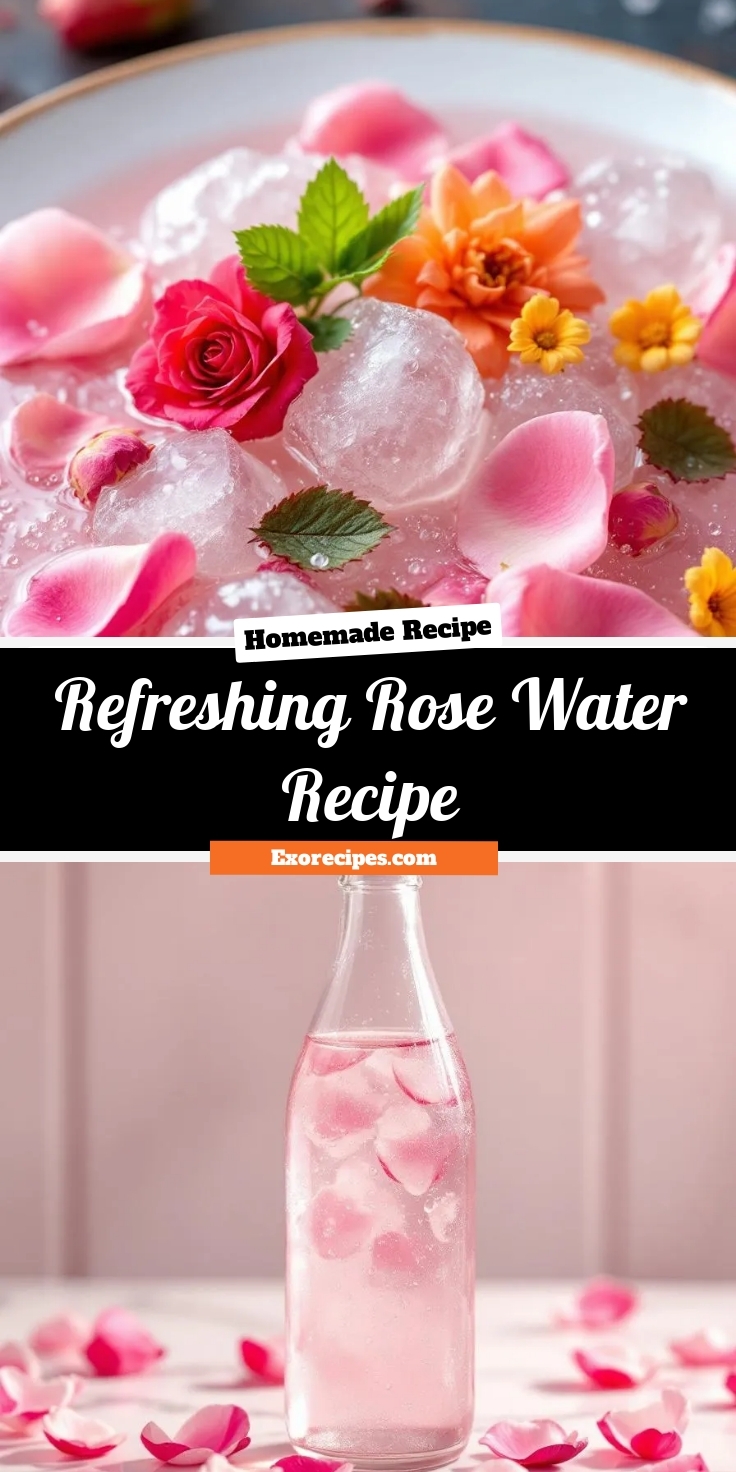
A light and floral homemade rose water perfect for drinks, desserts, or skincare.
Ingredients
Scale
For the Crust:
2 cups fresh rose petals (organic, pesticide-free)
2 cups distilled water
1 tsp lemon juice (optional)
Instructions
1. Prepare the Crust:
Rinse rose petals gently to remove any dirt.
In a saucepan, combine rose petals and distilled water.
Simmer on low heat for 20-30 minutes until petals lose color.
Strain the liquid into a clean glass bottle.
Add lemon juice if using for extended shelf life.
Notes
You can customize the seasonings to taste.
s-dish">How to Prepare This Dish
Steps and time-saving tips
Start by gathering fresh rose petals, preferably organic, to ensure the best flavor for your Refreshing Rose Water Recipe. Rinse them gently under cold water to remove any dirt, then pat them dry with a clean towel. Next, place the petals in a large pot and cover them with distilled water—just enough to submerge them without crowding. Bring the water to a gentle simmer over medium heat, then reduce the flame to low. Let the petals steep for about 20 minutes, stirring occasionally to release their fragrance. Meanwhile, prepare a clean glass jar or bottle for storage. Once the liquid turns a soft pink hue, strain it through a fine-mesh sieve or cheesecloth into the jar. For an extra refreshing twist, chill the rose water in the fridge before using. If you’re short on time, skip the simmering and opt for a cold infusion by soaking the petals in water overnight. Either way, this Refreshing Rose Water Recipe will fill your kitchen with a delicate floral aroma.
Mistakes I’ve made and learned from
When I first tried making this Refreshing Rose Water Recipe, I used tap water instead of distilled, and the result had a slight metallic aftertaste. Now, I always stick to distilled or filtered water for a cleaner flavor. Another time, I left the petals simmering too long, which made the water bitter. A quick fix? Set a timer for 20 minutes and stay nearby. If you’re new to floral infusions, check out my guide on avoiding common flavor mistakes to save time. Also, don’t skip straining—I once rushed this step and ended up with bits of petals in my final product. For more tips on perfecting delicate recipes, my post on mastering floral infusions covers all the basics. Trust me, a little patience goes a long way!
n-and-variations">Cultural Connection and Variations
Where this recipe comes from
Few ingredients whisper romance and tradition quite like rose water. The Refreshing Rose Water Recipe traces its roots to ancient Persia, where people first distilled rose petals for culinary and medicinal uses. Over time, this fragrant elixir traveled along trade routes, weaving itself into Middle Eastern, Indian, and Mediterranean cultures. In Iran, they stir it into saffron-infused desserts, while in Turkey, it perfumes syrupy baklava. Even today, families in Lebanon drizzle it over creamy rice pudding during festive gatherings.
My own introduction to the Refreshing Rose Water Recipe came through my grandmother, who always kept a small bottle in her pantry. She swore by its calming properties, adding a splash to her tea or homemade lemonade. Meanwhile, in Morocco, locals blend it with orange flower water for a citrusy twist, proving how versatile this floral essence can be. Whether you prefer it in desserts, drinks, or even savory dishes, rose water carries a legacy of hospitality and celebration.
How it fits in today’s cooking
Modern kitchens embrace the Refreshing Rose Water Recipe for its ability to elevate both everyday and special-occasion dishes. Health-conscious cooks love its natural aroma, often using it in light summer drinks or dairy-free desserts. Meanwhile, mixologists shake it into cocktails for a floral punch, proving tradition can feel fresh and exciting.
During holidays, rose w
ater still stars in festive treats, like saffron cakes or cardamom-scented cookies. Yet it’s also a pantry staple for quick upgrades—think rose-infused whipped cream or a fragrant splash in your morning smoothie. For more inspiration, check out our guide to floral dessert pairings. Whether you’re honoring heritage or experimenting with new flavors, this timeless ingredient bridges the past and present effortlessly.
Taste and Texture
What makes it delicious
The Refreshing Rose Water Recipe delivers a delicate floral sweetness with a whisper of citrusy brightness. Each sip feels light and silky on the tongue, while the rose water infuses every drop with its fragrant, almost perfume-like aroma. A hint of honey or agave rounds out the flavor, adding a subtle richness without overpowering the floral notes. Meanwhile, a squeeze of fresh lemon or lime lifts the drink with a crisp, refreshing zing. The Refreshing Rose Water Recipe strikes the perfect balance between soothing and invigorating, making it ideal for warm days or as a calming evening treat.
Boosting the flavor
For an extra layer of complexity, try muddling fresh mint or basil leaves into the Refreshing Rose Water Recipe before serving. The herbs add a vibrant, earthy contrast to the floral sweetness. Alternatively, a splash of sparkling water transforms it into a fizzy, celebratory drink. If you love experimenting with floral flavors, pair it with a drizzle of lavender simple syrup for a deeper aromatic profile. For a creamy twist, blend it with coconut milk and a pinch of cardamom, inspired by our rose cardamom latte. Small tweaks can elevate this drink from delightful to unforgettable.
Always use fresh, food-grade rose petals for your Refreshing Rose Water Recipe to ensure the best flavor and aroma. Meanwhile, steep the petals in distilled water rather than tap water to avoid impurities. Furthermore, store the finished rose water in a dark glass bottle to preserve its quality, and keep it refrigerated for maximum freshness. Finally, taste a small amount before using it in recipes to confirm the strength suits your preference.
Mistakes to avoid
Avoid overboiling the rose petals, as this can create a bitter taste in your Refreshing Rose Water Recipe. Instead, gently simmer them to extract the delicate flavors. Additionally, skip using roses treated with pesticides, as they can contaminate your final product. For more guidance on selecting safe ingredients, check out our guide on choosing organic ingredients. Another common mistake is skipping the straining step, which leaves behind unwanted sediment. For best results, use a fine-mesh strainer or cheesecloth, just like we recommend in our straining techniques tutorial.
g-suggestions">Serving and Pairing Suggestions
How to serve this dish
Serve your Refreshing Rose Water Recipe in elegant glassware to highlight its delicate pink hue. For a festive touch, rim the glasses with edible rose petals or a sprinkle of crushed pistachios. This drink shines at brunches, bridal showers, or summer gatherings, especially when paired with light bites. Meanwhile, you can also chill it in a decorative pitcher for easy self-serving at outdoor picnics. Garnish with a fresh mint sprig or a thin lemon slice to enhance both flavor and visual appeal.
What goes well with it
Pair your Refreshing Rose Water Recipe with a buttery almond croissant for a delightful contrast of floral and nutty flavors. Alternatively, serve it alongside a fresh fruit platter featuring berries and melon to amplify its light, aromatic notes. For a heartier option, try it with our Lemon Poppy Seed Muffins, as the citrusy zest complements the rose water perfectly. If you prefer savory pairings, our Herbed Goat Cheese Tart balances the drink’s sweetness with creamy, tangy flavors.
math-faq-block">
How do you make refreshing rose water at home?
To make a refreshing rose water recipe, steep fresh rose petals in distilled water over low heat for 20–30 minutes. Strain the liquid, let it cool, and store it in a spray bottle for a natural, hydrating mist. This simple method preserves the rose’s fragrance and benefits.
What are the benefits of using rose water on your face?
A refreshing rose water recipe can soothe irritation, reduce redness, and balance skin pH. Its anti-inflammatory properties make it ideal for toning and hydrating dry or sensitive skin. Spritzing rose water also gives a quick glow boost.
Can I use store-bought roses for homemade rose water?
Yes, but choose organic, pesticide-free roses to avoid chemicals in your refreshing rose water recipe. Garden-grown or farmers’ market roses work best. Avoid florist roses, as they’re often treated with preservatives.
ank-math-faq-item">
How long does homemade rose water last?
A properly stored refreshing rose water recipe lasts 1–2 weeks in the fridge or up to 6 months with a preservative like vodka. Always use a clean container and discard if the scent or color changes.
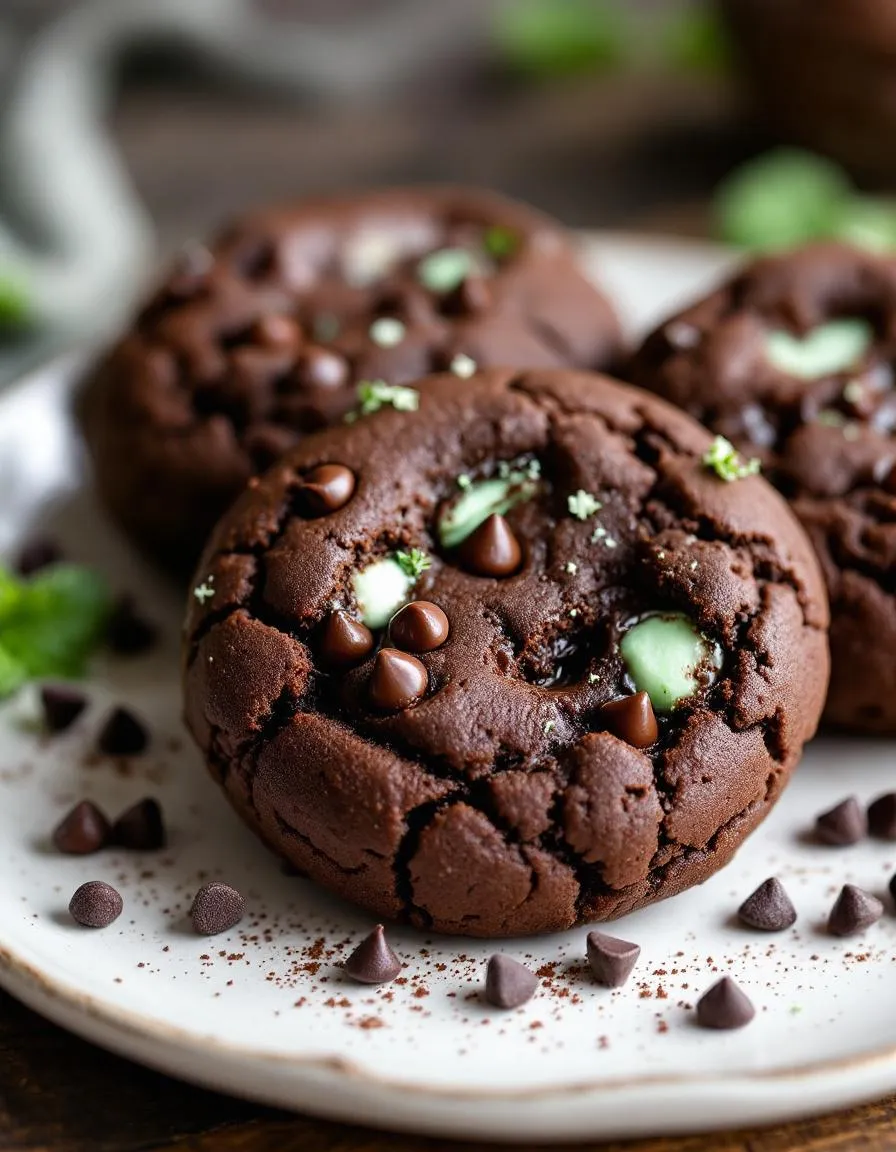
Best Mint Chocolate Double Delights Cookies Recipe
Introduction
There’s something magical about the combination of mint and chocolate, especially when it comes in the form of a soft, chewy cookie. If you’ve ever craved a treat that feels like a celebration in every bite, you’ll adore these Mint Chocolate Double Delights – Irresistible Cookies Recipe! Perfect for holidays, parties, or just a cozy night in, these cookies deliver a burst of refreshing mint and rich chocolate in every bite. Best of all, they’re surprisingly easy to make, even if you’re not a baking pro.
Mint Chocolate Double Delights – Irresistible Cookies Recipe! brings together the cool, invigorating flavor of mint with the deep, satisfying taste of chocolate. These cookies stand out because they strike the perfect balance between soft and chewy, with a delightful melt-in-your-mouth texture. Whether you’re a fan of classic chocolate chip cookies or love experimenting with unique flavors, this recipe offers a fun twist that everyone will enjoy. Plus, they’re versatile enough to fit any occasion, from holiday cookie exchanges to casual weekend baking sessions.
At Exorecipes, we believe baking should be both enjoyable and accessible. That’s why this recipe avoids complicated steps or hard-to-find ingredients. Instead, it focuses on simple techniques that yield impressive results. If you love cookies with a twist, you might also enjoy our Peanut Butter Crunch Cookies or our Classic Snickerdoodles. Each of these recipes shares the same goal: making baking fun, easy, and delicious.
Why I Love This Recipe
I first discovered Mint Chocolate Double Delights – Irresistible Cookies Recipe! during a holiday baking marathon, and they quickly became a family favorite. The way the mint brightens the rich chocolate reminds me of my grandmother’s homemade candies, but in cookie form. What I love most is how these cookies bring people together. Every time I bake them, friends and family ask for the recipe, and I love seeing their faces light up after the first bite. They’re not just cookies—they’re little moments of joy.
Health and Nutrition
Why it’s good for your body
Mint Chocolate Double Delights – Irresistible Cookies Recipe! packs more than just incredible flavor. First, the dark chocolate in these cookies delivers antioxidants that support heart health and reduce inflammation. Additionally, fresh mint leaves or natural mint extract can aid digestion and provide a refreshing burst of energy. Meanwhile, the recipe balances sweetness with wholesome ingredients, so you enjoy a treat without excessive sugar crashes.
Moreover, Mint Chocolate Double Delights – Irresistible Cookies Recipe! includes ingredients like oats or almond flour in some variations, adding fiber and healthy fats. These nutrients help keep you full longer and stabilize blood sugar levels. Furthermore, dark chocolate contains flavonoids, which may improve brain function and mood. Even better, the recipe avoids artificial additives, making it a cleaner choice for mindful indulgence.
Finally, the combination of mint and chocolate doesn’t just taste amazing. Mint naturally soothes the stomach, while dark chocolate boosts serotonin. Together, they make Mint Chocolate Double Delights – Irresistible Cookies Recipe! a smarter way to satisfy cravings. Whether you need a post-workout pick-me-up or a midday mood lifter, these cookies deliver both flavor and function.
How it fits in a healthy lifestyle
Mint Chocolate Double Delights – Irresistible Cookies Recipe! fits perfectly into a balanced diet when enjoyed mindfully. For example, pairing one with a protein-rich snack like Greek yogurt creates a satisfying treat that curbs sugar cravings. If you prefer gluten-free options, simply swap regular flour for almond or coconut flour, keeping the recipe just as delicious.
These cookies also align with heart-healthy eating when you use high-quality dark chocolate and natural sweeteners. For more ideas on balancing treats with nutrition, explore our guide to healthy dessert swaps. Additionally, if you’re meal prepping, bake a batch and store them for portion-controlled snacks. Check out our tips for meal prepping like a pro to keep your week organized and nutritious. With smart choices, Mint Chocolate Double Delights – Irresistible Cookies Recipe! becomes a guilt-free part of your routine.
A delightful combination of mint and chocolate in a soft, chewy cookie that’s perfect for any occasion.
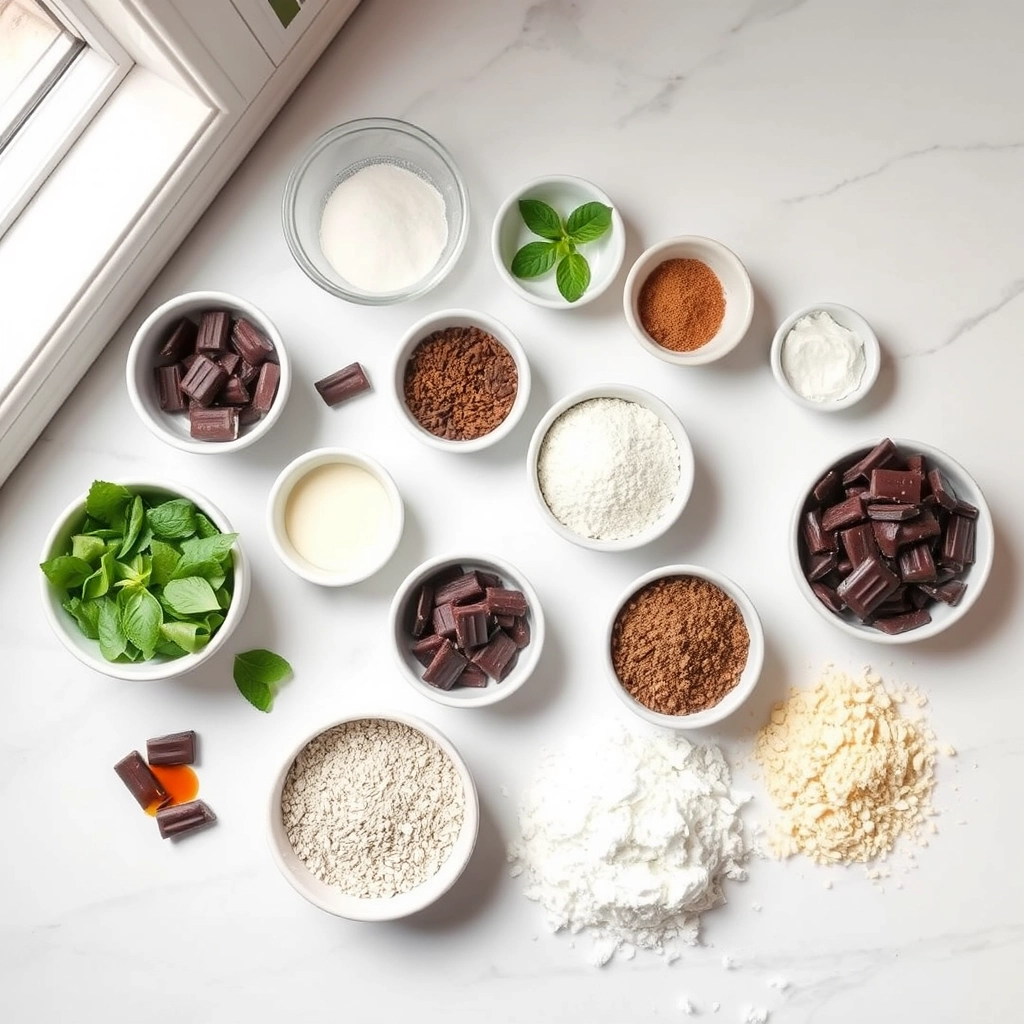
Ingredients
Scale
For the Crust:
1 cup all-purpose flour
1/2 cup cocoa powder
1/2 teaspoon baking soda
1/4 teaspoon salt
1/2 cup unsalted butter, softened
3/4 cup granulated sugar
1 large egg
1 teaspoon vanilla extract
1/2 teaspoon peppermint extract
1 cup chocolate chips
1/2 cup Andes mints, chopped
Instructions
1. Prepare the Crust:
Preheat oven to 350°F (175°C) and line baking sheets with parchment paper.
In a medium bowl, whisk together flour, cocoa powder, baking soda, and salt.
In a large bowl, cream together butter and sugar until light and fluffy. Beat in egg, vanilla extract, and peppermint extract.
Gradually mix in the dry ingredients until just combined. Fold in chocolate chips and chopped Andes mints.
Drop tablespoon-sized dough balls onto prepared baking sheets, spacing them 2 inches apart.
Bake for 10-12 minutes, or until edges are set but centers are still soft. Let cool on baking sheets for 5 minutes before transferring to wire racks.
Notes
You can customize the seasonings to taste.
“`html
="how-to-prepare-this-dish">How to Prepare This Dish
Steps and time-saving tips
Start by preheating your oven to 350°F and lining two baking sheets with parchment paper. In a large bowl, whisk together the flour, cocoa powder, baking soda, and salt until fully combined. Next, cream the butter and sugar in a separate bowl until light and fluffy, then beat in the eggs one at a time followed by the vanilla and peppermint extracts. Gradually mix the dry ingredients into the wet ingredients, folding gently to avoid overworking the dough. For a time-saving shortcut, use a stand mixer with a paddle attachment to speed up the process. Scoop tablespoon-sized portions of dough onto the prepared sheets, spacing them about two inches apart. Bake for 10-12 minutes until the edges set but the centers remain slightly soft. Let the cookies cool on the sheets for five minutes before transferring them to a wire rack. Meanwhile, melt the chocolate chips with a touch of coconut oil for a smooth drizzle. Once the cookies cool completely, drizzle the chocolate over the top and sprinkle with crushed candy canes for extra crunch. Chill for 15 minutes to set the chocolate, then enjoy your Mint Chocolate Double Delights – Irresistible Cookies Recipe! right away or store them in an airtight container.
Mistakes I’ve made and learned from
When I first tried making Mint Chocolate Double Delights – Irresistible Cookies Recipe!, I overbaked them, leaving them dry and crumbly. Now I set a timer for nine minutes and check for doneness early, since ovens vary. Another blunder was skipping the parchment paper, which caused stubborn sticking and broken cookies. Trust me, parchment is non-negotiable for easy removal. I also learned the hard way that rushing the cooling step leads to melted chocolate messes—patience pays off! If you’re new to baking, my guide on common baking mistakes covers these pitfalls in detail. For perfect chocolate drizzle every time, check out my tips in the chocolate drizzling techniques post. These small adjustments transformed my cookies from mediocre to magical, and they’ll do the same for yours.
Mint Chocolate Double Delights – Irresistible Cookies Recipe! brings together two beloved flavors in a way that feels both nostalgic and fresh. The combination of mint and chocolate traces back to early 20th-century America, where candy makers first paired peppermint with rich cocoa. Over time, this duo found its way into cookies, becoming a holiday staple in many households. Some families even tie the recipe to Christmas traditions, shaping the dough into festive wreaths or snowflakes.
Around the world, baker
s put their own spin on Mint Chocolate Double Delights – Irresistible Cookies Recipe!. In Mexico, for instance, some add a hint of chili powder for a spicy kick. Meanwhile, British versions might swap peppermint for spearmint or use dark chocolate for a deeper flavor. My grandmother always added a dash of vanilla extract to hers, claiming it “rounded out the edges” of the mint. Whether you prefer them chewy or crisp, these cookies adapt beautifully to personal tastes and regional twists.
How it fits in today’s cooking
Today, Mint Chocolate Double Delights – Irresistible Cookies Recipe! remains a crowd-pleaser for good reason. Busy home cooks love how easily the dough freezes, making it perfect for last-minute baking sessions. Many also tweak the recipe to fit dietary needs, like using gluten-free flour or vegan chocolate chips. During the holidays, these cookies often share the spotlight with other treats, such as classic sugar cookies or gingerbread creations.
Beyond seasonal baking, Mint Chocolate Double Delights – Irresistible Cookies Recipe! has found a place in everyday indulgences. Coffee shops serve them as afternoon pick-me-ups, while parents tuck them into lunchboxes for a sweet surprise. The recipe’s versatility keeps it relevant, whether you’re hosting a party or simply craving comfort. After all, who can resist that cool minty crunch paired with melty chocolate?
>Taste and Texture
What makes it delicious
Mint Chocolate Double Delights – Irresistible Cookies Recipe! delivers a burst of refreshing coolness paired with rich, velvety chocolate in every bite. The cookies boast a crisp outer edge that gives way to a soft, chewy center, creating the perfect contrast. Fresh mint extract infuses each morsel with a bright, aromatic flavor, while melty chocolate chunks add a decadent creaminess. As you take a bite, the fragrant mint dances on your tongue, balanced by the deep cocoa notes. Whether warm from the oven or cooled to perfection, Mint Chocolate Double Delights – Irresistible Cookies Recipe! offers a sensory experience that’s both indulgent and invigorating.
Boosting the flavor
Elevate your Mint Chocolate Double Delights – Irresistible Cookies Recipe! with a few creative tweaks. For extra richness, swap regular chocolate chunks for dark chocolate chunks, which intensify the cocoa flavor. A sprinkle of flaky sea salt before baking enhances the sweet-and-minty profile. If you love texture, fold in crushed peppermint candies for a crunchy surprise. Pair these cookies with a glass of cold milk or a scoop of vanilla ice cream for the ultimate treat. For more baking inspiration, explore our guide to perfect chocolate chip cookies or discover how to bake with mint for even more refreshing ideas.
Tips for Success
Best practices for results
Always chill the dough for at least 30 minutes before baking to prevent spreading and ensure thick, chewy Mint Chocolate Double Delights – Irresistible Cookies Recipe! results. Use parchment paper or a silicone baking mat for even browning and easy removal. Additionally, measure your flour correctly by spooning it into the cup and leveling it off—this avoids dense cookies. For extra minty flavor, gently press additional chocolate chunks on top right after baking.
Mistakes to avoid
Avoid overmixing the dough once you add the dry ingredients, as this can make the cookies tough. Instead, mix just until combined for a tender texture. Also, don’t skip the step of creaming the butter and sugar properly—this creates air pockets for a lighter cookie. If your cookies spread too much, check out our guide on how to fix spreading cookies. Finally, resist overbaking; pull them out when the edges are set but the centers look slightly soft. For more baking troubleshooting, explore our cookie baking tips.
Serving and Pairing Suggestions
How to serve this dish
Elevate your Mint Chocolate Double Delights – Irresistible Cookies Recipe! by arranging them on a sleek white platter with a dusting of powdered sugar. For festive flair, stack them in a pyramid and add fresh mint leaves between layers. Meanwhile, these cookies shine at holiday gatherings, but they also make a delightful after-dinner treat with friends. To impress guests, serve them alongside a small scoop of vanilla ice cream for a refreshing contrast.
h-it">What goes well with it
Pair Mint Chocolate Double Delights – Irresistible Cookies Recipe! with a steaming cup of peppermint hot chocolate for a cozy winter combo. The minty notes in the cookies harmonize beautifully with the rich cocoa. Alternatively, try them with a cold glass of milk or a frothy latte for a classic touch. If you love dessert pairings, explore our Decadent Chocolate Mousse for an indulgent duo. For a lighter option, our Berry Chia Pudding balances the cookies’ richness with fresh, tangy flavors.
What makes Mint Chocolate Double Delights – Irresistible Cookies Recipe! so special?
Mint Chocolate Double Delights – Irresistible Cookies Recipe! combines rich chocolate and refreshing mint for a perfect balance of flavors. The double chocolate chips and creamy mint filling create a unique texture that sets these cookies apart from ordinary recipes.
ank-math-faq-item">
Can I make Mint Chocolate Double Delights – Irresistible Cookies Recipe! gluten-free?
Yes! Simply substitute the all-purpose flour with a 1:1 gluten-free flour blend. The Mint Chocolate Double Delights – Irresistible Cookies Recipe! will still have that perfect chewy texture and delicious mint-chocolate flavor combination.
How do I store Mint Chocolate Double Delights – Irresistible Cookies Recipe! to keep them fresh?
Store your Mint Chocolate Double Delights – Irresistible Cookies Recipe! in an airtight container at room temperature for up to 5 days. For longer freshness, you can freeze the cookies for up to 3 months – just thaw at room temperature before serving.
Can I use peppermint extract instead of mint in Mint Chocolate Double Delights – Irresistible Cookies Recipe!?
Absolutely! Peppermint extract works wonderfully in Mint Chocolate Double Delights – Irresistible Cookies Recipe!, but use half the amount since it’s more concentrated. The peppermint will give your cookies an extra refreshing kick that pairs perfectly with the chocolate.
div>
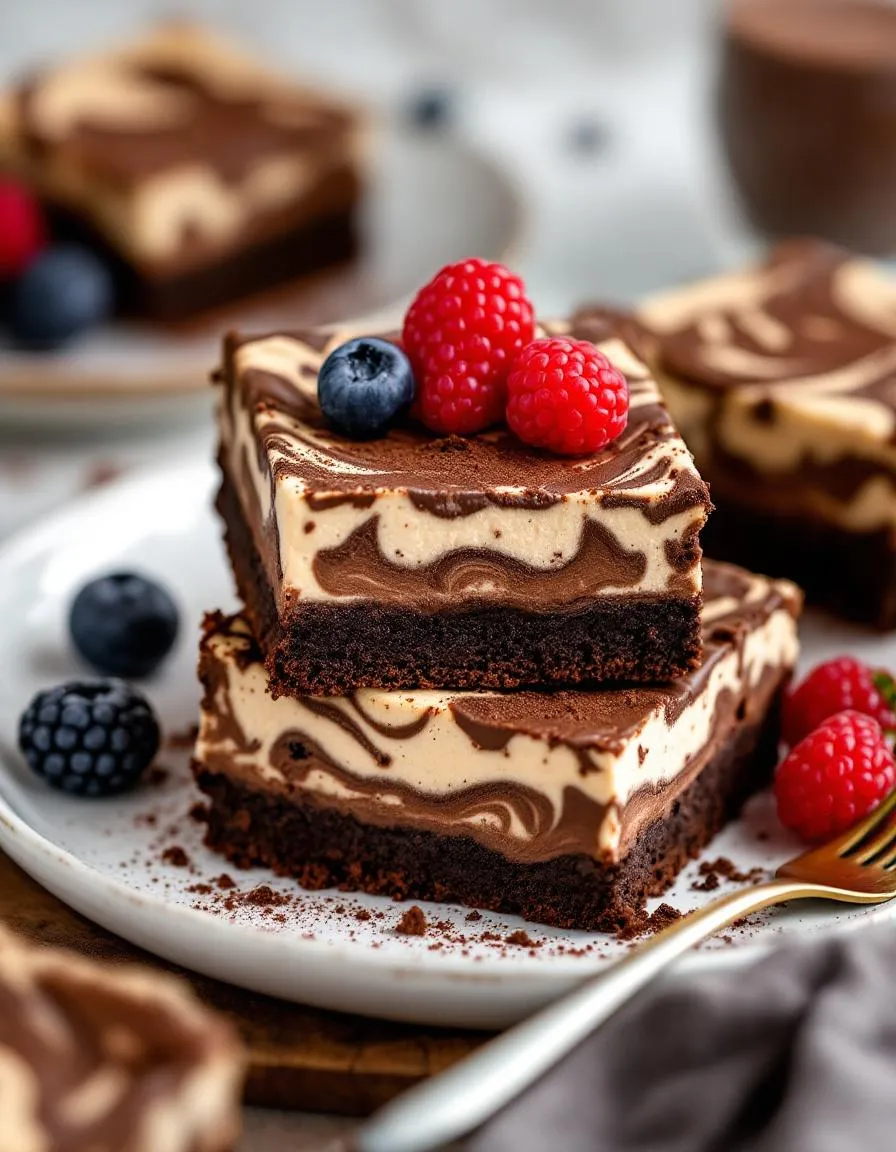
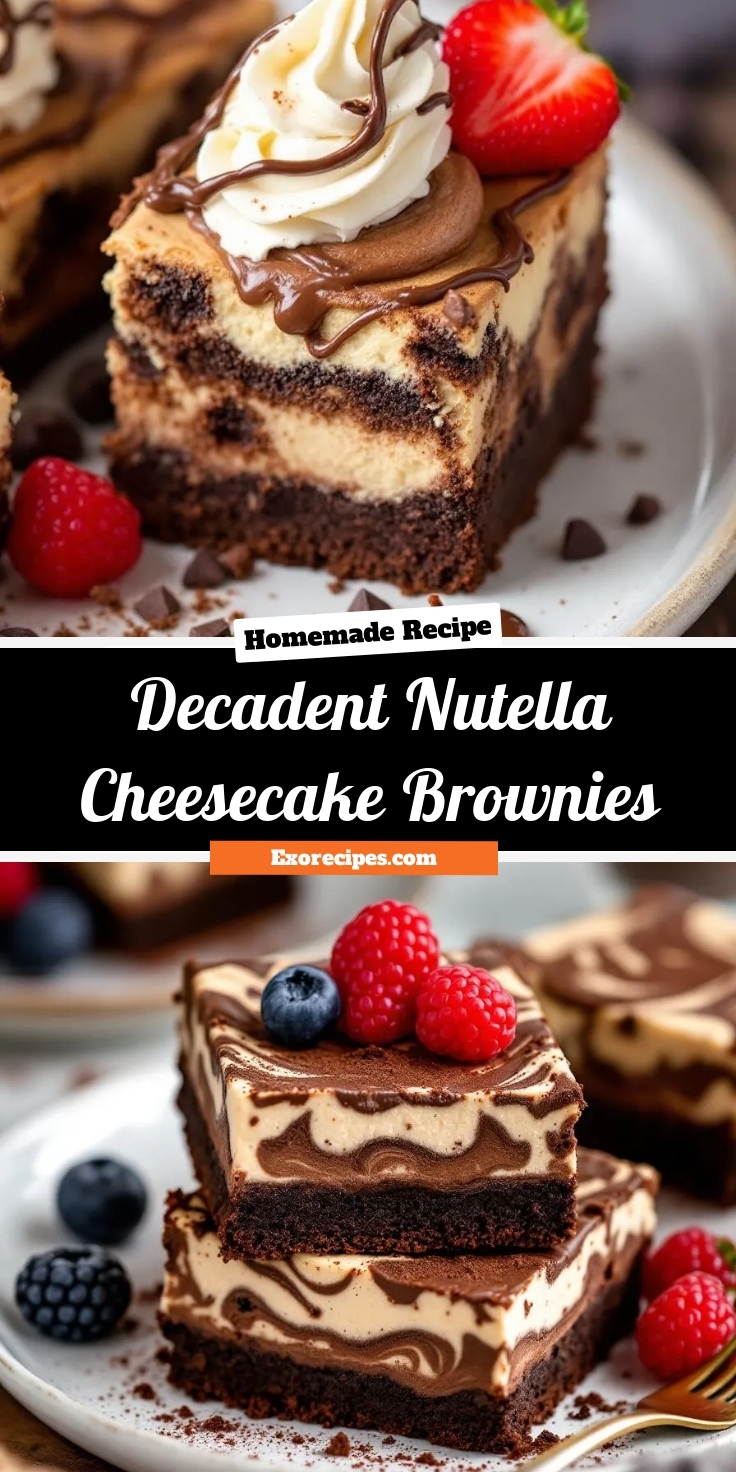
Ultimate Nutella Cheesecake Brownies Recipe
Introduction
Imagine biting into a rich, fudgy brownie swirled with creamy Nutella cheesecake—each bite melts in your mouth, blending chocolatey decadence with a hint of hazelnut bliss. If that sounds like your idea of dessert heaven, you’re in the right place. These Decadent Nutella Cheesecake Brownies are more than just a treat; they’re a celebration of indulgence, perfect for satisfying your sweet tooth or impressing guests at your next gathering. Whether you’re a baking novice or a seasoned pro, this recipe delivers irresistible results every time.
Decadent Nutella Cheesecake Brownies combine the best of both worlds: dense, chocolatey brownies and a velvety Nutella-infused cheesecake layer. The contrast between the fudgy base and the smooth, slightly tangy cheesecake creates a harmony of textures and flavors that’s hard to resist. What makes this recipe stand out is its simplicity—you don’t need fancy techniques, just quality ingredients and a little patience. Plus, Nutella adds a luxurious twist, elevating classic cheesecake brownies into something extraordinary. If you love easy yet impressive desserts, you’ll adore this crowd-pleaser. For more baking inspiration, check out our Classic Chocolate Chip Cookies or Vanilla Bean Cheesecake—both perfect companions to these brownies.
Why I Love This Recipe
I’ll never forget the first time I made these Decadent Nutella Cheesecake Brownies for a family potluck. The moment I pulled them out of the oven, the aroma of chocolate and toasted hazelnuts filled the kitchen, and within minutes, the pan was empty. What I love most is how they bring people together—kids, adults, even picky eaters can’t resist them. They’re my go-to when I need a dessert that feels special but doesn’t require hours of work. Every time I bake them, I’m reminded why simple, heartfelt recipes like this one are the best.
Health and Nutrition
Why it’s good for your body
Decadent Nutella Cheesecake Brownies offer more than just irresistible flavor. First, they provide a satisfying energy boost thanks to the natural sugars in Nutella and the carbohydrates in the brownie base. Additionally, hazelnuts in Nutella deliver healthy fats and a small dose of protein, which help keep you full longer. Moreover, the cream cheese layer adds a touch of calcium, supporting bone health.
While Decadent Nutella Cheesecake Brownies are a treat, they also include ingredients with antioxidants. For example, cocoa powder contains flavonoids, which may support heart health. Furthermore, hazelnuts contribute vitamin E, promoting skin health. Of course, moderation is key, but enjoying these brownies means you’re treating yourself to more than just empty calories.
Finally, Decadent Nutella Cheesecake Brownies can lift your mood. Dark chocolate in the recipe stimulates serotonin production, which helps reduce stress. So, while they’re undeniably indulgent, they also bring small but meaningful health perks.
How it fits in a healthy lifestyle
Balancing treats like Decadent Nutella Cheesecake Brownies with nutritious choices keeps your diet enjoyable and sustainable. Pair a small portion with a protein-rich snack, like Greek yogurt, to stabilize blood sugar. Alternatively, serve them after a meal packed with fiber and veggies to avoid overindulging.
If you’re mindful of gluten, you can easily adapt this recipe using gluten-free flour. For those watching sugar intake, reducing the Nutella slightly still delivers rich flavor. Craving more healthy dessert ideas? Explore our gluten-free dessert options or discover how to make protein-packed sweets that satisfy without guilt.
Remember, a healthy lifestyle includes room for joy. Decadent Nutella Cheesecake Brownies fit perfectly when enjoyed mindfully and in moderation.
Rich and fudgy brownies swirled with creamy Nutella cheesecake for an irresistible dessert.
Ingredients
Scale
For the Crust:
1 cup unsalted butter, melted
2 cups granulated sugar
4 large eggs
1 tsp vanilla extract
1 cup all-purpose flour
1/2 cup cocoa powder
1/2 tsp salt
8 oz cream cheese, softened
1/2 cup Nutella
1/4 cup powdered sugar
1 egg yolk
Instructions
1. Prepare the Crust:
Preheat oven to 350°F (175°C). Grease a 9×13-inch baking pan.
In a large bowl, mix melted butter, sugar, eggs, and vanilla until smooth.
Stir in flour, cocoa powder, and salt until just combined. Spread batter into prepared pan.
In another bowl, beat cream cheese, Nutella, powdered sugar, and egg yolk until smooth.
Drop spoonfuls of Nutella mixture over brownie batter. Swirl with a knife to create a marbled effect.
Bake for 30-35 minutes or until a toothpick comes out with moist crumbs. Cool completely before cutting.
Notes
You can customize the seasonings to taste.
s-dish">How to Prepare This Dish
Steps and time-saving tips
Start by preheating your oven to 350°F and lining an 8×8 baking pan with parchment paper for easy removal later. In a large bowl, whisk together melted butter, sugar, and eggs until smooth, then gently fold in flour and cocoa powder until just combined. Spread half the brownie batter into the pan, creating an even layer. Next, beat cream cheese, Nutella, and a touch of vanilla until creamy, then dollop this mixture over the brownie base. Use a knife to swirl the Nutella cheesecake layer into the remaining brownie batter before pouring it on top. Bake for 25-30 minutes until the edges set but the center stays slightly fudgy. Let the Decadent Nutella Cheesecake Brownies cool completely before slicing—this prevents crumbling. For a time-saving hack, use a boxed brownie mix as the base and enhance it with the homemade Nutella swirl. Chilling the pan for 10 minutes before cutting ensures clean edges.
Mistakes I’ve made and learned from
Early on, I overbaked my Decadent Nutella Cheesecake Brownies, leaving them dry instead of gloriously gooey. Now I rely on the toothpick test—a few moist crumbs mean they’re perfect. Another blunder? Skipping the parchment paper, which turned removal into a messy battle. Trust me, the extra minute to line the pan saves frustration. I also learned the hard way that overmixing the batter leads to dense brownies; gentle folding keeps them tender. If you’re new to baking, my guide to common baking mistakes covers these pitfalls in detail. For Nutella lovers, my favorite Nutella hacks can help tweak this recipe for even richer flavor.
n-and-variations">Cultural Connection and Variations
Where this recipe comes from
Decadent Nutella Cheesecake Brownies blend two beloved treats into one irresistible dessert, and their origins reflect a mix of creativity and cultural influence. Nutella, the star ingredient, traces its roots to post-war Italy, where resourceful chocolatiers stretched cocoa with hazelnuts. Meanwhile, cheesecake has ancient Greek beginnings, evolving through European and American kitchens. Together, they form a modern hybrid that feels both nostalgic and fresh.
Around the world, bakers put their own spin on similar desserts. In France, you might find a ganache-swirled brownie, while Middle Eastern versions often feature tahini or halva. Some families, like mine, add a pinch of sea salt to balance the sweetness of Decadent Nutella Cheesecake Brownies. Others fold in chopped nuts or raspberry jam for tangy contrast. No matter the variation, the result is always rich, comforting, and impossible to resist.
How it fits in today’s cooking
Today, Decadent Nutella Cheesecake Brownies thrive as a go-to dessert for gatherings, potlucks, or even solo indulgence. They fit seamlessly into holiday spreads, especially when paired with festive cookies, or as a decadent finale to weeknight dinners. Modern cooks love how adaptable they are—swapping gluten-free flour or dairy-free cream cheese keeps them inclusive without sacrificing flavor.
Social media has also c
emented their popularity, with bakers showcasing marbled swirls and gooey centers. For those craving simpler treats, quick mug cakes offer a single-serving twist. Whether you’re baking for a crowd or treating yourself, these brownies bridge tradition and innovation, proving some flavors never go out of style.
Taste and Texture
What makes it delicious
Decadent Nutella Cheesecake Brownies deliver an irresistible symphony of flavors and textures. First, the rich, fudgy brownie base melts in your mouth, while the creamy Nutella cheesecake layer adds a velvety contrast. Each bite bursts with deep chocolate notes, balanced by the nutty sweetness of hazelnut spread. Meanwhile, the aroma alone—warm cocoa mingling with toasted hazelnuts—will make your kitchen smell like a bakery. Because the brownies bake with a crackly top and a gooey center, they offer the perfect chew. Ultimately, Decadent Nutella Cheesecake Brownies satisfy every craving with their luxurious layers.
Boosting the flavor
Elevate your Decadent Nutella Cheesecake Brownies with a few easy tweaks. For extra crunch, sprinkle chopped toasted hazelnuts or sea salt on top before baking. Alternatively, swirl in a spoonful of homemade caramel sauce for a buttery depth. If you love bold contrasts, pair them with a scoop of vanilla bean ice cream to highlight the Nutella’s richness. A dash of espresso powder in the brownie batter also intensifies the chocolate flavor without overpowering it. With these simple upgrades, every bite becomes even more memorable.
Always line your baking pan with parchment paper to ensure easy removal and clean slices of Decadent Nutella Cheesecake Brownies. Meanwhile, use room-temperature cream cheese for a smooth, lump-free cheesecake swirl. For the richest flavor, measure your Nutella precisely and gently fold it into the batter to maintain those decadent streaks. Additionally, chill the brownies for at least two hours before cutting—this helps them set perfectly. Finally, store leftovers in an airtight container to keep them fresh for days.
Mistakes to avoid
Avoid overmixing the batter once you add the flour, as this can make your Decadent Nutella Cheesecake Brownies dense instead of fudgy. Instead, stir just until combined. Also, don’t skip preheating your oven—an uneven temperature can cause underbaked centers or overdone edges. For more troubleshooting tips, check out our guide on fixing dry brownies. Another common mistake? Spreading the cheesecake layer too thin. For balanced swirls, follow our cheesecake swirl technique to achieve bakery-worthy results every time.
g-suggestions">Serving and Pairing Suggestions
How to serve this dish
For a stunning presentation, slice your Decadent Nutella Cheesecake Brownies into small squares and arrange them on a marble or wooden serving board. Meanwhile, drizzle extra Nutella on top and add a sprinkle of crushed hazelnuts for texture. Alternatively, serve them warm with a scoop of vanilla ice cream for a gooey, indulgent dessert. These brownies shine at holiday gatherings, but they also make a delightful treat for weekend brunch or afternoon tea. Finally, garnish with fresh raspberries or mint leaves to balance the richness with a pop of color.
What goes well with it
Pair your Decadent Nutella Cheesecake Brownies with a creamy latte or a cold glass of milk to enhance the chocolatey flavors. If you prefer something stronger, try a shot of espresso to contrast the sweetness. For a fruity twist, serve them alongside our Berry Chia Pudding to add a refreshing contrast. Alternatively, balance the richness with a light, citrusy dessert like our Tangy Lemon Bars, which cut through the decadence perfectly.
math-faq-block">
How do you make Decadent Nutella Cheesecake Brownies from scratch?
To make Decadent Nutella Cheesecake Brownies, start with a rich brownie base, swirl in a creamy Nutella cheesecake layer, and bake until perfectly fudgy. The key is balancing the chocolatey brownie with the smooth Nutella cheesecake for an irresistible treat.
Can you freeze Decadent Nutella Cheesecake Brownies?
Yes, Decadent Nutella Cheesecake Brownies freeze well for up to 3 months. Wrap them tightly in plastic wrap or store in an airtight container to maintain freshness and prevent freezer burn.
What’s the best way to store Decadent Nutella Cheesecake Brownies?
Store Decadent Nutella Cheesecake Brownies in an airtight container at room temperature for up to 3 days or refrigerate for up to a week. The cheesecake layer stays creamy, and the brownies remain moist.
ank-math-faq-item">
Can I substitute peanut butter for Nutella in Decadent Nutella Cheesecake Brownies?
While peanut butter adds a different flavor, it works as a substitute in Decadent Nutella Cheesecake Brownies if you prefer. The texture will be similar, but the taste will shift from hazelnut-chocolate to peanut butter-chocolate.