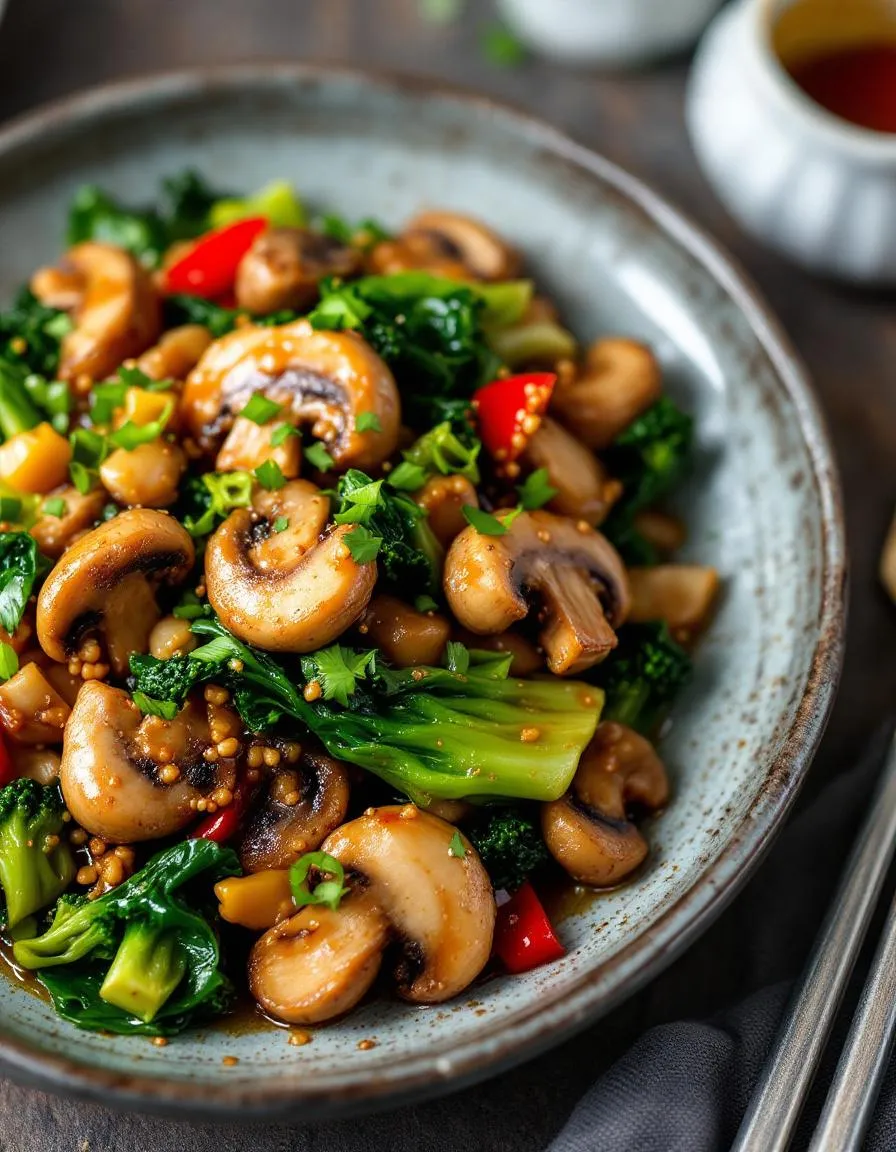
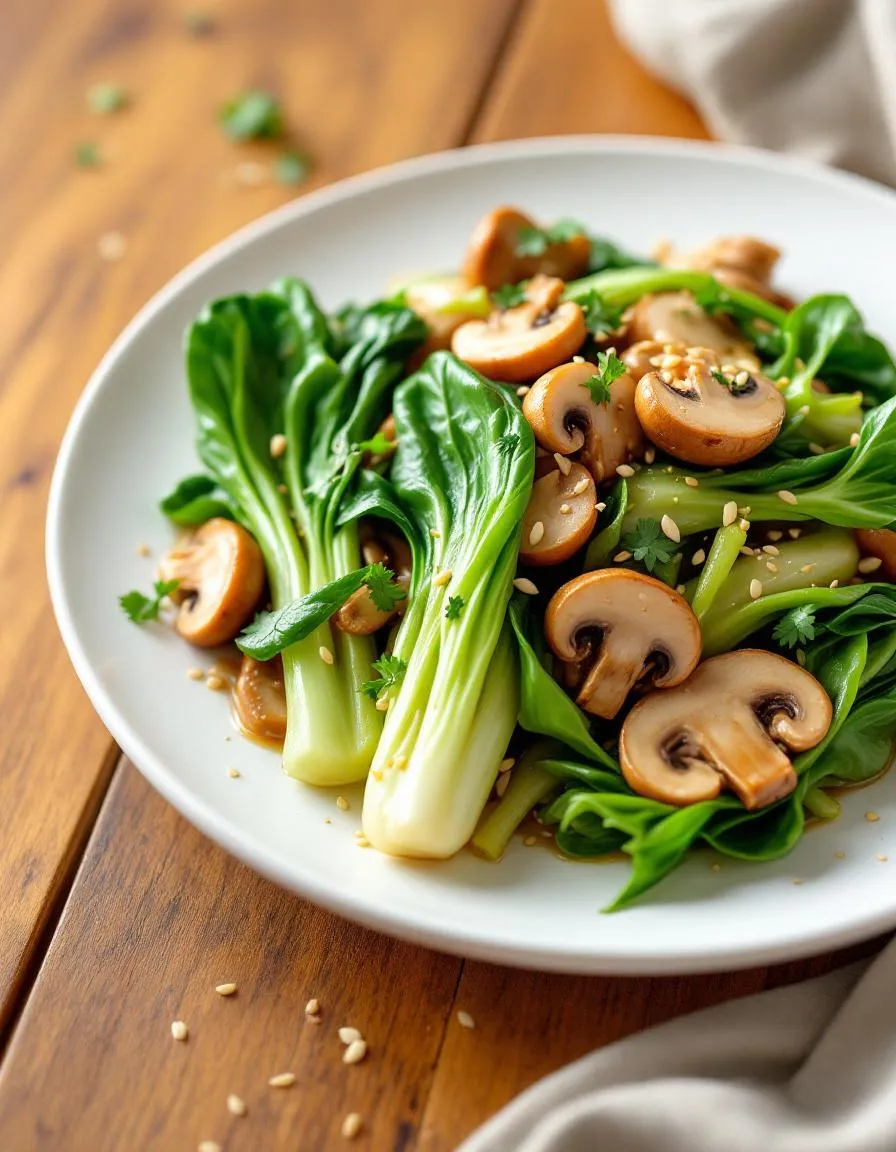
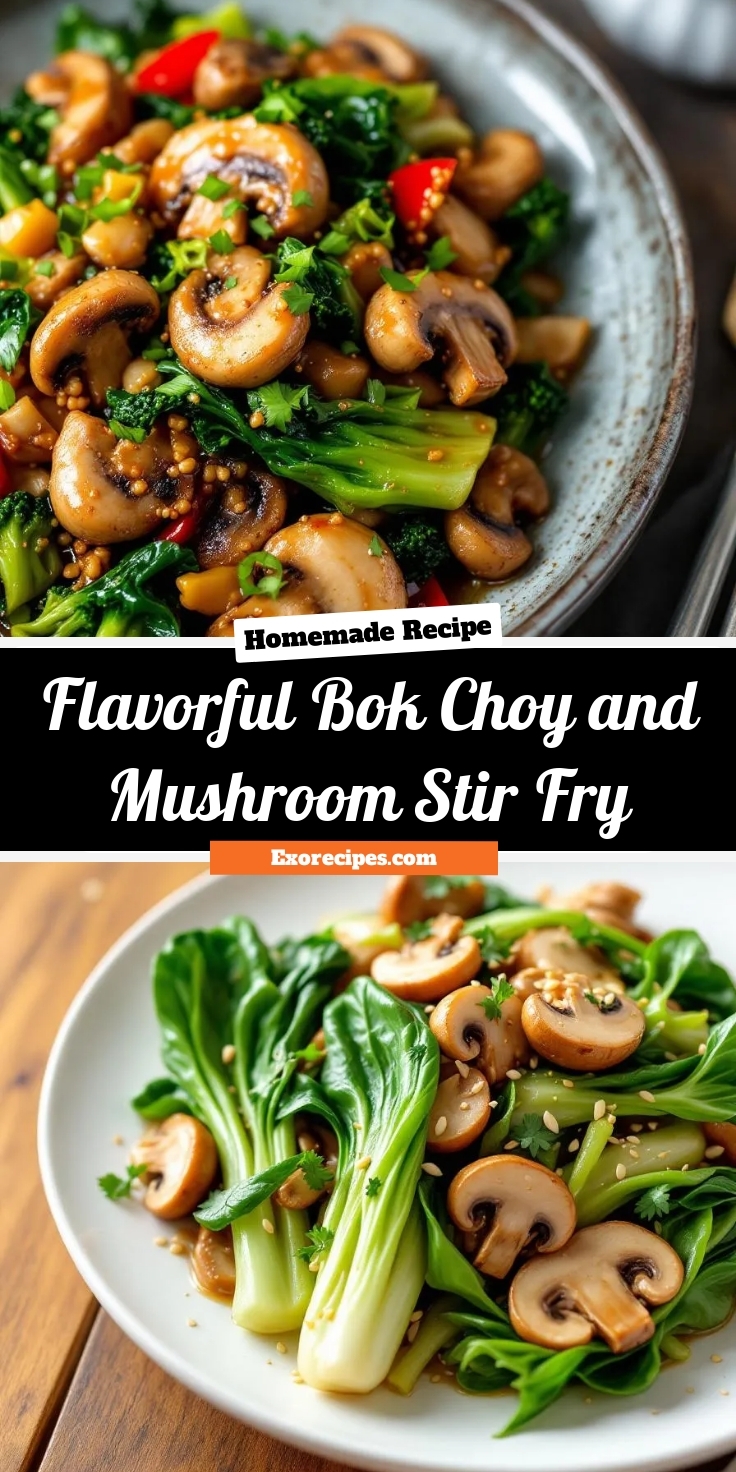
There’s something deeply satisfying about a stir-fry that comes together in minutes yet tastes like it took hours to prepare. If you’re craving a dish that’s both nourishing and bursting with umami, this Flavorful Bok Choy and Mushroom Stir Fry delivers. With crisp greens, meaty mushrooms, and a savory sauce, it’s the kind of meal that feels like a warm hug after a long day. Whether you’re a busy parent or a solo cook looking for a quick win, this recipe promises big flavor with minimal effort.
Flavorful Bok Choy and Mushroom Stir Fry is a vibrant, plant-forward dish that celebrates simplicity without sacrificing depth. Bok choy, with its tender stems and leafy greens, pairs perfectly with earthy mushrooms, while garlic, ginger, and a well-balanced sauce tie everything together. This stir-fry isn’t just delicious—it’s also packed with nutrients, making it a smart choice for weeknight dinners or meal prep. Unlike heavier takeout options, it’s light yet satisfying, and it aligns perfectly with our blog’s mission to share wholesome, approachable recipes. Plus, it’s versatile. You can swap in other veggies like bell peppers or snap peas, or add tofu for extra protein. If you love quick Asian-inspired meals, you’ll adore our Easy Garlic Noodles or Spicy Sesame Cucumber Salad as complementary sides.
Why I Love This Recipe
This stir-fry holds a special place in my kitchen because it’s the dish I turn to when I need something reliable yet exciting. The first time I made it, I was amazed by how such simple ingredients could create such bold flavors. Now, it’s my go-to when I’m short on time but refuse to compromise on taste. The sizzle of garlic in the pan, the way the bok choy wilts just enough to stay crisp—it’s a little ritual that never gets old. Every bite reminds me why I fell in love with cooking: it’s practical magic at its finest.
Health and Nutrition
Why it’s good for your body
Flavorful Bok Choy and Mushroom Stir Fry packs a powerful nutritional punch while delighting your taste buds. First, bok choy delivers a hefty dose of vitamins A, C, and K, which support immunity, skin health, and bone strength. Meanwhile, mushrooms add a rich umami flavor while providing selenium and B vitamins to boost energy and antioxidant defenses. Together, these ingredients make Flavorful Bok Choy and Mushroom Stir Fry a nutrient-dense meal that fuels your body efficiently.
Additionally, this dish keeps calories in check without sacrificing satisfaction. Since bok choy and mushrooms are naturally low in calories but high in fiber, they help you feel full longer. Furthermore, the stir-fry method preserves the crisp texture and nutrients of the vegetables, ensuring you get the most from every bite. With minimal oil and no heavy sauces, Flavorful Bok Choy and Mushroom Stir Fry stays light yet deeply satisfying.
Finally, the dish supports heart health and digestion. Bok choy contains potassium to help regulate blood pressure, while mushrooms contribute compounds that may lower cholesterol. The fiber from both ingredients also promotes gut health. Whether you seek a quick weeknight dinner or a meal that aligns with wellness goals, Flavorful Bok Choy and Mushroom Stir Fry delivers on all fronts.
How it fits in a healthy lifestyle
Flavorful Bok Choy and Mushroom Stir Fry effortlessly fits into a balanced diet. If you follow a plant-based or gluten-free lifestyle, this dish naturally meets your needs without requiring substitutions. It’s also ideal for meal prep, as the flavors deepen when stored, making it a smart choice for busy weeknights.
For those focused on heart health or weight management, the stir-fry offers a low-sodium, high-fiber option that keeps cravings at bay. Pair it with quinoa or brown rice for extra staying power, or enjoy it solo for a light yet nourishing meal. If you’re exploring more ways to incorporate veggies into your routine, check out these simple vegetable side dishes to round out your plate. No matter your dietary priorities, Flavorful Bok Choy and Mushroom Stir Fry adapts to support your goals.
A quick and healthy stir fry featuring crisp bok choy and savory mushrooms in a light garlic sauce.
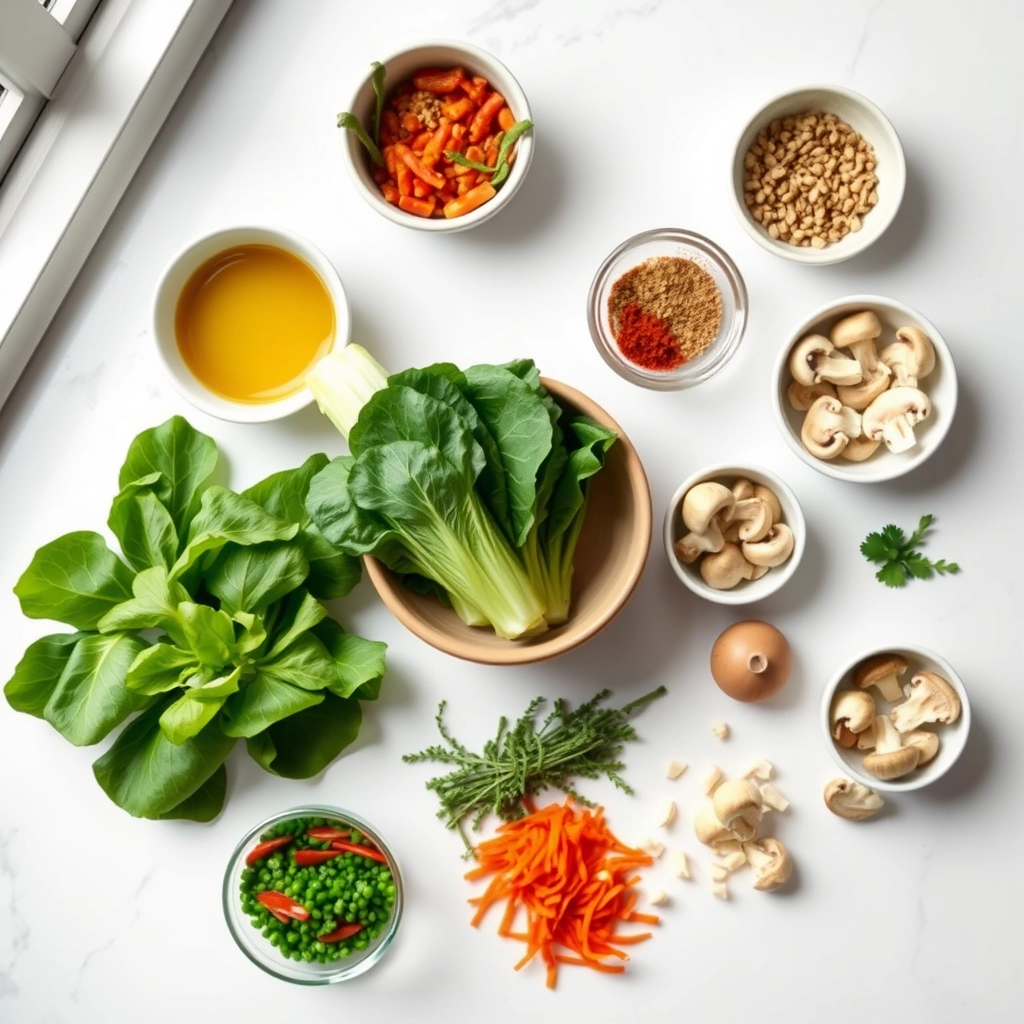
Ingredients
Scale
For the Crust:
2 heads bok choy, chopped
8 oz mushrooms, sliced
2 cloves garlic, minced
1 tbsp soy sauce
1 tbsp oyster sauce
1 tsp sesame oil
1 tbsp vegetable oil
1/2 tsp red pepper flakes
Instructions
1. Prepare the Crust:
Heat vegetable oil in a large wok or skillet over medium-high heat.
Add garlic and red pepper flakes, stir for 30 seconds until fragrant.
Add mushrooms and stir fry for 3-4 minutes until softened.
Add bok choy and continue cooking for 2-3 minutes until leaves wilt.
Stir in soy sauce, oyster sauce, and sesame oil. Toss to combine.
Cook for 1 more minute then remove from heat.
Notes
You can customize the seasonings to taste.
How to Prepare This Dish
Steps and time-saving tips
Start by washing and chopping your bok choy into bite-sized pieces, separating the stems from the leaves since they cook at different rates. Next, slice your mushrooms evenly so they brown beautifully in the pan. Heat a large wok or skillet over medium-high heat and drizzle in a high-smoke-point oil like avocado or peanut oil. Toss in the mushrooms first, stirring occasionally until they release their moisture and turn golden, about 4 minutes. Push them to one side and add the bok choy stems, cooking for another 2 minutes until slightly tender. Now fold in the leaves along with minced garlic and ginger, stirring constantly to prevent burning. Meanwhile, whisk together your sauce—a simple blend of soy sauce, sesame oil, and a pinch of sugar works wonders. Pour it over the veggies, tossing everything until glossy and fragrant. Finish with a sprinkle of sesame seeds or red pepper flakes for extra flair. To save time, prep all ingredients before heating the pan and use pre-minced garlic or ginger from the fridge.
and-learned-from">Mistakes I’ve made and learned from
Early on, I’d overcrowd the pan, steaming the mushrooms instead of searing them—now I cook in batches if needed. Another blunder? Adding the sauce too late, leaving the bok choy soggy. I learned to drizzle it just as the leaves wilt, locking in that crisp-tender texture. If your stir-fry feels bland, check out my guide to balancing Asian flavors for seasoning tweaks. And if you’re new to wok cooking, my wok care tips will help you avoid sticky disasters. Trust me, a well-seasoned pan makes all the difference for this Flavorful Bok Choy and Mushroom Stir Fry.
Cultural Connection and Variations
Where this recipe comes from
Flavorful Bok Choy and Mushroom Stir Fry carries deep roots in East Asian cuisine, where quick-cooked greens and earthy mushrooms shine in simple yet satisfying dishes. In southern China, cooks often prepare it with garlic and oyster sauce, while in Japan, they might swap bok choy for tatsoi and add a splash of mirin. My grandmother, however, always tossed in extra ginger and a pinch of chili flakes for warmth, turning weeknight dinners into something special.
Across Southeast Asia,
street vendors sizzle bok choy with shrimp paste or fermented tofu for bold umami punches. Meanwhile, vegetarian versions thrive in Buddhist temple cooking, where chefs spotlight mushrooms like shiitake or wood ear for texture. Even my college roommate, who grew up in Taiwan, taught me to finish the Flavorful Bok Choy and Mushroom Stir Fry with toasted sesame oil for an aromatic touch. The dish adapts beautifully, whether you crave it spicy, sweet, or tangy.
How it fits in today’s cooking
Today, Flavorful Bok Choy and Mushroom Stir Fry wins hearts as a speedy, nutrient-packed meal for busy households. Health-conscious cooks love it for its plant-powered goodness, while meal preppers batch-cook it with quinoa or brown rice. During Lunar New Year, families still serve it for prosperity, since bok choy symbolizes wealth. But really, it’s just as perfect for Tuesday dinners when you need greens fast.
Modern twists keep it fresh, like adding cashew cream for richness or tossing in rainbow chard for color. Some even pair it with glazed tofu for extra protein. Whether you stick to tradition or experiment, this stir fry bridges generations and cuisines effortlessly. It’s the kind of dish that feels both timeless and totally now.
>Taste and Texture
What makes it delicious
Flavorful Bok Choy and Mushroom Stir Fry delivers a mouthwatering balance of crisp and tender textures. The bok choy stays slightly crunchy, while the mushrooms turn buttery and rich, soaking up the savory sauce. Garlic and ginger add a warm, fragrant kick, and a splash of soy sauce brings deep umami notes. Every bite bursts with freshness, thanks to the bright bok choy leaves and earthy mushrooms. Whether you serve it over rice or noodles, Flavorful Bok Choy and Mushroom Stir Fry satisfies with its lively flavors and satisfying contrasts.
Boosting the flavor
For an extra flavor boost, try swapping regular soy sauce for tamari, which adds a smoother, richer taste. A sprinkle of toasted sesame seeds or a drizzle of chili oil elevates the dish with nutty or spicy notes. If you love heat, toss in sliced jalapeños or a dash of homemade chili crisp for a fiery finish. Fresh herbs like cilantro or Thai basil also brighten the stir-fry, adding a pop of color and freshness. With these easy tweaks, Flavorful Bok Choy and Mushroom Stir Fry becomes even more irresistible.
Tips for Success
Best practices for results
Always slice your bok choy and mushrooms evenly so they cook at the same rate. Meanwhile, heat your wok or skillet until it’s very hot before adding oil—this ensures a perfect sear for your Flavorful Bok Choy and Mushroom Stir Fry. Stir constantly to prevent sticking, and add sauces gradually to control the dish’s saltiness. Finally, taste as you go and adjust seasoning right before serving for the best flavor balance.
Mistakes to avoid
Avoid overcrowding the pan, as this steams the vegetables instead of crisping them. Instead, cook in batches if needed for even browning. Also, don’t skip prepping your ingredients beforehand—stir-fries move quickly, so having everything ready saves stress. For more on knife skills, check out our guide to chopping techniques. Additionally, resist the urge to overcook the bok choy; it should stay slightly crisp. Learn how to spot doneness with our vegetable textures breakdown.
Serving and Pairing Suggestions
How to serve this dish
For a stunning presentation, serve Flavorful Bok Choy and Mushroom Stir Fry in a wide, shallow bowl to showcase its vibrant colors. Meanwhile, garnish with toasted sesame seeds or thinly sliced green onions for a pop of freshness. This dish shines as a quick weeknight dinner, but it also makes an elegant addition to holiday spreads or potlucks. If you want to impress guests, pair it with steamed jasmine rice in a bamboo steamer for a restaurant-worthy touch.
h-it">What goes well with it
First, try pairing Flavorful Bok Choy and Mushroom Stir Fry with a light, citrusy white wine like Sauvignon Blanc. The crisp acidity balances the savory umami flavors perfectly. Alternatively, serve it alongside fluffy coconut rice for a subtle sweetness that enhances the dish. For a complete meal, add our Garlic Ginger Chicken Skewers or a refreshing Cucumber Avocado Salad. Both options add texture and contrast while keeping the meal balanced.
What’s the best way to cook bok choy for a stir fry?
For a Flavorful Bok Choy and Mushroom Stir Fry, separate the bok choy leaves from the stems and chop them into bite-sized pieces. Cook the stems first since they take longer, then add the leaves at the end to keep them crisp and vibrant.
ank-math-faq-item">
Can I use other mushrooms besides shiitake in this stir fry?
Absolutely! While shiitake mushrooms add a rich umami flavor to Flavorful Bok Choy and Mushroom Stir Fry, you can substitute with cremini, button, or oyster mushrooms. Just adjust cooking times slightly based on the mushroom type.
How do I make my stir fry sauce more flavorful?
Enhance your Flavorful Bok Choy and Mushroom Stir Fry by balancing soy sauce with a touch of honey or maple syrup, garlic, ginger, and a splash of rice vinegar. For depth, add a teaspoon of sesame oil or chili paste.
Is bok choy and mushroom stir fry healthy?
Yes! Flavorful Bok Choy and Mushroom Stir Fry is packed with vitamins, fiber, and antioxidants. Bok choy is low in calories but high in nutrients, while mushrooms provide protein and immune-boosting benefits, making this dish both delicious and nutritious.
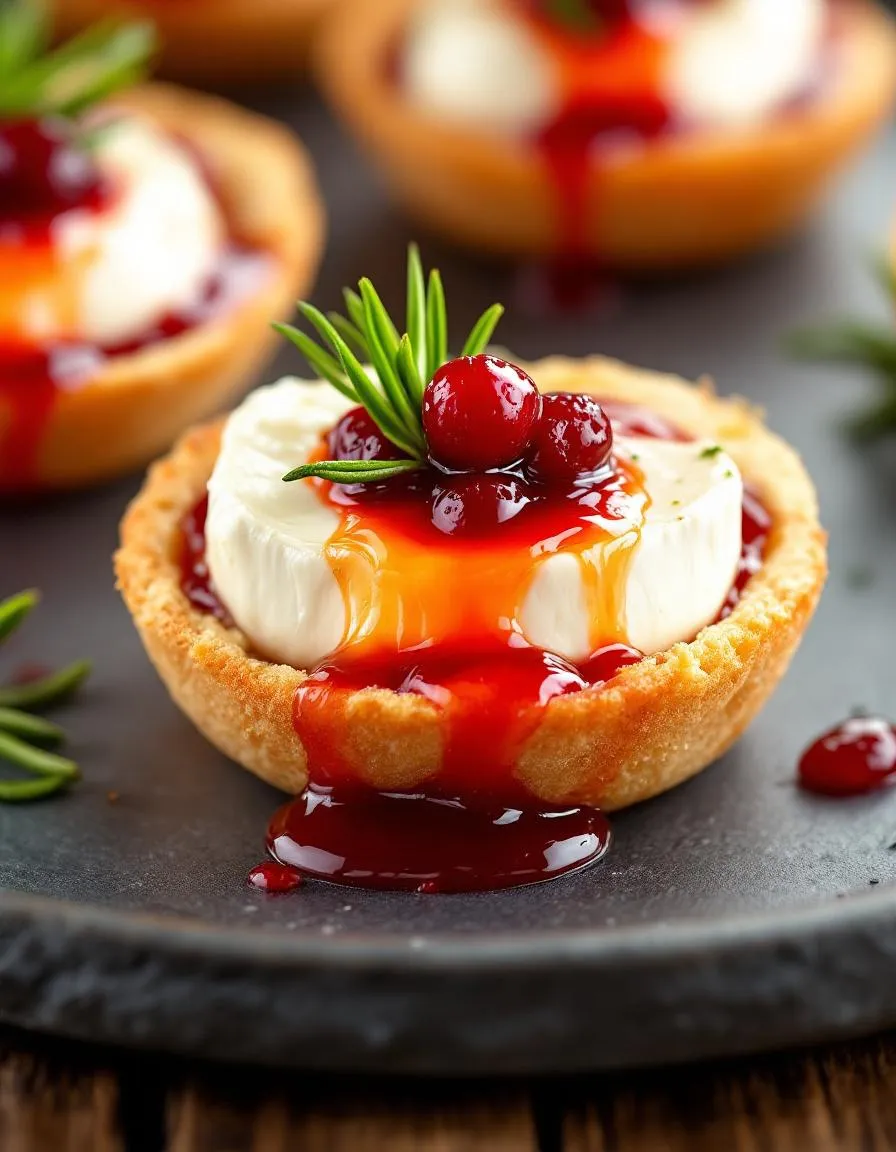
There’s something magical about bite-sized appetizers that bring people together, and these Irresistible Cranberry Brie Bites are no exception. Whether you’re hosting a holiday gathering or simply craving a cozy night in, these golden, flaky pastry cups filled with creamy brie and tangy cranberry sauce will steal the show. They’re easy to make yet impressively elegant, proving that the best moments often come in small, delicious packages.
Irresistible Cranberry Brie Bites combine buttery puff pastry, rich brie cheese, and sweet-tart cranberry sauce for a flavor explosion in every bite. These appetizers matter because they strike the perfect balance between simplicity and sophistication, making them ideal for both casual get-togethers and special occasions. Moreover, they fit seamlessly into our blog’s tone of approachable yet elevated recipes that celebrate seasonal ingredients. If you love effortless entertaining, you’ll appreciate how these bites come together in under 30 minutes. For more crowd-pleasing ideas, check out our Easy Holiday Appetizers or explore our guide to Cheese Board Essentials to complement your spread.
Why I Love This Recipe
These Irresistible Cranberry Brie Bites hold a special place in my heart because they remind me of my first holiday party as a host. I wanted something simple yet memorable, and these bites delivered. The way the warm brie melts into the cranberry sauce, paired with the crisp pastry, always feels like a hug in food form. Even now, they’re my go-to when I need a last-minute appetizer that never fails to wow guests. Trust me, once you try them, you’ll understand why they’re a staple in my recipe collection.
Health and Nutrition
Why it’s good for your body
Irresistible Cranberry Brie Bites pack a flavorful punch while delivering real nutritional benefits. First, cranberries bring a burst of antioxidants, which help combat inflammation and support immune health. Additionally, brie cheese provides a creamy dose of calcium and protein, promoting strong bones and muscle repair. Together, these ingredients create a satisfying bite that fuels your body.
Moreover, Irresistible Cranberry Brie Bites balance sweet and savory flavors without excessive sugar or processed ingredients. The natural tartness of cranberries pairs perfectly with the richness of brie, offering a guilt-free indulgence. Furthermore, whole-grain crackers or a nut-based crust can add fiber, aiding digestion and keeping you full longer.
Finally, these bites fit seamlessly into mindful eating habits. Because they combine protein, healthy fats, and complex carbs, Irresistible Cranberry Brie Bites stabilize energy levels. Whether you serve them as an appetizer or a light snack, they contribute to a well-rounded diet. With every bite, you enjoy both taste and nourishment.
How it fits in a healthy lifestyle
Irresistible Cranberry Brie Bites align with various dietary preferences, making them a versatile choice. For gluten-free eaters, simply swap traditional crackers for almond flour crust or gluten-free alternatives. If you focus on heart-healthy fats, the brie and cranberry combo delivers monounsaturated fats and anti-inflammatory compounds.
These bites also work well for entertaining or meal prep. Pair them with a fresh salad for a light lunch, or enjoy them as part of a holiday spread without derailing your goals. Their portion-controlled size helps with mindful eating, so you savor flavor without overindulging.
Ultimately, Irresistible Cranberry Brie Bites prove that nutritious food can be delicious. By choosing quality ingredients and balancing flavors, they fit effortlessly into a healthy, active lifestyle.
Delicious bite-sized appetizers featuring creamy brie and sweet-tart cranberry sauce wrapped in flaky puff pastry.
Ingredients
Scale
For the Crust:
1 sheet puff pastry, thawed
8 oz brie cheese, rind removed and cubed
1/2 cup cranberry sauce
1 tbsp fresh rosemary, chopped
1 egg, beaten (for egg wash)
1 tbsp honey (optional)
Instructions
1. Prepare the Crust:
Preheat oven to 400°F (200°C). Line a baking sheet with parchment paper.
Roll out puff pastry and cut into 24 equal squares. Press each square into a mini muffin tin.
Place a cube of brie in each pastry cup, then top with 1 tsp cranberry sauce and a sprinkle of rosemary.
Brush edges of pastry with egg wash. Bake for 12-15 minutes until golden brown.
Drizzle with honey if desired. Serve warm.
Notes
You can customize the seasonings to taste.
s-dish">How to Prepare This Dish
Steps and time-saving tips
Start by preheating your oven to 375°F so it’s ready when you are. While it heats, unroll a sheet of puff pastry and cut it into 24 equal squares. Press each square into a mini muffin tin, gently shaping them into little cups. Next, slice your brie into small cubes—about half an inch thick—and place one piece into each pastry cup. Spoon a teaspoon of cranberry sauce over the brie, then sprinkle with chopped pecans for crunch. Pop the tray into the oven and bake for 12-15 minutes until the pastry turns golden and the cheese melts. Meanwhile, whisk together a quick honey drizzle by combining honey with a pinch of cinnamon. Once the bites are out of the oven, let them cool for a minute before drizzling with honey and garnishing with fresh thyme. To save time, prep the cranberry sauce a day ahead or use store-bought for convenience. If you’re doubling the batch, stagger the baking trays to ensure even heat distribution.
Mistakes I’ve made and learned from
My first attempt at Irresistible Cranberry Brie Bites ended with soggy pastry because I overfilled the cups. Too much cranberry sauce seeped into the dough, making it chewy instead of crisp. Now I stick to a teaspoon per bite—just enough for flavor without the mess. Another lesson? Letting the brie come to room temperature before baking ensures even melting. Cold cheese stays clumpy, which I learned the hard way after serving oddly textured bites at a party. For more foolproof appetizers, check out my guide to avoiding holiday appetizer mistakes. And if your puff pastry cracks when unrolling, don’t panic. A light brush of water helps seal tears, or try the thawing tips in my puff pastry hacks post. Trust me, these small tweaks make all the difference.
n-and-variations">Cultural Connection and Variations
Where this recipe comes from
Irresistible Cranberry Brie Bites trace their roots to the cozy fusion of French and American holiday traditions. The dish marries creamy French Brie with tart cranberries, a staple in North American Thanksgiving and Christmas spreads. Over time, home cooks and chefs alike embraced this pairing, turning it into a bite-sized appetizer perfect for gatherings. In Provence, you might find a similar concept with fig jam instead of cranberry, while in Quebec, maple-glazed cranberries often steal the spotlight.
My family, like many others, adopted Irresistible Cranberry Brie Bites as a must-have for our festive table. My aunt swaps the cranberry sauce for orange marmalade during summer picnics, proving how versatile this recipe can be. Across the globe, variations pop up—some add pecans for crunch, others drizzle honey for sweetness. No matter the twist, the heart of the dish remains: melty Brie and vibrant fruit, a combo that always feels like celebration.
How it fits in today’s cooking
Today, Irresistible Cranberry Brie Bites bridge nostalgia and modern convenience. They’re a star at holiday potlucks but also fit effortlessly into weeknight charcuterie boards or easy appetizers for dinner parties. Busy cooks love how quickly they come together, while food bloggers riff on the recipe with spicy jalapeños or even vegan holiday recipes using plant-based Brie.
What keeps this dish re
levant? Its adaptability. Whether you’re hosting a fancy soiree or craving a cozy snack, these bites deliver. They’re a reminder that great food doesn’t need complexity—just quality ingredients and a dash of creativity. From freezer-friendly hacks to gluten-free phyllo cups, Irresistible Cranberry Brie Bites evolve without losing their charm.
Taste and Texture
What makes it delicious
Irresistible Cranberry Brie Bites deliver a symphony of flavors and textures in every bite. The buttery, flaky pastry shell shatters delicately, giving way to the rich, creamy brie that melts luxuriously on your tongue. Meanwhile, the sweet-tart cranberry sauce cuts through the richness with a bright, fruity zing. A hint of fresh rosemary or thyme adds an earthy, fragrant note, elevating the whole experience. These bites strike the perfect balance between crisp, gooey, and tangy—making them impossible to resist.
Boosting the flavor
For an extra flavor boost, try drizzling Irresistible Cranberry Brie Bites with warm honey or sprinkling them with toasted pecans for a nutty crunch. If you love bold contrasts, a pinch of chili flakes or a smear of fig jam will add depth. Pair them with a side of spiced apple chutney for a festive twist, or serve alongside rosemary garlic crostini to round out your appetizer spread. Small tweaks can make these bites even more memorable.
Always chill the puff pastry for at least 15 minutes before cutting it into squares, as this prevents shrinking during baking. Meanwhile, use room-temperature Brie to ensure smooth melting in your Irresistible Cranberry Brie Bites. For even browning, rotate the baking sheet halfway through cooking. Additionally, lightly brush the pastry edges with egg wash for a golden finish. Finally, let the bites cool slightly before serving so the cranberry filling sets perfectly.
Mistakes to avoid
Avoid overfilling the pastry cups with cranberry sauce, as it can leak and make the bottoms soggy. Instead, stick to a teaspoon per bite for the ideal balance. Also, don’t skip preheating the oven—uneven heat leads to undercooked dough. For more on perfecting pastry, check out our guide on puff pastry techniques. Another common misstep is using cold Brie straight from the fridge, which won’t melt properly. For cheese prep tips, explore our cheese selection guide to elevate your Irresistible Cranberry Brie Bites.
g-suggestions">Serving and Pairing Suggestions
How to serve this dish
Serve Irresistible Cranberry Brie Bites warm to highlight the gooey cheese and tangy cranberry filling. For a festive touch, arrange them on a wooden board with fresh rosemary sprigs and whole cranberries as garnish. Meanwhile, these bite-sized delights shine at holiday parties, brunch spreads, or even as an elegant appetizer for dinner gatherings. To impress guests, pair them with mini chalkboard signs labeling each flavor or stack them on tiered serving trays for visual appeal.
What goes well with it
Pair Irresistible Cranberry Brie Bites with a crisp white wine like Sauvignon Blanc, which cuts through the richness of the brie. Alternatively, serve them alongside a warm mug of spiced apple cider for a cozy fall twist. If you want a savory balance, try pairing them with a light arugula salad or our Garlic Herb Crostini for added crunch. For a sweet contrast, drizzle them with honey or serve with our Cinnamon Spiced Nuts to enhance the cranberry’s tartness.
math-faq-block">
What are the best crackers to serve with Irresistible Cranberry Brie Bites?
Buttery crackers like water crackers or toasted baguette slices pair perfectly with Irresistible Cranberry Brie Bites. Avoid overly seasoned crackers to let the creamy brie and tart cranberry flavors shine. For a gluten-free option, try crisp rice crackers.
Can I make Irresistible Cranberry Brie Bites ahead of time?
Yes! Assemble the Irresistible Cranberry Brie Bites up to 24 hours in advance and refrigerate them covered. Bring them to room temperature 30 minutes before baking for optimal texture. The cranberry sauce can be made 3 days ahead.
How do you prevent brie from oozing too much when baking?
Chill your brie for 20 minutes before cutting to make cleaner slices for Irresistible Cranberry Brie Bites. Bake at 375°F for just 8-10 minutes until warmed through but not melted. Using a firmer, slightly underripe brie also helps maintain structure.
ank-math-faq-item">
What can I substitute for cranberry sauce in this recipe?
For a twist on Irresistible Cranberry Brie Bites, try fig jam, orange marmalade, or spiced apple butter. Tart cherry preserves also work well with brie’s creaminess. Avoid runny substitutes that could make the bites soggy.
Best Fluffy Pumpkin Cinnamon Rolls Recipe
Introduction
There’s something magical about the aroma of warm spices filling your kitchen, especially when it leads to a batch of freshly baked Fluffy Pumpkin Cinnamon Rolls to Spice Up Your Day!. Whether you’re craving a cozy breakfast or a sweet afternoon treat, these rolls deliver comfort in every bite. With their tender dough, rich pumpkin flavor, and swirls of cinnamon sugar, they’re the perfect way to embrace the season—or simply brighten an ordinary day. Trust me, once you try them, you’ll understand why they’ve become a staple in my home.
If you love fall-inspired baking, Fluffy Pumpkin Cinnamon Rolls to Spice Up Your Day! will quickly become your new favorite. These rolls combine the warmth of pumpkin pie with the irresistible appeal of classic cinnamon buns, creating a treat that feels both nostalgic and exciting. What makes them special? First, the pumpkin puree adds moisture and a subtle earthiness, while the cinnamon-sugar filling delivers that signature gooey sweetness. Plus, the cream cheese glaze ties everything together for a decadent finish. Whether you’re hosting a brunch or treating yourself, these rolls fit effortlessly into any occasion. If you’re looking for more seasonal inspiration, check out our Pumpkin Spice Latte to pair with your rolls or explore our guide to Fall Baking Essentials for must-have tips. The best part? This recipe balances simplicity with indulgence, making it accessible for bakers of all levels.
Why I Love This Recipe
I’ll never forget the first time I made Fluffy Pumpkin Cinnamon Rolls to Spice Up Your Day!. It was a chilly Sunday morning, and I wanted something that felt like a hug in food form. The moment I pulled them out of the oven, golden and fragrant, I knew I’d found a keeper. Now, they’re my go-to for lazy weekends, holiday gatherings, and even just because. There’s something deeply satisfying about sharing them with loved ones—or savoring one all to yourself with a cup of coffee. These rolls aren’t just delicious; they’re a little reminder to slow down and enjoy life’s sweet moments.
Health and Nutrition
Why it’s good for your body
Fluffy Pumpkin Cinnamon Rolls to Spice Up Your Day! pack more than just irresistible flavor. First, pumpkin puree delivers a hefty dose of vitamin A, which supports vision and immune health. Additionally, cinnamon adds antioxidants that may help reduce inflammation. Together, these ingredients make every bite a little boost for your body.
Moreover, Fluffy Pumpkin Cinnamon Rolls to Spice Up Your Day! use whole-food ingredients like real pumpkin and warm spices. Unlike overly processed pastries, this recipe skips artificial additives. Instead, it relies on natural sweetness and fiber-rich pumpkin to keep you satisfied longer. As a result, you enjoy a treat that feels indulgent without the usual guilt.
Finally, the warmth of cinnamon in Fluffy Pumpkin Cinnamon Rolls to Spice Up Your Day! may even help regulate blood sugar levels. Studies suggest cinnamon can improve insulin sensitivity. While these rolls are still a dessert, their thoughtful ingredients offer more balance than typical sugary snacks. So go ahead—savor them knowing they bring both comfort and nourishment.
How it fits in a healthy lifestyle
Fluffy Pumpkin Cinnamon Rolls to Spice Up Your Day! fit perfectly into a balanced diet when enjoyed mindfully. Pair one with a protein-rich breakfast like Greek yogurt or scrambled eggs to stabilize energy levels. This combo keeps cravings at bay while letting you relish a cozy seasonal treat.
For those watching sugar intake, try reducing the glaze or swapping in a touch of maple syrup. Small tweaks let you align the recipe with your goals without sacrificing flavor. If you love baking healthier desserts, explore our guide to smart baking swaps for more ideas.
These rolls also shine as part of a heart-healthy lifestyle when made with whole-grain flour. Pumpkin’s potassium supports blood pressure, while cinnamon may aid circulation. Craving more wholesome twists? Check out our favorite fall recipes for inspiration that balances nutrition and comfort.
Soft, fluffy pumpkin cinnamon rolls with a warm spiced filling and creamy glaze.
Ingredients
Scale
For the Crust:
3 cups all-purpose flour
1/2 cup pumpkin puree
1/4 cup warm milk
1/4 cup granulated sugar
1/4 cup melted butter
1 large egg
2 1/4 tsp active dry yeast
1 tsp pumpkin pie spice
1/2 tsp salt
1/2 cup brown sugar
2 tsp ground cinnamon
1/4 cup softened butter (for filling)
1 cup powdered sugar (for glaze)
2 tbsp milk (for glaze)
1/2 tsp vanilla extract (for glaze)
Instructions
1. Prepare the Crust:
In a bowl, dissolve yeast in warm milk with a pinch of sugar. Let sit for 5 minutes until frothy.
Mix pumpkin puree, melted butter, egg, sugar, pumpkin pie spice, and salt in a large bowl. Add yeast mixture and stir.
Gradually add flour until a soft dough forms. Knead for 5 minutes, then cover and let rise for 1 hour.
Roll dough into a rectangle. Spread softened butter, then sprinkle brown sugar and cinnamon evenly.
Roll tightly, slice into 12 pieces, and place in a greased baking dish. Let rise for 30 minutes.
Bake at 375°F (190°C) for 20-25 minutes until golden. Cool slightly before drizzling with glaze.
Notes
You can customize the seasonings to taste.
How to Prepare This Dish
Steps and time-saving tips
Start by whisking together warm milk, sugar, and yeast in a large bowl, then let it sit for 5 minutes until frothy. Meanwhile, mix pumpkin puree, melted butter, and eggs in another bowl until smooth. Combine the wet ingredients with the yeast mixture, then gradually fold in flour and salt until a soft dough forms. Knead the dough on a floured surface for 5-7 minutes until elastic, or use a stand mixer with a dough hook to save time. Place the dough in a greased bowl, cover it with a damp towel, and let it rise in a warm spot for 1 hour or until doubled in size. While waiting, prepare the cinnamon filling by blending softened butter, brown sugar, cinnamon, and a pinch of nutmeg. Once the dough has risen, roll it out into a rectangle, spread the filling evenly, then tightly roll it into a log. Slice into 12 even pieces and arrange them in a buttered baking dish. Let the rolls rise again for 30 minutes before baking at 375°F for 20-25 minutes until golden. For a quicker rise, place the dough in a slightly warmed oven. Finally, drizzle with cream cheese glaze while still warm for the perfect finish.
Mistakes I’ve made and learned from
Early on, I rushed the yeast activation and ended up with dense rolls because the milk was too hot—it should feel warm, not scalding. Now I always test it with my wrist first. Another time, I over-floured the dough while kneading, which made the rolls dry. A sticky dough is actually ideal; just lightly flour the surface and your hands. If your dough isn’t rising, check your yeast’s expiration date or try placing it near a preheating oven for gentle warmth. For more troubleshooting, check out my guide on common baking mistakes. Also, don’t skip the second rise—it ensures those fluffy layers. If you’re short on time, my quick bread hacks can help speed things up without sacrificing texture.
Fluffy Pumpkin Cinnamon Rolls to Spice Up Your Day! weave together the cozy flavors of fall with a touch of nostalgia. While cinnamon rolls trace their roots to Sweden, where they’re known as “kanelbullar,” adding pumpkin transforms them into a distinctly American twist. The pumpkin puree not only lends moisture but also celebrates harvest season, making these rolls a staple at Thanksgiving brunches or Halloween gatherings. In some Southern households, cooks might swap the cinnamon for a dash of nutmeg or cardamom, while others drizzle them with maple glaze instead of classic cream cheese frosting.
Across the globe, bakers adapt similar treats to local tastes. In Germany, “zimtschnecken” might feature apples or marzipan, while in Mexico, “conchas” blend cinnamon with piloncillo sugar. Even within the U.S., families put their spin on Fluffy Pumpkin Cinnamon Rolls to Spice Up Your Day!—maybe by folding in pecans or topping them with a bourbon-infused icing. Whether served warm from the oven or packed into lunchboxes, these rolls carry a universal appeal: sweet, spiced, and utterly comforting.
ays-cooking">How it fits in today’s cooking
Today, Fluffy Pumpkin Cinnamon Rolls to Spice Up Your Day! bridge tradition and modern convenience. Busy home cooks streamline the recipe with pre-made dough or meal-prep hacks, while food bloggers experiment with gluten-free or vegan versions. Social media fuels their popularity, especially during pumpkin spice season, when bakers showcase swirl-perfect rolls on Instagram. They’ve also become a festive favorite for Friendsgiving or fall brunch spreads, pairing effortlessly with spiced lattes.
What keeps them relevant? Versatility. Some enjoy them as a weekend indulgence, while others bake them for holiday gifting. Whether you stick to the classic recipe or add a personal twist, these cinnamon rolls deliver warmth in every bite—proof that some traditions only get sweeter with time.
Taste and Texture
What makes it delicious
Fluffy Pumpkin Cinnamon Rolls to Spice Up Your Day! deliver a warm, cozy hug in every bite. The soft, pillowy dough melts in your mouth, while the rich pumpkin filling adds a velvety sweetness. Meanwhile, the cinnamon swirls through each layer, offering a fragrant, spicy kick that lingers delightfully. A hint of nutmeg and cloves deepens the flavor, making every bite feel like autumn on a plate. Plus, the gooey cream cheese glaze drizzled on top balances the spices with its creamy, tangy finish. Whether you enjoy them fresh from the oven or reheated, Fluffy Pumpkin Cinnamon Rolls to Spice Up Your Day! promise a comforting, irresistible treat.
r">Boosting the flavor
Elevate your Fluffy Pumpkin Cinnamon Rolls to Spice Up Your Day! with a few easy tweaks. First, try swapping the cream cheese glaze for a maple brown butter icing—its nutty depth pairs perfectly with pumpkin. Alternatively, sprinkle chopped pecans or walnuts on top for a crunchy contrast. For extra warmth, add a pinch of cardamom or ginger to the dough. If you love bold flavors, serve them with a side of spiced chai latte to amplify the cozy vibes. With these small changes, you’ll take an already delicious treat to the next level.
Tips for Success
Best practices for results
Always use room-temperature ingredients for your Fluffy Pumpkin Cinnamon Rolls to Spice Up Your Day! since cold butter or eggs can make the dough uneven. Meanwhile, lightly flour your work surface to prevent sticking, but avoid adding too much extra flour, which can dry out the rolls. Additionally, let the dough rise in a warm, draft-free spot until it doubles in size for the fluffiest texture. Finally, brush the rolls with melted butter right after baking to keep them soft and glossy.
>Mistakes to avoid
Overmixing the dough is a common mistake that leads to tough rolls, so stop kneading as soon as the ingredients combine. Similarly, don’t skip the second rise, or your Fluffy Pumpkin Cinnamon Rolls to Spice Up Your Day! won’t achieve their signature lightness. For more troubleshooting tips, check out our guide on common baking mistakes. Also, measure your pumpkin puree accurately—too much can make the dough soggy. If you’re unsure about conversions, our baking measurements guide has helpful tips.
Serving and Pairing Suggestions
How to serve this dish
Fluffy Pumpkin Cinnamon Rolls to Spice Up Your Day! deserve a show-stopping presentation. First, arrange them warm on a rustic wooden board or a pretty cake stand for a cozy, inviting look. Drizzle extra icing in zigzag patterns for a bakery-worthy finish. Sprinkle chopped pecans or a pinch of cinnamon on top for texture and warmth. These rolls shine at weekend brunches, holiday breakfasts, or even as a sweet afternoon pick-me-up. For special occasions, serve them alongside mini coffee cups or hot cocoa for a festive touch.
What goes well with it
Pair Fluffy Pumpkin Cinnamon Rolls to Spice Up Your Day! with a creamy pumpkin spice latte for the ultimate fall flavor combo. The latte’s richness balances the rolls’ sweetness perfectly. Alternatively, try them with a scoop of vanilla bean ice cream for an indulgent dessert twist. If you’re serving these at brunch, add a savory side like crispy bacon or our Perfect Scrambled Eggs to balance the meal. For a lighter option, pair them with fresh berries or our Homemade Chai Tea, which adds warm spices that echo the cinnamon rolls’ cozy vibes.
How do I make Fluffy Pumpkin Cinnamon Rolls extra soft?
For ultra-soft Fluffy Pumpkin Cinnamon Rolls to Spice Up Your Day!, use warm milk in the dough and let it rise twice. Adding pumpkin puree keeps them moist, while a touch of cornstarch in the flour blend creates a tender texture. Don’t overbake—pull them out when they’re golden but still slightly springy.
Can I prepare Fluffy Pumpkin Cinnamon Rolls the night before?
Absolutely! Assemble your Fluffy Pumpkin Cinnamon Rolls to Spice Up Your Day! and refrigerate them overnight after the first rise. In the morning, let them sit at room temperature for 30 minutes before baking. This method enhances flavor and saves time for a cozy breakfast.
ank-math-faq-item">
What’s the best frosting for Fluffy Pumpkin Cinnamon Rolls?
Cream cheese frosting pairs perfectly with Fluffy Pumpkin Cinnamon Rolls to Spice Up Your Day!—its tanginess balances the sweetness. For a lighter option, try a maple glaze or brown butter icing. Always frost while rolls are warm so it melts slightly into every layer.
How can I add more pumpkin flavor to my cinnamon rolls?
Boost the pumpkin taste in your Fluffy Pumpkin Cinnamon Rolls by using extra puree (up to ½ cup) and adding pumpkin pie spice to both the dough and filling. For intense flavor, brush rolls with a pumpkin-spiced syrup right after baking. This ensures every bite delivers autumn warmth!
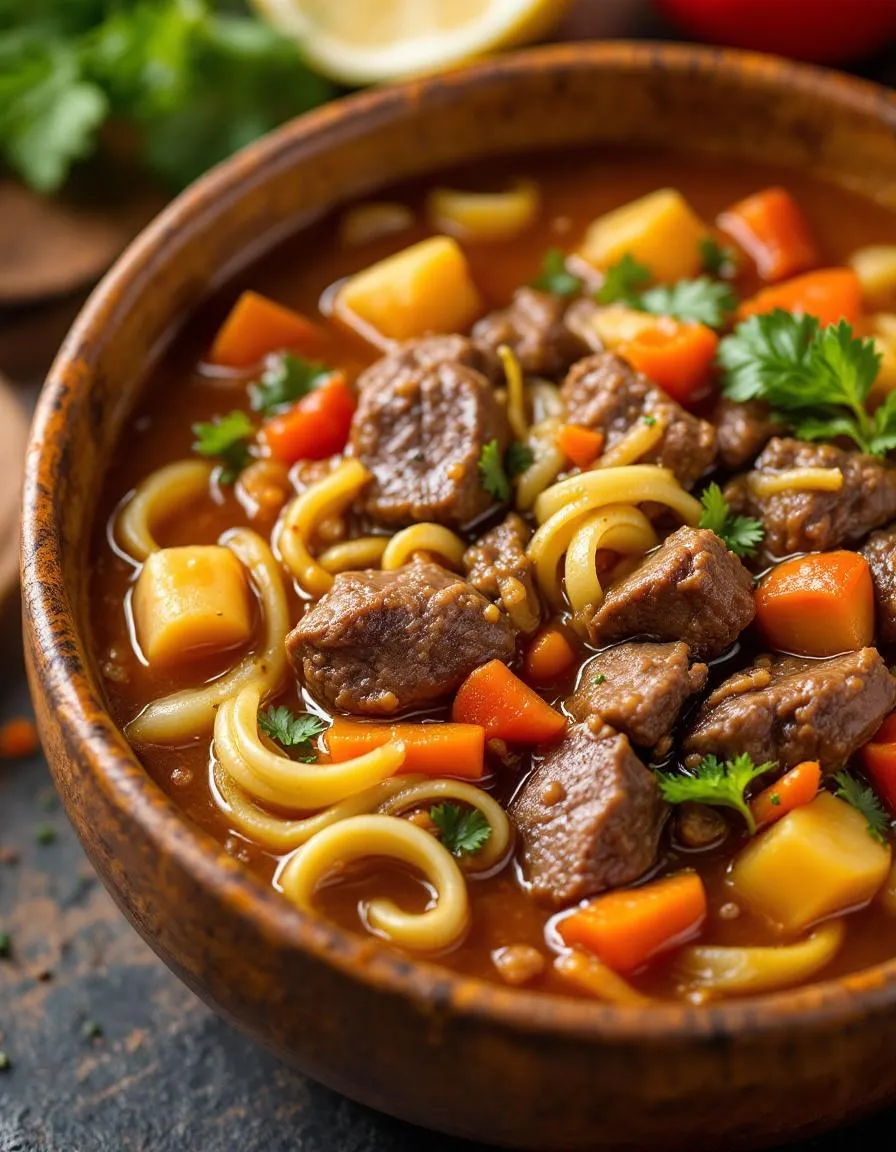
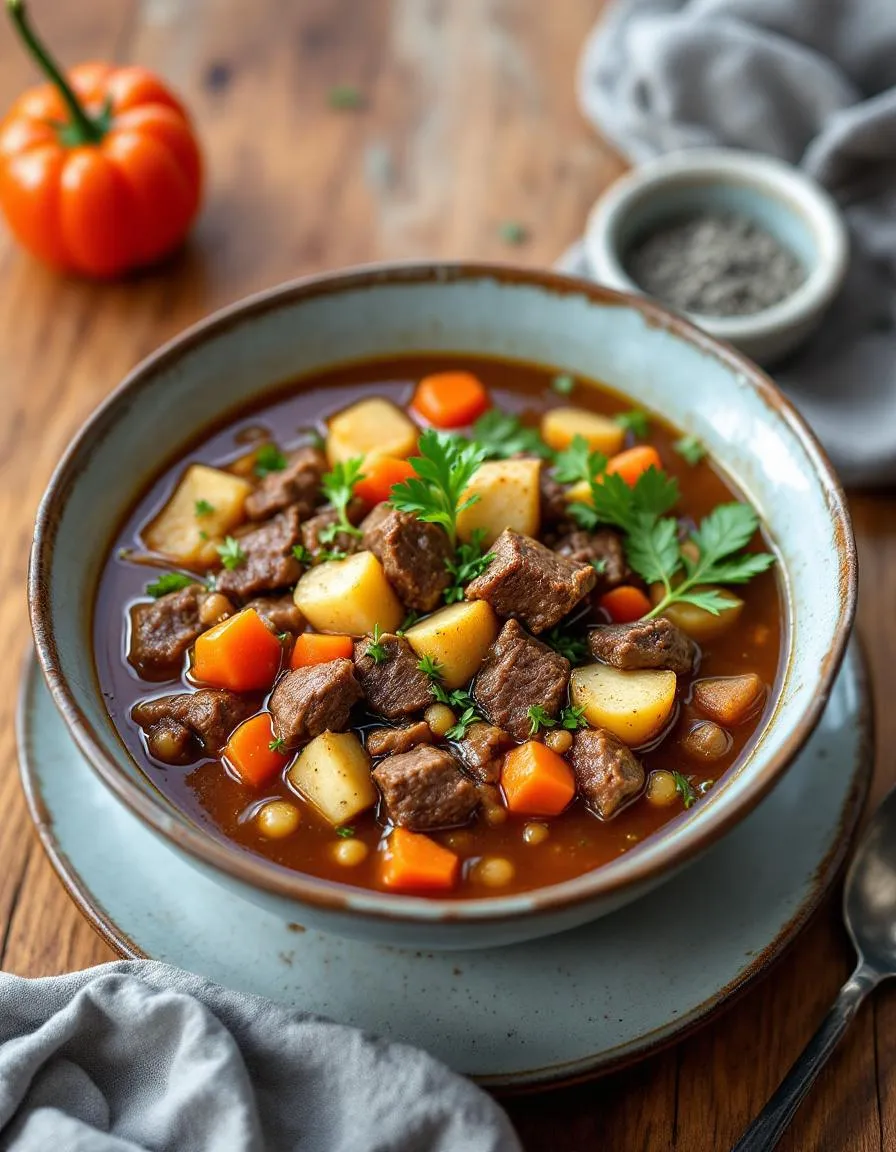
Best Hearty Vegetable Beef Soup – Easy Homemade Recipe
Introduction
There’s something deeply comforting about a steaming bowl of Hearty Vegetable Beef Soup Recipe, especially when the weather turns chilly or you simply crave a nourishing meal. Whether you’re cooking for a busy weeknight or prepping a cozy weekend dinner, this soup wraps you in warmth and nostalgia. Plus, it’s packed with wholesome ingredients that make every spoonful feel like a hug from the inside. If you’ve ever wanted a foolproof way to bring comfort to your table, this recipe delivers.
Hearty Vegetable Beef Soup Recipe is a classic dish that combines tender beef, vibrant vegetables, and a rich, savory broth. Unlike many soups that rely on shortcuts, this one builds layers of flavor by browning the meat and simmering the broth slowly. The result? A meal that’s both satisfying and nutritious. For those who love freezer-friendly meals, this soup stores beautifully, making it a practical choice for meal prep. If you’re looking for more make-ahead ideas, check out our meal prep recipes for inspiration.
What sets this recipe apart is its versatility. You can swap vegetables based on what’s in season or use ground beef for a quicker version. It’s also a fantastic way to sneak in extra veggies for picky eaters. Pair it with crusty bread or a light salad, and you’ve got a complete meal. If you enjoy soups with global flavors, our international soups collection offers plenty of delicious options. Ultimately, this Hearty Vegetable Beef Soup Recipe fits perfectly with our blog’s mission: delivering approachable, flavorful dishes that bring people together.
Why I Love This Recipe
This Hearty Vegetable Beef Soup Recipe holds a special place in my heart because it reminds me of my grandmother’s kitchen. She’d simmer it for hours, filling the house with an aroma that promised comfort. Now, whenever I make it, I feel that same connection—to her, to family, and to the simple joy of a well-made meal. It’s more than just food; it’s a tradition worth passing down.
Health and Nutrition
Why it’s good for your body
Hearty Vegetable Beef Soup Recipe packs a powerful nutritional punch while keeping flavors rich and satisfying. First, the lean beef delivers high-quality protein, which helps build muscle and keeps you full longer. Additionally, the mix of carrots, celery, and tomatoes provides a hefty dose of vitamins A and C, boosting immunity and skin health.
Moreover, the fiber from the vegetables supports digestion and helps regulate blood sugar levels. Since the soup simmers slowly, it retains most of its nutrients, unlike overcooked dishes. Furthermore, the broth base keeps calories in check while delivering hydration and electrolytes, making it a smart choice for staying nourished.
Finally, Hearty Vegetable Beef Soup Recipe includes garlic and onions, which offer anti-inflammatory benefits. These ingredients may also support heart health by promoting better circulation. Whether you need a post-workout meal or a comforting dish on a chilly day, this soup fuels your body without weighing you down.
How it fits in a healthy lifestyle
Hearty Vegetable Beef Soup Recipe fits seamlessly into balanced eating plans. For those focusing on high-protein diets, the lean beef and legumes provide ample protein to meet daily goals. If you prefer gluten-free meals, this recipe naturally avoids grains, making it a safe and flavorful option.
Busy weeknights become easier when you batch-cook this soup, as it stores well and reheats beautifully. Pair it with a crisp salad from our Easy Spring Salad for a complete, veggie-loaded meal. Plus, if you’re watching sodium intake, simply adjust the broth seasoning to suit your needs.
Looking for more ways to balance comfort food and nutrition? Try our Slow Cooker Chicken Stew for another hearty, health-conscious option. With its adaptable ingredients and nourishing profile, Hearty Vegetable Beef Soup Recipe helps you eat well without sacrificing taste or convenience.
A comforting and nutritious soup packed with tender beef, fresh vegetables, and rich flavors.
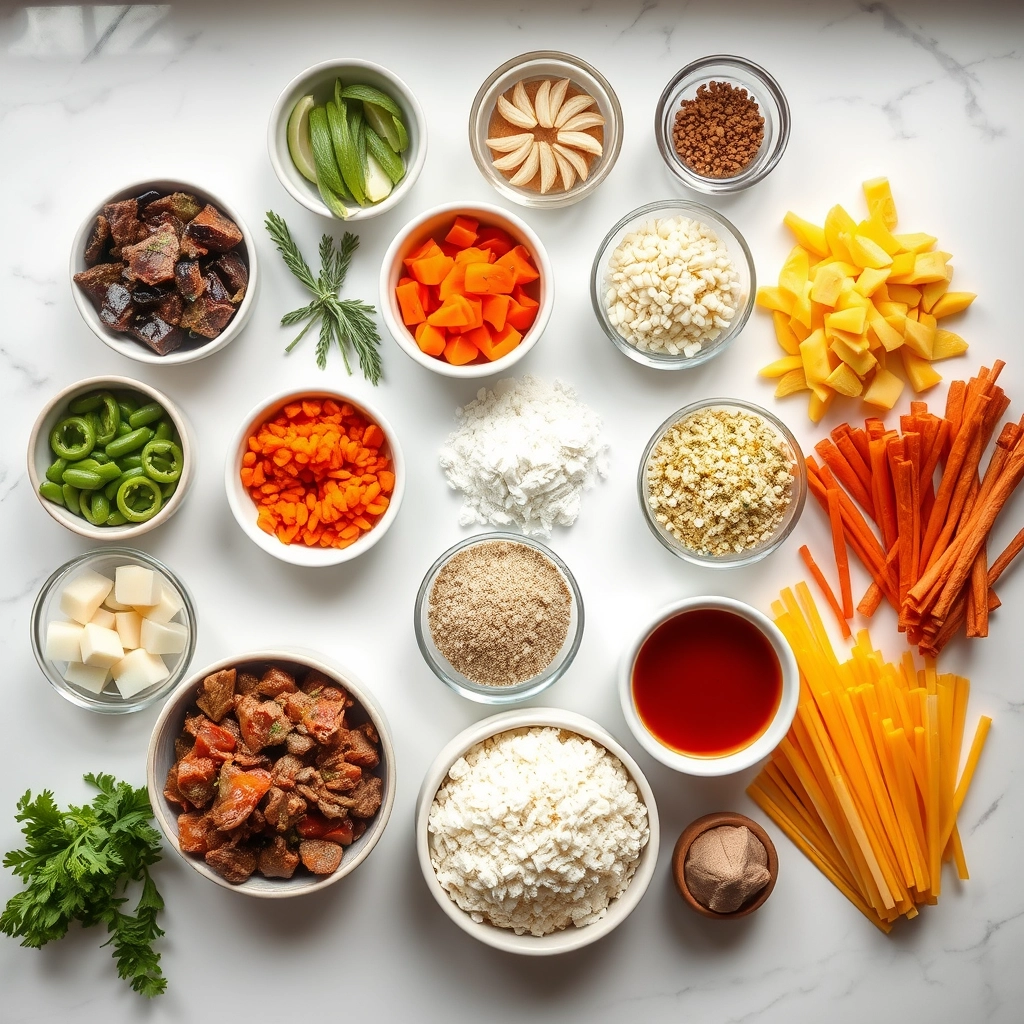
Ingredients
Scale
For the Crust:
1 lb beef stew meat, cubed
1 tbsp olive oil
1 onion, diced
2 carrots, sliced
2 celery stalks, chopped
3 cloves garlic, minced
4 cups beef broth
1 can (14.5 oz) diced tomatoes
1 cup green beans, chopped
1 tsp dried thyme
1 tsp dried rosemary
Salt and pepper to taste
Instructions
1. Prepare the Crust:
Heat olive oil in a large pot over medium-high heat. Add beef cubes and brown on all sides, about 5 minutes.
Add onion, carrots, celery, and garlic. Sauté for 5 minutes until vegetables begin to soften.
Pour in beef broth and diced tomatoes. Stir in thyme, rosemary, salt, and pepper.
Bring to a boil, then reduce heat to low. Cover and simmer for 20 minutes.
Add green beans and continue simmering for another 10 minutes until vegetables are tender and beef is cooked through.
Adjust seasoning if needed and serve hot.
Notes
You can customize the seasonings to taste.
How to Prepare This Dish
Steps and time-saving tips
Start by heating a large pot over medium-high heat and browning the beef cubes until they develop a rich, caramelized crust. Meanwhile, chop your vegetables—carrots, celery, and onions—into even pieces so they cook uniformly. Once the beef is seared, transfer it to a plate and sauté the veggies in the same pot to soak up all those flavorful drippings. Stir them frequently for about 5 minutes until they soften slightly. Next, add minced garlic and tomato paste, letting them toast for a minute to deepen the soup’s base. Pour in beef broth and return the seared meat to the pot, then toss in diced potatoes, bay leaves, and a pinch of thyme. Bring everything to a gentle boil before reducing the heat to a simmer. Cover the pot and let it cook for 45 minutes, stirring occasionally. For a time-saving shortcut, use pre-cut stew meat or frozen mirepoix mix. If the broth tastes thin, simmer uncovered for 10 extra minutes to concentrate the flavors. Finally, fold in green beans and corn during the last 15 minutes to keep them crisp-tender. Ladle the Hearty Vegetable Beef Soup Recipe into bowls and garnish with fresh parsley.
and-learned-from">Mistakes I’ve made and learned from
I once rushed the browning step, leaving pale beef that lacked depth—now I patiently sear it in batches to avoid overcrowding the pot. Another blunder? Adding all the veggies at once, which turned the potatoes mushy. Now I layer hardy vegetables early and delicate ones late, just like in my Perfect Pot Roast guide. And don’t skip deglazing! I learned the hard way after scorching fond (those tasty browned bits) by pouring broth too slowly. For more on balancing flavors, my Soup Seasoning Secrets post breaks it down. Taste as you go—underseasoned soup is a fixable tragedy.
Cultural Connection and Variations
Where this recipe comes from
Hearty Vegetable Beef Soup Recipe has deep roots in comfort cooking across cultures. In America, it often reminds people of chilly evenings and family gatherings, where a steaming pot simmers on the stove for hours. Many families, like mine, pass down their own twists—maybe extra carrots for sweetness or a splash of Worcestershire sauce for depth. Meanwhile, in Europe, similar soups like French pot-au-feu or Italian minestrone showcase regional ingredients but share the same soul-warming purpose.
Travel further, and you
’ll find variations like Korean seolleongtang, a milky beef bone soup, or Filipino nilagang baka, brimming with tropical veggies. What ties them all together? The need to nourish and bring people around the table. Even in my kitchen, the Hearty Vegetable Beef Soup Recipe changes with the seasons—heartier in winter, lighter in spring. It’s a dish that adapts but always feels like home.
How it fits in today’s cooking
Today, the Hearty Vegetable Beef Soup Recipe still shines as a versatile staple. Busy cooks love it for meal prep, while foodies elevate it with gourmet touches like grass-fed beef or heirloom tomatoes. It’s also a star during holidays, especially when paired with holiday side dishes that round out the feast. Plus, modern twists—think Instant Pot versions or vegan swaps—keep it fresh for today’s kitchens.
Whether you’re craving nostalgia or a quick weeknight fix, this soup fits. It’s even a great way to sneak in extra veggies for picky eaters, much like sneaking spinach into healthy smoothies. From slow-cooked traditions to fast adaptations, the Hearty Vegetable Beef Soup Recipe proves that some classics never go out of style.
>Taste and Texture
What makes it delicious
Hearty Vegetable Beef Soup Recipe delivers a rich, savory experience with every spoonful. Tender chunks of beef melt in your mouth, while the medley of carrots, celery, and potatoes adds a satisfying crunch and earthy sweetness. Fragrant garlic and thyme infuse the broth with warmth, and a hint of tomato paste deepens the umami flavor. Meanwhile, the slow-simmered broth feels velvety on the tongue, balancing the hearty textures of the ingredients. Whether you savor it on a chilly evening or as a comforting lunch, Hearty Vegetable Beef Soup Recipe wraps you in layers of cozy, robust flavor.
Boosting the flavor
Elevate your Hearty Vegetable Beef Soup Recipe with a few easy tweaks. First, try swapping regular potatoes for sweet potatoes to add a subtle caramelized note. A splash of Worcestershire sauce or a bay leaf during simmering amps up the savoriness. For a fresh finish, top each bowl with grated Parmesan or a dollop of garlic herb compound butter. If you love heat, stir in a pinch of crushed red pepper or serve with a side of crusty bread for dipping. Small changes make a big difference!
Tips for Success
Best practices for results
First, brown the beef well before adding liquids to build deep flavor in your Hearty Vegetable Beef Soup Recipe. Next, chop vegetables evenly so they cook uniformly—this prevents mushy or undercooked bites. Additionally, simmer the soup gently rather than boiling it vigorously to keep the meat tender and broth clear. Finally, taste and adjust seasoning at the end since flavors concentrate as the soup reduces.
Mistakes to avoid
One common misstep is overcrowding the pot when browning the beef, which steams the meat instead of searing it. Instead, work in batches for a proper crust. Another mistake is skipping the deglazing step after browning—scrape up those flavorful bits with broth or wine for a richer base. For more on building layers of flavor, check out our guide on soup-making secrets. Also, avoid overcooking starchy vegetables like potatoes, which can turn grainy. For perfect veggie textures, explore our tips on chopping vegetables the right way.
Serving and Pairing Suggestions
How to serve this dish
For a cozy family dinner, ladle the Hearty Vegetable Beef Soup Recipe into deep bowls and top with fresh parsley or grated Parmesan for a pop of color and flavor. Alternatively, serve it in rustic bread bowls for a fun, edible presentation that soaks up every last drop. This soup shines at holiday gatherings too—simply keep it warm in a slow cooker so guests can help themselves. To make it extra inviting, add a swirl of olive oil or a dollop of sour cream just before serving.
h-it">What goes well with it
Pair the Hearty Vegetable Beef Soup Recipe with warm, crusty bread like our Easy Homemade Focaccia for dipping. The chewy texture and herbs perfectly balance the rich broth. For a lighter option, try a crisp side salad such as our Classic Caesar Salad, which adds freshness to each bite. Finally, a glass of full-bodied red wine or sparkling water with lemon elevates the meal without overpowering the savory flavors.
What vegetables go well in a hearty vegetable beef soup?
Classic vegetables for a Hearty Vegetable Beef Soup Recipe include carrots, celery, potatoes, and green beans. Onions and garlic add depth, while tomatoes or tomato paste give richness. Feel free to add seasonal veggies like zucchini or corn for extra flavor.
ank-math-faq-item">
How long does it take to cook vegetable beef soup on the stove?
A Hearty Vegetable Beef Soup Recipe typically simmers for 45–60 minutes on the stove after browning the meat. This allows the flavors to meld and the beef to become tender. Slow cooking ensures the vegetables soften without turning mushy.
Can I make vegetable beef soup in a slow cooker?
Yes! A Hearty Vegetable Beef Soup Recipe adapts well to a slow cooker—just brown the beef first for best flavor. Cook on low for 6–8 hours or high for 3–4 hours. The slow cooker method makes the soup even more tender and flavorful.
What cut of beef is best for vegetable beef soup?
Chuck roast or stew meat works best for Hearty Vegetable Beef Soup Recipe because it becomes fork-tender when slow-cooked. Leaner cuts like sirloin can dry out. For richer flavor, choose well-marbled beef and trim excess fat before cooking.
div>
Best Peanut Butter Pie – Rich and Creamy Recipe
Introduction
There’s something magical about a dessert that feels like a hug in every bite. If you’ve ever craved a treat that’s rich, creamy, and utterly indulgent, this Decadent Peanut Butter Pie will steal your heart. Whether you’re celebrating a special occasion or simply treating yourself after a long day, this recipe delivers pure comfort with every forkful. Best of all, it’s surprisingly easy to make, so you can enjoy a slice of heaven without spending hours in the kitchen.
Decadent Peanut Butter Pie is a no-bake dessert that combines a buttery graham cracker crust with a velvety peanut butter filling, all topped with fluffy whipped cream or chocolate drizzle. What makes it stand out is its perfect balance of sweetness and richness, making it a crowd-pleaser for both kids and adults. Unlike fussy desserts that require precision, this pie forgives small mistakes and still turns out delicious every time. It’s also versatile—you can customize it with additions like crushed Reese’s cups or a sprinkle of sea salt for extra depth. If you love easy yet impressive desserts, you’ll adore our No-Bake Cheesecake too, which shares the same effortless charm.
This recipe fits perfectly with our blog’s mission to deliver approachable, crave-worthy dishes that anyone can master. We focus on flavors that excite and techniques that simplify, so you spend less time stressing and more time savoring. Peanut butter lovers, in particular, will appreciate how this pie highlights their favorite ingredient without overwhelming sweetness. For another peanut butter-packed delight, check out our Peanut Butter Cookies, which pair wonderfully with a slice of this pie for the ultimate dessert spread.
Why I Love This Recipe
This Decadent Peanut Butter Pie holds a special place in my heart because it reminds me of my grandmother’s kitchen. She used to make a similar version for family gatherings, and the first bite always transported me back to those warm, laughter-filled moments. Now, I love sharing it with my own family, watching their faces light up with that first creamy bite. It’s more than just a dessert—it’s a little piece of joy that brings people together, and that’s why I keep coming back to it.
Health and Nutrition
Why it’s good for your body
Decadent Peanut Butter Pie packs a surprising nutritional punch while satisfying your sweet tooth. First, peanut butter delivers a hearty dose of healthy fats and plant-based protein, which keep you full longer and support muscle repair. Additionally, this creamy dessert contains magnesium and potassium, two minerals that promote heart health and steady energy levels.
Moreover, Decadent Peanut Butter Pie often includes natural sweeteners or dark chocolate, which provide antioxidants to combat inflammation. For instance, cocoa flavonoids boost circulation and cognitive function. Meanwhile, the fiber in peanut butter aids digestion, making this treat a smarter indulgence than many sugar-loaded alternatives.
Finally, enjoying Decadent Peanut Butter Pie in moderation can actually benefit your mood. Peanut butter stimulates serotonin production, while the rich texture satisfies cravings without overeating. So while it’s undeniably indulgent, this dessert offers real perks for both body and mind.
How it fits in a healthy lifestyle
Decadent Peanut Butter Pie fits seamlessly into balanced eating when enjoyed mindfully. For protein-focused diets, it’s a delicious way to meet daily goals, especially post-workout. If you’re gluten-free, simply swap the crust for almond flour or oats, as suggested in our gluten-free dessert guide.
Pair a small slice with fresh berries or Greek yogurt to add fiber and probiotics. This approach aligns with heart-healthy habits, since peanut butter’s monounsaturated fats support cholesterol levels. For more smart swaps, explore our balanced dessert ideas to keep treats both satisfying and nutritious. Remember, balance is key—Decadent Peanut Butter Pie shines as an occasional highlight in a varied diet.
A rich and creamy peanut butter pie with a chocolate cookie crust, perfect for any occasion.
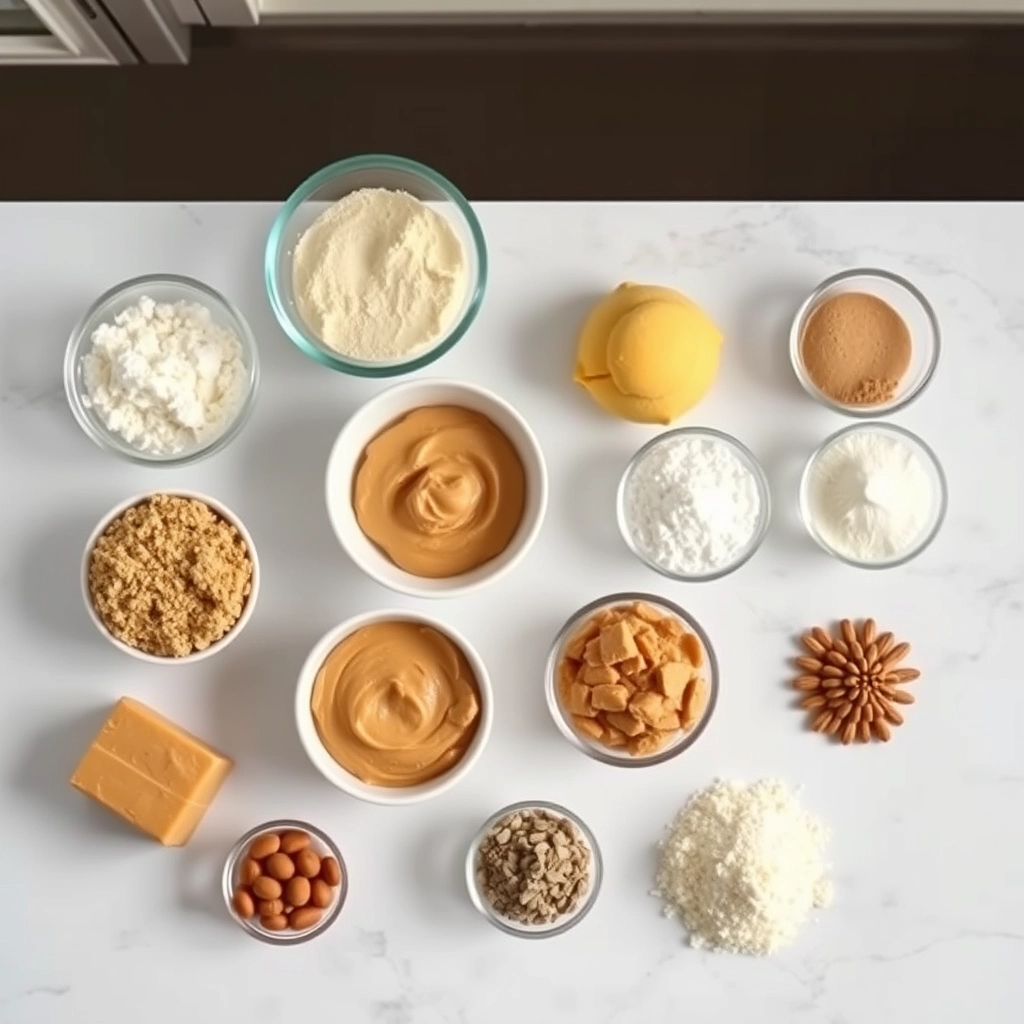
Ingredients
Scale
For the Crust:
1 1/2 cups chocolate cookie crumbs
1/4 cup melted butter
1 cup creamy peanut butter
8 oz cream cheese, softened
1 cup powdered sugar
1 tsp vanilla extract
1 1/2 cups heavy whipping cream
1/4 cup chocolate shavings (for garnish)
Instructions
1. Prepare the Crust:
Mix chocolate cookie crumbs with melted butter and press into a 9-inch pie dish. Chill for 15 minutes.
In a large bowl, beat peanut butter, cream cheese, powdered sugar, and vanilla until smooth.
In another bowl, whip the heavy cream until stiff peaks form. Gently fold into the peanut butter mixture.
Pour the filling into the chilled crust and smooth the top. Refrigerate for at least 4 hours or overnight.
Garnish with chocolate shavings before serving.
Notes
You can customize the seasonings to taste.
How to Prepare This Dish
Steps and time-saving tips
Start by crushing graham crackers into fine crumbs for the crust of your Decadent Peanut Butter Pie. Mix the crumbs with melted butter and press them firmly into a pie dish, then chill for 10 minutes to set. Meanwhile, whip the cream cheese until smooth before adding peanut butter, powdered sugar, and vanilla. Beat everything until creamy, then fold in half the whipped cream to lighten the filling. Spread this mixture over the chilled crust and smooth the top. Next, drizzle melted chocolate over the pie and swirl it gently for a marbled effect. Finally, chill the Decadent Peanut Butter Pie for at least 4 hours, or overnight for the best texture. To save time, use store-bought crust or pre-crushed graham crackers. If you’re in a hurry, freeze the pie for 2 hours instead of chilling, but let it soften slightly before serving.
and-learned-from">Mistakes I’ve made and learned from
I once overmixed the peanut butter filling, which made it dense instead of light and fluffy. Now, I stop blending as soon as the ingredients combine and gently fold in the whipped cream. Another mistake? Skipping the crust chill time—the crumbs fell apart when I sliced the pie. Lesson learned: patience pays off. For more tips on perfecting no-bake desserts, check out my guide on common no-bake mistakes. Also, if your chocolate drizzle hardens too fast, warm it slightly and thin it with a teaspoon of coconut oil, as I explain in my chocolate drizzle tricks post. Trust me, these small tweaks make all the difference.
Cultural Connection and Variations
Where this recipe comes from
Decadent Peanut Butter Pie traces its roots back to the American South, where creamy, rich desserts often take center stage at family gatherings. Many believe it evolved from classic peanut butter-based treats like buckeyes or peanut butter fudge, but with a smoother, more indulgent twist. In some households, this pie even became a staple at potlucks and church suppers, where its no-bake simplicity made it a crowd favorite. Meanwhile, in other regions, bakers might swap the traditional graham cracker crust for an Oreo base or add a layer of chocolate ganache for extra depth.
Around the world, simil
ar desserts put their own spin on the concept. For instance, in parts of Asia, cooks might blend peanut butter with coconut milk for a lighter, tropical version. Some European bakers, on the other hand, incorporate hazelnut spread alongside peanut butter for a nuttier profile. Even within the U.S., families pass down unique tweaks—like a sprinkle of sea salt on top or a drizzle of caramel sauce. No matter the variation, Decadent Peanut Butter Pie always delivers that irresistible combination of sweetness and nostalgia.
How it fits in today’s cooking
Today, Decadent Peanut Butter Pie remains a beloved dessert for its versatility and comfort-food appeal. Modern cooks often feature it at summer barbecues or holiday feasts, where its creamy texture contrasts perfectly with fresh seasonal fruits. Some even reinvent it as a no-bake dessert for busy weeknights, proving that indulgence doesn’t have to mean hours in the kitchen. Others lighten it up with Greek yogurt or almond butter, catering to health-conscious cravings without sacrificing flavor.
Social media has also given this pie new life, with food bloggers showcasing stunning variations like mini mason jar pies or layered parfaits. Whether served at a birthday party or as a comfort food pick-me-up, Decadent Peanut Butter Pie effortlessly bridges tradition and modern tastes. Its adaptability ensures it stays relevant, one creamy slice at a time.
>Taste and Texture
What makes it delicious
Decadent Peanut Butter Pie delivers a rich, velvety experience with every bite. The smooth, creamy peanut butter filling melts effortlessly on your tongue, while the buttery graham cracker crust adds a satisfying crunch. A hint of vanilla and a touch of sea salt balance the sweetness, creating layers of flavor that linger. Meanwhile, the whipped cream topping lightens each slice with a fluffy, airy contrast. Whether you savor it chilled or slightly softened, Decadent Peanut Butter Pie feels indulgent yet comforting—like a dessert hug.
Boosting the flavor
Elevate your Decadent Peanut Butter Pie by drizzling warm chocolate ganache over the top for a bittersweet twist. Alternatively, fold crushed pretzels into the crust for a salty-sweet crunch that amplifies the peanut butter’s richness. For a bolder finish, sprinkle flaky sea salt or add a dollop of homemade whipped cream infused with cinnamon. If you love contrasting textures, try layering the pie with salted caramel sauce—its buttery depth pairs perfectly with the nutty filling. Small tweaks make each slice unforgettable.
Tips for Success
Best practices for results
Always chill your crust for at least 30 minutes before baking to prevent shrinking. Meanwhile, use room-temperature cream cheese for the filling so it blends smoothly with the peanut butter. For the fluffiest texture, whip the heavy cream to stiff peaks before folding it into the mixture. Finally, let the Decadent Peanut Butter Pie set in the fridge for at least 4 hours, though overnight yields the best sliceability.
Mistakes to avoid
Avoid overmixing the filling, as this can make it dense instead of light and creamy. If your crust sticks to the pan, try our no-stick pie crust tricks for easy removal. Also, don’t skip the parchment paper under the crust edges—it prevents over-browning. For more troubleshooting, check our guide to fixing runny pie fillings if your Decadent Peanut Butter Pie doesn’t set properly.
Serving and Pairing Suggestions
How to serve this dish
For a stunning presentation, slice your Decadent Peanut Butter Pie into generous wedges and plate them on chilled dessert plates. Meanwhile, drizzle melted chocolate or caramel sauce in artistic swirls around each slice. Additionally, top each serving with a dollop of whipped cream and a sprinkle of crushed peanuts for extra texture. Since this pie shines as a showstopper, serve it at holiday gatherings or birthday celebrations. Alternatively, enjoy it as a special weekend treat with family. Either way, the rich flavors and creamy texture will impress everyone.
h-it">What goes well with it
Pair your Decadent Peanut Butter Pie with a steaming cup of dark roast coffee to balance its sweetness. The bold coffee notes enhance the pie’s rich peanut butter flavor. Similarly, a glass of cold milk makes a classic companion, especially if you love nostalgic desserts. For a festive twist, try serving it alongside our Salted Caramel Brownies for a decadent dessert spread. Finally, if you prefer lighter options, our Vanilla Bean Ice Cream adds a refreshing contrast to the pie’s creamy richness.
What makes a peanut butter pie decadent?
A Decadent Peanut Butter Pie earns its rich title from a creamy, velvety filling made with high-quality peanut butter, cream cheese, and whipped cream. The addition of chocolate ganache or crushed Reese’s cups on top enhances the indulgent experience, making it a dessert that feels truly special.
ank-math-faq-item">
Can I make Decadent Peanut Butter Pie ahead of time?
Yes! Decadent Peanut Butter Pie is perfect for preparing in advance. Chill it for at least 4 hours (or overnight) to let the flavors meld and the texture set. Just add toppings like whipped cream or chocolate drizzle right before serving.
What crust works best for Decadent Peanut Butter Pie?
A classic Oreo or graham cracker crust pairs perfectly with Decadent Peanut Butter Pie, balancing its richness with a crunchy contrast. For extra flavor, try adding melted butter and a pinch of salt to the crust mixture.
How do I store leftover Decadent Peanut Butter Pie?
Keep leftover Decadent Peanut Butter Pie covered in the refrigerator for up to 4 days. For longer storage, freeze slices wrapped tightly in plastic for up to 2 months—thaw in the fridge before enjoying.