There’s something magical about the smell of warm pumpkin spice wafting through the kitchen, especially when it leads to a batch of flaky, golden-brown hand pies. Whether you’re craving a cozy fall treat or need a portable dessert for your next gathering, this Irresistible Pumpkin Hand Pies Recipe delivers every time. Imagine biting into a buttery crust filled with velvety pumpkin filling—pure comfort in every bite. Trust me, once you try these, you’ll understand why they disappear so fast.
Irresistible Pumpkin Hand Pies Recipe combines the nostalgic flavors of classic pumpkin pie with the convenience of a handheld dessert. Perfect for autumn gatherings, holiday parties, or even a quiet afternoon with coffee, these pies strike the ideal balance between sweet and spiced. The recipe uses simple ingredients like canned pumpkin puree, warm cinnamon, and nutmeg, but the results taste anything but basic. Moreover, the flaky, homemade crust elevates them far beyond store-bought alternatives. If you love easy yet impressive desserts, you’ll appreciate how this recipe fits seamlessly into your baking routine.
At Exorecipes, we celebrate recipes that bring joy without complexity, and these hand pies embody that philosophy. They’re a fantastic way to use seasonal ingredients, much like our Perfect Apple Crisp, or to pair with other fall favorites like our Spiced Chai Latte. Whether you’re a seasoned baker or a beginner, this recipe guides you every step of the way, ensuring delicious results every time.
Why I Love This Recipe
These hand pies hold a special place in my heart because they remind me of baking with my grandmother during crisp autumn weekends. She taught me how to roll out dough just right and to never skimp on the spices. Now, whenever I make this Irresistible Pumpkin Hand Pies Recipe, I feel that same warmth and connection. Plus, seeing friends and family light up after their first bite? That’s the real magic.
Health and Nutrition
Why it’s good for your body
Irresistible Pumpkin Hand Pies Recipe packs a nutritious punch while satisfying your sweet cravings. First, pumpkin puree delivers a hefty dose of vitamin A, which supports vision and immune health. Additionally, the warm spices like cinnamon and nutmeg not only enhance flavor but also offer anti-inflammatory benefits. Moreover, these hand pies provide fiber from the pumpkin and whole-wheat crust, aiding digestion and keeping you full longer.
Furthermore, Irresistible Pumpkin Hand Pies Recipe balances indulgence with wholesome ingredients. Unlike many desserts, it avoids excessive refined sugar by relying on natural sweetness from the pumpkin and a touch of maple syrup. Meanwhile, the buttery crust adds healthy fats, which help your body absorb fat-soluble vitamins. Finally, because these hand pies are portion-controlled, you can enjoy them without overdoing it.
On top of that, pumpkin contains antioxidants like beta-carotene, which fights oxidative stress. Whether you enjoy Irresistible Pumpkin Hand Pies Recipe as a snack or dessert, you’re treating your body to nutrients that support overall wellness. With every bite, you get flavor and nourishment in one delicious package.
How it fits in a healthy lifestyle
Irresistible Pumpkin Hand Pies Recipe fits seamlessly into a balanced diet. For those mindful of gluten, simply swap the crust for a gluten-free alternative without sacrificing taste. The recipe also works well for meal prep, so you can enjoy a wholesome treat without last-minute temptations.
If you’re focused on heart health, the moderate sugar content and fiber-rich pumpkin make these hand pies a smarter choice than traditional pastries. Pair them with a protein source like Greek yogurt or nuts for a satisfying snack. For more ideas on balancing treats with nutrition, explore our guide to healthy dessert swaps. Whether you’re indulging occasionally or incorporating them into your routine, these hand pies prove that delicious and nutritious can go hand in hand.
Delicious, flaky hand pies filled with spiced pumpkin puree, perfect for fall treats.
Ingredients
Scale
For the Crust:
2 cups all-purpose flour
1/2 teaspoon salt
1/2 cup unsalted butter, cold and cubed
1/4 cup ice water
1 cup pumpkin puree
1/4 cup brown sugar
1 teaspoon pumpkin pie spice
1 egg, beaten (for egg wash)
1 tablespoon granulated sugar (for sprinkling)
Instructions
1. Prepare the Crust:
In a large bowl, whisk together flour and salt. Cut in cold butter until mixture resembles coarse crumbs.
Gradually add ice water, 1 tablespoon at a time, until dough comes together. Form into a disk, wrap in plastic, and chill for 30 minutes.
In a separate bowl, mix pumpkin puree, brown sugar, and pumpkin pie spice until well combined.
Roll out the dough to 1/8-inch thickness and cut into circles. Spoon pumpkin filling onto half of each circle, leaving a border.
Fold dough over filling, crimp edges with a fork, and brush with egg wash. Sprinkle with granulated sugar.
Bake at 375°F (190°C) for 20-25 minutes or until golden brown. Cool slightly before serving.
Notes
You can customize the seasonings to taste.
How to Prepare This Dish
Steps and time-saving tips
Start by preheating your oven to 375°F so it’s ready when you finish assembling the Irresistible Pumpkin Hand Pies Recipe. Meanwhile, whisk together the pumpkin puree, brown sugar, and warm spices in a bowl until smooth. For a shortcut, use store-bought pie dough, but if you prefer homemade, roll it out to ⅛-inch thickness before cutting circles with a biscuit cutter. Spoon a generous tablespoon of filling onto each dough round, then fold and crimp the edges with a fork to seal. Brush the tops with egg wash for a golden finish, and if you’re short on time, skip chilling the dough—just bake immediately for slightly flakier results. Bake for 18-20 minutes until the crust turns golden and the filling bubbles slightly. Let them cool on a wire rack before serving, or drizzle with a simple powdered sugar glaze for extra sweetness. To save effort later, double the batch and freeze unbaked pies for a quick dessert anytime.
Mistakes I’ve made and learned from
My first attempt at the Irresistible Pumpkin Hand Pies Recipe ended with leaking filling because I overstuffed them. Now, I stick to one tablespoon per pie and leave a half-inch border—no more mess! Another time, I rushed the dough and skipped chilling it properly, which made the crust tough. Lesson learned: patience pays off. If your filling seems too runny, thicken it with a teaspoon of cornstarch, a trick I picked up from my pumpkin pie filling guide. And if the edges don’t seal well, dab them with water before crimping. Trust me, these small adjustments make all the difference between a messy kitchen and perfect hand pies every time.
The Irresistible Pumpkin Hand Pies Recipe whispers of cozy autumn traditions, blending the warmth of pumpkin spice with the convenience of handheld treats. These little pies likely trace their roots to early American settlers, who transformed European pastry techniques with local ingredients like pumpkin, a staple in Native American cuisine. Over time, families tweaked the recipe, some adding a dash of nutmeg or swapping crusts for flakier versions.
Meanwhile, across the globe, cultures put their own spin on similar treats. In Jamaica, spicy pumpkin-filled patties pack a kick, while in Portugal, sweet pumpkin empanadas shine during festivals. Even within the U.S., Southern bakers might lace their Irresistible Pumpkin Hand Pies Recipe with bourbon, while Midwest versions keep it simple with cinnamon and brown sugar. No matter the variation, the heart of this dish remains—a portable celebration of harvest season.
ays-cooking">How it fits in today’s cooking
Today, the Irresistible Pumpkin Hand Pies Recipe bridges nostalgia and modern convenience. Busy home cooks love them for grab-and-go breakfasts, while food bloggers spotlight them as festive alternatives to pie. They’ve even become stars at fall gatherings, pairing perfectly with creative hot chocolate setups or Halloween dessert spreads.
Health-conscious bakers also adapt the recipe, using whole-wheat crusts or coconut sugar. Yet whether you stick to tradition or experiment, these hand pies keep pumpkin season magic alive—one buttery, spiced bite at a time.
Taste and Texture
What makes it delicious
Irresistible Pumpkin Hand Pies Recipe delivers a cozy, spiced sweetness in every bite. The flaky, buttery crust crumbles just right, while the creamy pumpkin filling melts smoothly on your tongue. Warm notes of cinnamon, nutmeg, and ginger mingle with rich brown sugar, creating a fragrant aroma that fills the kitchen. Each hand pie feels tender yet sturdy, with a golden-brown exterior that gives way to a velvety center. Whether served warm or at room temperature, Irresistible Pumpkin Hand Pies Recipe balances sweetness and spice for a treat that’s downright addictive.
r">Boosting the flavor
Elevate your Irresistible Pumpkin Hand Pies Recipe with a drizzle of homemade caramel sauce for extra richness. Alternatively, fold in a handful of chopped pecans for a nutty crunch. If you love bold spices, try doubling the ginger or adding a pinch of cardamom. For a festive twist, pair these hand pies with a scoop of vanilla bean ice cream—the cool creaminess contrasts perfectly with the warm pumpkin filling. Small tweaks like these can transform an already delicious treat into something unforgettable.
Tips for Success
Best practices for results
Always chill the dough for at least 30 minutes before rolling it out to prevent sticking and ensure flaky layers in your Irresistible Pumpkin Hand Pies Recipe. Meanwhile, use parchment paper when baking to guarantee even browning and an easy release. For the best texture, avoid overfilling the pies—stick to one heaping tablespoon of pumpkin filling per hand pie. Additionally, brush the tops with an egg wash for a golden, glossy finish that makes them irresistible.
>Mistakes to avoid
One common error is skipping the dough chilling step, which leads to tough pastry instead of tender, flaky layers. Instead, plan ahead and let the dough rest as directed. Another mistake is overbaking the pies, which dries out the filling. For perfect results, pull them from the oven as soon as the edges turn golden. If you need help troubleshooting dough issues, check out our guide to perfect pie crust. Also, if your filling seems too runny, thicken it with a bit of cornstarch—our pumpkin pie filling tips explain how to adjust consistency easily.
Serving and Pairing Suggestions
How to serve this dish
Serve your Irresistible Pumpkin Hand Pies warm for the best flavor and texture. Meanwhile, arrange them on a rustic wooden board or a vintage platter to enhance their cozy, homemade appeal. For special occasions like Thanksgiving or fall gatherings, dust them lightly with powdered sugar or drizzle with caramel for an elegant touch. Additionally, pair them with a scoop of vanilla ice cream to turn them into a decadent dessert. Whether you’re hosting brunch or a casual afternoon tea, these hand pies always steal the show.
What goes well with it
Pair your Irresistible Pumpkin Hand Pies with a spiced chai latte for a comforting autumnal treat. The warm spices in both the drink and the pies create a harmonious flavor experience. Alternatively, serve them alongside a creamy scoop of our Homemade Whipped Cream for a lighter, airy contrast. If you’re planning a full fall spread, try adding our Spiced Apple Cider to the menu—its crisp sweetness balances the rich pumpkin filling perfectly.
How do you keep pumpkin hand pies from getting soggy?
To prevent your Irresistible Pumpkin Hand Pies from getting soggy, brush the crust with an egg wash before baking. This creates a barrier and helps the pastry stay crisp. Also, avoid overfilling the pies with pumpkin mixture, as excess moisture can seep into the dough.
Can you freeze pumpkin hand pies after baking?
Yes! These Irresistible Pumpkin Hand Pies freeze beautifully after baking. Let them cool completely, then store in an airtight container with parchment paper between layers. Reheat in a 350°F oven for 10 minutes to restore their flaky texture.
ank-math-faq-item">
What’s the best crust for pumpkin hand pies?
A buttery, flaky pie crust works best for Irresistible Pumpkin Hand Pies. You can use store-bought dough for convenience or make homemade pastry with cold butter for maximum flavor. The crust should be sturdy enough to hold the pumpkin filling without tearing.
How long do pumpkin hand pies last at room temperature?
Freshly baked Irresistible Pumpkin Hand Pies stay good for 2-3 days at room temperature when stored in an airtight container. For longer storage, refrigerate for up to 5 days or freeze as mentioned above. The crust may soften slightly over time.
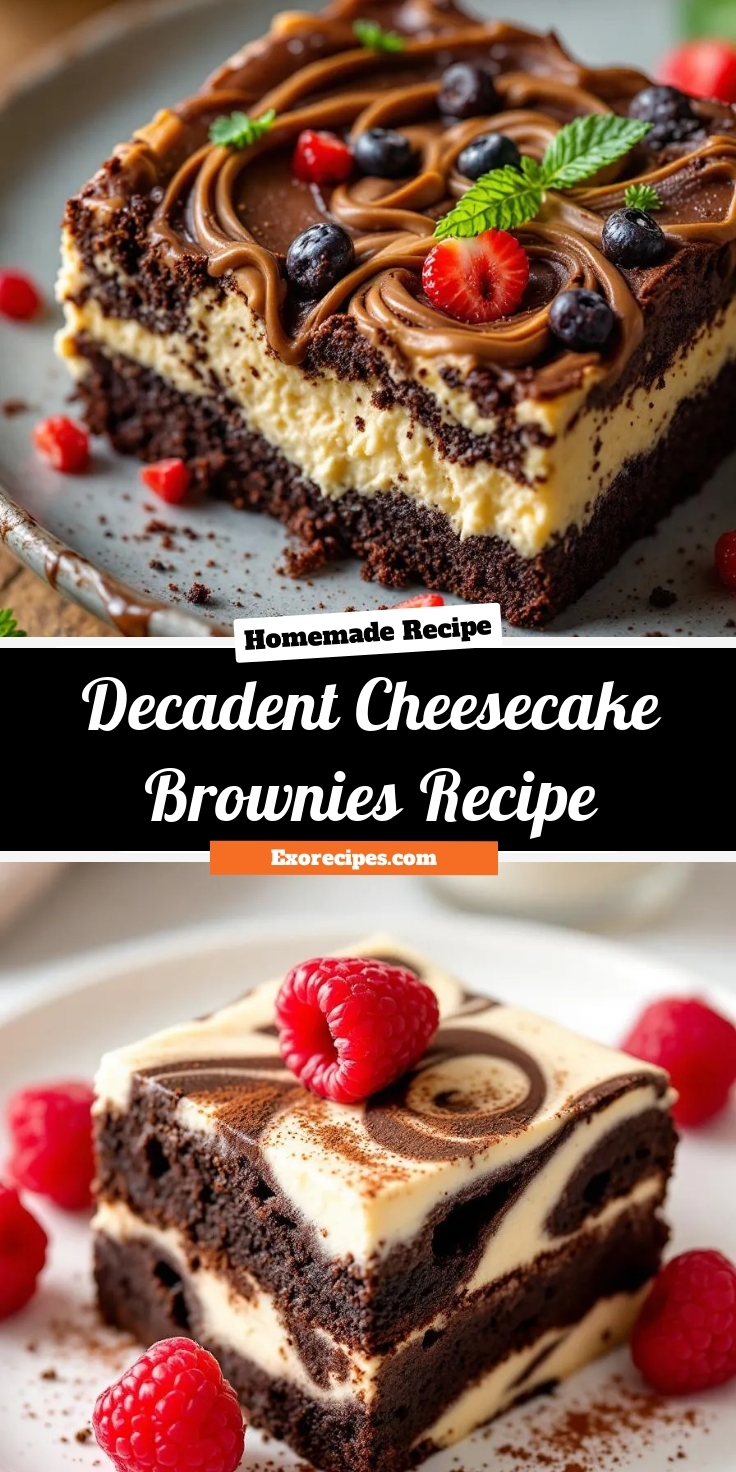
Ultimate Decadent Cheesecake Brownies Recipe
Introduction
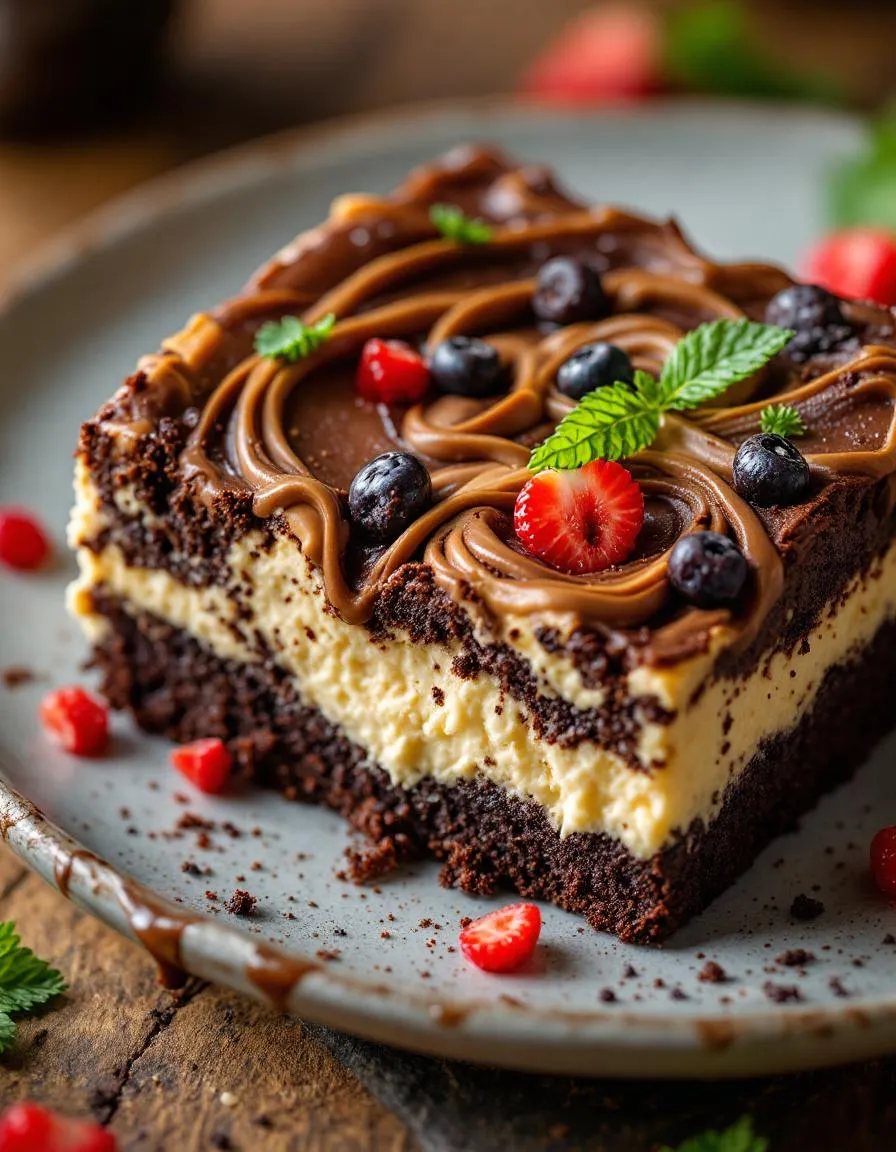
There’s something magical about biting into a rich, fudgy brownie swirled with creamy cheesecake—it’s pure indulgence in every bite. If you’ve ever craved a dessert that combines the best of both worlds, this Decadent Cheesecake Brownies Recipe is your answer. Whether you’re treating yourself after a long day or impressing guests at a gathering, these brownies deliver joy with minimal effort. Trust me, once you try them, you’ll understand why they’re a crowd favorite.
The Decadent Cheesecake Brownies Recipe blends a dense chocolate brownie base with a tangy, velvety cheesecake layer, creating a dessert that’s as visually stunning as it is delicious. Unlike ordinary brownies, this recipe elevates the classic treat with a luxurious twist, making it perfect for special occasions or everyday cravings. What sets it apart is the balance of textures and flavors—the fudgy brownie contrasts beautifully with the smooth cheesecake, while a hint of vanilla ties everything together. For those who love baking, this recipe offers a fun yet straightforward process, and the results always feel rewarding. If you’re looking for more dessert inspiration, check out our Classic Chocolate Chip Cookies or Vanilla Bean Cheesecake for equally irresistible options. Fitting seamlessly into our blog’s tone of approachable yet elevated recipes, these brownies prove that decadence doesn’t have to be complicated.
Why I Love This Recipe
I’ll never forget the first time I made these Decadent Cheesecake Brownies—they disappeared within minutes at a family potluck, and the requests for the recipe haven’t stopped since. There’s a nostalgic comfort in the chocolatey base, but the cheesecake swirl adds a touch of elegance that makes them feel special. Baking them reminds me of lazy Sunday afternoons spent experimenting in the kitchen, and now, they’ve become my go-to for birthdays, holidays, or just because. Every time I pull a pan out of the oven, that marbled top never fails to make me smile.
Health and Nutrition
Why it’s good for your body
Decadent Cheesecake Brownies Recipe delivers more than just irresistible flavor. First, the rich cocoa in the brownie base packs antioxidants, which help combat oxidative stress. Additionally, the cream cheese swirl adds a dose of protein and calcium, supporting muscle health and strong bones. While this treat is indulgent, it also offers a satisfying balance of textures and nutrients.
Moreover, dark chocolate, a key ingredient in Decadent Cheesecake Brownies Recipe, contains flavonoids linked to heart health. These compounds may improve blood flow and lower blood pressure over time. Meanwhile, the eggs in the recipe provide choline, a nutrient vital for brain function. Together, these elements make every bite both delicious and nourishing.
Finally, enjoying Decadent Cheesecake Brownies Recipe in moderation can boost your mood. The combination of carbs and fats triggers serotonin release, promoting relaxation. Of course, mindful portions let you savor the dessert without overdoing it. After all, treats like this belong in a well-rounded diet.
How it fits in a healthy lifestyle
Decadent Cheesecake Brownies Recipe fits seamlessly into balanced eating when enjoyed thoughtfully. Pair a small square with a protein-rich snack like Greek yogurt to stabilize blood sugar. For gluten-free diets, simply swap regular flour for almond or oat flour—our gluten-free baking guide makes it easy.
If you focus on heart-healthy choices, dark chocolate and moderate portions align with those goals. Craving something sweet after dinner? A single serving satisfies without derailing progress. For more tips on mindful indulgence, explore our healthy dessert swaps. Remember, balance is key, and this recipe delivers joy and flavor in every bite.
Rich chocolate brownies swirled with creamy cheesecake for an irresistible dessert.
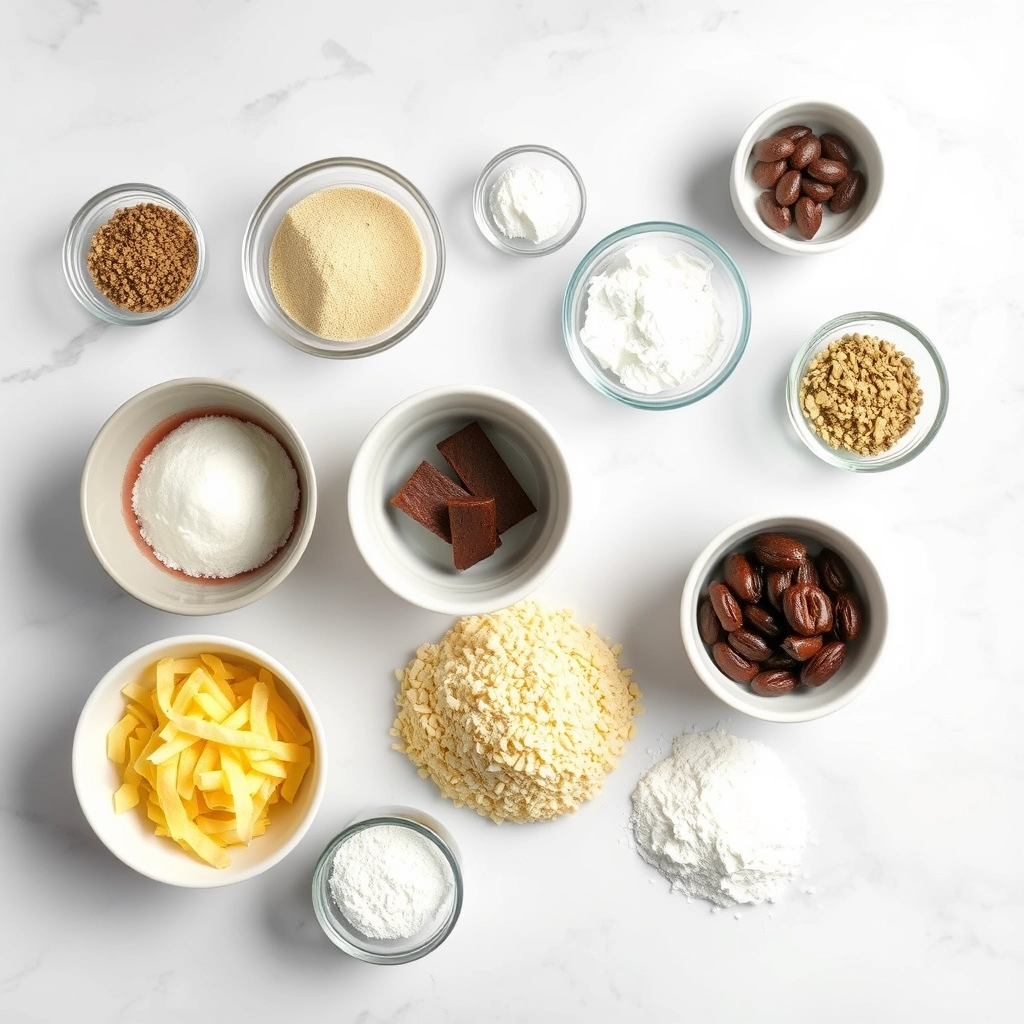
Ingredients
Scale
For the Crust:
1/2 cup unsalted butter
1 cup granulated sugar
2 large eggs
1 tsp vanilla extract
1/3 cup cocoa powder
1/2 cup all-purpose flour
1/4 tsp salt
8 oz cream cheese, softened
1/4 cup granulated sugar
1 large egg
1/2 tsp vanilla extract
Instructions
1. Prepare the Crust:
Preheat oven to 350°F (175°C). Grease an 8-inch square baking pan.
Melt butter in a saucepan. Remove from heat and stir in sugar, eggs, and vanilla. Mix in cocoa, flour, and salt until just combined.
In a separate bowl, beat cream cheese, sugar, egg, and vanilla until smooth.
Spread brownie batter into prepared pan. Drop spoonfuls of cheesecake mixture over the top. Swirl with a knife.
Bake for 25-30 minutes until edges pull away from pan. Cool completely before cutting.
Notes
You can customize the seasonings to taste.
“`html
How to Prepare This Dish
Steps and time-saving tips
Start by preheating your oven to 350°F and lining an 8×8-inch baking pan with parchment paper for easy removal later. In a large bowl, whisk together melted butter, sugar, and vanilla until smooth. Next, beat in the eggs one at a time, ensuring each is fully incorporated before adding the next. Gradually fold in the flour, cocoa powder, and salt until just combined—overmixing can make the brownies dense. Meanwhile, prepare the cheesecake layer by blending cream cheese, sugar, egg, and vanilla until creamy. Pour half the brownie batter into the pan, then dollop the cheesecake mixture on top. Use a knife to swirl the layers gently for that signature marbled look. Bake for 30-35 minutes until the edges pull away from the pan but the center stays slightly soft. Let the Decadent Cheesecake Brownies Recipe cool completely before slicing—this prevents crumbling. For clean cuts, chill them for an hour first or wipe your knife between slices.
and-learned-from">Mistakes I’ve made and learned from
I once rushed the cooling process and ended up with gooey, uneven slices—patience is key here! Another time, I overbaked the brownies, losing that fudgy texture. Now I rely on the toothpick test: a few moist crumbs mean they’re done. If you struggle with cracking cheesecake layers, try my cheesecake troubleshooting guide for smoother results. Also, don’t skip the parchment paper like I did once—stubbornly scraping the pan taught me that lesson. For more dessert hacks, check out my common baking mistakes post. Trust me, these small tweaks make all the difference in nailing the Decadent Cheesecake Brownies Recipe every time.
“`
n-and-variations">Cultural Connection and Variations
Where this recipe comes from
The Decadent Cheesecake Brownies Recipe blends two beloved desserts into one irresistible treat. While brownies trace their roots to late 19th-century America, cheesecake has a far older history, dating back to ancient Greece. When bakers combined these two classics, they created something magical. Today, this hybrid dessert appears in bakeries worldwide, each region adding its own twist.
In Europe, for instance, bakers often use quark instead of cream cheese for a lighter texture. Meanwhile, in Latin America, you might find dulce de leche swirled into the batter. My family’s version of the Decadent Cheesecake Brownies Recipe includes a hint of orange zest, a nod to my grandmother’s love for citrus flavors. Whether served at celebrations or as an everyday indulgence, this dessert adapts beautifully to local tastes.
How it fits in today’s cooking
The Decadent Cheesecake Brownies Recipe remains a staple in modern kitchens because it delivers both nostalgia and versatility. Busy home cooks appreciate how easily it fits into meal prep, while food bloggers showcase creative riffs like matcha swirls or gluten-free versions. During holidays, it often stars on dessert tables alongside classics like red velvet cake or chocolate chip cookies.
Today’s bakers a
lso tweak the recipe for dietary needs, swapping in plant-based cream cheese or coconut sugar. Yet no matter how you customize it, the Decadent Cheesecake Brownies Recipe always feels like a celebration. Whether you bake it for a party or a quiet night in, this dessert bridges generations and cultures with every rich, creamy bite.
Taste and Texture
What makes it delicious
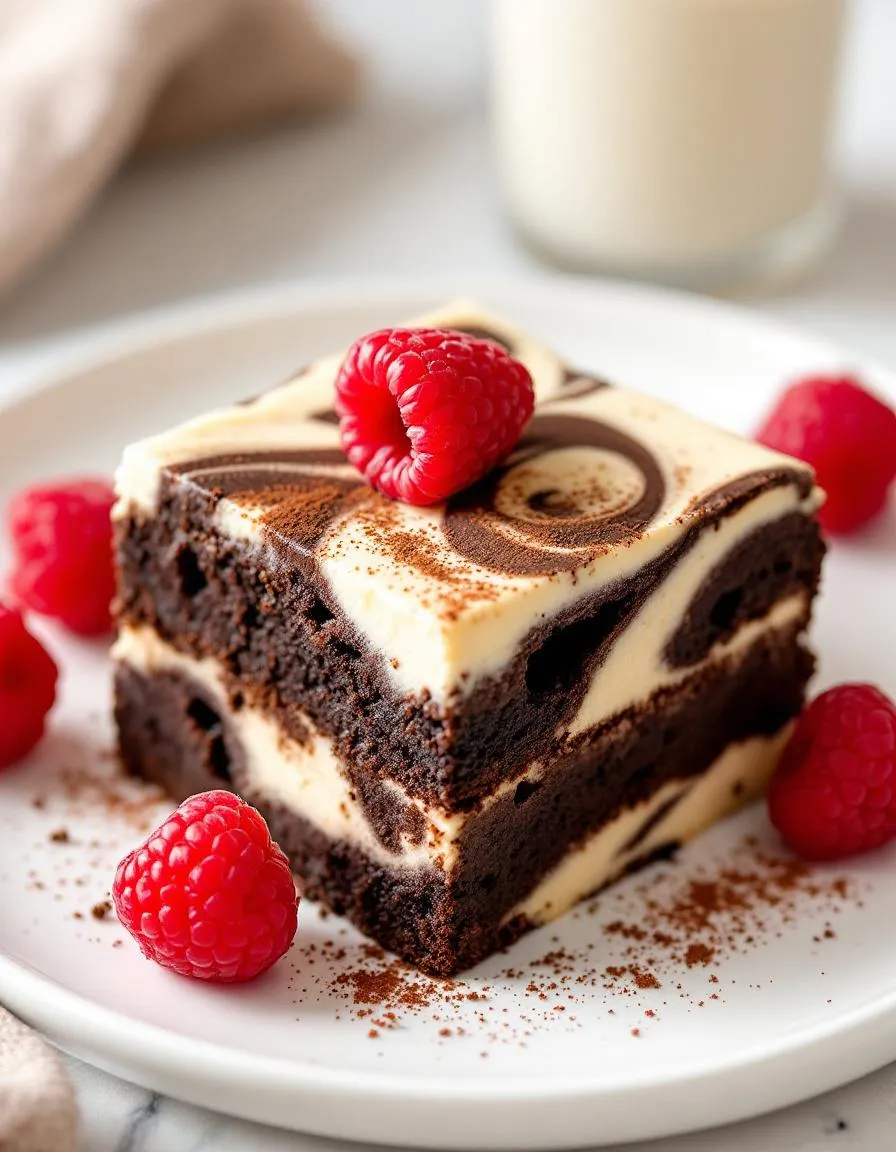
Decadent Cheesecake Brownies Recipe delivers a symphony of rich, indulgent flavors and textures. The fudgy brownie base melts in your mouth, while the creamy cheesecake swirl adds a tangy contrast that balances the sweetness. Every bite offers a velvety smoothness with just the right amount of density, thanks to the high-quality cocoa and butter. The aroma alone—warm chocolate mingling with vanilla and a hint of caramelized sugar—will make your kitchen smell like a bakery. Plus, the slight crackle of the brownie’s top crust gives way to a luxuriously soft center, making Decadent Cheesecake Brownies Recipe impossible to resist.
Boosting the flavor
Elevate your Decadent Cheesecake Brownies Recipe with a few easy tweaks. For a deeper chocolate flavor, swap regular cocoa powder with Dutch-process cocoa, which adds a smoother, less acidic taste. Top warm brownies with a drizzle of salted caramel or a dusting of powdered sugar for extra flair. If you love texture, sprinkle crushed toasted pecans or walnuts over the cheesecake swirl before baking. For a fruity twist, swirl in a spoonful of homemade raspberry sauce to brighten the richness. Small changes can make these brownies even more unforgettable.
Always use room-temperature cream cheese for a smooth, lump-free cheesecake swirl in your Decadent Cheesecake Brownies Recipe. Meanwhile, line your baking pan with parchment paper to ensure easy removal and clean cuts later. For the richest flavor, opt for high-quality dark chocolate in the brownie batter. Additionally, avoid overmixing the batter once you add the flour to keep the texture fudgy rather than dense. Finally, let the brownies cool completely before slicing so the layers set properly.
Mistakes to avoid
One common mistake is underbaking the brownies, which leaves them too gooey. To prevent this, insert a toothpick near the edge—it should come out with moist crumbs, not wet batter. Another error is swirling the cheesecake layer too aggressively, which can muddy the layers. Instead, use gentle figure-eight motions for a marbled effect. For more baking precision, check out our guide on how to test brownie doneness. Also, if your cheesecake swirl sinks, your brownie batter might be too thin. Learn how to adjust consistency with our brownie batter troubleshooting tips.
g-suggestions">Serving and Pairing Suggestions
How to serve this dish
Make your Decadent Cheesecake Brownies Recipe shine by serving them warm with a dusting of powdered sugar or a drizzle of caramel sauce. For special occasions, top each square with fresh raspberries or a dollop of whipped cream to add color and elegance. Meanwhile, arrange them on a tiered dessert stand for parties, or pack them in a festive box as a thoughtful homemade gift. Whether you’re hosting a holiday gathering or just craving a sweet treat, these brownies always impress.
What goes well with it
Pair your Decadent Cheesecake Brownies Recipe with a cold glass of milk for a classic combo that balances richness with simplicity. Alternatively, try them alongside a scoop of vanilla bean ice cream for an indulgent dessert experience. If you love coffee, a bold espresso or creamy latte enhances the chocolatey depth. For more dessert inspiration, check out our Homemade Chocolate Truffles or Vanilla Chai Latte to complete your sweet spread.
math-faq-block">
What makes cheesecake brownies so decadent?
Decadent Cheesecake Brownies Recipe combines rich fudgy brownies with a creamy cheesecake swirl, creating a perfect balance of textures and flavors. The contrast between the dense chocolate base and the tangy cheesecake layer elevates this dessert to a luxurious treat.
Can I use boxed brownie mix for Decadent Cheesecake Brownies?
Yes, you can save time by using a high-quality boxed brownie mix as the base for your Decadent Cheesecake Brownies Recipe. Just prepare the mix according to package directions, then add the homemade cheesecake swirl layer for that special touch.
How do you get perfect swirls in cheesecake brownies?
For picture-perfect swirls in your Decadent Cheesecake Brownies Recipe, dollop the cheesecake mixture evenly over the brownie batter, then use a knife or toothpick to gently swirl through both layers. Avoid overmixing – just 3-4 passes creates beautiful marbling.
ank-math-faq-item">
Should cheesecake brownies be refrigerated?
Absolutely! Because of the cheesecake component in Decadent Cheesecake Brownies Recipe, they must be refrigerated after cooling. Store them in an airtight container in the fridge for up to 5 days – they actually taste even better the next day as flavors meld.
Best Pecan Pie Pudding Cake – Easy Dessert Recipe
Introduction
There’s something magical about desserts that blend rich flavors with comforting textures, and this Irresistible Pecan Pie Pudding Cake delivers exactly that. Whether you’re craving a nostalgic treat or want to impress guests with a showstopper, this recipe wraps the warmth of pecan pie and the decadence of pudding cake into one unforgettable bite. Trust me, once you try it, you’ll understand why it’s a crowd favorite.
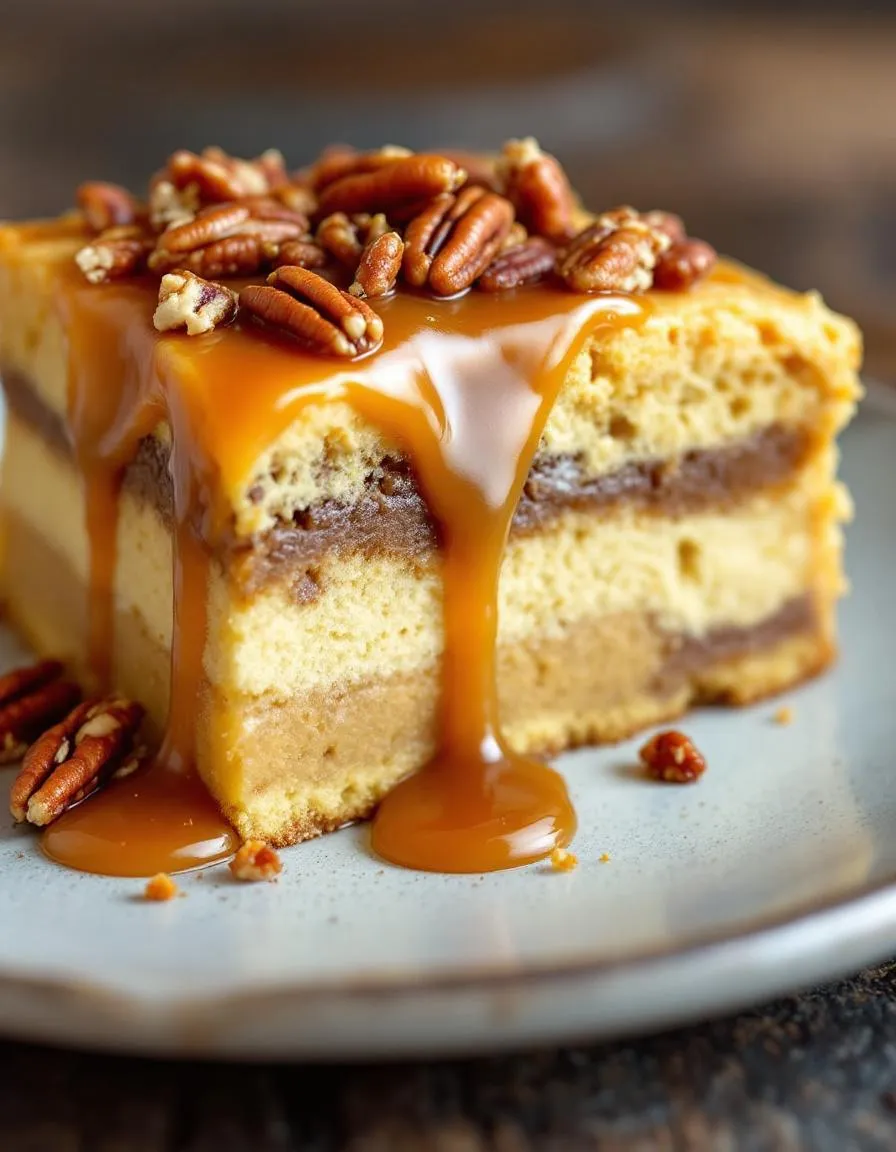
Irresistible Pecan Pie Pudding Cake is the ultimate fusion dessert, combining the gooey caramelized goodness of pecan pie with the moist, pudding-like crumb of a classic cake. Unlike traditional pecan pie, which can feel overly sweet or heavy, this version strikes the perfect balance with its light yet indulgent texture. The secret lies in the layers—crisp pecans on top, a buttery cake middle, and a luscious pudding base that forms as it bakes. It’s a dessert that feels both familiar and exciting, making it ideal for holidays, potlucks, or even a cozy night in.
Here at Exo Recipes, we celebrate dishes that bring people together, and this recipe fits right in. It’s approachable for bakers of all levels, yet impressive enough to earn rave reviews. If you love pecan pie but want a twist, or if you’re a fan of our Decadent Chocolate Lava Cake, you’ll adore this dessert. And for those who enjoy experimenting with flavors, try pairing it with our Homemade Vanilla Bean Ice Cream for an extra touch of luxury.
Why I Love This Recipe
This Irresistible Pecan Pie Pudding Cake holds a special place in my heart because it reminds me of family gatherings at my grandmother’s house. She always made pecan pie for Thanksgiving, but the first time I tried this pudding cake variation, it became an instant tradition. The way the flavors meld together—crisp pecans, buttery cake, and that irresistible caramelized pudding—brings back memories of laughter around the table. Now, I make it for my own family, and every time, it feels like a little piece of home. That’s the power of a truly great dessert.
Health and Nutrition
Why it’s good for your body
Irresistible Pecan Pie Pudding Cake packs a surprising nutritional punch while satisfying your sweet tooth. First, pecans deliver heart-healthy monounsaturated fats, which help lower bad cholesterol. Additionally, they provide plant-based protein and fiber to keep you full longer. Moreover, this dessert contains natural antioxidants from pecans, which combat inflammation and support overall wellness.
Unlike overly processed treats, Irresistible Pecan Pie Pudding Cake uses wholesome ingredients like eggs and butter for sustained energy. The eggs contribute high-quality protein, while the butter offers essential fat-soluble vitamins. Furthermore, the molasses or maple syrup in the recipe provides trace minerals like iron and zinc. As a result, you enjoy a richer flavor profile with added nutritional value.
Finally, Irresistible Pecan Pie Pudding Cake balances indulgence with mindful ingredients. For example, you can easily adapt it with gluten-free flour or reduce sugar without sacrificing taste. Whether you serve it as a special treat or a weekend dessert, it delivers both comfort and nourishment in every bite.
How it fits in a healthy lifestyle
Irresistible Pecan Pie Pudding Cake fits perfectly into a balanced diet when enjoyed in moderation. Pair a small slice with a protein-rich snack like Greek yogurt to stabilize blood sugar. Alternatively, serve it alongside fresh fruit for added fiber and vitamins. This way, you satisfy cravings without derailing your health goals.
For gluten-free eaters, simply swap regular flour for a gluten-free blend to make it celiac-friendly. If you focus on heart health, the pecans’ unsaturated fats align with heart-smart dessert choices. Even better, the recipe’s flexibility lets you adjust sweetness or fats to match your dietary needs.
Ultimately, Irresistible Pecan Pie Pudding Cake proves that decadence and nutrition can coexist. By savoring it mindfully, you turn dessert into a guilt-free pleasure that complements your lifestyle.
A decadent dessert combining the rich flavors of pecan pie with a moist pudding cake texture.
Ingredients
Scale
For the Crust:
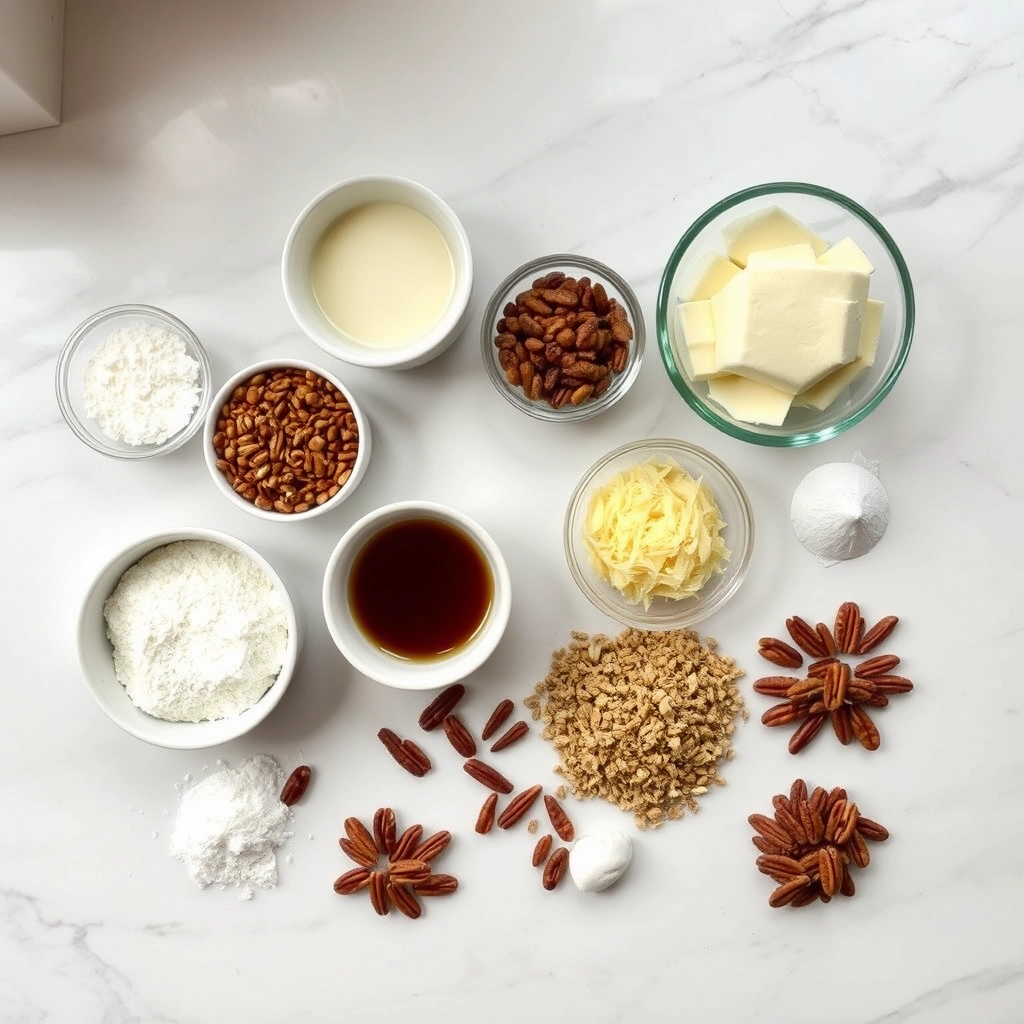
1 cup all-purpose flour
3/4 cup granulated sugar
2 teaspoons baking powder
1/2 teaspoon salt
1/2 cup milk
2 tablespoons melted butter
1 teaspoon vanilla extract
1/2 cup chopped pecans
3/4 cup packed brown sugar
1 1/2 cups hot water
Instructions
1. Prepare the Crust:
Preheat oven to 350°F (175°C). Grease an 8-inch square baking dish.
In a medium bowl, whisk together flour, granulated sugar, baking powder, and salt.
Stir in milk, melted butter, and vanilla extract until just combined. Fold in chopped pecans.
Spread batter evenly in prepared baking dish.
Sprinkle brown sugar evenly over the batter. Carefully pour hot water over the top (do not stir).
Bake for 35-40 minutes until top is golden and pudding layer forms beneath.
Let cool for 10 minutes before serving warm.
Notes
You can customize the seasonings to taste.
How to Prepare This Dish
Steps and time-saving tips
Start by preheating your oven to 350°F and greasing a 9×13-inch baking dish. While the oven warms, whisk together the flour, sugar, and baking powder in a large bowl. In a separate bowl, mix the milk, melted butter, and vanilla until smooth. Gradually pour the wet ingredients into the dry, stirring just until combined—don’t overmix. Spread the batter evenly into the prepared dish. Next, sprinkle the chopped pecans over the top, pressing them lightly into the batter. Now, drizzle the homemade caramel sauce (or store-bought for a shortcut) in a zigzag pattern. Bake for 30-35 minutes until golden and set. Let it cool slightly before serving. For a time-saving hack, toast the pecans in advance or use a food processor to chop them quickly. If you’re short on time, assemble the dry and wet ingredients the night before and combine them right before baking.
Mistakes I’ve made and learned from
I once rushed the baking time and pulled my Irresistible Pecan Pie Pudding Cake out too early, leaving the center underbaked. Now I always use a toothpick test—if it comes out clean, it’s done. Another blunder? Overmixing the batter, which made the cake dense instead of fluffy. A gentle fold is key! If your caramel sauce hardens, warm it slightly before drizzling. For more baking tricks, check out my guide on common baking mistakes. And if you love pecan desserts, don’t miss my perfect pecan recipes for more inspiration.
Irresistible Pecan Pie Pudding Cake feels like a warm hug from the South, where pecan pies have long been a staple at holiday tables. This dessert blends the gooey richness of pecan pie with the comforting texture of pudding cake, creating something uniquely indulgent. Many Southern families pass down their own versions, often tweaking the sweetness or adding a splash of bourbon for depth. Meanwhile, in the Midwest, home bakers might swap pecans for walnuts or drizzle caramel for extra decadence.
Beyond the U.S., similar treats pop up in surprising places. In Mexico, for instance, cooks might infuse the batter with cinnamon or serve it with a side of cajeta. Some European bakers even layer the cake with frangipane for a nutty twist. No matter where you go, Irresistible Pecan Pie Pudding Cake adapts beautifully, making it a global crowd-pleaser. My grandma’s version included a pinch of cloves, which gave it a subtle warmth perfect for chilly evenings. Whether you stick to tradition or experiment, this dessert always feels like home.
ays-cooking">How it fits in today’s cooking
Today, Irresistible Pecan Pie Pudding Cake still shines as a nostalgic yet versatile treat. Modern cooks love it for Thanksgiving, but it’s just as welcome on a random Tuesday when you crave something cozy. Many bakers now use gluten-free flour or coconut sugar to fit dietary needs, proving this classic can evolve without losing its charm. For a quicker version, some even repurpose leftover pecan pie into the batter—talk about a delicious hack!
You’ll often spot this dessert at potlucks or as the star of a fall dessert spread. It pairs perfectly with coffee or a scoop of vanilla ice cream, making it a year-round favorite. If you’re looking for more inspiration, check out these easy cake recipes to keep the baking momentum going. Whether you’re honoring tradition or putting your own spin on it, Irresistible Pecan Pie Pudding Cake always delivers comfort and joy.
Taste and Texture
What makes it delicious
Irresistible Pecan Pie Pudding Cake delivers a symphony of flavors and textures in every bite. The rich, buttery cake base melts in your mouth, while the gooey pecan pie filling adds a luscious, caramel-like sweetness. Toasted pecans provide a satisfying crunch, contrasting perfectly with the velvety pudding layer. Warm notes of vanilla and cinnamon weave through the dessert, making it smell as heavenly as it tastes. Whether served warm or chilled, Irresistible Pecan Pie Pudding Cake feels indulgent yet comforting, like a hug in dessert form.
r">Boosting the flavor
For an extra flavor boost, try drizzling warm caramel sauce over your Irresistible Pecan Pie Pudding Cake or adding a scoop of vanilla bean ice cream. Alternatively, swap regular pecans for candied ones to intensify the sweetness and texture. A pinch of sea salt on top balances the richness, while a dash of bourbon in the batter deepens the caramel notes. If you love experimenting with toppings, check out our guide to decadent dessert sauces or explore creative ways to use spice pairings for baked goods. The possibilities are endless!
Tips for Success
Best practices for results
Always measure your ingredients precisely for Irresistible Pecan Pie Pudding Cake, especially the flour and sugar, to maintain the perfect balance of textures. Meanwhile, preheat your oven at least 20 minutes before baking to ensure even cooking. For the best caramelized topping, spread the pecans evenly across the batter before baking. Additionally, let the cake cool for at least 15 minutes before serving so the pudding layer sets properly. Finally, store leftovers in an airtight container to keep the cake moist and flavorful for days.
>Mistakes to avoid
Avoid overmixing the batter, as this can make Irresistible Pecan Pie Pudding Cake dense instead of light and fluffy. Instead, gently fold the dry ingredients into the wet ones until just combined. Another common mistake is skipping the toothpick test—insert it near the center to check for doneness, as underbaking leads to a gooey middle. For more troubleshooting tips, check out our guide on fixing baking fails. Also, don’t substitute dark corn syrup with light corn syrup unless necessary, since it affects the richness of the topping. Learn more about ingredient swaps in our baking substitutions article.
Serving and Pairing Suggestions
How to serve this dish
Serve Irresistible Pecan Pie Pudding Cake warm for a gooey, comforting texture or chilled for a firmer, cake-like bite. For a stunning presentation, drizzle caramel sauce over each slice and top with a scoop of vanilla ice cream. Meanwhile, a sprinkle of toasted pecans adds crunch and elegance. This dessert shines at holiday gatherings, but it also makes a special treat for weekend brunches. If you want to impress guests, pair individual servings with edible gold leaf for a touch of luxury.
What goes well with it
A hot cup of spiced chai tea balances the sweetness of Irresistible Pecan Pie Pudding Cake, creating a cozy flavor contrast. Alternatively, try a drizzle of bourbon-infused whipped cream for a rich, grown-up twist. For a complete dessert spread, serve it alongside our Cinnamon Apple Crisp or Classic Chocolate Mousse. The warm spices in the crisp and the smooth cocoa in the mousse make perfect companions to this decadent cake.
What makes Irresistible Pecan Pie Pudding Cake so moist?
Irresistible Pecan Pie Pudding Cake gets its moist texture from a combination of buttermilk, brown sugar, and the natural caramelization of pecans during baking. The pudding layer seeps into the cake as it bakes, creating a rich, gooey consistency that mimics pecan pie filling.
Can I make Irresistible Pecan Pie Pudding Cake ahead of time?
Yes! Irresistible Pecan Pie Pudding Cake actually tastes better when made a day ahead, as the flavors meld together. Store it covered at room temperature or refrigerate for up to 3 days—just warm slightly before serving to restore that fresh-baked texture.
ank-math-faq-item">
What’s the difference between pecan pie and pecan pie pudding cake?
While traditional pecan pie has a custard filling in a single crust, Irresistible Pecan Pie Pudding Cake features a cake layer topped with a pecan-packed pudding that bakes into the dessert. The result is a hybrid texture—part cake, part gooey pie filling—with more depth of flavor.
Can I use walnuts instead of pecans in this pudding cake?
While walnuts can substitute pecans in Irresistible Pecan Pie Pudding Cake, the flavor profile will change significantly. Pecans have a sweeter, buttery taste that defines this dessert. If using walnuts, consider adding 1 tbsp maple syrup to better approximate the classic pecan pie flavor.
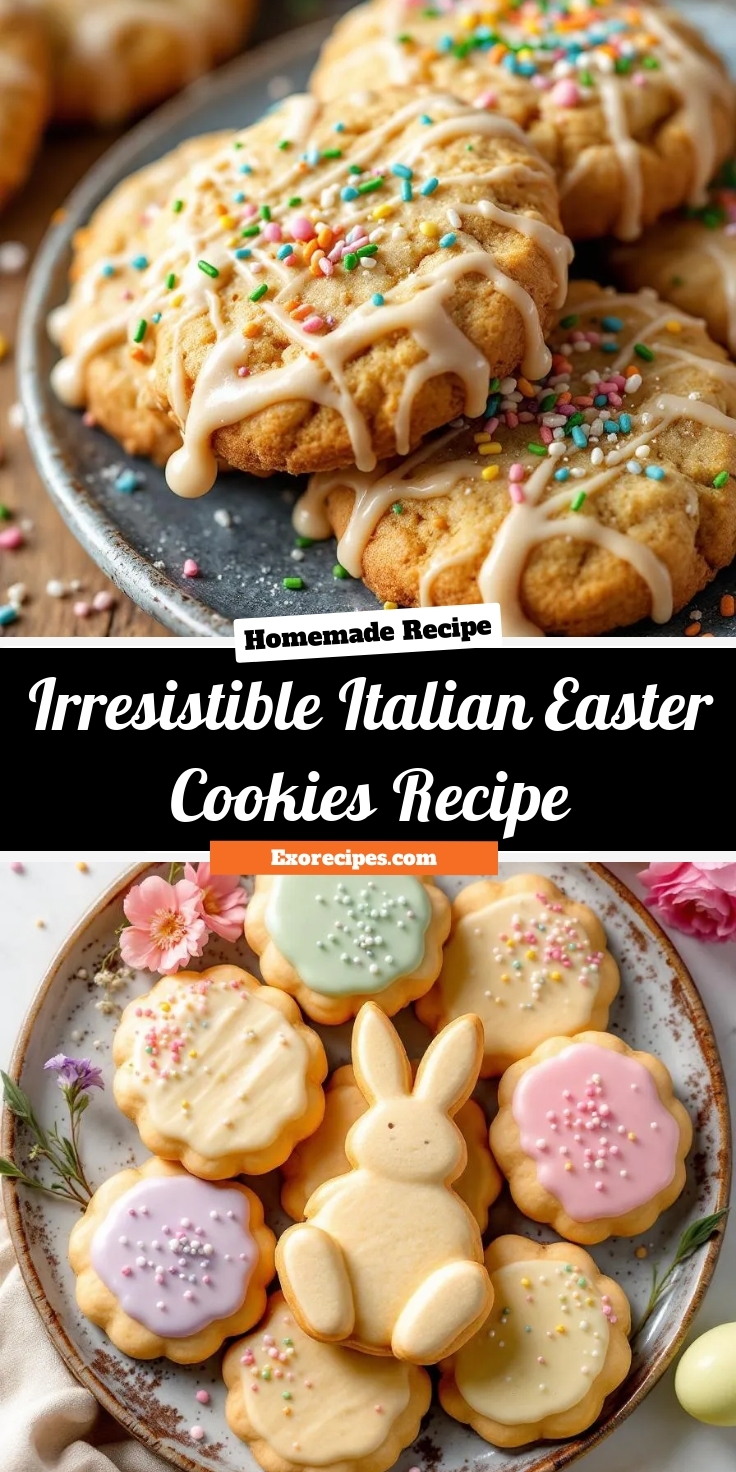
Best Italian Easter Cookies – Classic Recipe
Introduction
Easter brings memories of family gatherings, sweet traditions, and the irresistible aroma of freshly baked treats wafting through the kitchen. If you crave a taste of nostalgia or want to start a new holiday ritual, this Irresistible Italian Easter Cookies Recipe delivers soft, buttery delights that melt in your mouth. Whether you grew up with these cookies or are discovering them for the first time, their delicate texture and festive charm will make them a staple on your dessert table. Plus, they pair perfectly with a cup of coffee or a glass of milk, making them ideal for sharing with loved ones.
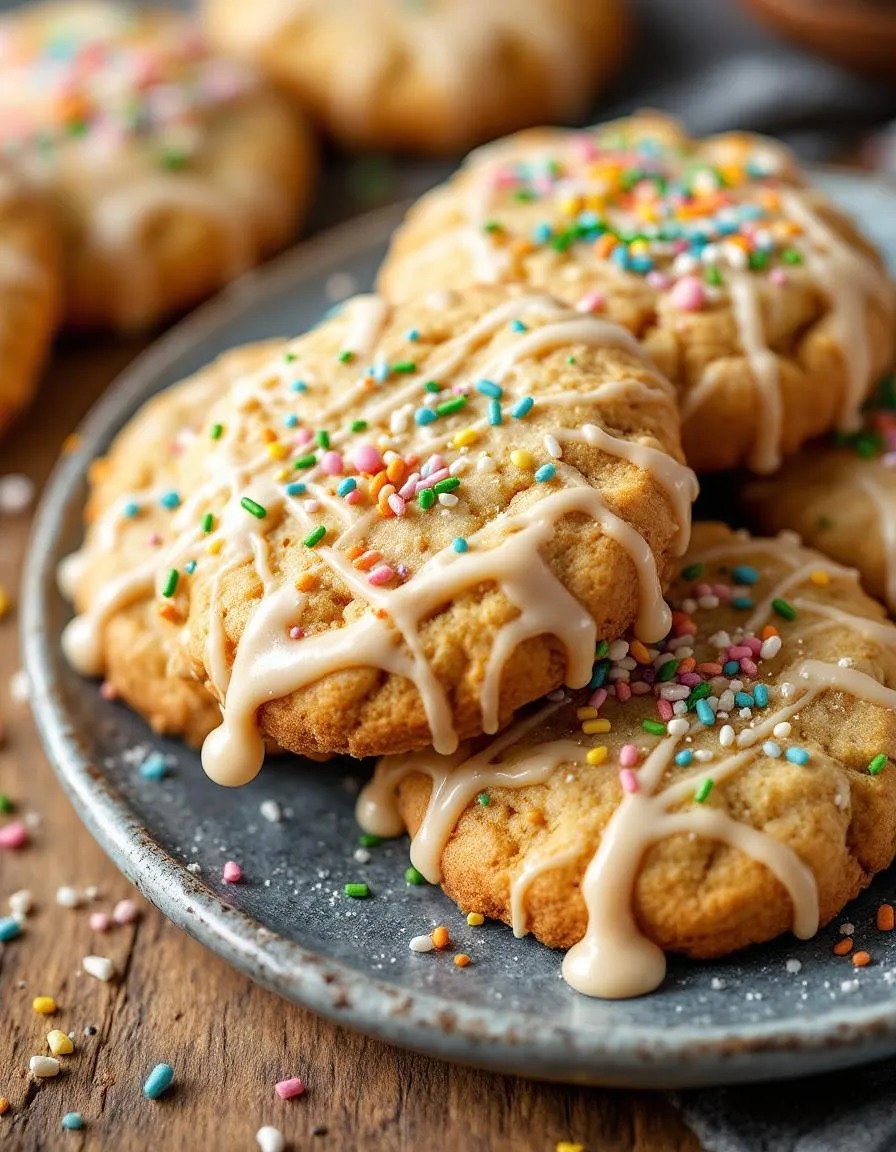
The Irresistible Italian Easter Cookies Recipe celebrates generations of tradition, blending simple ingredients like flour, butter, and vanilla into tender, pillowy bites. Often decorated with colorful sprinkles or a light glaze, these cookies symbolize joy and togetherness during the holiday season. Unlike store-bought treats, homemade versions carry heart and history, which is why we prioritize recipes that honor authenticity while keeping methods approachable. If you love Italian desserts, you might also enjoy our Classic Tiramisu or Homemade Cannoli, which share the same dedication to flavor and tradition. This recipe fits our blog’s mission to deliver tested, crowd-pleasing dishes that bridge cultures and create lasting memories. Whether you bake them for a family brunch or gift them to neighbors, these cookies will leave everyone asking for more.
Why I Love This Recipe
My grandmother first taught me to make these cookies when I was barely tall enough to reach the counter. She would hum old Italian songs while shaping the dough, and the scent of vanilla would fill her tiny kitchen. Now, every Easter, I recreate that magic for my own family, tweaking the recipe just enough to make it mine while keeping her spirit alive. The Irresistible Italian Easter Cookies Recipe isn’t just about the ingredients—it’s about the laughter, the sticky fingers, and the stories shared over a baking sheet. That’s why I’ll always cherish it.
Health and Nutrition
Why it’s good for your body
Irresistible Italian Easter Cookies Recipe packs wholesome ingredients that offer surprising health perks. First, almond flour and citrus zest provide antioxidants, which help fight inflammation. Additionally, these cookies contain heart-healthy fats from almond flour, supporting cardiovascular wellness. Unlike many store-bought treats, Irresistible Italian Easter Cookies Recipe skips artificial additives, making them a cleaner indulgence.
Moreover, the recipe includes eggs, which deliver high-quality protein for muscle repair. The citrus zest also boosts vitamin C levels, enhancing immune function. Since the cookies use natural sweeteners like honey, they avoid refined sugar spikes. For those mindful of digestion, almond flour offers fiber to promote gut health.
Finally, Irresistible Italian Easter Cookies Recipe balances flavor and nutrition effortlessly. The aromatic vanilla and citrus zest not only elevate taste but also provide calming properties. Whether you enjoy them as a festive treat or a midday snack, these cookies nourish your body while satisfying your sweet tooth.
How it fits in a healthy lifestyle
Irresistible Italian Easter Cookies Recipe fits seamlessly into a balanced diet when enjoyed in moderation. The almond flour base makes them a great gluten-free option, perfect for those with dietary restrictions. Pair them with a protein-rich snack, like Greek yogurt, to create a satisfying and nutritious combo.
For heart-conscious eaters, the healthy fats in almond flour align with a Mediterranean-inspired diet. If you’re exploring more wholesome dessert ideas, check out our guide to healthy dessert swaps. These cookies also work well for portion-controlled indulgence, helping you stay on track without feeling deprived.
Planning ahead? Bake a batch and store them for mindful snacking throughout the week. For more tips on balancing treats and nutrition, visit our post on mindful eating habits. Irresistible Italian Easter Cookies Recipe proves that delicious flavors and wholesome ingredients can go hand in hand.
Soft, buttery Italian Easter cookies topped with a sweet glaze and colorful sprinkles, perfect for celebrating the holiday.
Ingredients
Scale
For the Crust:
4 cups all-purpose flour
1/2 cup granulated sugar
1 tbsp baking powder
1/2 tsp salt
1/2 cup unsalted butter, softened
3 large eggs
1 tsp vanilla extract
1/2 tsp almond extract
1/2 cup milk
1 1/2 cups powdered sugar
2–3 tbsp milk
1/2 tsp vanilla extract
Sprinkles for decoration
Instructions
1. Prepare the Crust:
Preheat oven to 350°F (175°C) and line baking sheets with parchment paper.
In a large bowl, whisk together flour, sugar, baking powder, and salt.
Cut in the softened butter until the mixture resembles coarse crumbs.
In a separate bowl, beat eggs, vanilla extract, almond extract, and milk. Add to the dry ingredients and mix until a soft dough forms.
Roll dough into 1-inch balls and place on prepared baking sheets. Bake for 12-15 minutes until lightly golden. Let cool completely.
For the glaze, whisk powdered sugar, milk, and vanilla extract until smooth. Dip the tops of the cookies into the glaze and decorate with sprinkles.
Let glaze set before serving.
Notes
You can customize the seasonings to taste.
s-dish">How to Prepare This Dish
Steps and time-saving tips
Start by preheating your oven to 350°F and lining your baking sheets with parchment paper. This simple step ensures your Irresistible Italian Easter Cookies won’t stick, saving you cleanup time later. In a large bowl, whisk together the flour, baking powder, and salt until well combined. Meanwhile, beat the softened butter and sugar in a separate bowl until light and fluffy, then mix in the eggs and vanilla. Gradually fold the dry ingredients into the wet mixture, but avoid overmixing to keep the cookies tender. If the dough feels sticky, chill it for 15 minutes—this makes rolling easier. Shape the dough into small balls or festive shapes, then bake for 10-12 minutes until the edges turn golden. While they cool, whip up the glaze by whisking powdered sugar, milk, and a splash of almond extract. Drizzle it over the cookies and add colorful sprinkles for a cheerful finish. For efficiency, bake in batches and reuse the same parchment paper. These Irresistible Italian Easter Cookies stay fresh for days, so you can make them ahead and focus on enjoying the holiday.
Mistakes I’ve made and learned from
My first attempt at these Irresistible Italian Easter Cookies was a lesson in patience. I rushed the dough chilling step, which made rolling messy, and the cookies spread too much in the oven. Now, I never skip the 15-minute chill—it’s a game-changer for texture. Another blunder? Overbaking. I once left them in just two minutes too long, and they lost their softness. A timer is your best friend here. If you’re new to baking, check out my guide to common baking mistakes to avoid similar pitfalls. Also, I learned the hard way that glaze consistency matters. Too thick, and it won’t drizzle; too thin, and it slides right off. For perfect results, aim for a honey-like texture, like the one in my glaze techniques post. Trust me, these small tweaks make all the difference.
n-and-variations">Cultural Connection and Variations
Where this recipe comes from
The Irresistible Italian Easter Cookies Recipe carries the warmth of generations, rooted in Italy’s vibrant holiday traditions. Families across Southern Italy bake these tender, lemon-kissed cookies during Holy Week, often shaping them into knots or crowns to symbolize renewal. My grandmother would tell stories of her village, where neighbors exchanged them as edible blessings. Today, you’ll find variations from Sicily to Naples—some add anise for a licorice twist, while others dip the cookies in pastel-colored glazes to match spring’s palette.
Beyond Italy, the Irresistible Italian Easter Cookies Recipe adapts to local tastes. In American-Italian households, almond extract might replace lemon, or sprinkles add a festive crunch. Some bakers even stuff them with a dollop of jam, turning them into sweet surprises. Whether served alongside Easter brunch or packed in gift boxes, these cookies bridge cultures with every buttery bite.
How it fits in today’s cooking
Modern cooks love the Irresistible Italian Easter Cookies Recipe for its versatility. While it honors tradition, it also fits seamlessly into today’s baking trends. Busy home chefs might use a stand mixer to streamline the dough, or swap in gluten-free flour for dietary needs. Others bake them year-round, pairing them with spring desserts for baby showers or garden parties.
What keeps this recipe
timeless? Its ability to evoke nostalgia while inviting creativity. Whether you’re a beginner or a seasoned baker, these cookies remind us that food connects us—to heritage, to family, and to the simple joy of sharing something sweet.
Taste and Texture
What makes it delicious
Irresistible Italian Easter Cookies Recipe delivers a melt-in-your-mouth experience with its tender, slightly chewy texture and delicate sweetness. The buttery dough, infused with fragrant vanilla and a hint of citrus zest, creates a light yet rich flavor. Meanwhile, the colorful sprinkles or icing on top adds a playful crunch, making every bite a delightful contrast. These cookies smell heavenly as they bake, filling your kitchen with warm, comforting aromas. Whether enjoyed fresh or stored for later, Irresistible Italian Easter Cookies Recipe remains irresistibly soft and flavorful.
Boosting the flavor
For an extra layer of indulgence, try brushing the warm cookies with a light glaze infused with almond extract or a drizzle of homemade chocolate sauce. Alternatively, fold finely chopped nuts into the dough for a subtle crunch. If you love citrus, swap the vanilla for orange blossom water or lemon zest to brighten the flavor. Pair these cookies with a cup of vanilla chai latte for a cozy, aromatic treat. Small tweaks can elevate the classic Irresistible Italian Easter Cookies Recipe into something even more memorable.
Always chill the dough for at least 30 minutes before shaping your Irresistible Italian Easter Cookies Recipe. This step prevents spreading and keeps the cookies tender. Additionally, use room-temperature butter for a smooth, even dough. For the best texture, roll the dough gently between your palms—avoid overworking it. Finally, bake the cookies on parchment paper to ensure they brown evenly without sticking.
Mistakes to avoid
One common error is overbaking the Irresistible Italian Easter Cookies Recipe, which makes them dry. Instead, pull them from the oven when the edges are just golden. Another mistake is skipping the sifting step for powdered sugar in the glaze. For a silky finish, sift it first, just like we recommend in our perfect glaze techniques guide. Also, avoid overcrowding the baking sheet, as this leads to uneven baking. For more on proper spacing, check out our baking sheet hacks.
g-suggestions">Serving and Pairing Suggestions
How to serve this dish
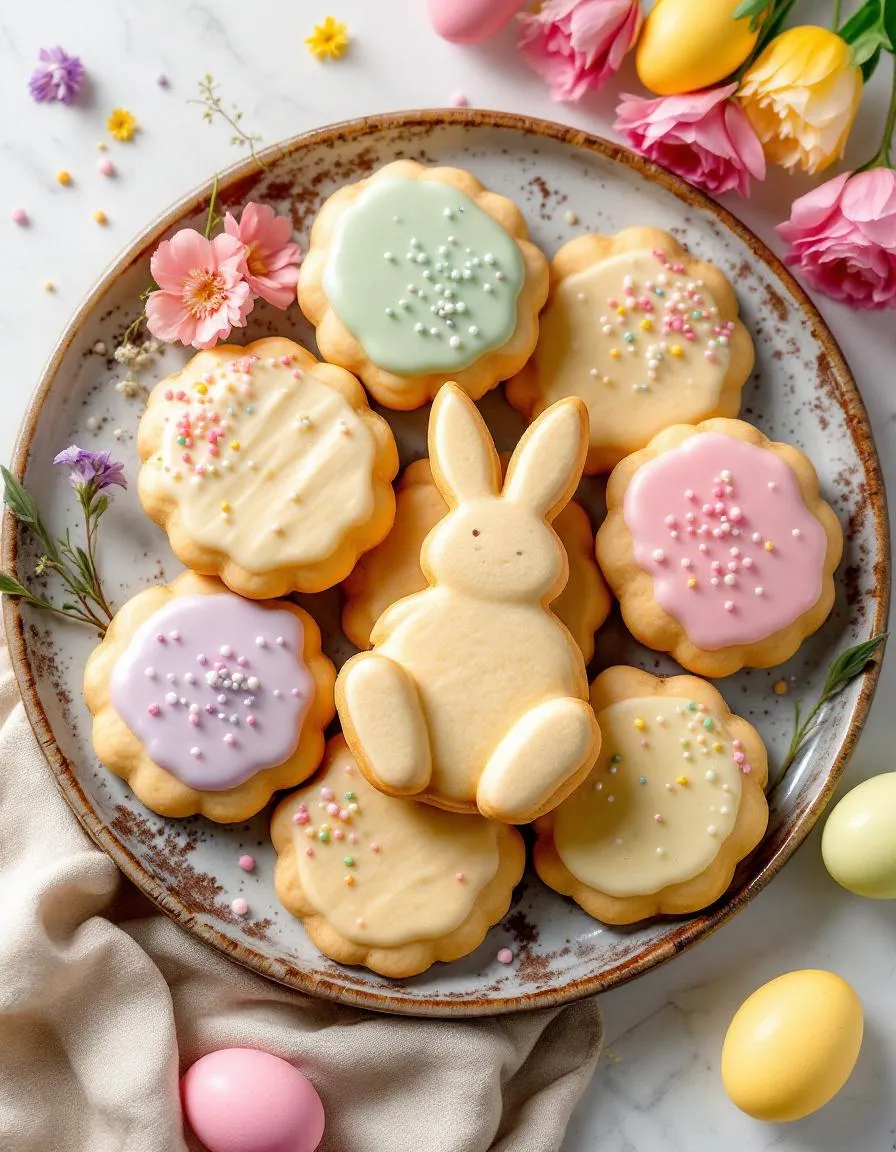
Showcase your Irresistible Italian Easter Cookies Recipe by arranging them on a vintage ceramic platter for a charming rustic touch. Alternatively, stack them in a clear glass jar to highlight their delicate shapes and pastel glazes. These cookies shine at holiday gatherings, especially Easter brunches or afternoon tea parties. For extra flair, sprinkle edible rose petals or lemon zest over the top before serving. Meanwhile, if you’re hosting a spring celebration, pair them with fresh flowers on the table for a cheerful centerpiece.
What goes well with it
Elevate your Irresistible Italian Easter Cookies Recipe with a cup of frothy cappuccino, as the coffee’s bold flavor balances the cookies’ subtle sweetness. Alternatively, serve them alongside a tangy citrus salad for a refreshing contrast. If you love pairing desserts with drinks, try our Homemade Lavender Lemonade—its floral notes complement the cookies perfectly. For a heartier option, offer them after a meal featuring our Creamy Sun-Dried Tomato Pasta, as the savory main course makes the cookies even more delightful.
math-faq-block">
What makes Italian Easter cookies different from regular cookies?
Irresistible Italian Easter Cookies Recipe typically features a soft, cake-like texture with hints of lemon or anise flavor. Unlike regular cookies, they’re often shaped into knots or twists and topped with colorful sprinkles or icing, making them a festive holiday treat.
Can I make Italian Easter cookies without anise flavor?
Absolutely! While traditional Irresistible Italian Easter Cookies Recipe often uses anise, you can substitute it with vanilla, almond extract, or lemon zest for a different flavor profile. The cookies will still maintain their signature soft texture and festive appearance.
How long do Italian Easter cookies stay fresh?
When stored properly in an airtight container, Irresistible Italian Easter Cookies Recipe stays fresh for up to 5 days at room temperature. For longer storage, you can freeze them for up to 2 months without losing their soft texture.
ank-math-faq-item">
What’s the best way to decorate Italian Easter cookies?
The classic way to decorate Irresistible Italian Easter Cookies Recipe is with pastel-colored icing and nonpareils or sprinkles. For a simpler option, brush them with melted butter while warm and dust with powdered sugar for a snowy effect.
Easy Cheesy Zucchini Ravioli Delight Recipe
Introduction
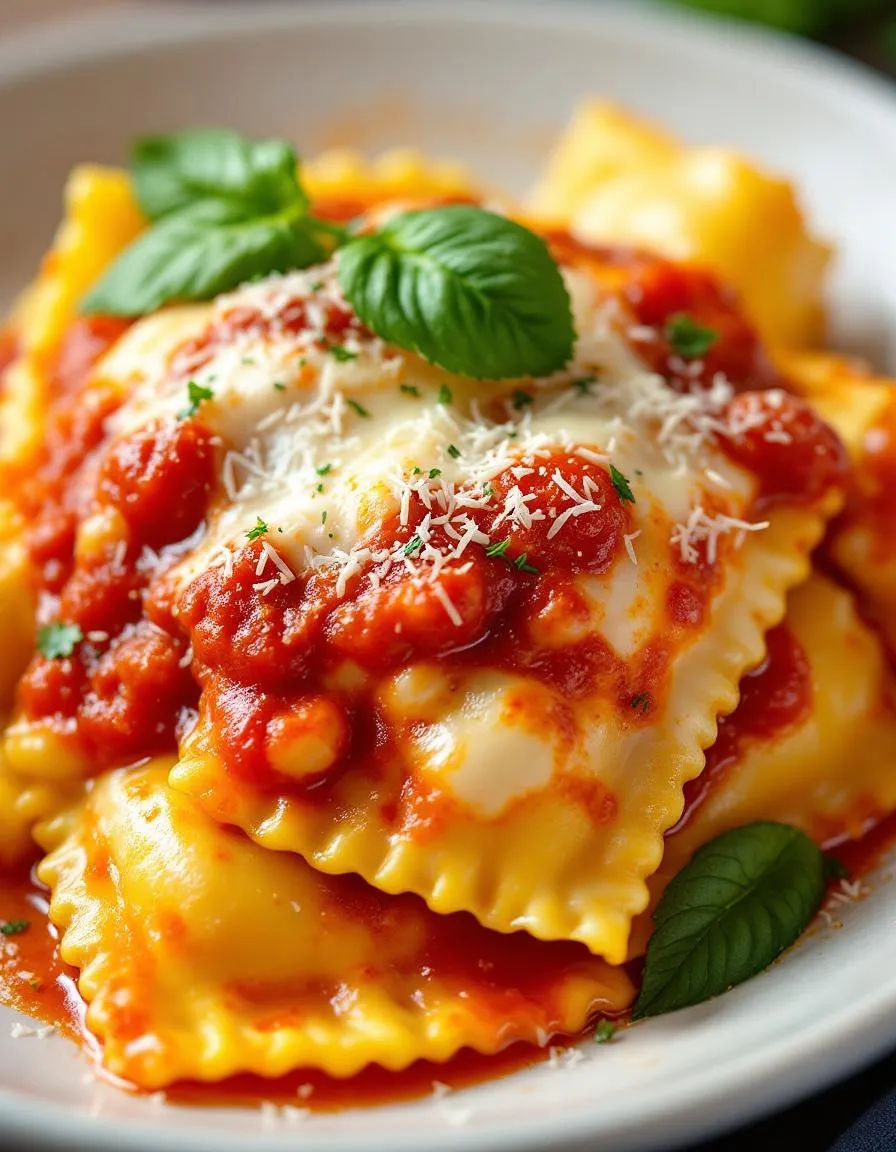
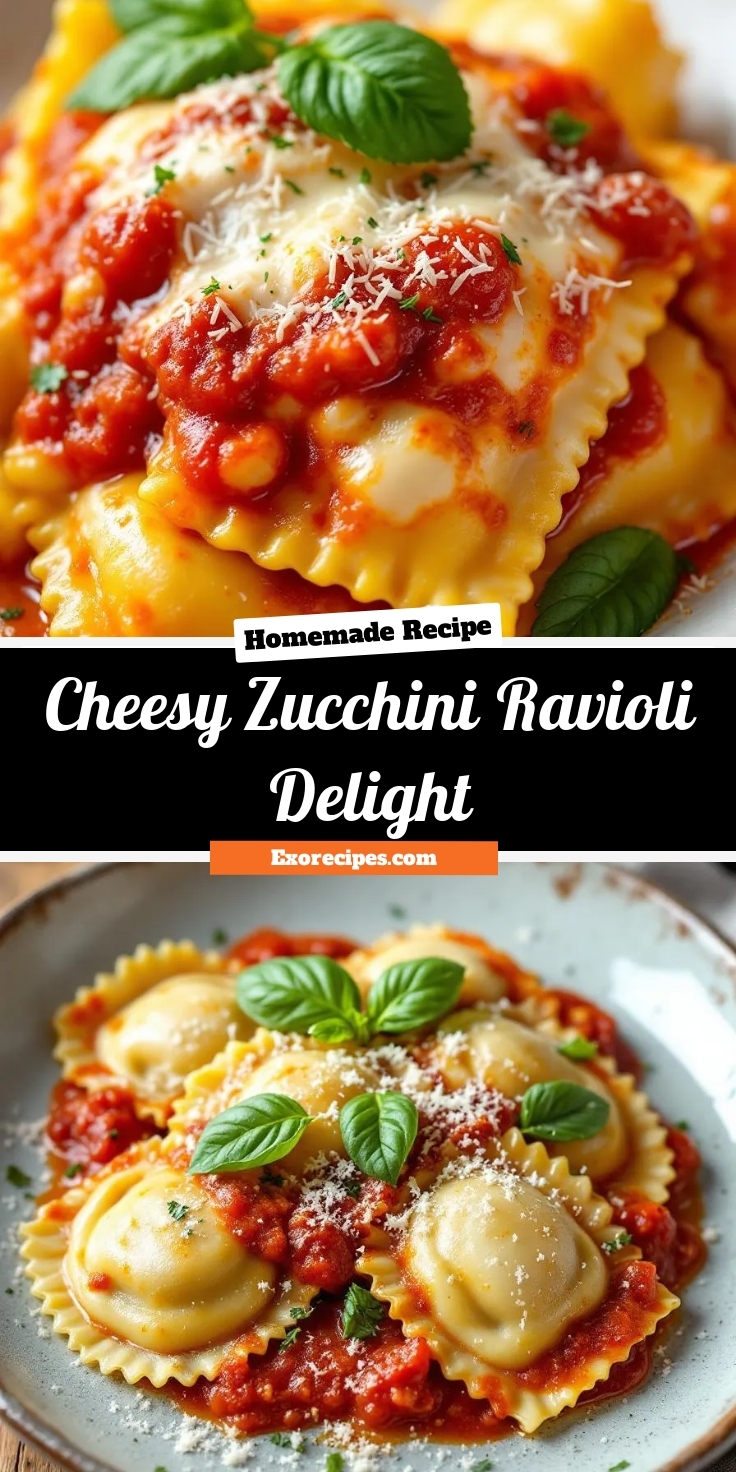
If you crave comfort food with a healthy twist, Cheesy Zucchini Ravioli Delight will steal your heart. This dish wraps tender zucchini around a creamy, cheesy filling, creating a guilt-free indulgence that satisfies pasta cravings without the heaviness. Whether you need a cozy weeknight dinner or a showstopping meal for guests, this recipe delivers flavor, simplicity, and a touch of elegance. Plus, it’s a fantastic way to sneak more veggies into your diet while keeping things deliciously cheesy.
Cheesy Zucchini Ravioli Delight reimagines classic ravioli by replacing traditional pasta with thin zucchini slices, making it a lighter yet equally satisfying alternative. The filling blends ricotta, parmesan, and herbs for a rich, savory bite, while a quick marinara sauce ties everything together. This dish matters because it caters to both comfort-food lovers and health-conscious eaters, proving that you don’t need carbs to enjoy hearty flavors. It’s also gluten-free and low-carb, fitting seamlessly into modern dietary preferences. If you love creative veggie-forward dishes like our Vegetable Lasagna Roll-Ups, you’ll adore this twist. The recipe aligns perfectly with our blog’s mission to make wholesome eating feel indulgent, just like our Creamy Cauliflower Mac and Cheese. With minimal prep and maximum flavor, Cheesy Zucchini Ravioli Delight is a weeknight hero.
Why I Love This Recipe
Cheesy Zucchini Ravioli Delight holds a special place in my kitchen because it’s the ultimate compromise between my love for cheese and my goal to eat lighter. The first time I made it, I worried the zucchini wouldn’t hold up, but one bite convinced me otherwise. Now, it’s my go-to when I want something comforting yet fresh. The way the melted cheese oozes with each forkful reminds me of Sunday dinners growing up, but with a modern, veggie-packed twist. It’s proof that healthy eating doesn’t mean sacrificing flavor—and that’s a win in my book.
Health and Nutrition
Why it’s good for your body
Cheesy Zucchini Ravioli Delight packs a nutritious punch while satisfying your comfort food cravings. First, zucchini serves as a low-carb, fiber-rich base that supports digestion and keeps you full longer. Additionally, this dish delivers a boost of vitamins A and C, which promote healthy skin and a strong immune system. Because it swaps traditional pasta for zucchini, you also cut down on refined carbs without sacrificing flavor.
Moreover, the creamy cheese filling provides a solid dose of protein and calcium, essential for muscle repair and bone health. Unlike heavy pasta dishes, Cheesy Zucchini Ravioli Delight feels light yet indulgent, making it a smart choice for mindful eaters. The dish also incorporates herbs like basil or oregano, which add antioxidants and anti-inflammatory benefits. Whether you’re aiming for better digestion or more energy, this recipe delivers.
Finally, Cheesy Zucchini Ravioli Delight balances indulgence with nourishment. By using fresh, whole ingredients, it avoids processed additives while still tasting decadent. Transitioning to healthier alternatives has never been easier—or more delicious.
How it fits in a healthy lifestyle
Cheesy Zucchini Ravioli Delight fits seamlessly into a balanced diet, whether you’re gluten-free, watching your carbs, or just craving a wholesome meal. The zucchini-based “pasta” keeps it low in refined grains, aligning with gluten-free or keto-friendly goals. Meanwhile, the protein-rich cheese filling helps stabilize blood sugar, making it a great option for sustained energy.
If you’re focused on heart health, you can easily tweak the recipe with low-fat cheese or add a side of leafy greens for extra fiber. For more inspiration on light yet satisfying meals, check out our gluten-free dinner ideas. Pair it with a fresh salad or roasted veggies, and you’ve got a complete, nutrient-dense plate. Plus, the recipe’s versatility means you can adapt it to your dietary needs without losing flavor.
Busy weeknights call for simple, nourishing meals, and Cheesy Zucchini Ravioli Delight delivers. For more tips on balancing indulgence with nutrition, explore our healthy comfort food swaps. With this dish, you’re not just eating well—you’re enjoying every bite.
A delicious low-carb twist on traditional ravioli using zucchini slices as the pasta.
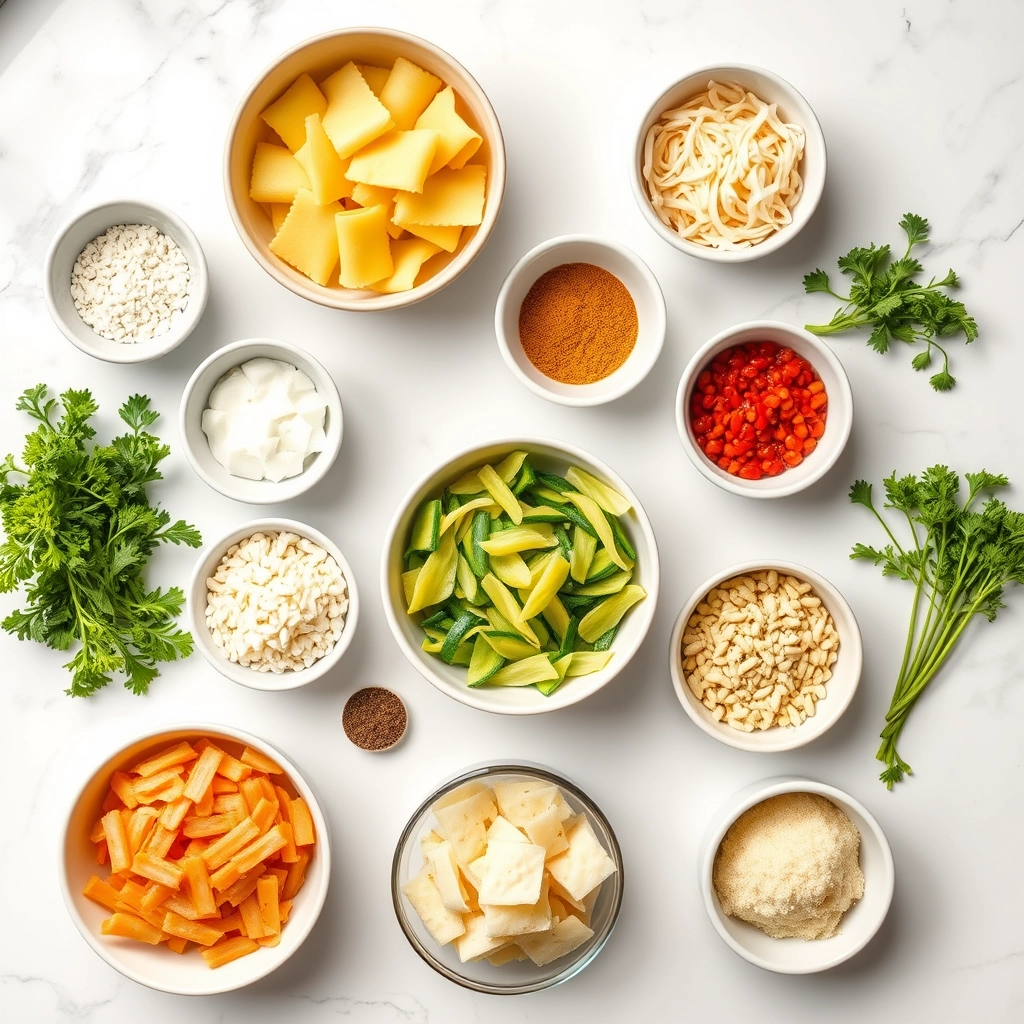
Ingredients
Scale
For the Crust:
2 large zucchinis, thinly sliced lengthwise
1 cup ricotta cheese
1/2 cup shredded mozzarella cheese
1/4 cup grated parmesan cheese
1 egg
1 tsp garlic powder
1 tsp dried basil
1/2 tsp salt
1/4 tsp black pepper
1 cup marinara sauce
Instructions
1. Prepare the Crust:
Preheat oven to 375°F (190°C).
In a bowl, mix ricotta, mozzarella, parmesan, egg, garlic powder, basil, salt, and pepper.
Lay out zucchini slices and place a spoonful of cheese mixture on each. Fold slices over to create ravioli.
Place ravioli in a baking dish, cover with marinara sauce, and bake for 25 minutes.
Let cool for 5 minutes before serving.
Notes
You can customize the seasonings to taste.
“`html
How to Prepare This Dish
Steps and time-saving tips
First, preheat your oven to 375°F and lightly grease a baking dish. Slice the zucchini lengthwise into thin strips using a mandoline or sharp knife for even layers. Meanwhile, mix ricotta, shredded mozzarella, grated Parmesan, minced garlic, and a pinch of salt in a bowl. Lay out the zucchini strips on a clean surface, then spoon a small amount of the cheese mixture onto each strip. Gently fold the zucchini over the filling to create ravioli-like pockets. Arrange them snugly in the baking dish. Next, drizzle olive oil over the top and sprinkle with extra Parmesan for a golden crust. Bake for 20-25 minutes until the zucchini softens and the cheese bubbles. For a time-saving twist, prep the filling a day ahead or use store-bought ricotta. If you’re short on time, skip the folding and layer the zucchini and cheese like a lasagna—it’s just as delicious!
and-learned-from">Mistakes I’ve made and learned from
Early on, I rushed the zucchini slicing and ended up with uneven strips that tore when folded. Now, I take my time or use a mandoline for perfect slices every time. Another blunder? Overstuffing the ravioli, which caused messy leaks during baking. A heaping teaspoon of filling is plenty—trust me! For more foolproof tips, check out my guide on perfect cheese fillings. And if your zucchini releases too much water, blot the strips with a paper towel first, or try the tricks in my zucchini hacks post. These small adjustments make all the difference for a flawless Cheesy Zucchini Ravioli Delight.
“`
n-and-variations">Cultural Connection and Variations
Where this recipe comes from
Cheesy Zucchini Ravioli Delight has roots in Italian cuisine, where fresh pasta and seasonal vegetables often take center stage. However, this dish puts a creative spin on tradition by swapping classic pasta sheets for thinly sliced zucchini, making it lighter yet just as satisfying. In Northern Italy, cooks might stuff their ravioli with ricotta and herbs, but in my family, we add a touch of cream cheese for extra richness. Meanwhile, in the American South, you might find a version with a crispy breadcrumb topping for added texture.
Around the world, similar dishes adapt to local tastes. In Greece, for example, cooks might layer zucchini with feta and mint, while in Mexico, they could spice it up with jalapeños and cotija cheese. Cheesy Zucchini Ravioli Delight also shines in summer when zucchini is abundant, but thanks to modern grocery availability, it’s now a year-round favorite. Whether served as a cozy weeknight meal or a showstopper at gatherings, this dish bridges comfort food and fresh flavors effortlessly.
How it fits in today’s cooking
Today, Cheesy Zucchini Ravioli Delight fits perfectly into healthy, low-carb lifestyles without sacrificing flavor. Busy cooks love it because prep is quick, and it pairs well with everything from a crisp salad to garlic bread. For a heartier twist, some add ground turkey or mushrooms, while others keep it vegan with dairy-free cheese. It’s also a hit at potlucks, proving that comfort food can be both wholesome and crowd-pleasing.
Seasonal eating trends
keep this dish relevant, too. In spring, fresh basil brightens it up, while winter calls for a sprinkle of nutmeg. If you’re looking for more ways to enjoy zucchini, check out our zucchini recipe roundup. And for those who love cheesy goodness, our comfort food classics collection offers plenty of inspiration. Whether you stick to the original or make it your own, Cheesy Zucchini Ravioli Delight remains a timeless favorite.
Taste and Texture
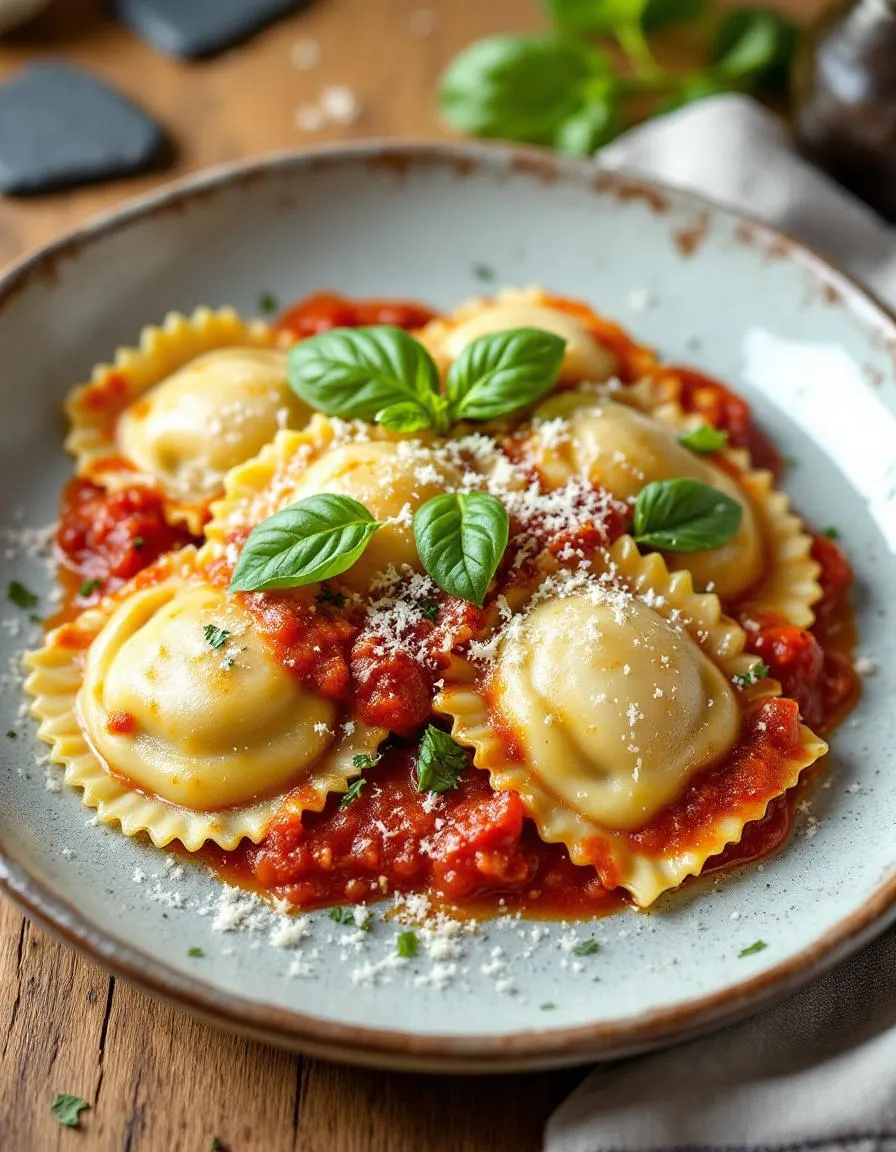
What makes it delicious
Cheesy Zucchini Ravioli Delight bursts with rich, savory flavors and a satisfying mix of textures. The tender zucchini ribbons wrap around a creamy, melted cheese filling, creating a luscious bite that melts in your mouth. Fresh herbs like basil and oregano add a fragrant, earthy note, while a hint of garlic infuses every layer with warmth. The dish balances richness with a slight crispness from the zucchini, making each forkful irresistible. Whether you savor it fresh from the oven or as leftovers, Cheesy Zucchini Ravioli Delight delivers comfort and freshness in every bite.
Boosting the flavor
Elevate your Cheesy Zucchini Ravioli Delight with a few easy tweaks. For a tangy twist, drizzle with a lemon-herb sauce or sprinkle with grated Parmesan for extra umami depth. If you love heat, add red pepper flakes or a dash of smoked paprika. Pair it with a light summer salad to balance the richness, or try a side of garlic bread for a crispy contrast. Experiment with fresh herbs like thyme or rosemary to layer even more aroma into this already irresistible dish.
Always pat the zucchini dry before using it to prevent excess moisture in your Cheesy Zucchini Ravioli Delight. Additionally, use fresh ricotta for the creamiest filling, and lightly salt the zucchini slices to draw out extra water. For the best texture, cook the ravioli in small batches so they don’t stick together. Finally, let the dish rest for a few minutes after baking so the flavors meld perfectly.
Mistakes to avoid
Avoid overfilling the ravioli, as this can cause them to burst during cooking. Instead, use a measured teaspoon of filling for even results. Also, don’t skip preheating the oven, as uneven heat can lead to soggy ravioli. For more on perfecting pasta dishes, check out our guide on cooking pasta al dente. Another common mistake is using watery sauce, which can make the dish soggy. For a thicker, richer sauce, try our homemade marinara tips to elevate your Cheesy Zucchini Ravioli Delight.
g-suggestions">Serving and Pairing Suggestions
How to serve this dish
For a stunning presentation, plate your Cheesy Zucchini Ravioli Delight on a white or pastel ceramic dish to let the vibrant colors shine. Meanwhile, drizzle a swirl of basil pesto or marinara sauce around the edges for an elegant touch. Alternatively, top each serving with a sprinkle of fresh herbs like parsley or microgreens to add freshness and contrast. Since this dish feels both cozy and sophisticated, it works beautifully for date nights, holiday gatherings, or even a fancy weeknight dinner. To make it extra special, serve Cheesy Zucchini Ravioli Delight alongside a crisp side salad or crusty bread for dipping.
What goes well with it
A light, citrusy white wine like Pinot Grigio perfectly balances the richness of Cheesy Zucchini Ravioli Delight. Similarly, a refreshing cucumber mint lemonade offers a non-alcoholic option that enhances the dish’s fresh flavors. For sides, try pairing it with a simple arugula salad with lemon vinaigrette or our popular Garlic Parmesan Roasted Asparagus. If you love dipping sauces, our Creamy Sun-Dried Tomato Dip adds a tangy twist that complements the cheesy filling. Each pairing brings out the best in this comforting yet elegant meal.
math-faq-block">
What ingredients do I need for Cheesy Zucchini Ravioli Delight?
You’ll need zucchini (sliced thin), ricotta cheese, mozzarella, Parmesan, egg, garlic, Italian seasoning, and marinara sauce. Cheesy Zucchini Ravioli Delight replaces traditional pasta with zucchini slices for a lighter twist.
Can I make Cheesy Zucchini Ravioli Delight ahead of time?
Yes! Assemble the dish without baking, cover tightly, and refrigerate for up to 24 hours. When ready, bake as directed—Cheesy Zucchini Ravioli Delight tastes just as fresh.
Is Cheesy Zucchini Ravioli Delight keto-friendly?
Absolutely! With zucchini replacing pasta and high-fat cheeses, this dish fits a keto diet. One serving of Cheesy Zucchini Ravioli Delight has just 5g net carbs.
ank-math-faq-item">
How do I prevent watery zucchini in Cheesy Zucchini Ravioli Delight?
Salt the zucchini slices and let them sit for 10 minutes to draw out moisture. Pat them dry before assembling—this keeps your Cheesy Zucchini Ravioli Delight perfectly textured.