Introduction
There is something truly magical about the aroma of gingerbread that instantly wraps you in a warm, nostalgic hug. Now, imagine that cozy feeling baked into a soft, decadent cookie with a surprise creamy center. These Gingerbread Cheesecake Cookies are not just a dessert; they are a heartfelt experience, combining the best of two beloved worlds into one unforgettable holiday treat that will have everyone begging for the recipe.
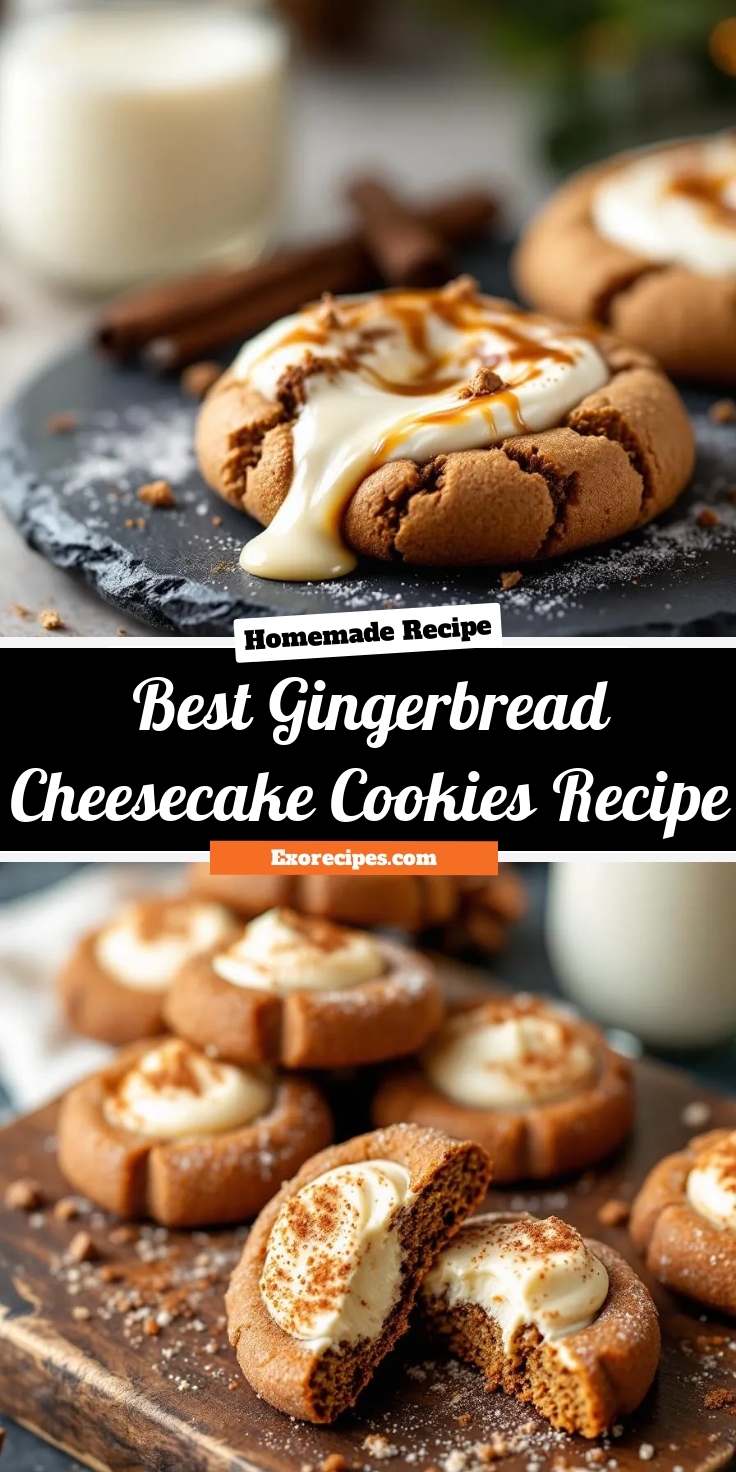
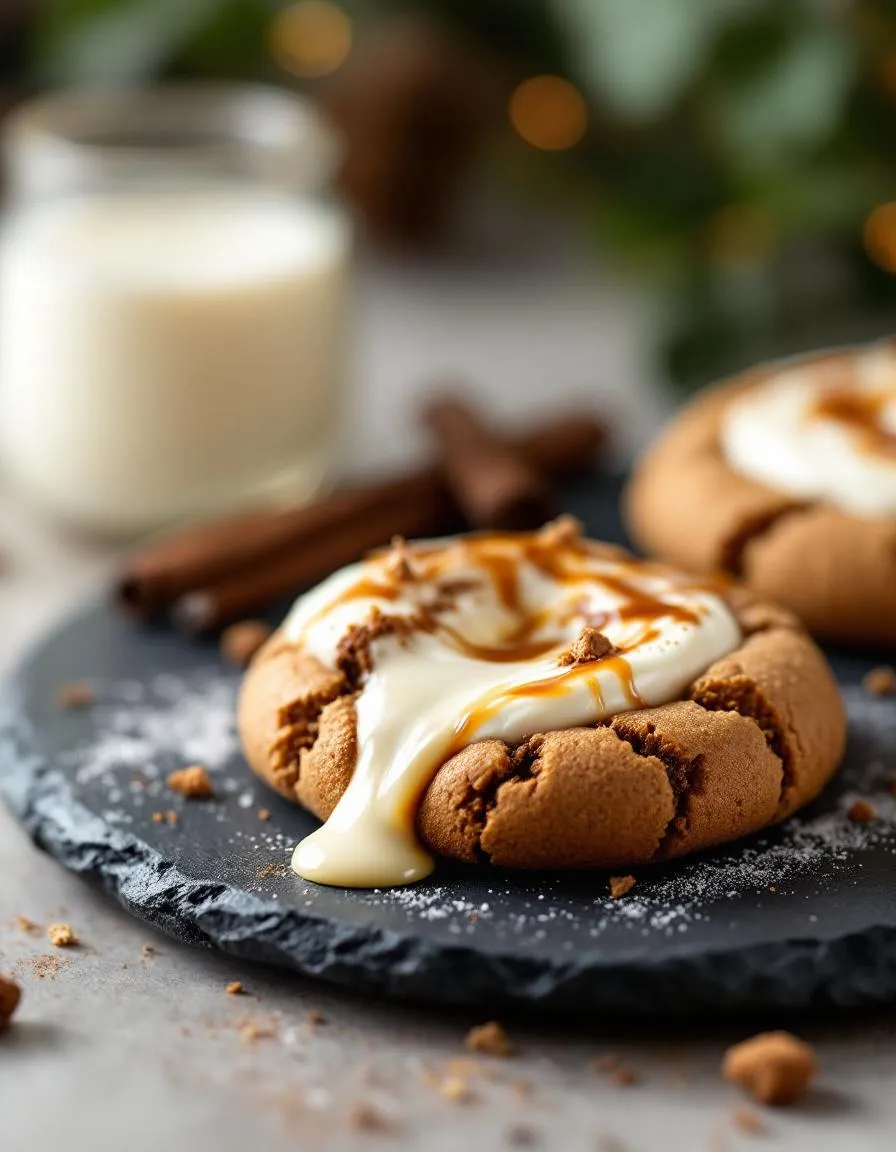
Gingerbread Cheesecake Cookies are a festive innovation, essentially a soft, spiced gingerbread cookie enveloping a rich, tangy cheesecake filling. This creation matters because it elevates classic holiday baking, offering a sophisticated and impressive cookie that stands out on any dessert platter. Furthermore, it perfectly captures the spirit of the season in a single, handheld bite. This recipe fits our blog’s tone beautifully, as we always strive to share unique and approachable recipes that create lasting memories around food. For instance, if you enjoy these, you might also love our ultimate guide to creating the perfect cheesecake for a larger-scale dessert. Ultimately, these cookies deliver the familiar comfort of gingerbread with the indulgent, creamy surprise of cheesecake, making them an instant classic for your cookie exchange or family gathering. They are surprisingly simple to make, yet the result looks and tastes incredibly professional. Moreover, the process of making them is a joyful activity, much like crafting our famous gingerbread cookies, but with an extra step that yields a spectacular payoff.
Why I Love This Recipe
I absolutely adore this recipe because it reminds me of baking with my grandmother. She always made the most incredible gingerbread houses, and the scent of molasses and spice brings me right back to her kitchen. However, my own twist with the cheesecake center feels like a modern homage to her tradition. Every time I pull a batch of these Gingerbread Cheesecake Cookies from the oven, I feel like I am both honoring the past and creating new, delicious memories for my own family to cherish.
Health and Nutrition
Why it’s good for your body
Believe it or not, these Gingerbread Cheesecake Cookies offer some surprising benefits. For instance, ginger, a star ingredient, actively soothes your stomach and fights inflammation. Furthermore, molasses provides a rich source of iron and calcium, which directly supports your bone health and energy levels. Consequently, enjoying one of these spiced treats does more than just satisfy your sweet tooth.
Moreover, the creamy cheesecake element contributes a valuable amount of protein and calcium. Therefore, these Gingerbread Cheesecake Cookies deliver a more balanced snack compared to many conventional desserts. Additionally, cinnamon, another key spice, helps regulate blood sugar levels. Ultimately, this combination of wholesome ingredients makes each cookie a flavorful and somewhat nutritious indulgence.
Finally, the warmth of these spices can actually boost your mood and metabolism. So, when you savor a Gingerbread Cheesecake Cookie, you are treating your body to a host of hidden advantages. In conclusion, this delightful dessert cleverly combines taste with tangible wellness perks.
How it fits in a healthy lifestyle
These cookies perfectly complement a balanced diet when you enjoy them mindfully. Think of them as a special treat within your overall eating pattern, not an everyday occurrence. Savoring one with a cup of tea or after a nutritious meal helps prevent overindulgence and keeps your health goals on track.
You can easily adapt the recipe to meet specific dietary needs. For a gluten-free version, simply swap the all-purpose flour for your favorite gluten-free flour blend. If you are monitoring your sugar intake, consider reducing the molasses slightly or exploring a natural sugar alternative. Pairing a cookie with a source of protein, like a handful of nuts, can also help create a more satisfying and balanced snack that keeps you full longer. For more ideas on creating satisfying treats, explore our guide to healthy baking substitutions that don’t sacrifice flavor.
Print
Gingerbread Cheesecake Cookies
Description
Soft, spiced gingerbread cookies with a creamy cheesecake swirl and a hint of molasses.
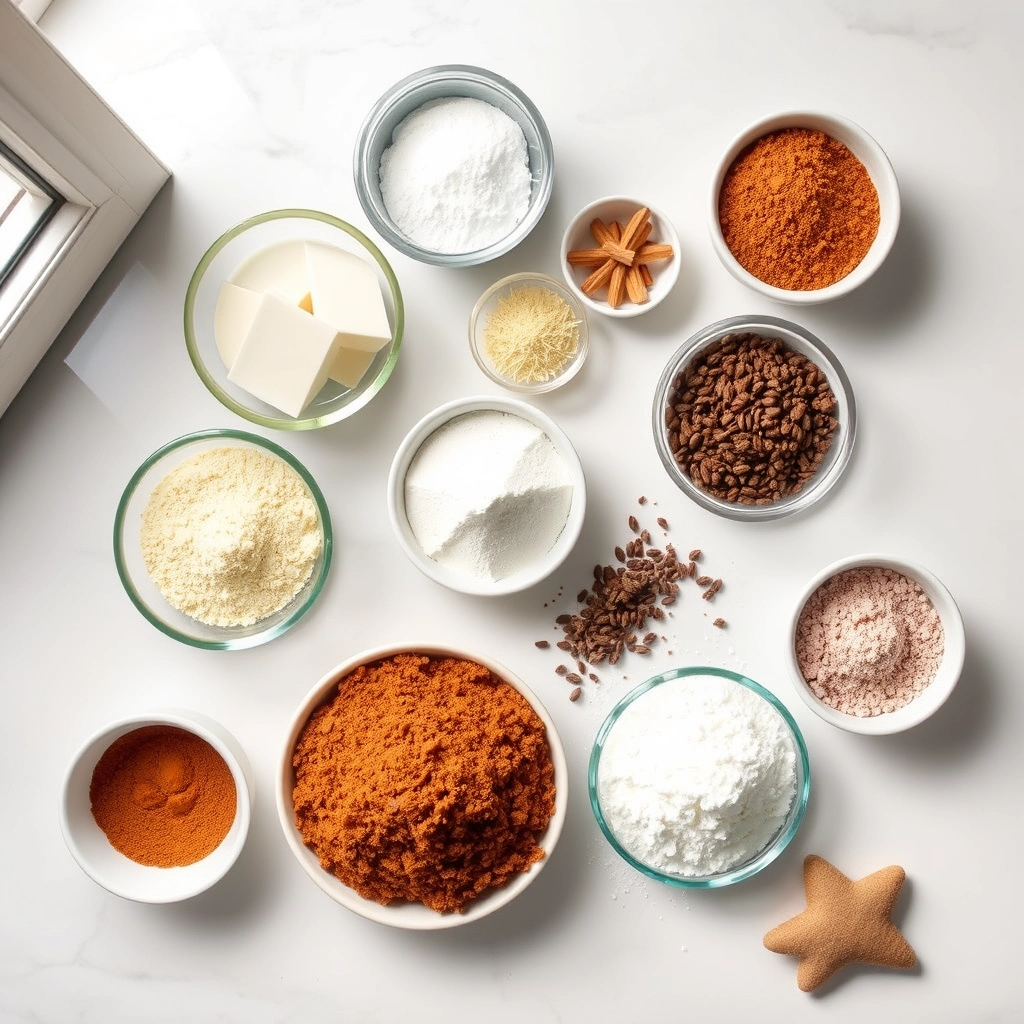
Ingredients
For the Crust:
- 1 cup all-purpose flour
- 1 tsp ground ginger
- 1/2 tsp ground cinnamon
- 1/4 tsp ground cloves
- 1/4 tsp baking soda
- 1/4 tsp salt
- 4 tbsp unsalted butter, softened
- 1/4 cup brown sugar
- 1/4 cup molasses
- 1 large egg yolk
- 4 oz cream cheese, softened
- 2 tbsp granulated sugar
- 1/2 tsp vanilla extract
Instructions
1. Prepare the Crust:
- Preheat oven to 350°F (175°C). Line a baking sheet with parchment paper.
- In a medium bowl, whisk together flour, ginger, cinnamon, cloves, baking soda, and salt.
- In a large bowl, beat butter and brown sugar until creamy. Add molasses and egg yolk; mix well. Gradually blend in dry ingredients until dough forms.
- In a small bowl, mix cream cheese, granulated sugar, and vanilla until smooth.
- Drop tablespoon-sized scoops of dough onto the baking sheet. Make a small indentation in each, add 1/2 tsp cream cheese mixture, and lightly swirl with a knife.
- Bake for 10-12 minutes until edges are set. Cool on the baking sheet for 5 minutes before transferring to a wire rack.
Notes
You can customize the seasonings to taste.
How to Prepare This Dish
Steps and time-saving tips
First, gather all your ingredients to make the process smooth. Cream the softened butter with both sugars until the mixture becomes light and fluffy. Next, beat in the egg and molasses until everything combines perfectly. In a separate bowl, whisk together your dry ingredients like flour and spices. Gradually add these dry ingredients to your wet mixture, stirring just until a soft dough forms. For a major time-saving tip, use a cookie scoop to portion the dough onto your baking sheets; this ensures even baking and saves you a messy cleanup. Now, gently press your thumb into the center of each cookie dough ball to create a little well. Fill each well with a generous teaspoon of the cheesecake filling you prepared earlier. Finally, bake your Gingerbread Cheesecake Cookies until the edges look set. Let them cool completely on the pan so the filling can firm up beautifully.
Mistakes I’ve made and learned from
I’ve definitely had my share of kitchen mishaps with these Gingerbread Cheesecake Cookies. My biggest mistake was using cream cheese straight from the fridge, which resulted in a lumpy filling that refused to incorporate smoothly no matter how much I mixed. I learned that taking the time to let all your dairy ingredients, especially the cream cheese, truly come to room temperature is non-negotiable for a silky, perfect filling. Another hard lesson was overbaking them, which made the cookies dry and caused the delicate cheesecake center to crack. For more on getting that perfect texture, my guide on avoiding common baking errors was a lifesaver. Now, I always set a timer for the minimum bake time and check for doneness a minute early. Trust me, a soft, slightly underbaked center is far superior to a dry one. If your filling ever does crack, don’t panic. A simple cream cheese drizzle covers a multitude of sins and adds even more flavor.