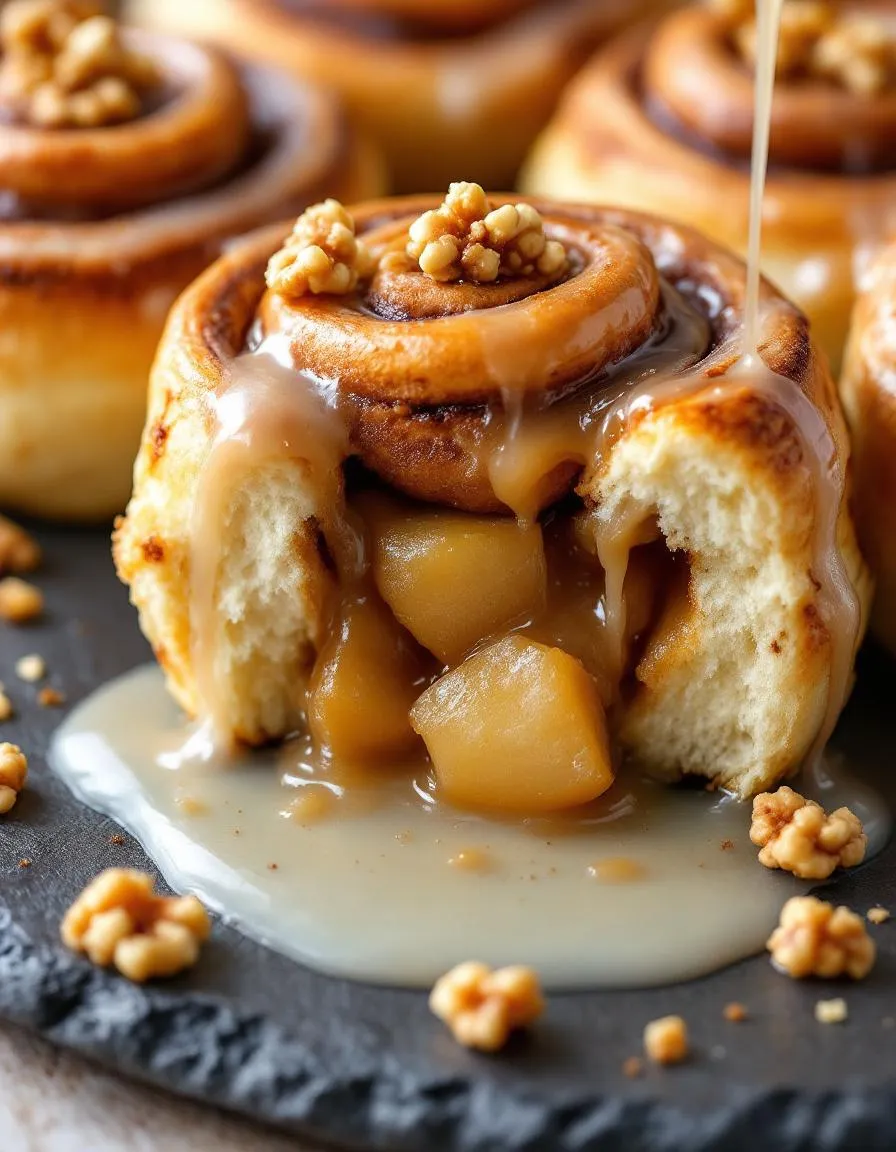
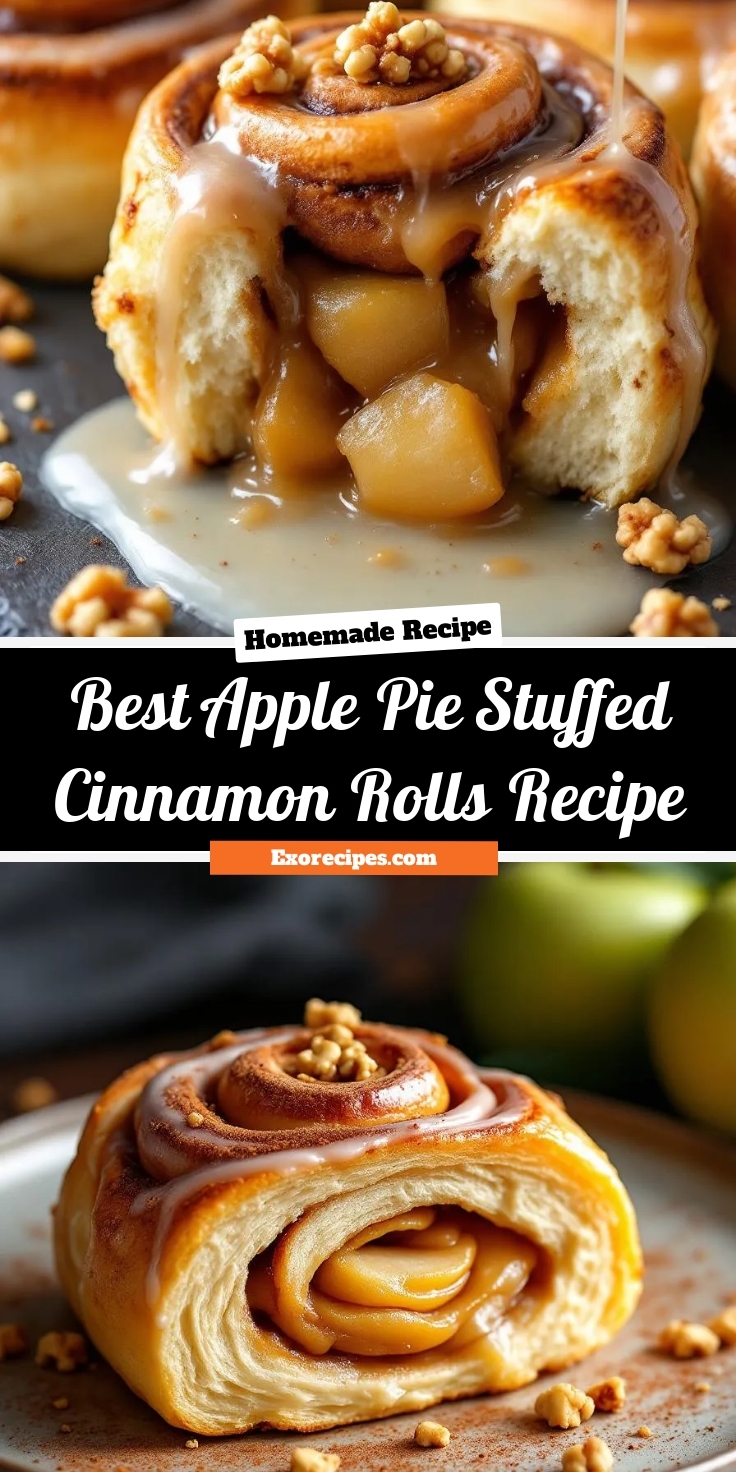
Is there any aroma more comforting than cinnamon and apples baking together? Honestly, that smell instantly transports me to my happiest autumn memories. Now, imagine taking that classic, heartwarming feeling and rolling it into the most incredible pastry you have ever tasted. That is the exact experience these Apple Pie Stuffed Cinnamon Rolls promise. They combine two beloved desserts into one show-stopping breakfast or treat that will absolutely wow your family and friends.
So what exactly are Apple Pie Stuffed Cinnamon Rolls? Fundamentally, they are soft, fluffy yeast rolls swirled with a classic cinnamon-sugar filling. However, the magic happens with a generous layer of spiced, tender apple pie filling tucked inside before baking. Ultimately, this creates a decadent pastry where every single bite delivers the gooey goodness of a cinnamon roll and the nostalgic, fruity flavor of homemade apple pie. This recipe matters because it takes a familiar favorite and elevates it into something extraordinary and share-worthy. It is the perfect project for a weekend baking session, filling your kitchen with an incredible scent and resulting in a treat that feels both special and deeply familiar. This recipe fits our blog’s tone perfectly because we always strive to create approachable yet impressive dishes that bring people joy. If you are looking for other fantastic baking projects that use similar skills, consider our perfect Homemade Dinner Rolls as a great starting point for working with yeast dough. Furthermore, the apple pie filling technique can also be used in our famous Apple Hand Pies if you want a more portable option. This recipe is truly a celebration of from-scratch baking and the wonderful flavors of the season.
Why I Love This Recipe
I have a profound love for this recipe because it perfectly merges two of my childhood favorites. My grandmother always made apple pie for holidays, and my mom would bake cinnamon rolls on lazy Sunday mornings. Creating Apple Pie Stuffed Cinnamon Rolls feels like honoring both of them in the most delicious way possible. I genuinely love how the process fills my entire home with a scent that brings everyone running to the kitchen. Seeing the look on my family’s faces when I pull the pan out of the oven, with the icing dripping down the sides, is a feeling I cherish every single time.
Health and Nutrition
Why it’s good for your body
Believe it or not, this treat offers some genuine nutritional perks. First, each Apple Pie Stuffed Cinnamon Roll packs a serving of fruit. Apples provide essential vitamins and a powerful dose of fiber, which supports good digestion and helps you feel full. Furthermore, cinnamon brings its own set of benefits; this warming spice boasts anti-inflammatory properties and may help regulate blood sugar.
Consequently, choosing a dessert with real fruit and spices is a smarter move than options with only empty calories. Additionally, the warmth of baked apples and cinnamon creates a deeply satisfying experience. This satisfaction means you can fully enjoy a single roll without feeling deprived later. Ultimately, these Apple Pie Stuffed Cinnamon Rolls deliver comfort and nutrition in one delicious package. Enjoy them knowing you are giving your body something good.
How it fits in a healthy lifestyle
Enjoying these cinnamon rolls fits perfectly into a balanced approach to eating. Think of them as a celebratory breakfast for a weekend brunch or a special dessert rather than an everyday item. This mindset allows you to savor the experience without guilt. For a more nutrient-dense version, you can easily use whole wheat flour or a gluten-free flour blend in the dough.
Pairing a roll with a source of protein, like a Greek yogurt or a handful of nuts, can also help balance your blood sugar and keep energy levels steady. Remember, a healthy lifestyle includes room for joyful eating and the foods you love. It is all about balance and making mindful choices most of the time. For more ideas on creating satisfying and nutritious treats, explore our guide to healthy baking substitutes that don’t sacrifice flavor.
Soft cinnamon rolls filled with spiced apple pie filling and topped with a sweet glaze.
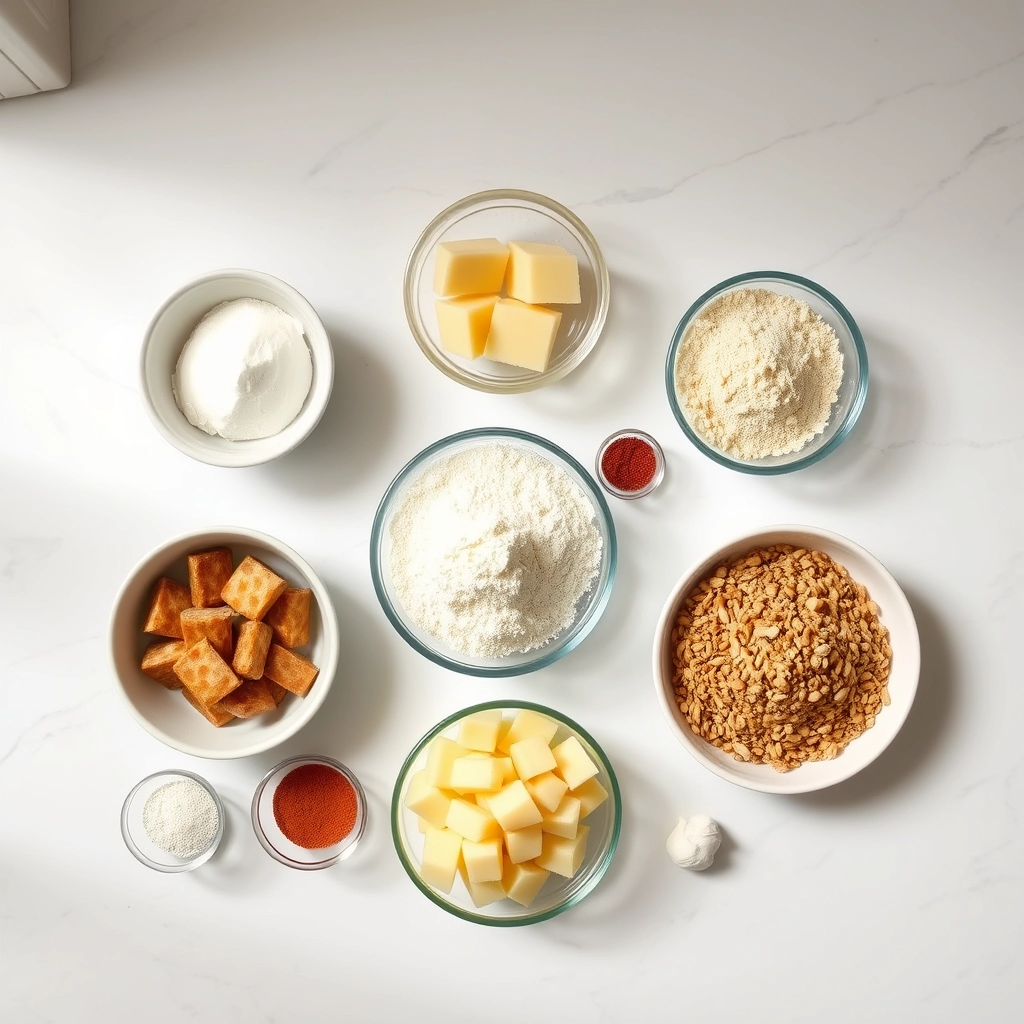
Ingredients
Scale
For the Crust:
1 can refrigerated cinnamon roll dough
2 medium apples, peeled and diced
2 tbsp butter
1/4 cup brown sugar
1 tsp cinnamon
1/4 tsp nutmeg
1 tbsp lemon juice
1/4 cup chopped walnuts (optional)
Instructions
1. Prepare the Crust:
Preheat oven to 375°F (190°C). Grease a baking dish.
In a skillet, melt butter over medium heat. Add apples, brown sugar, cinnamon, nutmeg, and lemon juice. Cook for 5-7 minutes until apples are tender. Stir in walnuts if using.
Unroll cinnamon roll dough. Spoon apple mixture along the center of each roll. Roll up tightly and place in baking dish.
Bake for 20-25 minutes until golden brown. Drizzle with included icing while warm.
Notes
You can customize the seasonings to taste.
How to Prepare This Dish
Steps and time-saving tips
First, grab a large mixing bowl and whisk together your dry ingredients for the dough. Next, gently warm your milk and butter before combining them with the yeast mixture. This step wakes the yeast up perfectly for a fluffy rise. Then, pour the wet ingredients into the dry ones and stir until a shaggy dough forms. Turn this out onto a floured surface and knead for about 7 minutes until it becomes smooth and elastic. Meanwhile, you can start preparing your apple pie filling. Simply toss diced apples with cinnamon, sugar, and a pinch of nutmeg in a separate bowl. For a huge time-saver, use pre-made dough from the store; honestly, it works wonderfully when you are in a rush. After your dough doubles in size, roll it out into a large rectangle on a floured surface. Subsequently, spread a generous layer of softened butter over the entire sheet of dough. Then, evenly sprinkle your spiced apple mixture all over the top, leaving a small border around the edges. Carefully and tightly roll the dough into a log, starting from the long side. Finally, use a sharp serrated knife or even unflavored dental floss to slice the log into even rolls. Place these swirls of joy into a prepared baking dish, let them rise again, and bake until golden brown.
and-learned-from">Mistakes I’ve made and learned from
I have absolutely learned the hard way that rushing the rise is a recipe for dense rolls. One time, I placed my bowl in a spot that was a tad too warm, and the yeast actually over-proofed, which gave my Apple Pie Stuffed Cinnamon Rolls a weird, yeasty taste. Now, I always find a warm, draft-free spot and just practice a little patience. Another classic blunder of mine was overstuffing the rolls with too much filling. It seemed like a great idea at the time, but it caused everything to ooze out during baking and created a sticky, burnt mess on the bottom of my pan. Through trial and error, I discovered that a moderate, even layer is the true secret to a perfect swirl that holds together. For more on getting that rise just right, my guide on why your yeast might not be foaming covers all the basics. And if your filling is giving you trouble, my tips for a non-leaking cinnamon roll filling will save your baking pan and your sanity.
Cultural Connection and Variations
Where this recipe comes from
We often think of apple pie and cinnamon rolls as separate, beloved classics. However, someone brilliantly decided to unite them. This fusion dish marries the homestyle comfort of a fruit pie with the soft, spiced sweetness of a pastry. My grandmother, for instance, always made her cinnamon rolls with a jar of homemade apple butter. Consequently, her version hinted at this glorious mash-up long before it trended online.
Different regions put t
heir own spin on the concept. In the American South, cooks might add a handful of pecans to the filling for a satisfying crunch. Meanwhile, in parts of Europe, bakers often incorporate raisins or currants, echoing traditional strudel fillings. Some families even add a sharp cheddar cheese twist, paying homage to the classic apple pie and cheese pairing. Ultimately, every variation celebrates the same core idea: wrapping the iconic flavors of fall into a warm, swirled delight. The beauty of Apple Pie Stuffed Cinnamon Rolls lies in its adaptable, welcoming nature.
How it fits in today’s cooking
This recipe absolutely thrives in modern kitchens. Firstly, it perfectly captures the cozy essence of autumn and holiday mornings. Families now bake these rolls for Thanksgiving breakfast or as a special treat after a day of apple picking. Moreover, contemporary cooks love adapting it to fit busy schedules. Many use pre-made dough or prepare the rolls the night before for an easy, impressive bake.
Its popularity also stems from its incredible versatility. You can easily make a stunning chocolate babka for a chocolatey brunch, but these cinnamon rolls offer a fruity, spiced alternative. Furthermore, bakers often experiment with different fillings, like using pears or a dash of bourbon. This spirit of innovation keeps the recipe fresh and exciting. For anyone seeking another fantastic brunch centerpiece, a classic French toast casserole always delivers. Ultimately, Apple Pie Stuffed Cinnamon Rolls secure their place by blending tradition with delicious, modern creativity.
>Taste and Texture
What makes it delicious
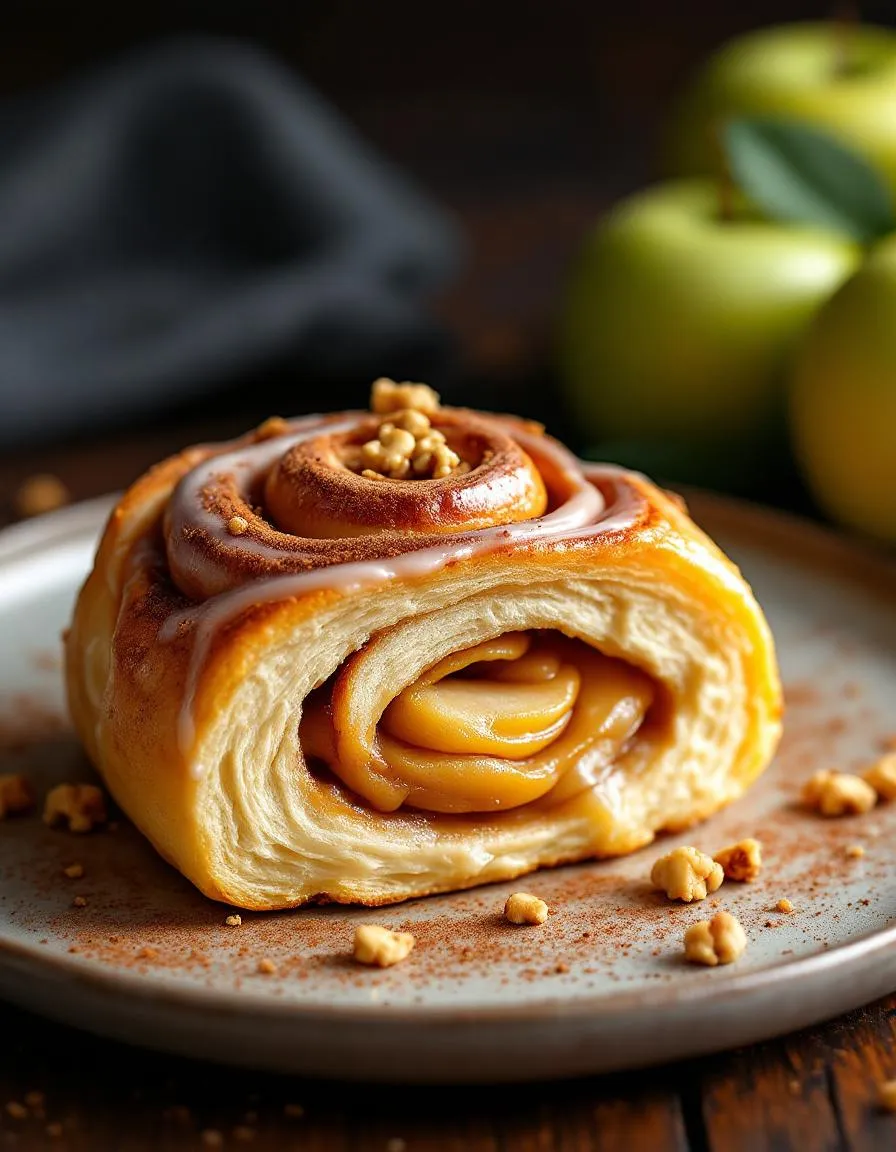
These Apple Pie Stuffed Cinnamon Rolls deliver a truly decadent experience. First, you encounter the soft, incredibly fluffy dough that yields with a gentle pull. Next, your teeth sink into the warm, spiced apple pie filling, which offers tender, slightly chewy chunks of fruit. The aroma alone is intoxicating, filling your kitchen with the comforting scent of baked apples, cinnamon, and brown sugar. Ultimately, each bite of these Apple Pie Stuffed Cinnamon Rolls perfectly balances sweet, gooey filling with a soft, pillowy base for a heavenly treat.
Boosting the flavor
For an even more luxurious experience, consider a simple cream cheese glaze drizzle. Alternatively, a sprinkle of coarse sugar on top before baking creates a delightful crunchy texture. If you adore warm spices, a pinch of cardamom or nutmeg in the filling will deepen the flavor profile wonderfully. For a perfect pairing, serve your rolls warm alongside a scoop of vanilla ice cream. Explore our guide on homemade vanilla ice cream for the ultimate combination. Furthermore, using a high-quality selecting cinnamon makes a remarkable difference in achieving that signature warm, aromatic spice.
Tips for Success
Best practices for results
First, always chill your dough thoroughly before rolling it out. This crucial step prevents the butter from melting and guarantees your Apple Pie Stuffed Cinnamon Rolls will hold their beautiful, flaky layers. Furthermore, use a sharp knife or unflavored dental floss to slice the rolls for clean, defined edges. For the best texture, always place them seam-side down in your pan. Finally, do not skip the step of letting them rise until they are visibly puffy before baking.
Mistakes to avoid
Avoid overstuffing your rolls with the apple pie filling, as this can cause them to burst open during baking. Instead, use a moderate amount and spread it evenly. Additionally, do not add your yeast to overly hot liquid, or you will kill it and your dough will not rise. For more guidance on this, check our guide on why dough doesn’t rise. Moreover, resist the urge to overbake them; you want the centers to be soft and fully cooked. Pull them out when they are golden brown. If you are new to working with yeast, our baking with yeast guide covers all the fundamentals for perfect results every single time.
Serving and Pairing Suggestions
How to serve this dish
Present your warm Apple Pie Stuffed Cinnamon Rolls on a beautiful rustic platter for a truly inviting tablescape. For special occasions, drizzle each roll with a simple vanilla glaze and a light dusting of cinnamon sugar. Consequently, this creates a gorgeous, bakery-worthy finish everyone will adore. Serve these decadent rolls as the star of your holiday brunch or as a cozy weekend treat. Ultimately, their incredible aroma and homestyle appeal make any morning feel celebratory.
h-it">What goes well with it
Pair these indulgent Apple Pie Stuffed Cinnamon Rolls with a hot mug of our creamy Vanilla Chai Latte for the ultimate cozy combination. Alternatively, a scoop of vanilla bean ice cream transforms them into an unforgettable dessert. For a brunch spread, you must offer our refreshing Berry Breakfast Parfait alongside to balance the sweetness with a bright, tangy contrast.
Can you make apple pie stuffed cinnamon rolls ahead of time?
Absolutely! You can assemble the apple pie stuffed cinnamon rolls the night before, cover them tightly, and refrigerate them overnight. Simply let them sit at room temperature for about 30 minutes before baking in the morning for a fresh, warm breakfast.
ank-math-faq-item">
What kind of apples are best for apple pie stuffed cinnamon rolls?
For the best texture and flavor, use firm, tart apples that hold their shape when baked, such as Granny Smith or Honeycrisp. These varieties provide a delicious contrast to the sweet, soft dough and prevent the filling from becoming too mushy in your Apple Pie Stuffed Cinnamon Rolls.
How do you prevent the filling from leaking out?
To prevent leaking, ensure your apple pie filling is not too watery by cooking it down slightly to thicken it before spreading. Also, be careful not to overfill the dough and pinch the seams of your Apple Pie Stuffed Cinnamon Rolls very tightly before the second rise and baking.
Can you freeze apple pie stuffed cinnamon rolls?
Yes, these cinnamon rolls freeze very well either before or after baking. For best results, freeze them after assembling and before the final rise, then thaw overnight in the refrigerator and bake as directed. You can also freeze baked rolls and gently reheat them in the oven.
div>
Easy Slow Cooker Chicken Tortilla Soup Recipe
Introduction
There is something incredibly comforting about a warm bowl of soup on a crisp day, especially when it practically makes itself. If you crave a meal that soothes the soul without demanding hours in the kitchen, you have found your perfect match. This Slow Cooker Chicken Tortilla Soup delivers deep, complex flavors with minimal effort, wrapping you in a cozy embrace with every single spoonful. Ultimately, it is the ultimate solution for a hectic weeknight that still feels special and deeply satisfying.
Slow Cooker Chicken Tortilla Soup is a hearty, Tex-Mex inspired dish that beautifully layers tender shredded chicken, a rich tomato-based broth, and vibrant spices like cumin and chili powder. Furthermore, the magic truly happens as it simmers away all day, allowing the flavors to meld into something extraordinary. This recipe matters because it solves a real problem for busy people; it provides a wholesome, from-scratch dinner that requires little more than some quick chopping and dumping of ingredients. It perfectly fits our blog’s mission to deliver reliable, family-friendly meals that respect your time without sacrificing an ounce of flavor. For those who adore this hands-off cooking method, our ultimate guide to slow cooker basics offers fantastic tips to ensure every recipe is a success. This soup is incredibly versatile, welcoming countless toppings like creamy avocado, sharp cheese, and crunchy tortilla strips. In fact, its adaptability makes it a year-round favorite, providing warmth in the winter and a surprisingly light option for warmer months when you top it with a bright squeeze of lime. If you enjoy the fusion of these flavors, you might also love exploring our popular easy taco bar for another fun and customizable meal idea.
Why I Love This Recipe
This Slow Cooker Chicken Tortilla Soup holds a special place in my heart because it is my go-to recipe for both busy days and casual gatherings with friends. I love how the aroma fills my home all afternoon, building anticipation for a dinner that always delivers. Personally, I find immense joy in customizing each bowl with different toppings, making everyone at the table feel like they got a meal made just for them. It is more than just dinner; it is a warm, delicious experience that brings people together with minimal stress.
Health and Nutrition
Why it’s good for your body
Slow Cooker Chicken Tortilla Soup delivers a powerful nutritional punch in every comforting bowl. First, the lean chicken breast provides a fantastic source of high-quality protein. Consequently, this protein helps your body build and repair muscle tissue while also keeping you feeling full and satisfied for hours. Furthermore, the blend of vegetables like tomatoes, onions, and peppers contributes essential vitamins and antioxidants. These nutrients actively support your immune system and help combat inflammation.
Additionally, the broth-based nature of this soup makes it naturally hydrating and lower in calories than creamy alternatives. Moreover, the spices, such as cumin and chili powder, do more than just add flavor; they actually offer their own anti-inflammatory benefits. Ultimately, this combination of lean protein, vibrant vegetables, and healing spices creates a truly wholesome meal. Therefore, enjoying a bowl of Slow Cooker Chicken Tortilla Soup is a delicious way to fuel your body right.
Finally, you can easily control the sodium content by using a low-sodium broth, making it a heart-smart choice. As a result, this soup supports cardiovascular health without sacrificing any flavor. Slow Cooker Chicken Tortilla Soup truly is a wellness powerhouse in a bowl.
How it fits in a healthy lifestyle
This soup seamlessly fits into a balanced eating plan. It naturally aligns with high-protein and gluten-free diets, making it a fantastic option for a wide audience. The lean protein from the chicken supports muscle maintenance, which is crucial for an active lifestyle. For those managing their weight, the high volume and fiber content promote satiety, helping you avoid less healthy snacks later.
Preparing a big batch of Slow Cooker Chicken Tortilla Soup is one of the best meal prep ideas for a busy week. You can have a healthy lunch or dinner ready in minutes, preventing last-minute takeout decisions. For a complete and satisfying meal, consider pairing it with a fresh side. A simple avocado salad would complement the soup’s flavors beautifully while adding healthy fats. It’s a practical, nourishing choice that makes eating well incredibly easy and delicious.
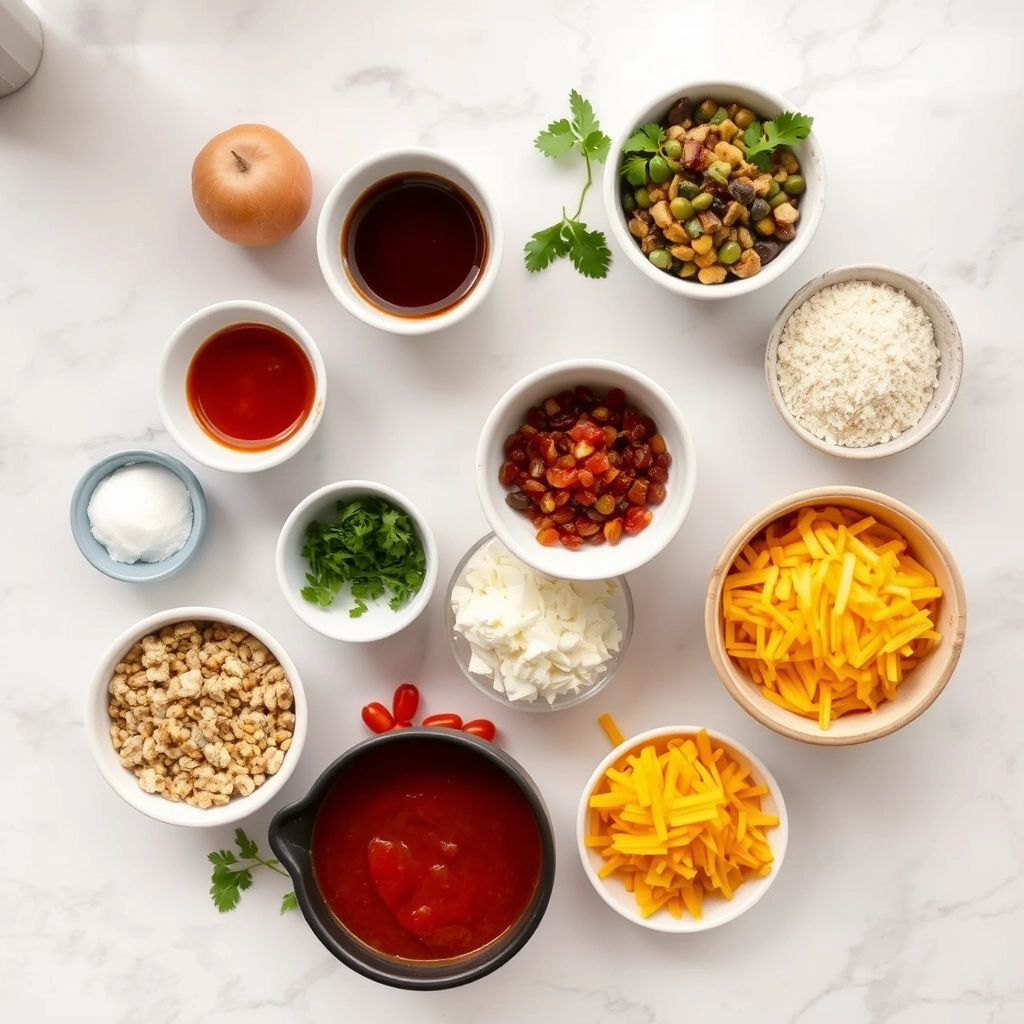
A comforting and flavorful soup with tender chicken, black beans, corn, and spices, simmered to perfection in the slow cooker.
Ingredients
Scale
For the Crust:
1 lb boneless, skinless chicken breasts
1 (15 oz) can black beans, drained and rinsed
1 (15 oz) can corn, drained
1 (14.5 oz) can diced tomatoes
4 cups chicken broth
1 medium onion, diced
2 cloves garlic, minced
1 tbsp chili powder
1 tsp cumin
1/2 tsp paprika
Salt and pepper to taste
Tortilla strips for serving
Avocado, lime wedges, and cilantro for garnish
Instructions
1. Prepare the Crust:
Place chicken breasts at the bottom of the slow cooker.
Add black beans, corn, diced tomatoes, onion, garlic, chili powder, cumin, paprika, salt, and pepper.
Pour chicken broth over all ingredients and stir gently to combine.
Cover and cook on low for 6-7 hours or high for 3-4 hours, until chicken is tender and easily shredded.
Remove chicken, shred with two forks, and return to the slow cooker. Stir to combine.
Serve hot, topped with tortilla strips, avocado slices, a squeeze of lime, and fresh cilantro.
Notes
You can customize the seasonings to taste.
How to Prepare This Dish
Steps and time-saving tips
First, grab your slow cooker and set it to low heat for the best flavor development. Next, simply dump all your pre-chopped ingredients right into the pot. This includes your chicken, black beans, corn, and diced tomatoes. Then, pour in your chicken broth and stir everything together thoroughly. Consequently, you ensure every ingredient gets coated in that delicious seasoned broth. Now, secure the lid and let your slow cooker work its magic for 6-8 hours. About thirty minutes before serving, carefully remove the chicken breasts and shred them using two forks. Afterward, return the shredded chicken to the pot and stir it back in. This step guarantees perfectly tender chicken in every single bite. Meanwhile, you can quickly prepare your toppings. For a fantastic time-saving tip, use a store-bought rotisserie chicken. Simply add the shredded meat during the last hour of cooking. Finally, ladle the hot soup into bowls and let everyone customize with their favorite garnishes.
Mistakes I’ve made and learned from
I have definitely learned a few lessons the hard way with this slow cooker chicken tortilla soup. Initially, I would add the chicken breasts completely frozen, which threw off my cooking time dramatically and left me with undercooked chicken. Now, I always thaw my chicken first for consistent, safe results. Another mistake was overloading the soup with salt too early, especially since the broth and canned goods reduce and concentrate over the long cook time. I wait until the very end to do my final seasoning taste test. Speaking of seasoning, I once made a bland batch because I didn’t toast my spices. This is a crucial step I learned from my guide on how to toast spices to unlock their full, deep flavor. And for the best results, always use a quality broth; my experiments with bland soup led me to create this homemade chicken broth recipe that makes all the difference.
This soul warming bowl of Slow Cooker Chicken Tortilla Soup carries the vibrant spirit of Mexican home cooking. Families in different regions of Mexico often put their own signature spin on it. For instance, in the Yucatán, they might add a splash of sour orange juice, while in Sonora, the soup often features a richer, deeper red chili base. My own abuela always insisted on frying her own strips of corn tortillas right before serving. Conversely, she considered store bought chips a minor kitchen sin.
Ultimately, this dish embodies resourcefulness and comfort. Cooks traditionally use what they have, simmering a whole chicken to create a rich broth and shredding the meat. The beauty of this recipe, however, lies in its adaptability. Some families add a spoonful of rice directly into the pot, while others prefer a squeeze of lime and a handful of fresh cilantro on top. No matter the variation, a great Slow Cooker Chicken Tortilla Soup always delivers a hearty, flavorful experience that feels like a hug in a bowl.
ays-cooking">How it fits in today’s cooking
This classic soup fits perfectly into our modern need for convenient, hands off meals. Busy home cooks absolutely love letting the slow cooker do all the work. Furthermore, they can easily adapt it for various dietary needs, making it a versatile staple for family dinners. Its set it and forget it nature means you can come home to a fully prepared, nutritious meal that the whole family will devour.
Today, we often see it as the ultimate comfort food for chilly evenings or a restorative meal when someone feels under the weather. Many people also pair it with other make ahead favorites. For example, it makes a fantastic starter before a main course of easy beef enchiladas. Similarly, its warm, brothy goodness complements the cool, creamy textures of a fresh avocado tomato salad. Ultimately, this soup continues to earn its place in our weekly rotations and our hearts.
Taste and Texture
What makes it delicious
This Slow Cooker Chicken Tortilla Soup offers a deeply satisfying and complex flavor profile. Initially, you experience a rich, savory broth that is both smoky and slightly tangy from the fire-roasted tomatoes and lime juice. Tender, shredded chicken then melts in your mouth, while soft black beans and sweet corn provide delightful bursts of texture. Ultimately, the warm, aromatic spices like cumin and chili powder create a fragrant and comforting aroma that fills your kitchen. Each spoonful of this Slow Cooker Chicken Tortilla Soup delivers a harmonious blend of hearty and fresh elements.
r">Boosting the flavor
You can easily amplify your soup with a few creative additions. For instance, stir in a spoonful of adobo sauce from canned chipotles to introduce a smoky heat that deepens the overall flavor. Furthermore, top your bowl with a generous handful of crispy tortilla strips, a dollop of cool crema, and fresh cilantro for contrasting textures. Consider serving it alongside a slice of our moist classic cornbread for the ultimate comforting meal. Finally, a squeeze of fresh lime juice just before eating brightens every bite, much like the zest in our favorite key lime pie recipe.
Tips for Success
Best practices for results
Always use fresh, high-quality spices for your Slow Cooker Chicken Tortilla Soup because they release the most flavor during the long cooking process. Furthermore, shred your chicken directly in the pot with two forks for the easiest and most consistent texture. For the best results, add your delicate toppings like avocado and fresh lime juice just before serving. Consequently, you will enjoy a perfect bowl of Slow Cooker Chicken Tortilla Soup every single time.
>Mistakes to avoid
Avoid adding all of your toppings too early; for instance, placing sour cream and tortilla strips in the pot at the start will make them soggy. Instead, always serve them fresh on the side. Additionally, do not overlook the browning step for your chicken, as it builds a deeper flavor foundation. If you are looking for more ways to keep your meals exciting, explore our simple meal prep ideas. Moreover, remember that slow cooker sizes vary, so do not overfill your pot. For guidance on selecting the right appliance, check out our guide to kitchen essentials.
Serving and Pairing Suggestions
How to serve this dish
First, present your Slow Cooker Chicken Tortilla Soup in a beautiful, wide-rimmed bowl. This simple step makes the meal feel extra special. Next, create a vibrant garnish bar for a fun, interactive experience. Consequently, everyone can customize their bowl with fresh toppings. For instance, set out bowls of crunchy tortilla strips, creamy avocado slices, zesty lime wedges, and fresh cilantro. Ultimately, this transforms your Slow Cooker Chicken Tortilla Soup into a festive centerpiece. Therefore, it becomes perfect for a casual family dinner or even a game day gathering with friends.
What goes well with it
Firstly, a crisp, cold beer perfectly balances the warm spices in this soup. A light Mexican lager or a citrusy IPA cleanses the palate wonderfully between each flavorful spoonful. For a non-alcoholic option, a sparkling agua fresca also works beautifully. Secondly, you absolutely need something for dipping. Our incredibly popular Easy Cheesy Garlic Bread soaks up the rich broth in the most delicious way. Alternatively, a side of our Avocado Corn Salad offers a cool, creamy contrast that truly highlights the soup’s smoky depth. Finally, this combination creates a completely satisfying and well-rounded meal.
Can you put raw chicken in a slow cooker for soup?
Yes, you can safely put raw chicken directly into the slow cooker for this soup. The long, slow cooking process at a consistent, low temperature will thoroughly cook the chicken, making it tender and easy to shred. This method is perfect for creating a flavorful base for your Slow Cooker Chicken Tortilla Soup.
How do you thicken chicken tortilla soup?
To thicken your Slow Cooker Chicken Tortilla Soup, you can use a cornstarch slurry by mixing one tablespoon of cornstarch with two tablespoons of cold water and stirring it into the hot soup. Alternatively, you can blend a portion of the soup, including some of the beans, and stir it back into the pot to create a creamier, thicker consistency.
ank-math-faq-item">
What to serve with chicken tortilla soup?
This hearty soup pairs wonderfully with a variety of sides. Classic toppings include crispy tortilla strips, diced avocado, a sprinkle of cotija or shredded cheese, and a dollop of sour cream or Greek yogurt. For a complete meal, serve it with a side of warm cornbread or a fresh, simple green salad.
How long does chicken tortilla soup last in the fridge?
Properly stored in an airtight container, your homemade Slow Cooker Chicken Tortilla Soup will last for 3 to 4 days in the refrigerator. The flavors often meld and improve after a day, making the leftovers just as delicious. Always be sure to reheat the soup thoroughly on the stovetop or in the microwave before serving.
Best Toffee Apple Pie Recipe – Homemade & Delicious
Introduction
Is there anything more comforting than the scent of baking apples and cinnamon wafting from your kitchen? Honestly, this aroma instantly transports me to my happiest autumn memories. Consequently, if you are craving a dessert that feels like a warm hug, you have found the perfect recipe. Today, we are making the ultimate celebration of the season: a decadent Toffee Apple Pie. This treat promises to become an instant classic at your holiday table.
So, what exactly is a Toffee Apple Pie? Essentially, it takes everything we adore about a traditional apple pie and elevates it to a spectacular new level. We start with a flaky, buttery crust that cradles a spiced apple filling. Then, we introduce the star of the show: rich, chewy toffee. This glorious addition creates a caramel-like sauce that soaks into the apples during baking. The result is an unforgettable symphony of sweet, tart, and buttery flavors in every single bite. This particular dessert matters because it transforms a simple family meal into a special occasion. Moreover, it perfectly fits our blog’s mission to share approachable recipes with a gourmet twist. For instance, if you want to master another foundational pastry, our guide on how to make pie crust is an excellent resource. Ultimately, this pie delivers the nostalgic comfort of a classic dessert while feeling exciting and new. It is the perfect centerpiece for Thanksgiving, but frankly, its deliciousness warrants making it all year long.
Why I Love This Recipe
This Toffee Apple Pie holds a very special place in my heart. My grandmother always made a simple apple pie for every family gathering, and I loved helping her in the kitchen. One year, I decided to put my own spin on her classic recipe by stirring in some chopped toffee bits. The look on her face after that first bite, a mix of surprise and pure delight, is a memory I will always cherish. Now, I bake this Toffee Apple Pie every fall to honor her tradition while adding my own chapter to our family’s story. It truly represents the joy of sharing food and creating new memories with loved ones, much like our favorite classic apple crisp does on a busy weeknight.
Health and Nutrition
Why it’s good for your body
Toffee Apple Pie offers more than just incredible flavor; it also provides some genuine nutritional value. First and foremost, the apples themselves are the star of the show. Consequently, they deliver a healthy dose of fiber and essential vitamin C. This fiber actively supports good digestion and helps you feel fuller for longer. Meanwhile, the cinnamon often found in this dessert contributes powerful antioxidants that fight inflammation.
Moreover, when you prepare this treat at home, you control the ingredients. Therefore, you can create a Toffee Apple Pie that uses natural sweeteners and whole-grain flour for an extra health boost. Ultimately, enjoying a slice means you are treating yourself to beneficial nutrients alongside that classic, comforting taste. In essence, this dessert can be a surprisingly wholesome choice for a sweet ending to any meal.
How it fits in a healthy lifestyle
You can absolutely enjoy Toffee Apple Pie as part of a balanced diet. The key, as with any indulgence, is mindful portion control. Savoring a single slice allows you to appreciate the rich flavors without overdoing it. Consider pairing your dessert with a source of protein, like a handful of nuts, to help manage blood sugar levels and keep you satisfied.
For those with specific dietary needs, this pie adapts beautifully. You can easily make a gluten-free version by using your favorite alternative flour blend. If you are watching your sugar intake, try reducing the sugar in the filling and letting the natural sweetness of the apples shine through. Remember, healthy eating is about the big picture. A lifestyle that includes balanced indulgence is a sustainable and joyful one. This pie fits perfectly into that philosophy.
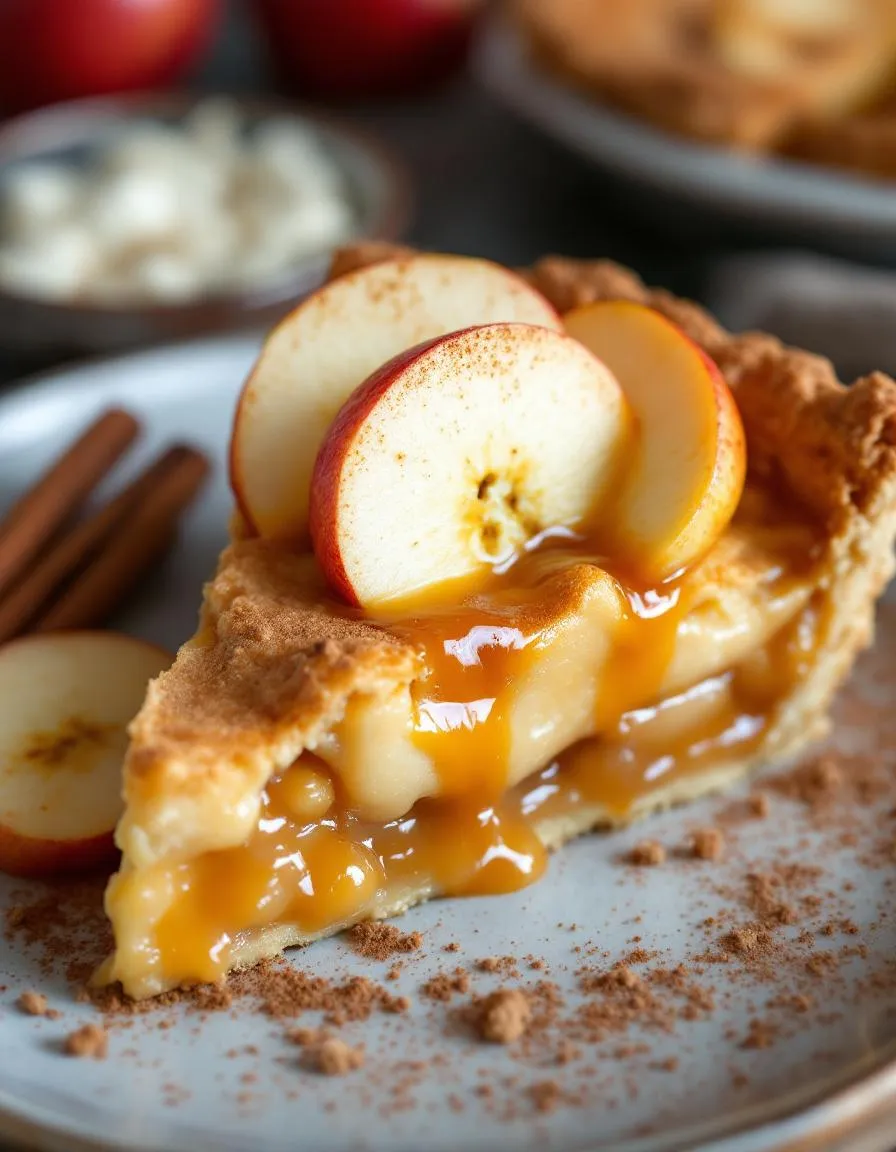
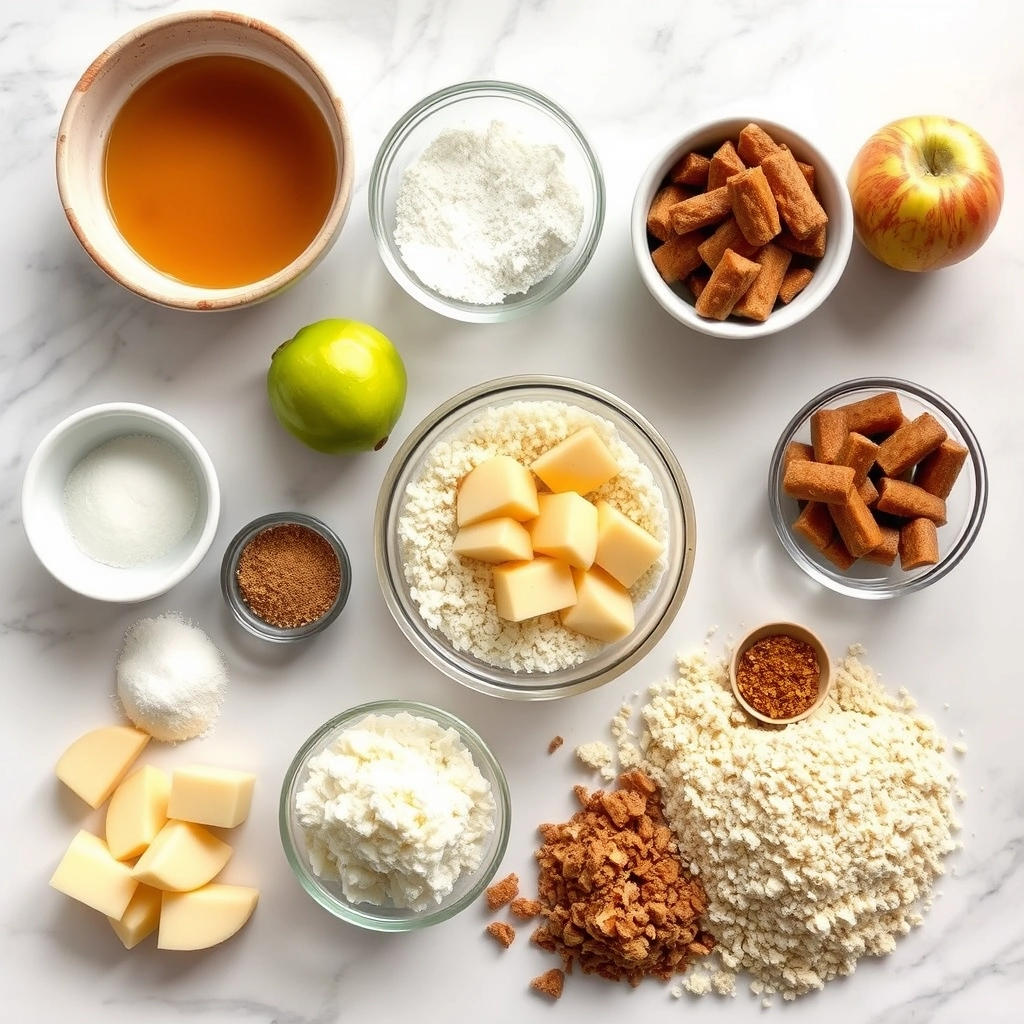
A decadent twist on classic apple pie with a rich toffee layer and buttery crust.
Ingredients
Scale
For the Crust:
2 pre-made pie crusts
6 large apples, peeled and sliced
1/2 cup brown sugar
1/4 cup granulated sugar
1/4 cup all-purpose flour
1 tsp cinnamon
1/4 tsp nutmeg
1/2 cup toffee bits
2 tbsp butter, cubed
1 egg, beaten for glaze
Instructions
1. Prepare the Crust:
Preheat oven to 375°F (190°C). Place one pie crust in a 9-inch pie dish.
In a large bowl, mix apples, sugars, flour, cinnamon, and nutmeg until coated.
Sprinkle half the toffee bits over the bottom crust. Add apple mixture and dot with butter.
Top with second crust, seal edges, and cut slits. Brush with beaten egg.
Bake for 45-50 minutes until golden. Sprinkle remaining toffee bits on top while warm.
Notes
You can customize the seasonings to taste.
How to Prepare This Dish
Steps and time-saving tips
First, preheat your oven to 375°F. Meanwhile, roll out your pie crust and gently press it into a 9-inch pie dish. Next, focus on the star of the show: the apples. Peel and thinly slice them for even cooking. Toss the apple slices with lemon juice to keep them from browning. In a separate bowl, whisk together the sugars, flour, and warm spices like cinnamon and nutmeg. Sprinkle this mixture over the apples and toss everything until each slice is perfectly coated. This step builds the deep, spiced flavor base for your Toffee Apple Pie. For a brilliant time-saving tip, use a store-bought refrigerated pie crust; honestly, no one will know the difference and it shaves precious minutes off your prep.
Now, pour the fragrant
apple filling into your waiting crust and dot the top with small pieces of butter. Then, drizzle a generous amount of toffee sauce over the apples for that signature caramelized sweetness. Carefully place the top crust over the filling, crimp the edges to seal, and cut a few slits in the center for steam to escape. For an extra glossy finish, brush the top with an egg wash. Finally, bake your Toffee Apple Pie for about 50 minutes until the crust is a beautiful golden brown and the filling is bubbly. Let the pie cool on a wire rack for at least two hours before slicing; this patience allows the juices to thicken properly.
Mistakes I’ve made and learned from
I have absolutely learned the hard way that using the wrong apples can lead to a soupy mess. I once used McIntosh, and they completely broke down during baking. Now, I always opt for firmer varieties like Granny Smith or Honeycrisp to maintain structure. Another common error I made was slicing my apples too thick, which resulted in a crunchy texture nobody wants in a Toffee Apple Pie. A mandoline slicer ensures uniform, thin slices every single time. Also, I used to skip the cooling step, slicing into the pie while it was still piping hot. This always caused the filling to run everywhere instead of holding its shape. Letting it rest is non-negotiable. For more on selecting the perfect base, my guide on choosing pie crust dives deeper into textures. Furthermore, if your toffee sauce ever seizes up, my troubleshooting tips on fixing caramel sauce will save the day.
n-and-villations">Cultural Connection and Variations
Where this recipe comes from
We can trace the roots of this dessert to the classic American apple pie, a symbol of home and comfort. However, someone clearly decided that classic apple pie needed an upgrade. They introduced rich, buttery toffee, and a star was born. My grandmother, for instance, always made her Toffee Apple Pie for our annual harvest festival. She would use tart Granny Smith apples from our tree and swear that the toffee sauce was a secret family recipe. Meanwhile, in England, they often serve a similar pie with a crumbly streusel topping instead of a full pastry lid. Australians might add a handful of macadamia nuts for extra crunch. Every region and every family seems to put their own delightful spin on it. Ultimately, this fusion of sweet, spiced fruit and decadent candy creates a universally beloved treat. The magic of a great Toffee Apple Pie lies in this beautiful adaptability.
How it fits in today’s cooking
This pie absolutely remains a superstar in modern kitchens. For many, it defines autumn and has become a non-negotiable centerpiece for Thanksgiving. Furthermore, contemporary bakers love to experiment with it. They might use a gluten-free pie crust to make it inclusive for everyone at the table. Others streamline the process by using a slow cooker for the apple filling, effortlessly blending old-world flavor with new-world convenience. You can even enjoy a slice of Toffee Apple Pie as a decadent weeknight treat, not just a holiday reserve. Its combination of fruit and indulgence perfectly suits our current desire for cozy, comforting foods. Interestingly, this dessert pairs wonderfully with a scoop of homemade vanilla ice cream, creating the ultimate temperature and texture contrast. Consequently, this classic dessert continues to earn its place in our recipe boxes and our hearts.
Taste and Texture
What makes it delicious
This Toffee Apple Pie delivers a symphony of comforting flavors and contrasting textures. Firstly, you experience the crisp, buttery pastry that shatters with each forkful. Then, the soft, tender apples coated in warm cinnamon and rich toffee sauce melt in your mouth. Each bite of this Toffee Apple Pie offers a perfect balance between sweet and tart, with the deep, caramelized notes from the toffee creating a truly decadent experience. Ultimately, the aroma of baked apples and spice that fills your kitchen is just a preview of the cozy delight to come.
r">Boosting the flavor
For an even more luxurious dessert, consider a few simple upgrades. A scoop of vanilla bean ice cream melting over the warm slice is a classic move for a reason. Alternatively, a drizzle of homemade salted caramel sauce amplifies the buttery toffee notes beautifully. Furthermore, toasting your own spices, like the cinnamon and nutmeg, just before baking will unlock their most fragrant, potent qualities. If you want to add a sophisticated crunch, a handful of chopped pecans in the filling works wonders. Finally, serving it alongside a dollop of cinnamon whipped cream introduces a cool, spiced creaminess that complements the warm apples perfectly.
Tips for Success
Best practices for results
Always chill your pie dough thoroughly before rolling it out, as this prevents a soggy bottom crust in your Toffee Apple Pie. Use a mix of tart and sweet apples for a perfectly balanced flavor and texture. Furthermore, toss your apple slices with the sugar and spices early, which allows them to release some juice and prevents a gap between the filling and the top crust. For the best results, always bake your pie on the lower oven rack to ensure the bottom crust cooks through completely.
>Mistakes to avoid
A common mistake involves slicing the apples too thinly, which causes them to turn mushy during baking. Instead, aim for consistent 1/4-inch slices so they soften yet still hold their shape. Additionally, do not skip the step of dotting the top of the filling with butter before adding the lid, as this step is crucial for a rich, luxurious sauce. If your crust begins to brown too quickly, simply tent the edges with foil to protect them. Remember, allowing your Toffee Apple Pie to cool for at least three hours lets the filling set properly; cutting into a hot pie is a primary reason for a runny slice. For more guidance, our article on how to prevent a soggy pie crust offers excellent advice. Moreover, if you are new to lattice tops, our guide to easy pie crust designs can help you create a beautiful finish without stress.
Serving and Pairing Suggestions
How to serve this dish
For a truly show-stopping presentation, serve your warm Toffee Apple Pie a la mode. Furthermore, place a generous slice on a rustic plate and top it with a smooth scoop of vanilla bean ice cream. The melting ice cream creates a beautiful, creamy sauce right at the table. Alternatively, you can elevate a simple weeknight dessert into a holiday centerpiece by garnishing each plate with a delicate drizzle of caramel and a sprinkle of toasted pecans. This Toffee Apple Pie truly shines at autumn gatherings and Thanksgiving feasts, filling your home with incredible aroma and warmth.
What goes well with it
A hot cup of coffee makes an exceptional partner for this dessert. Its robust bitterness provides a perfect counterbalance to the sweet, sticky notes of the Toffee Apple Pie. For an indulgent treat, consider pairing a slice with a glass of rich, creamy bourbon. The oak and vanilla notes in the spirit beautifully mirror the warm spices in the filling. Moreover, if you want to complete your meal with another classic, our perfect homemade vanilla ice cream is the ultimate topping. For a festive brunch option, serve it alongside a slice of our decadent cinnamon coffee cake, as the cozy spices complement each other wonderfully.
A classic Toffee Apple Pie combines the traditional elements of an apple pie—like a flaky crust and spiced apple filling—with the rich, buttery flavor of toffee. The filling typically includes sliced apples (such as Granny Smith or Honeycrisp), brown sugar, cinnamon, and nutmeg, mixed with or topped with a homemade or store-bought toffee sauce or bits of soft toffee candy. This creates a deliciously sweet and gooey dessert that elevates the standard apple pie.
How do you keep apple pie from getting soggy on the bottom?
To prevent a soggy bottom crust in your Toffee Apple Pie, you can blind bake the bottom crust for 10-15 minutes before adding the filling. Another effective method is to toss your apple slices with a little sugar and let them drain for 30 minutes to reduce excess liquid. Using a glass or ceramic pie dish also helps conduct heat evenly, ensuring a crisper crust for your delicious Toffee Apple Pie.
ank-math-faq-item">
What are the best apples to use for pie?
The best apples for pie are firm, tart varieties that hold their shape during baking. Granny Smith apples are the most popular choice due to their sharp flavor and structure, but a blend of Granny Smith with sweeter, firmer apples like Honeycrisp, Braeburn, or Jonagold works wonderfully. This combination provides a complex flavor and perfect texture that stands up well to the sweet toffee in a Toffee Apple Pie.
Can you freeze toffee apple pie?
Yes, you can absolutely freeze a baked or unbaked Toffee Apple Pie. For best results, wrap the cooled pie tightly in two layers of plastic wrap and then a layer of aluminum foil to prevent freezer burn. It will keep well for up to 3 months. Thaw the pie overnight in the refrigerator and reheat it in the oven to restore its fresh-baked texture and gooey toffee goodness.
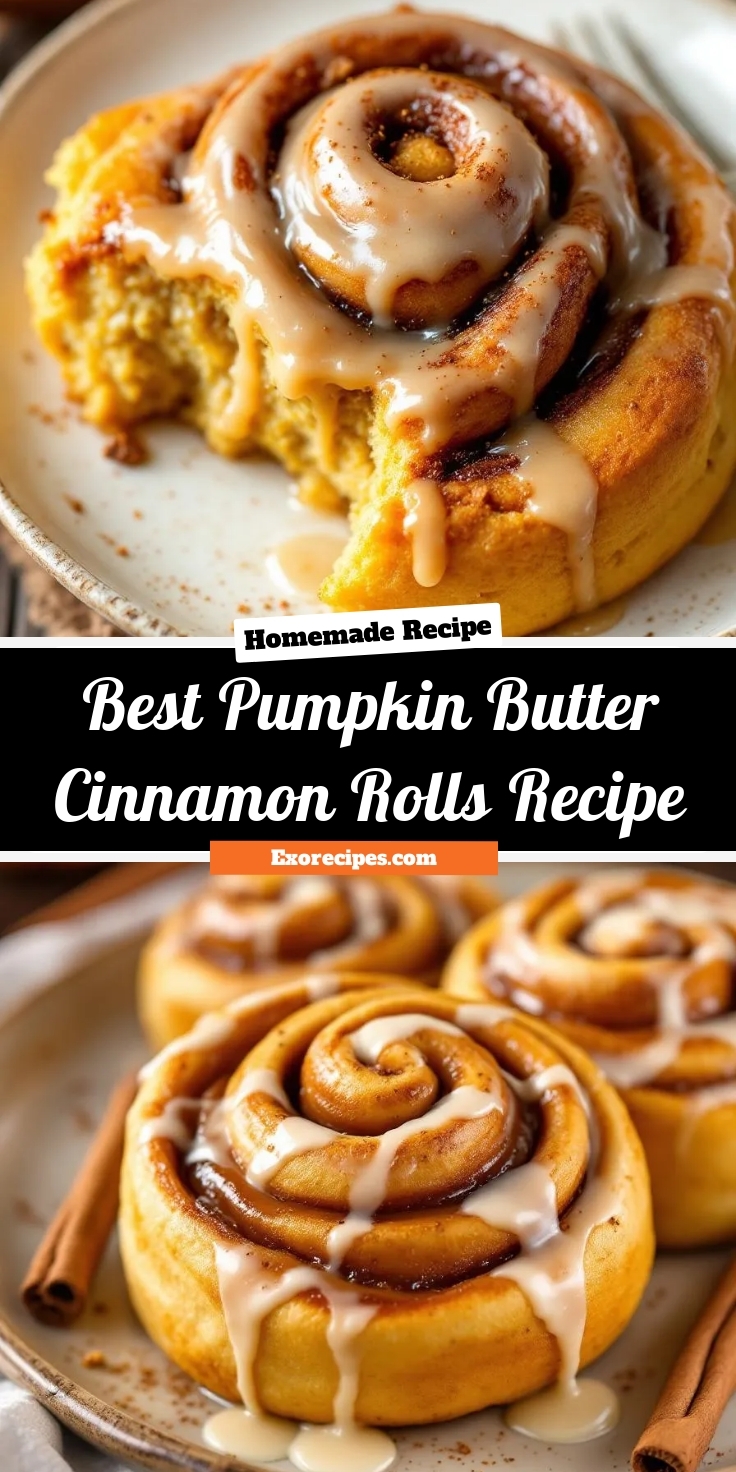
Best Pumpkin Butter Cinnamon Rolls Recipe
Introduction
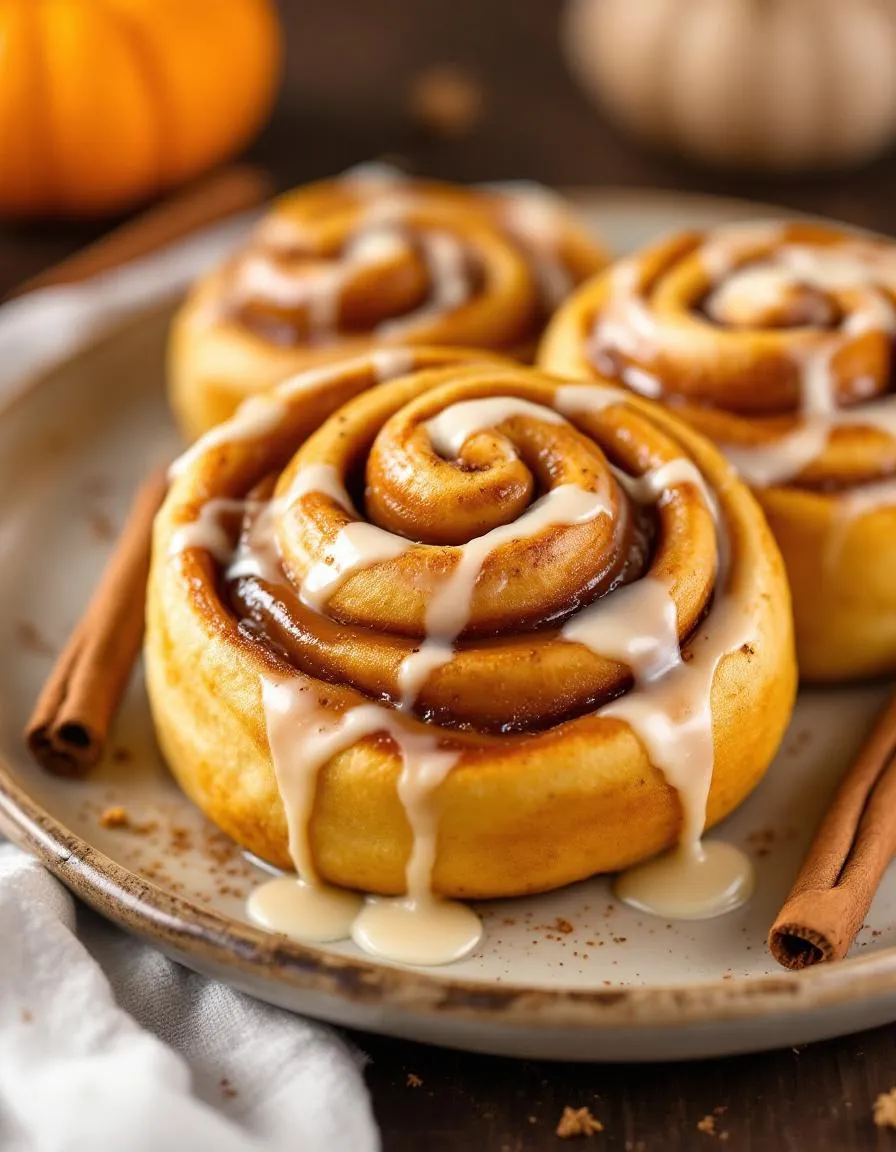
Is there anything cozier than the scent of warm spices and baking dough wafting through your kitchen on a crisp morning? Honestly, that feeling of anticipation, knowing something truly special is coming out of the oven, is pure magic. Today, we are creating that exact feeling with the ultimate autumnal treat: Pumpkin Butter Cinnamon Rolls. This recipe wraps all the warmth of the season into one irresistible, gooey, and utterly delicious pastry that will have everyone begging for the recipe.
So what exactly are Pumpkin Butter Cinnamon Rolls? Essentially, we take the classic, beloved cinnamon roll and give it a full fall makeover. We enrich the dough with real pumpkin puree for incredible moisture and a subtle earthy sweetness. Then, instead of a standard cinnamon-sugar filling, we slather on a generous layer of spiced pumpkin butter, which creates an intensely flavorful and aromatic center. Finally, a smooth cream cheese glaze crowns each roll, balancing the spices with its tangy sweetness. This recipe matters because it transforms a simple baking project into a celebratory event, perfect for weekend brunches, holiday gatherings, or simply treating yourself. It fits our blog’s mission perfectly, as we always strive to share approachable recipes that deliver restaurant-quality results right in your own home. For more inspiration on using seasonal flavors, explore our collection of incredible fall desserts. Furthermore, if you find yourself with extra pumpkin puree, you must try our famous pumpkin chocolate chip cookies next. They are another family favorite that captures the essence of the season in every single bite.
Why I Love This Recipe
This recipe holds a special place in my heart because it truly marks the beginning of fall in our household. I started making these Pumpkin Butter Cinnamon Rolls years ago as a way to welcome the changing leaves and cooler weather, and it quickly became our cherished Saturday morning tradition. The process of kneading the soft, orange-hued dough feels meditative, and the smell as they bake never fails to bring my entire family gathered in the kitchen, plates in hand. For me, these rolls are more than just a breakfast; they are a warm, delicious memory in the making.
Health and Nutrition
Why it’s good for your body
These Pumpkin Butter Cinnamon Rolls offer a surprisingly nutritious twist on a classic treat. First, pumpkin puree provides a powerful dose of vitamin A, which actively supports healthy vision and a strong immune system. Furthermore, the warming spices like cinnamon and nutmeg do more than just add flavor; they also deliver antioxidants that help combat inflammation in your body.
Additionally, this recipe uses pumpkin butter as its star ingredient, which often contains less sugar than traditional fillings. Consequently, you can enjoy a sweet pastry without the typical sugar crash. Moreover, pumpkin contributes a good amount of fiber, which actively promotes healthy digestion and helps you feel satisfied longer. Therefore, each bite of these Pumpkin Butter Cinnamon Rolls supports your well-being in multiple ways.
Finally, enjoying what you eat is a vital part of health, and these rolls certainly deliver on joy. Ultimately, treating yourself to a homemade Pumpkin Butter Cinnamon Roll means you control the quality of every ingredient, making it a wholesome choice for a comforting breakfast or snack.
How it fits in a healthy lifestyle
You can absolutely enjoy these Pumpkin Butter Cinnamon Rolls as part of a balanced diet. Think of them as a celebratory breakfast for the weekend or a special dessert rather than an everyday item. Pairing one with a source of protein, like a glass of milk or a Greek yogurt, can help balance your blood sugar and keep you full. This approach aligns perfectly with building sustainable eating habits that don’t feel restrictive.
If you have specific dietary needs, you can easily adapt this recipe. For a gluten-free version, simply use your favorite 1:1 gluten-free flour blend. For more ideas on creating delicious treats that cater to various needs, explore our guide on gluten-free baking. Remember, a healthy lifestyle is all about flexibility and finding joy in your food. For more inspiration on balancing indulgences with nutrition, check out our tips for healthy meal prep that can help you stay on track throughout your busy week.
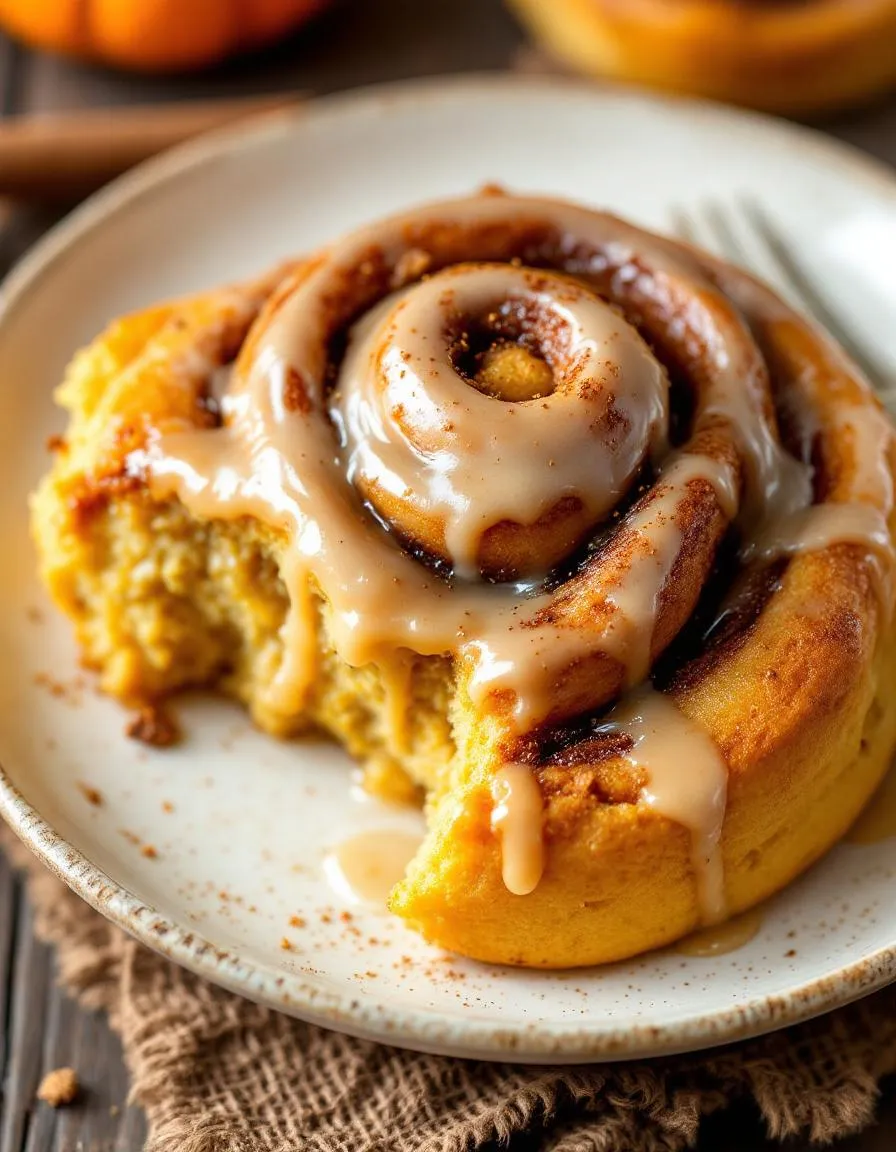
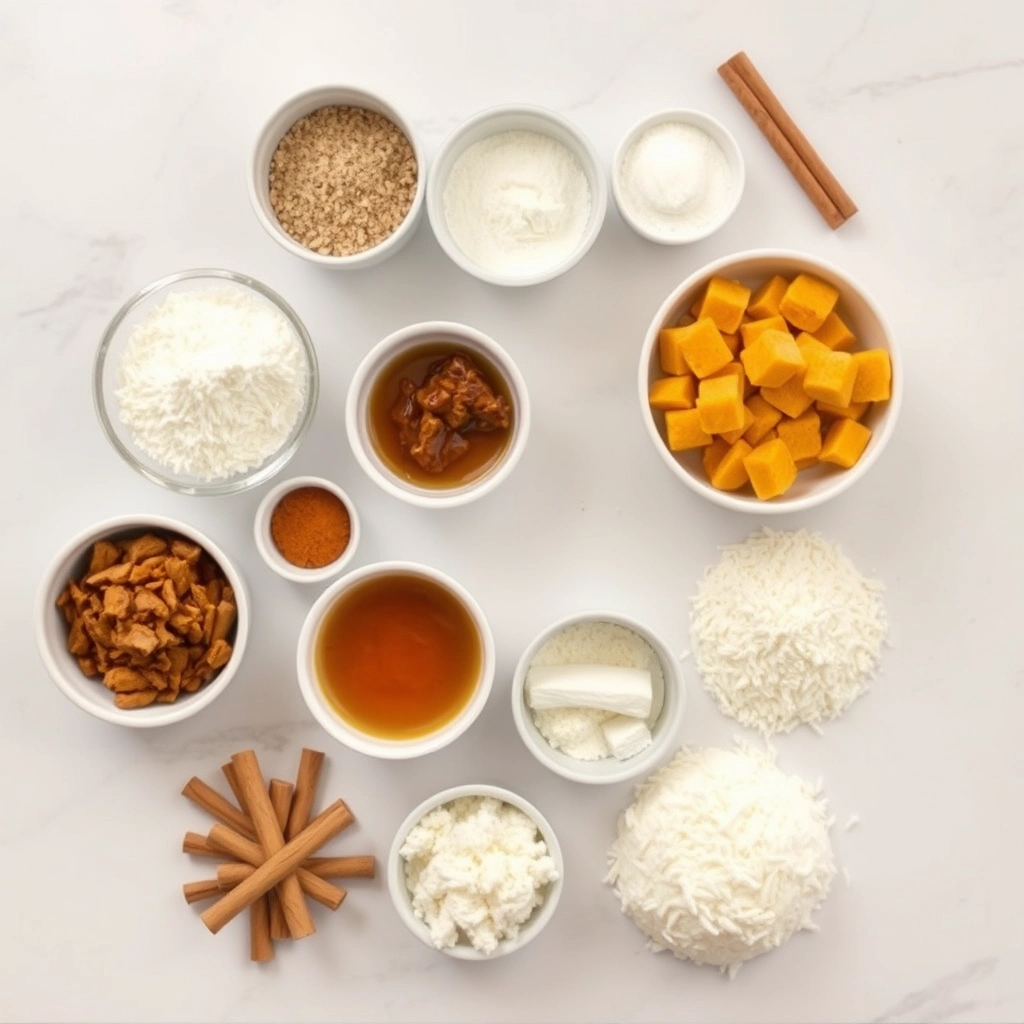
Soft, fluffy cinnamon rolls swirled with sweet pumpkin butter and topped with a creamy glaze.
Ingredients
Scale
For the Crust:
2 1/4 cups all-purpose flour
1/4 cup granulated sugar
1 packet instant yeast
1/2 cup warm milk
1/4 cup pumpkin puree
3 tbsp softened butter
1 egg
1/2 tsp salt
1/2 cup pumpkin butter
1/4 cup brown sugar
1 tsp cinnamon
1 cup powdered sugar
2 tbsp milk
1/2 tsp vanilla extract
Instructions
1. Prepare the Crust:
Combine flour, sugar, yeast, and salt in a bowl. Add warm milk, pumpkin puree, butter, and egg. Mix until a dough forms.
Knead dough on a floured surface for 5 minutes. Place in a greased bowl, cover, and let rise for 1 hour.
Roll dough into a rectangle. Spread pumpkin butter evenly, then sprinkle with brown sugar and cinnamon.
Roll dough tightly from the long end. Cut into 9 slices and place in a greased baking pan. Let rise 30 minutes.
Bake at 375°F for 25 minutes or until golden. Mix powdered sugar, milk, and vanilla for glaze. Drizzle over warm rolls.
Notes
You can customize the seasonings to taste.
How to Prepare This Dish
Steps and time-saving tips
First, gather all your ingredients to make the process smooth and efficient. Next, whisk together your warm milk, melted butter, sugar, and yeast in a large bowl. Let this mixture sit for about five minutes until it becomes frothy. Meanwhile, combine the flour, pumpkin pie spice, and salt in a separate bowl. Gradually add these dry ingredients to your wet mixture, then stir everything until a shaggy dough forms. Turn the dough out onto a lightly floured surface and knead it for several minutes until it feels smooth and elastic. For a fantastic time-saving tip, use a stand mixer with a dough hook to handle the kneading for you. Afterwards, place your dough in a greased bowl, cover it with a clean towel, and let it rise in a warm spot until it doubles in size. This usually takes about an hour, so you can prepare your filling during this wait.
Roll the risen dough out into a large rectangle on a floured surface. Then, generously spread your homemade pumpkin butter over the entire surface, leaving a small border around the edges. Sprinkle a generous amount of cinnamon-sugar mixture over the pumpkin butter layer. Carefully and tightly roll the dough into a log, starting from the long side. Use unflavored dental floss or a very sharp knife to slice the log into even rolls. Place these rolls snugly into a buttered baking dish. Let them rise again for another thirty minutes until they look puffy. Finally, bake your Pumpkin Butter Cinnamon Rolls until they turn golden brown and your kitchen smells incredible.
and-learned-from">Mistakes I’ve made and learned from
I have absolutely made my share of mistakes with these Pumpkin Butter Cinnamon Rolls, so learn from my errors. Initially, I used yeast that was far too old, which resulted in dense, flat rolls that barely rose. Now, I always test my yeast in the warm liquid first to ensure it’s active and bubbly before I proceed. Another common blunder was rolling the dough log too loosely, which caused all the delicious filling to ooze out during baking. I learned to roll it tightly, almost like a yoga mat, to keep everything sealed inside. If your filling is too runny, it can create a similar mess; for a thicker, perfect consistency, check out my guide on how to make pumpkin butter. Also, do not skip the second rise. I did once, impatient for a fresh bake, and the texture was disappointingly tough. For more insights on achieving that dreamy, soft texture every time, my post on common baking mistakes dives deeper into the science of patience.
Cultural Connection and Variations
Where this recipe comes from
My family always weaves pumpkin into our autumn traditions. Consequently, we transform our favorite recipes into cozy seasonal celebrations. For instance, we took a classic cinnamon roll and gave it a harvest twist with rich, spiced pumpkin butter. This creation quickly became our signature centerpiece for chilly weekend breakfasts and holiday gatherings alike.
Different regions, howe
ver, put their own spin on similar buns. In Sweden, for example, they might add cardamom to the dough for their kanelbullar. Meanwhile, in parts of the American South, a generous cream cheese frosting often crowns the pastry. Our version celebrates the quintessential flavors of a North American fall. Ultimately, baking a batch of Pumpkin Butter Cinnamon Rolls fills the kitchen with a scent that simply means home.
How it fits in today’s cooking
This recipe absolutely thrives in modern cooking because it delivers supreme comfort. Furthermore, it beautifully bridges the gap between special occasion baking and everyday indulgence. Busy home cooks now often use a no-knead dough or prepare the rolls the night before for an easy morning bake. This adaptability makes enjoying warm Pumpkin Butter Cinnamon Rolls entirely achievable, even on a busy weekday.
They naturally fit into holiday brunches and Thanksgiving morning, becoming a cherished seasonal ritual. Moreover, this recipe pairs wonderfully with other autumn favorites. For a full spread, consider serving them alongside a slice of moist pumpkin bread. You can also explore other spiced treats for your table, like these perfect ginger cookies. Ultimately, this dish remains a timeless and beloved way to savor the flavors of the season.
>Taste and Texture
What makes it delicious
These Pumpkin Butter Cinnamon Rolls deliver a warm, spiced aroma that fills your kitchen. Each soft, pillowy bite offers a gooey center swirled with rich pumpkin butter. Consequently, the filling provides a deep, caramelized sweetness that perfectly complements the tangy cream cheese frosting. Ultimately, the texture is wonderfully chewy and tender, making every mouthful a cozy autumn delight.
Boosting the flavor
For an extra flavor boost, consider toasting the pecans before sprinkling them over the frosting. Alternatively, a drizzle of salted caramel sauce introduces a delicious sweet and salty contrast. Furthermore, a dash of freshly grated nutmeg in the dough can amplify the warm spice profile beautifully. For more creative topping ideas, explore our guide on frosting variations. You can also experiment with different fillings by using our favorite homemade pumpkin butter recipe for an even more intense pumpkin flavor.
Tips for Success
Best practices for results
Always ensure your milk is warm to the touch, not hot, because this activates the yeast perfectly. Furthermore, use room temperature ingredients for a smooth, even dough that rises consistently. Additionally, chill your dough before rolling it out, as this prevents the butter from melting and creates those beautiful, flaky layers. For the best texture, generously spread your pumpkin butter right to the edges of the dough. Finally, allow your Pumpkin Butter Cinnamon Rolls to cool slightly before drizzling the glaze so it doesn’t just melt away.
Mistakes to avoid
A common error is killing the yeast with liquid that is too hot, which unfortunately results in dense rolls. Instead, use a digital thermometer to guarantee the perfect temperature. Moreover, avoid over-flouring your surface when rolling, since this can make the dough tough; a well-dusted surface is key. If your kitchen is cold and the dough isn’t rising, simply find a warm spot as outlined in our guide to troubleshooting dough that won’t rise. Also, do not overbake them, otherwise the rolls can become dry. For a perfectly soft and gooey center, pull them out when they are just golden brown, similar to the technique we recommend for our classic cinnamon rolls.
Serving and Pairing Suggestions
How to serve this dish
For a truly stunning presentation, arrange your warm Pumpkin Butter Cinnamon Rolls on a rustic wooden board or a beautiful ceramic platter. Meanwhile, drizzle that creamy glaze artfully over the top just before your guests arrive. Furthermore, a sprinkle of toasted pecans or a dusting of cinnamon adds a delightful textural contrast and visual appeal. These rolls absolutely shine as the star of a holiday brunch spread or a cozy weekend breakfast. Ultimately, serving them fresh from the oven makes the entire experience feel incredibly special and indulgent.
h-it">What goes well with it
Balance the sweet, spiced flavor of Pumpkin Butter Cinnamon Rolls with a robust, freshly brewed cup of coffee. Alternatively, a cold glass of milk provides a classic and refreshing complement. For a fuller brunch experience, consider serving them alongside savory dishes. For instance, our hearty Breakfast Potato Hash creates a perfect savory counterpoint. Moreover, a light and fruity option like our Mixed Berry Salad cuts through the richness beautifully for a complete and satisfying meal.
Can you use pumpkin butter instead of pumpkin puree in cinnamon rolls?
No, pumpkin butter and pumpkin puree are not direct substitutes. Pumpkin butter is already sweetened and spiced, which will drastically alter the sugar and spice levels in your dough. For the best results, use the pumpkin puree called for in the dough recipe and reserve the pumpkin butter for the filling of your Pumpkin Butter Cinnamon Rolls.
ank-math-faq-item">
How do you keep pumpkin cinnamon rolls from getting soggy?
The key is to avoid adding too much moisture. Ensure your pumpkin puree is not watery; if it is, strain it in a fine-mesh sieve. Also, be careful not to over-spread the pumpkin butter filling, as an excessively thick layer can release moisture and lead to soggy Pumpkin Butter Cinnamon Rolls. Proper baking time is also crucial for setting the structure.
What is a good icing for pumpkin cinnamon rolls?
A cream cheese icing is the classic and most popular pairing. Its tangy flavor perfectly balances the sweet and spiced notes of the pumpkin butter. For a simpler option, a vanilla or maple glaze also works wonderfully. Drizzle your chosen icing over the warm Pumpkin Butter Cinnamon Rolls for the best flavor absorption.
Can you make pumpkin cinnamon rolls ahead of time?
Absolutely! You can assemble the rolls the night before, cover the pan tightly, and refrigerate them. The next morning, let them sit at room temperature for about 30 minutes before baking. This make-ahead method actually improves the flavor and texture, making it a fantastic strategy for serving fresh Pumpkin Butter Cinnamon Rolls for breakfast or brunch.
div>
Easy Zucchini Chicken Rolls Recipe
Introduction
Do you ever feel stuck in a boring dinner routine, desperately craving something that feels both gourmet and guilt-free? I know that struggle all too well, which is why I get so excited to share these incredible Zucchini Chicken Rolls. They transform simple ingredients into an elegant, satisfying meal that will absolutely wow your family and reignite your passion for cooking. Best of all, they prove that healthy eating never has to mean sacrificing flavor or fun in the kitchen.
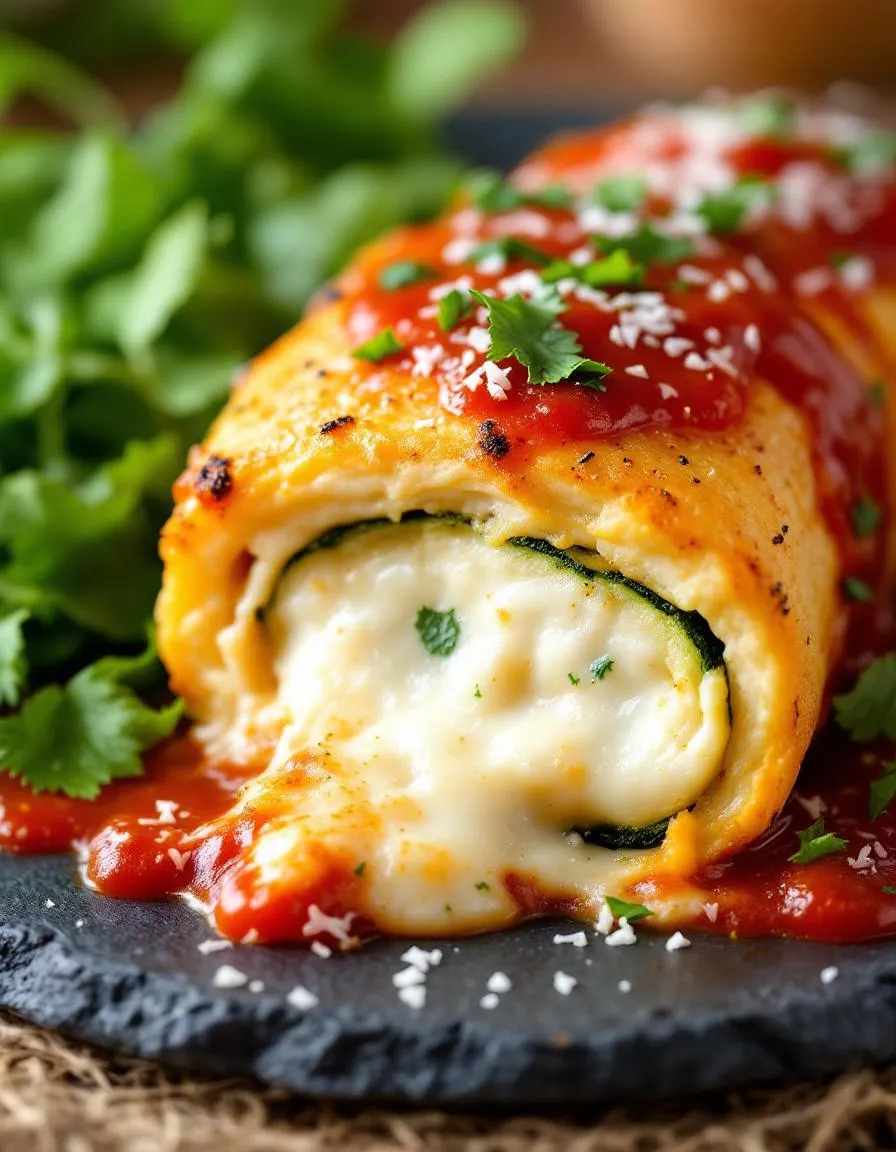
So what exactly are Zucchini Chicken Rolls? Essentially, we take thin slices of fresh zucchini and roll them around a savory, herby filling of ground chicken, Parmesan cheese, and sun-dried tomatoes. We then bake them until the zucchini becomes tender and the filling cooks through, resulting in a beautiful, flavorful roll. This dish matters because it offers a brilliant solution for anyone seeking a low-carb, high-protein meal that doesn’t compromise on taste or presentation. It fits our blog’s tone perfectly as we focus on creative, approachable recipes that make healthy living enjoyable and sustainable. Furthermore, this method of using zucchini as a wrap is a fantastic kitchen skill that opens doors to so many other culinary creations. You can easily adapt the filling to use whatever ingredients you have on hand, making it a versatile staple for your weekly meal plan. If you enjoy this style of cooking, you might also love our approach to creating a perfect Grilled Chicken Caprese Salad for another light yet fulfilling option. For a different take on using ground meat in a clever way, our Turkey Stuffed Bell Peppers are always a huge hit. This recipe truly delivers a restaurant-quality experience right from your own oven.
Why I Love This Recipe
This recipe holds a special place in my heart because it was my go-to dish when I first started my journey towards healthier eating. I needed food that felt like a treat but still aligned with my goals, and these rolls were the perfect answer. I love how the process of carefully rolling each one feels meditative and creative, and the final result never fails to impress guests. Most importantly, it reminds me that taking care of myself can and should be a delicious adventure.
Health and Nutrition
Why it’s good for your body
Zucchini Chicken Rolls deliver a powerful nutritional punch in every delicious bite. For starters, zucchini provides a fantastic source of vitamins A and C, which actively support your immune system and promote healthy skin. Furthermore, this vegetable contributes a healthy dose of dietary fiber, which aids in digestion and helps you feel full and satisfied.
Meanwhile, the lean chicken breast serves as an excellent source of high-quality protein. Consequently, this protein helps build and repair muscle tissue, making it a fantastic choice for post-workout recovery. Additionally, this macronutrient is a key player in keeping you energized and satiated for hours, which can help prevent unnecessary snacking.
Moreover, when you prepare Zucchini Chicken Rolls, you create a meal that is naturally low in carbohydrates and sugars. The combination of lean protein and fibrous vegetables offers a steady release of energy without the common crash associated with heavier meals. Ultimately, Zucchini Chicken Rolls provide a well-rounded profile of essential nutrients that your body will truly thank you for.
How it fits in a healthy lifestyle
Zucchini Chicken Rolls seamlessly fit into various healthy eating plans. If you follow a gluten-free diet, you can rest easy knowing this dish is naturally free from gluten-containing ingredients. It also aligns perfectly with high-protein and low-carb goals, supporting muscle maintenance and healthy weight management.
This recipe encourages practical, wholesome eating habits. You can easily prepare a batch of Zucchini Chicken Rolls ahead of time for a quick, nutrient-dense lunch that keeps you on track. For more inspiration on building balanced meals, explore our guide on easy meal prep ideas. Pairing these rolls with a simple side salad creates a complete, satisfying dinner that feels gourmet without any guilt. Finding dishes that are both delicious and supportive of your wellness journey is key, and our collection of healthy dinner recipes offers plenty of options to keep your menu exciting and diverse.
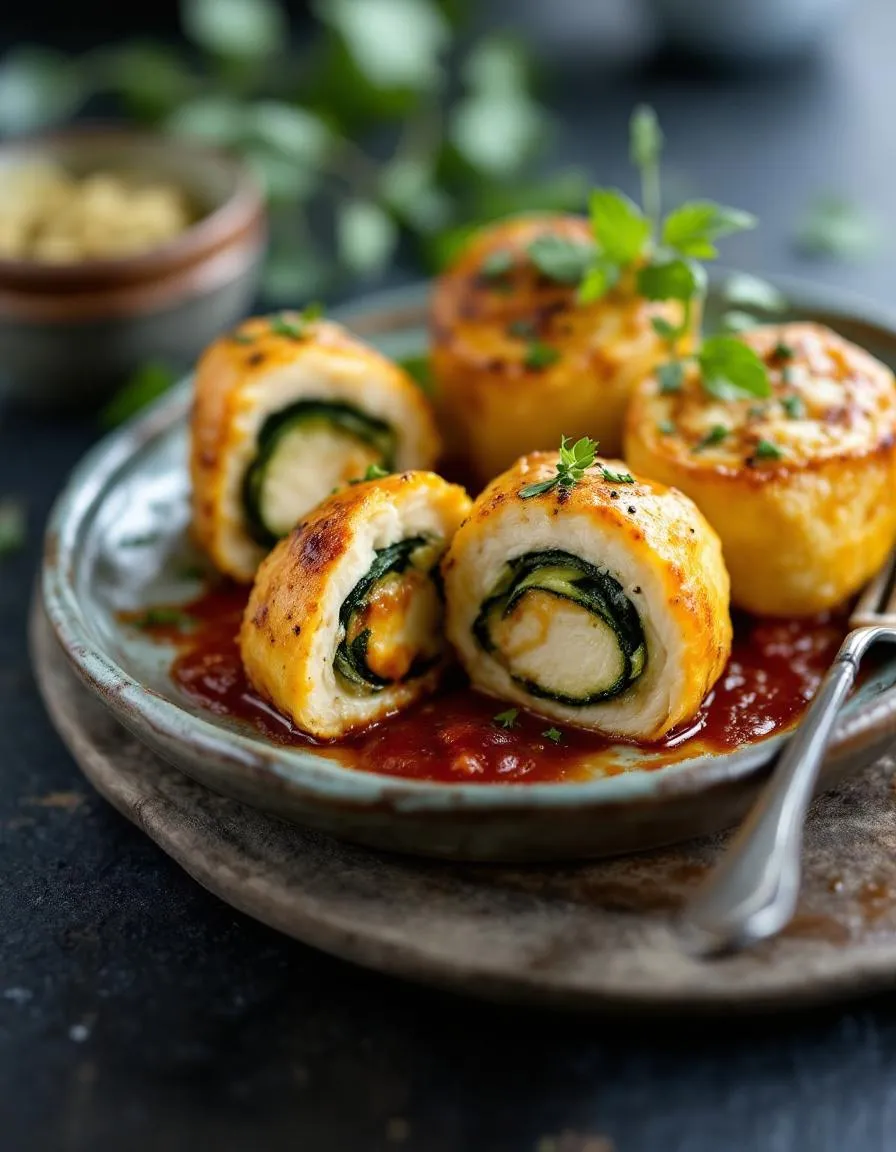
Tender chicken breasts rolled with seasoned zucchini and cheese, baked to perfection for a healthy and flavorful meal.
Ingredients
Scale
For the Crust:
2 large chicken breasts, pounded thin
1 medium zucchini, grated
1/2 cup shredded mozzarella cheese
1/4 cup grated Parmesan cheese
1 tsp Italian seasoning
1/2 tsp garlic powder
Salt and pepper to taste
2 tbsp olive oil
1/2 cup marinara sauce (optional for serving)
Instructions
1. Prepare the Crust:
Preheat oven to 375°F (190°C). Lightly grease a baking dish.
In a bowl, mix grated zucchini, mozzarella, Parmesan, Italian seasoning, garlic powder, salt, and pepper.
Lay pounded chicken breasts flat. Divide zucchini mixture evenly and spread over each chicken breast.
Roll up each chicken breast tightly and secure with toothpicks. Place seam-side down in baking dish.
Drizzle olive oil over rolls. Bake for 25-30 minutes or until chicken is cooked through.
Let rest for 5 minutes, remove toothpicks, and serve with marinara sauce if desired.
Notes
You can customize the seasonings to taste.
s-dish">How to Prepare This Dish
Steps and time-saving tips
First, grab your zucchini and slice it lengthwise into thin, even strips using a mandoline for perfect results. Next, generously salt the strips and let them sit for ten minutes; this crucial step pulls out excess water so your Zucchini Chicken Rolls do not become soggy. Meanwhile, prepare the filling by mixing shredded chicken, cream cheese, garlic, and herbs in a bowl. Pat the zucchini strips completely dry with a paper towel before assembling. Lay a strip flat, place a spoonful of the chicken mixture at one end, then gently roll it up tightly. Place each roll seam-side down in a baking dish. Drizzle them with a little olive oil and sprinkle Parmesan cheese on top for a golden, crispy finish. Bake for about 20 minutes until they are tender and delicious. For a time-saving tip, use a store-bought rotisserie chicken and pre-shredded cheese to cut your prep time in half. Finally, let the Zucchini Chicken Rolls rest for five minutes before serving; this helps them hold their shape beautifully.
Mistakes I’ve made and learned from
I have definitely learned a few lessons the hard way with these Zucchini Chicken Rolls. My first mistake was skipping the salting step for the zucchini, which resulted in a pan full of watery disappointment instead of firm, tasty rolls. Now, I never rush this process. Another common error I made was overstuffing the rolls, causing them to burst open during baking. A modest tablespoon of filling is the perfect amount for a secure roll. Getting your internal temperature right is also key for any meat dish. I once pulled the chicken filling from the stove a bit early, and it was underdone. Now I always use a reliable meat thermometer to guarantee food safety and perfect doneness every time. For more guidance on nailing your cooking times, my post on perfect baking times for various veggies has been a total game-changer for me and my readers.
n-and-variations">Cultural Connection and Variations
Where this recipe comes from
My grandmother first introduced me to the magic of Zucchini Chicken Rolls during a humid summer visit. She would harvest the zucchini from her sprawling garden, slice them thinly, and then carefully wrap them around a savory, herbed chicken filling. For her, this dish was a celebration of the season’s bounty and a clever way to create an elegant meal from humble ingredients. Consequently, this recipe always reminds me of family gatherings and the simple joy of cooking from the garden.
Globally, the concept of wrapping meat and vegetables in a thin slice of another vegetable appears in many cultures. For instance, in some Mediterranean regions, cooks might use eggplant or vine leaves instead of zucchini, stuffing them with lamb and rice. Similarly, Italian cooks often favor a version with prosciutto and cheese, baking it with a rich tomato sauce. Ultimately, our version of Zucchini Chicken Rolls feels like a beautiful fusion, focusing on lean protein and fresh produce.
In my own kitchen, I sometimes add a layer of prosciutto for a salty kick or swap the herbs based on what is growing on my windowsill. Therefore, this dish is wonderfully adaptable, allowing every cook to imprint their own story onto it.
ays-cooking">How it fits in today’s cooking
Zucchini Chicken Rolls fit perfectly into modern cooking routines because they offer a healthy, protein-packed meal that feels both gourmet and approachable. Today’s home cooks love them for meal prep, as they reheat beautifully for a satisfying lunch. Furthermore, their elegant presentation makes them a fantastic centerpiece for a dinner party menu without requiring hours of complicated work.
Many people now adapt the recipe to suit specific dietary needs, using turkey or even plant-based fillings. They also embrace seasonal flexibility, pairing the rolls with different sides throughout the year. For a complete and balanced weeknight meal, I often serve them alongside a light quinoa salad recipe. Ultimately, this dish continues to thrive because it masterfully blends tradition with contemporary, health-conscious tastes.
Taste and Texture
What makes it delicious
These Zucchini Chicken Rolls deliver a wonderfully savory and satisfying experience. First, you get the tender, juicy chicken, which is perfectly seasoned and wrapped around a creamy, rich filling. Meanwhile, the zucchini itself becomes soft and almost silky, creating a delicate package that holds everything together. Each bite offers a fantastic contrast between the hearty chicken and the melt-in-your-mouth vegetable. Ultimately, the fresh herbs provide a fragrant, bright note that cuts through the richness beautifully. You will absolutely love the comforting and elegant feel of these Zucchini Chicken Rolls.
r">Boosting the flavor
Fortunately, you can easily customize these rolls to suit your taste. For a richer, deeper flavor, try adding a sprinkle of smoked paprika or a pinch of red pepper flakes to the filling. Alternatively, a squeeze of fresh lemon juice right before serving brightens all the other ingredients wonderfully. Consider serving them with a simple, herby dipping sauce; a creamy dill sauce or a tangy yogurt dip complements the savory chicken perfectly. For more inspiration on creating fantastic sauces, explore our guide on how to make a creamy garlic sauce. Additionally, if you enjoy experimenting with herbs, our tips for using fresh herbs in cooking will give you even more creative ideas.
Tips for Success
Best practices for results
Always pat the zucchini slices completely dry before assembling your rolls; consequently, you will prevent a soggy filling. Use thin, uniform slices for even cooking and, moreover, ensure they roll easily without breaking. Tightly roll each Zucchini Chicken Rolls and, finally, secure them with a toothpick to maintain their perfect shape during baking.
>Mistakes to avoid
Avoid overstuffing the rolls with filling, as this often causes them to burst open during cooking; instead, use a moderate amount for best results. Do not skip salting and draining the zucchini; otherwise, excess moisture can make your dish watery. For a perfectly cooked chicken filling every time, remember to check the internal temperature with a reliable instant-read thermometer. Furthermore, always let your Zucchini Chicken Rolls rest for a few minutes after baking; this allows the juices to redistribute, much like when you rest meat for maximum flavor.
Serving and Pairing Suggestions
How to serve this dish
Present your Zucchini Chicken Rolls with style for a truly memorable meal. For instance, arrange them on a pristine white platter to let their golden color shine. Drizzle any remaining pan sauce over the top for extra flavor and a glossy finish. Furthermore, a final sprinkle of fresh chopped parsley or basil adds a vibrant pop of color. These elegant rolls absolutely shine at a dinner party or a special holiday brunch. Ultimately, their neat, rolled shape makes them a visually stunning centerpiece.
What goes well with it
Choose light, complementary sides to let your Zucchini Chicken Rolls stand out. For example, a simple arugula salad with a lemon vinaigrette cuts through the richness beautifully. Alternatively, a serving of fluffy quinoa or our popular Garlic Herb Roasted Potatoes makes a wonderfully satisfying base. Additionally, a cool, creamy dipping sauce like tzatziki or ranch always complements the savory chicken. Finally, a crisp white wine, such as Sauvignon Blanc, pairs perfectly for a complete dining experience. You can also explore our Creamy Cucumber Salad for a refreshing and tangy side dish option.
Can you make zucchini chicken rolls ahead of time?
Yes, you can assemble Zucchini Chicken Rolls a day in advance. Store them covered in the refrigerator and bake just before serving. This makes them a perfect appetizer or main course for entertaining.
What do you serve with zucchini chicken rolls?
These rolls pair wonderfully with a light side salad, garlic mashed potatoes, or roasted vegetables. A simple marinara or pesto dipping sauce also complements the flavors of the Zucchini Chicken Rolls beautifully.
ank-math-faq-item">
How do you keep zucchini from getting soggy in rolls?
The key is to salt the zucchini slices and let them sit for 10-15 minutes to draw out excess moisture. Pat them completely dry with paper towels before assembling to ensure your Zucchini Chicken Rolls stay firm and not watery.
Can I use ground chicken instead of chicken breast for zucchini rolls?
Absolutely. Using seasoned ground chicken is a great alternative to sliced chicken breast. It can be easier to roll and creates a different, equally delicious texture for your Zucchini Chicken Rolls.