Easy Amish Apple Fritter Bread Recipe

easy-amish-apple-fritter-bread

Introduction

Is there anything more comforting than the smell of warm cinnamon and baked apples wafting through your kitchen? Honestly, that aroma instantly transports me to a happier, cozier place. If you crave that feeling but need a simple, no-fuss recipe, you have found your perfect match. This Easy Amish Apple Fritter Bread delivers all the nostalgic flavor of a state fair treat without any of the complicated frying. Ultimately, it is the homemade dessert your weekend brunch has been missing.

So what exactly is this incredible bread? Essentially, Easy Amish Apple Fritter Bread is a moist, tender loaf cake bursting with juicy apple chunks and swirled with a generous ribbon of cinnamon sugar. It boasts a sweet vanilla glaze drizzle that melts into every crevice, mimicking the iconic taste of a classic apple fritter doughnut. This recipe matters because it transforms a seemingly indulgent bakery item into a shockingly simple homemade reality. Furthermore, it perfectly fits our blog’s mission to share approachable recipes that feel both special and doable, much like our popular collection of easy breakfast ideas. You do not need any special equipment or advanced baking skills to achieve amazing results. The method involves creating a simple batter, folding in apples, and layering a cinnamon swirl throughout the loaf pan. Consequently, the final product emerges from the oven looking and tasting like it came from a professional bakery. This Easy Amish Apple Fritter Bread is the ultimate crowd-pleaser for potlucks, holiday mornings, or just because you deserve a treat. It also pairs wonderfully with a cup of coffee, making it an ideal choice for a leisurely weekend brunch spread. For another fantastic brunch option that follows a similar simple-to-make, hard-to-resist philosophy, you must try our cinnamon roll casserole.

Why I Love This Recipe

I have a deep personal connection to this Easy Amish Apple Fritter Bread. My grandmother used to make a similar recipe every fall when the apples were at their peak, and the scent alone brings back a flood of warm memories from her kitchen. I love that this version honors that tradition but simplifies the process immensely, allowing me to share that same heartwarming experience with my own family on a busy Sunday morning without any stress. It is my absolute go-to recipe when I want to impress guests or simply treat my kids to something I know they will devour with a giant glass of milk.

Health and Nutrition

Why it’s good for your body

This Easy Amish Apple Fritter Bread offers more than just incredible flavor; it also provides some genuine nutritional perks. For instance, the star ingredient, apples, delivers a solid dose of dietary fiber. This fiber actively supports healthy digestion and helps you feel full and satisfied after enjoying a slice. Additionally, apples bring essential vitamins like vitamin C to the table, which is a powerful antioxidant that bolsters your immune system.

Moreover, the cinnamon swirled throughout this bread does more than create a warm spice. In fact, cinnamon is well-known for its anti-inflammatory properties and its potential role in helping to regulate blood sugar levels. Consequently, each bite contributes to your overall wellness in a small but meaningful way. Furthermore, when you bake this Easy Amish Apple Fritter Bread at home, you control the ingredients, allowing you to potentially reduce sugar without sacrificing taste.

Ultimately, this treat combines wholesome ingredients that work together. Therefore, you can feel good about serving this delicious Easy Amish Apple Fritter Bread to your family, knowing it provides both comfort and nourishment.

How it fits in a healthy lifestyle

Enjoying this Amish Apple Fritter Bread fits perfectly into a balanced approach to eating. Think of it as a satisfying treat that rewards your healthy habits rather than derails them. Pair a slice with a source of protein like Greek yogurt or a handful of nuts for a complete snack that keeps your energy levels stable. This strategy helps manage portions while maximizing satisfaction.

For those mornings when you need a quick yet thoughtful start, this bread is a fantastic option. If you are exploring other make-ahead breakfast ideas that support your goals, our guide to healthy make-ahead breakfasts offers plenty of inspiration. Remember, a healthy lifestyle is all about flexibility and finding joy in your food. Baking this bread yourself is a wonderful way to practice mindful eating and appreciate the ingredients that go into your meals.

If you love the simplicity of this recipe, you might also enjoy discovering more easy homemade bread recipes that use whole food ingredients. This allows you to expand your baking repertoire with options that align with your nutritional preferences.

Print
clock clock iconcutlery cutlery iconflag flag iconfolder folder iconinstagram instagram iconpinterest pinterest iconfacebook facebook iconprint print iconsquares squares iconheart heart iconheart solid heart solid icon

Easy Amish Apple Fritter Bread

  • Author: Chef Mia

Description

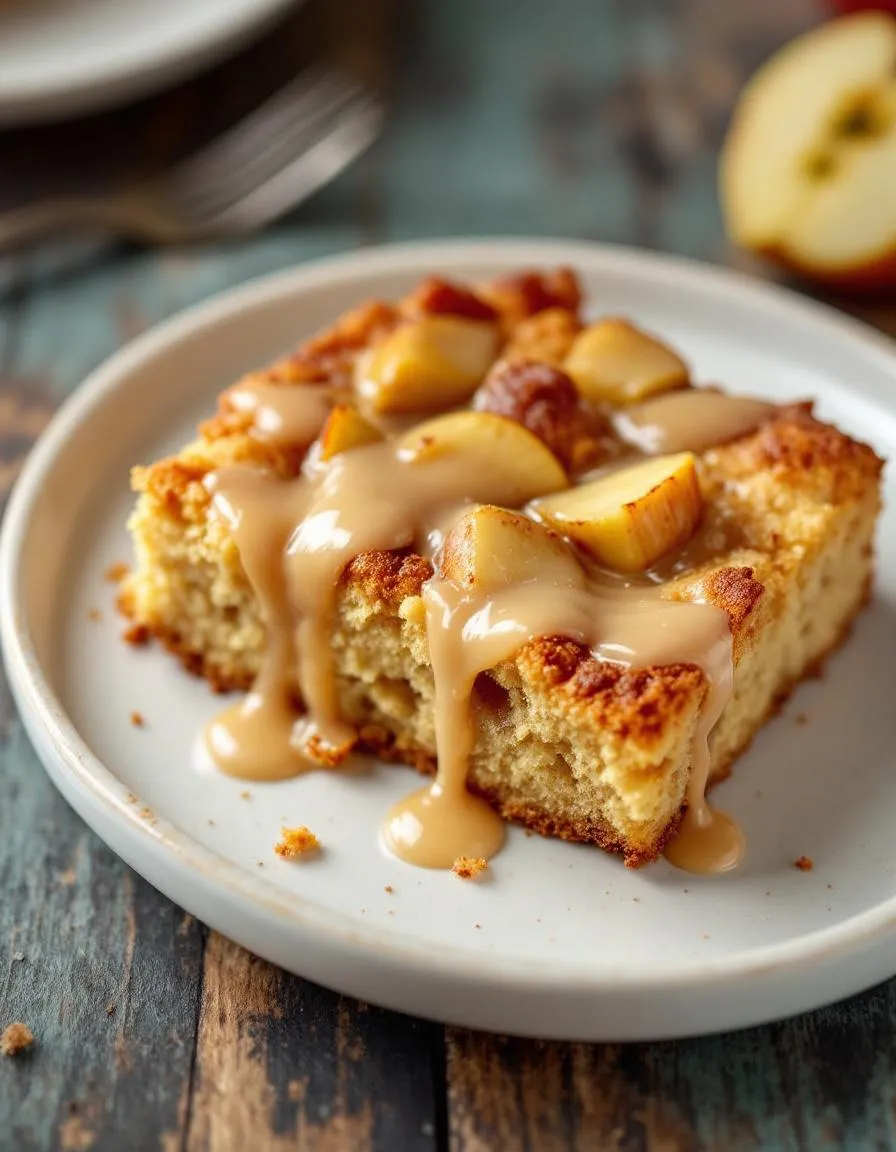
A moist, cinnamon-spiced quick bread swirled with tender apple pieces and topped with a sweet glaze, inspired by classic Amish baking.
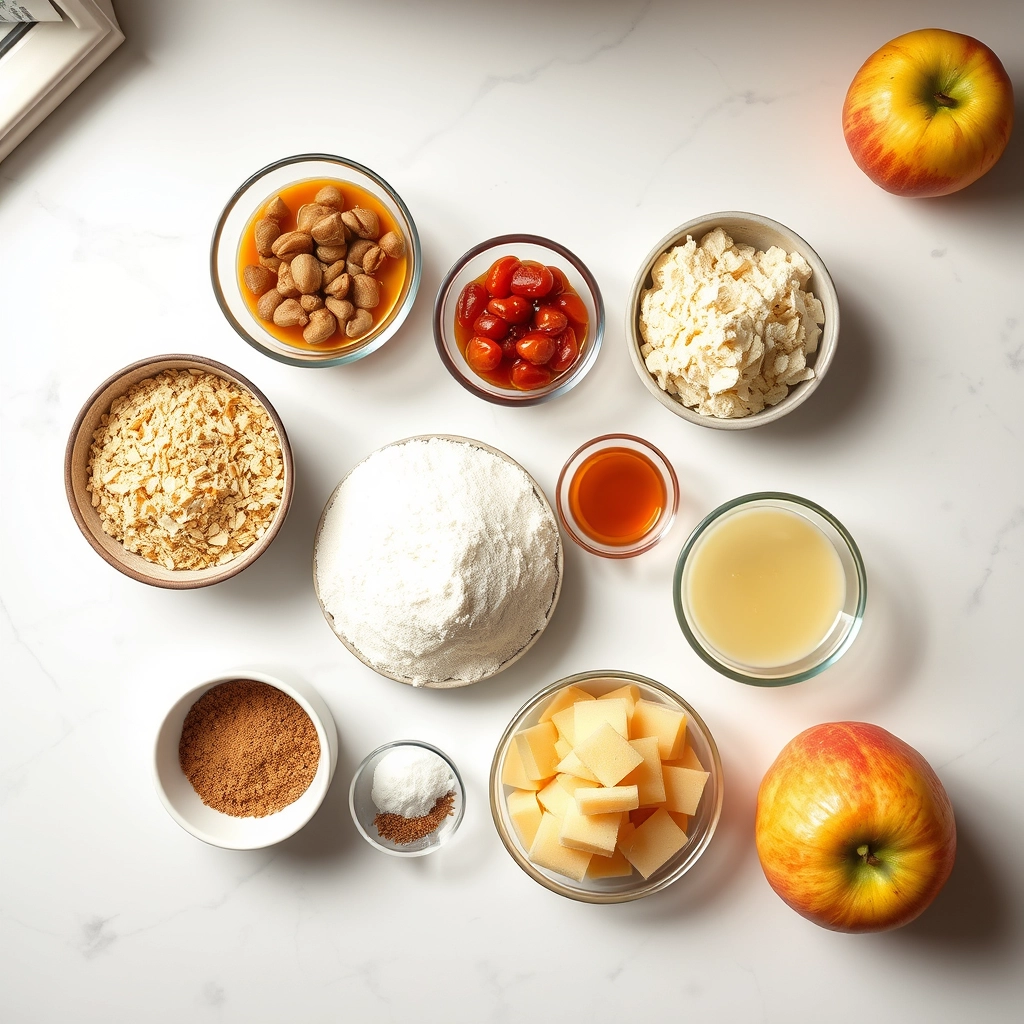

Ingredients

Scale

For the Crust:

  • 2 cups all-purpose flour
  • 1/2 cup granulated sugar
  • 1/4 cup brown sugar
  • 2 tsp baking powder
  • 1/2 tsp salt
  • 2 tsp ground cinnamon
  • 2 large eggs
  • 1 cup milk
  • 1/4 cup melted butter
  • 2 tsp vanilla extract
  • 2 cups peeled and diced apples
  • 1/2 cup powdered sugar
  • 2 tbsp milk

Instructions

1. Prepare the Crust:

  1. Preheat oven to 350°F (175°C). Grease a 9×5 inch loaf pan.
  2. In a large bowl, whisk together flour, granulated sugar, brown sugar, baking powder, salt, and cinnamon.
  3. In another bowl, beat eggs, then mix in milk, melted butter, and vanilla. Pour wet ingredients into dry and stir until just combined. Fold in diced apples.
  4. Pour batter into prepared pan. Bake for 50-60 minutes, or until a toothpick inserted comes out clean. Cool in pan for 10 minutes, then transfer to a wire rack.
  5. Whisk powdered sugar and 2 tbsp milk to make a glaze. Drizzle over cooled bread before slicing.

Notes

You can customize the seasonings to taste.

How to Prepare This Dish

Steps and time-saving tips

First, preheat your oven and generously grease a standard loaf pan. This initial step ensures your Easy Amish Apple Fritter Bread releases perfectly later. Meanwhile, whisk together all your dry ingredients in one large bowl. In a separate bowl, vigorously mix the wet ingredients until they are completely smooth and emulsified. Next, gently fold the wet mixture into the dry ingredients; however, remember to stop mixing as soon as the last streaks of flour disappear. Overmixing is the enemy of a tender crumb. Consequently, your batter will be thick and lumpy, which is exactly what you want. Now, spread half of this batter into the bottom of your prepared pan. Layer your spiced apple chunks evenly over this base, then dollop and carefully spread the remaining batter on top. Finally, swirl a knife through the layers just once or twice for that signature marbled effect. Bake until a tester comes out clean, then let the loaf cool slightly before drizzling with the simple glaze.

Mistakes I’ve made and learned from

I once rushed the mixing process for my Easy Amish Apple Fritter Bread and ended up with a tough, dense loaf instead of the soft, cake-like texture I craved. I learned the hard way that gently folding the batter until just combined is non-negotiable. Another common hiccup involved my apples sinking straight to the bottom. Thankfully, I discovered that tossing them in a light dusting of flour first helps them stay suspended throughout the bread beautifully. If you’re new to baking with fruit, my guide on avoiding a soggy bottom offers great tips that apply here too. Also, never underestimate the importance of proper pan preparation; a well-greased pan is your best friend for a flawless release. For more foundational advice that has saved my bakes countless times, my post on essential baking tools covers the must-haves that make everything easier.

rc="https://exorecipes.com/wp-content/uploads/2025/08/easy-amish-apple-fritter-bread-recipe.webp" />

Cultural Connection and Variations

Where this recipe comes from

This recipe for Easy Amish Apple Fritter Bread pulls its cozy charm straight from the heart of Amish country kitchens. The Amish community, known for its simple living and incredible baking, often creates recipes that transform humble ingredients into something spectacular. They typically use fresh, seasonal apples and a straightforward, no-fuss method. My own family, however, always adds a dash of nutmeg to the cinnamon sugar swirl. It gives the bread a warmer, spicier kick that makes the whole house smell like autumn.

Around the world, people put their own spin on similar treats. For instance, a French baker might layer the apples in a delicate, buttery galette. Meanwhile, a German version could lean into a denser, cake-like apple kuchen. The beauty of this concept is its adaptability. You truly can make this Easy Amish Apple Fritter Bread your own with a few small tweaks. Some families fold in chopped pecans for crunch, while others drizzle a simple vanilla glaze on top for extra sweetness. Every variation tells a different story.

ays-cooking">How it fits in today’s cooking

This bread fits perfectly into our modern need for comfort and convenience. It delivers the deep, satisfying flavor of a fried fritter without the mess of a pot of oil. Furthermore, it has become a star for holiday mornings and weekend brunches alike. Its incredible aroma alone makes any day feel special. Many home cooks now see it as the ultimate fall baking project, especially when they want to create a memorable dessert without too much stress.

Today, we often adapt it for our busy routines. For example, some bakers use a stand mixer to quickly bring the batter together. Others might swap in a different seasonal fruit, like pears or even peaches. This versatile bread pairs wonderfully with a cup of coffee for a quick breakfast. It also makes a fantastic offering for a potluck or a thoughtful gift for a neighbor. If you love this, you might also enjoy exploring other simple, comforting recipes like our classic Easy Banana Bread. For another seasonal twist, our Pumpkin Spice Muffins capture that same cozy feeling. Ultimately, this recipe connects us to tradition while fitting right into our contemporary lives.

Taste and Texture

What makes it delicious

This Easy Amish Apple Fritter Bread greets you with a warm, cinnamon-spiced fragrance that fills your kitchen. Each moist, tender bite bursts with soft, sweet apple pieces and a delightful brown sugar swirl. Furthermore, the crackly cinnamon-sugar crust gives way to an incredibly soft and chewy interior. Ultimately, the combination of tart Granny Smith apples and rich vanilla creates a perfectly balanced flavor in every slice of this Easy Amish Apple Fritter Bread.

r">Boosting the flavor

For an extra flavor boost, try adding a handful of toasted walnuts or pecans to the batter for a satisfying crunch. Alternatively, a simple vanilla glaze drizzled over the top while the loaf is still warm adds a sweet, creamy finish. Moreover, a scoop of vanilla bean ice cream transforms this bread into a decadent dessert. For more inspiration on perfect pairings, explore our guide to perfect cinnamon pairings. If you adore apple desserts, you will also love our classic old-fashioned apple crisp recipe.

Tips for Success

Best practices for results

First, always use room temperature ingredients for your Easy Amish Apple Fritter Bread because they combine more smoothly. Furthermore, do not overmix the batter after adding the flour; instead, gently fold it until just combined. For the best texture and to prevent a soggy bottom, always let the loaf cool in the pan for at least 15 minutes before transferring it to a wire rack. Consequently, you will achieve a perfectly moist crumb with a delightfully crisp top on your Easy Amish Apple Fritter Bread.

>Mistakes to avoid

Avoid packing your flour into the measuring cup, as this common error leads to a dense and dry loaf. Instead, lightly spoon the flour into the cup and level it off for perfect results every time. Additionally, do not skip layering the cinnamon sugar swirl in the middle; otherwise, you will miss the classic fritter flavor. For more guidance on getting your measurements just right, check out our essential baking conversion charts. Moreover, if your bread browns too quickly, tent it loosely with foil to protect the top while the center finishes baking, a technique we also detail in our post on common baking mistakes.

Serving and Pairing Suggestions

How to serve this dish

Serve your freshly baked Easy Amish Apple Fritter Bread warm for the ultimate experience. Furthermore, dust the top with a light snowfall of powdered sugar just before presenting it. For a special brunch or holiday gathering, slice the loaf thickly and arrange it on a rustic wooden board. You can also drizzle a simple vanilla glaze over each piece for extra decadence. Ultimately, this beautiful presentation makes the Easy Amish Apple Fritter Bread the star of any table.

What goes well with it

A hot cup of coffee perfectly complements the warm spices in this Easy Amish Apple Fritter Bread. Alternatively, a cold glass of milk provides a classic and refreshing pairing. For a truly indulgent breakfast spread, serve it alongside a scoop of our creamy Vanilla Bean Greek Yogurt. Moreover, a side of savory breakfast sausage or crispy bacon creates a wonderful sweet and salty balance. Finally, consider a slice with our sweet and tangy Maple Cinnamon Whipped Cream for an unforgettable dessert.

rc="https://s3-placid.s3.eu-central-1.amazonaws.com/production/rest-images/rawp1noeia0hh/int-57074c8b6c11615c57867815b6755b6a-x5ka1e15.jpg" />

What makes Amish apple fritter bread “Amish”?

The “Amish” title typically refers to the recipe’s simplicity and use of humble, pantry-staple ingredients, which is characteristic of Amish cooking. This Easy Amish Apple Fritter Bread recipe often features a dense, moist crumb and a sweet, cinnamony apple swirl, mimicking the flavors of a classic fried fritter in a simpler, baked loaf form.

Can I use a different type of apple for this bread?

Yes, you can use a variety of apples, but for the best results, choose a firm, tart apple that holds its shape when baked. Granny Smith, Honeycrisp, or Braeburn apples are excellent choices for this Easy Amish Apple Fritter Bread as they provide a nice texture and balance the sweetness of the glaze.

ank-math-faq-item"> How should I store Amish apple fritter bread to keep it fresh?

Once the loaf is completely cool, store it in an airtight container at room temperature for up to 2 days. For longer storage, you can refrigerate it for up to 5 days, but note that the bread may dry out slightly, so allowing it to come to room temperature before serving is best.

Can I make this recipe into muffins instead of a loaf?

Absolutely! This batter works perfectly for muffins. Simply divide the batter between a greased or lined muffin tin, ensuring you include the cinnamon-apple layers. Bake at the same temperature for 18-22 minutes, or until a toothpick inserted into the center comes out clean.

Easy Salmon Spinach Pasta Recipe

easy-salmon-spinach-pasta

Introduction

Ever have one of those nights where you crave something truly special, yet you feel completely drained? You want a meal that feels like a warm hug but does not demand hours in the kitchen. I know that feeling all too well. Fortunately, this incredible Salmon Spinach Pasta delivers restaurant-quality flavor with minimal effort. It is the perfect answer to your weeknight dilemma, combining comfort and elegance in a single, satisfying bowl.

So, what exactly is this dish? Fundamentally, Salmon Spinach Pasta is a beautifully balanced one-pan meal featuring flaky, tender salmon, vibrant fresh spinach, and al dente pasta all coated in a luxurious, creamy sauce. Often, recipes incorporate ingredients like garlic, lemon, and Parmesan cheese to create a rich depth of flavor. This combination matters because it transforms simple, wholesome ingredients into a gourmet experience you can easily achieve at home. Moreover, it fits a modern lifestyle perfectly, offering a fantastic way to incorporate heart-healthy fats from the salmon and a powerful nutrient boost from the spinach. Consequently, this dish proves that eating well does not require complex recipes or exotic ingredients. Our blog champions exactly this philosophy: creating approachable, delicious food that empowers you in the kitchen. This Salmon Spinach Pasta recipe, for instance, aligns seamlessly with our collection of quick weeknight dinners that are both impressive and practical. Ultimately, it is a testament to how a few good ingredients can create something extraordinary, making it a perfect fit for anyone looking to expand their culinary repertoire without the stress.

Why I Love This Recipe

This Salmon Spinach Pasta holds a special place in my heart because it was my go-to meal when I first learned to cook for myself. I remember wanting to create something that felt sophisticated but was actually foolproof. This recipe never let me down. The process of searing the salmon until the skin is perfectly crispy and watching the fresh spinach wilt into the creamy sauce is incredibly satisfying. It always makes me feel like a accomplished home chef, and the final result is a dish that consistently wows my family. It reminds me that the best meals are often the simplest ones, shared with loved ones around the table. For more inspiration on turning simple ingredients into something magical, explore our guide to crafting the perfect creamy garlic sauce, which is a cornerstone of this dish.

Health and Nutrition

Why it’s good for your body

This salmon spinach pasta delivers a powerful nutritional punch with every single bite. First, the wild-caught salmon provides an exceptional source of omega-3 fatty acids, which actively support brain function and reduce inflammation. Consequently, these healthy fats also promote excellent cardiovascular health. Additionally, the leafy green spinach packs a ton of essential vitamins like A, C, and K into the dish.

Moreover, this meal offers a fantastic balance of macronutrients that your body truly needs. The complex carbohydrates from the whole wheat pasta supply sustained energy, while the high-quality protein from the salmon effectively helps rebuild muscle tissue. Furthermore, the combination of fiber from the spinach and whole grains supports a healthy digestive system. Therefore, enjoying a serving of this salmon spinach pasta makes for a genuinely satisfying and nourishing experience.

Ultimately, the synergy of these ingredients creates a meal that is far greater than the sum of its parts. For instance, the vitamin C in the spinach boosts iron absorption, which means your body can better utilize the nutrients from the entire dish. Regularly incorporating this salmon spinach pasta into your rotation is a delicious strategy for boosting your overall wellness.

How it fits in a healthy lifestyle

This salmon spinach pasta seamlessly fits into a balanced and healthy lifestyle. It’s a perfect example of a meal that is both incredibly satisfying and genuinely good for you, making it easier to stick to your wellness goals without feeling deprived. The high protein content keeps you feeling full and energized for hours, which can help curb unnecessary snacking.

If you are following a heart-healthy diet, you will appreciate the omega-3s that support cholesterol levels and overall cardiovascular function. For those looking to build or maintain muscle, this dish provides a solid protein foundation. You can easily tailor this recipe to meet specific needs; for example, using a gluten-free pasta alternative makes it perfect for anyone with sensitivities. Finding more gluten-free dinner ideas can help keep your weekly menu exciting and diverse.

Ultimately, this is a quintessential healthy meal prep option that stores and reheats beautifully for a quick lunch or dinner. It proves that eating well doesn’t require complicated recipes or hard-to-find ingredients. For more inspiration on creating balanced plates, explore our guide to meal prep for weight loss that focuses on flavor and nutrition.

Print
clock clock iconcutlery cutlery iconflag flag iconfolder folder iconinstagram instagram iconpinterest pinterest iconfacebook facebook iconprint print iconsquares squares iconheart heart iconheart solid heart solid icon

Salmon Spinach Pasta

  • Author: Chef Mia

Description

A quick and nutritious pasta dish featuring flaked salmon and fresh spinach in a creamy garlic sauce.


Ingredients

Scale

For the Crust:

  • 12 oz pasta (such as penne or fettuccine)
  • 2 salmon fillets (about 1 lb total), skin removed
  • 2 tbsp olive oil
  • 3 cloves garlic, minced
  • 1 cup heavy cream
  • 4 cups fresh spinach
  • 1/2 cup grated Parmesan cheese
  • 1 tsp lemon juice
  • Salt and black pepper to taste
  • Fresh dill for garnish (optional)

Instructions

1. Prepare the Crust:

  1. Cook pasta according to package directions until al dente. Drain and set aside.
  2. Season salmon fillets with salt and pepper. Heat olive oil in a large skillet over medium heat. Cook salmon for 4-5 minutes per side until flaky. Remove from skillet and flake into chunks.
  3. In the same skillet, add garlic and sauté for 1 minute until fragrant. Pour in heavy cream and bring to a simmer.
  4. Add spinach and cook until wilted, about 2 minutes. Stir in Parmesan cheese and lemon juice until smooth.
  5. Add cooked pasta and flaked salmon to the skillet. Toss to coat evenly with the sauce. Season with additional salt and pepper if needed.
  6. Garnish with fresh dill and serve immediately.

Notes

You can customize the seasonings to taste.

How to Prepare This Dish

Steps and time-saving tips

First, get your pasta water boiling with a generous pinch of salt. Meanwhile, heat a large drizzle of olive oil in a separate skillet over medium heat. Pat your salmon fillets completely dry with a paper towel; this step is crucial for a beautiful sear. Season the fillets well with salt and pepper, then place them skin-side down in the hot skillet. Cook for about five to six minutes until the skin is wonderfully crispy. Flip the salmon carefully and cook for just another two minutes on the other side; the fish will finish cooking later. Remove the salmon from the pan and set it aside on a plate. Now, toss your minced garlic into the same skillet and let it become fragrant for thirty seconds. Immediately add all of your fresh spinach and stir continuously until it wilts down dramatically. This process goes very quickly, so stay close! Your pasta should be al dente by now; reserve a full cup of the starchy pasta water before you drain it. Combine the drained pasta, wilted spinach, and that glorious reserved pasta water back into the large skillet. Crumble the cooked salmon right over the top, then gently fold everything together. Finally, finish your Salmon Spinach Pasta with a big squeeze of fresh lemon juice and a sprinkle of Parmesan cheese. Serve immediately for the best flavor and texture.

and-learned-from">Mistakes I’ve made and learned from

I have absolutely overcooked the salmon more times than I care to admit, turning it dry and chalky instead of flaky and moist. The key is to remember it keeps cooking from residual heat even after you take it out of the pan. Now, I always pull it a minute early, and it turns out perfectly every single time. Another classic blunder of mine was not reserving that starchy pasta water, which resulted in a dish that was far too dry. That liquid gold is essential for creating a silky, cohesive sauce that clings to every noodle. For more on getting those textures just right, my guide on perfect pasta texture breaks it all down. Finally, if your sauce ever tastes a bit flat, a little acid is usually the answer. A splash of lemon juice at the end brightens the entire dish, a trick I learned from my post on sauce balancing basics. Trust me, learning from these mistakes makes this Salmon Spinach Pasta truly foolproof.

Cultural Connection and Variations

Where this recipe comes from

My grandmother first introduced me to this dish on a chilly autumn evening. She called it her “clean out the fridge” special, but it felt like so much more. Honestly, this Salmon Spinach Pasta recipe feels like a warm hug from the Mediterranean. It pulls inspiration from the coastal regions of Italy, where cooks effortlessly combine fresh seafood with garden greens and olive oil. Families there might use whatever fish the day’s catch provided, simmering it with wild greens and garlic.

Meanwhile, in Scandinav

ia, they often pair salmon with creamy dill sauces. Consequently, our version feels like a beautiful fusion of these two culinary worlds. Some families add a splash of white wine for acidity, while others stir in a generous dollop of cream cheese for richness. My aunt, for instance, always tops her Salmon Spinach Pasta with crispy fried capers for a salty crunch. Ultimately, this dish showcases how a few simple, wholesome ingredients can travel across borders and create something universally comforting.

How it fits in today’s cooking

This dish fits perfectly into our modern need for quick, nutritious, and satisfying meals. Busy weeknights demand recipes that come together in under 30 minutes, yet still feel special. Furthermore, its balance of lean protein, healthy fats, and leafy greens aligns perfectly with contemporary wellness goals. Many home cooks now adapt it for specific diets, using gluten-free pasta or swapping the cream for coconut milk.

You can easily incorporate this pasta into your regular meal prep rotation for effortless lunches. It also makes a fantastic, impressive option for a casual dinner party with friends. Ultimately, its versatility and timeless flavors ensure this dish remains a beloved staple on dinner tables everywhere.

>Taste and Texture

What makes it delicious

This Salmon Spinach Pasta delivers a truly luxurious experience. Flaky, tender salmon melts in your mouth, while the creamy sauce coats every noodle with a rich, savory depth. Fresh spinach adds a mild, earthy note and a pleasant, soft texture that wilts perfectly into the dish. Furthermore, the aroma of garlic and herbs like dill or parsley creates an incredibly inviting fragrance. Ultimately, each forkful of this Salmon Spinach Pasta offers a harmonious blend of creamy, savory, and fresh flavors that is deeply satisfying.

Boosting the flavor

You can easily elevate this dish with a few creative twists. For a brighter, tangier kick, simply stir in a spoonful of lemon zest or a splash of fresh juice right before serving. Additionally, topping your bowl with a sprinkle of toasted pine nuts or slivered almonds introduces a wonderful crunch. If you love a bit of heat, a pinch of red pepper flakes will add a warm, spicy undertone. For more inspiration on building flavor, explore our guide on essential herbs and spices. Moreover, swapping the cream for a rich creamy garlic sauce can create an even more decadent and aromatic experience.

Tips for Success

Best practices for results

First, always pat your salmon fillets completely dry with a paper towel before cooking. This step ensures you get a beautiful, crispy sear instead of steaming the fish. Furthermore, reserve a cup of the starchy pasta water before you drain the pot. Consequently, you can use this liquid to help your sauce cling perfectly to every noodle. For the best flavor, gently fold the fresh spinach into the hot pasta at the very end. It will wilt beautifully from the residual heat without becoming slimy. Finally, always taste your Salmon Spinach Pasta and adjust the seasoning with salt and pepper just before serving.

Mistakes to avoid

A common mistake is overcooking the salmon, which results in a dry and tough texture. Instead, cook it just until it flakes easily with a fork. For more guidance, check out our guide on how to cook salmon perfectly every time. Additionally, avoid adding the spinach too early while the pan is still on the heat. This will cause it to release too much water and make your entire dish soggy. Moreover, do not skip toasting your garlic and shallots. This crucial step builds a deep, foundational flavor that elevates the entire recipe. If you are unsure about balancing flavors, our tips on balancing pasta sauces can help you create a harmonious dish.

Serving and Pairing Suggestions

How to serve this dish

Immediately serve this Salmon Spinach Pasta while it is still warm for the best flavor and texture. For a beautiful presentation, twirl the pasta into a nest using tongs and place a flaked salmon fillet on top. Furthermore, garnish each plate with a sprinkle of fresh dill, a crack of black pepper, and a generous squeeze of lemon juice to make the colors pop. This elegant dish truly shines for a date night at home or a casual weekend dinner with friends. Ultimately, a simple white serving bowl creates a lovely contrast with the vibrant green spinach and pink salmon.

h-it">What goes well with it

A crisp, chilled white wine like Sauvignon Blanc beautifully cuts through the richness of this Salmon Spinach Pasta. For a non-alcoholic option, consider sparkling water with a wedge of lime to cleanse the palate between bites. Additionally, a light and refreshing side salad provides the perfect crunchy contrast. Our classic Caesar Salad offers a garlicky punch that complements the meal wonderfully. Finally, complete your feast with a slice of something sweet, like our popular Lemon Ricotta Cake, for a truly satisfying and memorable dining experience.

Can you use frozen spinach in salmon spinach pasta?

Yes, frozen spinach works perfectly in this dish. Make sure to thoroughly thaw and squeeze out all the excess water to prevent your salmon spinach pasta from becoming watery. This step ensures a rich, creamy sauce that clings to the pasta.

ank-math-faq-item"> What type of pasta is best for salmon spinach pasta?

Short, sturdy pasta shapes like penne, fusilli, or farfalle are ideal because they hold the creamy sauce and chunks of salmon well. Their ridges and shapes help capture every bit of flavor, making each bite of your salmon spinach pasta delicious.

How do you keep salmon from drying out in pasta?

The key is to cook the salmon separately and add it at the end. Pan-sear the salmon fillets just until they are cooked through and flake easily with a fork, then gently fold them into the finished pasta and spinach to warm through.

Can you make salmon spinach pasta ahead of time?

You can prep the components ahead, but it’s best assembled just before serving. Cook the sauce and pasta separately, store them in the fridge, and then combine them gently with the freshly cooked salmon when ready to serve for the best texture.

div>

Ultimate Garlic Mushroom Grilled Cheese Recipe

ultimate-garlic-mushroom-grilled-cheese

Introduction

Is there anything more comforting than a perfectly golden, buttery grilled cheese sandwich? Now, imagine elevating that classic with savory, garlicky sautéed mushrooms for the ultimate cozy meal. This Garlic Mushroom Grilled Cheese recipe transforms a simple lunch into a gourmet experience that feels incredibly indulgent. Furthermore, it delivers that unbeatable combination of crispy bread and molten, stretchy cheese we all crave. Ultimately, it is the quickest way to turn an ordinary day into something truly special.

So what exactly is a Garlic Mushroom Grilled Cheese? Fundamentally, it starts with the familiar foundation of two slices of bread and plenty of cheese. However, we then add a rich, umami-packed filling of mushrooms sautéed with garlic and herbs. This crucial step introduces a deep, savory flavor that makes the sandwich feel far more sophisticated. The recipe matters because it proves that you do not need complicated techniques or rare ingredients to create something extraordinary. In fact, it takes a beloved childhood favorite and upgrades it for the adult palate without losing any of its nostalgic charm. This approach perfectly fits our blog’s tone, which celebrates making everyday cooking exciting and accessible. For instance, if you enjoy mastering simple yet impactful dishes, you might also love our guide for the perfect garlic butter, which is a key player in this recipe. Moreover, this sandwich is incredibly versatile; you can easily enjoy it with a light side salad for a complete meal or simply on its own for the ultimate comfort food experience. Ultimately, it is a testament to how a few quality ingredients, when combined thoughtfully, can create pure magic.

Why I Love This Recipe

This Garlic Mushroom Grilled Cheese holds a special place in my heart because it was my go-to meal in my first apartment. I vividly remember experimenting with adding mushrooms to a basic grilled cheese to make my grocery budget feel more luxurious. The moment I took that first bite, with the earthy mushrooms and sharp cheese mingling together, I knew I had created something truly special. It represents that beautiful intersection of simplicity and decadence, and it never fails to make my kitchen smell absolutely incredible.

Health and Nutrition

Why it’s good for your body

This Garlic Mushroom Grilled Cheese delivers a powerful nutritional punch. For instance, garlic provides allicin, a compound that actively supports immune function. Meanwhile, mushrooms offer a fantastic source of selenium and B vitamins, which naturally boost your energy levels.

Furthermore, the combination creates a truly satisfying meal. Consequently, you feel full and energized for hours after enjoying it. This particular Garlic Mushroom Grilled Cheese also promotes heart health. Olive oil, a key ingredient, contains monounsaturated fats that actively help manage cholesterol.

Additionally, you get a solid dose of protein and calcium from the melted cheese. These nutrients are essential for building strong muscles and bones. Ultimately, this dish proves that comfort food can also be incredibly good for you. Therefore, treating yourself to this Garlic Mushroom Grilled Cheese means you are nourishing your body with every single bite.

How it fits in a healthy lifestyle

This grilled cheese easily fits into a balanced eating plan. You can pair it with a light side salad or a bowl of vegetable soup for a complete, satisfying meal that covers all your nutritional bases. It’s all about the company it keeps on your plate.

For those following specific diets, this recipe is wonderfully adaptable. Simply use your favorite gluten-free bread to make it celiac-friendly. You can also opt for a low-fat cheese variety and control the amount of oil to align with heart-healthy goals. Looking for more ways to create balanced comfort food? Explore our guide on healthy comfort food swaps for more clever ideas. Remember, enjoying the foods you love is a key part of a sustainable healthy lifestyle. If you are curious about other nutrient-packed ingredients, our article on superfoods you already have in your pantry might surprise you.

Print
clock clock iconcutlery cutlery iconflag flag iconfolder folder iconinstagram instagram iconpinterest pinterest iconfacebook facebook iconprint print iconsquares squares iconheart heart iconheart solid heart solid icon

Garlic Mushroom Grilled Cheese

  • Author: Chef Mia

Description

A savory twist on the classic grilled cheese, featuring buttery garlic mushrooms and melted cheese between golden, crispy bread.


Ingredients

Scale

For the Crust:

  • 4 slices sourdough bread
  • 2 tablespoons butter, divided
  • 1 tablespoon olive oil
  • 8 oz cremini mushrooms, sliced
  • 2 cloves garlic, minced
  • 1 teaspoon fresh thyme leaves
  • 1 cup shredded Gruyère cheese
  • 1/2 cup shredded mozzarella cheese
  • Salt and black pepper to taste

Instructions

1. Prepare the Crust:

  1. Heat olive oil and 1 tablespoon butter in a skillet over medium heat. Add mushrooms and cook until browned, about 5-7 minutes. Add garlic and thyme, cook for 1 minute more. Season with salt and pepper, then remove from heat.
  2. Butter one side of each bread slice. Place two slices buttered-side down in a clean skillet over medium heat.
  3. Divide the mushroom mixture between the two slices in the skillet. Top each with equal amounts of Gruyère and mozzarella cheese. Place the remaining bread slices on top, buttered-side up.
  4. Cook until the bottom is golden brown, about 3-4 minutes. Carefully flip and cook the other side until golden and cheese is melted, about 3-4 minutes more. Serve immediately.

Notes

You can customize the seasonings to taste.

How to Prepare This Dish

Steps and time-saving tips

First, grab a large skillet and warm your olive oil over a medium heat. Meanwhile, thinly slice your fresh mushrooms and mince the garlic. Toss them into the skillet and sauté everything until the mushrooms release their moisture and turn a beautiful golden brown. Next, season the mixture generously with salt, pepper, and a pinch of thyme for that incredible depth of flavor. While the mushrooms cook, you can butter the outsides of your bread slices. For a fantastic time-saving tip, use a high-quality store-bought sliced sourdough; it holds up perfectly to the hearty filling. Then, simply layer a generous amount of shredded cheese on the unbuttered side of one bread slice, pile on your savory garlic mushroom mixture, and top with more cheese before placing the second slice on top, buttered side out. Finally, grill your sandwich in the same skillet over medium-low heat until each side is deeply golden and crisp and the cheese has melted into gooey perfection. Press down gently with your spatula for even browning and that classic grilled cheese feel.

Mistakes I’ve made and learned from

I used to rush the process and crank the heat to high, which resulted in a burnt exterior and a disappointingly cold center. I learned that low and slow is the absolute key for a perfect melt. Another common mistake was overstuffing the sandwich with too many mushrooms, which made it impossible to flip without a major mess. Now, I make sure my filling is well-cooked and any excess liquid has evaporated before assembling. Getting the cheese-to-filling ratio right is crucial for structural integrity. For more on building the ultimate sandwich, my guide on how to make the perfect breakfast sandwich has some great cross-over tips. Also, if you love this savory combination, you must try my savory mushroom and thyme scones; they use a very similar flavor profile in a delightful, flaky pastry.

rc="https://exorecipes.com/wp-content/uploads/2025/08/ultimate-garlic-mushroom-grilled-cheese-recipe.webp" />

Cultural Connection and Variations

Where this recipe comes from

We can trace the roots of this sandwich back to two different comfort food traditions. Of course, the classic American grilled cheese provides the buttery, crispy foundation. Meanwhile, the rich, earthy filling takes its cue from European mushroom dishes, like the creamy duxelles of French cuisine or the garlicky toppings you often find on Italian crostini. Consequently, this fusion creates something entirely new and deeply satisfying.

My own family puts its spin on the Garlic Mushroom Grilled Cheese by adding a whisper of fresh thyme. Some regions, however, might incorporate wild mushrooms foraged from local forests, which adds a wonderfully deep, seasonal flavor. In other parts of the world, cooks might use a sharp provolone or a funky gruyere instead of classic cheddar. Ultimately, this versatility makes every version a unique tribute to its maker.

This dish truly feels l

ike a hug on a plate, especially during the chilly autumn months. Preparing a perfect Garlic Mushroom Grilled Cheese connects us to a global tradition of making simple, available ingredients feel special and decadent. It is a small luxury that everyone can enjoy.

How it fits in today’s cooking

This sandwich absolutely thrives in modern kitchens because it delivers maximum flavor with minimal fuss. It fits perfectly into our current love for #MeatlessMonday and plant-forward eating, offering a deeply savory and satisfying option that even carnivores adore. Furthermore, its simplicity makes it an ideal choice for a quick weeknight dinner after a long day.

Today’s cooks often adapt the recipe to suit their dietary needs. For instance, they might use a sturdy gluten-free bread or a fantastic vegan butter and cheese alternative. You can easily pair it with a light soup for a complete meal; a classic tomato soup is a timeless combo, but it also goes wonderfully with a cozy Creamy Potato Leek Soup. Moreover, its comforting nature makes it a star for casual entertaining.

It also shines as the u

ltimate comfort food during the holiday season. After a day of holiday shopping or decorating, a warm, melty Garlic Mushroom Grilled Cheese feels like a reward. For a truly special brunch, serve it alongside a slice of something sweet, like our popular Cinnamon Swirl Bread. Ultimately, this humble sandwich continues to earn its place at our tables, proving that the best dishes are often the simplest ones.

Taste and Texture

What makes it delicious

This Garlic Mushroom Grilled Cheese delivers a powerful savory punch. First, you smell the deeply fragrant garlic and earthy mushrooms sizzling in herb-infused butter. Then you bite in, discovering a perfect contrast of textures. The exterior offers a wonderfully crisp and golden-brown crunch, thanks to the butter-toasted bread. Meanwhile, the inside reveals a luxuriously creamy and gooey melt of cheese, which beautifully binds the tender, umami-rich mushroom filling. Ultimately, every element in this sandwich creates a harmonious and deeply satisfying comfort food experience.

Boosting the flavor

Consider boosting the flavor of your Garlic Mushroom Grilled Cheese with a few simple tweaks. For instance, a spoonful of caramelized onions adds a sweet depth that complements the savory mushrooms perfectly. Alternatively, a dash of truffle oil or a sprinkle of fresh thyme just before serving introduces an elegant, aromatic finish. Furthermore, a tangy spread like our creamy herb aioli cuts through the richness beautifully. Finally, serving your sandwich with a side of roasted tomato soup creates a classic, comforting combination that is always a winner.

rc="https://exorecipes.com/wp-content/uploads/2025/08/ultimate-garlic-mushroom-grilled-cheese.webp" />

Tips for Success

Best practices for results

First, always use a generous amount of butter on the outside of your bread for a truly golden and crispy crust. Furthermore, cook your Garlic Mushroom Grilled Cheese over medium-low heat to ensure the cheese melts completely without burning the bread. Additionally, press down on the sandwich gently with your spatula to encourage even browning and help everything fuse together. Finally, let your Garlic Mushroom Grilled Cheese rest for two minutes before cutting to allow the cheese to set slightly.

Mistakes to avoid

A common mistake is overloading the sandwich with too many mushrooms, which can make it soggy and difficult to eat. Instead, make sure you properly sauté and drain your mushrooms first to concentrate their flavor. Moreover, avoid using cheese that is too cold straight from the fridge, as it will not melt evenly. For the best melt, consider grating your cheese from a block using the techniques we outline in our guide on how to grate cheese. Also, do not rush the cooking process by using high heat; otherwise, you will end up with a blackened exterior and unmelted interior. For more insights on mastering stovetop cooking, our tips for perfect stovetop temperatures are incredibly helpful.

g-suggestions">Serving and Pairing Suggestions

How to serve this dish

Immediately serve your Garlic Mushroom Grilled Cheese hot from the pan for the ultimate gooey, melty experience. For a beautiful presentation, slice it diagonally to showcase the cheesy, mushroom-filled interior. Additionally, a light sprinkle of fresh chopped parsley or chives on top adds a pop of color and a fresh flavor contrast. This sandwich truly shines at a cozy weekend lunch or as the star of a simple weeknight dinner. Ultimately, its comforting nature makes it a fantastic choice for a rainy day or a casual gathering with friends.

What goes well with it

A classic tomato soup provides the perfect creamy, tangy counterpart to your rich and savory Garlic Mushroom Grilled Cheese. For a lighter option, a simple arugula salad with a lemon vinaigrette cuts through the richness beautifully. Furthermore, a crisp, chilled glass of white wine like Sauvignon Blanc or a pale ale complements the earthy mushrooms and sharp cheese. If you’re planning a larger meal, this sandwich pairs wonderfully with a bowl of our roasted cauliflower soup. For a truly indulgent spread, consider serving it alongside our famous ultimate breakfast casserole during a holiday brunch.

math-faq-block">
What kind of cheese is best for a garlic mushroom grilled cheese?

For the ultimate Garlic Mushroom Grilled Cheese, use a combination of cheeses that melt well and complement the earthy mushrooms. A classic sharp white cheddar provides a tangy flavor, while Gruyère or Fontina offers excellent creaminess. The key is to use cheeses that will create a smooth, gooey texture throughout the sandwich.

How do you keep a grilled cheese from getting soggy with mushrooms?

The secret is to thoroughly cook the mushrooms beforehand to remove their excess moisture. Sauté the garlic and mushrooms until they are golden brown and all the liquid released into the pan has evaporated. This step ensures your Garlic Mushroom Grilled Cheese has a crispy exterior and is never soggy.

Can you make garlic mushroom grilled cheese ahead of time?

You can prepare the garlic mushroom filling up to two days in advance and store it in an airtight container in the refrigerator. However, for the best texture, assemble and grill the sandwich just before serving. A freshly made Garlic Mushroom Grilled Cheese will always have the perfect crispy bread and melted cheese.

ank-math-faq-item"> What can I serve with a garlic mushroom grilled cheese?

This rich sandwich pairs wonderfully with a light, acidic side to cut through the richness. A simple tomato soup is a classic choice, or try a fresh green salad with a tangy vinaigrette. For a heartier meal, serve your Garlic Mushroom Grilled Cheese with a bowl of creamy roasted red pepper soup.

Easy White Chicken Chili Recipe – Best Homemade Version

easy-white-chicken-chili

Introduction

Is there anything more comforting than a warm, hearty bowl of chili on a crisp day? Honestly, we think not. This incredible White Chicken Chili recipe delivers that cozy feeling in every single spoonful. Furthermore, it is a wonderfully flavorful and satisfying meal that your entire family will absolutely adore. It is the perfect solution for those busy weeknights when you need something both nourishing and incredibly easy to prepare. Ultimately, this dish will quickly become a cherished staple in your regular dinner rotation.

White Chicken Chili is a creamy, broth-based stew that features tender chicken, white beans, and green chiles as its star ingredients. Unlike its tomato-based, beefy cousin, this version offers a uniquely lighter yet equally robust flavor profile. It matters because it provides a fantastic alternative for anyone seeking a comforting meal that feels a bit fresher and is often quicker to make. This recipe fits our blog’s tone perfectly as we always strive to share accessible, family-friendly dishes that do not sacrifice an ounce of flavor. For instance, if you enjoy simple, one-pot wonders, you will also love our popular Creamy Tuscan Chicken. Moreover, this chili is incredibly versatile. You can easily adjust the spice level to suit your taste, making it a crowd-pleaser for both adults and kids alike. It is the ideal make-ahead meal, as the flavors meld and deepen beautifully overnight. Essentially, it represents the kind of fuss-free, delicious cooking that we champion every day. For another great option that reheats wonderfully, check out our easy Instant Pot Beef Stew.

Why I Love This Recipe

This White Chicken Chili recipe holds a special place in my heart because it reminds me of crisp autumn evenings gathered around the table with my family. I love how the simple combination of ingredients creates such a complex and comforting flavor. Furthermore, it is my go-to dish for potlucks and casual get-togethers because it always receives rave reviews and requests for the recipe. Ultimately, it represents more than just a meal. It symbolizes warmth, community, and the simple joy of sharing good food with the people you love.

Health and Nutrition

Why it’s good for your body

White Chicken Chili offers a powerful combination of lean protein and fiber. Consequently, this delicious meal provides sustained energy and keeps you feeling full for hours. Moreover, the lean chicken breast delivers a high-quality protein punch which actively supports muscle repair and a healthy metabolism.

Additionally, the beans and vegetables contribute significant nutritional value. For instance, the white beans pack a serious fiber boost that promotes excellent digestive health and stable blood sugar levels. Furthermore, ingredients like onions and garlic provide potent antioxidants and anti-inflammatory compounds that strengthen your immune system.

Ultimately, a warm bowl of White Chicken Chili acts as a fantastic source of essential vitamins and minerals. Finally, you can enjoy this comforting dish knowing it fuels your body with high-quality nutrients. Therefore, making White Chicken Chili means you are choosing a meal that truly loves you back.

How it fits in a healthy lifestyle

This chili seamlessly fits into various healthy eating plans. It naturally aligns with a high-protein diet, thanks to the chicken and beans, helping you meet your fitness goals. It’s also a great gluten-free option, making it perfect for those with dietary restrictions.

You can easily enjoy White Chicken Chili as a make-ahead lunch that powers you through the afternoon or as a simple, satisfying weeknight dinner. For more inspiration on balancing your meals, explore our guide to easy meal prep ideas. If you’re looking for other hearty and healthy options, our comfort food recipes use wholesome ingredients to create nourishing dishes the whole family will love.

Print
clock clock iconcutlery cutlery iconflag flag iconfolder folder iconinstagram instagram iconpinterest pinterest iconfacebook facebook iconprint print iconsquares squares iconheart heart iconheart solid heart solid icon

White Chicken Chili

  • Author: Chef Mia

Description

A creamy and comforting chili made with tender chicken, white beans, and mild green chiles, perfect for a cozy meal.


Ingredients

Scale

For the Crust:

  • 1 lb boneless, skinless chicken breasts, diced
  • 1 tbsp olive oil
  • 1 medium onion, diced
  • 2 cloves garlic, minced
  • 1 (4 oz) can diced green chiles
  • 2 (15 oz) cans great northern beans, drained and rinsed
  • 4 cups chicken broth
  • 1 tsp ground cumin
  • 1/2 tsp dried oregano
  • 1/4 tsp cayenne pepper (optional)
  • Salt and black pepper to taste
  • 1/2 cup heavy cream or half-and-half
  • 1 cup shredded Monterey Jack cheese
  • Fresh cilantro for garnish

Instructions

1. Prepare the Crust:

  1. Heat olive oil in a large pot over medium heat. Add diced chicken and cook until no longer pink, about 5-7 minutes. Remove and set aside.
  2. In the same pot, add onion and cook until softened, about 5 minutes. Add garlic and cook for 1 minute until fragrant.
  3. Stir in green chiles, beans, chicken broth, cumin, oregano, cayenne (if using), salt, and pepper. Bring to a simmer.
  4. Return cooked chicken to the pot. Simmer for 20 minutes, stirring occasionally.
  5. Reduce heat to low. Stir in heavy cream and shredded cheese until cheese is melted and soup is creamy.
  6. Serve hot, garnished with fresh cilantro.

Notes

You can customize the seasonings to taste.

How to Prepare This Dish

Steps and time-saving tips

First, grab your largest pot or Dutch oven and heat a bit of oil over medium-high heat. Next, add your diced onion and poblano peppers, then sauté them until they become beautifully soft and fragrant. This step builds a fantastic flavor base, so don’t rush it. Meanwhile, you can quickly shred your pre-cooked chicken to save a ton of time. Alternatively, use a store-bought rotisserie chicken for the ultimate shortcut. Now, stir in your minced garlic and let it cook for just one minute until it smells incredible. Immediately add your chicken broth, green chiles, and all those wonderful spices. Bring everything to a lively boil, then immediately reduce the heat to a gentle simmer. Let the chili bubble away for about fifteen minutes to let the flavors get to know each other. Finally, stir in your canned white beans and shredded chicken, then heat everything through. Serve your creation with a generous dollop of sour cream, a sprinkle of cheese, and some fresh cilantro. This entire process feels simple and delivers a deeply satisfying meal.

and-learned-from">Mistakes I’ve made and learned from

I have absolutely made my share of mistakes with this white chicken chili. My biggest error was cranking the heat way too high in a rush to get it done. Unfortunately, this caused the broth to reduce too much and left me with a disappointingly thick, almost pasty stew instead of a brothy chili. I learned that a low, patient simmer is the only way to go for perfect results. Another common issue was underseasoning; the beans and broth really soak up those spices. Now, I always taste and adjust my seasoning right at the very end, right before serving. For more guidance on getting your seasoning just right, check out my tips on how to balance flavors. Also, if you’re new to working with peppers, my guide on chopping peppers without the burn will save you from a lot of discomfort. Trust me, learning these lessons the hard way makes your next pot of chili truly exceptional.

Cultural Connection and Variations

Where this recipe comes from

White Chicken Chili tells a distinctly modern American story. Unlike its tomato-based, beefy cousin, this creamy, comforting dish emerged from the Southwest. Chefs and home cooks began crafting it in the 1980s, blending green chiles and white beans with Mexican influences. Consequently, it carved out its own unique culinary identity.

Families across the cou

ntry quickly adopted it, each adding their own signature twist. Some regions swear by adding corn for sweetness, while others insist on a generous handful of spicy jalapeños. My own family always simmers the pot with a whole, roasted poblano pepper. We then shred it into the broth for a subtle, smoky depth that makes our version special.

Globally, you find similar comforting white bean and chicken stews, but they wear different hats. In Portugal, they might add linguiça sausage. Meanwhile, a Italian version would likely include cannellini beans and a shower of rosemary. Ultimately, the beauty of this particular White Chicken Chili recipe is its incredible flexibility. It warmly welcomes whatever your pantry or heritage provides.

How it fits in today’s cooking

Today, this chili remains a superstar for busy weeknights and festive gatherings alike. Its relevance absolutely soars during the autumn and winter months. Families frequently feature it as a cozy game day meal or a simple, yet impressive, holiday open-house offering.

Modern cooks brilliantl

y adapt it to fit various dietary needs. For instance, they easily make it dairy-free with coconut milk or instantly boost protein with an extra can of beans. It pairs perfectly with so many sides. Personally, I love serving it with a slice of moist banana bread for a sweet contrast. Furthermore, its make-ahead nature makes it a fantastic option for meal prepping. You can easily freeze portions for those nights when you need a quick, wholesome dinner. After all, a warm bowl of White Chicken Chili feels like a hug in a bowl. It is the ultimate comfort food that never goes out of style, much like the classic chocolate chip cookie.

Taste and Texture

What makes it delicious

This White Chicken Chili wraps you in a warm, savory embrace from the very first spoonful. Tender chunks of chicken mingle with creamy white beans in a rich, mildly spicy broth. Each bite delivers a comforting, velvety texture that feels incredibly satisfying. Furthermore, the bright, fragrant notes of lime and cilantro cut through the richness, creating a perfectly balanced flavor profile. Ultimately, the gentle heat from green chiles and cumin builds slowly, making this White Chicken Chili a complex yet cozy dish.

Boosting the flavor

Fortunately, you can easily elevate your bowl with a few creative tweaks. For instance, try stirring in a spoonful of sour cream or Greek yogurt to amplify the creamy texture and add a tangy twist. Additionally, a final squeeze of fresh lime juice just before serving will brighten all the flavors beautifully. For a smoky depth, consider roasting your own poblano peppers instead of using canned green chiles. Moreover, a dollop of this vibrant Cilantro Lime Crema adds a cool, herby flourish that complements the spices perfectly. Finally, serving it alongside a slice of warm, buttery Southern Cornbread makes for the ultimate comforting meal.

rc="https://exorecipes.com/wp-content/uploads/2025/08/easy-white-chicken-chili.webp" />

Tips for Success

Best practices for results

Always use a combination of white beans for the best texture in your White Chicken Chili. Furthermore, shred your own cooked chicken instead of buying pre-shredded for superior flavor and moisture. Additionally, do not skip the step of sautéing your aromatics, as this builds a critical flavor foundation. Finally, let your chili rest for ten minutes off the heat before serving to allow the flavors to fully meld together.

Mistakes to avoid

A common mistake is boiling the chili vigorously after adding the dairy, which often causes it to curdle. Instead, always temper your sour cream or yogurt by whisking in a small amount of hot broth first. Similarly, using bland, underseasoned broth can result in a flat-tasting White Chicken Chili. For a guaranteed solution, consider making your own homemade chicken broth for maximum flavor. Moreover, remember that beans will continue to absorb liquid as the chili sits. Consequently, if you plan on having leftovers, you should hold back a cup of broth to stir in later, just like when you are meal prepping like a pro.

g-suggestions">Serving and Pairing Suggestions

How to serve this dish

Present your White Chicken Chili in a beautiful way to make any meal feel special. For instance, ladle it into deep bowls and create a vibrant garnish bar for everyone to customize their own bowl. Furthermore, a generous topping of fresh cilantro, a dollop of cool sour cream, and a sprinkle of sharp cheddar cheese make this dish visually stunning and incredibly delicious. This cozy White Chicken Chili truly shines at casual gatherings like game day parties or a simple family dinner. Ultimately, its comforting nature also makes it a wonderful, stress-free option for holiday potlucks.

What goes well with it

You will absolutely love how a slice of warm, buttery cornbread soaks up the rich flavors of your White Chicken Chili. Alternatively, a crisp, refreshing side salad provides a perfect light and crunchy contrast to the hearty chili. For a truly special meal, consider serving it alongside our popular Garlic Herb Focaccia for dipping. Moreover, a chilled, crisp lager or a zesty lime margarita beautifully cuts through the dish’s creaminess. Finally, do not forget to offer a side of our creamy Avocado Crema for an extra layer of cool, tangy flavor that everyone will adore.

math-faq-block">
What is white chicken chili made of?

White Chicken Chili is typically made with shredded chicken, white beans (like cannellini or great northern beans), onions, garlic, green chiles, and a creamy broth base often featuring chicken stock and sometimes cream cheese or sour cream. It’s seasoned with cumin, oregano, and other spices for a warm, comforting flavor that distinguishes it from traditional red chili.

What to serve with white chicken chili?

This chili pairs wonderfully with cornbread, tortilla chips, or a side of rice for a hearty meal. A fresh, crisp side like a green salad or coleslaw helps balance the richness, and toppings like avocado, shredded cheese, and cilantro add great texture and flavor to your bowl of White Chicken Chili.

How to thicken white chicken chili?

To thicken your White Chicken Chili, mash some of the beans against the side of the pot with a spoon or fork to release their natural starches. Alternatively, you can create a quick slurry by mixing a tablespoon of cornstarch with two tablespoons of cold water and stirring it into the simmering chili until it reaches your desired consistency.

ank-math-faq-item"> Can you freeze white chicken chili?

Yes, White Chicken Chili freezes exceptionally well. Allow the chili to cool completely before transferring it to airtight containers or freezer bags, leaving some space for expansion. It can be stored frozen for up to 3 months, making it a perfect make-ahead meal for busy nights.

Easy Creamy Lemon Chicken Pasta Recipe

easy-creamy-lemon-chicken-pasta

Introduction

Ever have one of those days where you desperately crave a restaurant-quality meal but absolutely cannot face the thought of a complicated recipe or a huge pile of dishes? We completely understand. That specific feeling is precisely why this incredibly easy and outrageously delicious Creamy Lemon Chicken Pasta exists. It is your ultimate weeknight dinner hero, transforming simple ingredients into a luxurious, comforting dish that feels like a warm hug.

Creamy Lemon Chicken Pasta is a vibrant and satisfying one-pan wonder that masterfully balances rich, savory flavors with a bright, citrusy kick. This dish matters because it delivers a truly impressive and elegant meal without any of the stress typically associated with gourmet cooking. Essentially, it proves that you can create something extraordinary on a busy Wednesday night. The creamy sauce, which we make from scratch, clings to every strand of pasta and piece of tender chicken, offering a restaurant-style experience right at your kitchen table. Furthermore, it perfectly fits our blog’s mission to provide reliable, family-approved recipes that actually work and bring people together around the table. For more inspiration on turning simple ingredients into amazing meals, explore our collection of easy chicken dinners. This Creamy Lemon Chicken Pasta recipe, in particular, uses a fantastic method for cooking chicken that ensures it stays incredibly juicy and flavorful every single time. Ultimately, this dish is a celebration of simplicity meeting sophistication, making it a guaranteed crowd-pleaser for both busy parents and aspiring home chefs alike. If you enjoy mastering these fundamental techniques, you will also love our guide on how to cook chicken breast perfectly.

Why I Love This Recipe

This Creamy Lemon Chicken Pasta holds a special place in my heart because it was the first meal I ever confidently cooked for my now-husband when we were dating. I vividly remember wanting to make something that looked and tasted impressive but that I couldn’t possibly mess up. The combination of the pan-seared chicken with the bright lemon sauce felt so sophisticated, and his reaction was absolutely priceless. Now, we make it at least once a month, and it always brings back those happy, nervous memories from our early days together. It is my forever go-to for a reliable dose of comfort and joy.

Health and Nutrition

Why it’s good for your body

This Creamy Lemon Chicken Pasta delivers a powerful combination of lean protein and energizing carbohydrates. Consequently, it provides your body with the essential fuel it needs for both muscle repair and daily activity. The lean chicken breast, for instance, is a fantastic source of high-quality protein that supports satiety and helps maintain muscle mass.

Furthermore, the bright lemon juice and zest offer a significant dose of vitamin C. This vital antioxidant strengthens your immune system and also boosts your body’s ability to absorb iron from other foods. Additionally, using whole wheat pasta instead of refined versions increases your fiber intake, which promotes digestive health and helps keep you feeling full longer.

Moreover, you can easily customize this dish to suit your nutritional needs. For example, you can create a lighter sauce with Greek yogurt for extra protein and probiotics. Ultimately, enjoying a serving of this Creamy Lemon Chicken Pasta means you are treating yourself to a meal that is as nourishing as it is delicious. It truly is a wholesome choice for any night of the week.

How it fits in a healthy lifestyle

This Creamy Lemon Chicken Pasta fits beautifully into a balanced eating plan. It combines protein, carbs, and healthy fats in one satisfying bowl, making it a perfect example of a complete meal. If you are focusing on muscle building or recovery after a workout, the high protein content from the chicken is incredibly beneficial. For those managing their weight, the protein and fiber work together to keep you full and prevent mindless snacking later.

You can also easily adapt this recipe to meet specific dietary goals. Simply swap in your favorite whole grain or legume-based pasta to add more fiber and nutrients. For a lighter version, a dollop of Greek yogurt creates that creamy texture without the heaviness. Finding ways to make comforting dishes healthier is key to sustainable habits. For more inspiration on balancing your meals, explore our guide on easy meal prep ideas that save time. Remember, a healthy lifestyle includes all foods in moderation, and this dish is a tasty way to nourish your body and please your palate. Discover more tips for a balanced diet on our blog.

Print
clock clock iconcutlery cutlery iconflag flag iconfolder folder iconinstagram instagram iconpinterest pinterest iconfacebook facebook iconprint print iconsquares squares iconheart heart iconheart solid heart solid icon

Creamy Lemon Chicken Pasta

  • Author: Chef Mia

Description

A refreshing and creamy pasta dish with tender chicken and a bright lemon sauce.


Ingredients

Scale

For the Crust:

  • 8 oz fettuccine pasta
  • 2 boneless, skinless chicken breasts, sliced
  • 2 tbsp olive oil
  • 3 cloves garlic, minced
  • 1 cup heavy cream
  • 1/2 cup chicken broth
  • 1/4 cup fresh lemon juice
  • 1 tsp lemon zest
  • 1/2 cup grated Parmesan cheese
  • Salt and pepper to taste
  • 2 tbsp fresh parsley, chopped

Instructions

1. Prepare the Crust:

  1. Cook pasta according to package directions; drain and set aside.
  2. Season chicken with salt and pepper. In a large skillet, heat olive oil over medium-high heat and cook chicken until golden and cooked through, about 6-7 minutes. Remove and set aside.
  3. In the same skillet, add garlic and sauté for 30 seconds until fragrant. Pour in chicken broth, lemon juice, and lemon zest, scraping up any browned bits.
  4. Reduce heat to medium-low. Stir in heavy cream and Parmesan cheese until smooth and slightly thickened.
  5. Return chicken to the skillet, add cooked pasta, and toss to coat. Garnish with fresh parsley before serving.

Notes

You can customize the seasonings to taste.

How to Prepare This Dish

Steps and time-saving tips

First, gather all your ingredients and preheat your skillet. Meanwhile, cook your pasta until it is just al dente; this crucial step prevents a mushy final dish. Next, generously season your chicken breasts with salt and pepper. Then, sear them in a hot pan with olive oil until they develop a beautiful golden-brown crust on each side. After that, remove the chicken to rest, as this allows the juices to redistribute for maximum tenderness. Now, use the same pan to create your sauce. Sauté minced garlic briefly until it becomes fragrant. Subsequently, pour in your chicken broth and heavy cream, and bring the mixture to a gentle simmer. Whisk constantly while you add grated parmesan cheese until your sauce becomes smooth and luxuriously creamy. Finally, stir in fresh lemon zest and juice for that essential bright, zesty kick. Slice your rested chicken and fold it, along with the drained pasta, into the creamy lemon sauce. Serve immediately with an extra sprinkle of parmesan and a twist of black pepper. For a true time-saver, use pre-cooked rotisserie chicken and simply warm it through in the sauce.

Mistakes I’ve made and learned from

I have absolutely made my share of mistakes with this creamy lemon chicken pasta. My biggest error was adding the lemon juice too early in the cooking process; the high heat completely cooked out its vibrant flavor, leaving the sauce tasting flat and one-dimensional. Now, I always stir in the fresh lemon juice right at the very end, off the heat, to preserve its bright, sunny character. Another lesson learned the hard way was using pre-shredded cheese from a bag. It contains anti-caking agents that prevent it from melting smoothly, resulting in a grainy, broken sauce instead of a silky one. I quickly learned that taking the extra minute to freshly grate a block of parmesan makes a world of difference for a perfectly emulsified sauce. For more guidance on getting sauces just right, my post on common sauce mistakes dives deeper. And if you are new to cooking, my kitchen essentials for beginners list will help you avoid these common pitfalls from the start.

rc="https://exorecipes.com/wp-content/uploads/2025/08/easy-creamy-lemon-chicken-pasta-recipe.webp" />

Cultural Connection and Variations

Where this recipe comes from

My grandmother first introduced our family to a version of this dish. She brought it back from a sun-drenched trip to the Amalfi Coast, where lemons grow as large as softballs. Consequently, she swapped her usual heavy Alfredo for something brighter. She would always say the lemon juice cuts through the richness and wakes up your whole palate. Meanwhile, in different Italian regions, cooks might use capers or a splash of white wine for extra zing. Some families even add fresh herbs like thyme or basil from their garden.

This particular Creamy Lemon Chicken Pasta recipe feels like a bridge between continents. For instance, American versions often favor a heavier cream sauce, while the Italian original might use just a touch of starchy pasta water and butter. Ultimately, the beauty of this dish lies in its adaptability. Every family seems to add their own signature twist, making each plate of Creamy Lemon Chicken Pasta a unique story.

ays-cooking">How it fits in today’s cooking

This dish absolutely thrives in modern kitchens because it balances comfort and freshness. Busy weeknights demand meals that feel special without requiring hours of work. Fortunately, this recipe delivers restaurant-quality flavor in less time than it takes to watch your favorite show. Furthermore, it fits perfectly into a rotation of easy weeknight dinners that everyone at the table will love.

Today’s cooks also love to personalize it. Many swap in gluten-free pasta or use plant-based cream for a dairy-free version. Its bright, sunny flavor also makes it a fantastic spring or summer meal. Moreover, it pairs wonderfully with a simple side, like a refreshing summer salad. Ultimately, this dish remains a timeless classic because it effortlessly combines simplicity, elegance, and incredible taste.

Taste and Texture

What makes it delicious

This Creamy Lemon Chicken Pasta delivers a bright and comforting flavor profile. First, you notice the rich, velvety sauce that coats every strand of pasta. Subsequently, the fresh lemon zest cuts through the richness with a vibrant, citrusy pop. Tender, seasoned chicken pieces offer a savory depth, while the parmesan cheese adds a salty, nutty complexity. Ultimately, each forkful is a perfect balance of creamy, tangy, and savory notes, making this Creamy Lemon Chicken Pasta an unforgettable meal.

r">Boosting the flavor

For an even more dynamic dish, consider a few simple upgrades. Firstly, finish your plate with a sprinkle of red pepper flakes to introduce a gentle, warming heat. Alternatively, stir in a handful of fresh spinach or sun-dried tomatoes for a burst of color and extra layers of flavor. If you want to explore more ways to enhance your meals, our guide on using herbs and spices offers fantastic inspiration. Furthermore, a side of garlic bread perfectly soaks up the luxurious sauce; discover our secrets for the ultimate garlic bread recipe to complete your feast.

Tips for Success

Best practices for results

Always zest your lemons before you juice them, because it is significantly easier. Furthermore, use a microplane for the finest zest that will incorporate seamlessly into your sauce. For the most tender chicken, pound the breasts to an even thickness before cooking. Additionally, reserve a cup of the starchy pasta water before you drain the noodles. Finally, toss the hot pasta directly in the pan with the sauce to help it cling perfectly to every strand. Following these simple steps guarantees a fantastic Creamy Lemon Chicken Pasta.

>Mistakes to avoid

Avoid overcooking the chicken, as this will make it tough and dry. Instead, use a meat thermometer to ensure it reaches the perfect 165 degrees Fahrenheit, just like we recommend in our guide on how to cook chicken breast. Moreover, do not add the lemon juice while the cream is too hot, or you risk it curdling. Instead, temper the sauce by taking the pan off the heat before stirring in the lemon juice and zest. Also, remember that the sauce will thicken as it cools, so serve your dish immediately for the best consistency. For more on getting sauces just right, check out our tips for perfect pasta sauces.

Serving and Pairing Suggestions

How to serve this dish

Immediately serve your Creamy Lemon Chicken Pasta while it is still warm and luxuriously saucy. For a beautiful presentation, twirl the pasta into a nest on a wide, shallow bowl. Subsequently, artfully arrange the tender chicken pieces on top. Always finish with a final flourish of fresh parsley, a sprinkle of lemon zest, and a crack of black pepper. This elegant dish truly shines for a date night in or a special family dinner. Ultimately, its bright, comforting flavors also make it a fantastic centerpiece for a spring brunch or holiday gathering.

What goes well with it

A crisp, refreshing side salad perfectly cuts through the rich sauce of this Creamy Lemon Chicken Pasta. We highly recommend our classic Easy Arugula Salad with a light lemon vinaigrette that mirrors the pasta’s citrus notes. Furthermore, a crusty piece of garlic bread is essential for scooping up every last bit of that delicious cream sauce. For a drink pairing, a chilled glass of Sauvignon Blanc complements the lemon herb profile wonderfully. Alternatively, a sparkling lemonade with mint makes a fantastic non-alcoholic option. Finally, consider starting your meal with a light appetizer like our Caprese Skewers for a complete and satisfying Italian-inspired feast.

rc="https://s3-placid.s3.eu-central-1.amazonaws.com/production/rest-images/rawp1noeia0hh/int-bc6436c1c6845731f54c63d161866ae8-fwvyvkj8.jpg" />

What is creamy lemon chicken pasta made of?

Creamy Lemon Chicken Pasta typically consists of tender chicken breast, pasta like fettuccine or penne, a rich sauce made from heavy cream or half-and-half, fresh lemon juice and zest, garlic, parmesan cheese, and herbs like parsley. The key to its signature flavor is the bright, fresh lemon that cuts through the richness of the creamy sauce, creating a perfect balance. This dish is a favorite for its simple yet elegant combination of ingredients.

How do you keep creamy pasta from drying out?

To prevent your Creamy Lemon Chicken Pasta from drying out, reserve a cup of the starchy pasta water before draining. If the sauce thickens too much upon standing, simply stir in a small splash of this hot water to loosen it back to a silky consistency. Always serve the dish immediately after combining the pasta and sauce for the best texture.

ank-math-faq-item"> Can I use milk instead of heavy cream for creamy pasta?

Yes, you can use whole milk as a lighter alternative, but the sauce will be less rich and may not thicken as effectively. For a better result, create a quick roux by melting butter, whisking in a tablespoon of flour, and then gradually adding the milk while stirring constantly. This method will help you achieve a creamy consistency for your Lemon Chicken Pasta without heavy cream.

What can I add to creamy pasta to make it better?

Elevate your Creamy Lemon Chicken Pasta by adding sun-dried tomatoes for a sweet, tangy punch or a handful of fresh spinach for color and nutrients. Toasted pine nuts or a sprinkle of red pepper flakes can also add wonderful texture and a subtle kick. Finishing with a high-quality extra virgin olive oil and fresh basil right before serving will enhance the overall flavor profile dramatically.