“`html
Table of Contents
- Welcome to a World of Sweet Nostalgia!
- The Magic Ingredients for Cotton Candy Cookies
- Making Time for Sweetness: Prep, Cook, and Total Time
- Step-by-Step: Crafting Your Cotton Candy Dream Cookies
- Nutritional Information
- Healthier Alternatives
- Serving Suggestions
- Common Baking Mistakes to Avoid
- Storing Your Cotton Candy Creations
- Embrace the Whimsy!
- Frequently Asked Questions
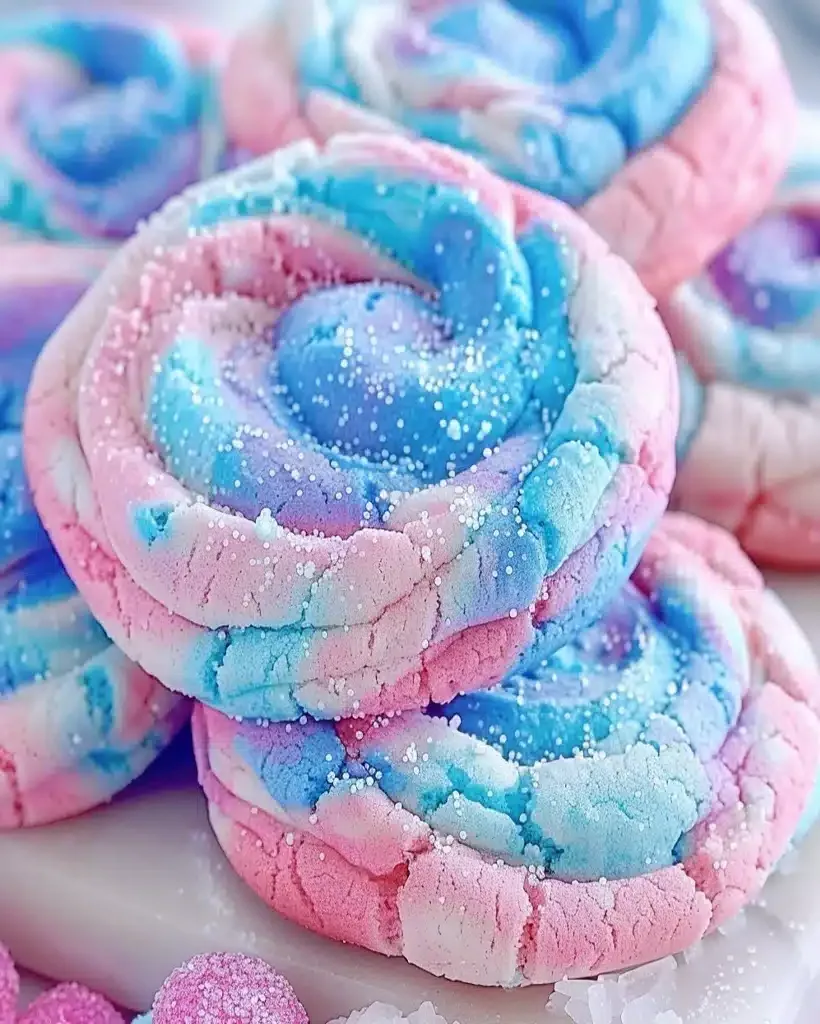
Cotton Candy Cookies Recipe – Fun, Colorful & Irresistible!
Welcome to a World of Sweet Nostalgia!
Have you ever wondered what it would be like to hold the magical, airy sweetness of cotton candy in the delightful chewiness of a cookie? In today’s baking landscape, where trendy flavors constantly emerge, there’s a unique charm in revisiting childhood favorites. Are you searching for a recipe that is not only incredibly delicious but also guarantees a burst of color and joy with every bite? If your baking ventures are seeking an injection of whimsy and a touch of pure happiness, then these Cotton Candy Cookies are your answer! These delightful treats are more than just cookies; they are a nostalgic journey to carnival days, childhood fairs, and carefree smiles, all captured in a sweet, melt-in-your-mouth confection. Infused with vibrant hues and a subtle, sugary essence that evokes the quintessential taste of spun sugar, they are designed to mesmerize both the eyes and the palate. Perfect for parties, bake sales, or simply when you need a little magic in your day, these cookies are guaranteed to bring smiles and spark joy!
The Magic Ingredients for Cotton Candy Cookies
Crafting these delightful Cotton Candy Cookies requires a blend of pantry staples and a touch of confectionary magic. The secret to their perfect texture and vibrant appearance lies in the quality and combination of these ingredients. We’ve also included some helpful substitutions to ensure you can whip these up regardless of what you have on hand.
Dry Ingredients
- 2 ¼ cups All-Purpose Flour: This forms the structural base of our cookies. For a slightly richer texture, you can substitute with cake flour, but you might need to slightly increase the flour quantity as it’s lighter.
- 1 teaspoon Baking Soda: Our leavening agent, ensuring a lovely rise and chewiness. Ensure it’s fresh for the best lift.
- ½ teaspoon Salt: Crucial for balancing the sweetness and enhancing the other flavors. Don’t skip this!
Wet Ingredients
- 1 cup (2 sticks) Unsalted Butter, softened: The heart of any good cookie, providing richness and a tender crumb. Make sure it’s softened to room temperature – not melted!
- ¾ cup Granulated Sugar: For sweetness and crisp edges.
- ¾ cup Packed Light Brown Sugar: Adds moisture, chewiness, and a hint of caramel undertone. If you only have granulated, you can use 1 ½ cups total granulated sugar, but the chewiness will be slightly reduced.
- 2 Large Eggs: Bind the ingredients together and add richness. Ensure they are at room temperature for better emulsification.
- 1 teaspoon Vanilla Extract: A classic flavor enhancer. Use good quality extract for the best taste.
Flavorings and Extras
- ½ teaspoon Cotton Candy Extract (optional, but recommended): This is the key to truly capturing that unmistakable cotton candy flavor. Available online or at specialty baking stores. If you can’t find it, a little extra vanilla or a touch of almond extract can be used, but the flavor won’t be as authentic.
- Gel Food Coloring: Pink, blue, or any pastel shades you desire to create that iconic cotton candy look. Gel colors are highly concentrated and won’t add excess moisture to the dough.
- Optional Sprinkles: For added sparkle and fun!
Making Time for Sweetness: Prep, Cook, and Total Time
Baking should be a joy, not a chore! Here’s a breakdown of the time commitment for these Cotton Candy Cookies, so you can plan your baking adventure accordingly. On average, standard cookie recipes take about 15-20 minutes of prep and 10-12 minutes of baking. Our cotton candy cookies are right in line with that, offering maximum fun for minimal effort!
Step-by-Step: Crafting Your Cotton Candy Dream Cookies
Let’s dive into the fun part – creating these visually stunning and deliciously whimsical cookies! Follow these easy steps for cookie perfection.
Step 1: Preheat & Prep
Begin by preheating your oven to 375°F (190°C). Line baking sheets with parchment paper or silicone baking mats. This prevents sticking and ensures even browning.
Step 2: Cream Butter & Sugar
In a large mixing bowl, cream together the softened butter, granulated sugar, and light brown sugar using an electric mixer on medium speed. Beat for about 2-3 minutes until the mixture is light, fluffy, and pale in color. This incorporates air, which is crucial for a tender cookie.
Step 3: Add Eggs & Vanilla
Add the eggs one at a time, beating well after each addition until fully incorporated. Stir in the vanilla extract and the cotton candy extract (if using). The aroma should already be hinting at the delightful flavor to come!
Step 4: Combine Dry Ingredients
In a separate medium bowl, whisk together the all-purpose flour, baking soda, and salt. Whisking ensures that the baking soda and salt are evenly distributed throughout the flour, preventing pockets of bitterness or uneven leavening.
Step 5: Gradually Add Dry to Wet
Gradually add the dry ingredients to the wet ingredients mixture. Mix on low speed until just combined. Be careful not to overmix, as this can lead to tough cookies. Mix only until you no longer see streaks of flour.
Step 6: Divide & Color
Divide the cookie dough into however many colors you wish to create (typically two or three). For example, if making two colors, divide the dough in half. Add a few drops of your chosen gel food coloring to each portion of dough. Gently knead or mix with a spatula until the color is evenly distributed. You can swirl colors for a marbled effect or keep them solid.
Step 7: Shape & Bake
Roll the dough into small balls, about 1 to 1.5 inches in diameter. Place them onto the prepared baking sheets, leaving about 2 inches between each cookie to allow for spreading. For a more uniform shape, you can gently flatten the balls slightly with the palm of your hand or the bottom of a glass. Bake for 10-12 minutes, or until the edges are lightly golden and the centers are still slightly soft. The cookies will continue to set as they cool.
Step 8: Cool & Enjoy
Let the cookies cool on the baking sheets for 5 minutes before transferring them to a wire rack to cool completely. This resting period is crucial for the cookies to firm up and prevent them from breaking apart. Once cooled, admire your colorful creations and dive in!
Nutritional Information
While these cookies are a delightful treat, they are primarily a source of carbohydrates and sugar. Here’s an approximate nutritional breakdown per cookie (yields about 24 cookies):
- Calories: ~150-180 kcal
- Fat: ~7-9g
- Carbohydrates: ~20-25g
- Sugar: ~15-20g
- Protein: ~1-2g
*Nutritional information is an estimate and can vary based on exact ingredient measurements and brands used.
Healthier Alternatives
If you’re looking to make these cookies a bit lighter without sacrificing too much flavor and fun, consider these swaps:
- Reduced Sugar: Decrease the granulated and brown sugar slightly, perhaps by ¼ cup total. The cookies might be less sweet and slightly less chewy.
- Whole Wheat Flour: Substitute half of the all-purpose flour with whole wheat flour for added fiber. This may result in a slightly denser cookie.
- Coconut Oil: Replace some of the butter with melted coconut oil. This will alter the flavor profile slightly but can reduce saturated fat.
- Natural Sweeteners: While not a direct substitute for granulated sugar in cookies, for other recipes, think about maple syrup or honey, consumed in moderation.
Serving Suggestions
These Cotton Candy Cookies are standalone stars! Serve them at:
- Birthday Parties: Their vibrant colors make them perfect for themed parties.
- Baby Showers: Use soft pastel colors to match a nursery theme.
- Carnival or Circus-Themed Events: These are a must-have!
- Afternoon Tea: A whimsical treat with a cup of tea or milk.
- Just Because: Anytime you need a smile!
They pair wonderfully with a cold glass of milk, a refreshing lemonade, or even a cup of coffee for the adults who love a sweet kick!
Common Baking Mistakes to Avoid
To ensure your Cotton Candy Cookies turn out perfectly every time, keep these common pitfalls in mind:
- Overmixing the Dough: Overbeating the flour can develop gluten excessively, leading to tough, dense cookies instead of tender, chewy ones. Mix dry ingredients into wet until *just* combined.
- Using Melted Butter: Melted butter will make your cookies spread too much and become flat and greasy. Always use softened butter that yields to gentle pressure.
- Incorrect Oven Temperature: An oven that’s too hot will burn the cookies before the inside bakes, while an oven that’s too cool will result in pale, flat cookies. Use an oven thermometer to ensure accuracy.
- Not Enough Chill Time (for some recipes): While these cookies don’t strictly require chilling, if your dough feels too soft and sticky to handle, a 30-minute chill in the refrigerator can make shaping much easier and help prevent excessive spread.
- Using Liquid Food Coloring: Liquid food coloring can add too much moisture, thinning the dough and affecting the texture. Opt for gel or oil-based food coloring for vibrant colors without impacting consistency.
Storing Your Cotton Candy Creations
Proper storage will keep your Cotton Candy Cookies fresh and delicious:
- At Room Temperature: Store cooled cookies in an airtight container at room temperature for up to 3-5 days. Layering them with parchment paper can prevent sticking.
- Refrigerator: For longer storage (up to a week), you can refrigerate them, but they may become a bit firmer. Bring them back to room temperature before serving.
- Freezing Dough: You can freeze cookie dough balls for up to 3 months. Place them on a baking sheet, freeze until solid, then transfer to a freezer-safe bag. Bake from frozen, adding a minute or two to the baking time.
- Freeze Baked Cookies: Store completely cooled cookies in a freezer-safe container or bag for up to 3 months. Thaw at room temperature.
Embrace the Whimsy!
These Cotton Candy Cookies are more than just a dessert; they are an experience. They bring a splash of color, a hint of playful nostalgia, and a delightful sweetness that appeals to all ages. Whether you’re a seasoned baker or just starting, this recipe is wonderfully accessible and incredibly rewarding. So, gather your ingredients, get creative with colors, and let the magic of cotton candy fill your kitchen and your hearts. Happy baking, and may your cookies always bring smiles!
Frequently Asked Questions
***Can I make these cookies without cotton candy extract?***
Yes, you can! While the extract provides the most authentic cotton candy flavor, you can omit it or substitute it with an extra teaspoon of vanilla extract or half a teaspoon of almond extract for a different, but still pleasant, flavor profile.
***Why are my cookies spreading too much?***
This can happen if your butter is too soft or melted, your oven temperature is too low, or if you’ve used too much sugar relative to the flour. Ensure your butter is softened, not melted, check your oven temperature with a thermometer, and try chilling the dough for 30 minutes if it’s very soft.
***How do I get vibrant colors without affecting the dough consistency?***
Use gel food coloring! Unlike liquid food coloring, gel colors are highly concentrated and add very little moisture, ensuring your dough maintains its perfect consistency while achieving brilliant hues.
***Can I add sprinkles to the dough?***
Absolutely! You can gently fold sprinkles into the dough before coloring, or press them onto the top of the cookie balls before baking for extra sparkle and fun.
***How long does the cotton candy flavor last in the cookies?***
The flavor is most potent when the cookies are fresh. It will gradually fade over the 3-5 days they are stored, but they will still be wonderfully sweet and delicious.

Cotton Candy Cookies Recipe – Fun & Colorful Treats
Description
Welcome to a world of sweet nostalgia! If you’re looking to add a touch of magic to your baking, theseCotton Candy Cookiesare the perfect treat. Infused with vibrant colors and a hint of sugary sweetness, they capture the essence of cotton candy in a chewy, melt-in-your-mouth cookie. Whether you’re planning a party or just want to indulge in something whimsical, these cookies are bound to bring smiles and spark joy!
Ingredients
- Feel free to swap the buttermilk with any plant-based milk if you’re making a dairy-free version. For a gluten-free option, substitute the all-purpose flour with a gluten-free flour blend.
Instructions
- Preheat your oven to350°F (175°C). Prepare a baking sheet by lining it with parchment paper to prevent the cookies from sticking and ensure even baking.
- In a medium-sized bowl, combineflour, baking powder, baking soda, and salt. Whisk them together to evenly distribute the leavening agents and salt through the flour.
- In a separate large bowl, use an electric mixer to beatsoftened butter and sugaruntil the mixture is light and fluffy. This will take about 2-3 minutes and is crucial for giving your cookies the perfect texture.
- Next, add theegg,vanilla extract, andbuttermilkto the butter-sugar mixture. Beat until the mixture is smooth and creamy.
- Gradually add the dry ingredient mixture to the wet ingredients. Mix just until combined, being careful not to overmix, as this can make the cookies tough.
- Split the dough into two equal parts. In one bowl, add a few drops ofpink gel food coloring, and in the other, addblue gel food coloring. Mix each portion of dough until the colors are evenly distributed.
- Take a small amount of pink dough and a small amount of blue dough, roll them together into a ball, and gently swirl them to create a cotton candy effect. Place the cookie balls on the prepared baking sheet, leaving about 2 inches of space between each cookie to allow them to spread as they bake.
- Bake the cookies for10-12 minutes, or until the edges are lightly golden. Keep an eye on them, as you don’t want to overbake these delicate cookies.
- Let the cookies cool on the baking sheet for a few minutes before transferring them to a wire rack to cool completely. Once cooled, serve and enjoy these delightful treats!
Notes
Use gel food coloring: Gel coloring provides more vibrant shades than liquid food coloring and won’t alter the dough’s texture.
Chill the dough: If your dough is too soft to handle, chilling it in the fridge for 20-30 minutes will make it easier to work with.
Swirl, don’t mix: When combining the pink and blue doughs, gently swirl them to create a fun cotton candy look. Avoid overmixing, which will blend the colors too much.
“`