Irresistible Peanut Butter Rice Krispie Bars – So Easy & Addictive! 🤤

Irresistible Peanut Butter Rice Krispie Bars – So Easy & Addictive! 🤤

Introduction

Did you know that over 90% of American households have a box of cereal in their pantry, and Rice Krispies are a top-10 favorite? This simple statistic highlights the universal appeal of the classic treat we’re about to elevate. Welcome to a colorful, crunchy, and delightfully easy-to-make snack! Today, we’re diving into the recipe for Peanut Butter Rice Krispie Treats with M&M’s, a fun twist on the classic that combines the rich, creamy depth of peanut butter with the joyful, chocolatey crunch of M&M’s. If you love the nostalgic snap, crackle, and pop of crispy cereal paired with the irresistible duo of peanut butter and chocolate, this recipe will be your new go-to! Perfect for family gatherings, parties, or a quick pick-me-up, these no-bake bars are guaranteed to become a household favorite, disappearing faster than you can make them.

Ingredients List

Gather these simple ingredients for a batch of pure joy. Each plays a crucial role in creating the perfect texture and flavor balance.

  • 6 cups Rice Krispies cereal: The star that provides the iconic light, airy, and crispy texture. For a deeper flavor, you can substitute with toasted rice cereal or even a mix of puffed rice and cornflakes.
  • 1 (10 oz) bag mini marshmallows: Mini marshmallows melt faster and more evenly than large ones, creating a perfectly gooey, stretchy binder. For a vegan version, use Dandies or other vegan marshmallows.
  • 3 tablespoons unsalted butter: Adds a rich, creamy base and helps prevent the marshmallows from sticking. For a dairy-free swap, use a high-quality vegan butter or coconut oil.
  • 3/4 cup creamy peanut butter: Use a standard, no-stir peanut butter for best consistency. The nutty, salty-sweet flavor is the heart of this recipe. For substitutions, try almond butter, sunflower seed butter (allergy-friendly), or even cookie butter for a decadent twist.
  • 1 cup M&M’s (regular or mini): Provides vibrant color, a satisfying chocolate crunch, and a sweet shell that contrasts beautifully with the salty peanut butter. Feel free to use seasonal colors or dark chocolate M&M’s for a richer taste.
  • Pinch of salt (optional): If using unsalted butter and unsalted peanut butter, a tiny pinch will enhance all the other flavors.

Timing

Prep Time10 minutes
Cook Time5 minutes
Total Time15 minutes + setting
Servings16 bars

One of the biggest wins of this Peanut Butter Rice Krispie Treats recipe is its incredible speed. Compared to the average baked dessert which can take 30-60 minutes of active time plus cooling, this treat comes together in about 15 minutes of hands-on work. The “cook” time is merely melting marshmallows on the stovetop or in the microwave. The majority of the time is passive, allowing the bars to set firm at room temperature or in the fridge. This makes it an ideal last-minute lifesaver for unexpected guests or sudden snack cravings.

Irresistible Peanut Butter Rice Krispie Bars – So Easy & Addictive! 🤤

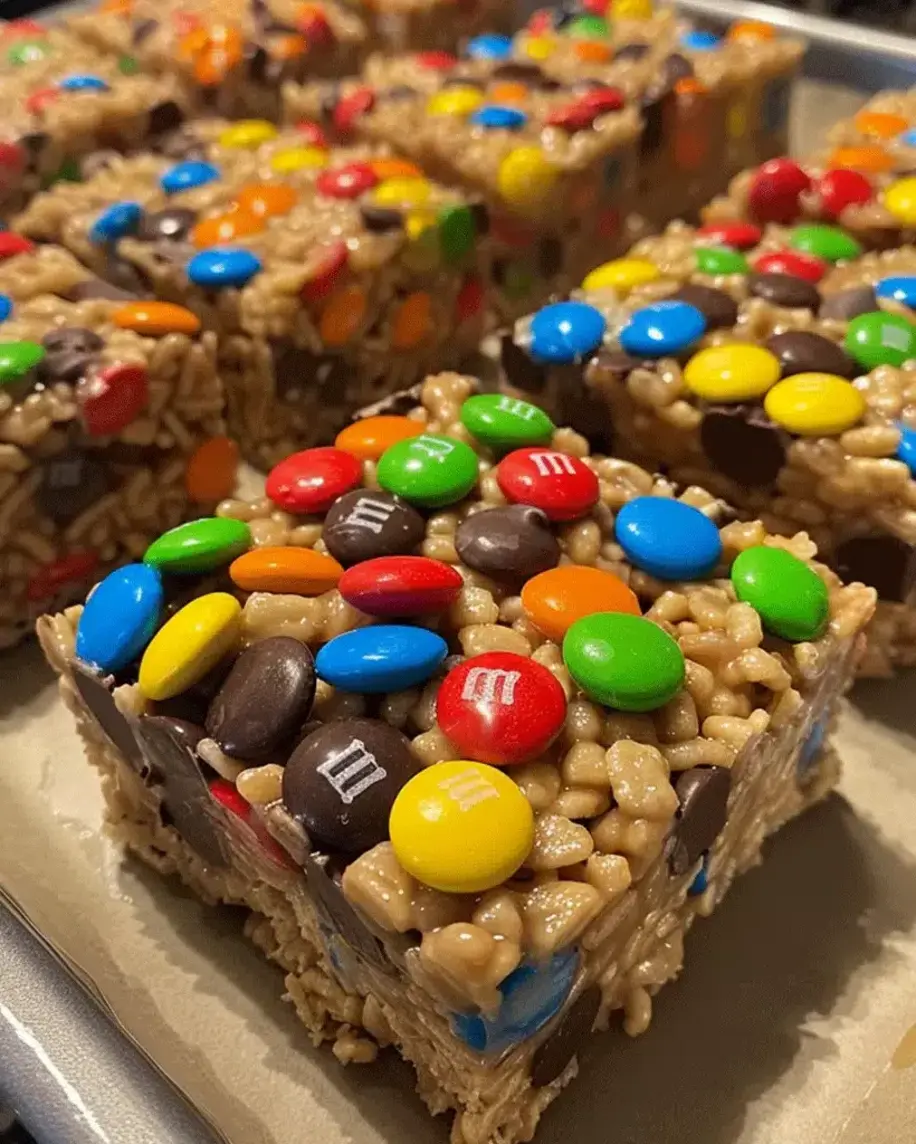
These vibrant, crunchy bars are as fun to look at as they are to eat! The combination of creamy peanut butter and colorful M&M’s makes every bite a celebration.

Step-by-Step Instructions

Step 1: Prepare Your Pan

Grab a 9×13 inch baking dish. Lightly grease it with butter, cooking spray, or line it with parchment paper, leaving an overhang on two sides. This “sling” will be your best friend later, allowing you to lift the entire slab of treats out for clean, easy cutting. Trust me, taking this 60-second prep step prevents a world of sticky frustration.

Step 2: Melt the Butter and Marshmallows

In a large, heavy-bottomed pot or Dutch oven (you’ll need the space later!), melt the 3 tablespoons of butter over low heat. Once melted, add the entire bag of mini marshmallows. Stir constantly with a sturdy silicone spatula or wooden spoon until the marshmallows are completely melted, smooth, and glossy. This should take about 3-5 minutes. Keep the heat low to avoid scorching the sugar, which can give a bitter taste.

Step 3: Stir in the Peanut Butter

Remove the pot from the heat. Immediately add the 3/4 cup of creamy peanut butter and your optional pinch of salt. Stir vigorously until the peanut butter is fully incorporated into the marshmallow mixture, creating a luxuriously smooth, fragrant, and tan-colored “glue.” The residual heat from the marshmallows is perfect for melting the peanut butter seamlessly.

Step 4: Combine with Cereal

Quickly add all 6 cups of Rice Krispies cereal to the pot. Using your spatula, gently fold and stir until every single piece of cereal is thoroughly and evenly coated with the peanut butter-marshmallow mixture. Work efficiently before the mixture starts to set. You should hear the delightful crackle as you mix!

Step 5: Fold in the M&M’s

Now for the fun part! Add 3/4 cup of the M&M’s to the cereal mixture. Fold them in gently but quickly to distribute the color and chocolate throughout. Reserve the remaining 1/4 cup for pressing on top for a beautiful, professional finish.

Step 6: Press and Set

Transfer the mixture to your prepared pan. With lightly buttered hands or a sheet of parchment paper, press the mixture firmly and evenly into the pan. Don’t just pat it down—apply firm, even pressure to ensure the bars hold together well. Sprinkle the reserved M&M’s over the top and press them in lightly. Let the pan sit at room temperature for at least 1-2 hours, or pop it in the fridge for 30-45 minutes to speed up the setting process. Once set, use the parchment sling to lift the slab onto a cutting board and slice into squares.

Nutritional Information

(Nutritional values are approximate per bar, based on 16 servings.)

  • Calories: ~210 kcal
  • Total Fat: 9g
  • Saturated Fat: 3.5g
  • Carbohydrates: 30g
  • Sugar: 19g
  • Protein: 3g
  • Fiber: 1g

Healthier Alternatives

Love the flavor but want to tweak the nutrition profile? Here are some simple swaps that maintain deliciousness:

  • Butter: Substitute with coconut oil or a light olive oil spread.
  • Marshmallows: Use a brand with less added sugar or natural sweeteners. Vegan marshmallows often have simpler ingredient lists.
  • Peanut Butter: Opt for a natural, unsweetened peanut butter (just peanuts and salt) to cut added sugars. Almond or cashew butter are great alternatives.
  • Cereal: Choose a brown rice crisps cereal or a whole-grain puffed cereal for added fiber.
  • M&M’s: Swap with a mix of dark chocolate chips and dried fruit like cranberries or chopped apricots for antioxidants and less sugar.

Serving Suggestions

These bars are fantastic on their own, but you can elevate them for any occasion:

  • Party Platter: Cut into small, bite-sized pieces and arrange on a platter with other finger desserts.
  • Ice Cream Sundae Topper: Crumble a bar over a scoop of vanilla or chocolate ice cream for an incredible texture contrast.
  • Lunchbox Treat: Wrap individual bars for a sweet surprise.
  • Holiday Style: Use red and green M&M’s for Christmas, pastels for Easter, or team colors for game day to make them theme-perfect.

Common Mistakes

  • High Heat: Melting marshmallows over too high heat causes them to burn or become tough. Always use low heat and patience.
  • Inadequate Mixing: Not coating every cereal piece leads to crumbly bars that fall apart. Take the time to fold thoroughly.
  • Pressing Too Lightly: A gentle pat won’t compress the bars enough. Use firm pressure for dense, chewy treats that hold their shape.
  • Adding M&M’s Too Early: If folded into the hot mixture in the pot, the colors can bleed and melt. Adding them off the heat or during the transfer preserves their crunch and color.
  • Not Greasing the Pan: Skipping this step means you’ll be chiseling your treats out. Don’t skip it!

Storing Tips

To keep your treats fresh and delicious:

  • Room Temperature: Store in an airtight container at room temperature for up to 3 days. Place parchment between layers to prevent sticking.
  • Refrigerator: For a firmer texture and longer shelf life (up to 1 week), refrigerate in an airtight container.
  • Freezer: These bars freeze beautifully! Wrap individual bars tightly in plastic wrap and place in a freezer bag for up to 2 months. Thaw at room temperature for 15 minutes before eating.
  • Pro Tip: Avoid storing in humid environments, as the cereal can lose its crispness.

Conclusion

In just 15 minutes of active time, you can create a batch of these utterly Irresistible Peanut Butter Rice Krispie Bars that are guaranteed to bring smiles. The combination of salty-sweet peanut butter, gooey marshmallow, crispy cereal, and chocolatey M&M’s is a timeless crowd-pleaser with a playful, colorful twist. It’s the perfect recipe for bakers of all skill levels, from kids helping in the kitchen to seasoned pros needing a quick dessert fix.

🧀 Mozzarella Stuffed Soft Pretzels – Gooey, Cheesy, & Irresistible! 🥨

🧀 Mozzarella Stuffed Soft Pretzels – Gooey, Cheesy, & Irresistible! 🥨

Introduction

Did you know that over 75% of people cite cheese as their ultimate comfort food? Now, imagine combining that with the universally beloved soft pretzel. If you’re searching for a gooey mozzarella stuffed soft pretzels recipe that delivers on both flavor and fun, you’ve hit the jackpot. Hello, pretzel lovers and cheese enthusiasts! If you’re looking for a delicious snack that’s as fun to make as it is to eat, this recipe for Gooey Mozzarella Stuffed Soft Pretzels will be a game-changer in your kitchen. Imagine biting into a soft, golden-brown pretzel, only to discover a hot, melty mozzarella center—it’s comfort food at its finest! These mozzarella-stuffed pretzels are perfect for parties, cozy nights in, or anytime you’re craving something cheesy and satisfying. Let’s dive into this delightful recipe!

Ingredients List

Gather these simple ingredients for the ultimate cheesy treat. I’ve included sensory notes and substitutions to help you customize.

  • For the Pretzel Dough:
    • Warm Water (1 ½ cups, 110°F): The base for activating the yeast. It should feel like a warm bath, not hot, to avoid killing the yeast.
    • Active Dry Yeast (2 ¼ tsp / 1 packet): The magic leavener that gives the pretzels their airy, soft texture.
    • Granulated Sugar (1 tbsp): Feeds the yeast and adds a hint of sweetness that balances the salt.
    • All-Purpose Flour (4 cups): Provides structure. For a chewier bite, you can substitute 1 cup with bread flour.
    • Unsalted Butter (2 tbsp, melted): Adds richness and a tender crumb. For a dairy-free version, use refined coconut oil.
    • Fine Sea Salt (1 tsp): Enhances all the flavors in the dough.
  • For the Filling & Toppings:
    • Low-Moisture Mozzarella Cheese (8 oz, cut into 24 small sticks): The star! Low-moisture cheese melts beautifully without making the dough soggy. For a sharper flavor, try a blend of mozzarella and cheddar.
    • Baking Soda (½ cup): For the iconic pretzel bath that creates the signature chewy, dark brown crust.
    • Coarse Sea Salt or Pretzel Salt: For that classic, crunchy, salty topping. Everything Bagel seasoning is a fantastic savory alternative.
    • Egg Wash (1 large egg beaten with 1 tbsp water): Gives the pretzels a gorgeous, glossy sheen.

Timing

Prep Time

25 minutes

Rise Time

1 hour

Cook Time

15 minutes

Total Time

1 hour 40 minutes

Compared to the average soft pretzel recipe which often skips a rise for speed, our method includes a full hour for the dough to develop flavor and texture. This extra patience is the secret to achieving that bakery-soft, pillowy interior that perfectly complements the molten cheese center.

🧀 Mozzarella Stuffed Soft Pretzels – Gooey, Cheesy, & Irresistible! 🥨

Golden-brown, perfectly twisted pretzels with a hidden, gooey mozzarella surprise inside.

Step-by-Step Instructions

Follow these detailed steps for foolproof, cheesy pretzels every time.

Step 1: Prepare the Dough

In the bowl of a stand mixer fitted with a dough hook, combine the warm water, sugar, and yeast. Let it sit for 5-7 minutes until it becomes foamy and fragrant—this is your proof that the yeast is alive and ready. Add the melted butter and salt. With the mixer on low speed, gradually add the flour, one cup at a time, until a shaggy dough forms. Increase the speed to medium and knead for 5-6 minutes until the dough is smooth, elastic, and pulls away from the sides of the bowl. If kneading by hand, turn the dough onto a floured surface and knead for 8-10 minutes until you achieve the same smooth, springy texture.

Step 2: Shape and Stuff the Pretzels

Place the dough in a lightly oiled bowl, turning to coat. Cover with a damp kitchen towel or plastic wrap and let it rise in a warm, draft-free spot for 1 hour, or until doubled in size. Once risen, punch the dough down gently. Turn it out onto a lightly floured surface and divide it into 12 equal pieces. Roll each piece into a 20-inch long rope. Place a stick of mozzarella in the center of the rope. Carefully fold the dough over the cheese, pinching the seam tightly to seal. Roll the sealed log gently to ensure the cheese is completely enclosed—this is crucial to prevent leaks! Shape the stuffed rope into a classic pretzel twist.

Step 3: The Baking Soda Bath

Preheat your oven to 425°F (220°C) and line two large baking sheets with parchment paper. In a large, wide pot, bring 8 cups of water to a gentle boil. Carefully add the baking soda—it will fizz up, so add it slowly. Reduce the heat to a simmer. Using a slotted spoon or spider, lower each shaped pretzel into the baking soda bath for 30 seconds. This bath is non-negotiable; it’s what gives pretzels their distinctive chewy crust and deep color. Remove, let excess water drip off, and place the pretzels on the prepared baking sheets.

Step 4: Bake to Golden Perfection

Brush each boiled pretzel generously with the egg wash. This step ensures a beautiful, glossy finish. Sprinkle immediately with coarse salt or your chosen seasoning. Bake for 12-15 minutes, rotating the pans halfway through, until the pretzels are a deep, rich golden brown. Let them cool on the baking sheet for at least 5 minutes before serving—the cheese inside will be molten lava hot!

Nutritional Information

The following is an approximate nutritional breakdown per pretzel (based on 12 pretzels).

  • Calories: 280 kcal
  • Total Fat: 9g
  • Saturated Fat: 5g
  • Cholesterol: 35mg
  • Sodium: 720mg (primarily from the salt topping and bath)
  • Total Carbohydrates: 38g
  • Dietary Fiber: 1g
  • Sugars: 2g
  • Protein: 11g

Healthier Alternatives

Love the idea but want a lighter version? These swaps maintain flavor while tweaking the nutrition profile.

  • Whole Wheat Flour: Substitute half of the all-purpose flour with whole wheat pastry flour for added fiber and a nutty flavor.
  • Reduced-Fat Cheese: Use part-skim mozzarella sticks. The melt won’t be as luxurious, but it will still be deliciously gooey.
  • Oil Swap: Replace melted butter with an equal amount of heart-healthy avocado oil in the dough.
  • Salt Control: Skip the coarse salt topping and use a light brush of olive oil and a sprinkle of everything bagel seasoning (which often has less sodium per volume).
  • Protein Boost: Add 2 tablespoons of nutritional yeast to the dough for a cheesy, umami flavor and a boost of B-vitamins.

Serving Suggestions

These pretzels are stars on their own, but pairing them takes the experience to the next level.

  • Classic Duo: Serve warm with a side of tangy yellow mustard or spicy brown mustard for dipping.
  • Ultimate Cheese Dip: Create a quick beer cheese sauce by melting cheddar with a splash of lager and a pinch of garlic powder.
  • Marinara Madness: Offer a bowl of warm marinara or pizza sauce for a pizza-pretzel fusion that’s always a crowd-pleaser.
  • Game Day Spread: Pair with other finger foods like buffalo wings, celery sticks, and a cold beverage for the perfect snack table.
  • Sweet & Salty: For a surprising twist, serve with a side of warm vanilla icing or salted caramel sauce for dipping.

Common Mistakes

Avoid these pitfalls to ensure your pretzels are perfect.

  • Water Too Hot for Yeast: If your water is above 115°F, it can kill the yeast, resulting in dense, flat pretzels. Use a thermometer or the wrist test (it should feel warm, not hot).
  • Inadequate Sealing: Not pinching the dough seam tightly over the cheese is the #1 cause of leaky pretzels. Take an extra moment to seal it well.
  • Skipping the Baking Soda Bath: This step is essential for flavor and texture. Without it, you’ll have bland, bread-like twists instead of authentic pretzels.
  • Overcrowding the Baking Sheet: Pretzels need space to expand and brown evenly. Give them at least 2 inches of room on all sides.
  • Cutting Open Immediately: The cheese needs 5-10 minutes to set slightly. Cutting too soon will result in all the glorious cheese oozing out onto the plate.

Storing Tips

To enjoy these treats beyond the first bake, follow these storage guidelines.

  • Room Temperature: Store completely cooled pretzels in an airtight container at room temperature for up to 2 days. Reheat in a 350°F oven for 5-8 minutes to restore crispness.
  • Freezing for Later: These pretzels freeze beautifully. After baking and cooling completely, place them in a single layer on a baking sheet to flash freeze for

Catch a Husband Cake

Catch a Husband Cake

Introduction: The Allure of Catch a Husband Cake

Ever wondered why a simple dessert could earn such a bold, romantic name? With over 2 million searches for “easy Brazilian desserts” monthly, the legendary Catch a Husband Cake stands out as a top contender for its irresistible charm and creamy texture. This isn’t just folklore; it’s a testament to the power of a perfectly balanced, custard-like cake that truly melts in your mouth. Originating from Brazil, this dessert combines the rich, tropical sweetness of coconut milk with the velvety depth of sweetened condensed milk and eggs, creating a flan-like masterpiece that’s perfect for any occasion, from a casual family dinner to a show-stopping potluck. Let’s dive into the magic behind this beloved treat and why it might just be the key to winning hearts (and taste buds).

Ingredients List

The beauty of this cake lies in its simplicity and the harmonious blend of just a few pantry staples. Here’s what you’ll need for the classic version, along with sensory notes and potential substitutions.

  • For the Caramel Layer:
    • 1 cup (200g) granulated sugar – This will melt into a deep amber caramel, providing a bittersweet counterpoint to the sweet cake and a beautiful glossy coating. Substitute: You can use light brown sugar for a more molasses-like, softer caramel.
  • For the Cake Batter:
    • 1 can (14 oz / 396g) sweetened condensed milk – The backbone of sweetness and creamy body. Its thick, sticky texture is essential for the custard-like consistency.
    • 1 can (13.5 oz / 400ml) full-fat coconut milk – Infuses the cake with a subtle tropical aroma and lush moisture. Shake the can well before using. Substitute: For a less pronounced coconut flavor, use half coconut milk and half whole milk.
    • 4 large eggs – Act as the binding and leavening agent, giving the cake structure and its signature golden top.
    • 1 cup (125g) all-purpose flour – Provides just enough structure without making the cake dense. It should be sifted to avoid lumps.
    • 1 tablespoon unsalted butter, melted – Adds richness and helps create a tender crumb.
    • 1 tablespoon coconut flakes (optional, for garnish) – Toasted, these add a delightful crunch and enhance the visual appeal.

Timing and Efficiency

Prep Time
15 minutes
Cook Time
50-60 minutes
Total Time
About 1 hour 15 minutes (plus cooling)

Compared to many layered or frosted cakes that can take hours, Catch a Husband Cake is remarkably efficient. The active prep time is under 15 minutes—most of the work is done by your blender. The baking time is standard for a custard-based dessert, requiring patience as it slowly sets to perfection. The majority of the “total time” is hands-off cooling, which is crucial for the perfect slice. This makes it an ideal dessert for busy hosts who want maximum impact with minimal fuss.

Creamy slice of Catch a Husband Cake on a plate, showing its golden top and moist, custard-like interior.

A slice of the irresistible Catch a Husband Cake, showcasing its creamy, flan-like texture and golden caramel top.

Step-by-Step Instructions

Follow these detailed steps to ensure your cake turns out silky, perfectly set, and stunningly presented.

Step 1: Prepare the Baking Dish

Preheat your oven to 350°F (180°C). Place a deep baking dish or a 9-inch round cake pan (with at least 2-inch high sides) on the counter. In a small, heavy-bottomed saucepan over medium heat, melt the 1 cup of granulated sugar. Do not stir aggressively; instead, swirl the pan occasionally until the sugar dissolves and turns a deep, golden amber color. This should take about 5-7 minutes. Immediately pour the hot caramel into the bottom of your baking dish. Using oven mitts, carefully tilt and rotate the dish to coat the entire bottom evenly. Set aside to harden and cool slightly while you make the batter.

Step 2: Blend the Batter

In a powerful blender, combine the sweetened condensed milk, coconut milk, eggs, all-purpose flour, and melted butter. Blend on high speed for a full 2-3 minutes until the mixture is completely smooth, homogenous, and slightly frothy. This aeration is key for the cake’s light texture. You should not see any streaks of flour or lumps. For an extra flavor boost, you can add a teaspoon of vanilla extract at this stage, though it’s not traditional.

Step 3: Assemble and Bake

Gently pour the blended batter over the hardened caramel in the prepared dish. Do this slowly to avoid disturbing the caramel layer. Place the filled dish inside a larger roasting pan. Create a water bath (bain-marie) by carefully pouring hot water into the larger pan until it comes about halfway up the sides of the cake dish. This gentle, indirect heat is what gives the cake its signature custard-like, melt-in-your-mouth texture. Carefully transfer the pans to the preheated oven. Bake for 50 to 60 minutes. The cake is done when the top is a beautiful golden brown, and the center is set but still has a slight, gentle jiggle—it will firm up as it cools.

Step 4: Cool and Unmold

Once baked, remove the cake dish from the water bath and place it on a wire rack. Let it cool to room temperature for at least 1-2 hours. This cooling period is non-negotiable for proper setting. Then, cover the dish with plastic wrap and refrigerate for a minimum of 4 hours, preferably overnight. This chilling step makes unmolding effortless and intensifies the flavors. To serve, run a thin knife around the edge of the dish. Place your serving plate upside-down over the dish, and with confidence, flip the whole assembly over. The cake should release smoothly, revealing the glossy caramel top (now the bottom) that will cascade deliciously over the slices.

Nutritional Information

(Approximate values per serving, based on 12 slices.)

  • Calories: ~320 kcal
  • Total Fat: 12g
  • Saturated Fat: 8g
  • Cholesterol: 75mg
  • Sodium: 80mg
  • Total Carbohydrates: 48g
  • Sugars: 38g
  • Protein: 7g

This is a rich, indulgent dessert. The high sugar and saturated fat content come from the condensed milk, coconut milk, and caramel, making it a perfect treat for occasional enjoyment.

Healthier Alternatives

You can create a slightly lighter version without sacrificing the soul of the dessert. These swaps reduce calories and refined sugar while maintaining great flavor.

  • Reduced-Sugar Caramel: Use a sugar substitute like monk fruit or erythritol designed for caramelizing. The texture may be slightly different, but it will still provide that essential layer.
  • Lighter Dairy: Substitute the full-fat coconut milk with “lite” coconut milk. Use fat-free or low-fat sweetened condensed milk if available.
  • Flour Swap: For a gluten-free version, use a 1:1 gluten-free all-purpose flour blend. The texture will be nearly identical.
  • Egg Option: While eggs are crucial for structure, for a dairy-free version, ensure your condensed milk is plant-based (often made from oat or coconut). The eggs themselves are not dairy.

Serving Suggestions

  • Classic & Elegant: Serve a clean slice on its own, allowing the creamy texture and caramel to be the stars.
  • With Fresh Fruit: Accompany with a side of fresh berries (strawberries, raspberries) or tropical fruits like mango or passion fruit pulp. The acidity cuts through the richness beautifully.
  • Creamy Additions: A dollop of lightly sweetened whipped cream or a scoop of vanilla bean ice cream takes it to another level of decadence.
  • Coffee Pairing: This cake is a classic companion to a strong cup of Brazilian coffee or espresso. The bitterness of the coffee balances the dessert’s sweetness perfectly.

Common Mistakes to Avoid

  • Skipping the Water Bath: Baking without the bain-marie will result in a rubbery, dense texture, not the desired creamy custard. This is the most critical step.
  • Overbaking: Remove the cake when the center still jiggles slightly. Overbaking causes it to become eggy and firm.
  • Not Cooling Completely: Attempting to unmold the cake while it’s warm will cause it to break apart. Patience with cooling and chilling is key.
  • Blending Insufficiently: If the batter isn’t perfectly smooth, you’ll get pockets of raw flour in the final cake. Blend for the full recommended time.
  • Stirring the Caramel: Stirring melting sugar can cause it to crystallize into a grainy mess. Swirl the pan instead.

Storing and Reheating Tips

  • Refrigeration: Once cooled, cover the cake tightly with plastic wrap or store in an airtight container. It will keep beautifully in the refrigerator for up to 5 days.
  • Freezing: This cake freezes surprisingly well. Wrap individual slices or the whole cake (once fully set) tightly in plastic wrap and then aluminum foil. Freeze for up to 2 months. Thaw overnight in the refrigerator.
  • Serving After Storage: Serve chilled straight from the fridge for the best texture and clean slices. It is not recommended to reheat this cake, as it can alter the delicate custard texture.

Conclusion: Your Perfect Dessert Awaits

The Catch a Husband Cake is more than just a dessert; it’s an experience. Its magical combination of simple ingredients transforming into a luxurious, creamy, and unforgettable treat is what makes it a global favorite. Whether you’re aiming to impress a special someone or simply treat your family to a

Marinated Cucumbers, Onions, and Tomatoes

Marinated Cucumbers, Onions, and Tomatoes

Introduction

Did you know that a study published in the Journal of Food Composition and Analysis found that cucumbers can be over 95% water, making them a powerhouse for hydration? This Marinated Cucumbers, Onions, and Tomatoes recipe is the ultimate answer to the question: what is a refreshing, no-cook side dish that bursts with flavor and nutrition? Perfect for summer picnics, potlucks, or a simple weeknight dinner, this vibrant salad transforms humble vegetables into a tangy, crisp, and utterly addictive experience. The magic lies in the marinade—a simple vinaigrette that penetrates every slice, softening the sharpness of the onions and drawing out the natural sweetness of the tomatoes and cucumbers. It’s a classic for a reason, and once you try this version, you’ll understand why it’s a staple in so many households. Let’s dive into creating this simple yet spectacular dish.

Ingredients List

Gather fresh, high-quality ingredients for the best flavor. Here’s what you’ll need:

  • For the Vegetables:
    • 2 large cucumbers (about 1 ½ lbs): Use English or Persian cucumbers for fewer seeds and a crisp, sweet bite. If using standard cucumbers, you may want to peel and seed them for a more tender texture.
    • 1 medium red onion: Thinly sliced. The vibrant purple color adds visual appeal, and its sharpness mellows beautifully in the marinade.
    • 4-5 medium ripe tomatoes (about 1 ½ lbs): Roma, vine-ripened, or heirloom tomatoes work wonderfully. They should be firm yet juicy, offering a sweet, acidic counterpoint to the other ingredients.
  • For the Tangy Vinaigrette Marinade:
    • ¾ cup white vinegar: Provides the essential tang. For a milder acidity, substitute with apple cider vinegar, which adds a fruity depth.
    • ¼ cup water: Balances the sharpness of the vinegar.
    • ⅓ cup granulated sugar: Creates the sweet-and-sour balance. You’ll taste the sweetness first, followed by the vinegar’s punch.
    • ¼ cup extra virgin olive oil: Adds richness and helps carry the flavors. A good, fruity olive oil makes a noticeable difference.
    • 1 ½ teaspoons salt: Enhances all the natural flavors and helps draw moisture from the vegetables.
    • 1 teaspoon freshly ground black pepper: For a warm, aromatic kick.
    • 1 tablespoon dried dill weed (or 2 tablespoons fresh): Imparts a classic, grassy, slightly anise-like flavor that pairs perfectly with cucumbers. Fresh dill is brighter, while dried is more concentrated.
    • Optional: 1 minced garlic clove for savory depth, or a pinch of red pepper flakes for heat.

Timing

Prep Time20 minutes
Cook Time0 minutes
Total Time4 hours 20 minutes (includes marinating)

Compared to many cooked side dishes that require 30-60 minutes of active kitchen time, this marinated salad is incredibly efficient. The active prep is a swift 20 minutes. The “secret ingredient” is patience—allowing the salad to marinate for at least 4 hours (or ideally overnight) is what develops the deep, melded flavors. This hands-off marinating time is what sets it apart from a quick tossed salad, making it a fantastic make-ahead option.

Marinated Cucumbers, Onions, and Tomatoes

A vibrant bowl of Marinated Cucumbers, Onions, and Tomatoes, ready to refresh any meal.

Step-by-Step Instructions

Step 1: Prepare the Vegetables

Start by washing all your vegetables thoroughly. I like to use a mandoline slicer for uniformly thin cucumber and onion slices, which allows the marinade to penetrate evenly. If you’re using a knife, aim for slices about 1/8-inch thick. For the cucumbers, if they have thick, waxy skins, I recommend peeling them in stripes for a pretty look and better texture. Cut the tomatoes into wedges or chunks—I find that wedges hold their shape better during the marinating process. Place all the prepared vegetables into a large, non-reactive bowl (glass or ceramic is perfect). The combination of colors at this stage is already beautiful!

Step 2: Whisk the Marinade

In a separate medium bowl or a large glass measuring cup, combine the white vinegar, water, and sugar. Whisk vigorously until the sugar is completely dissolved. This is a crucial step; undissolved sugar will sink to the bottom. Next, slowly stream in the extra virgin olive oil while continuing to whisk. This helps create a temporary emulsion. Finally, whisk in the salt, black pepper, and dill (and any optional additions like garlic). Take a quick taste—the marinade should be a bold balance of sweet, tangy, and savory. Remember, it will mellow once it coats the vegetables.

Step 3: Combine and Marinate

Pour the whisked marinade directly over the bowl of prepared vegetables. Using clean hands or a large spoon, gently toss everything together, ensuring every piece is coated with the flavorful liquid. Now, cover the bowl tightly with plastic wrap or a lid. This is where the patience comes in. Refrigerate for at least 4 hours, but I truly encourage you to let it go overnight. During this time, flip or stir the salad once or twice if you remember. You’ll witness the transformation: the vegetables will soften slightly, release some of their juices, and the flavors will become wonderfully unified.

Nutritional Information

This salad is not only delicious but also packed with nutrients. The following estimates are per serving (assuming the recipe serves 6):

  • Calories: ~120 kcal
  • Total Fat: 7g (primarily healthy monounsaturated fats from olive oil)
  • Saturated Fat: 1g
  • Carbohydrates: 14g
  • Fiber: 2g
  • Sugars: 11g (includes natural sugars from vegetables and added sugar)
  • Protein: 2g
  • Sodium: ~390mg

This dish is an excellent source of vitamins A and C from the tomatoes, hydration from the cucumbers, and antioxidants from all the vegetables.

Healthier Alternatives

Want to tweak the recipe for specific dietary needs? Here are some easy, flavorful swaps:

  • Reduce Sugar: Cut the granulated sugar to 2-3 tablespoons and add a tablespoon of honey or maple syrup for a more complex sweetness. For a sugar-free option, use a monk fruit or erythritol blend that measures 1:1 like sugar.
  • Boost Healthy Fats: Swap the olive oil for avocado oil for a more neutral taste, or use a high-quality flaxseed oil for an omega-3 boost (add after chilling to preserve nutrients).
  • Lower Sodium: Use a low-sodium soy sauce or tamari (just 1 teaspoon) in place of a portion of the salt for a savory umami flavor without all the sodium.
  • Add More Veggies: Toss in thinly sliced bell peppers, radishes, or even some cooked and chilled green beans to increase the fiber and nutrient profile.

Serving Suggestions

This versatile salad shines in many settings. Serve it chilled straight from the fridge. Use a slotted spoon to serve if you prefer less liquid in the bowl. It’s the perfect side for grilled meats like chicken, steak, or burgers, cutting through their richness. It’s fantastic alongside sandwiches and wraps for a crunchy contrast. For a light summer meal, serve it over a bed of lettuce with a piece of crusty bread to soak up the incredible marinating juice. You can even chop the marinated vegetables finer and use them as a vibrant, chunky salsa for grilled fish.

Common Mistakes

  • Not Dissolving the Sugar: This leads to a grainy marinade and uneven flavor. Always whisk until completely clear.
  • Marinating for Too Short a Time: Serving it after just 1 hour means you’ll miss the harmonious, mellowed flavor. The onions will still be too sharp. Give it the full time.
  • Using a Reactive Bowl: Avoid metal bowls (like aluminum or copper) for marinating, as the acid can react with the metal, imparting an off-flavor. Stick to glass, ceramic, or food-safe plastic.
  • Over-Salting Too Early: The salt draws out moisture from the vegetables. If you plan to marinate for more than 24 hours, you might reduce the salt slightly to prevent the salad from becoming too watery.

Storing Tips

Store the salad in an airtight container in the refrigerator. It will keep well for 3-4 days. The vegetables will continue to soften the longer they sit, but the flavors remain delicious. I do not recommend freezing this salad, as the texture of the vegetables will become mushy and unappealing upon thawing. If you have leftovers, the marinating liquid makes a fantastic base for a quick vinaigrette—just strain it and shake it up with a bit more oil.

Conclusion

This Marinated Cucumbers, Onions, and Tomatoes recipe is a testament to how simple ingredients can create something extraordinary. It’s a no-fuss, make-ahead dish that delivers maximum flavor with minimal effort. Whether you’re hosting a backyard barbecue or just looking for a bright side to your weekday dinner, this salad is guaranteed to impress. The crisp texture, the tangy-sweet marinade, and the fresh herbs make it an unforgettable addition to your recipe repertoire.

FAQs

Can I use yellow or white onion instead of red?

Yes, but red onion is preferred for its milder flavor and beautiful color when pickled. Yellow or white onions have a sharper, more pungent taste that takes longer to mellow in the marinade. If you use them, consider soaking the slices in cold water for 10 minutes before adding to the salad to tame their bite.

How long does this last in the fridge?

Properly stored in an airtight container, it will stay fresh and tasty for 3 to 4 days. The tomatoes will soften significantly by day 4, so for the best texture, aim to enjoy it within the first 3 days.

Warm, Gooey Cheesy Pretzel Bites – The Ultimate Snack! 🧀

Warm, Gooey Cheesy Pretzel Bites – The Ultimate Snack! 🧀

Introduction

Did you know that according to a recent survey, over 70% of people crave a warm, savory snack when relaxing at home? If you’re searching for the perfect warm, gooey, cheesy snack to satisfy that craving, you’ve landed in the right spot. Welcome to our delicious adventure! Today, we’re diving deep into the world of Warm, Gooey Cheesy Pretzel Bites with Sea Salt Sprinkle—the ultimate comfort snack that masterfully combines the soft, chewy texture of a classic pretzel with a surprise, molten cheesy center. Perfect for game nights, gatherings, or just a cozy evening in, these pretzel bites are guaranteed to be a hit. Get ready to embrace the irresistible aroma of freshly baked pretzels mingling with that mouthwatering melted cheese filling. This recipe isn’t just food; it’s an experience, a conversation starter, and a surefire way to become the hero of any snack table.

Ingredients List

Gather these simple ingredients to create your cheesy masterpiece. I’ve included sensory notes and substitutions to help you customize.

  • For the Dough:
    • 1 ½ cups warm water (110°F/45°C) – Should feel like a warm bath, not hot, to activate the yeast properly.
    • 2 ¼ teaspoons active dry yeast (1 packet) – Look for that foamy, bubbly reaction to ensure it’s alive.
    • 1 tablespoon granulated sugar – Feeds the yeast and adds a hint of sweetness to balance the salt.
    • 4 ½ cups all-purpose flour, plus more for dusting – Creates that classic, slightly dense yet tender pretzel chew. Substitute: For a heartier bite, swap 1 cup with whole wheat flour.
    • 2 teaspoons fine sea salt – The backbone of flavor. Use kosher salt if needed.
    • 2 tablespoons unsalted butter, melted – Adds richness and a beautiful golden color to the crust.
  • For the Filling & Topping:
    • 8 oz block of sharp cheddar cheese, cut into ½-inch cubes – The star! Sharp cheddar offers a bold, tangy punch that oozes beautifully. Substitute: Pepper Jack for spice, mozzarella for a milder, stringier pull, or Gouda for a smoky note.
    • ½ cup baking soda – For the crucial boiling step that gives pretzels their iconic dark, glossy crust and unique flavor.
    • 1 large egg, beaten – For the egg wash, creating a shiny, professional finish.
    • Coarse sea salt or pretzel salt, for sprinkling – The finishing crunch that makes every bite pop.

Timing

Prep Time
30 minutes
Cook Time
15 minutes
Total Time
1 hour 15 minutes (includes rising)

Compared to the average pretzel recipe that can take over 2 hours, our streamlined method focuses on a single, efficient rise. The active hands-on time is under 45 minutes, leaving you free to prepare dipping sauces or simply anticipate the cheesy goodness. The 30-minute dough rise is the perfect window to tidy up or set the table.

Warm, Gooey Cheesy Pretzel Bites – The Ultimate Snack! 🧀

A golden-brown batch of Warm, Gooey Cheesy Pretzel Bites fresh from the oven, ready to be devoured.

Step-by-Step Instructions

Step 1: Prepare the Dough

In the bowl of a stand mixer fitted with a dough hook, combine the warm water, sugar, and yeast. Let it sit for 5-7 minutes until it becomes frothy and fragrant—this is your sign the yeast is active and ready. If you don’t see bubbles, your yeast may be old; start over. Add the flour, salt, and melted butter. Mix on low speed until the ingredients come together, then increase to medium speed and knead for 4-5 minutes. The dough should be smooth, slightly tacky, but not sticky. If it’s too sticky, add a tablespoon of flour at a time. Turn the dough out onto a lightly floured surface and knead by hand for another minute, shaping it into a smooth ball.

Step 2: Shape and Fill

Place the dough ball in a lightly oiled bowl, turning to coat. Cover with a damp kitchen towel or plastic wrap and let it rise in a warm, draft-free spot for 30 minutes, or until nearly doubled in size. While it rises, cut your cheese into small, consistent cubes. Once risen, punch down the dough and divide it into 4 equal portions. Roll each portion into a long rope, about 1-inch thick. Using a sharp knife or bench scraper, cut each rope into 1-inch pieces. Flatten each piece slightly in your palm, place a cheese cube in the center, and carefully pinch the dough around it, sealing tightly to prevent cheese leakage. Roll gently between your palms to form a smooth ball. Place seam-side down on a parchment-lined baking sheet.

Step 3: Boil the Bites

This is the magic step! Preheat your oven to 425°F (220°C). Bring a large, wide pot of water to a gentle boil. Carefully add the ½ cup of baking soda—it will fizz up, so add it slowly. In batches, gently lower 6-8 dough balls into the boiling water using a slotted spoon. Boil for exactly 30 seconds. They will puff up slightly and look matte. Remove with the slotted spoon, letting excess water drip off, and return them to the parchment-lined baking sheet, spacing them about 1 inch apart.

Step 4: Bake to Perfection

Brush the tops of each boiled pretzel bite generously with the beaten egg wash. This is what gives them that beautiful, glossy, deep-brown finish. Sprinkle immediately with your coarse sea salt. Bake in the preheated oven for 12-15 minutes, or until they are a deep, rich golden brown all over. The aroma will be incredible. Let them cool on the baking sheet for just 2-3 minutes—they are best served warm when the cheese is at its peak gooeyness.

Nutritional Information

The following is an approximate nutritional breakdown per serving (about 4 pretzel bites).

  • Calories: 280 kcal
  • Total Fat: 12g
  • Saturated Fat: 7g
  • Cholesterol: 45mg
  • Sodium: 850mg
  • Total Carbohydrates: 32g
  • Dietary Fiber: 1g
  • Sugars: 1g
  • Protein: 10g

Healthier Alternatives

Love the flavor but want a lighter twist? Try these simple swaps that don’t sacrifice taste:

  • Flour: Use 50% whole wheat pastry flour for added fiber and a nutty flavor. The texture remains soft.
  • Cheese: Opt for part-skim mozzarella or reduced-fat sharp cheddar. The meltability is still excellent.
  • Butter: Substitute with an equal amount of light olive oil or avocado oil in the dough.
  • Topping: Skip the egg wash and use a light spray of olive oil before baking, then sprinkle with “Everything But the Bagel” seasoning for a lower-cholesterol option with big flavor.
  • Serving: Pair with a light, yogurt-based herb dip instead of a traditional cheese sauce.

Serving Suggestions

These bites are versatile stars. Serve them warm on a large platter with an assortment of dips. Classic yellow mustard or spicy brown mustard is a must. For a decadent touch, offer a side of warm beer cheese sauce or jalapeño queso. For a sweet-and-salty contrast, a side of honey mustard or even a warm caramel sauce can be surprisingly delightful. They’re perfect alongside a crisp, cold beer, a glass of dry cider, or a family-friendly sparkling lemonade.

Common Mistakes

  • Water too hot for yeast: This will kill the yeast, resulting in dense, flat bites. Use a thermometer or water that feels warm, not hot, to the touch.
  • Inadequate sealing: If you don’t pinch the dough tightly around the cheese, it will all melt out during baking. Take an extra second to ensure a good seal.
  • Skipping the boil: The baking soda bath is non-negotiable for authentic pretzel flavor and texture. Don’t be tempted to skip it.
  • Over-baking: Set a timer! Baking beyond 15 minutes can lead to tough bites and over-cooked, rubbery cheese inside.
  • Salting after baking: The salt won’t stick. Always sprinkle immediately after the egg wash, before the bites go into the oven.

Storing Tips

To Store: Cool leftovers completely and store in an airtight container at room temperature for up to 2 days. The texture is best fresh.
To Reheat: Revive that gooey center by reheating in a 350°F (175°C) oven for 5-8 minutes, or in an air fryer for 3-4 minutes. Avoid the microwave, as it will make the dough rubbery.
To Freeze: Freeze unbaked, boiled bites on a parchment-lined sheet until solid, then transfer to a freezer bag. Bake from frozen, adding 3-5 minutes to the baking time. You can also freeze baked bites and reheat in the oven.

Conclusion

There you have it—the complete guide to creating unforgettable Warm, Gooey Cheesy Pretzel Bites. This recipe delivers the perfect combination of soft, salty pretzel exterior and a thrilling, molten cheese center that’s impossible to resist. Whether you’re hosting a party or treating yourself, these bites promise to deliver joy in every single piece. I hope this recipe becomes a cherished favorite in your home. Now, I’d