Table of Contents
Pink Lemonade Rice Krispie Treats
Introduction: A Tangy Twist on a Classic
Did you know that over 90% of home bakers have made a classic Rice Krispie treat at least once? Yet, how many have dared to elevate this nostalgic no-bake dessert with a vibrant, tangy twist? These Pink Lemonade Rice Krispie Treats are here to revolutionize your snack game, combining the beloved chewy, crispy texture with a burst of refreshing citrus flavor. Perfect for baby showers, summer picnics, birthday parties, or just a bright spot in your afternoon, this recipe is a guaranteed crowd-pleaser. The secret lies in a simple infusion of pink lemonade flavoring, transforming the ordinary into an extraordinary treat that’s as visually stunning as it is delicious. Let’s dive into how you can create this easy, fun, and utterly delightful dessert that will have everyone asking for the recipe.
Ingredients List
Gathering the right ingredients is the first step to success. Here’s what you’ll need for these perfectly pink and tangy treats:
- 6 cups Rice Krispies cereal: The classic, airy, and crispy base. You’ll hear that iconic “snap, crackle, pop” when you mix them in.
- 10 oz (about 40 regular) marshmallows: Use fresh, standard-sized marshmallows for the best melt and stretch. The gooey, sweet binder that holds everything together.
- 3 tablespoons unsalted butter: Adds a rich, creamy flavor and prevents the marshmallows from sticking. You’ll smell its nutty aroma as it melts.
- 3 tablespoons pink lemonade drink mix powder: This is the star! It provides the vibrant pink color and that signature sweet-tart lemonade flavor. Look for brands like Country Time or Kool-Aid.
- 1-2 drops red or pink food coloring (optional): For an extra vibrant, photogenic pink hue. Gel food coloring works best as it won’t thin the mixture.
- Pinch of fine sea salt: A chef’s secret to balancing the sweetness and making the lemonade flavor pop.
Substitutions & Variations:
- Marshmallows: Vegan marshmallows work perfectly for a dairy-free version.
- Butter: Substitute with coconut oil for a slightly tropical note.
- Pink Lemonade Mix: In a pinch, use 2 tablespoons of powdered sugar mixed with 1 tablespoon of freeze-dried strawberry powder and 1 teaspoon of citric acid or True Lemon crystals.
- Cereal: For a different texture, try using Crispix or a gluten-free crispy rice cereal.
Timing
Compared to the average no-bake dessert recipe, which can take 20-30 minutes of active time, this recipe is remarkably swift. The actual “cooking” is just melting and stirring, taking only about 5 minutes on the stovetop. The majority of the time is hands-off cooling, allowing the treats to set into perfect, clean-cut squares. This makes it an ideal last-minute recipe for unexpected guests or spontaneous cravings.
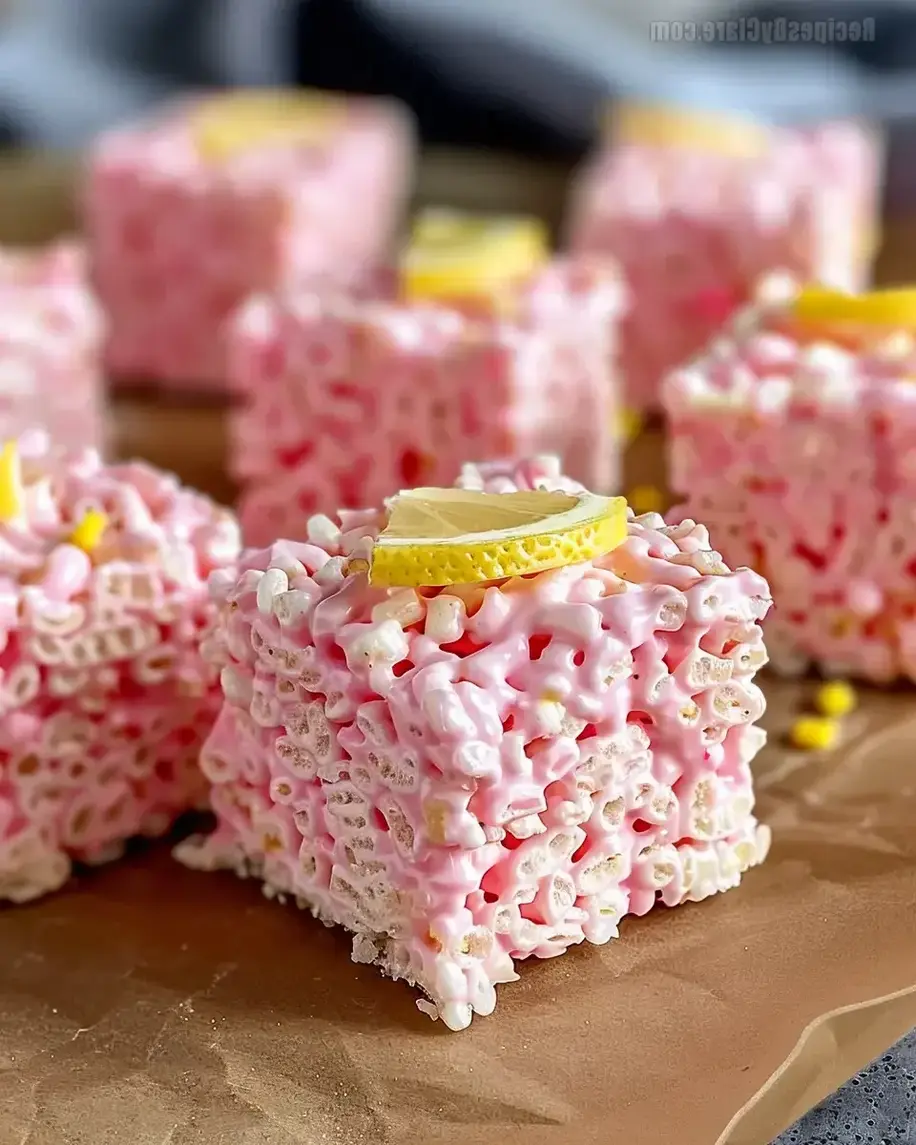
Vibrant, tangy, and irresistibly chewy – the perfect upgrade to a childhood favorite.
Step-by-Step Instructions
Step 1: Prepare Your Pan
Lightly grease a 9×13 inch baking pan with butter or non-stick cooking spray. I like to use the wrapper from my butter stick for this—it’s the perfect amount of grease and zero waste. For super easy removal, you can also line the pan with parchment paper, leaving a slight overhang on two sides. This creates a “sling” that lets you lift the entire block of treats out for flawless cutting.
Step 2: Melt the Marshmallow Base
In a large pot or Dutch oven (I recommend using one with a heavy bottom to prevent scorching), melt the 3 tablespoons of butter over low heat. Once it’s fully melted and just beginning to bubble, add in all 10 ounces of marshmallows. Stir constantly with a sturdy silicone spatula or wooden spoon. You’ll watch the marshmallows slowly deflate and melt into a smooth, glossy, white lava. This should take about 3-4 minutes. Key tip: Keep the heat low. High heat will cause the sugar in the marshmallows to crystallize, making your treats hard instead of soft and chewy.
Step 3: Infuse the Lemonade Flavor
As soon as the marshmallow mixture is completely smooth, remove the pot from the heat. Immediately stir in the 3 tablespoons of pink lemonade powder and the pinch of salt. This is where the magic happens! The mixture will instantly take on a beautiful pale pink color and the air will fill with the scent of sweet lemons. If you desire a more intense pink color, now is the time to add 1-2 drops of food coloring. Stir vigorously until the color and powder are fully incorporated.
Step 4: Combine and Press
Quickly add the 6 cups of Rice Krispies cereal to the pot. Using your spatula, gently fold the cereal into the marshmallow mixture until every single piece is evenly coated in the pink, sticky glaze. It will be thick and slightly difficult to stir, but that’s normal. Working swiftly, transfer the mixture into your prepared pan. Use a sheet of parchment paper or lightly greased hands to press the mixture firmly and evenly into the pan. Don’t smash it—just a firm, even press will give you the ideal chewy-yet-crispy texture.
Step 5: Cool, Cut, and Serve
Allow the treats to cool at room temperature for at least 1 hour, or until completely set and firm to the touch. For faster setting, you can place the pan in the refrigerator for 30 minutes. Once set, use a sharp knife (lightly greased or run under hot water) to cut into squares. I find cutting into 12 large squares or 24 smaller, bite-sized pieces works best. Wipe the knife clean between cuts for neat edges.
Nutritional Information
The following is an approximate nutritional breakdown per serving (based on 24 smaller squares):
- Calories: 110 kcal
- Total Fat: 2g
- Saturated Fat: 1.2g
- Carbohydrates: 22g
- Sugar: 13g
- Protein: 1g
- Sodium: 85mg
Please note: Values can vary based on specific brands of ingredients used.
Healthier Alternatives
Want to enjoy the tangy flavor with a slightly better nutritional profile? Try these simple swaps:
- Reduce Sugar: Use mini marshmallows—they often contain slightly less sugar per volume and melt more evenly. You can also reduce the lemonade powder to 2 tablespoons.
- Boost Fiber: Substitute half (3 cups) of the Rice Krispies with a high-fiber, low-sugar puffed brown rice or quinoa cereal.
- Butter Swap: Replace butter with an equal amount of unsweetened applesauce or mashed avocado for healthy fats. The color might be slightly off, but the texture remains surprisingly good.
- Natural Coloring: Skip the artificial food coloring and use 1 teaspoon of beetroot powder mixed into the lemonade powder for a natural pink hue.
Serving Suggestions
- Party Platter: Arrange the squares on a tiered stand with other pastel-colored desserts for a stunning spring or summer party display.
- A La Mode: Serve a slightly warmed square with a scoop of vanilla bean ice cream or frozen yogurt for a decadent dessert.
- Lemonade Pairing: Naturally, pair them with an ice-cold glass of real pink lemonade or sparkling lemon water.
- Gift Them: Stack a few squares in a clear cellophane bag, tie with a cute ribbon, and gift them as a sweet, homemade treat.
Common Mistakes
- Overheating the Marshmallows: This is the #1 mistake. High heat makes hard, crunchy treats. Always melt on low and remove from heat as soon as smooth.
- Using Stale Cereal: Stale cereal won’t give you that satisfying crisp texture. Always use a fresh, recently opened box.
- Not Pressing Firmly Enough: Loose pressing leads to treats that fall apart. Use firm, even pressure across the entire pan.
- Cutting While Warm: Impatience leads to messy, gooey squares. Let them cool completely for clean cuts.
Storing Tips
To keep your treats fresh and chewy:
- Room Temperature: Store in an airtight container at room temperature for up to 3 days. Place parchment paper between layers to prevent sticking.
- Refrigerator: For longer storage (up to 1 week), keep them in the fridge. Let them sit at room temp for 10 minutes before serving to soften slightly.
- Freezer: These freeze beautifully! Wrap individual squares tightly in plastic wrap, then place in a freezer bag for up to 2 months. Thaw at room temperature for 30 minutes.
Conclusion
These Pink Lemonade Rice Krispie Treats are more than just a dessert; they’re a burst of joy in every bite. They prove that with one simple, clever ingredient swap, you can transform a beloved classic into something new, exciting, and utterly shareable. The tangy lemonade flavor cuts through the sweetness perfectly, creating a balanced treat that’s refreshing and indulgent all at once. I hope this recipe brings a splash of color and a lot of happiness to your kitchen. Did you try it? I’d love to see your creations! Tag @exorecipes on social media or leave a comment below telling me how your treats turned out. Happy baking (or rather, no-baking)!
Orange Infused Sweet Ricotta Peach Cookies
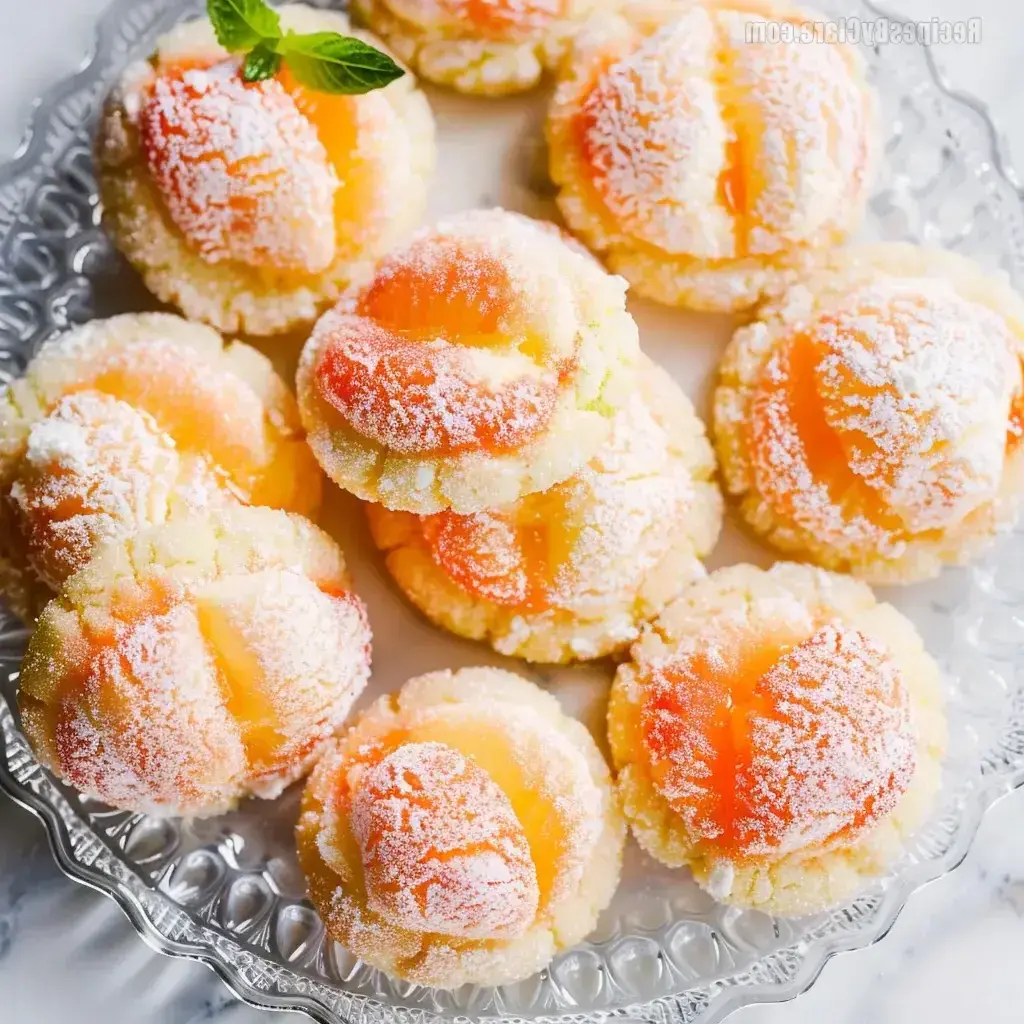
Table of Contents
Orange Infused Sweet Ricotta Peach Cookies
Introduction
Did you know that over 70% of home bakers seek recipes that combine unique flavor profiles with visually stunning results? If you’re part of that majority, you’re in the right place. Today, we’re diving into the world of Italian-inspired pasticceria with these stunning Orange Infused Sweet Ricotta Peach Cookies. These delightful peach cookies, or “pesche dolci,” are more than just a treat; they are a centerpiece, a conversation starter, and a bite of sunshine. The combination of a soft, orange-kissed cookie, a luscious sweet ricotta filling, and a final dusting of peach-colored sugar creates an experience that is as beautiful as it is delicious. Perfect for a summer gathering, a holiday table, or simply to satisfy a craving for something special, this recipe is designed to impress your guests and elevate your baking repertoire. Let’s create some edible art!
Ingredients List
Gather your ingredients. Using high-quality components, especially for the ricotta and citrus, makes a world of difference in flavor and texture.
For the Cookie Dough:
- All-purpose flour (3 cups): The foundation. For a lighter crumb, you can substitute 1 cup with cake flour.
- Granulated sugar (1 cup): Provides sweetness and helps with browning.
- Unsalted butter (1 cup, softened): Use real butter for that rich, melt-in-your-mouth texture. It should be soft to the touch but not melted.
- Large eggs (2): Binds the dough and adds structure. Bring them to room temperature for easier mixing.
- Fresh orange zest (from 2 large oranges): The star of the infusion! This provides vibrant, aromatic citrus oils that artificial extracts can’t match.
- Baking powder (2 tsp): Our leavening agent for a gentle rise.
- Salt (½ tsp): A pinch to balance and enhance all the sweet flavors.
- Pure vanilla extract (1 tsp): Adds a warm, comforting background note.
- Milk or cream (2-3 tbsp): For brushing the cookies before baking, giving them a beautiful golden sheen.
For the Sweet Ricotta Filling:
- Whole milk ricotta cheese (1 ½ cups): Seek out a fresh, high-quality ricotta. Drain any excess liquid in a fine-mesh sieve for 30 minutes to ensure a thick, non-watery filling.
- Powdered sugar (¾ cup, sifted): Dissolves instantly for a silky-smooth filling.
- Finely chopped dark chocolate or mini chocolate chips (½ cup): Adds delightful little bursts of flavor and texture. A high-cocoa percentage (70%) works beautifully.
- Orange zest (from 1 orange): Echoes the citrus note from the cookie.
- Optional: 1 tbsp of orange liqueur (like Grand Marnier) or 1 tsp of orange extract: For an extra kick of orange flavor.
For Assembly & Decoration:
- Peach-colored sanding sugar or a mix of red & yellow food coloring with granulated sugar: For that iconic “peach skin” look. The sensory appeal of the sparkling sugar is irresistible.
- Apricot jam or peach preserves, warmed and strained (½ cup): Acts as the “glue” and adds a fruity gloss.
Timing
Compared to the average drop cookie, this recipe requires about 15-20 minutes more hands-on time for shaping and assembly. However, this investment yields a dramatically more impressive result. The active time is front-loaded; once the cookies are baked and cooled, the filling and assembly are quite quick and therapeutic. Think of it as a fun baking project rather than a rushed weekday treat.
Beautiful, golden Orange Infused Sweet Ricotta Peach Cookies ready to delight.
Step-by-Step Instructions
Step 1: Prepare the Dough
In the bowl of a stand mixer fitted with the paddle attachment (or using a hand mixer), cream together the softened butter and granulated sugar on medium speed for 3-4 minutes. You want it light, fluffy, and almost pale in color. This step is crucial for a tender cookie. Scrape down the bowl. Add the eggs one at a time, beating well after each addition. Beat in the vanilla extract and the fresh orange zest. In a separate bowl, whisk together the flour, baking powder, and salt. With the mixer on low, gradually add the dry ingredients to the wet ingredients, mixing just until a soft dough forms and no dry flour remains. Avoid overmixing. Divide the dough into two equal portions, wrap each in plastic wrap, and chill in the refrigerator for at least 30 minutes. This firms up the dough, making it much easier to handle and shape.
Step 2: Shape the Peaches
Preheat your oven to 350°F (175°C) and line two baking sheets with parchment paper. Take one portion of dough from the fridge. Pinch off small pieces and roll them into smooth, 1-inch balls—they should be about the size of a walnut. Place them on the prepared baking sheets, spacing them about 1.5 inches apart. These will form the base of your “peach halves.” Using the back of a round measuring spoon (like ½ tsp) or your thumb, gently make an indentation in the center of each ball. This little well is where our ricotta filling will later nestle. Lightly brush the tops of the cookies with a little milk or cream. This promotes even browning and a lovely sheen.
Step 3: Bake to Perfection
Bake the cookies for 12-15 minutes, or until the bottoms are lightly golden and the tops are set but not browned. They should remain pale. Over-baking will make them too crisp for the soft “peach” texture we desire. Let the cookies cool on the baking sheet for 5 minutes, then transfer them to a wire rack to cool completely. They must be completely cool before filling, or the ricotta will melt.
Step 4: Make the Sweet Ricotta Filling
While the cookies cool, prepare the filling. Ensure your ricotta is well-drained. In a medium bowl, combine the drained ricotta, sifted powdered sugar, orange zest, and orange liqueur (if using). Stir with a spatula until smooth and well combined. Gently fold in the chopped dark chocolate or chocolate chips. Cover and refrigerate for 15-20 minutes to let it firm up slightly, making it easier to pipe or spoon.
Step 5: Assemble and Dust
This is where the magic happens! Place your peach-colored sanding sugar in a shallow bowl. If making your own, mix a few drops of red and yellow food coloring with granulated sugar until you achieve a perfect peach hue. Take two cooled cookies that are roughly the same size. Spread or pipe a generous teaspoon of the sweet ricotta filling onto the flat side (the indented side) of one cookie. Gently press the flat side of a second cookie onto the filling to create a “peach” sandwich. The filling should peek out slightly like the flesh of a peach. Now, lightly brush the outside of the assembled cookie with the warmed, strained apricot jam. This acts as an edible adhesive. While the jam is still tacky, roll the cookie in the peach-colored sugar until fully coated. Repeat with all cookies. Let them set for 10 minutes before serving.
Nutritional Information
The following is an approximate nutritional breakdown per cookie (recipe makes about 24 assembled cookies).
- Calories: 220 kcal
- Total Fat: 10g
- Saturated Fat: 6g
- Cholesterol: 35mg
- Sodium: 85mg
- Total Carbohydrates: 29g
- Dietary Fiber: 1g
- Sugars: 17g
- Protein: 4g
Healthier Alternatives
Want to enjoy these delightful cookies with a slightly lighter touch? Here are some flavorful swaps that don’t sacrifice taste:
- Flour: Substitute half of the all-purpose flour with white whole wheat flour for added fiber and a nuttier note.
- Sugar: In the dough, you can reduce the granulated sugar by ¼ cup. For the filling, use a sugar substitute blend that measures like powdered sugar.
- Butter: Replace half the butter with unsweetened applesauce or mashed ripe banana for a softer, cake-like texture (note: this will slightly change the flavor profile).
- Ricotta: Opt for part-skim ricotta to reduce fat content while maintaining creaminess.
- Chocolate: Use cacao nibs or finely chopped 85% dark chocolate for less sugar and more antioxidants.
Serving Suggestions
These cookies are stars on their own, but you can elevate your presentation:
- Arrange them on a tiered cake stand with fresh mint leaves and real peach slices for a stunning centerpiece.
- Serve alongside a glass of chilled Prosecco, Moscato d’Asti, or a pot of fragrant Earl Grey tea.
Common Mistakes
- Using Cold Butter or Eggs: This prevents proper creaming and can lead to a dense dough. Always bring them to room temperature.
- Skipping the Chill Time: Warm dough is sticky and difficult to shape, resulting in misshapen cookies. Don’t rush this step.
- Over-baking: We want soft, cake-like cookies, not crunchy biscuits. Remove them when the bottoms are just golden.
- Using Wet Ricotta: Not draining the ricotta will make the filling runny and cause the cookies to become soggy. Dra