Irresistible Soft and Chewy Caramel Clusters

Irresistible Soft and Chewy Caramel Clusters

Introduction

Did you know that over 70% of people cite texture as a primary reason for loving a dessert? That perfect combination of soft, chewy, and crunchy is a sensory experience we all crave. This brings us to the ultimate question: how can you create an irresistible soft and chewy caramel cluster that hits all the right notes? The answer lies in this deceptively simple recipe that transforms just a handful of pantry staples into a treat that’s perfect for any occasion, from holiday platters to after-school snacks. These clusters are a beautiful symphony of creamy, homemade caramel enveloping light, airy cornflakes, resulting in a bite that’s both decadent and delightfully easy to make. Let’s dive into how you can master this crowd-pleaser.

Ingredients List

Gathering the right ingredients is the first step to success. Here’s what you’ll need for these soft and chewy caramel clusters:

  • Cornflakes (6 cups): The star of the crunch. Look for a fresh, crisp box. The light, airy flakes provide the perfect structural contrast to the sticky caramel. Substitution: Crispy rice cereal or lightly crushed pretzel pieces can work for a different texture.
  • Unsalted Butter (1/2 cup / 1 stick): Use high-quality butter for the best flavor. It creates a rich, silky base for the caramel. Substitution: For a dairy-free version, a high-quality plant-based butter stick works remarkably well.
  • Light Brown Sugar (1 cup, packed): This is the soul of the caramel, providing that deep molasses flavor and gorgeous color. Pack it firmly into your measuring cup for accuracy.
  • Light Corn Syrup (1/2 cup): The secret weapon for chewiness! It prevents the sugar from crystallizing, ensuring your caramel stays gloriously soft and pliable. Substitution: Golden syrup or honey can be used, but note they will impart their own distinct flavors.
  • Sweetened Condensed Milk (1 can, 14 oz): This is what makes the caramel ultra-creamy and luscious. It’s non-negotiable for the signature soft texture.
  • Pure Vanilla Extract (1 teaspoon): A flavor enhancer that rounds out the sweetness. Use the real stuff for the best aroma.
  • Pinch of Salt: Balances the sweetness and makes all the other flavors pop. If you only have salted butter, omit this extra pinch.

Timing

Prep Time
10 minutes
Cook Time
10 minutes
Total Time
20 minutes (plus 1 hour to set)

One of the most compelling aspects of this recipe is its speed. With a total active time of just 20 minutes, it’s significantly faster than many other candy recipes, like fudge or truffles, which can require tempering and lengthy chilling. The majority of the time is hands-off, allowing the clusters to firm up at room temperature. This makes it an ideal last-minute dessert when you need something impressive fast.

Irresistible Soft and Chewy Caramel Clusters

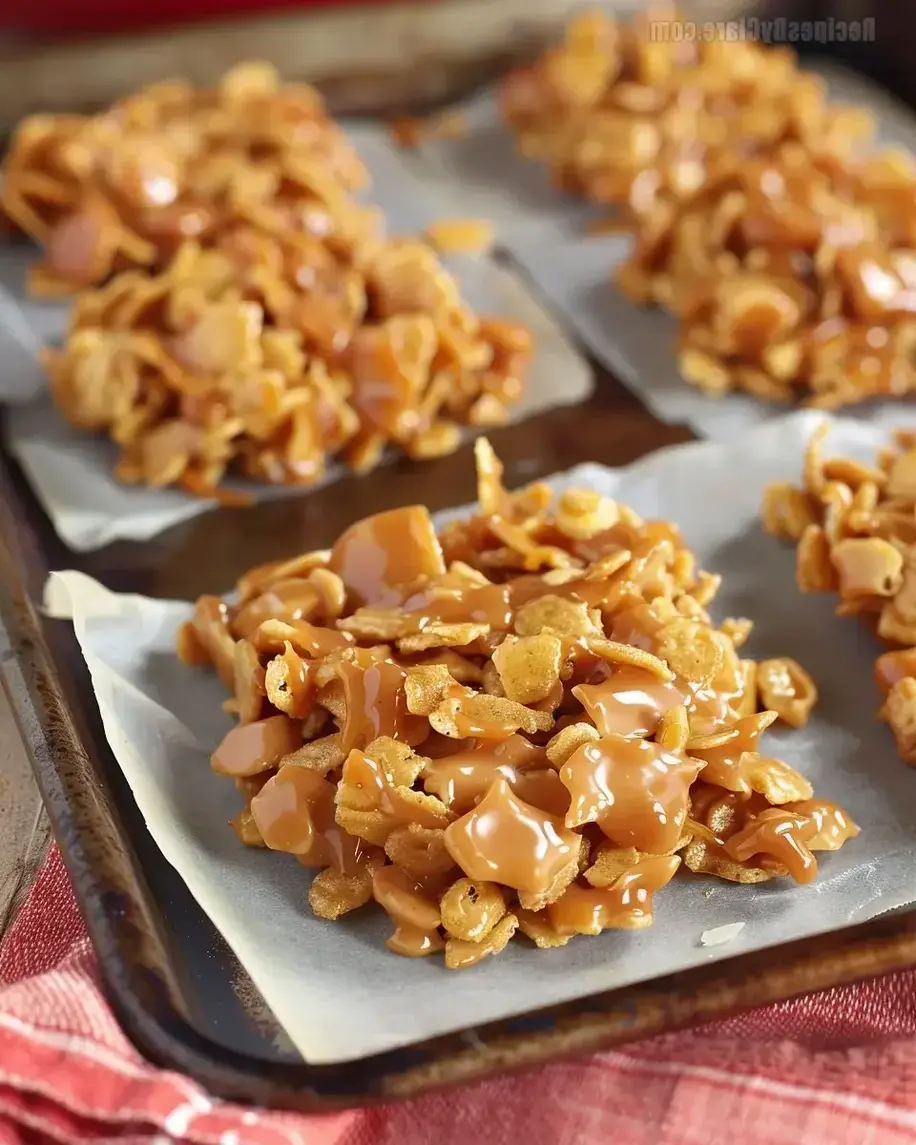
A batch of golden, soft and chewy caramel clusters, ready to be devoured.

Step-by-Step Instructions

Step 1: Prepare Your Ingredients and Pan

Success in candy-making is all about mise en place—having everything ready to go. Measure out your cornflakes and set them aside in a very large mixing bowl. You’ll need space to stir. Line two large baking sheets with parchment paper or silicone baking mats. Do not grease them, as the caramel needs to stick slightly to set. Having your vanilla measured and your butter cut into chunks will make the cooking process seamless and stress-free.

Step 2: Make the Homemade Caramel Sauce

In a medium-sized, heavy-bottomed saucepan, combine the butter, packed brown sugar, corn syrup, and sweetened condensed milk. Place the saucepan over medium heat. Stir constantly with a wooden spoon or heatproof spatula until the butter melts and the mixture becomes smooth. Once it begins to bubble gently, set a timer for 5 minutes. Continue stirring constantly to prevent scorching on the bottom of the pan. You’ll see the sauce thicken slightly and darken to a beautiful caramel hue. After 5 minutes of bubbling, remove the pan from the heat and immediately stir in the vanilla extract and pinch of salt. The aroma at this stage is absolutely heavenly.

Step 3: Combine and Cluster

Working quickly but carefully (the caramel is very hot), pour the entire contents of the saucepan over the waiting cornflakes. Using two large spoons or spatulas, gently fold the caramel into the cornflakes. Be thorough but gentle to coat every flake without turning them into dust. Once the mixture is evenly coated, use a tablespoon or a small cookie scoop to drop mounds of the mixture onto your prepared baking sheets. You can make them as large or as small as you like—I prefer generous tablespoon-sized clusters. Do not press them down; let them stay in rustic mounds.

Step 4: Set and Serve

Allow the clusters to cool and set completely at room temperature. This will take about 1 hour. Resist the urge to speed up the process by refrigerating them, as this can cause the caramel to become overly hard and lose its soft, chewy quality. Once set, the clusters will hold their shape but yield to a bite with that perfect soft chew. Gently peel them off the parchment paper. They are now ready to serve or store!

Nutritional Information

While these are a treat, it’s helpful to know what you’re enjoying. The following estimates are per cluster (assuming a batch of 24).

  • Calories: ~150 kcal
  • Total Fat: 6g
  • Saturated Fat: 3.5g
  • Carbohydrates: 23g
  • Sugars: 18g
  • Protein: 1.5g
  • Sodium: 65mg

Healthier Alternatives

You can make mindful tweaks to this recipe without sacrificing the soul-satisfying texture.

  • Reduced Sugar: Use a brown sugar substitute that measures 1:1 with real sugar. The texture may be slightly different, but it will still work.
  • Dairy-Free: Swap the butter for a plant-based alternative and use a canned coconut milk sweetened condensed milk (available in most health food stores).
  • Whole Grain Crunch: Substitute half the cornflakes with a whole-grain, low-sugar cereal like bran flakes for added fiber.
  • Nutty Boost: Add 1/2 cup of chopped, unsalted almonds or peanuts to the mix for healthy fats and protein, creating a more substantial snack.

Serving Suggestions

These versatile clusters shine in many settings. Pile them high on a decorative platter for a party. Package them in cellophane bags tied with ribbon for thoughtful homemade gifts. Crumble them over vanilla ice cream or Greek yogurt for an incredible sundae topping. For a festive twist during the holidays, sprinkle a few flakes of sea salt over the clusters right after scooping them, or drizzle them with melted dark chocolate once they’ve set.

Common Mistakes

  • Overcooking the Caramel: Cooking the caramel sauce for longer than 5 minutes after it bubbles will make it too hard once set. Use a timer.
  • Stirring Too Vigorously: When combining the caramel and cornflakes, aggressive stirring will crush the flakes. Fold gently.
  • Using a Thin Pan: A heavy-bottomed saucepan is crucial for even heat distribution and preventing hot spots that burn the caramel.
  • Refrigerating to Set: This is the most common error. Room-temperature setting is key for the soft, chewy texture. Refrigeration makes them hard.

Storing Tips

To keep your caramel clusters at their soft and chewy best, store them in an airtight container at room temperature. Place sheets of parchment paper between layers to prevent sticking. They will stay perfect for up to 5 days. For longer storage, you can freeze them for up to 2 months. Place them in a single layer on a baking sheet to freeze solid, then transfer to a freezer bag. Thaw at room temperature for 30 minutes before serving.

Conclusion

Mastering these Irresistible Soft and Chewy Caramel Clusters is about embracing simplicity for maximum reward. With their perfect textural contrast and rich, buttery flavor, they are guaranteed to disappear quickly from any table. This recipe proves that you don’t need fancy equipment or obscure ingredients to create a treat that feels special. I hope this guide gives you the confidence to make them again and again.

FAQs

***Can I use pre-made caramel instead?***

While you can use a jar of store-bought caramel sauce, the texture and sweetness will be different. The homemade sauce with condensed milk is specifically formulated to set up soft and chewy. Pre-made sauce may stay too runny or become overly sticky.

***Why are my clusters too hard?***

This is almost always due to overcooking the caramel sauce. Remember, only 5 minutes of bubbling once the mixture is smooth and combined. Using a candy thermometer, the soft-ball stage (235°F to 240°F) is your target. Going beyond this will result in a firmer set.

***Can I add nuts or chocolate chips?***

Absolutely! Fold in up to 1 cup of add-ins like chopped pecans, peanuts, or mini chocolate chips right after you combine the caramel and cornflakes. For chocolate, mini chips work best as they distribute more evenly.

***How do I prevent the clusters from sticking together in the container?***

Ensure they are completely cool and set before storing. Using parchment paper between layers is the foolproof method. If your kitchen is very humid, a dusting of cornstarch on the parchment can help, but use it sparingly.

***Can I double this recipe?***

Yes, but do it in batches for best results. Doubling the caramel mixture in one pot makes it

Pink Paradise: No-Bake M&M Snickers Cheesecake

Pink Paradise: No-Bake M&M Snickers Cheesecake

Introduction

Did you know that no-bake desserts are searched for over 300,000 times a month online, with cheesecakes leading the trend? If you’re looking for a show-stopping dessert that requires zero oven time and delivers maximum flavor and fun, you’ve found it. This Pink Paradise: No-Bake M&M Snickers Cheesecake is a vibrant, playful, and utterly delicious treat that combines a rich chocolate cookie crust with a lusciously smooth pink chocolate cheesecake filling, packed with chunks of Snickers and a confetti of colorful M&Ms. It’s the perfect centerpiece for birthdays, celebrations, or any day that needs a splash of joy. Let’s dive into creating this pink paradise that’s as easy to make as it is to devour.

Ingredients List

Gather these ingredients for a 9-inch springform pan dessert. For the best flavor and texture, use full-fat, room-temperature ingredients unless otherwise noted.

  • For the Chocolate Cookie Crust:
    • Chocolate Sandwich Cookies: 24 cookies (about 2 cups of crumbs) – their dark, cocoa-rich flavor and slight sweetness create the perfect base. Substitution: Use graham crackers or digestive biscuits mixed with 2 tbsp cocoa powder.
    • Unsalted Butter: 1/2 cup (1 stick), melted – it binds the crumbs into a firm, buttery foundation with a satisfying snap.
  • For the Pink Paradise Filling:
    • Cream Cheese: 16 oz (two 8-oz blocks), softened to room temperature – this is the heart of the filling, providing a tangy, creamy, and luxuriously thick base.
    • Powdered Sugar: 1 cup, sifted – dissolves seamlessly into the cream cheese for a silky-sweet texture without graininess.
    • Vanilla Extract: 1 tsp – a warm, aromatic backbone that enhances all the other flavors.
    • Heavy Whipping Cream: 1 1/4 cups, cold – when whipped, it introduces air and lightness, transforming the filling into a cloud-like mousse.
    • Pink Chocolate Melts or White Chocolate + Pink Food Coloring: 8 oz, melted and slightly cooled – this gives the filling its signature “paradise” hue and a subtle chocolate flavor. For a more natural color: Use freeze-dried raspberry powder mixed into white chocolate.
  • For the Mix-ins & Topping:
    • Snickers Bars: 4 full-size bars, chopped into bite-sized chunks – these add chewy caramel, crunchy peanuts, and milk chocolate bursts. Substitution: Use Milky Way or Twix for a different caramel-chocolate profile.
    • M&M’s: 1 cup, divided – use mini or regular; their candy shells add a delightful crunch and a rainbow of color. Reserve 1/4 cup for the top garnish.
    • Optional Garnish: Extra whipped cream, a drizzle of chocolate or caramel sauce.

Timing

Prep Time
20 minutes
Chill Time
6 hours (minimum)
Total Time
6 hours 20 minutes

Compared to a traditional baked cheesecake, which can take over an hour of active baking plus cooling, this no-bake version saves you significant time and eliminates the risk of cracks. The majority of the time is hands-off chilling, allowing the flavors to meld and the texture to set into perfect, sliceable decadence.

Pink Paradise: No-Bake M&M Snickers Cheesecake

A vibrant slice of Pink Paradise No-Bake Cheesecake, showing the pink filling, chocolate crust, and colorful M&Ms.

Step-by-Step Instructions

Step 1: Prepare the Crust

First, let’s build our foundation. Place your chocolate sandwich cookies (creams and all) into a food processor. Pulse until you have fine, even crumbs that resemble dark sand. If you don’t have a processor, place the cookies in a sturdy zip-top bag and crush them with a rolling pin. Transfer the crumbs to a medium bowl. Pour the melted butter over the crumbs and use a fork to mix until every crumb is evenly moistened and the mixture holds together when pinched. Press this mixture firmly and evenly into the bottom of a 9-inch springform pan. I like to use the bottom of a flat glass or measuring cup to really compact it. This prevents a crumbly crust later. Place the pan in the refrigerator to set while you make the filling.

Step 2: Make the Pink Paradise Filling

In a large mixing bowl, beat the softened cream cheese with an electric mixer on medium speed for about 2 minutes, until it’s completely smooth and lump-free. Scrape down the sides of the bowl. Add the sifted powdered sugar and vanilla extract. Beat again on low initially to avoid a sugar cloud, then on medium until fully combined and creamy.

In a separate, clean, chilled bowl, whip the cold heavy cream until stiff peaks form. Be careful not to over-whip it into butter. Gently fold about one-third of the whipped cream into the cream cheese mixture to lighten it. Then, fold in the remaining whipped cream with a spatula, using broad, gentle strokes to maintain as much air as possible.

Melt your pink chocolate according to package directions (usually in 30-second bursts in the microwave, stirring between each). Let it cool for a few minutes so it’s not piping hot. Slowly drizzle the melted chocolate into the cheesecake filling while gently folding. Continue folding until the pink color is uniform and stunning.

Step 3: Layer and Chill

Now for the fun part! Take the crust out of the fridge. Fold about 3/4 cup of the chopped Snickers and 3/4 cup of the M&M’s into the pink filling. Pour about half of the filling over the crust and spread it evenly. Sprinkle the remaining Snickers and M&M’s (except the reserved 1/4 cup for garnish) over this layer. Then, carefully spoon and spread the rest of the filling on top, covering the candy layer completely. Smooth the top with an offset spatula or the back of a spoon. This layered approach ensures candy in every single bite.

Step 4: Add the Final Toppings

Once the top is smooth, gently press the reserved 1/4 cup of M&M’s onto the surface in a decorative pattern. You can create a border, scatter them randomly, or spell out a message. Cover the pan tightly with plastic wrap. This is crucial: you must chill the cheesecake for at least 6 hours, but ideally overnight. This patience allows the filling to firm up perfectly for clean slices.

Nutritional Information

The following is an approximate nutritional breakdown per serving (based on 12 slices).

  • Calories: ~580 kcal
  • Total Fat: 38g
  • Saturated Fat: 21g
  • Carbohydrates: 55g
  • Sugar: 45g
  • Protein: 7g
  • Fiber: 1g

Healthier Alternatives

You can create a lighter version of this paradise without sacrificing all the fun:

  • Crust: Use almond flour or crushed nuts (like almonds or pecans) bound with a bit of coconut oil and a touch of maple syrup.
  • Filling: Swap full-fat cream cheese for a lower-fat Neufchâtel or a blended cottage cheese/greek yogurt base. Use a sugar-free powdered sweetener like erythritol.
  • Chocolate & Candy: Opt for sugar-free chocolate chips melted with natural pink color (beet powder). Use a smaller amount of dark chocolate-covered nuts and raisins instead of Snickers and M&Ms.
  • Cream: Chill a can of full-fat coconut milk and whip the solid cream for a dairy-free alternative.

Serving Suggestions

  • For a stunning presentation, run a thin knife under hot water, wipe it dry, and slice. Clean the knife between each cut.
  • Serve each slice with a dollop of freshly whipped cream and a light drizzle of salted caramel or dark chocolate sauce to complement the sweetness.
  • Pair with a scoop of vanilla bean ice cream for an ultra-indulgent “cheesecake à la mode” experience.
  • This dessert is perfect for themed parties. Use holiday-colored M&Ms (like red and green for Christmas, or pastels for Easter) to match the occasion.

Common Mistakes

  • Using Cold Cream Cheese: This leads to a lumpy, difficult-to-mix filling. Always let it sit on the counter for 1-2 hours before starting.
  • Overmixing the Filling After Adding Cream: Vigorous beating after folding in the whipped cream will deflate it, resulting in a dense, not light and moussey, texture.
  • Adding Hot Melted Chocolate: If the chocolate is too hot, it can melt the whipped cream and cause the filling to separate or become runny. Let it cool slightly.
  • Insufficient Chilling Time: Slicing too early is the #1 reason for a soupy mess. Respect the 6-hour minimum. Overnight is king.
  • Not Using a Springform Pan: Trying to remove this cheesecake from a regular pan is nearly impossible. The springform sides are non-negotiable for clean removal.

Storing Tips

  • Refrigeration: Keep the cheesecake covered in the springform pan or transferred to an airtight container in the fridge for up to 5 days.
  • Freezing: This cheesecake freezes beautifully! Wrap the whole cheesecake or individual slices tightly in plastic wrap, then in foil. Freeze for up to 2 months. Thaw overnight in the refrigerator before serving.
  • Preventing Sogginess: If storing for more than a day, the M&Ms on top may start to bleed color slightly. For a pristine top, add the final M&M garnish just before serving.

Conclusion

This Pink Paradise: No-Bake M&M Snickers Cheesecake is more than just a dessert; it’s an experience. It combines the creamy dreaminess of cheesecake with the playful crunch of candy in a visually stunning package that’s surprisingly simple to make. By following these detailed steps, you’ll avoid common pitfalls and

Twix Cookies

Twix Cookies

Introduction

Did you know that the classic Twix bar, with its perfect trio of cookie, caramel, and chocolate, is one of the top three best-selling candy bars globally? Now, what if you could capture that iconic, crave-worthy flavor in a homemade, shareable cookie bar that’s even more satisfying? Welcome to the ultimate guide for making irresistible Twix Cookies. This recipe transforms the beloved candy bar into a decadent dessert that’s perfect for parties, gifts, or a special treat. We’re talking about a buttery, crumbly shortbread base, a layer of rich, gooey homemade caramel, all enrobed in a smooth blanket of chocolate. It’s a textural symphony in every bite, and I promise, once you try these, the store-bought version will never compare. Let’s dive into how you can create this iconic treat in your own kitchen.

Ingredients List

Gathering high-quality ingredients is the first secret to perfect Twix Cookies. Here’s what you’ll need, broken down by layer with notes on substitutions and sensory details.

For the Shortbread Base:

  • 1 cup (2 sticks / 226g) Unsalted Butter, softened: The foundation of flavor. Use high-fat, European-style butter for an extra rich, tender crumb with a subtle tang. It should be cool to the touch but yield to gentle pressure.
  • 1/2 cup (100g) Granulated Sugar: Provides sweetness and helps create that signature sandy texture.
  • 2 cups (250g) All-Purpose Flour: Spoon and level it for accuracy. For a nuttier flavor, you can substitute 1/4 cup with almond flour.
  • 1/4 teaspoon Salt: A must to balance the sweetness and enhance all the other flavors.
  • 1 teaspoon Pure Vanilla Extract: Use the real stuff! It adds a warm, floral aroma that elevates the simple shortbread.

For the Caramel Layer:

  • 1 (11-oz) bag of Soft Caramel Candies, unwrapped: The classic choice for ease and authentic flavor. Look for that familiar golden color and soft, pliable texture.
  • 3 tablespoons Heavy Cream: This is non-negotiable for a silky, pourable caramel. Milk can be used in a pinch, but the caramel will be firmer and less luscious.
  • Pinch of Sea Salt: A flaky sea salt sprinkled on top of the caramel layer creates a sublime sweet-and-salty contrast.

For the Chocolate Topping:

  • 2 cups (12 oz) Semi-Sweet Chocolate Chips or Chopped Chocolate Bars: Quality matters! A good semi-sweet chocolate (around 55-60% cacao) will have a balanced flavor that isn’t too bitter. For a true Twix taste, milk chocolate is a perfect substitute.
  • 1 tablespoon Coconut Oil or Vegetable Shortening: This small addition ensures the chocolate sets with a beautiful, glossy snap and makes it easier to slice.

Timing

Prep Time
25 minutes
Cook Time
20 minutes
Chill Time
2 hours
Total Time
2 hours 45 minutes

While the total time includes essential chilling, the active kitchen time is under an hour. Compared to many layered bar cookies that require multiple rounds of baking and cooling, this recipe is streamlined. The shortbread bakes just once, and the caramel and chocolate layers are no-bake, making the process efficient. The 2-hour chill is crucial for clean slicing, but if you’re in a pinch, the freezer can reduce this to about 45 minutes.

Twix Cookies

Golden shortbread topped with luscious caramel and glossy chocolate—the ultimate homemade Twix Cookies.

Step-by-Step Instructions

Step 1: Prepare the Shortbread Base

Preheat your oven to 350°F (175°C). Line a 9×13 inch baking pan with parchment paper, leaving an overhang on two sides. This “sling” will be your best friend for lifting the whole slab out later. In a large bowl, use an electric mixer on medium speed to cream the softened butter and granulated sugar together for 2-3 minutes. You want it to be light and fluffy, almost like pale yellow clouds. This step incorporates air, which contributes to the shortbread’s tender texture. Beat in the vanilla extract. Now, reduce the mixer speed to low and gradually add the flour and salt. Mix just until the dough comes together and no dry streaks of flour remain. It will be slightly crumbly but should hold together when pinched. Resist the urge to overmix, which can lead to a tough base.

Step 2: Bake the Shortbread

Transfer the dough to your prepared pan. Using your fingers, a flat-bottomed glass, or a small piece of parchment paper, press the dough firmly and evenly into the bottom of the pan. I like to use a measuring cup to really compact it and smooth the surface. Prick the dough all over with a fork—this prevents it from puffing up too much during baking. Bake for 18-22 minutes, or until the edges are just beginning to turn a very light golden brown. The center may still look pale, and that’s perfect. It will continue to firm up as it cools. Place the pan on a wire rack and let the shortbread cool completely. This is critical; if the base is warm, the caramel will melt and become a mess.

Step 3: Make the Gooey Caramel Layer

While the shortbread cools, make the caramel. In a medium saucepan, combine the unwrapped caramels and heavy cream. Cook over low heat, stirring constantly with a silicone spatula or wooden spoon. Low and slow is the key here—too much heat can cause the caramel to seize or burn. After 5-7 minutes, the caramels will melt into a smooth, velvety, golden-brown sauce. Once completely smooth, remove the pan from the heat. Let it cool for about 5 minutes; it should still be pourable but not scalding hot.

Step 4: Assemble the Caramel Layer

Pour the warm caramel sauce evenly over the completely cooled shortbread base. Tilt the pan gently to help it spread to the corners. Immediately sprinkle the top with a pinch of flaky sea salt. This not only looks beautiful but amplifies the caramel flavor. Allow the caramel layer to set at room temperature for about 15-20 minutes. It should be slightly firm to the touch but still have a bit of give.

Step 5: Add the Chocolate Topping

Now for the final coat! Combine the chocolate chips and coconut oil in a microwave-safe bowl. Microwave in 30-second bursts, stirring thoroughly after each interval, until the chocolate is completely melted and glossy. Alternatively, you can use a double boiler. Pour the melted chocolate over the set caramel layer. Use an offset spatula or the back of a spoon to spread it into a smooth, even layer, making sure to cover the caramel completely.

Step 6: Chill and Slice

This is the hardest part: waiting. Carefully transfer the pan to the refrigerator. Chill for at least 2 hours, or until the chocolate is completely firm and set. Once set, use the parchment paper overhang to lift the entire slab of Twix Cookies out of the pan and onto a cutting board. Using a large, sharp knife (wiping it clean with a hot towel between cuts makes for perfect slices), cut into bars or squares. For that authentic Twix look, I like to cut them into long, narrow fingers, about 1 inch by 3 inches.

Nutritional Information

The following is an approximate nutritional breakdown per serving (assuming 24 bars). For precise dietary tracking, use a dedicated calculator with your exact brands.

  • Calories: ~280 kcal
  • Total Fat: 16g
  • Saturated Fat: 10g
  • Cholesterol: 25mg
  • Sodium: 85mg
  • Total Carbohydrates: 33g
  • Dietary Fiber: 1g
  • Sugars: 22g
  • Protein: 3g

Healthier Alternatives

You can enjoy the spirit of these Twix Cookies with some mindful swaps that don’t sacrifice flavor:

  • Shortbread Base: Substitute half the all-purpose flour with whole wheat pastry flour for added fiber. You can also reduce the sugar by 2 tablespoons; the shortbread will be less sweet but still deliciously buttery.
  • Caramel Layer: Opt for a homemade date caramel. Blend 1.5 cups of soaked pitted dates with 2-3 tablespoons of almond milk and a pinch of salt until completely smooth. It’s naturally sweet and packed with nutrients.
  • Chocolate Topping: Use a high-quality dark chocolate (70% cacao or higher). It contains less sugar and more antioxidants. You can also use a sugar-free chocolate chip alternative.
  • General: Reduce the overall richness by cutting the bars into 36 smaller, bite-sized pieces for portion control.

Serving Suggestions

These bars are stars on their own, but a little presentation goes a long way. Serve them on a platter dusted with a light sprinkle of cocoa powder or flaky salt. For a dessert board, pair them with fresh berries, a dollop of lightly sweetened whipped cream, or a scoop of vanilla bean ice cream. They make fantastic gifts—stack them in a clear cellophane bag tied with a ribbon, or package them in a decorative tin. They’re the perfect treat for bake sales, holiday cookie exchanges, or as a sweet ending to a dinner party.

Common Mistakes

  • Not Cooling the Shortbread Completely: Pouring caramel onto a warm base is the #1 reason for a runny, unset middle layer. Patience is key.
  • Overheating the Caramel: Cooking on too high a heat can cause the caramel to become grainy, burn, or turn into a hard, chewy block instead of a soft, gooey layer.
  • Skipping the Parchment Paper Sling: Trying to pry these bars out of the pan with a spatula will result in broken, messy pieces. The parchment sling ensures clean, professional-looking bars.

Cheesy Spaghetti Carbonara with Pancetta and Eggs

Cheesy Spaghetti Carbonara with Pancetta and Eggs

Introduction

Did you know that a recent survey of home cooks revealed that over 70% feel intimidated by the prospect of making a perfect, creamy spaghetti carbonara from scratch? This classic Italian dish, with its rich history rooted in Roman cuisine, is often misunderstood. Today, we’re demystifying the process and showing you how to create an authentic, Cheesy Spaghetti Carbonara with Pancetta and Eggs that rivals any trattoria. Forget the heavy cream—the real magic lies in the silky emulsion of eggs, starchy pasta water, and sharp Pecorino Romano. This recipe delivers a luxurious, comforting dinner that comes together in under 30 minutes, making it the perfect solution for a busy weeknight or a special weekend meal. Let’s dive into the art of creating that iconic, creamy sauce without scrambling a single egg.

Ingredients List

Gathering high-quality ingredients is the first secret to an unforgettable carbonara. Here’s what you’ll need for 4 generous servings:

  • 1 lb (450g) Spaghetti: The classic long pasta with a rough surface that holds the sauce beautifully. Substitution: Bucatini or fettuccine work wonderfully.
  • 8 oz (225g) Pancetta, diced: This Italian cured pork belly provides a deep, salty, and crispy backbone. Substitution: Guanciale (traditional) or thick-cut bacon for a smokier flavor.
  • 4 large Egg Yolks + 1 whole Egg: The heart of the sauce. The yolks offer a rich, velvety texture, while the whole egg helps bind it. Use room-temperature eggs for a smoother emulsion.
  • 1 ½ cups (150g) freshly grated Pecorino Romano: This sharp, salty sheep’s milk cheese is non-negotiable for authentic flavor. Substitution: A 50/50 mix of Pecorino and Parmigiano-Reggiano for a slightly milder, nuttier profile.
  • 1 cup (100g) freshly grated Parmigiano-Reggiano: Adds a nutty, complex depth to the cheese blend.
  • 3-4 cloves Garlic, lightly smashed (optional but recommended): Infuses the pancetta fat with a subtle aromatic note. Remove before serving.
  • 1 tsp freshly cracked Black Pepper: Carbonara is famously “peppery.” The heat from the pasta will bloom its flavor.
  • 1 tsp Kosher Salt for the pasta water.
  • Reserved Pasta Water: Your liquid gold. The starchy, salty water is crucial for creating a glossy, cohesive sauce.

Timing

One of carbonara’s greatest virtues is its speed. While many complex pasta dishes can take over an hour, this recipe is a study in efficient, parallel cooking.

Prep Time
15 minutes
Cook Time
15 minutes
Total Time
30 minutes

Compared to the average “30-minute meal,” this carbonara is genuinely clockwork. The 15-minute prep is mostly hands-off grating and dicing, while the cook time is an active, fast-paced dance between the pancetta, pasta, and sauce. You’ll spend less time cooking than you would waiting for a delivery, with infinitely more delicious results.

Cheesy Spaghetti Carbonara with Pancetta and Eggs

A creamy, dreamy plate of homemade carbonara, ready in just 30 minutes.

Step-by-Step Instructions

Step 1: Prepare the Ingredients

Mise en place is critical for carbonara’s success. Before you turn on a single burner, complete these tasks: Dice your pancetta into ¼-inch cubes. Grate all your cheeses finely—pre-grated cheese contains anti-caking agents that can make your sauce grainy. In a medium bowl, whisk together the 4 egg yolks and 1 whole egg until just combined. Stir in all of the grated cheese and the black pepper. The mixture will be thick and paste-like; that’s perfect. Set this bowl aside near your stove. Bring a large pot of water to a rolling boil and salt it generously (it should taste like the sea).

Step 2: Cook the Pancetta

While the water heats, place your diced pancetta in a large, cold skillet or Dutch oven. Turn the heat to medium. Cook, stirring occasionally, until the fat has rendered and the pancetta is crispy and golden brown, about 8-10 minutes. If using, add the smashed garlic cloves during the last 2-3 minutes to infuse the fat. Once crisp, use a slotted spoon to transfer the pancetta to a paper towel-lined plate. Remove the garlic cloves. Turn off the heat but leave the rendered fat in the pan.

Step 3: Cook the Pasta

Once your water is boiling, add the spaghetti. Cook according to package directions until it is al dente—firm to the bite. This is non-negotiable, as soft pasta will become mushy when tossed with the sauce. Just before draining, use a heatproof mug or ladle to reserve at least 1 ½ cups of the starchy pasta water. This is your sauce’s key ingredient. Drain the pasta, but do not rinse it.

Step 4: Create the Egg Sauce

Here’s the pivotal moment. Take about ½ cup of the reserved hot pasta water and, while whisking vigorously, slowly drizzle it into the bowl with the egg and cheese mixture. This step, called “tempering,” gently raises the temperature of the eggs without scrambling them, creating a loose, creamy base.

Step 5: Combine Everything

Working quickly, add the hot, drained spaghetti directly to the skillet with the pancetta fat. Toss the pasta thoroughly for a minute, ensuring every strand is coated in the flavorful fat. Remove the skillet from the heat entirely. Now, pour the tempered egg and cheese sauce over the pasta. Using tongs, toss and stir rapidly and continuously. The residual heat from the pasta and pan will cook the eggs into a silky, glossy coating. If the sauce seems too thick, add more reserved pasta water, a tablespoon at a time, until it reaches a luxurious, flowing consistency that clings to the pasta. Fold in the crispy pancetta.

Step 6: Serve Immediately

Carbonara waits for no one. Divide the pasta among warm bowls. Finish with an extra crack of black pepper and a final snow-like shower of grated Pecorino Romano. Serve right away while it’s hot, creamy, and absolutely perfect.

Nutritional Information

The following nutritional estimates are per serving (approximately ¼ of the recipe). Values can vary based on specific ingredients used.

  • Calories: ~780 kcal
  • Total Fat: 38g
  • Saturated Fat: 16g
  • Cholesterol: 285mg
  • Sodium: 1150mg
  • Total Carbohydrates: 65g
  • Dietary Fiber: 3g
  • Sugars: 2g
  • Protein: 38g

Healthier Alternatives

You can enjoy the soul-satisfying flavors of carbonara with a lighter touch through a few smart swaps:

  • Leaner Protein: Swap pancetta for diced turkey bacon or a few ounces of sautéed mushrooms for a vegetarian, umami-rich alternative.
  • Whole-Grain Pasta: Use whole-wheat or legume-based spaghetti. The nutty flavor pairs well, and you’ll gain extra fiber and protein.
  • Reduce Cheese & Eggs: Use 2 whole eggs + 2 yolks instead of 4 yolks + 1 whole egg, and reduce the total cheese by ¼ cup. The sauce will still be creamy, especially if you rely on the starchy pasta water.
  • Boost Veggies: Stir in a handful of fresh baby spinach or peas at the very end of tossing. They’ll wilt gently from the heat and add color and nutrients.

Serving Suggestions

Carbonara is a rich, complete meal on its own, but these pairings can elevate your dinner:

  • Starters: A simple arugula salad with lemon vinaigrette cuts through the richness. A classic Caesar salad also works beautifully.
  • Wine Pairing: A crisp, acidic white wine like a Frascati, Vermentino, or Pinot Grigio cleanses the palate. For red lovers, a light-bodied Chianti is a fantastic match.
  • On the Side: Serve with crusty, warm bread to scoop up every last bit of sauce. Roasted asparagus or broccolini make excellent vegetable sides.
  • For Dessert: Keep it light and Italian with affogato (espresso poured over vanilla gelato) or lemon sorbet.

Common Mistakes

Avoid these pitfalls to ensure carbonara perfection:

  • Using Cream: Authentic carbonara never contains cream. The sauce is an emulsion of eggs, cheese, and pasta water.
  • Scrambling the Eggs: Adding the egg mixture to a piping hot pan or pasta will cook it too fast, creating curds. Always remove the pan from heat first.
  • Skipping Pasta Water: The starchy water is essential for sauciness. Without it, the cheese and eggs will be clumpy and dry.
  • Rinsing the Pasta: This washes away the starch needed to bind the sauce. Never rinse after draining.
  • Using Pre-Grated Cheese: It doesn’t melt as smoothly and can lead to a gritty texture. Always grate fresh.

Storing Tips

Carbonara is best enjoyed immediately. However, if you have leftovers:

  • Refrigeration: Store in an airtight container for up to 2 days. The sauce will solidify when cold.
  • Reheating: Do not microwave as it will overcook the eggs. Gently reheat in a skillet over very low heat, adding a splash of water, milk, or cream to help re-emulsify the sauce. Stir constantly until just warmed through.
  • Freezing: Not recommended. The egg

Pink Lemonade Cupcakes

Pink Lemonade Cupcakes

Introduction

Did you know that searches for “vibrant dessert recipes” have increased by over 150% in the past year, signaling a massive trend towards colorful, joyful baking? Our stunning Pink Lemonade Cupcakes are the perfect answer to this demand, offering a visually stunning and flavor-packed treat that’s guaranteed to be the star of any gathering. These cupcakes masterfully blend the nostalgic, tangy-sweet taste of summer lemonade with a playful pink hue, creating an unforgettable sensory experience. The magic lies in the details: a moist, tender crumb infused with bright citrus, a hidden pocket of tart lemon curd, and a beautifully swirled two-tone buttercream that’s as delicious as it is Instagram-worthy. Whether you’re planning a birthday party, a baby shower, or just want to brighten a regular Tuesday, this recipe delivers professional bakery results with a fun, approachable process. Let’s dive into how you can create these little masterpieces that bring a pop of color and a burst of citrusy sweetness to your table.

Ingredients List

For the best flavor and texture, use room-temperature ingredients unless otherwise noted. This allows for better emulsification and a lighter, fluffier cupcake crumb.

For the Pink Lemonade Cupcakes:

  • 1 ½ cups (190g) all-purpose flour – The foundation for a soft, structured crumb. For a lighter texture, you can sift it.
  • 1 ½ tsp baking powder – Our leavening agent for that perfect rise.
  • ¼ tsp salt – Enhances all the other flavors and balances the sweetness.
  • ½ cup (115g) unsalted butter, softened – Provides rich flavor and moisture. It should be soft to the touch but not melted.
  • 1 cup (200g) granulated sugar – Sweetens and helps create a tender texture.
  • 2 large eggs – Bind the batter and add structure. They should be at room temperature to prevent the batter from curdling.
  • 1 tsp pure vanilla extract – Adds a warm, aromatic depth.
  • Zest of 2 medium lemons – This is where the intense, fragrant citrus oil lives! Use a microplane for the finest zest.
  • ½ cup (120ml) whole milk – For moisture and tenderness. Substitution: Buttermilk for a slight tang, or a non-dairy milk like almond or oat.
  • ¼ cup (60ml) fresh lemon juice – The key to that signature tang! Freshly squeezed is non-negotiable for the brightest flavor.
  • 1-2 tsp pink gel food coloring – Gel coloring provides vibrant color without thinning the batter. Start with less, you can always add more.

For the Lemon Curd Filling:

  • ⅓ cup (80ml) fresh lemon juice
  • Zest of 1 lemon
  • ⅓ cup (65g) granulated sugar
  • 2 large egg yolks – Creates a luxuriously thick and rich curd.
  • 3 tbsp (45g) unsalted butter, cubed – Stirred in at the end for a silky, glossy finish.

For the Two-Tone Buttercream:

  • 1 cup (230g) unsalted butter, softened – The base of our fluffy, pipeable frosting.
  • 4 cups (480g) powdered sugar, sifted – Sifting is crucial to avoid lumps in your smooth frosting.
  • 2-3 tbsp heavy cream or milk – Adjusts consistency. Heavy cream will yield a richer, more stable frosting.
  • 1 tsp pure vanilla extract
  • Pinch of salt
  • Pink gel food coloring – For the pink portion of the swirl.
  • 1-2 tbsp reserved lemon curd or ½ tsp lemon extract – For the pale yellow/white portion, adding a hint of lemon flavor.

Timing

Prep Time 45 minutes
Cook Time 18-20 minutes
Total Time ~1 hour 30 minutes (including cooling)

Compared to the average cupcake recipe which often takes just over an hour total, this recipe requires a bit more time due to the homemade lemon curd and the artistic two-tone frosting. However, this extra 20-30 minutes is what transforms a simple cupcake into a show-stopping dessert. The process is broken down into manageable stages—baking, curd-making, and frosting—so you can easily pace yourself. The lemon curd can even be made a day or two in advance to split up the work.

Pink Lemonade Cupcakes with lemon curd filling and two-tone pink and white buttercream frosting

A batch of vibrant Pink Lemonade Cupcakes, showcasing the beautiful two-tone frosting swirl and a drizzle of lemon curd.

Step-by-Step Instructions

Step 1: Prepare the Cupcake Batter

Start by preheating your oven to 350°F (175°C). Line a standard 12-cup muffin tin with pretty pink or white liners. In a medium bowl, whisk together the flour, baking powder, and salt. This not only combines them but also aerates the flour slightly. In the bowl of a stand mixer fitted with the paddle attachment (or using a hand mixer), beat the softened butter and granulated sugar on medium-high speed for a full 3-4 minutes. This step is critical—you want the mixture to become very pale, fluffy, and almost creamy. This incorporates air, which is essential for lift. Scrape down the bowl. Add the eggs one at a time, beating well after each addition, then mix in the vanilla and lemon zest. The kitchen should smell amazing already!

With the mixer on low, add about one-third of the dry ingredients, followed by half of the milk. Repeat, ending with the final third of dry ingredients. Mix only until just combined—overmixing leads to tough cupcakes. Finally, add the fresh lemon juice and your desired amount of pink gel coloring. Fold gently with a spatula until the batter is uniformly a soft, pretty pink hue. A few streaks are okay; they’ll bake out.

Step 2: Bake to Perfection

Using a cookie scoop or two spoons, divide the batter evenly among the 12 prepared liners, filling each about ⅔ full. This ensures a nice dome without overflow. Immediately place the tin in the center of your preheated oven. Bake for 18-22 minutes. The cupcakes are done when the tops spring back lightly when touched, and a toothpick inserted into the center comes out clean or with a few moist crumbs. Avoid opening the oven door before the 15-minute mark to prevent sinking. Once baked, let the cupcakes cool in the tin for 5 minutes, then transfer them to a wire rack to cool completely. Patience is key here—frosting warm cupcakes is a recipe for melted buttercream!

Step 3: Create the Lemon Curd Filling

While the cupcakes cool, make the lemon curd. In a small, heatproof bowl, whisk together the lemon juice, lemon zest, sugar, and egg yolks until smooth. Place the bowl over a saucepan of gently simmering water (double boiler method), ensuring the bottom of the bowl does not touch the water. Cook, whisking constantly, for about 8-10 minutes. The mixture will slowly thicken to a pudding-like consistency that coats the back of a spoon. Remove from heat and immediately whisk in the cubed butter until fully melted and incorporated. Press a piece of plastic wrap directly onto the surface of the curd to prevent a skin from forming and refrigerate until cool and set, about 30 minutes. This curd is a tangy, velvety gold that will be the delicious surprise inside each cupcake.

Step 4: Make the Two-Tone Buttercream

In the clean bowl of your stand mixer, beat the softened butter on medium speed until completely smooth and creamy, about 2 minutes. With the mixer on low, gradually add the sifted powdered sugar, one cup at a time, until fully incorporated. Add the vanilla, salt, and 2 tablespoons of cream. Increase speed to medium-high and beat for 3-4 minutes until the frosting is very light, fluffy, and almost white. If it’s too thick, add more cream a teaspoon at a time.

Now, divide the frosting into two bowls. In one bowl, mix in a small amount of pink gel food coloring until you achieve your desired shade. In the other bowl, mix in 1-2 tablespoons of the cooled lemon curd (or lemon extract) for a subtle lemon flavor and a pale yellow hue. You now have two separate colors of the same delicious frosting ready for piping.

Step 5: Assemble and Frost

Take your completely cooled cupcakes. Using a small paring knife, apple corer, or a cupcake corer, cut a small cone-shaped piece out of the center of each cupcake, going about halfway down. Fill this cavity with a generous teaspoon of the chilled lemon curd. You can replace the cake “cap” or simply leave it open—the frosting will cover it.

To create the stunning two-tone effect, you’ll need a piping bag fitted with a large open star tip (like a Wilton 1M). Take a second piping bag and fill one side with the pink frosting and the other side with the lemon frosting. Carefully place this filled bag into your piping bag fitted with the tip. As you pipe, the two colors will swirl together beautifully. Pipe a generous swirl onto each cupcake, starting at the outer edge and working inward. For a final touch, you can drizzle a little extra lemon curd on top or garnish with a thin slice of lemon or a sprinkle of zest.

Nutritional Information

The following is an approximate nutritional breakdown per cupcake (based on 12 servings, including frosting and filling). Values may vary based on specific ingredients and portion sizes.

  • Calories: ~420 kcal
  • Total Fat: 22g
  • Saturated Fat: 14g
  • Carbohydrates: 55g
  • Sugar: 45g
  • Protein: 3g
  • Sodium: 85mg

Healthier Alternatives

You can easily adapt this recipe for dietary preferences or to lighten it up without sacrificing the fun, vibrant spirit.

  • Flour: Substitute half of the all-purpose flour with white whole wheat flour for added fiber.
  • Sugar: In the cupcake batter, you can reduce the