Table of Contents
Twinkie Cake Recipe: The Only Recipe You’ll Ever Need
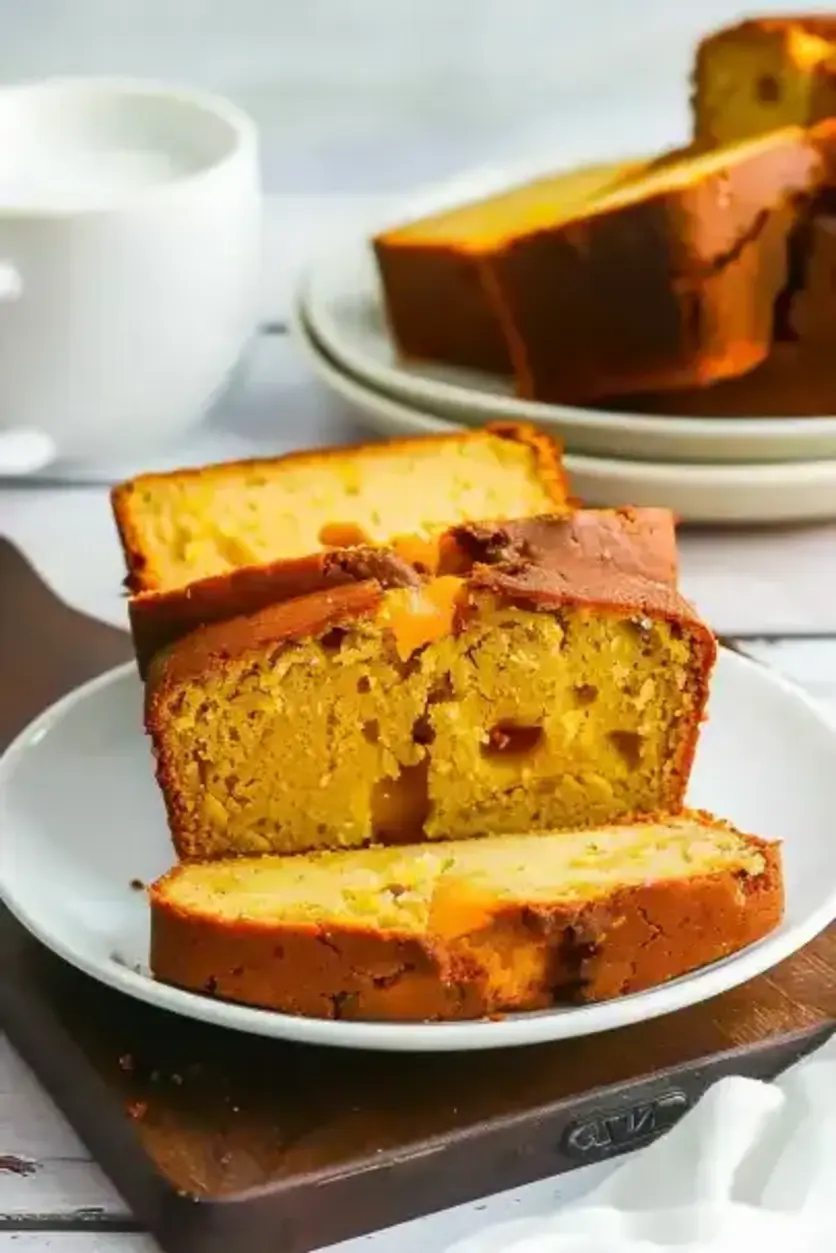
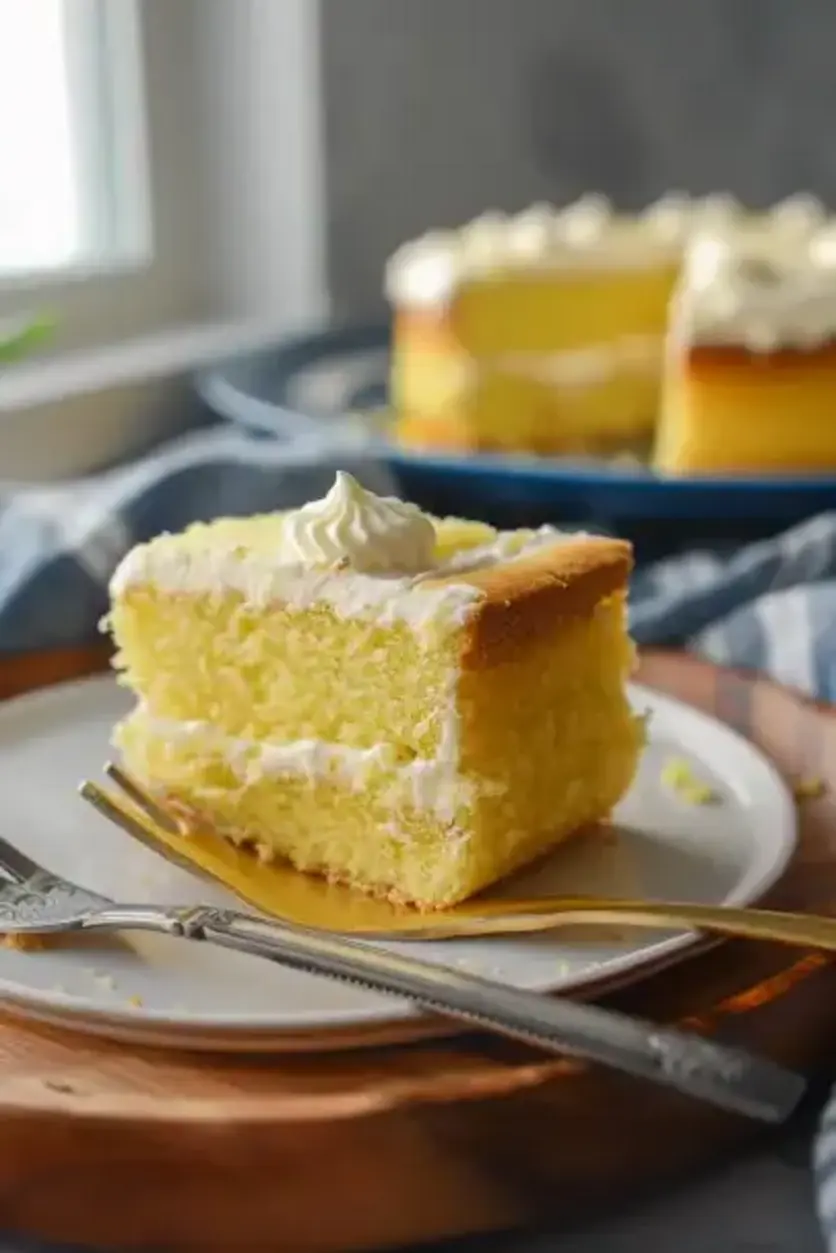
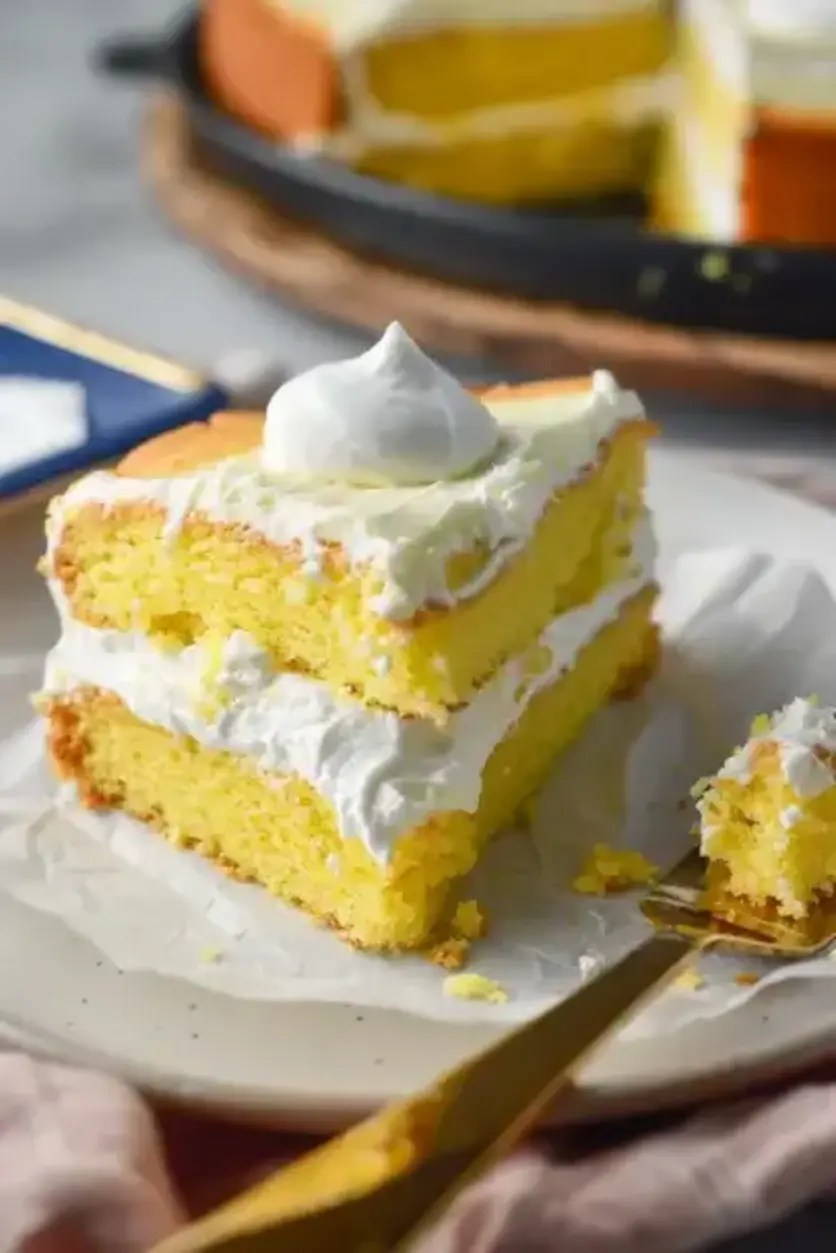
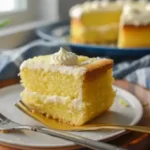
Imagine biting into a slice of nostalgia that transports you back to your childhood, with every forkful delivering the iconic, extra fluffy filling that makes this Twinkie Cake Recipe truly unforgettable. As the ultimate homemade version of the classic treat, this Twinkie Cake Recipe combines a light, airy yellow cake with a creamy center that’s been perfected for maximum fluffiness through extended beating techniques. Whether you’re craving a simple dessert for family gatherings or a showstopper for parties, this easy Twinkie Cake Recipe will become your go-to guide, promising fail-proof results right from your kitchen. With its irresistible blend of flavors and textures, it’s no wonder this recipe stands out as the best on exorecipes.com.
The aroma of this Twinkie Cake Recipe baking in the oven fills the air with warm, buttery sweetness that evokes pure comfort. Each layer boasts a tender, moist crumb from the yellow cake base, perfectly contrasted by the extra fluffy filling that’s smooth, velvety, and just sweet enough to satisfy your cravings. The filling’s lightness comes from whipping air into the mixture, creating a cloud-like texture that melts in your mouth, while the subtle vanilla undertones enhance the overall experience. Every bite offers a delightful contrast of soft cake and creamy interior, making this Twinkie Cake Recipe not just a dessert, but a sensory journey that will leave you wanting more.
At exorecipes.com, we’ve refined this Twinkie Cake Recipe to ensure it’s the most reliable and comprehensive resource available, drawing from Chef Mia’s expertise and our team’s rigorous testing. Discover the “Chef’s Secret” that elevates the filling to extraordinary heights, along with step-by-step guidance that builds your confidence in the kitchen. From ingredient spotlights to pro tips, this post covers everything you need to create a flawless homemade Twinkie cake that’s far superior to store-bought options. Stick around for FAQs and storage advice to make this recipe a staple in your baking repertoire.
Why This Twinkie Cake Recipe is a Game-Changer
The Chef’s Secret: What sets this Twinkie Cake Recipe apart is the extra fluffy filling achieved through prolonged high-speed beating, which incorporates more air for a light, dreamy texture that mimics the original Twinkies but with a homemade twist. This technique, using the flour-milk base as a stabilizer, prevents the filling from becoming greasy and ensures it holds its shape beautifully. It’s this attention to detail that makes our version superior, turning a simple dessert into an indulgent masterpiece.
Unbeatable Texture: The science behind the texture lies in the emulsion process during filling preparation. Beating the shortening, butter, and cooled flour mixture creates a stable foam that traps air, resulting in that signature fluffiness. High-quality ingredients like real butter contribute to a richer mouthfeel, as the fats crystallize properly when chilled, enhancing the cake’s overall structure without making it dense.
Foolproof for a Reason: This Twinkie Cake Recipe has been tested multiple times in our kitchens to guarantee success, even for novice bakers. With clear instructions and built-in pro tips, you’ll avoid common pitfalls, ensuring consistent results every time you bake. It’s designed to be accessible yet exceptional, making it the go-to Twinkie Cake Recipe for home cooks seeking reliability and delight.
Ingredient Spotlight: Quality Makes the Difference
For the yellow cake mix, this foundational ingredient simplifies the process while delivering a moist, fluffy base essential for any great Twinkie Cake Recipe. Opt for a high-quality brand with no artificial preservatives to ensure better flavor and texture; it’s the canvas for your dessert. If you’re out of mix, substitute with 2 cups of all-purpose flour, 1 cup of sugar, 1/2 teaspoon baking powder, and 1/2 teaspoon baking soda for a from-scratch alternative that maintains the recipe’s integrity.
Flour plays a crucial role in thickening the filling, creating that creamy consistency that defines this Twinkie Cake Recipe. Use all-purpose flour for its balanced protein content, which helps form a smooth roux without lumps. Quality matters here because fresh flour absorbs liquids evenly; avoid old stock to prevent off-flavors. A good substitution is cornstarch in a 1:1 ratio if you’re aiming for a gluten-free option, but note it may slightly alter the filling’s texture.
Milk adds richness and creaminess to the filling in this Twinkie Cake Recipe, helping to create a silky base when combined with flour. Whole milk is ideal for its fat content, which enhances the emulsion and final fluffiness—skim milk won’t yield the same results. For dietary needs, swap with almond milk, but use unsweetened to avoid sweetness overload, ensuring the filling remains balanced and delicious.
Shortening provides stability and aeration in the filling, contributing to the extra fluffy texture that makes this Twinkie Cake Recipe stand out. Choose a vegetable-based shortening without trans fats for better health and performance; it helps the mixture hold air pockets. If substituting, unsalted butter can replace it 1:1, though it might make the filling softer, so chill it longer for optimal results.
Butter is key for flavor and creaminess in the filling of this Twinkie Cake Recipe, blending seamlessly with shortening to create a luxurious mouthfeel. Always use unsalted butter to control salt levels, and ensure it’s at room temperature for easy creaming. A vegan substitute like coconut oil works well, but use refined oil to avoid a coconut taste, maintaining the recipe’s classic profile.
Sugar sweetens the filling perfectly in this Twinkie Cake Recipe, balancing the flavors without overpowering them. Granulated sugar dissolves easily and aids in creating volume during beating; choose organic for a purer taste. If you need a lower-sugar option, substitute with powdered sugar or a sugar alternative like erythritol, but adjust quantities to prevent the filling from becoming grainy.
Salt enhances the overall flavor profile in this Twinkie Cake Recipe, cutting through the sweetness for a more balanced taste. Just 1/2 teaspoon is enough to brighten the filling; use fine sea salt for even distribution. If you’re watching sodium, kosher salt can be used in the same amount, as it dissolves readily and won’t alter the recipe’s foolproof nature.
Step-by-Step Instructions for Twinkie Cake Recipe
Step 1: Preparing the Cake Mix
Preheat your oven according to the cake mix instructions, typically around 350°F. Prepare the yellow cake mix as directed on the box, using the specified ingredients like eggs, oil, and water. Pour the batter evenly into two 9-inch round cake pans and bake according to the package instructions, usually 20-25 minutes or until a toothpick inserted in the center comes out clean. Let the cakes cool completely on a wire rack before proceeding.
Pro Tip: Always measure ingredients precisely to ensure even baking; this prevents one layer from doming unevenly, which can affect the final assembly of your Twinkie Cake Recipe.
Step 2: Making the Filling
In a saucepan, whisk together the 5 tablespoons of flour and 1 cup of milk over medium heat, stirring constantly until it thickens to a pudding-like consistency, about 5 minutes. Remove from heat and let it cool to room temperature, stirring occasionally to prevent a skin from forming.
Common Mistake to Avoid: Don’t rush the cooling process, as adding warm mixture to the butter could cause it to separate; always let it reach room temperature to keep your Twinkie Cake Recipe’s filling smooth and extra fluffy.
Step 3: Creaming the Shortening and Butter
In a mixing bowl, beat together the 1/2 cup of shortening and 1/2 cup of butter on medium speed until light and fluffy, about 2-3 minutes. Gradually add the 1 cup of sugar and continue beating until fully incorporated and the mixture is creamy and pale, which should take another 2 minutes.
Pro Tip: Use room-temperature ingredients for easier creaming; this ensures maximum air incorporation, enhancing the extra fluffy texture in your Twinkie Cake Recipe.
Step 4: Combining for the Filling
Add the cooled flour mixture to the creamed shortening and butter, along with 1/2 teaspoon of salt. Beat on high speed until the filling is light, fluffy, and well-blended, about 5-7 minutes. This step is crucial for achieving the signature lightness.
Common Mistake to Avoid: Undermixing can result in a dense filling, so beat for the full time to trap air effectively and avoid a gummy texture in your Twinkie Cake Recipe.
Step 5: Assembling the Cake
Place one cooled cake layer on your serving plate and spread a generous amount of the prepared filling on top, about 1/2 inch thick. Top with the second cake layer and use the remaining filling to frost the top and sides evenly. Refrigerate the cake for at least an hour to set.
Pro Tip: Chill the assembled cake to firm up the filling, which locks in the extra fluffy quality and makes slicing easier for your perfect Twinkie Cake Recipe.
Serving & Presentation
For an eye-catching presentation of your Twinkie Cake Recipe, slice it into generous wedges and arrange on a decorative platter, perhaps dusted with a light sprinkle of powdered sugar for a subtle sheen. Enhance the nostalgic vibe with simple garnishes like fresh berries or a drizzle of chocolate sauce to add color and contrast without overwhelming the cake’s flavors. This dessert pairs wonderfully with a cup of coffee or tea, making it ideal for afternoon treats, or serve it alongside vanilla ice cream for a decadent finish that elevates the experience.
To complement this Twinkie Cake Recipe in a full meal, consider light sides like fresh fruit salads or yogurt parfaits to balance the richness. For a celebratory occasion, pair it with other American desserts such as apple pie or brownies, creating a spread that highlights classic flavors. The key is to keep accompaniments simple, allowing the extra fluffy filling and moist cake to shine as the star.
Make-Ahead & Storage Solutions
Make-Ahead Strategy: Prepare the cake layers up to 2 days in advance by baking and wrapping them tightly in plastic wrap, then store in the refrigerator. For the filling, make it 1 day ahead and keep it covered in the fridge; assemble just before serving to maintain the extra fluffy texture in your Twinkie Cake Recipe.
Storing Leftovers: Store any remaining cake in an airtight container in the refrigerator for up to 5 days to preserve freshness; the filling stays firm when chilled. For longer storage, freeze individual slices wrapped in foil for up to 3 months, ensuring they retain their moisture and flavor.
The Best Way to Reheat: To restore the original texture, thaw frozen slices in the refrigerator overnight, then let them sit at room temperature for 30 minutes before serving. Avoid microwaving to prevent the filling from melting; instead, warm gently in a low oven for 5 minutes if desired, keeping your Twinkie Cake Recipe as delightful as fresh-baked.
Frequently Asked Questions (FAQ)
How long does it take to make this Twinkie Cake Recipe from start to finish?
This Twinkie Cake Recipe takes about 45 minutes total, with 20 minutes for prep and 25 minutes for cooking. However, include an additional hour of refrigeration for the best results, making it a quick yet rewarding project for any home cook.
What are some good substitutions for ingredients in this Twinkie Cake Recipe?
For a healthier twist on this Twinkie Cake Recipe, substitute shortening with coconut oil for a subtle tropical note, or use almond milk instead of regular milk in the filling to make it dairy-free. If you’re avoiding sugar, opt for a natural sweetener like honey, but reduce the amount slightly to maintain the balance.
What are the best tips for achieving the perfect texture in this Twinkie Cake Recipe?
To get the extra fluffy filling in this Twinkie Cake Recipe, beat the mixture on high speed for at least 5-7 minutes and ensure all ingredients are at room temperature. Also, let the cake layers cool completely before assembling to prevent sogginess and maintain that light, airy quality.
What sides pair well with this Twinkie Cake Recipe for a complete dessert experience?
This Twinkie Cake Recipe pairs beautifully with fresh fruits like strawberries or raspberries to add a tangy contrast, or serve it with whipped cream for added indulgence. For a full meal, follow it with a light coffee or herbal tea to cleanse the palate and enhance the flavors.
Can I make this Twinkie Cake Recipe vegan or gluten-free?
Yes, you can adapt this Twinkie Cake Recipe for vegan or gluten-free diets. For vegan, replace butter and milk with plant-based alternatives like vegan butter and almond milk, and use a vegan cake mix. For gluten-free, opt for a gluten-free yellow cake mix and ensure your flour is a gluten-free blend, which will keep the texture light and fluffy with minimal adjustments.
Tried This Recipe? Leave a Comment!
Did you make this Twinkie Cake Recipe? I’d love to hear how it turned out! Please leave a comment and a rating below. Your feedback helps other home cooks and supports exorecipes!
For more delicious inspiration, follow me on Pinterest!
Twinkie Cake Recipe
- Prep Time: 20 minutes
- Cook Time: 25 minutes
- Total Time: 45 minutes
- Yield: 12 servings 1x
- Method: Dessert
- Cuisine: American
Description
This homemade Twinkie Cake brings the nostalgic taste of classic Twinkies into a delightful and easy-to-make dessert. With a light and fluffy yellow cake and a creamy, irresistible filling, this cake is perfect for any occasion. The smell when this cake is baking is incredible, and it tastes even better!
Ingredients
- 1box yellow cake mix (plus ingredients listed on the box)
- 5 tbspflour
- 1 cupmilk
- 1/2 cupshortening
- 1/2 cupbutter
- 1 cupsugar
- 1/2 tspsalt
Instructions
- Prepare the Cake Mix: Preheat yourovenaccording to the cake mix instructions. Prepare the yellow cake mix as directed on the box. Pour the batter into two 9-inch round cake pans and bake according to the package instructions. Once baked, let the cakes cool completely.
- Make the Filling: In asaucepan,whisktogether the flour and milk over medium heat until it thickens, about 5 minutes. Remove from heat and let it cool to room temperature.
- Cream the Shortening and Butter: In a mixing bowl, beat together the shortening and butter until light and fluffy. Gradually add the sugar and continue to beat until fully incorporated and creamy.
- Combine for the Filling: Add the cooled flour mixture to the butter mixture, along with the salt and vanilla. Beat on high speed until the filling is light and fluffy.
- Assemble the Cake: Place one cake layer on your servingplateand spread a generous amount of filling on top. Place the second cake layer on top of the filling. Use the remaining filling to frost the top and sides of the cake. Refrigerate the cake for at least an hour before serving for best results.
Notes
Ensure both the cake layers and the flour mixture are completely cooled before assembling to prevent the filling from melting.For a truly fluffy filling, don’t skimp on the beating time. The longer you beat the filling, the fluffier it will be.Refrigerate the cake for at least an hour before serving to let the flavors meld together.
Nutrition
- Calories: 350
- Sugar: 25
- Fat: 18
- Carbohydrates: 45
- Protein: 4
Conclusion
This Twinkie Cake Recipe delivers a delightfully moist and creamy dessert that captures the nostalgic charm of classic snack cakes, making it perfect for family gatherings or a simple sweet treat. Its straightforward preparation and familiar flavors ensure it’s accessible for bakers of all skill levels, while the end result is sure to impress with its light, airy texture. For the best experience, serve it chilled with a dollop of whipped cream, or try a variation by incorporating chocolate chips into the batter for an extra indulgent twist.