“`html
Table of Contents
- Introduction to Chicken Fajitas
- Ingredients for Juicy Chicken Fajitas
- Timing Your Fajita Fiesta
- Step-by-Step: Crafting Perfect Chicken Fajitas
- Nutritional Snapshot
- Healthier Fajita Alternatives
- Serving Suggestions to Elevate Your Fajitas
- Common Fajita Mistakes to Avoid
- Storing Your Fajita Leftovers
- Conclusion: Your New Favorite Fajita Recipe
- Frequently Asked Questions About Chicken Fajitas
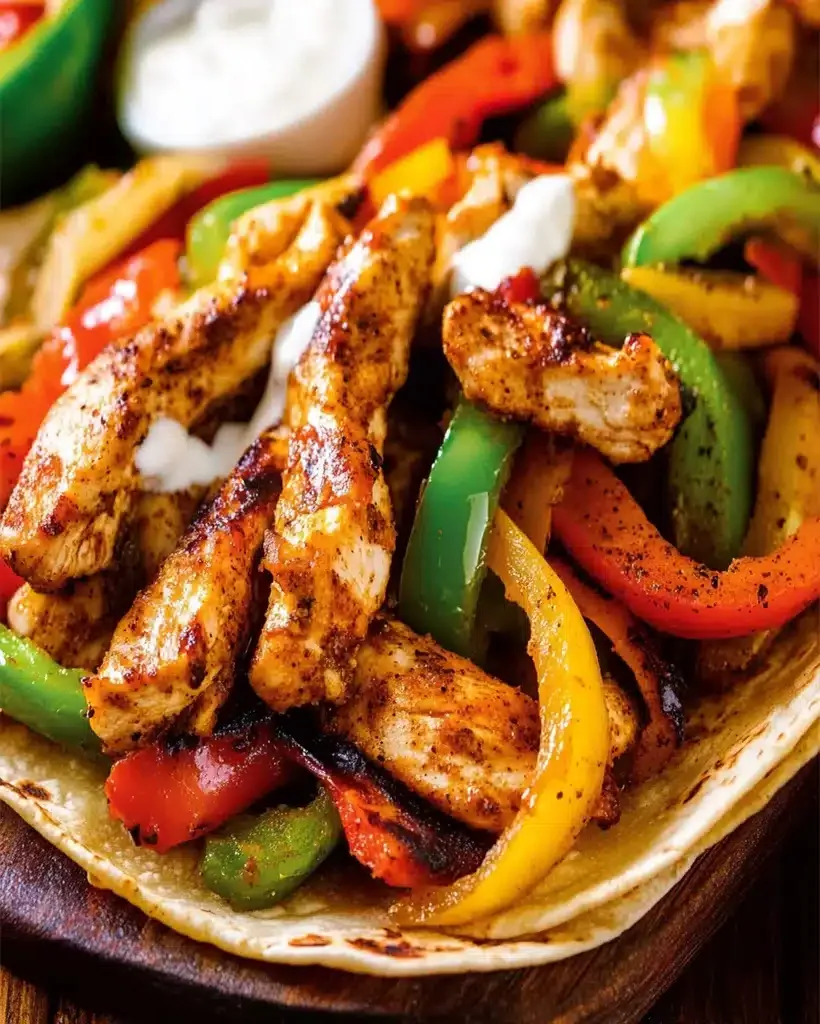
Chicken Fajitas Recipe – Juicy, Flavorful & Super Easy!
Hey there, fellow foodies! Are you ready to embark on a flavor-packed journey with a recipe that might just change your fajita game forever? Chicken fajitas often steal the show in Mexican restaurants, but what if I told you that this Chicken Fajitas Recipe made at home is even better? It’s time to fire up the skillet and create some magic in your kitchen!
Did you know that the average restaurant-style chicken fajita can contain upwards of 800 calories and 25 grams of fat? We’re about to show you how to create a version that’s not only bursting with incredible flavor but can also be lighter and healthier, all while being incredibly satisfying and easy to make on a weeknight!
Forget bland, dry chicken and unevenly cooked vegetables. This recipe focuses on creating impossibly juicy, tender chicken and perfectly crisp-tender vegetables, all infused with a smoky, zesty marinade that will transport your taste buds straight to Mexico. Whether you’re a seasoned home cook or just starting your culinary adventures, this fajita recipe is designed for success. Get ready to impress yourself and anyone lucky enough to share your table!
Ingredients for Juicy Chicken Fajitas
The secret to phenomenal fajitas lies in both the marinade and the quality of your ingredients. We’ve included some ideas for substitutions to make this recipe work with what you have on hand.
For the Chicken & Marinade:
- 1.5 lbs boneless, skinless chicken breasts or thighs: Thighs tend to stay juicier, but breasts are a classic choice. For a leaner option, use breasts. Cut into thin strips (about 1/2 inch thick) for quick cooking and maximum marinade absorption.
- 2 tbsp olive oil: Or avocado oil for a higher smoke point.
- 2 tbsp lime juice: Freshly squeezed is best for that bright, tangy kick.
- 1 tbsp chili powder: Use a good quality, flavorful blend.
- 1 tsp cumin: For that essential smoky, earthy depth.
- 1 tsp smoked paprika: Enhances the smoky notes without adding heat.
- 1/2 tsp garlic powder: Or 2 cloves minced fresh garlic.
- 1/4 tsp onion powder: For a subtle savory base.
- 1/4 tsp dried oregano: Preferably Mexican oregano if you can find it.
- Salt and freshly ground black pepper to taste: Season generously!
- Optional: Pinch of cayenne pepper: For a touch of heat.
For the Sautéed Veggies:
- 1 large onion: Yellow or red onions work beautifully. Slice into thin wedges.
- 2 bell peppers: A mix of colors like red, yellow, and green adds visual appeal and varying sweetness. Slice into thin strips.
- 1 tbsp olive oil or avocado oil: For sautéing.
- Salt and pepper to taste: To enhance vegetable flavors.
For Serving (Optional but Recommended!):
- Warm tortillas: Flour or corn, your preference!
- Toppings: Guacamole, salsa, sour cream (or Greek yogurt), shredded cheese, fresh cilantro, pico de gallo, sliced jalapeños.
Timing Your Fajita Fiesta
Compared to the average fajita recipe which might require longer marinating or slower cooking, this recipe is designed for weeknight efficiency. The quick marination and high-heat cooking ensure tender chicken and perfectly sautéed vegetables in under 40 minutes of active preparation and cooking!
Step-by-Step: Crafting Perfect Chicken Fajitas
Let’s get cooking! Follow these easy steps for fajitas that will become a staple in your home.
Step 1: Marinate the Chicken for Maximum Flavor
In a medium bowl, combine the chicken strips with olive oil, lime juice, chili powder, cumin, smoked paprika, garlic powder, onion powder, oregano, salt, pepper, and cayenne (if using). Toss everything together until the chicken is evenly coated. Cover the bowl and let it marinate at room temperature for at least 30 minutes, or in the refrigerator for up to 2 hours. If refrigerating, bring it back to room temperature for about 15-20 minutes before cooking.
Step 2: Prep Your Veggies
While the chicken is marinating, slice your onion and bell peppers into thin, uniform strips. This ensures they cook evenly and quickly. Set them aside.
Step 3: Cook the Chicken to Perfection
Heat a large skillet or cast-iron pan over medium-high heat. Add a tablespoon of oil if your pan isn’t well-seasoned, but often the oil from the marinade is enough. Add the marinated chicken in a single layer, working in batches if necessary to avoid overcrowding the pan. Overcrowding will steam the chicken instead of searing it, leading to less flavor and a less appealing texture. Cook for 3-5 minutes per side, until browned and cooked through. The chicken should reach an internal temperature of 165°F (74°C). Remove the cooked chicken from the skillet and set aside on a plate. Tent loosely with foil to keep warm.
Step 4: Sauté the Vibrant Veggies
In the same skillet (no need to clean it – those browned bits are flavor!), add another tablespoon of oil if needed. Add the sliced onions and bell peppers. Sprinkle with salt and pepper. Cook, stirring occasionally, for 5-7 minutes, or until the vegetables are tender-crisp. You want them to have a slight bite, not be mushy. If they start to stick, you can add a tablespoon or two of water or broth.
Step 5: Combine and Serve Your Masterpiece
Return the cooked chicken to the skillet with the vegetables. Toss everything together for about a minute to heat the chicken through and allow the flavors to meld. Taste and adjust seasoning if needed. Serve immediately with warm tortillas and your favorite toppings!
Nutritional Snapshot
(Note: Nutritional values are estimates and can vary based on exact ingredients and portion sizes used.)
- Calories: Approximately 350-450 per serving (without tortillas and toppings)
- Protein: 30-40g
- Fat: 15-25g (depending on chicken cut and oil used)
- Carbohydrates: 10-15g (from vegetables)
- Fiber: 3-5g
Healthier Fajita Alternatives
Looking to lighten things up even further without sacrificing flavor? Try these swaps:
- Leaner Protein: Swap chicken for lean turkey breast strips or even firm tofu for a vegetarian option.
- Reduce Oil: Use cooking spray or a very minimal amount of oil when sautéing vegetables. Add a splash of water or broth to prevent sticking.
- Whole Wheat Tortillas: Opt for small, whole wheat tortillas over traditional white flour ones.
- Lighter Toppings: Use plain Greek yogurt instead of sour cream, load up on fresh salsa and avocado, and go easy on cheese.
- Fajita Bowls: Serve the chicken and vegetable mixture over a bed of cauliflower rice or quinoa for a hearty, grain-free meal.
Serving Suggestions to Elevate Your Fajitas
The magic of fajitas is in the customization! Assemble your perfect bite:
- Warm tortillas are key! Lightly warm corn or flour tortillas on a dry skillet or in the microwave for pliability.
- Salsa Spectrum: Offer a variety from mild pico de gallo to a spicier salsa verde.
- Creamy Companions: A dollop of guacamole or plain Greek yogurt adds cooling richness.
- Fresh Finish: Sprinkle with chopped fresh cilantro and thinly sliced radishes for a peppery crunch.
- Spice it Up: Offer sliced jalapeños or a drizzle of hot sauce for those who crave extra heat.
Common Fajita Mistakes to Avoid
- Overcrowding the Pan: This leads to steaming, not searing. Cook in batches!
- Dry, Overcooked Chicken: Cut chicken into strips for quick cooking and don’t cook it for too long.
- Mushy Vegetables: Sauté vegetables quickly over medium-high heat until tender-crisp.
- Under-Marinating: While 30 minutes is okay, longer is better for deeper flavor.
- Bland Seasoning: Don’t be shy with the spices and salt!
Storing Your Fajita Leftovers
Leftover cooked chicken and vegetable mixture can be stored in an airtight container in the refrigerator for up to 3-4 days. Reheat gently on the stovetop or in the microwave. Tortillas are best stored separately at room temperature.
Conclusion: Your New Favorite Fajita Recipe
There you have it – a Chicken Fajitas Recipe that’s incredibly flavorful, surprisingly easy, and endlessly customizable. You’ve learned how to achieve that perfect balance of juicy chicken and crisp-tender veggies, all thanks to a simple yet effective marinade and smart cooking techniques. Say goodbye to boring weeknight dinners and hello to a fiesta of flavor!
So, what are you waiting for? Gather your ingredients, fire up that skillet, and create some fajita magic in your own kitchen. We promise you won’t be disappointed! Let us know in the comments below how your fajitas turned out and what toppings you loved the most!
Frequently Asked Questions About Chicken Fajitas
***What is the best cut of chicken for fajitas?***
Chicken thighs are often preferred because they have more fat, which keeps them incredibly moist and tender during high-heat cooking. However, boneless, skinless chicken breasts are also a popular choice and can be just as juicy if not overcooked. Cutting them into thin strips helps ensure even cooking.
***How long should I marinate the chicken?***
For best flavor, marinate for at least 30 minutes at room temperature. You can also marinate it in the refrigerator for up to 2 hours. If marinating longer than 30 minutes in the fridge, let it sit out for about 15-20 minutes before cooking to bring it closer to room temperature.
***Can I make the fajitas ahead of time?***
You can prepare the marinade and cut the chicken and vegetables ahead of time. Marinate the chicken, and store the vegetables separately in the refrigerator. Cook everything just before serving for the best texture and flavor. The cooked fajita mixture can be stored for a few days and reheated.
***What can I use instead of bell peppers?***
While bell peppers are classic, you can experiment with other firm vegetables like zucchini, yellow squash, mushrooms, or even asparagus. Ensure they are cut into similar-sized strips for even cooking.
***Why are my fajitas not sizzling?***
This is likely due to overcrowding the pan. When too many ingredients are in the pan at once, they release moisture and steam, preventing proper searing and browning. Cook in batches to ensure a good sizzle and caramelization of both the chicken and vegetables.

Chicken Fajitas Recipe: Juicy, Flavorful & Easy to Make
Description
Hey there, fellow foodies! Are you ready to embark on a flavor-packed journey with a recipe that might just change your fajita game forever? Chicken fajitas often steal the show in Mexican restaurants, but what if I told you that thisChicken Fajitas Recipemade at home is even better? It’s time to fire up the skillet and create some magic in your kitchen!
Ingredients
- To Garnish:
Instructions
- Start by slicing 1 1/2 pounds of chicken thighs into 1-inch wide strips. Mix the marinade ingredients: lime juice, soy sauce, liquid smoke, cumin, salt, chili powder, smoked paprika, onion powder, cayenne pepper, cilantro, and garlic. Let the chicken soak in this flavorful mixture for at least 15 minutes or up to 24 hours in the fridge.
- Slice the bell peppers into 1/4-inch strips. Cut the onion into thin slices, about the same thickness. This will ensure even cooking and a perfect texture when sautéed.
- Heat a 12-inch cast-iron skillet on medium-high. Add vegetable oil and once hot, place the marinated chicken strips in batches, making sure not to overcrowd the pan. Sear until blackened on both sides, then remove the chicken from the pan.
- In the same skillet, add more oil and sauté the onions and bell peppers. Sprinkle with salt and pour the remaining marinade from the chicken over the veggies. Cook until they are crisp-tender.
- Warm the tortillas in a skillet. Add the cooked chicken and sautéed veggies, top with shredded cheese, and garnish with sour cream, guacamole, or chipotle mayo. Add a squeeze of lime for an extra burst of freshness.
Notes
Use chicken thighsfor a juicier bite, but you can swap for chicken breasts if you prefer leaner meat.
Marinate the chicken for at least 15 minutes, but for the best flavor, leave it in the fridge overnight.
Don’t overcrowd the skilletwhen searing the chicken. Cooking in batches ensures a perfect sear and locks in the juices.
“`