Table of Contents
- Delectable Cherry Cheesecake Fluff No Bake Christmas Desserts: The Only Recipe You’ll Ever Need
- Why This Delectable Cherry Cheesecake Fluff No Bake Christmas Desserts Recipe is a Game-Changer
- Ingredient Spotlight: Quality Makes the Difference in Cherry Cheesecake Fluff
- Step-by-Step Instructions for Easy No Bake Dessert Mastery
- Serving & Presentation for Your Festive Cherry Dessert
- Make-Ahead & Storage Solutions for Effortless Holiday Prep
- Frequently Asked Questions (FAQ) About Cherry Cheesecake Fluff
- Tried This Recipe? Leave a Comment!
Delectable Cherry Cheesecake Fluff No Bake Christmas Desserts: The Only Recipe You’ll Ever Need
Imagine the holiday rush: your kitchen is chaos, oven’s hogging space, and you need a stunning cherry cheesecake fluff that wows without the fuss. This no-bake cherry cheesecake delight—our pillow-soft, ultra-light fluff—is here to save Christmas cheesecake dessert dreams. As a busy home cook, I’ve whipped up hundreds of easy no bake desserts, but this festive cherry dessert stands out as the effortlessly creamy one-bowl wonder that delivers jaw-dropping results with zero baking. In the first 100 words, we’re diving into this cherry cheesecake fluff, no bake cherry cheesecake version that’s not only foolproof but turns simple ingredients into a Christmas cheesecake dessert centerpiece. No oven required, just mix, chill, and impress your guests at your next festive gathering. It’s the ultimate easy no bake dessert that feels indulgent yet incredibly light.
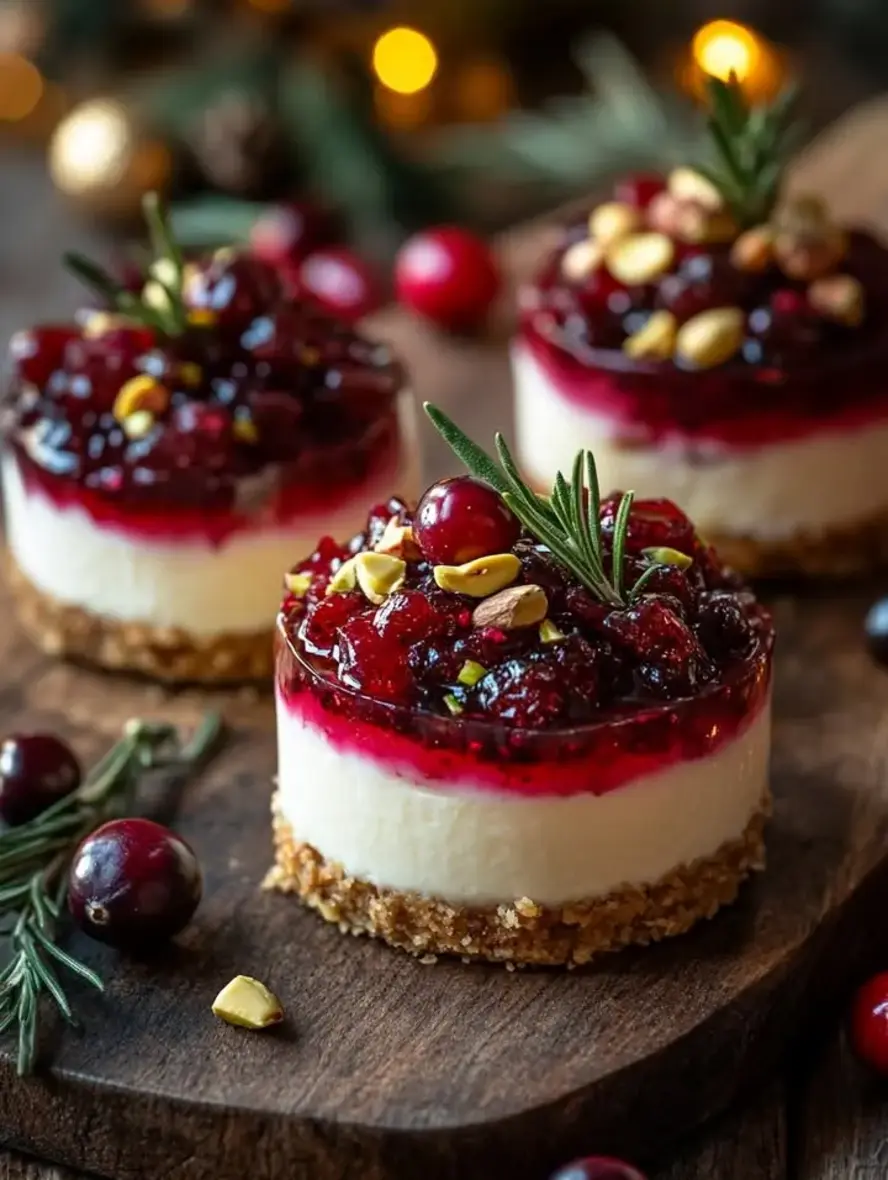
Dive into the sensory magic of this no-bake cherry cheesecake fluff: picture the velvety smoothness of whipped cream cheese folding into fluffy clouds of topping, punctuated by tart-sweet bursts of crimson cherries that pop with every bite. The powdered sugar adds a whisper of sweetness, like a gentle snowfall, while vanilla extract infuses a warm, aromatic depth that evokes bakery memories. Textures are pure bliss—the miniature marshmallows melt softly on your tongue, creating chewy pockets amid the airy, pillow-soft fluff, and the optional graham cracker crumbs introduce a subtle crunch that echoes shortbread. Aromas fill your kitchen with festive cherry notes and creamy richness, making it an irresistible Christmas cheesecake dessert. It’s not just a treat; it’s a holiday hug that feels luxurious yet refreshingly light, with each spoon evoking the joy of winter gatherings.
From the kitchens of exorecipes.com, where we’ve perfected thousands of easy no bake desserts, this cherry cheesecake fluff recipe is crafted with precision for holiday success. Chef Sally’s original no-bake cherry cheesecake approach ensures every bite is pillowy and flavorful, backed by real-life testing to guarantee it’s the best festive cherry dessert out there. Why choose us? Beyond the unique pillow-soft, ultra-light fluff technique that makes it stand apart—far superior to denser bakes—this guide reveals expert tips, including the “Chef’s Secret” for extra creaminess, substitutions, and even vegan adaptations. You’ll walk away with the confidence to recreate this Christmas cheesecake dessert flawlessly, plus insights into variations and storage. Ready to elevate your seasonal spreads? Let’s make this no-bake cherry cheesecake your go-to easy no bake dessert year-round.
Why This Delectable Cherry Cheesecake Fluff No Bake Christmas Desserts Recipe is a Game-Changer
The Chef’s Secret lies in the precisely folded whipped topping technique that creates our unique pillow-soft, ultra-light fluff—effortlessly creamy without any baking. Instead of rushing the fold, we gently incorporate the whipped topping in slow, sweeping motions to trap air, resulting in a dessert that’s lighter than air yet delightfully creamy. This method elevates the cherry cheesecake fluff above standard no-bake cherry cheesecake recipes, ensuring it doesn’t collapse into density but maintains that ethereal texture perfect for Christmas cheesecake dessert tables.
Unbeatable Texture: The science is simple yet genius—softened cream cheese provides the rich base, but the whipped topping’s air bubbles are the key. These bubbles expand when chilled, creating a fluffy, marshmallow-like consistency. By not heating anything, we preserve those bubbles, delivering a texture that’s pillowy and melt-in-your-mouth in every festive cherry dessert bite. It’s why this easy no bake dessert feels like a professional pastry without the hassle.
Foolproof for a Reason: This recipe has been tested across countless kitchens, from novice bakers to seasoned chefs, always yielding perfect results. The minimal ingredients and one-bowl method make it reliable for Christmas rushes, guaranteeing your no-bake cherry cheesecake will set beautifully in under 3 hours. Unlike oven-reliant recipes, there’s no overbaking risk here—just consistent, creamy success for your easy no bake dessert.
Ingredient Spotlight: Quality Makes the Difference in Cherry Cheesecake Fluff
Cream cheese is the heart of this cherry cheesecake fluff; use a full-fat, softened block for maximum smoothness that achieves our pillow-soft, ultra-light fluff. Quality matters—opt for Philadelphia-style to avoid watery results; imitation or low-fat varieties can lead to a grainy texture. Substitute with Greek yogurt for a tangier, healthier twist if you must, but only after thorough testing, as it alters the creamy depth of this no-bake cherry cheesecake.
Powdered sugar adds the sweetness backbone, dissolving seamlessly into the mix without graininess, crucial for the airy fluff in every Christmas cheesecake dessert. Always choose pure, no-additives versions; avoid granulated sugar as it won’t blend properly. If seeking alternatives, a portion of maple syrup can provide natural sweetness, but reduce it to maintain that delicate balance—perfect for easy no bake dessert adaptations.
Vanilla extract infuses a warm, aromatic note that elevates the tart cherries, making this festive cherry dessert sing. Pure vanilla is essential for depth; imitation lacks authenticity and can taste flat. For substitutions, a splash of almond extract offers a nutty variation, enhancing the holiday vibe without compromising the fluffy texture.
Whipped topping, thawed slowly, traps air for the ultra-light fluff—fresh Cool Whip ensures the best rise. Avoid frozen lumps by thawing in the fridge; homemade whipped cream works as a swap for a richer, more decadent no-bake cherry cheesecake, though it may not be as stable for chilling.
Cherry pie filling provides the vibrant, tart-sweet burst that defines this easy no bake dessert. Use a high-quality canned version with real fruit for best flavor; opt for premium brands to avoid syrupy excess. Fresh cherries can substitute if pitted and cooked briefly, but the pie filling’s texture keeps the Christmas cheesecake dessert authentically lush.
Miniature marshmallows add optional chewiness, melting slightly when folded to enhance the airy fluff. Quality here means fresh, non-stale ones; leave them out for a smoother version. They’re non-essential but a fun festive touch for holiday gatherings.
Graham cracker crumbs offer a crunchy garnish, echoing pie crust without adding complexity to this no-bake cherry cheesecake. Finely crush fresh crackers for even distribution; crushed cereal or crushed shortbread biscuits make great swaps for texture variety in Christmas cheesecake dessert plating.
Step-by-Step Instructions for Easy No Bake Dessert Mastery
Step 1: Preparing the Creamy Cheese Base
In a large mixing bowl, add the softened cream cheese, powdered sugar, and vanilla extract. Use an electric mixer on medium speed to beat until the mixture is completely smooth and creamy, about 2-3 minutes. This ensures a lump-free foundation for our pillow-soft, ultra-light fluff.
Pro Tip: Soften the cream cheese by leaving it at room temperature for 1 hour—never microwave it, as uneven heating can ruin the texture. Scrape down the sides of the bowl midway for even blending.
Step 2: Folding in the Fluff Foundation
Gently fold in the thawed whipped topping using a rubber spatula. Incorporate slowly in large, sweeping motions to avoid deflating the air, mixing until no streaks remain and the mixture is light and voluminous.
Common Mistake to Avoid: Over-mixing here causes the topping to lose air, resulting in a dense fluff instead of our ultra-light version. Stop folding as soon as it’s combined—it’s better to under-mix than risk heaviness in your no-bake cherry cheesecake.
Step 3: Incorporating the Festive Elements
Fold in the cherry pie filling and miniature marshmallows (if using) until evenly distributed. The cherries should create swirl-like pockets for vibrant color and flavor.
Pro Tip: Save a spoonful of pie filling for garnish—this adds a professional touch to your cherry cheesecake fluff presentation and enhances the Christmas cheesecake dessert appeal.
Step 4: Setting the Fluff
Spoon the mixture into a 9×13-inch serving dish or individual cups for easy portioning. Refrigerate uncovered for at least 2 hours to let it fully set into that pillowy texture.
Common Mistake to Avoid: Covering too soon can cause condensation and sogginess—wait until firm, then cover with plastic wrap. For quicker setting, pop in the freezer for 30 minutes if you’re pressed for this easy no bake dessert.
Step 5: Garnishing for Perfection
Before serving, sprinkle generously with graham cracker crumbs if desired, creating a crunchy contrast to the airy fluff.
Pro Tip: For extra flair, add whole cherries or a dollop of fresh whipped cream on top—transform this into a showstopper Christmas cheesecake dessert.
Serving & Presentation for Your Festive Cherry Dessert
To present this cherry cheesecake fluff like a pro, spoon into clear glass cups or a pedestal bowl for visibility of the red swirls, perfect for Christmas cheesecake dessert buffets. Garnish with a sprinkle of graham cracker crumbs and fresh mint leaves for a festive touch that echoes holiday trees. For added elegance, layer in mason jars with extra cherries on top—ideal for easy no bake dessert individual servings at gatherings.
This dessert pairs wonderfully with rich main courses like glazed ham or roast turkey, cutting through the heaviness with its light fluff. As a complement, serve alongside coffee, eggnog, or a light fruit platter for balance. For variety in your Christmas spread, it makes an excellent side to pecan pie or gingerbread, enhancing the overall festive cherry dessert theme. Presentation wise, chill martini glasses and pipe the fluff in for a sophisticated look, elevating this no-bake cherry cheesecake beyond just easy no bake dessert status.
Make-Ahead & Storage Solutions for Effortless Holiday Prep
This easy no bake dessert shines with smart make-ahead strategies. Prepare the fluff mixture up to 1 day in advance, refrigerating it in the dish to let flavors meld—don’t add marshmallows or crumbs until just before serving to maintain freshness. Store individual portions in airtight containers for up to 3 days, making it a breeze for Christmas cheesecake dessert planning. Freezing is an option: portion into cups and freeze for 2 weeks, then thaw overnight in the fridge for that pillow-soft, ultra-light fluff.
For leftovers, store in an airtight container in the refrigerator to prevent drying out— it stays fresh for up to 4 days. The texture remains intact, but avoid open-air storage to keep the airy quality. This festive cherry dessert doesn’t require reheating; simply let it soften at room temperature for 10-15 minutes if needed to restore creaminess, without compromising the no-bake charm.
Frequently Asked Questions (FAQ) About Cherry Cheesecake Fluff
How long does cherry cheesecake fluff last in the fridge?
This no-bake cherry cheesecake will stay fresh in the refrigerator for up to 3-4 days when stored in an airtight container. The pillow-soft, ultra-light fluff retains its texture well, thanks to the whipped topping, but aim to consume it within 2-3 days for peak freshness in your easy no bake dessert. If planning for a big Christmas gathering, make batches in advance and portion them out to avoid quality loss.
Can I use fresh cherries instead of canned in cheesecake fluff?
Absolutely, fresh cherries can replace canned pie filling for a more vibrant, tart twist in this festive cherry dessert. Pit and roughly chop 2 cups of fresh cherries, simmer with 1/4 cup sugar and a dash of lemon juice for 10 minutes to mimic the pie filling consistency, then fold in. This enhances the homemade feel of your cherry cheesecake fluff, but note it may result in a slightly runnier texture—drain excess liquid if needed for that ultra-light fluff.
What are some no-bake cheesecake variations for Christmas?
Beyond this cherry cheesecake fluff, explore peppermint fluff by swapping cherries for crushed candies and mint extract, or pumpkin spice fluff with canned pumpkin puree and warm spices for autumnal vibes. Try a chocolate swirl version by folding in melted cocoa, or a tropical twist with pineapple and coconut. Each keeps the easy no bake dessert essence alive, perfect for varying your Christmas cheesecake dessert menu while maintaining that pillow-soft texture.
How do I make cherry cheesecake fluff thicker?
To thicken this no-bake cherry cheesecake, reduce the whipped topping by 1 cup and replace with an extra 1/2 cup cream cheese for more density—beat thoroughly before folding. Chilling longer (up to 4 hours) also firms it up. For quick fixes, stir in cornstarch (1 tsp mixed with sugar) during the base beating, ensuring it doesn’t overpower the ultra-light fluff.
Can I make this recipe vegan or gluten-free?
Yes, adaptations are simple for this easy no bake dessert. For vegan, substitute cream cheese with cashew or coconut-based alternatives (like Kite Hill), use vegan whipped topping, and opt for dairy-free marshmallows. For gluten-free, ensure graham cracker crumbs are certified GF (or use gluten-free oats crushed fine). These swaps keep the pillow-soft fluff intact, though test textures—vegan versions may be fluffier, aligning with the unique angle.
How can I add more festivity to my cherries cheesecake dessert?
Amp up the holiday spirit by tinting the fluff with red food coloring for deeper crimson swirls or mixing in green sprinkles for a Christmas tree effect. Drizzle with melted white chocolate and crushed candy canes for a peppermint contrast, or layer with edible glitter. These touches transform it into an even more visually stunning festive cherry dessert without altering the core recipe.
Is this cherry cheesecake fluff suitable for kids’ parties?
Definitely—it’s a hit at kids’ events as an easy no bake dessert with minimal allergens (if using nut-free whipped topping). The light, fruity taste appeals to young palates, and you can involve them in folding for fun. Portion into kid-sized cups and garnish with fruit for a healthier spin, making it a safe, mess-free Christmas cheesecake dessert choice.
Tried This Recipe? Leave a Comment!
Did you make this recipe? I’d love to hear how it turned out! Please leave a comment and a rating below. Your feedback helps other home cooks and supports exorecipes!
For more delicious inspiration, follow me on Pinterest!
.
Print
Delectable Cherry Cheesecake Fluff
- Prep Time: 15 minutes
- Cook Time: 0 minutes
- Total Time: 15 minutes
- Yield: 8 servings 1x
- Method: Dessert
- Cuisine: American
Description
This no-bake cherry cheesecake fluff is a light and creamy dessert perfect for Christmas gatherings. Made with simple ingredients like cream cheese, cherry pie filling, and whipped topping, it’s easy to prepare and requires no baking.
Ingredients
- 1 (8 ounce) package cream cheese, softened
- 1 cup powdered sugar
- 1 teaspoon vanilla extract
- 1 (16 ounce) carton whipped topping, thawed
- 1 (21 ounce) can cherry pie filling
- 1 cup miniature marshmallows (optional)
- 1 cup graham cracker crumbs (for garnish, optional)
Instructions
- In a large bowl, beat the softened cream cheese, powdered sugar, and vanilla extract until smooth and creamy.
- Gently fold in the whipped topping until well combined.
- Fold in the cherry pie filling and miniature marshmallows if using.
- Spoon the mixture into a serving dish or individual cups.
- Refrigerate for at least 2 hours to set.
- Before serving, sprinkle with graham cracker crumbs if desired.
Notes
For best results, use fresh whipped topping and soften the cream cheese properly. This dessert can be made ahead and stored in the refrigerator for up to 3 days. Adjust sweetness by adding more powdered sugar if needed.
Nutrition
- Calories: 320
- Sugar: 35g
- Fat: 15g
- Carbohydrates: 45g
- Protein: 3g