Flavorful Dill Pickle Sourdough Bread

SAVE FOR LATER ❤️ You’ve gotta try this Crusty Dill Pickle Sourdough Bread—it’s tangy, crunchy, and totally unique! Perfect for jazzing up your sandwich at lunch or impressing friends at weekend brunch.

Print

clock clock iconcutlery cutlery iconflag flag iconfolder folder iconinstagram instagram iconpinterest pinterest iconfacebook facebook iconprint print iconsquares squares iconheart heart iconheart solid heart solid icon

Tangy Dill Pickle Sourdough Bread

  • Author: Chef Mia

Instructions


    Easy Lemon Blueberry Sourdough Bread Recipe

    Easy Lemon Blueberry Sourdough Bread Recipe – Simplicity and a Starter

    Print

    clock clock iconcutlery cutlery iconflag flag iconfolder folder iconinstagram instagram iconpinterest pinterest iconfacebook facebook iconprint print iconsquares squares iconheart heart iconheart solid heart solid icon

    Lemon Blueberry Sourdough Bread Recipe

    • Author: Chef Mia

    Description

    Lemon Blueberry Sourdough Bread is bursting with juicy blueberries and sweet lemon flavor from fresh lemon zest. It’s the sourdough loaf you’re going to want to bake all spring long.


    Ingredients

    Scale
    • 50 grams active sourdough starter 1/4 cup
    • 350 grams water scant 1 1/2 cups
    • 500 grams bread flour 3 1/2 cups
    • 11 grams salt 2 teaspoons
    • 150 grams fresh blueberries 1 cup
    • zest of a lemon

    Instructions

    1. An active starter can take around 4-12 hours to peak, so adjust to what works best for your situation.
    2. In a straight-edge bowl, add the active sourdough starter and filtered water. Mix with a Danish dough whisk or with your hand until it looks like a milky liquid.I love using this straight-edge bowl because it allows me to clearly see when the dough is done rising.50 grams active sourdough starter, 350 grams water
    3. Then, add the bread flour and salt. Again, mix with a whisk or by hand. Be sure to mix until all of the flour is incorporated. The dough will look shaggy, not like a uniform dough ball.500 grams bread flour, 11 grams salt
    4. Let the dough rest for at least a half hour before you move on to the next step.
    5. With a bowl scraper, scrape the dough away from the bowl.
    6. Now, with slightly wet hands, grab a section of the dough and stretch the bread dough above your bowl. Then fold it over on top of the dough.
    7. Rotate your bowl clockwise a quarter of the way and repeat identical stretch and fold. Repeat the process until you come full circle, about 6 stretch and folds in total. You will notice the dough will start to look much smoother than before.Doing stretch and folds develops gluten in your dough, which is what allows your bread to rise beautifully while it bakes.
    8. Let the dough rest for another 30 minutes. (Now this is super flexible you dont have to stretch and fold every 30 minutes on the dot, but every 30 60 minutes will do just fine. As I said, its flexible).
    9. Repeat the identical stretch and fold process three more times (for a total of 4 different rounds), waiting at least 30 minutes between each stretch and fold.
    10. Cover the dough after each stretch and fold.
    11. Now this is the most finicky part of sourdough. There isnt a set time for your bulk ferment. It is greatly dependent on the temperature of your environment. The warmer it is, the faster your dough will ferment. The opposite is true for cooler temperatures.
    12. Bulk fermentation begins the moment you mix your dough and continues until you shape your dough.
    13. In an environment of 70 degrees, doughs will typically bulk ferment for a total of 12 hours, but again, you will have to look for the signs that your dough is done fermenting, rather than the clock. Warm temperatures will be faster, while cooler will be slower.
    14. The dough should have increased in size by 75%-The dough looks light, airy and jiggles when shaken.-The dough should easily pull away from the bowl.-There should be visible bubbles on top of the dough.-The dough doesnt tear when you do a windowpane test.
    15. With slightly wet fingers, gently release the dough from the sides of the bowl. Be careful not to pop all of those lovely bubbles!
    16. Tilt the bowl and leave gravity to do the work to move the dough on the counter.
    17. Preshape the dough by doing another round of stretch and folds until you have gone full circle.
    18. With a bench scraper or your hands, turn the dough upside down, so the seam is now on the counter. Cover the dough with the bowl and let it rest for 30 minutes.
    19. While you are waiting for the dough to rest, prepare your proofing basket. This can either be a banneton or a small mixing bowl lined with a tea towel. The purpose of this proofing basket is to keep the tight shape that you just created, so make sure you are using a standard bowl that is around 10 inches to help keep the shape.
    20. Dust the banneton or the tea towel with flour (most will say to use rice flour, but I have used just regular all-purpose flour) to prevent sticking.
    21. Gather the fresh blueberries and the zest of one lemon. Set them to the side.150 grams fresh blueberries, zest of a lemon
    22. After 30 minutes of rest, flip the dough, with the seam side up.
    23. Gently stretch the dough into a large rectangle, this is called lamination technique. Be careful not to stretch any sections of the dough too thinly, as the blueberries will break through.
    24. Spread half of the blueberries and lemon zest over the dough.
    25. Next, take the left side of the dough and fold it towards the middle. Spread 1/2 of the remaining blueberries and lemon zest on top of this new section.
    26. Finally, take the right side of the dough and fold that towards the middle on top of the last section, like a tri-fold. Spread the remaining blueberries and lemon zest on top. Now, roll up the dough, starting with the part of the dough closest to you.
    27. Gently cup your hands around the dough ball. Turn the ball in a clockwise motion about a quarter turn and then softly pull the dough towards you. Do this repeatedly until you see the dough form a tighter and more round shape. Stop if the dough starts to tear. Some blueberries may pop through the dough, this is okay.
    28. With a bench scraper or just your hands, carefully scope up the dough and lay it upside down (smooth side down) into your floured proofing basket and cover it with a plastic bag or a shower cap.
    29. Place your proofing basket in the fridge to cold proof for 8-72 hours.Placing your dough in the fridge slows down the fermentation process, which deepens the flavors of your loaf. It also gives you flexibility in when you want to bake your bread. But dont wait too long! If left in the fridge for too long, your dough will over-ferment, causing the dough to not be able to rise.
    30. Thirty minutes before baking, place the dough in the freezer. This helps with the scoring design.
    31. At the same time, place your Dutch oven in your oven and preheat to 450 degrees F. Allow the Dutch oven to preheat for at least 30 minutes.
    32. Place a piece of parchment paper on your workspace and gently flip the banneton upside down over the parchment paper. Since you dusted the banneton, your dough should slowly release and fall onto the parchment paper, landing in the middle with the floured side facing up.
    33. With a lame or sharp knife, score a crescent moon shape, or any other scoring design your prefer. This is necessary for your bread to be able to expand while baking.
    34. Grab the corners of the parchment paper and carefully place the loaf into the preheated Dutch Oven and cover it with the lid.
    35. Bake the Blueberry Lemon Sourdough Bread covered for 27 minutes. Then remove the lid of the Dutch oven and continue to bake the bread for an additional 10-15 minutes with the lid off or until golden brown with an internal temperature of 205-210 degrees F.
    36. Once golden brown, remove the Dutch Oven from your oven.
    37. Using the corners of the parchment paper, lift the sourdough bread out of the Dutch oven and place it onto a wire rack to cool.
    38. Allow your homemade bread to cool for at least 1 hour before cutting into it. (I know!! How can you possibly wait when it looks and smells so good?! But trust me, if you cut in too soon, your masterpiece will turn mushy and gummy.) In the meantime, listen to your loaf sing its little tune to you with every crinkle and crack.
    39. Once the hour is up, slice into your work of art, slather on some whipped blueberry honey butter, and enjoy!
    40. To a bowl of a stand mixer with the whisk attachment, beat together the room temperature butter, mashed blueberries, honey and salt on high until desired consistency is reached (2-3 minutes).113 grams unsalted butter, room temperature, 75 grams fresh blueberries, mashed, 45 grams honey, a pinch of salt

    Notes

    This recipe card was updated on 03/05/26.
    Day 1
    Feed starter before bed 1:4:4 ratio (ex. 25g starter /100g flour /100g water)
    DAY 2
    9 am Mix Ingredients
    9:30 11:30 am Stretch and fold every 30 minutes
    5 pm Preshape
    5:30 pm Inclusions, shape and place in the fridge
    DAY 3
    Score and bake in the morning
    ** This schedule is made for a 68-70 degree environment. Higher temperatures will quicken the process. Lower will lengthen the process.
    DAY 1
    Feed starter so that its active, bubbly, and at its peak (4-12hrs before mixing dough)
    8 pm Mix Ingredients
    8:30 10:00 pm Stretch and fold every 30 minutes
    DAY 2
    5 am Preshape
    5:30 am Inclusions, shape and place in the fridge
    Score and bake in the evening
    ** This schedule is made for a 68-70 degree environment. Higher temperatures will quicken the process. Lower will lengthen the process.
    Store sourdough at room temperature in a paper or linen bag for up to three days to maintain its crust. Avoid plastic, as it traps moisture and makes the bread soggy.
    For longer storage, freeze the sliced or whole loaf by wrapping it in plastic wrap and placing it in a freezer bag for up to three months. Thaw at room temperature or reheat in a toaster or oven.
    *Refrigeration is not recommended, as it dries out the bread and affects texture.
    Sourdough Lemon Blueberry Bread is irresistible when sliced, lightly toasted and topped with salted butter, my whipped blueberry honey butter, honey, or jams!
    If you happen to have any parts leftover that is starting to go stale, this Blueberry Lemon Sourdough Loaf makes for incredible French Toast or French Toast Casserole. Substitute plain sourdough with this Sourdough Lemon Blueberry Bread for a refreshing upgrade to a beloved breakfast option.


    Nutrition

    • Calories: 2926kcal
    • Sugar: 61g
    • Protein: 64g

    Quick Sourdough Discard French Bread

    Try this Tasty Sourdough Discard French Bread Recipe for a delicious way to use your sourdough leftovers! It’s perfect for impressing guests at brunch or enjoying a cozy evening with homemade bread fresh out of the oven.

    Print

    clock clock iconcutlery cutlery iconflag flag iconfolder folder iconinstagram instagram iconpinterest pinterest iconfacebook facebook iconprint print iconsquares squares iconheart heart iconheart solid heart solid icon

    Perfect Sourdough Discard French Bread

    • Author: Chef Mia

    Instructions


      Soft and Chewy Sourdough Bread Made from Scratch

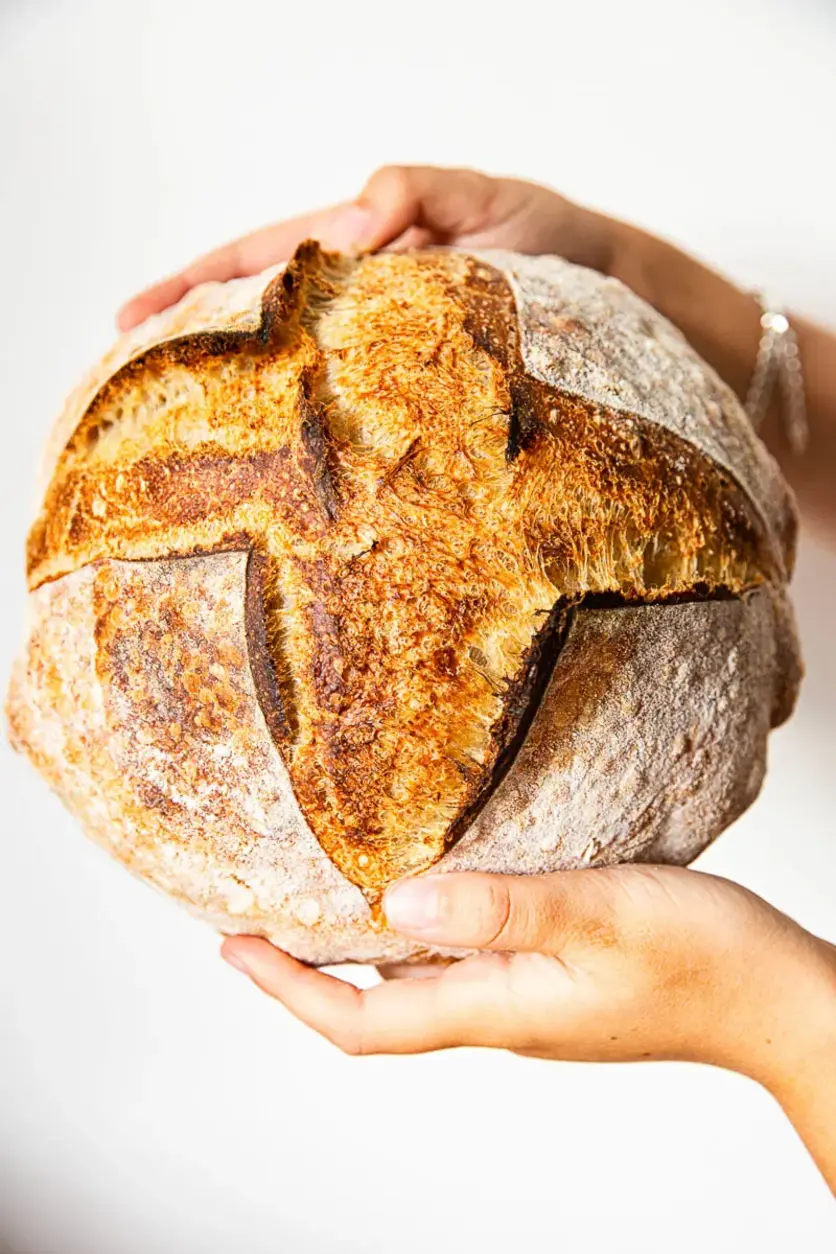
      Make soft sourdough bread with this homemade sourdough bread recipe that’s great for beginners. It includes a complete guide to sourdough bread starter and shows how to bake crusty Dutch oven sourdough bread with no kneading required. If you’re interested in sourdough bread recipes that work every time, this one’s worth trying. Perfect for anyone learning about bread starter or making sourdough bread the easy way.

      Print

      clock clock iconcutlery cutlery iconflag flag iconfolder folder iconinstagram instagram iconpinterest pinterest iconfacebook facebook iconprint print iconsquares squares iconheart heart iconheart solid heart solid icon

      Sourdough Bread

      • Author: Chef Mia

      Description

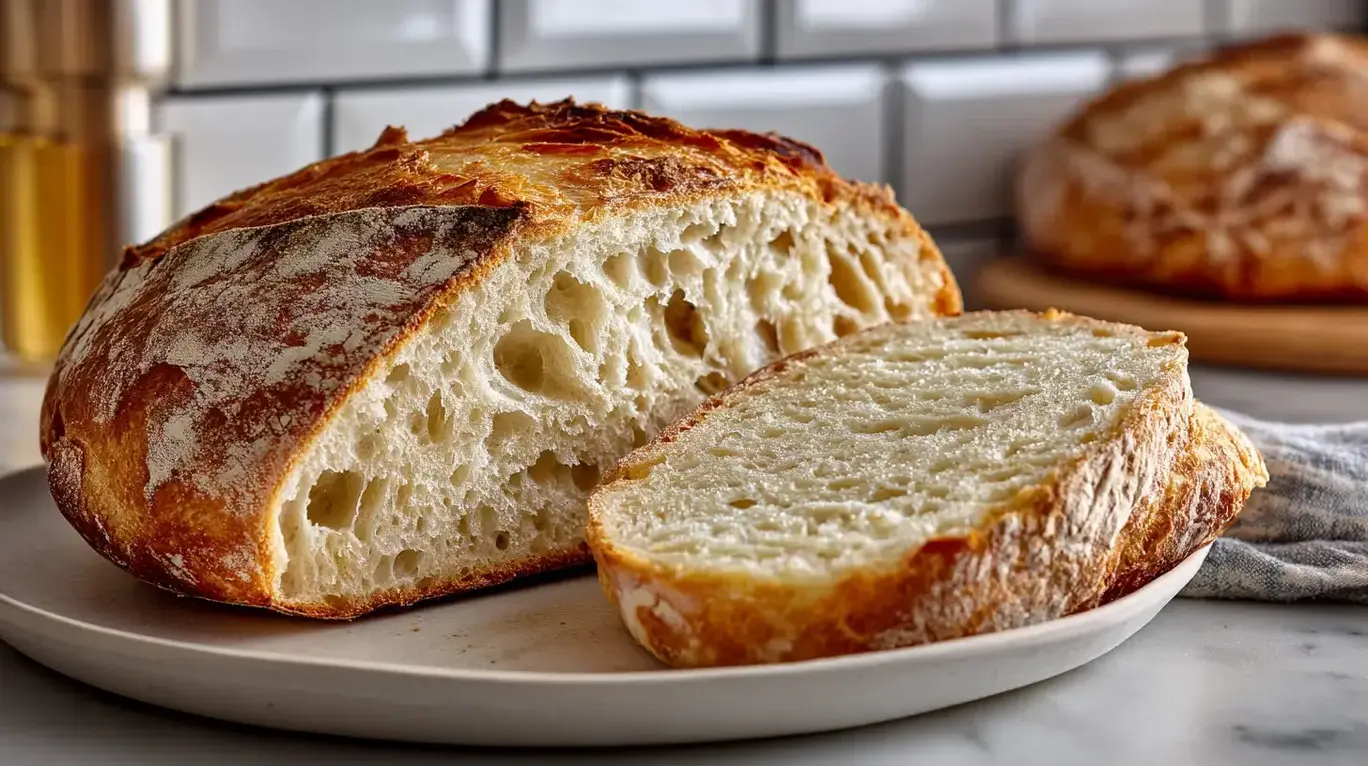
      This classic sourdough bread has a chewy center, crisp golden crust, and simple ingredients. Its naturally leavened and baked to perfection in a Dutch ovenno kneading needed.


      Ingredients

      Scale
      • 4 cups 500g bread flour or all-purpose flour
      • 1 cups 375g warm water
      • 1 cup 200g active sourdough starter
      • 2 teaspoons 10g salt

      Instructions

      1. In a large mixing bowl, combine 4 cups of flour and 1 cups of warm water.
      2. Stir until a shaggy dough forms, then let it rest for 30 minutes.
      3. After resting, add 1 cup of active sourdough starter and 2 teaspoons of salt.
      4. Mix well until everything is fully combined.
      5. Cover the bowl with a clean towel or plastic wrap.
      6. Let the dough sit at room temperature.
      7. Every 30 minutes for 2 hours, perform a set of stretch and folds.
      8. To stretch and fold, pull one side of the dough upward and fold it over itself.
      9. Turn the bowl a quarter turn and repeat three more times.
      10. After the final fold, cover the bowl again and let the dough rise for 6 to 8 hours.
      11. It should double in size and appear bubbly and puffy.
      12. Gently transfer the dough to a lightly floured surface.
      13. Shape it into a round or oval loaf by folding and tucking the edges underneath.
      14. Place the shaped dough seam-side up into a floured proofing basket or towel-lined bowl.
      15. Cover and refrigerate for 8 to 12 hours.
      16. The next day, place a Dutch oven into your oven and preheat to 450°F (232°C).
      17. Remove the dough from the fridge and turn it out onto parchment paper.
      18. Score the top of the dough with a sharp knife or razor blade.
      19. Carefully lower the dough into the hot Dutch oven using the parchment paper.
      20. Cover and bake for 20 minutes.
      21. Remove the lid and bake uncovered for another 25 minutes.
      22. Take the bread out of the Dutch oven and let it cool completely on a wire rack before slicing.

      Sourdough Bread for Beginners

      Everything you need to know to start baking delicious sourdough bread. From making the starter to troubleshooting for common issues.

      Print

      clock clock iconcutlery cutlery iconflag flag iconfolder folder iconinstagram instagram iconpinterest pinterest iconfacebook facebook iconprint print iconsquares squares iconheart heart iconheart solid heart solid icon

      Sourdough Bread for Beginners

      • Author: Chef Mia

      Description

      Everything you need to know to start baking delicious sourdough bread. From making the starter to troubleshooting for common issues.


      Ingredients

      Scale
      • 100g/1/2 cup sourdough starter
      • 500g/4 cups white bread flour
      • 350ml/1 1/3 cups + 1 tablespoon water
      • 910g/ 1/2 tablespoon salt

      Instructions

      1. In the morning discard a half of your active starter, then feed it by adding 50g of flour and 50g of water. Leave to ferment at room temperature. It should double in size after 4-5 hours depending on the strength of your starter and the temperature of your house. (It will rise quicker in the summer but might take 6-7 hours in the winter.)
      2. When you starter is nearly doubled in size. Start the autolyse by mixing the flour and water. Cover with plastic wrap and set aside until the starter is ready to be used. (It will take anywhere between 30 minutes to 1 hour.)
      3. Once the starter is at its peak add 100g of it to the flour and water mixture, then add the salt and mix well. You should have some of the starter left over, keep it until the next day, then feed it as usual.
      4. Knead the dough either in the bowl of a stand mixer using a dough hook or by hand. It takes approximately 10 minutes on low speed (I use speed 1 or 2 out of 7 on the dial) if kneading in a stand mixer. We aim to develop gluten in the dough, so to check is the dough is ready, pull a small amount away and stretch it between your fingers. The dough should stretch easily into a transparent membrane and not tear. This is called a windowpane test and is a good indicator that your dough has been kneaded properly.
      5. Cover the dough with plastic wrap, so it doesn't dry out and let it ferment for 5-7 hours. Gently scrape the dough out of the bowl onto a floured work surface. With floured hands pull one side of the dough and fold it over itself, repeat the same motion with the other 3 sides. Wrap it like an envelope and pinch at the top, so it stay together. Your dough should be full of bubbles at this point, so make sure to not knock them down.
      6. Using a bench scraper pick the dough up and flip it over, so the pinched knot is facing the countertop now. Then shape it into a ball by tucking the sides of the dough inwards with your hands. Keep spinning the dough while tucking the sides in at the same time in order to create tension on the surface, so the top is smooth and round. (It helps to have very little flour on your work surface, so when you spin the dough it catches and pulls for a taut surface. Check photos for reference.)
      7. Generously dust your banneton with rice flour (it prevents the dough from sticking!) and put the shaped loaf in the seam side up. Cover with a tea towel and allow to ferment in a refrigerator for 16-20 hours.
      8. The following day preheat the oven with your Dutch Oven inside to the highest temperature 450F/220C or higher one hour before you intend to bake. Take the dough out of the proofing basket and flip it over on a piece of parchment paper. Placing the paper on a flat baking sheet helps with the flipping. Then score the dough with a sharp knife or a blade in any way you like. Take the Dutch Oven out of the oven, pick the shaped loaf by the opposite sides of parchment paper and quickly drop it into the pot, put the lid on bake for 30 minutes, then take the lid off and bake for 15 minutes longer.
      9. Cool your sourdough bread on a wire rack for at least 4-5 hours before slicing it.

      Notes

      Please note:
      You need to start this bread recipe a day before you actually bake the bread.


      Nutrition

      • Calories: 127kcal
      • Sugar: 1g
      • Protein: 4g