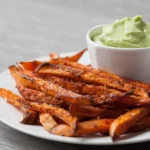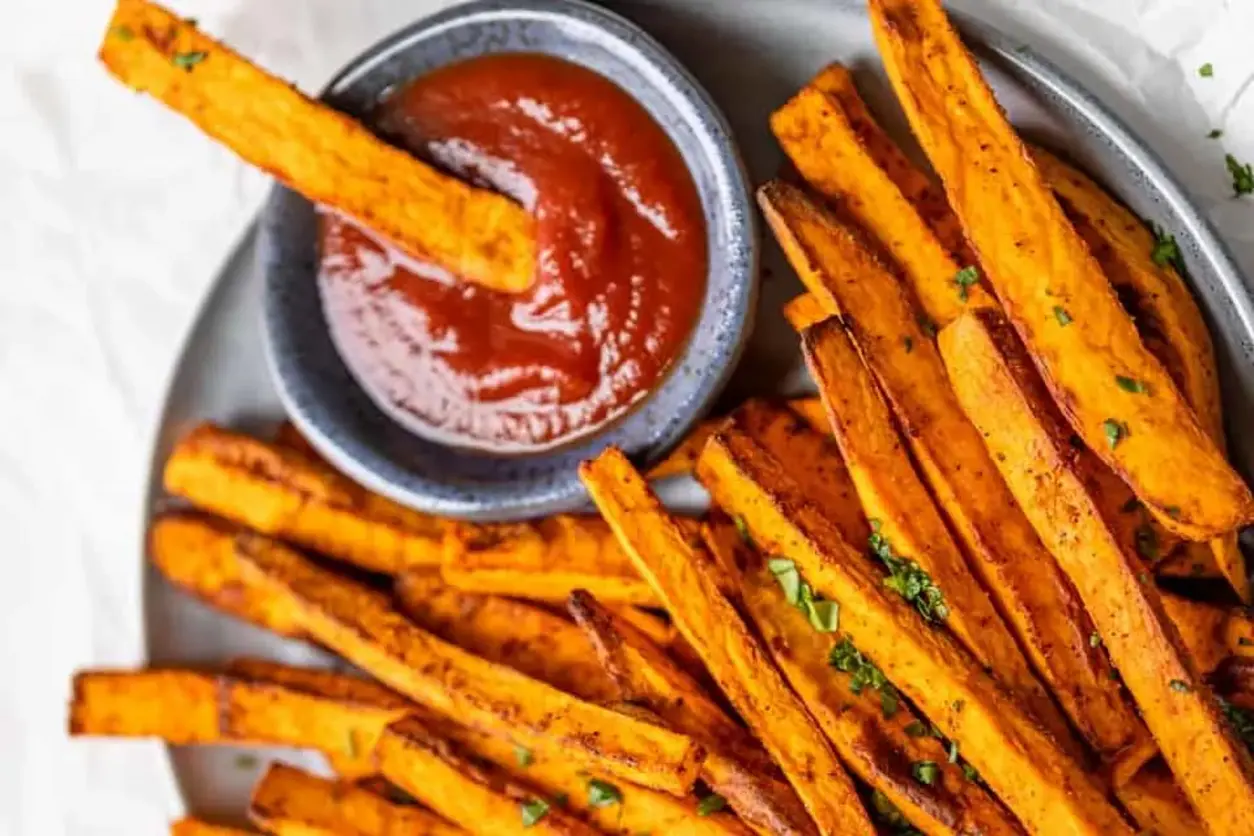
Crispy Air Fryer Sweet Potato Fries Recipe

Air Fryer Sweet Potato Fries: The Secret to Extra Crispy Fries – No Soaking Needed!

⚖️
Difficulty
Easy
⏲️
Prep Time
10 mins
🕒
Cook Time
15 mins
⏱️
Total Time
25 mins
🍽️
4

Growing up in Morocco, sweet potatoes weren’t a staple in the way they are here in the US, but once I discovered them in my culinary journey – first in Paris, then truly embraced in NYC – I was hooked! There’s something undeniably comforting and versatile about them. And when it comes to turning them into fries, the air fryer is an absolute game-changer. These air fryer sweet potato fries are not just good; they’re perfectly crispy, surprisingly healthy, and require no soaking or cornstarch. It’s a simple, elegant side dish that delivers big on flavor and texture every single time.

Imagine biting into a fry that’s shatteringly crisp on the outside, giving way to a soft, sweet, and slightly savory interior. That’s what we’re aiming for here. The natural sweetness of the potato is highlighted by just a hint of olive oil, earthy garlic powder, and a touch of smoky paprika – a nod to the spices I love in North African cooking. The high heat of the air fryer, combined with mia’s specific method of slicing and small batch cooking, ensures that beautiful caramelization and crispiness without ever feeling greasy. It’s light, vibrant, and utterly addictive.

While many recipes call for soaking or flour dredging, I’ve found a way to achieve that restaurant-quality crispiness without the extra steps. My method focuses on the right cut, precise temperature, and strategic air frying that lets the sweet potato shine. I’ll share my pro tips for avoiding the dreaded soggy fry and reveal the simple secret to achieving golden, delicious crispy sweet potato fries that will make you rethink your oven method forever. Get ready for a healthy french fries alternative that tastes anything but!

Why This Air Fryer Sweet Potato Fries Recipe Is the Best

What sets this recipe apart, friends? It’s the unique balance. My Moroccan heritage always tells me to find simplicity in ingredients, and my French training teaches me precision. Here, we embrace the natural starches of the sweet potato and let the air fryer do its magic, intensifying their inherent sweetness and creating a crispy exterior that’s truly remarkable with minimal effort and oil.

Achieving that perfect texture has always been a quest for me, from the frites I enjoyed as a student in Paris to the innovative applications I see in New York. The secret here lies in the consistent ¼-inch cut and not overcrowding the air fryer basket. This allows the hot air to circulate freely around each and every fry, resulting in even cooking and supreme crispiness. Forget soggy; these are pure golden perfection!

This recipe is designed to be foolproof and fast, making it ideal for busy weeknights or last-minute cravings. With just a few basic ingredients and my simple method, you can have a batch of delicious, healthy french fries on the table in under 30 minutes. It’s a testament to how simple ingredients can yield truly extraordinary results when treated with a little care and understanding of the cooking process.

Air Fryer Sweet Potato Fries Ingredients

For these irresistibly crispy sweet potato fries, you’ll need just a handful of ingredients. I often pick up my sweet potatoes from the farmers market here in NYC, always looking for ones that feel firm and heavy, a trick I learned from my mother in Morocco and refined in the markets of Les Halles.

Ingredients List

  • 2 medium sweet potatoes (peeled)
  • 2 teaspoons olive oil
  • ½ teaspoon salt
  • ¼ teaspoon garlic powder
  • ¼ teaspoon paprika
  • ⅛ teaspoon black pepper

Ingredient Spotlight

Sweet Potatoes: These are the star of the show. Look for firm, unblemished sweet potatoes. Their natural sugars caramelize beautifully in the air fryer, giving you that lovely flavor and color. I prefer medium-sized ones as they are easier to cut into uniform sticks. If you can’t find sweet potatoes, regular russet potatoes can be used, but the cook time and flavor will change slightly.

Olive Oil: Just a touch is all you need to help the spices adhere and aid in browning. Extra virgin olive oil imparts a lovely fruity note. If you’re out of olive oil, avocado oil is a good neutral-flavored alternative, but avoid butter as it has a lower smoke point and can burn in the air fryer at this temperature.

Paprika: This spice adds a beautiful warmth and a hint of smoky flavor, reminiscent of some of the deep, rich stews from my Moroccan upbringing. Smoked paprika would be fantastic here for an extra layer of complexity, but regular sweet paprika works perfectly. If you want a little kick, a pinch of cayenne pepper can be added.

Original IngredientBest SubstitutionFlavor / Texture Impact
Sweet PotatoesButternut SquashSweeter, slightly less starchy, may require a minute or two less cook time.
Olive OilAvocado OilMore neutral flavor, similar crisping properties. Coconut oil could add a subtle tropical note.
PaprikaChili Powder (mild)Adds a similar warmth with a slightly different spice blend. Cumin could also be interesting for an earthier flavor.

Air Fryer Sweet Potato Fries

How to Make Air Fryer Sweet Potato Fries — Step-by-Step

Making these air fryer sweet potato fries is incredibly straightforward. Just follow these steps, and you’ll be enjoying perfectly crispy fries in no time. Precision is key, so make sure your cuts are uniform!

Step 1: Prepare Your Sweet Potatoes

First, preheat your air fryer to 380°F (195°C). While it heats, peel your two medium sweet potatoes. Then, slice each potato into even ¼-inch-thick sticks. Uniformity is crucial here for even cooking. Think of the perfect french fry size – that’s your goal!

💡 mia’s Pro Tip: A mandoline slicer, if you have one, makes this step incredibly easy and ensures consistent thickness, which is a major factor in achieving perfectly crispy fries. If using a knife, take your time to cut them as evenly as possible.

Step 2: Season for Flavor

Place your sliced sweet potatoes in a large mixing bowl. Drizzle with 2 teaspoons of olive oil, then sprinkle with ½ teaspoon of salt, ¼ teaspoon of garlic powder, ¼ teaspoon of paprika, and ⅛ teaspoon of black pepper. Toss everything together really well with your hands until every fry is lightly coated with oil and seasoning. This ensures maximum flavor in every bite.

⚠️ Common Mistake to Avoid: Don’t over-oil! Too much oil can make the fries soggy rather than crispy. Just a light coating is enough to help the spices stick and promote browning.

Step 3: Air Fry to Perfection

Cook the sweet potatoes in 2 or 3 batches, depending on the size of your air fryer basket, without overcrowding the pan. This is vital for crispy results. A single layer is ideal. Cook for about 12 minutes, making sure to turn or shake the basket halfway through (around the 6-minute mark). You’re looking for a lovely golden-brown color and a crispy exterior. Cook time may vary slightly based on your specific air fryer model.

💡 mia’s Pro Tip: If your air fryer doesn’t have a high-powered fan, or if your fries aren’t browning as expected, a quick spritz of cooking spray at the halfway point can significantly boost crispiness without adding excessive oil.

Step 4: Serve Immediately

Transfer your perfectly crispy air fryer sweet potato fries to a serving platter. A final sprinkle of flaky sea salt is always a good idea! Serve them immediately with your favorite dipping sauce. They lose some of their crispness as they cool, so don’t delay in enjoying them!

StepActionDurationKey Visual Cue
1Preheat air fryer, peel and slice sweet potatoes10 minutesSweet potatoes neatly cut into ¼-inch sticks
2Toss with oil and seasonings2 minutesFries evenly coated with spices
3Air fry in batches, turning12 minutes per batchFries golden-brown and crispy
4Serve immediatelyN/AHot and ready to eat!

Serving & Presentation

For me, half the joy of cooking is in the presentation! These air fryer sweet potato fries look beautiful piled high on a rustic platter or even served in small individual paper cones for a fun, casual touch. A sprinkle of fresh parsley or finely chopped cilantro adds a pop of color that always makes a dish more inviting. Think of them as more than just a side; they’re a vibrant addition to any plate.

When it comes to pairings, the possibilities are endless. In my NYC kitchen, I often serve them alongside a grilled chicken za’atar salad for a complete meal bursting with Mediterranean flavors, or them with a simple French-inspired steak frites. They’re also fantastic as a snack with a creamy, spicy dip—perhaps a harissa aioli if I’m feeling nostalgic for the flavors of my childhood kitchen in Morocco.

Don’t hesitate to get creative with your dips! A simple Greek yogurt mixed with a little fresh dill and lemon zest, or even a classic ketchup, works wonderfully. The sweet and savory profile of these fries makes them incredibly versatile. They’re hearty enough to feel substantial, but light enough not to overpower the main course.

Pairing TypeSuggestionsWhy It Works
Side DishGrilled Chicken, Burgers, Fish TacosAdds a touch of sweetness and satisfying crunch without being heavy.
Sauce / DipHarissa Aioli, Chipotle Mayo, Lemon-Herb Yogurt DipComplements the inherent sweetness with creamy, spicy, or tangy notes.
BeverageCrisp Lager, Iced Green Tea, Sparkling LemonadeRefreshing drinks that cut through the richness and enhance the flavors.
GarnishChopped Fresh Parsley, Chives, Flaky Sea SaltAdds visual appeal, freshness, and a final burst of flavor.

Make-Ahead, Storage & Reheating

In my fast-paced life in NYC, understanding make-ahead and storage options is key to enjoying delicious food without constant cooking. While these air fryer sweet potato fries are certainly best fresh, there are definitely ways to manage them for later enjoyment if you have leftovers.

MethodContainerDurationReheating Tip
RefrigeratorAirtight container3-4 daysAir fry at 350°F for 5-7 minutes until crispy again.
FreezerFreezer bag (blanched first)2-3 monthsBake from frozen at 400°F for 15-20 mins, or air fry at 380°F for 10-15 mins.
Make-AheadPre-cut and seasonedUp to 24 hours (refrigerated)Store in an airtight bag/container after seasoning; cook just before serving.

To truly maintain the best texture, I highly recommend enjoying them fresh. However, if you must store them, the trick is always to reheat them in the air fryer. The microwave will just make them soggy, and a traditional oven might not get them quite as crisp as a second go in the air fryer. The direct, circulating heat is what will revive that delightful crunch.

If you’re really looking to meal prep, you can peel and cut the sweet potatoes a day in advance and store them wrapped in a damp paper towel in an airtight container in the fridge. This saves you a step on a busy day. Just don’t season them until right before you’re ready to cook, as the salt can draw out moisture and impact crispiness.

Variations & Easy Swaps

One of the joys of cooking is experimenting with flavors and making a dish truly your own. These sweet potato fries are a fantastic blank canvas for different seasonings and twists. When I’m shopping at the Union Square Greenmarket, I’m always inspired by the seasonal herbs and spices to mix things up.

VariationKey ChangeBest ForDifficulty Impact
Spicy Harissa Sweet Potato FriesAdd a teaspoon of harissa paste to the seasoning mix.Those who love a fiery kick and North African flavors.Minimal – just an extra ingredient.
Gluten-Free Herb Sweet Potato FriesAdd fresh herbs like rosemary or thyme; ensure all spices are GF certified.Dietary restrictions, or a fresher, aromatic profile.None.
Rosemary Parmesan Sweet Potato FriesToss with dried rosemary and sprinkle with grated Parmesan post-cooking.Elevating the fries with Italian-inspired notes.Minimal – requires post-cook addition.

Spicy Harissa Sweet Potato Fries

For a taste of my Moroccan roots, replace the paprika with a teaspoon of harissa paste mixed directly into the olive oil before tossing with the sweet potatoes. The smoky, complex heat of harissa pairs beautifully with the sweetness of the potatoes, giving them an incredible depth of flavor that’s both comforting and exciting.

Gluten-Free Herb Sweet Potato Fries

This recipe is naturally gluten-free, which is fantastic! To enhance the savory notes and keep it on the lighter side, skip the paprika and instead add a tablespoon of finely chopped fresh rosemary and a teaspoon of fresh thyme leaves to the oil and sweet potato mix. This creates an aromatic, earthy fry that’s perfect alongside a roasted chicken or a fresh salad, and it’s a staple for a truly healthy french fries option.

Rosemary Parmesan Sweet Potato Fries

For a more savory, umami-rich variation, toss the sweet potatoes with a teaspoon of dried rosemary along with the other seasonings. Once the fries are cooked and still hot, sprinkle them generously with finely grated Parmesan cheese. The cheese will melt slightly and cling to the fries, adding a salty, nutty flavor that’s absolutely irresistible, a classic pairing I often saw in my culinary school days in Paris.

How do you keep sweet potato fries from getting soggy in the air fryer?

The key to preventing soggy air fryer sweet potato fries is a combination of factors. First, ensure your sweet potatoes are cut into uniform, relatively thin (about ¼-inch) sticks. This allows for even cooking and more surface area for crisping. Second, don’t overcrowd the air fryer basket; cook in batches to allow hot air to circulate freely around each fry. Overfilling the basket traps steam, which leads to sogginess. Lastly, a light coating of oil helps promote browning and crispiness without making them greasy.

What temperature and how long do you cook sweet potato fries in an air fryer?

I find that 380°F (195°C) is the ideal temperature for cooking air fryer sweet potato fries. This temperature is hot enough to achieve browning and crispness without burning the natural sugars in the potatoes. On average, they take about 12 minutes to cook, with a crucial step of turning or shaking the basket halfway through (around 6 minutes). This ensures all sides get exposed to the heat, contributing to even crispiness. Always keep an eye on them, as air fryer models can vary.

Do you need to soak sweet potato fries before air frying?

Unlike regular white potatoes, sweet potatoes generally do not need to be soaked before air frying. White potatoes benefit from soaking to remove excess starch, which helps them get crispy. However, sweet potatoes have a different starch and sugar composition. My recipe proves you can achieve wonderfully crispy air fryer sweet potato fries without the extra step of soaking, making this process even quicker and simpler, embracing their natural texture and flavor.

What are the best seasonings for air fryer sweet potato fries?

For a beautifully balanced flavor, a simple combination of salt, garlic powder, and paprika works wonders for air fryer sweet potato fries. These spices enhance the natural sweetness of the potato while adding a savory depth. For variations, I love adding a pinch of cayenne for a subtle kick, or dried rosemary and a touch of grated Parmesan بعد cooking for a more gourmet twist. Experiment with chili powder, cumin, or even a mixed herb blend to find your personal favorite!

Can I make air fryer sweet potato fries without oil?

While you can attempt to make sweet potato fries in the air fryer without oil, I strongly advise against it if crispy results are your goal. A small amount of oil (like the 2 teaspoons used in this recipe) is crucial for promoting caramelization, preventing sticking, and achieving that desirable golden-brown, crispy exterior. Without oil, they tend to dry out and become tough rather than crisp. My recipe uses a minimal amount of oil, keeping them a healthy french fries option.

How do I know when my air fryer sweet potato fries are done?

Your air fryer sweet potato fries are done when they are golden brown, lightly caramelized at the edges, and have a crispy exterior while remaining tender on the inside. You should be able to hear a slight crisp when you shake the basket. If they look too pale or feel soft, continue cooking for another 1-2 minutes, shaking the basket, until they reach your desired level of crispness. Trust your senses – sight and sound are your best guides!

Can I use frozen sweet potato fries in the air fryer?

Absolutely, frozen sweet potato fries perform beautifully in the air fryer! The method is quite similar, though you won’t need to add oil or seasonings as they typically come pre-seasoned and sometimes pre-oiled. Just arrange them in a single layer in your preheated air fryer at around 400°F (200°C) and cook for 15-20 minutes, shaking the basket halfway through, until they are hot and crispy. Always check the package instructions for precise timing too.

Share Your Version!

I truly hope you adore these air fryer sweet potato fries as much as I do! There’s something so satisfying about making a healthy choice that also tastes incredible. I’d love to hear how these crispy sweet potato fries turn out for you. Did you try a fun new seasoning? What’s your favorite dipping sauce?

Please leave a star rating and comment below – it truly warms my heart to hear from you. And if you snap a picture, share it on Instagram or Pinterest and tag @exorecipes. I’m always looking for new inspiration, and your creations motivate me every day! What other simple, healthy sides would you like to see me tackle next?

From my NYC kitchen to yours — I hope this recipe brings as much warmth to your table as it does to mine. — mia 🧡

📌

Love This Recipe? Save It to Pinterest!

If you enjoyed this Air Fryer Sweet Potato Fries recipe, don’t let it get lost in your browser tabs! 😄 Pin it now so you can find it again anytime — and explore hundreds more tried-and-tested recipes waiting for you on my Pinterest boards.

👉 Follow mia on Pinterest @chefrecipes2

📌 Pin this recipe · 🔁 Re-pin your favorites · 💬 Tag me when you make it — I love seeing your creations!
Print

clock clock iconcutlery cutlery iconflag flag iconfolder folder iconinstagram instagram iconpinterest pinterest iconfacebook facebook iconprint print iconsquares squares iconheart heart iconheart solid heart solid icon

Air Fryer Sweet Potato Fries Recipe

  • Author: Chef Mia

Description

Crispy Air Fryer Sweet Potato Fries made with minimal oil and basic seasonings. No soaking or cornstarch needed, the first batch is ready in about 15 minutes.


Ingredients

Scale
  • 2 medium sweet potatoes (peeled)
  • 2 teaspoons olive oil
  • ½ teaspoon salt
  • ¼ teaspoon garlic powder
  • ¼ teaspoon paprika
  • teaspoon black pepper

Instructions

  1. Preheat the air fryer to 380°F. Peel the sweet potatoes, then slice each potato into even ¼-inch-thick sticks.
  2. Place the sweet potatoes in a large mixing bowl and toss with olive oil, salt, garlic powder, paprika, and black pepper.
  3. Cook in 2 or 3 batches, depending on the size of your basket, without overcrowding the pan until they're crispy. I recommend 12 minutes, turning halfway through. This may vary based on your air fryer.
  4. Serve immediately with your favorite dipping sauce.


Nutrition

  • Calories: 232 kcal
  • Sugar: 9 g
  • Fat: 4 g
  • Carbohydrates: 46 g
  • Protein: 4 g


Air Fryer Sweet Potato Fries

Ultimate Crispy Sweet Potato Fries Recipe

Perfect Crispy Sweet Potato Fries: The No-Soggy Secret – Your Guide to Golden Perfection

⚖️
Difficulty
Easy
⏲️
Prep Time
15 mins
🕒
Cook Time
40 mins
⏱️
Total Time
55 mins
🍽️
Servings
2

Growing up in Morocco, the concept of “fries” was often simple, hearty potato wedges made by my mother, full of flavor but rarely achieving that ultimate crispness we crave in a good fry. After culinary school in Paris, where I learned the science behind perfect textures, and now living in the bustling food scene of NYC, I’ve dedicated myself to perfecting everyday classics. Today, I’m thrilled to share my secret to the most irresistible, genuinely crispy sweet potato fries you can make right in your home oven. Forget soggy, forget pale – these are golden, crunchy, and packed with flavor, making them the healthy sweet potato fries you’ve been dreaming of.

Imagine biting into a fry that offers that satisfying initial crunch, then gives way to a tender, sweet interior. That’s the experience we’re aiming for. The subtle sweetness of the sweet potato perfectly balances the warmth of smoked paprika and a hint of cayenne, reminiscent of the vibrant spice blends from my Moroccan kitchen. Drizzled with good quality olive oil, these fries develop a beautiful caramelized exterior that not only looks appealing but locks in all that amazing flavor. It’s a simple dish, yes, but one elevated by careful technique and a passion for texture.

Many struggle to achieve true crispiness with baked sweet potato fries, often ending up with a limp result. My method, honed through years of professional cooking and countless home experiments, ensures a consistently perfect texture every time. I’ll reveal my absolute best pro tip for preventing sogginess, share the magical ingredient that guarantees that coveted crunch, and point out a common mistake that can sabotage your efforts. Get ready to transform your sweet potato game and learn how to make sweet potato fries that will impress everyone.

Why This Perfect Crispy Sweet Potato Fries Recipe Is the Best

The Flavor Secret: My Moroccan heritage taught me the power of spices. While sweet potatoes are naturally flavorful, a beautiful combination of smoked paprika and a pinch of cayenne pepper elevates them beyond the ordinary. This isn’t just about heat; it’s about adding depth and warmth that complements the potato’s sweetness, creating a profile far more interesting than just salt and pepper. It’s a simple touch that makes all the difference, reminiscent of the complex spice blends I grew up with.

Perfected Texture: The secret to truly crispy sweet potato fries lies in a French culinary principle: moisture control. My method involves a crucial soak and then a special coating, inspired by techniques used in Parisian kitchens to achieve perfectly fried elements. This, combined with a precise baking strategy, ensures each fry boasts a golden-brown, shatteringly crisp exterior without requiring a deep fryer. Believe me, this isn’t just baking; it’s a carefully orchestrated process for maximum crunch.

Foolproof & Fast: I know life in NYC is busy, so this recipe is designed to be straightforward and accessible, even for beginner cooks. There are no fancy gadgets required, and the steps are clear, guiding you to success. The small proactive steps, like the pre-bake soak and the mid-cook oven door trick, are simple yet powerful. You’ll be amazed at how easily you can achieve restaurant-quality crispy sweet potato fries with just a little know-how.

Crispy Sweet Potato Fries Ingredients

For me, cooking starts with the ingredients. Whether I’m at the Union Square Greenmarket or remembering my mother haggling for fresh produce in the souks of Morocco, quality matters. These ingredients are simple, but choosing them well makes all the difference for your baked sweet potato fries.

Ingredients List

  • 1 large sweet potato (500g or 1lb) – Look for firm, unblemished potatoes.
  • 2 tsp corn starch – The magic ingredient for real crispness!
  • 1/2 tsp black pepper – Freshly ground if possible, for best flavor.
  • 1/2 tsp smoked paprika – Adds a beautiful, deep flavor.
  • 1 pinch of cayenne pepper (optional) – For a touch of warmth.
  • 2 tbsp olive oil – My go-to for its flavor and crisping ability.
  • Salt to taste – Essential, but added at the very end!

Ingredient Spotlight

Sweet Potatoes: When selecting sweet potatoes, I always look for firm, smooth-skinned potatoes without any soft spots or sprouts. Yams can sometimes be mislabeled as sweet potatoes, but for this recipe, true sweet potatoes (the orange-fleshed kind) are best for their natural sweetness and texture. If you can’t find a large one, two medium sweet potatoes will do. The starch in sweet potatoes is essential for that lovely interior.

Corn Starch: This is my secret weapon for achieving truly crispy sweet potato fries in the oven. Corn starch creates a thin, dry coating that browns beautifully and ensures an unbeatable crunch. You can find it in the baking aisle of any US grocery store. If you’re out, a little arrowroot powder can work as a substitute, but corn starch truly gives the best result.

Olive Oil: I prefer a good quality extra virgin olive oil for its flavor and because it has a relatively high smoke point suitable for our baking temperature. It helps create that lovely golden crust. If you don’t have olive oil, avocado oil is an excellent neutral-tasting alternative that also performs well at high heat, making your healthy sweet potato fries even healthier.

Smoked Paprika: This spice is a game changer for flavor, adding a smoky depth that regular paprika simply doesn’t offer. I always have it in my pantry after discovering its richness in Parisian bistros. It pairs wonderfully with the sweet potato and gives a beautiful color. If you only have regular paprika, you can use it, but you’ll miss that smoky dimension.

Cayenne Pepper: Just a pinch of cayenne adds a subtle warmth without making the fries overly spicy. This is entirely optional, but I find it adds that little extra layer of flavor complexity, a nod to the spicy dishes my mother would make in Morocco. If you prefer no heat, simply omit it.

Original IngredientBest SubstitutionFlavor / Texture Impact
Sweet PotatoButternut SquashSweeter, slightly softer texture. Still delicious, but a different fry experience.
Corn StarchArrowroot PowderSimilar crisping effect, but can sometimes be a bit gummier if overused. Flour (all-purpose) will give a softer, less crisp result.
Olive OilAvocado OilMore neutral flavor, slightly higher smoke point, excellent for high-heat baking.
Smoked PaprikaSweet Paprika + small pinch of CuminLost smokiness, but cumin adds a different depth of flavor. Less complex.

Perfect Crispy Sweet Potato Fries

How to Make Perfect Crispy Sweet Potato Fries — Step-by-Step

Making healthy sweet potato fries that are truly crispy is all about technique, not just ingredients. Follow these steps inspired by my professional kitchen training, and you’ll achieve perfection every time.

Step 1: Prep and Soak

Peel your large sweet potato and cut it into strips. I aim for about 1/3 inch (1 cm) thick pieces – consistency is key for even cooking. Place these cut sweet potato strips into a bowl of cold water and let them sit for 45-60 minutes. This might seem like an extra step, but it’s crucial. It draws out excess starch, which is the nemesis of crispiness!

💡 mia’s Pro Tip: The soaking process is non-negotiable for that extra crispy texture. Think of it as blanching for potatoes – it removes surface starch that would otherwise turn gummy. I learned similar starch-reducing techniques in culinary school for perfectly crisp vegetable garnishes.

Step 2: Dry and Cornstarch

Discard the water from the bowl, give the sweet potato strips a quick rinse under cold water, and then pat them *very* dry with a kitchen towel. This dryness is critical. Transfer the dry strips to a clean bowl and add the 2 teaspoons of cornstarch. Gently toss them until each piece is evenly coated with a fine white powder. This coating forms a barrier that helps them crisp up beautifully.

⚠️ Common Mistake to Avoid: Do not skip drying the sweet potatoes thoroughly before adding the cornstarch. Any residual moisture will turn the cornstarch into a sticky paste rather than a crisping agent, leading to soggy, soft fries. Use a clean kitchen towel or paper towels and be generous!

Step 3: Arrange, Oil, and Season

Line a large baking tray with parchment paper. Arrange your coated sweet potato fries in a single layer, ensuring they touch each other as little as possible. Overcrowding equals steaming, not crisping! Drizzle them evenly with the 2 tablespoons of olive oil, and then season with black pepper, smoked paprika, and the pinch of cayenne pepper (if using).

Step 4: The Salt Rule

Here’s a golden rule for baked sweet potato fries: Do NOT add any salt at this stage. If you add salt before baking, it will draw moisture out of the sweet potatoes as they cook, turning your beautiful fries soggy. We want to preserve every bit of that crisp potential. Save the salt for the very end!

Step 5: Bake to Perfection

Bake your fries in a preheated oven at 390°F (200°C) with the fan assist on (if you have it). The baking time will be approximately 30-45 minutes, depending on how thickly you cut your fries and your oven’s specific quirks. Halfway through, give them a gentle toss and flip to ensure even browning.

💡 mia’s Pro Tip: A fan-assisted oven dramatically helps with crisping, as it circulates hot air more evenly, preventing steam build-up. If you don’t have one, just make sure your fries are in a single layer and give them an extra turn or two.

Step 6: Release the Steam

Once the sweet potatoes begin to cook and the oil is bubbling (usually around 15-20 minutes in), open the oven door just a tiny bit – enough to let a puff of steam escape – and then quickly close it again. This is a quick maneuver, lasting only a few seconds, to release accumulated moisture without drastic temperature drops. This is a trick I picked up in NYC restaurants for maintaining crispness!

Step 7: Rest in the Oven

When your fries are beautifully golden brown and crispy to your liking, turn off the oven. Leave the fries inside for another 5-10 minutes. The residual heat will continue to dry them out, making them even crispier, while preventing them from becoming hard or brittle.

Step 8: Season and Serve

Just before serving, sprinkle your perfectly baked sweet potato fries generously with salt. Serve them immediately. I love them with a variety of dips, but honestly, they’re so good on their own, you might not even need one!

StepActionDurationKey Visual Cue
1Prep and Soak45-60 minWater becomes cloudy
2Dry and Cornstarch5 minFries are dry and lightly coated in white powder
3Arrange, Oil, Season2 minFries in single layer, glistening with oil, spices even
4The Salt RuleNo salt added!
5Bake to Perfection30-45 minGolden brown, edges slightly darkened
6Release the SteamFew secondsPuff of steam visible when oven door cracks open
7Rest in the Oven5-10 minFries continue to crisp without burning
8Season and Serve1 minSalt adheres to hot fries, ready to eat

Serving & Presentation

Serving these perfect crispy sweet potato fries is almost as satisfying as making them. I like to pile them high in a rustic bowl, letting their golden hue and delicious aroma speak for themselves. A sprinkle of fresh chopped parsley or cilantro can add a pop of color and freshness, a trick I often used in my Moroccan kitchen to brighten dishes. Don’t forget that final dash of flaky sea salt – it clings beautifully to the hot fries and provides a textural counterpoint to the crisp exterior.

These fries are incredibly versatile. In my NYC apartment, I often enjoy them as a sophisticated side to a perfectly seared steak or a juicy grilled chicken sandwich. For a more casual meal, they’re fantastic paired with homemade burgers or a vibrant salad. When I want to bring a touch of my French culinary training to the table, I might serve them alongside a classic croque monsieur, adding a sweet and savory balance that’s simply divine.

For dipping, the possibilities are endless. A creamy aioli (perhaps infused with a touch of garlic, like a nod to Mediterranean flavors), a spicy Sriracha mayo, or even just a good quality ketchup all work wonderfully. For a Moroccan touch, a harissa yogurt dip would be truly exceptional. Ultimately, they’re so flavorful on their own that a simple lemon wedge or a sprinkle of fresh herbs is often all they need.

Pairing TypeSuggestionsWhy It Works
Side DishGrilled Salmon, Juicy Burger, Roasted ChickenThe sweet and savory balance is perfect; adds texture and a healthy carb.
Sauce / DipGarlic Aioli, Chipotle Mayo, Harissa Yogurt, KetchupCreamy dips complement the crisp fries, while spicy sauces add a kick.
BeverageCold Craft Beer, Sparkling Lemonade, Iced Green TeaLively and refreshing drinks cut through the richness and enhance the flavors.
GarnishFresh Parsley, Cilantro, Chopped Green Onions, Flaky Sea SaltAdds visual appeal, fresh aroma, and a final burst of flavor and texture.

Make-Ahead, Storage & Reheating

In my fast-paced life in NYC, smart kitchen practices are a must. While these crispy sweet potato fries are truly best enjoyed fresh from the oven, there are certainly ways to prepare them in advance or store leftovers. I often prep the sweet potatoes ahead of time to make weeknight cooking a breeze.

MethodContainerDurationReheating Tip
Refrigerator (Cooked)Airtight container3-4 daysReheat in oven or air-fryer sweet potato fries method (see variations)
Freezer (Uncooked)Freezer bag, single layerUp to 3 monthsToss with extra cornstarch and oil, bake from frozen. Add 10-15 mins to cook time.
Make-Ahead (Prepped)Bowl of cold waterUp to 24 hoursDrain, dry thoroughly, and proceed with step 2 (cornstarch).

To maintain the crispness when reheating pre-baked healthy sweet potato fries, avoid the microwave at all costs – it will make them irrevocably soggy. Your best bet is to spread them in a single layer on a baking sheet and pop them back into a preheated 375°F (190°C) oven or even an air fryer sweet potato fries for about 5-10 minutes, or until heated through and re-crisped. The key is to get them hot and dry again.

If you’re freezing uncooked sweet potato fries, make sure they are completely dry and coated with cornstarch before freezing in a single layer on a tray. Once frozen, you can transfer them to a freezer bag. This prevents them from clumping together and makes them much easier to bake straight from the freezer when you have a craving for crispy sweet potato fries without the prep work.

Variations & Easy Swaps

VariationKey ChangeBest ForDifficulty Impact
Spicy Harissa Sweet Potato FriesAdd harissa paste to oilThose who love a fiery kick with North African flavors.Easy
Herb & Garlic Sweet Potato FriesAdd minced garlic, fresh rosemary/thymeAromatic, earthy flavor profiles.Easy
Air Fryer Sweet Potato FriesAir fryer instead of ovenFaster cooking, slightly different crispness.Easy

Spicy Harissa Sweet Potato Fries

For a taste of my Moroccan roots, stir a teaspoon of harissa paste into your olive oil before tossing with the sweet potatoes. Harissa, a vibrant chili paste, offers a complex heat that pairs beautifully with the sweet potato and the smoked paprika. It’s a quick way to add a layer of exotic, fiery flavor that will transport your taste buds straight to North Africa.

Herb & Garlic Sweet Potato Fries

Infuse your fries with aromatic herbs and savory garlic. After coating with cornstarch, toss the sweet potatoes with 1-2 cloves of minced garlic and a tablespoon of finely chopped fresh rosemary or thyme. The herbs will become delightfully fragrant and crispy in the oven, offering a French bistro-inspired twist to your baked sweet potato fries.

Air Fryer Sweet Potato Fries Variation

If you prefer using an air fryer, you can achieve fantastic results. After coating with cornstarch and seasoning, place the fries in a single layer in your air fryer basket – you’ll likely need to work in batches. Air fry at 380°F (195°C) for 15-20 minutes, shaking the basket every 5 minutes, until golden and crispy. This is a super-efficient way to make crispy sweet potato fries in less time!

How do you keep sweet potato fries from getting soggy?

The secret to genuinely crispy sweet potato fries that don’t get soggy involves a few crucial steps that I swear by in my NYC kitchen. First, a good soak in cold water for 45-60 minutes draws out excess starch. Second, thorough drying is paramount; moisture is the enemy of crispiness. Third, a thin coating of cornstarch before baking creates an amazing crunchy crust. Lastly, baking in a single layer in a hot oven (390°F / 200°C) with a quick steam release early on helps ensure maximum crispness. And a final sprinkle of salt *after* baking is key, as salt draws out moisture.

What is the best oil for baking crispy sweet potato fries?

For achieving those perfectly crisp baked sweet potato fries, I recommend using olive oil or avocado oil. Both have a relatively high smoke point, meaning they can withstand the high temperatures required for crisping without burning. Olive oil adds a lovely flavor, while avocado oil is more neutral. The oil acts as a heat conductor, helping the sweet potatoes brown evenly and become beautifully crisp on the outside. Make sure to use just enough to coat the fries, but not drench them, to avoid a greasy result.

Can you make sweet potato fries in an air fryer?

Absolutely, air fryer sweet potato fries are a fantastic and often quicker alternative to oven baking! The principles remain the same: soak, dry thoroughly, and coat with cornstarch and seasoning. Place them in a single layer in your air fryer basket – you’ll likely need to cook in batches to avoid overcrowding, which can lead to steaming rather than crisping. Air fry at around 380°F (195°C) for 15-20 minutes, shaking the basket every 5 minutes, until they are golden brown and wonderfully crispy. This method gives a great crunch with minimal oil, making them super healthy sweet potato fries.

What seasonings go well with sweet potato fries?

Sweet potato fries are incredibly versatile when it comes to seasoning! Beyond the classic salt, I love using a blend of smoked paprika and a pinch of cayenne pepper for a warm, slightly smoky flavor with a hint of spice, a combo I often use in Moroccan-inspired dishes. Other great options include garlic powder, onion powder, a dash of chili powder, or even a touch of brown sugar for extra sweetness. For a fresh, earthy note, try finely chopped fresh rosemary or thyme added during baking. Don’t be afraid to experiment with your favorite spice blends to make them truly your own!

Do I need to peel sweet potatoes for fries?

While I recommend peeling sweet potatoes for my perfect crispy sweet potato fries recipe to achieve a consistent texture and a beautifully uniform crunch, it’s not strictly necessary. The skin of sweet potatoes is thin and perfectly edible, and leaving it on can add some nutritional fiber. If you choose to leave the skin on, ensure you scrub the sweet potatoes very thoroughly before cutting. Just be aware that the texture might be slightly different around the skin compared to the peeled versions, but they will still be delicious.

Share Your Version!

I poured my heart, my Parisian training, and a bit of my Moroccan soul into perfecting these Perfect Crispy Sweet Potato Fries. There’s nothing that brings me more joy than seeing them become a favorite in your kitchen too!

If you’ve whipped up a batch, please leave a star rating and comment below – your feedback means the world to me. Did you try a new dip? Or perhaps a different spice blend? Share your photos on Instagram or Pinterest and tag @exorecipes. I absolutely adore seeing your creations! And tell me, what’s your go-to trick for making sure your sweet potato fries stay truly crispy?

From my NYC kitchen to yours — I hope this recipe brings as much warmth to your table as it does to mine. — mia 🧡

📌

Love This Recipe? Save It to Pinterest!

If you enjoyed this Perfect Crispy Sweet Potato Fries recipe, don’t let it get lost in your browser tabs! 😄 Pin it now so you can find it again anytime — and explore hundreds more tried-and-tested recipes waiting for you on my Pinterest boards.

👉 Follow mia on Pinterest @chefrecipes2

📌 Pin this recipe · 🔁 Re-pin your favorites · 💬 Tag me when you make it — I love seeing your creations!

Print

clock clock iconcutlery cutlery iconflag flag iconfolder folder iconinstagram instagram iconpinterest pinterest iconfacebook facebook iconprint print iconsquares squares iconheart heart iconheart solid heart solid icon

Perfect Crispy Sweet Potato Fries

  • Author: Chef Mia

Description

If you’ve never tried to bake your fries in the oven then you should definitely give these perfect crispy sweet potato fries a chance.


Ingredients

Scale
  • 1 large sweet potato (500g or 1lb)
  • 2 tsp corn starch
  • 1/2 tsp black pepper
  • 1/2 tsp smoked paprika
  • 1 pinch of cayenne pepper
  • 2 tbsp olive oil
  • salt to taste

Instructions

  1. Peel and cut the sweet potato into strips. I tend to cut them into 1cm (1/3 inch) thick pieces. Place them in a cold bowl of water and let them sit for 45-60minutes.
  2. Discard the water, give them a very quick rinse with cold water and pat them dry with a kitchen towel. Place them in a bowl and add 2 tsp of cornstarch. Gently mix them until they are evenly covered.
  3. Place them on a baking tray that is lined with baking paper and make sure they touch each other as little as possible. Drizzle your fries with olive oil and season them with the spices.
  4. Do NOT add any salt at this stage. If you do that it will turn the fries soggy. Add the salt after they are baked, just before you eat them.
  5. Bake your fries in a preheated, fan assisted oven for a total of about 30-45 minutes at 200°C (390°F). The duration depends on how thickly you cut your fries.
  6. Once the sweet potatoes started cooking and the oil is bubbling, open the oven door just a tiny bit. Just enough to let all the steam out that gathered in the oven at this point and close it quickly again. It should suffice to just open it for a few seconds, do not overdo it or the temperature will drop too much.
  7. Turn the oven off once your fries are done and let them sit in the oven for another 5-10 minutes.
  8. Just before serving season them with salt and serve them with whatever you prefer.


Nutrition

  • Calories: 190 kcal
  • Sugar: 2 g
  • Fat: 14 g
  • Carbohydrates: 15 g
  • Protein: 1 g


Perfect Crispy Sweet Potato Fries

Easy Patriotic Charcuterie Board for Summer Celebrations

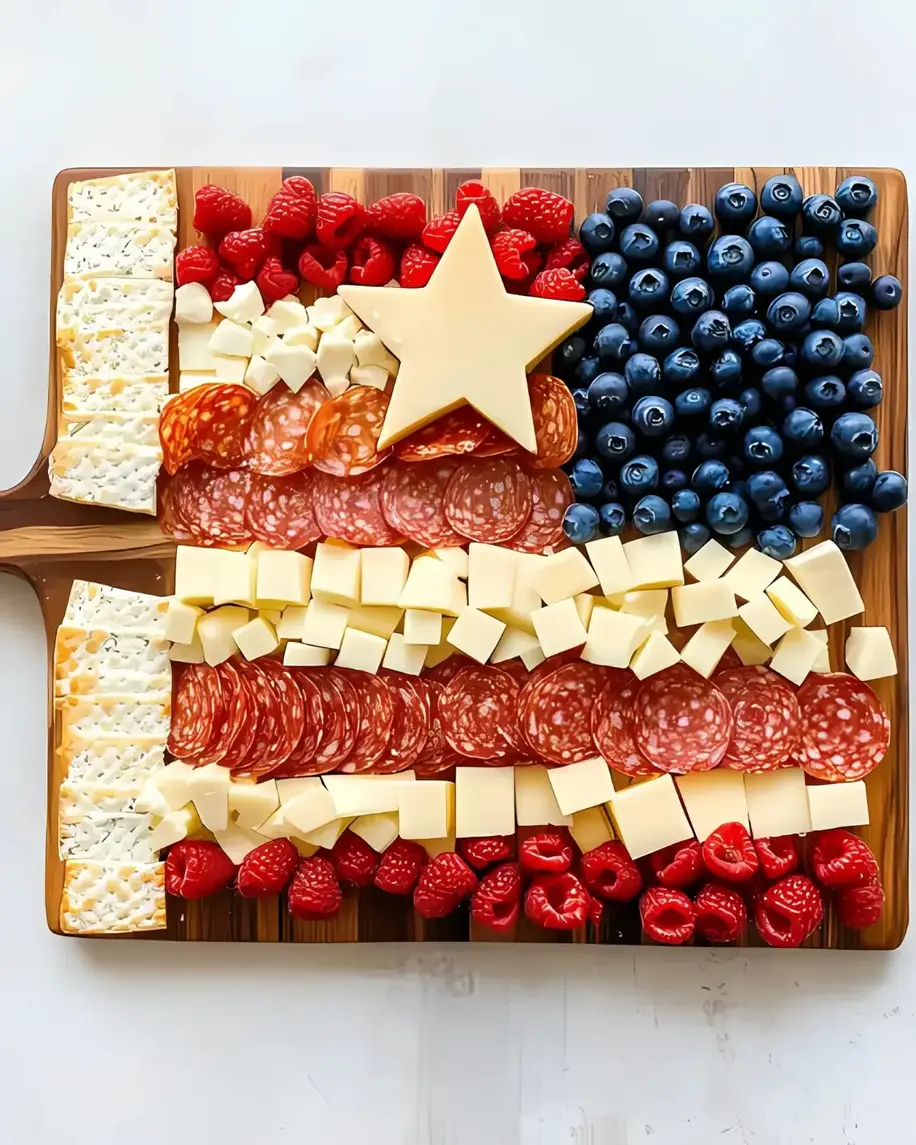
Easy American Flag Charcuterie Board: A Patriotic Centerpiece for Your Celebrations

⚖️
Difficulty
Easy
⏲️
Prep Time
20 mins
🕒
Cook Time
0 mins
⏱️
Total Time
20 mins
🍽️
Servings
8-10

Growing up in Morocco, I learned the art of entertaining from my mother’s spontaneous gatherings, always centered around abundance and vibrant presentation. While our traditions might have featured platters of olives and mint tea, moving to New York City and embracing its wonderful blend of cultures has opened my eyes to new ways of celebrating. That’s how I discovered the magic of a beautifully assembled charcuterie board. This year, for all my summer parties, I’m bringing you my version of an Easy American Flag Charcuterie Board – a show-stopping patriotic party food that serves as the perfect 4th of July appetizer or Memorial Day snack, bringing a touch of my global culinary journey to an American classic. It’s an effortless way to impress your guests without spending hours in the kitchen, making it a truly easy charcuterie board option for any host.

Picture this: plump, juicy blueberries gleaming like sapphires, nestled against bright, sweet raspberries. Creamy white cheddar stars artfully placed on a backdrop of deep blue, while rows of savory pepperoni and delicate salami weave between fresh provolone slices, creating the iconic red and white stripes. The aroma is a delightful mix of sweet, salty, and savory, inviting everyone to dive in. From selecting the freshest berries at the Union Square Greenmarket to meticulously arranging each piece, I approach every charcuterie board with the same attention to detail I honed during my culinary training in Paris. It’s about balance, color, and inviting textures – a true feast for the eyes and the palate that makes entertaining feel elegant yet entirely approachable.

This isn’t just any patriotic party food; it’s a streamlined process designed for maximum visual impact with minimal fuss. My secret, gleaned from years of professional cooking, lies in the strategic use of pre-sliced ingredients and thoughtful layering to create depth and dimension. I’ll show you how to choose the right cheeses and meats, master the art of folding salami for that perfect bloom, and even share a pro tip on how to ensure your board stays fresh and vibrant throughout your celebration. By focusing on quality ingredients and a few clever techniques, we’ll craft an easy charcuterie board that looks incredibly elaborate but comes together in a flash, avoiding common mistakes like a sparse appearance or ingredients wilting too quickly.

Why This American Flag Charcuterie Board Recipe Is the Best

As a chef, I believe a great dish — or in this case, a great board — isn’t just about ingredients; it’s about thoughtful execution. My method for this American Flag Charcuterie Board incorporates elements of French presentation with the vibrant, fresh ingredients I adore from my New York City life. The key is in selecting a diverse range of red and white components, from different meats to various cheeses, ensuring each stripe has its own nuanced flavor and texture profile, preventing the board from becoming monotonous.

The texture on this board is truly perfected. Instead of just laying items flat, I’ll teach you how to fold and layer the meats, giving them volume and creating an inviting, abundant look. This isn’t just for aesthetics; it allows for better air circulation, keeping ingredients fresh longer, a trick I picked up during my catering days. The contrast between the soft berries, creamy cheeses, and savory cured meats creates an exciting interplay with every bite, a testament to balanced culinary composition.

Above all, this recipe is designed to be foolproof and fast, truly living up to its “easy charcuterie board” promise. You don’t need fancy skills or expensive tools to create a stunning display. The steps are intuitive, focusing on assembly rather than cooking, making it perfect for hosts who want to enjoy their party rather than being stuck in the kitchen. Even a beginner can feel like a gourmet chef with this straightforward approach to a patriotic party food masterpiece.

American Flag Charcuterie Board Ingredients

When I head to my local market, whether it’s a farmers market for fresh berries or my favorite cheese shop in Brooklyn, I choose ingredients not just for their color, but for their quality and how they’ll contribute to the story of the board. This patriotic spread is no exception, and selecting good components makes all the difference for this 4th of July appetizer.

Ingredients List

  • Blueberries (enough to fill a small corner of your board)
  • White cheese slices, cut into star shapes (use a mini star cookie cutter or a knife)
  • Raspberries
  • Sliced pepperoni
  • Sliced salami
  • White cheese slices (like provolone or white cheddar)
  • White cheese cubes (mozzarella, Monterey Jack, or more cheddar)

Ingredient Spotlight

Blueberries: These small wonders are the cornerstone of our blue field. When selecting blueberries, look for plump, firm berries with a dusty bloom – a sign of freshness. Avoid any that are soft, shriveled, or show signs of mold. Their natural sweetness and slight tartness provide a lovely contrast to the savory elements, and they hold their shape beautifully on the board. For this easy American flag charcuterie board, the blueberries really complete the patriotic look.

White Cheese Slices (for stars & stripes): For the star-shaped cheeses, a firm yet sliceable cheese like provolone, white cheddar, or even Monterey Jack works perfectly. You want a cheese that holds its shape when cut with a cookie cutter, but still offers a pleasant texture. For the stripes, provolone or thinly sliced Swiss are excellent choices; they are mild enough not to overwhelm the other flavors and provide that distinct white contrast. If you can’t find a star cutter, you can carefully cut star shapes with a small paring knife – it might take a little longer but the effect is worth it!

Raspberries: These vibrant red berries provide a pop of color and a delightful burst of sweet-tart flavor for your red stripes. Choose raspberries that are firm, fully colored, and free from bruising. They are delicate, so handle them gently to maintain their structure. When arranged, their unique texture adds visual interest and a burst of freshness to this patriotic party food.

Sliced Pepperoni & Salami: These cured meats bring rich, savory, and slightly spicy notes (from the pepperoni) to our red stripes. Look for good quality, thinly sliced varieties that are easy to fold or roll. The fattiness of these meats pairs wonderfully with the fresh berries and mild cheeses. I often find wonderful artisanal versions at my local Italian deli in Little Italy, but even good quality supermarket varieties will work splendidly for this 4th of July appetizer.

Original IngredientBest SubstitutionFlavor / Texture Impact
BlueberriesBlackberries or dark purple grapesSimilar color, grapes offer a different texture and sweetness.
White cheese slices (for stars)Feta cheese blocks (crumbled for shape)A saltier, tangier flavor, crumbles can create a “star” effect.
RaspberriesStrawberries (sliced) or small cherry tomatoesStrawberries offer a similar sweetness; tomatoes provide a savory alternative.
Pepperoni / SalamiProsciutto or CapicolaProsciutto is less spicy, leaner; Capicola brings a similar spiced flavor.

Easy American Flag Charcuterie Board for Parties

How to Make American Flag Charcuterie Board — Step-by-Step

Creating this stunning American Flag Charcuterie Board is much simpler than you might imagine, and the payoff in compliments will be immense. Let’s build our edible masterpiece together!

Step 1: Create the Blue Field

Locate the top-left corner of your serving board. Begin piling up your fresh blueberries in a rectangular or square shape, creating a dense, vibrant blue block. Depending on the size of your board, this blue section should ideally cover roughly one-quarter to one-third of the board’s width, and about half of its length, mimicking the canton of the flag. Aim for a neat, defined edge where it meets the future stripes.

💡 mia’s Pro Tip: For a really lush blue field, overlap the blueberries slightly and ensure there are no visible gaps. A small ceramic ramekin or bowl can also be placed in the corner and filled with blueberries for a more defined, contained blue section.

Step 2: Add the White Stars

Gently place your star-shaped white cheese pieces directly on top of the blueberry field. Arrange them in a scattered but evenly distributed pattern to represent the stars. You can use between 6-10 stars, depending on their size and the area of your blue field. The contrast of the white cheese against the deep blue berries is truly striking, and this step really brings the “flag” to life.

⚠️ Common Mistake to Avoid: Don’t overload the blue section with too many stars. Fewer, well-placed stars will have a more elegant and impactful appearance than a crowded cluster. Ensure they are flat against the blueberries so they don’t roll off.

Step 3: Lay the First Red Stripe

Immediately adjacent to the blueberry field, along the top edge of your board, begin laying out your first red stripe using raspberries. Arrange them in a tight, continuous line. You can choose to lay them individually or gently pile them to create a full, rich red stripe. This will be the uppermost red stripe of your flag, running parallel to the blue section.

💡 mia’s Pro Tip: Instead of just laying raspberries flat, try arranging some on their sides or slightly overlapping them to create visual interest and a more bountiful appearance for your patriotic party food.

Step 4: The First White Stripe

Directly below the raspberry stripe, create your first white stripe using the white cheese slices (like provolone or white cheddar). Overlap the slices slightly to create a continuous, opaque white band. Ensure this stripe is roughly the same width as your raspberry stripe for a balanced look. This is where precision helps, but remember, charcuterie boards are also about rustic charm.

Step 5: Alternate Red and White Stripes

Continue to build your flag by alternating red and white stripes down the length of your board. For the red stripes, vary your ingredients by using sliced pepperoni and sliced salami. For your white stripes, alternate between more white cheese slices and white cheese cubes. Fold the pepperoni and salami into quarters or rolls for texture and to make them easier to pick up. Keep the widths of your stripes as consistent as possible for a cohesive flag design.

⚠️ Common Mistake to Avoid: Laying meats or cheeses flat can make the board look sparse. Always fold or slightly overlap your charcuterie items to give the board a more abundant, inviting, and professional finish. This technique, straight from my French culinary training, really elevates the presentation.

Step 6: Fill and Garnish

Once your main stripes are in place, step back and assess your board. Are there any small gaps or empty spots? Fill these in with extra blueberries, raspberries, or cheese cubes to give the board a truly abundant, overflowing feel. You can also add small sprigs of fresh mint or basil for a touch of green and aromatic freshness, though this is optional. This final touch makes your easy charcuterie board look even more spectacular.

StepActionDurationKey Visual Cue
1Create the Blue Field5 minsDense, rectangular pile of blueberries.
2Add the White Stars3 minsWhite cheese stars evenly scattered on blueberries.
3Lay First Red Stripe3 minsTight line of raspberries next to blue field.
4First White Stripe3 minsOverlapping white cheese slices below raspberries.
5Alternate Stripes4 minsVaried red (pepperoni/salami) and white (cheese) stripes.
6Fill and Garnish2 minsNo visible gaps, abundant appearance.

Serving & Presentation

A charcuterie board is a celebration of visual appeal as much as it is of taste. For this Easy American Flag Charcuterie Board, presentation is key to truly wowing your guests with a patriotic statement. I love to serve this masterpiece on a large, flat wooden board or a slate platter for a rustic yet elegant touch. Ensure your board is large enough to accommodate all the components without looking cramped—abundance is always inviting! Place small tongs or toothpicks nearby for easy serving, a simple courtesy I learned from Parisian soirées.

Consider adding a few small bowls of complementary items around the main flag. A bowl of cornichons or small pickles would add a delightful tang that cuts through the richness of the meats, a classic French pairing. A dish of honey or a fig jam could be a beautiful sweet counterpoint to the cheeses, reminiscent of the sweet-savory balance often found in Moroccan cuisine. And don’t forget some crackers or slices of a crusty baguette – they are the perfect vehicles for scooping up all that deliciousness.

When it comes to drinks, this patriotic party food pairs wonderfully with light, refreshing beverages. Think sparkling lemonade, a crisp Sauvignon Blanc, or even a chilled rosé for the adults. For a non-alcoholic option, a cranberry-sparkling water mix with a lemon twist would be both festive and delicious. The vibrant colors of this 4th of July appetizer truly sing when surrounded by thoughtful accompaniments.

Pairing TypeSuggestionsWhy It Works
Side DishAssorted crackers, Sliced baguette, Pretzel crispsProvides crunch and a neutral base for the toppings.
Sauce / DipFig jam, Honey, Whole-grain mustardAdds sweet or tangy notes that complement meats and cheeses.
BeverageRosé, Sparkling white wine, Lemonade, Iced teaRefreshing drinks that balance the rich flavors and fit the summer theme.
GarnishFresh mint leaves, Small American flags (toothpicks)Adds freshness, visual appeal, and reinforces the patriotic theme.

Make-Ahead, Storage & Reheating

Living in NYC with a demanding schedule, I’ve mastered the art of efficient party prep. This easy charcuterie board is perfect for making ahead, allowing you to relax and enjoy your celebration. The key is knowing which components to assemble and which to keep separate until the last minute to ensure everything stays fresh and vibrant, especially when serving a crowd this patriotic party food.

MethodContainerDurationReheating Tip
RefrigeratorAirtight container or tightly wrapped with plastic wrapUp to 2 days for pre-cut items; assembly 2-4 hours before servingNot applicable, serve chilled.
FreezerNot RecommendedNot ApplicableFreezing alters texture of fresh berries and most cheeses.
Make-AheadSeparate sealed bags/containers for each componentUp to 1 day in advanceAssemble the flag on the board about 30 minutes before serving, allowing cheeses to come to room temperature slightly.

For ultimate freshness, I recommend preparing all your ingredients a day in advance – washing and drying berries, slicing cheeses, and arranging charcuterie on separate wax paper sheets. Store each component in individual airtight containers in the refrigerator. This way, assembly becomes a quick 15-20 minute task right before your guests arrive, ensuring everything is at its peak flavor and texture. For my Parisian-trained palate, that’s crucial!

When you’re ready to serve, pull the cheeses out of the fridge about 20-30 minutes beforehand. This allows them to come slightly to room temperature, enhancing their flavor and yielding a creamier texture. Blueberries and raspberries, however, are best kept chilled until just before placing on the board. Building the entire American flag charcuterie board closer to serving time prevents the berries from dehydrating and the meats from losing their luster, keeping your patriotic party food looking its absolute best.

Variations & Easy Swaps

The beauty of a charcuterie board lies in its versatility. While the classic American flag charcuterie board is a showstopper, there are so many ways to adapt it to dietary needs, seasonal availability, or just your personal taste. Don’t be afraid to get creative – it’s what I love about cooking, drawing inspiration from my Moroccan roots and French training!

VariationKey ChangeBest ForDifficulty Impact
Mediterranean Flag BoardAdd olives, feta, cherry tomatoes, cucumbers.Global flavor twist, colorful and fresh.Slightly more prep for chopping.
Vegetarian & Gluten-Free Flag BoardReplace meats with plant-based alternatives, use GF crackers.Dietary restrictions, lighter option.None, just ingredient swaps.
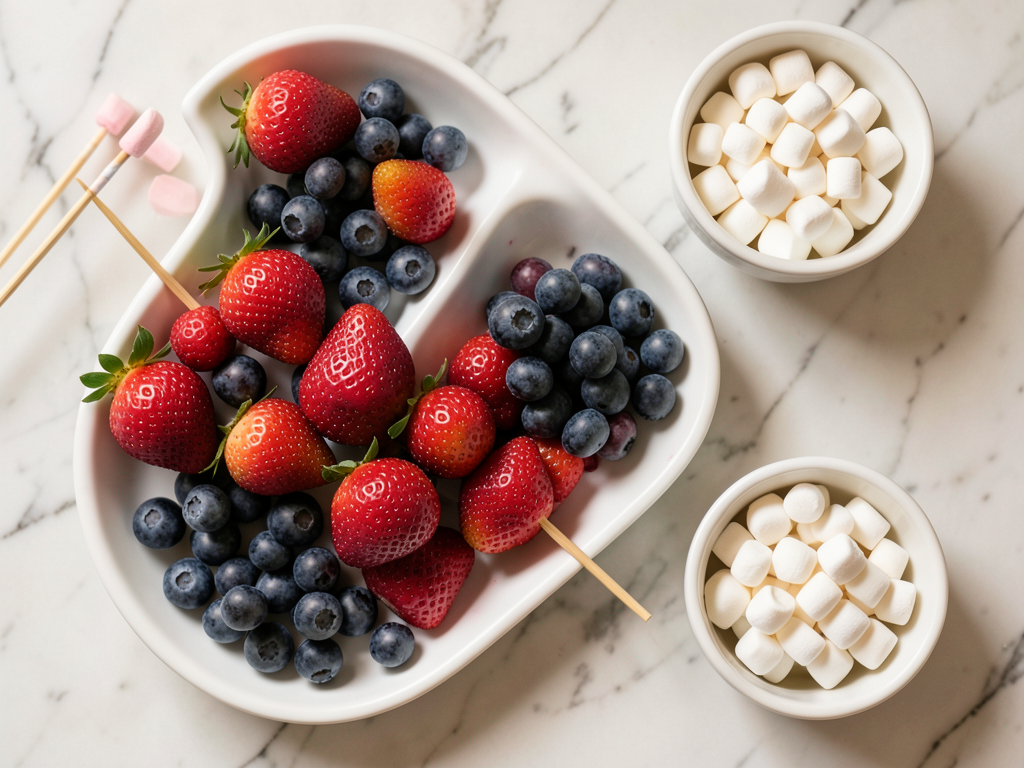
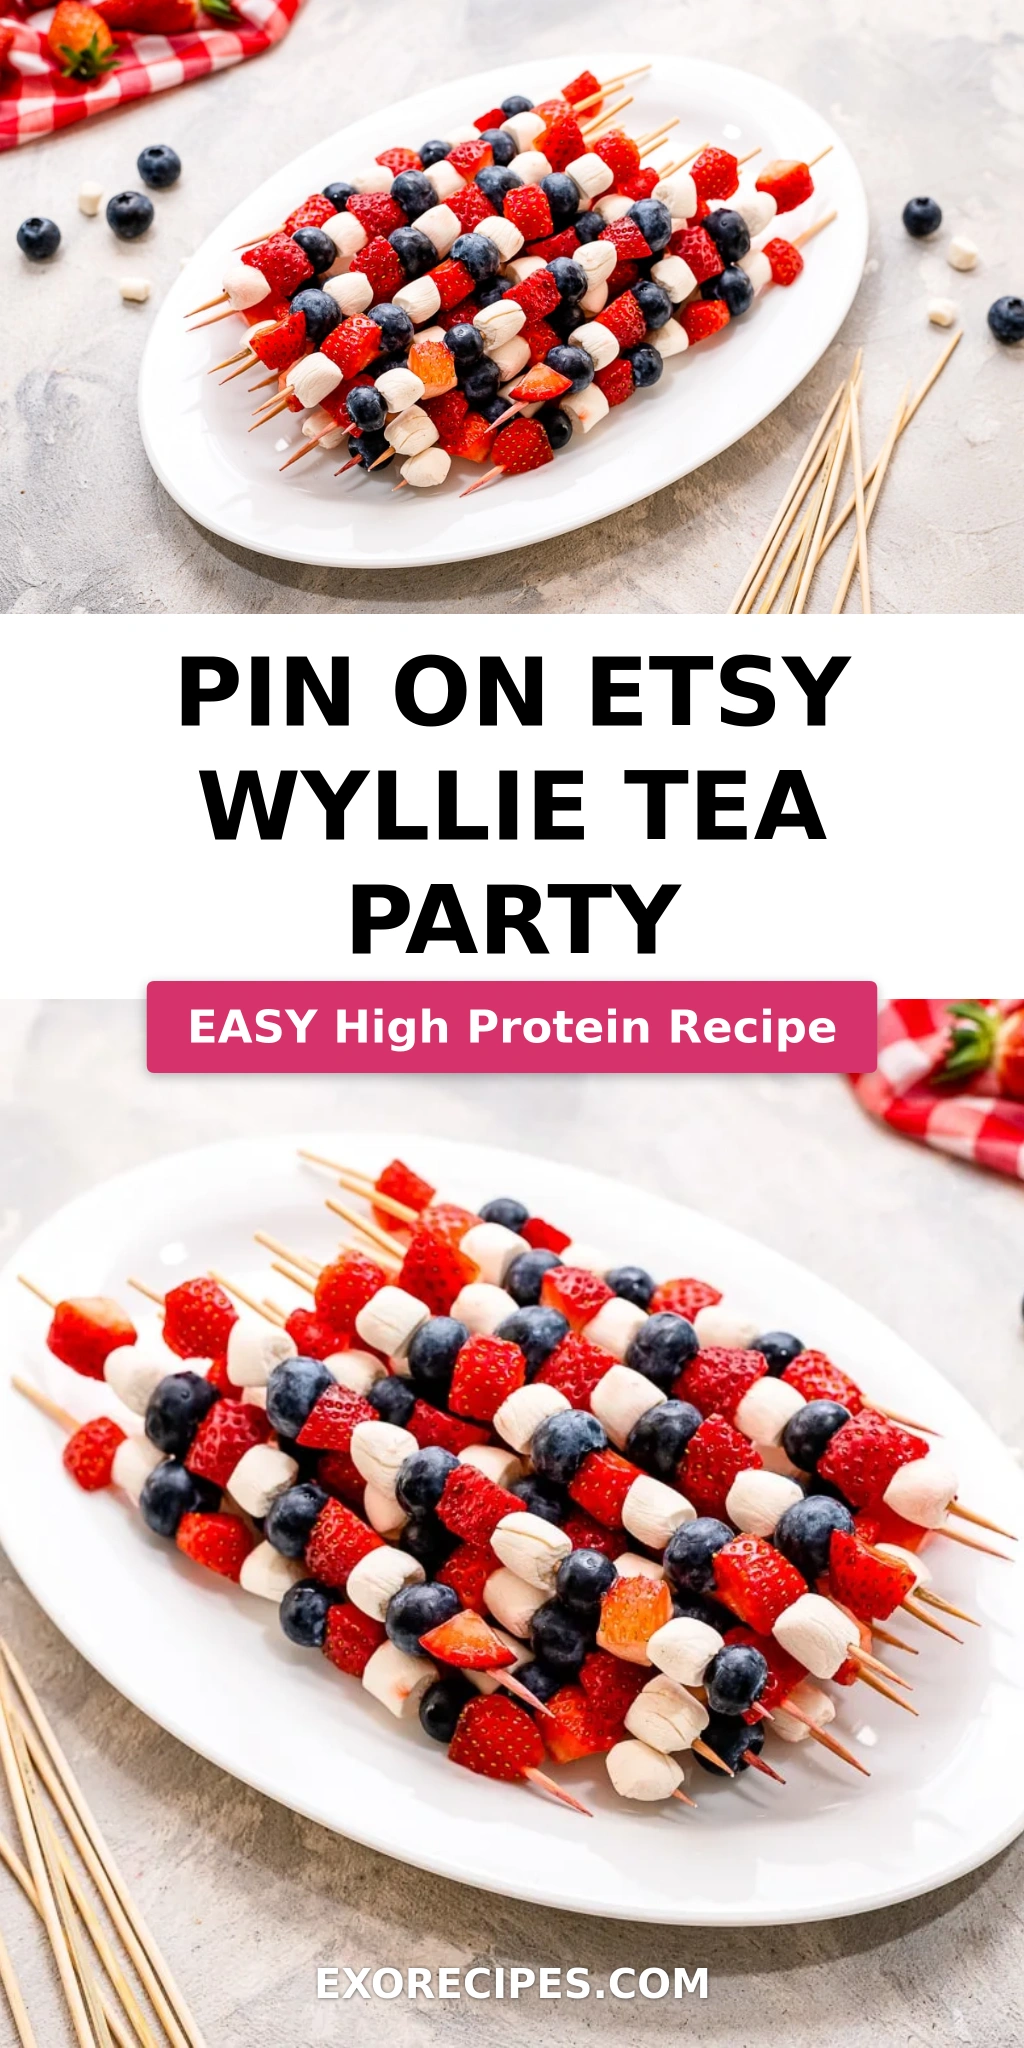
Sweet Treat Flag BoardUse strawberries, marshmallow, yogurt pretzels, various candies.Kids’ parties, dessert focus.None, different ingredients.

Mediterranean Flag Board

Inspired by my Moroccan heritage, you can easily pivot this board to a Mediterranean theme. Keep the stars as feta cubes and for colors, use cherry tomatoes for red stripes, and miniature cucumber slices or white bean dip for white stripes. The blue field can be replaced with a vibrant olive tapenade. Drizzle with a good quality olive oil for an authentic touch. This variation makes a wonderfully fresh and flavorful patriotic party food.

Vegetarian and Gluten-Free Flag Board

Making this an easy charcuterie board for everyone is simple. For a vegetarian option, swap out the pepperoni and salami for roasted red peppers (thinly sliced) or sun-dried tomatoes for the red stripes. For white stripes, you could use jicama sticks, hard-boiled egg slices, or a creamy white hummus. Ensure all cheeses are vegetarian-friendly. For gluten-free guests, simply offer a selection of your favorite gluten-free crackers and breads alongside the board. This ensures everyone can enjoy this lovely 4th of July appetizer.

Sweet Treat Flag Board

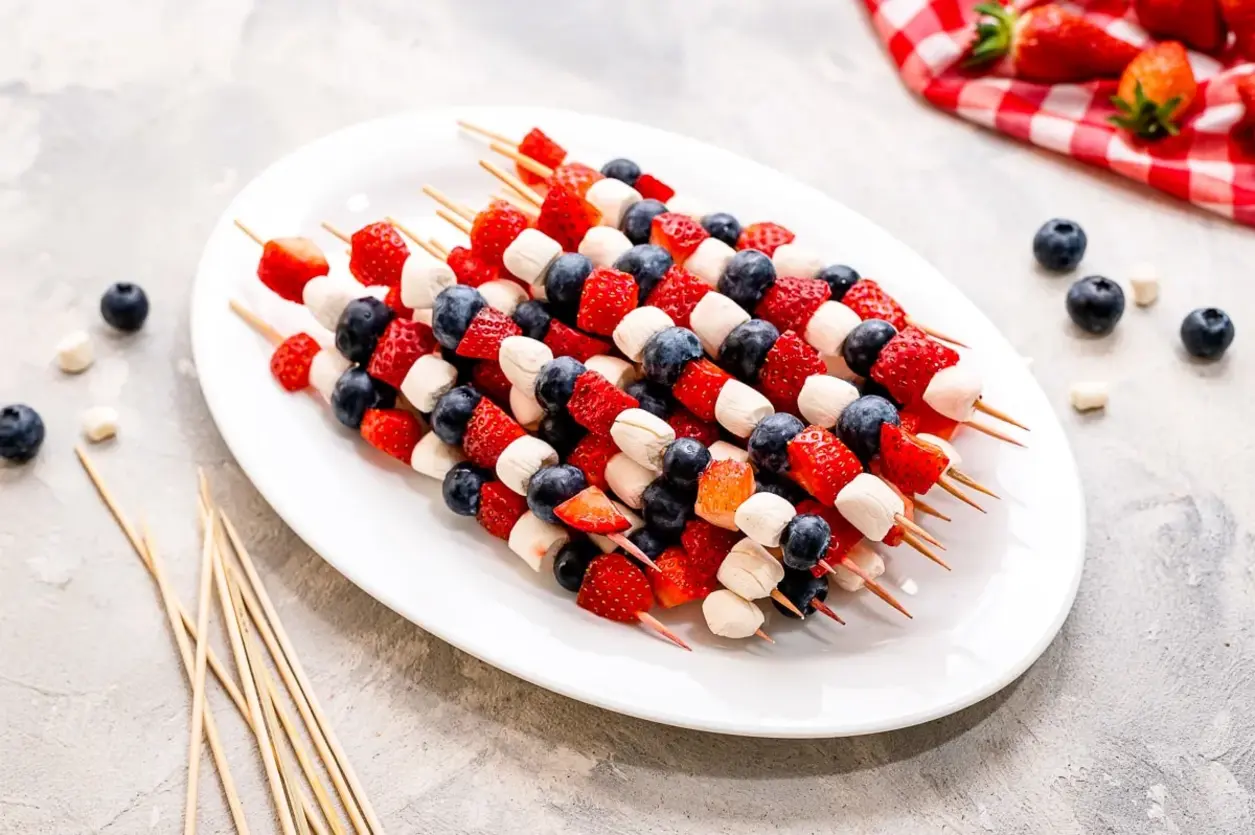
Turn your patriotic display into a dessert wonderland! For red stripes, use sliced strawberries, red grapes, or even red licorice. For white, think mini marshmallows, white chocolate-covered pretzels, or banana slices (tossed in lemon juice to prevent browning). The blue field comes alive with blueberries, of course, or even blue candy. This is a particularly fun and easy charcuterie board for kids’ parties or as a sweet ending to your Independence Day feast.

What are the best red, white, and blue foods to use for a patriotic charcuterie board?

For your blue section, plump blueberries are always my top choice due to their perfect size and vibrant color. If you’re looking to mix it up, dark purple grapes or even some blue-tinted crackers can work. For the red stripes, fresh raspberries are fantastic, offering both sweetness and a lovely texture. Sliced strawberries, red bell pepper strips, pepperoni, salami, and thinly sliced prosciutto also make excellent red options. As for white, think white cheese slices (provolone, white cheddar, Monterey Jack), star-shaped cheese cut-outs, mini mozzarella balls, or even some jicama sticks. The key is to find ingredients that contrast well and stand out in the flag design, making it an easy charcuterie board to assemble with visual impact.

How do you arrange a flag charcuterie board so it looks like the American flag?

Arranging an American flag charcuterie board is all about creating the distinct blue field and alternating red and white stripes. Start by dedicating a significant top-left corner of your board to the “blue” section, piling your blueberries (or other blue ingredients) densely to form a rectangle or square. On top of this, place your white cheese stars. Then, from the right edge of this blue section and extending across the rest of the board’s top, begin your first red stripe with raspberries or sliced meats. Directly below that, place a white stripe using cheese slices or cubes. Continue alternating red and white stripes down the remaining length of the board. The goal is to make the blue section visually distinct and the stripes fairly uniform in width for that classic flag look. My French culinary training emphasizes precision in presentation, and here it really shines for this patriotic party food!

Can I make a patriotic charcuterie board ahead of time, and how do I store it?

Absolutely! This is one of the best parts about an easy charcuterie board – its make-ahead potential. I recommend prepping all your ingredients up to 24 hours in advance. Wash and dry your berries thoroughly, slice and cut your cheeses, and arrange your meats on separate plates lined with parchment paper. Store each type of ingredient in its own airtight container in the refrigerator. Assemble the entire board no more than 2-4 hours before your event. Once assembled, cover the entire board loosely with plastic wrap, avoiding direct contact with the berries to prevent crushing, and refrigerate. Take it out 20-30 minutes before serving to allow the cheeses and meats to come slightly to room temperature, enhancing their flavors.

What are some easy substitutes for common ingredients on a 4th of July flag board?

If you’re having trouble finding specific ingredients or want variety, there are many easy swaps for your American Flag Charcuterie Board. For blue, consider pitted black olives (though the flavor profile shifts to savory) or even blue corn tortilla chips for a crunchy element. Instead of raspberries for red, thinly sliced strawberries, mini cherry tomatoes, or even roasted red peppers work beautifully. For white, jicama sticks, hard-boiled egg slices, or various types of white crackers can be used instead of cheese. If you’re out of pepperoni or salami, any thinly sliced cured meat like prosciutto or even turkey deli meat can fill in the red stripe. Don’t be afraid to experiment with what you have on hand – my Moroccan mother always taught me to make do beautifully!

Is it better to serve a charcuterie board at room temperature or chilled?

For optimal flavor and texture, I always recommend serving charcuterie boards, including this patriotic one, at slightly below room temperature. While it’s crucial to keep ingredients chilled for safety during storage, allowing the cheeses and cured meats to sit out for about 20-30 minutes before serving lets their flavors bloom and their textures soften beautifully. Berries, however, are best kept cold. So, assemble the board mostly chilled, but give it a moment on the counter before placing it out for your guests. This small step, a detail often emphasized in French culinary practices, makes a huge difference in the overall enjoyment of your 4th of July appetizer.

Share Your Version!

I absolutely adore seeing your culinary creations, especially when they’re inspired by my recipes! If you whip up this Easy American Flag Charcuterie Board for your next patriotic gathering, please don’t be shy. Leave a star rating and a comment below to let me know how it went – did you add a secret ingredient, or maybe discover a new favorite method? I love hearing about your experience!

And if you snap a photo, make sure to share it on Instagram or Pinterest and tag @exorecipes. It makes my heart happy to see my recipes come to life in your kitchens. What was your favorite “red” ingredient to use for the stripes? I’m curious to see your creative twists!

From my NYC kitchen to yours — I hope this recipe brings as much warmth to your table as it does to mine. — mia 🧡

📌

Love This Recipe? Save It to Pinterest!

If you enjoyed this American Flag Charcuterie Board recipe, don’t let it get lost in your browser tabs! 😄 Pin it now so you can find it again anytime — and explore hundreds more tried-and-tested recipes waiting for you on my Pinterest boards.

👉 Follow mia on Pinterest @chefrecipes2

📌 Pin this recipe · 🔁 Re-pin your favorites · 💬 Tag me when you make it — I love seeing your creations!

Print

clock clock iconcutlery cutlery iconflag flag iconfolder folder iconinstagram instagram iconpinterest pinterest iconfacebook facebook iconprint print iconsquares squares iconheart heart iconheart solid heart solid icon

American Flag Charcuterie Board

  • Author: Chef Mia

Description

A festive and patriotic charcuterie board shaped like the American flag, perfect for Fourth of July, Memorial Day, or any summer celebration.


Ingredients

  • Blueberries (enough to fill a small corner of your board)
  • White cheese slices, cut into star shapes (use a mini star cookie cutter or a knife)
  • Raspberries
  • Sliced pepperoni
  • Sliced salami
  • White cheese slices (like provolone or white cheddar)
  • White cheese cubes (mozzarella, Monterey Jack, or more cheddar)

Instructions

  1. In the top-left corner of your board, pile up blueberries to create the blue section of the flag.
  2. Place the white star-shaped cheeses gently on top of the blueberries.
  3. Starting at the top, lay out a row of raspberries for the first red stripe.
  4. Below the raspberries, add a row of white cheese slices for a white stripe.
  5. Alternate rows with pepperoni for red, more white cheese slices, salami for red, and cubes of white cheese until the board is filled.
  6. Fold and layer the meats slightly to add texture and make the board look full.
  7. Fill any empty spots with extra berries or cheese cubes for an abundant appearance.


Nutrition

  • Calories: 350 calories
  • Sugar: 8g
  • Fat: 25g
  • Carbohydrates: 12g
  • Protein: 20g


Easy American Flag Charcuterie Board for Parties

Easy No-Bake Cheesecake Stuffed Strawberries

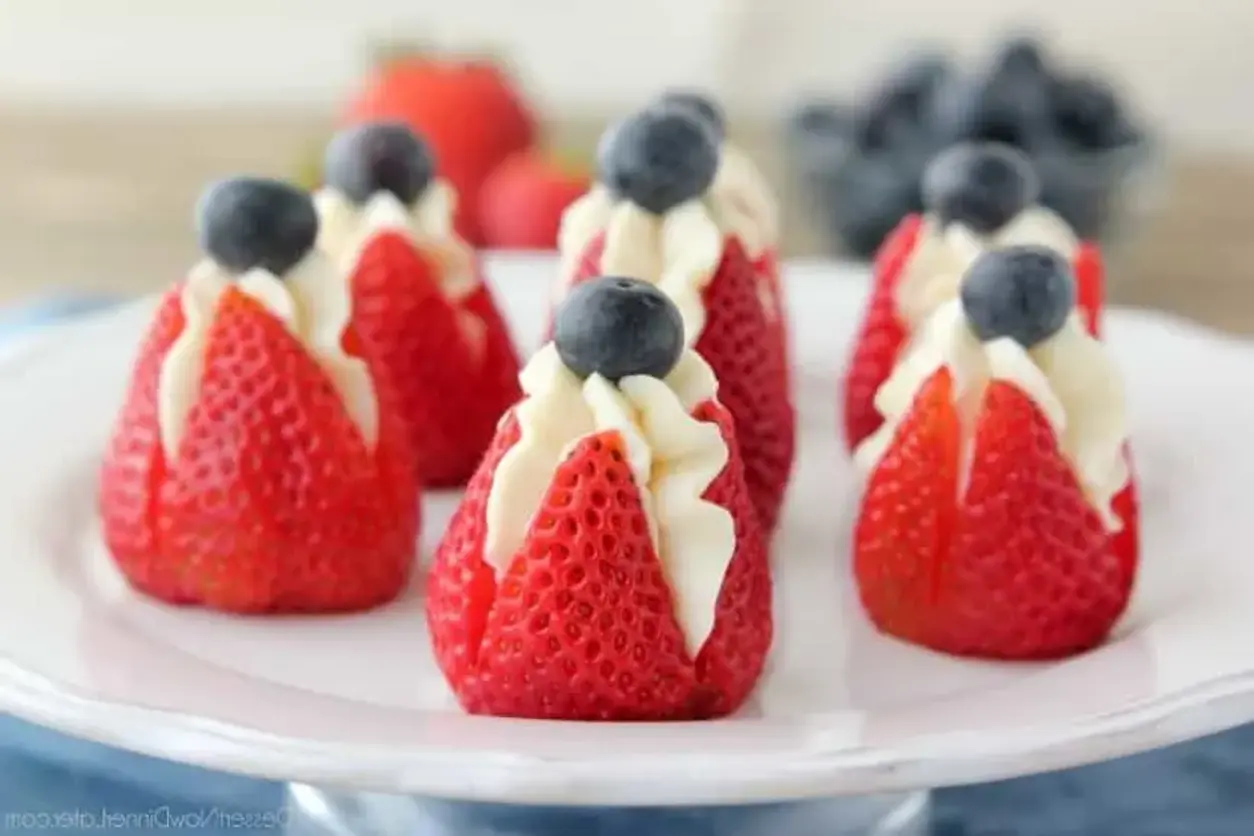
Cheesecake Stuffed Strawberries Red, White, and Blue: Delightfully Easy No-Bake Dessert

⚖️
Difficulty
Easy
⏲️
Prep Time
20 mins
🕒
Cook Time
0 mins
⏱️
Total Time
80 mins
🍽️
24

Growing up in Morocco, fruit was always a star of our dessert table, often served simply or with just a touch of honey and orange blossom water. Here in New York City, I’ve learned to appreciate the beautiful way simple ingredients can be elevated, and these Cheesecake Stuffed Strawberries are a perfect example. They’re a vibrant, healthier treat, especially dazzling as a red, white, and blue dessert for any patriotic occasion. These delightful strawberry cheesecake bites are not only incredibly easy to make with no baking required but also light, fruity, and utterly delicious. It’s a sweet, creamy, and fresh dessert that always brings smiles, whether it’s a backyard BBQ or a sophisticated brunch.

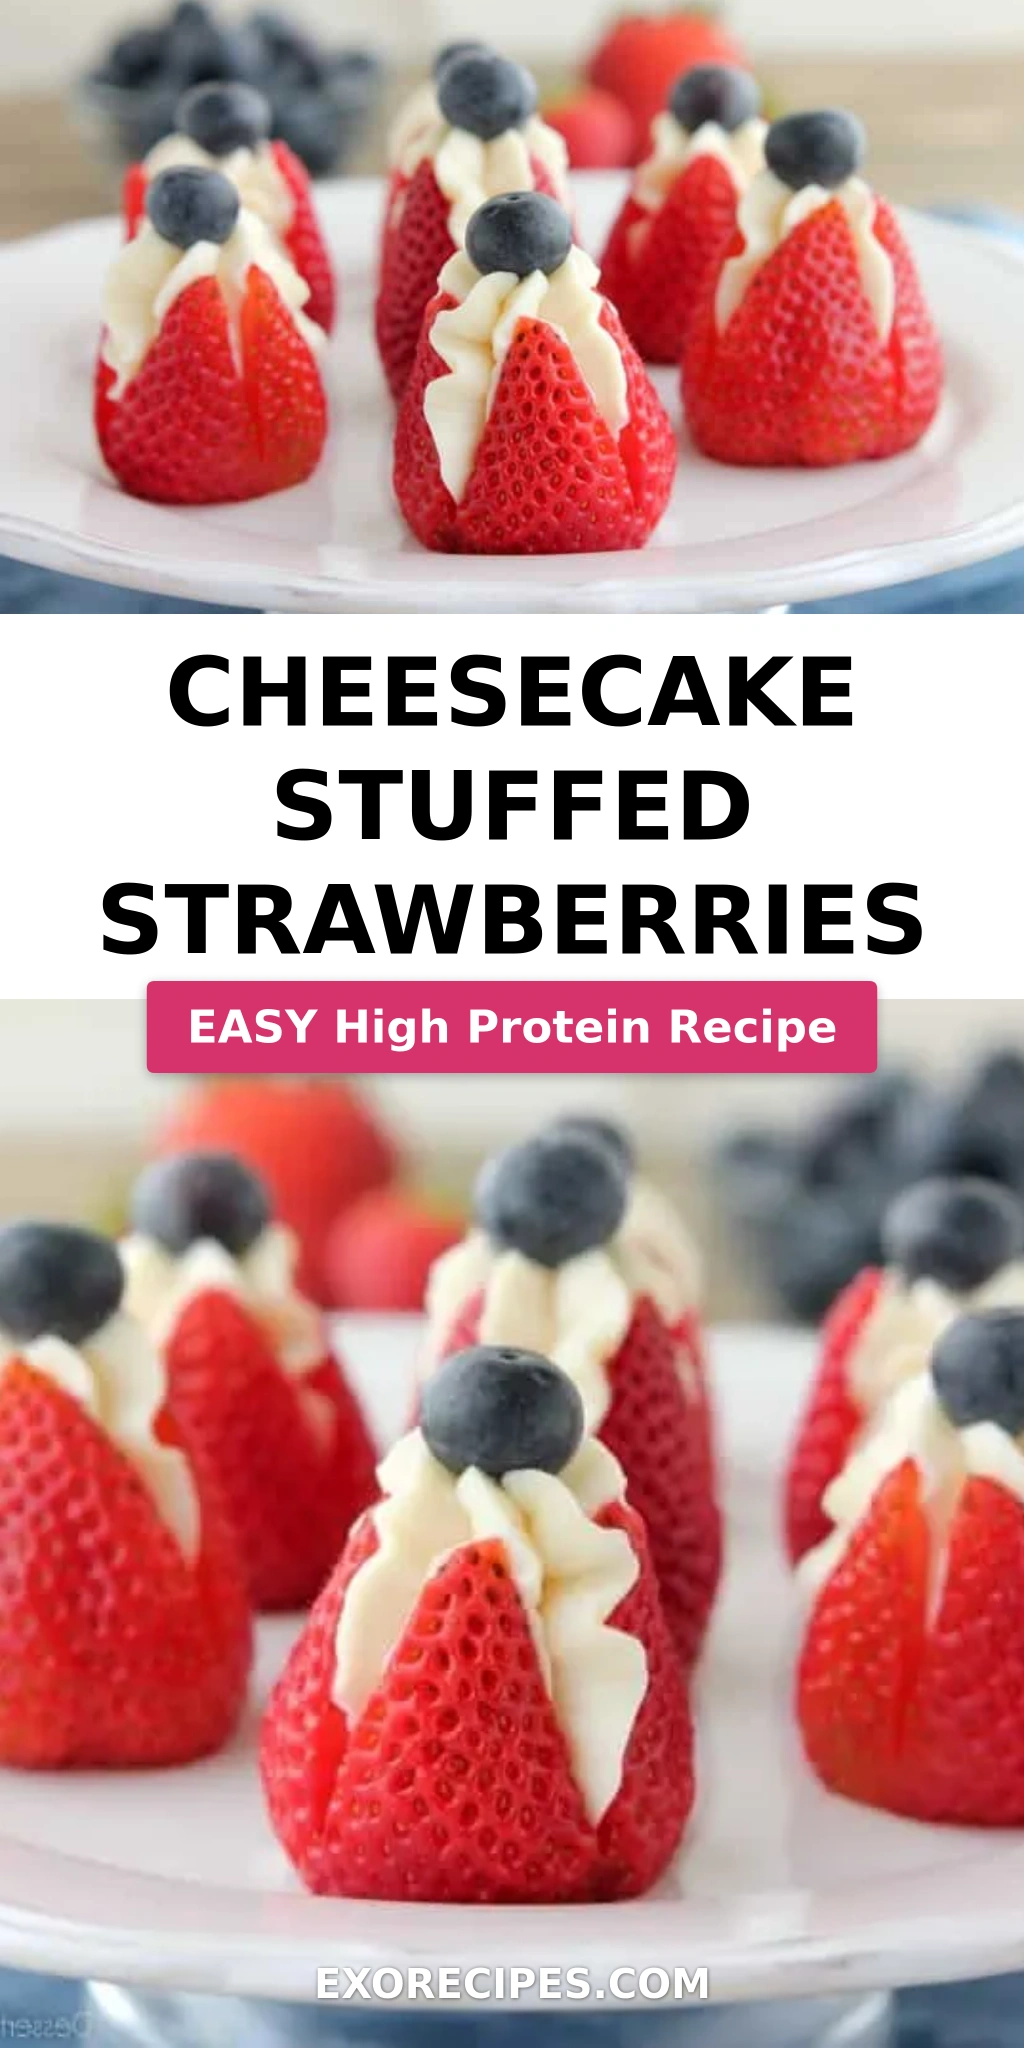
Imagine plump, juicy strawberries, tender yet firm, cradling a rich, velvety no-bake cheesecake filling. The brilliant red of the berry, the pristine white of the cream cheese, and the pop of blue from a fresh blueberry create a stunning visual symphony that’s almost too pretty to eat. The aroma of fresh vanilla mingles with the sweet tartness of the strawberries, hinting at the refreshing burst of flavor to come. This dessert showcases the inherent beauty of fresh produce, transforming simple berries into an elegant, light bite that’s both indulgent and surprisingly wholesome – a truly lovely balance I learned to appreciate during my pastry training in Paris, where every ingredient is respected.

What sets my version of these stuffed strawberries recipe apart is the perfect balance in the cheesecake filling – creamy, not too sweet, and with just the right tang to complement the fruit. It’s a trick I honed over years, marrying traditional cheesecake richness with a lighter, fresher finish. I’ll show you how to pick the perfect strawberries, achieve that cloud-like filling texture, and even share a pro tip on piping without fancy equipment. Plus, I’ll warn you about one common mistake that can turn your beautiful berries into a watery mess!

Why This Cheesecake Stuffed Strawberries Recipe Is the Best

The secret to these fantastic cheesecake stuffed strawberries lies in the quality of your ingredients and a few simple, well-executed steps. Inspired by the emphasis on fresh, seasonal produce I saw in my mother’s kitchen in Morocco and the elegant simplicity of French patisserie, I’ve crafted a filling that truly sings. The cream cheese is whipped to an ethereal lightness, ensuring it doesn’t overpower the delicate strawberries, and the touch of vanilla adds warmth without being too sweet. It’s an easy strawberry dessert that truly feels gourmet.

Achieving the perfect texture for the cheesecake filling is key, and it’s something I focused on perfecting during my pastry training. You want it smooth and pipeable, but firm enough to hold its shape inside the strawberry. This involves beating the cream cheese and powdered sugar just until light and fluffy, avoiding overmixing which can make it too soft. The slight chill time in the refrigerator also plays a crucial role in firming up the filling, creating a delightful contrast with the juicy berry.

This recipe is truly foolproof and fast, making it ideal for both seasoned cooks and beginners. With no baking involved and minimal prep, you can have these elegant strawberry cheesecake bites ready in under an hour (plus chilling time). The instructions are straightforward, focusing on simple techniques that yield impressive results. It’s the kind of dessert I love to whip up after a busy day sourcing ingredients from the NYC farmers market, knowing it will be a hit with everyone.

Cheesecake Stuffed Strawberries Ingredients

When I head to the Union Square Greenmarket here in NYC, I’m always on the lookout for the freshest, most vibrant ingredients. For these cheesecake stuffed strawberries, the quality of your produce truly shines through. My mother always said, “Good food starts with good ingredients,” and these simple components are proof of that wisdom.

Ingredients List

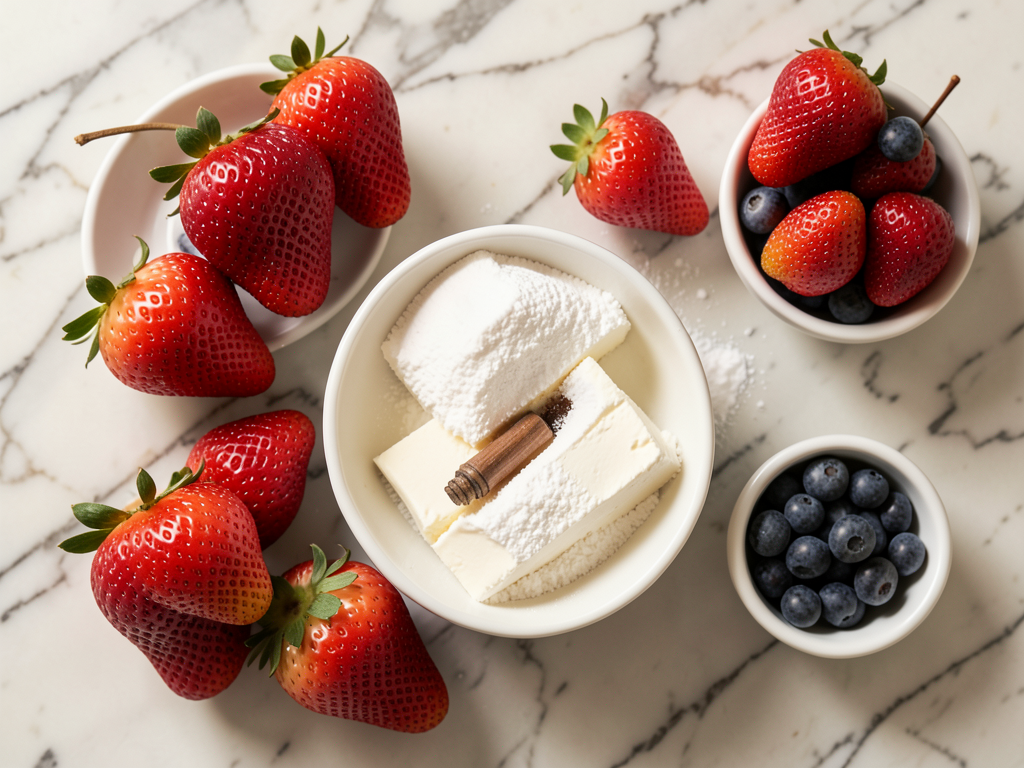
  • 24 large fresh strawberries (1.5 to 2 lbs of strawberries, depends on how much you fill them)
  • 8 oz block-style cream cheese (room temperature or softened slightly)
  • ½ cup powdered sugar
  • 1 teaspoon vanilla extract
  • ½ cup fresh blueberries

Ingredient Spotlight

Fresh Strawberries: These are the star, so choose wisely! Look for plump, firm, brightly colored berries without any soft spots or mold. Their sweet-tart flavor is the backbone of this easy strawberry dessert. You want large strawberries so you have plenty of space for the creamy filling. If you can only find smaller ones, you might need more than 24, or simply adjust your portion sizes. There’s no perfect substitute for fresh strawberries in this recipe; their unique shape and flavor are essential.

Block-Style Cream Cheese: I always recommend block cream cheese over whipped or spreadable types for baking, and especially for this no-bake cheesecake filling. It has less water content and provides a firmer, richer texture when whipped. Ensure it’s at room temperature for easy blending – this is a tip straight from my pastry school days in Paris, essential for a smooth, lump-free filling. If you absolutely can’t find block cream cheese, you could try a full-fat sour cream or mascarpone for a similar tang and richness, but the texture might be slightly softer.

Powdered Sugar: Also known as confectioners’ sugar, this fine powder dissolves beautifully into the cream cheese, creating a silky-smooth, lump-free filling. Granulated sugar would result in a gritty texture, so it’s not a direct substitute here. It also contributes to the firmness of the no-bake filling. If you’re in a pinch, you can make your own by blending granulated sugar in a food processor with a teaspoon of cornstarch until very fine.

Vanilla Extract: A good quality vanilla extract elevates the flavor of the cream cheese, adding a warm, aromatic note that balances the tang. I prefer pure vanilla extract over imitation for its depth of flavor. In Moroccan cooking, we often use similar aromatic essences, like orange blossom water, which could be a delightful twist here. If you desire a different flavor profile, you could swap the vanilla for almond extract or a tiny dash of lemon zest.

Fresh Blueberries: Functioning both as a garnish and a flavor complement, fresh blueberries add an extra layer of fruitiness and that wonderful patriotic pop of color. Choose firm, plump berries. While they are primarily for aesthetic and textural contrast, if you don’t have them, the strawberries will still be delicious. You could, perhaps, use a small raspberry or even a tiny mint leaf for a different visual appeal.

Original IngredientBest SubstitutionFlavor / Texture Impact
Block Cream CheeseFull-fat Mascarpone (or homemade cream cheese from yogurt)Slightly richer & softer texture, milder tang.
Powdered SugarGranulated sugar + Cornstarch (blended)If not blended finely, a slightly grainy texture.
Vanilla ExtractAlmond Extract or Orange Blossom WaterDistinct nutty or floral aroma, changes flavor profile.
Fresh BlueberriesSmall raspberries or finely chopped kiwiDifferent color and tartness; still provides a fruit garnish.

Cheesecake Stuffed Strawberries

How to Make Cheesecake Stuffed Strawberries — Step-by-Step

Making these cheesecake stuffed strawberries is a joy, truly! Follow these steps, and you’ll create a beautiful dessert that looks impressive but is deceptively simple. Trust me, even my little niece loves helping with the “stuffing” part!

Step 1: Prepare the Strawberries

First things first, wash your strawberries gently under cool running water. Then, carefully cut the green stems flat from the tops of each strawberry. This creates a stable base so your berries can sit cut-side down without toppling over, ready to be filled. Perfection in presentation, even for an easy strawberry dessert, always makes a difference!

💡 mia’s Pro Tip: After washing, make sure to gently pat the strawberries completely dry with a paper towel. Any excess moisture will make your beautiful no-bake cheesecake strawberries soggy, and can even thin out your filling. This attention to detail is key for the best results!

Step 2: Cut for Filling

Once the stems are trimmed, take a small, sharp knife and cut a deep “X” from the tip of each strawberry down towards the stem end. Be careful not to cut all the way through the berry – you want to create a little pocket or cavity for our creamy cheesecake filling. It’s like creating a tiny edible bowl! This step also helps the strawberry open up beautifully once filled.

⚠️ Common Mistake to Avoid: Don’t cut too deeply or all the way through the strawberry! This will cause your delicious cheesecake filling to leak out, and your strawberry cheesecake bites will lose their elegant shape. A gentle, controlled cut is what you’re aiming for.

Step 3: Make the Cheesecake Filling

In a medium bowl, combine your softened block-style cream cheese, powdered sugar, and vanilla extract. Using a hand mixer, beat these ingredients together on medium speed until the mixture is beautifully smooth, light, and fluffy. My Parisian chef instructor always emphasized aeration for light fillings, and this step is crucial for that cloud-like consistency in your stuffed strawberries recipe. Taste it – adjust sugar if needed, but remember the strawberries add sweetness too!

Step 4: Fill and Garnish

Now for the fun part! Gently open up each strawberry at the “X” cut you made and pipe the cheesecake filling inside. If you have a pastry bag and a star piping tip, it will look incredibly elegant – a trick even my mother picked up from watching French chefs on TV! No fancy equipment? No problem! Just snip the corner off a zip-top bag, fill it with the cheesecake mixture, and squeeze away. Once filled, top each berry with a fresh blueberry. These cheesecake stuffed strawberries are best served after chilling for at least an hour to let the flavors meld and the filling firm up. Store any leftovers in an airtight container in the refrigerator for up to 3 days, depending on the firmness of your strawberries.

💡 mia’s Pro Tip: Chill your filled strawberries for at least an hour. This doesn’t just make them refreshingly cool; it allows the cream cheese filling to set properly, ensuring they hold their shape beautifully and taste even more delicious!

StepActionDurationKey Visual Cue
1Prepare Strawberries5 minsFlat, stable base on each strawberry
2Cut for Filling5 minsDeep “X” cut, not through the berry
3Make Cheesecake Filling5-7 minsSmooth, light, and fluffy mixture
4Fill and Garnish5-8 minsBeautifully piped filling with a blueberry on top

Serving & Presentation

These cheesecake stuffed strawberries are like little jewels, and presentation truly makes them shine. I love arranging them on a simple white platter or a rustic wooden board, letting their vibrant colors speak for themselves. For a touch of Moroccan elegance, I sometimes dust them lightly with a whisper of powdered sugar, mimicking the white Sahara sands, which enhances their visual appeal without adding too much sweetness. A sprinkle of finely chopped fresh mint also adds a beautiful contrast and a burst of fresh aroma, reminiscent of the mint tea served in my childhood home.

For a patriotic gathering, nestle them among other red, white, and blue treats, perhaps beside a bowl of mixed berries or a light lemon trifle. They make excellent individual dessert portions, perfect for a buffet or passed appetizers during a summer soirée. The goal is to make them look as irresistible as they taste, inviting guests to grab these delightful strawberry cheesecake bites.

In New York City, I often serve these as a lighter alternative to heavier desserts, especially during warmer months. They pair beautifully with a crisp, dry rosé or even a sparkling water infused with cucumber and lime for a hydrating, refreshing combination. Their fresh, creamy, and fruity profile makes them incredibly versatile, suitable for anything from a casual picnic in Central Park to a more formal dinner party. Don’t be shy about adding a tiny sprig of fresh basil or a microscopic leaf of thyme for an unexpected, sophisticated herbal note – a little trick I picked up during my time in Paris that always intrigues the palate.

Pairing TypeSuggestionsWhy It Works
Side DishMixed Berry Salad, Lemon SorbetComplements the fruitiness and offers a palate cleanser.
Sauce / DipRaspberry Coulis, Thin Chocolate DrizzleAdds complexity and visual appeal, enhancing sweetness.
BeverageDry Rosé, Sparkling Wine, Herbal Iced TeaCuts through richness, refreshes the palate.
GarnishFresh Mint Leaves, Lemon Zest, Finely Chopped PistachiosAdds freshness, contrasting color, and textural crunch.

Make-Ahead, Storage & Reheating

Living in NYC with a demanding schedule, I’ve mastered the art of elegant make-ahead dishes, and these cheesecake stuffed strawberries fit the bill perfectly. They’re ideal for meal prepping for a party or just having a healthy treat ready when a craving strikes. It’s all about strategic planning to keep them fresh and delicious.

MethodContainerDurationReheating Tip
RefrigeratorAirtight container, single layerUp to 3 daysServe chilled directly from fridge; no reheating needed.
FreezerNot RecommendedN/AStrawberries become mushy when thawed, affecting texture.
Make-AheadAirtight container, single layerUp to 24 hours in advanceAssemble an hour before serving for best appearance.

While these are best freshly assembled, you can easily prepare the cheesecake filling a day in advance. Just store it in an airtight container in the refrigerator. When you’re ready to serve, let the filling soften slightly at room temperature for about 10-15 minutes, then give it a quick whisk to restore its fluffy texture before piping. This little culinary dance ensures your strawberry cheesecake bites are always at their peak. For the strawberries themselves, I prefer to hull and slice them the day of, as cut strawberries can lose their freshness and become watery relatively quickly.

One rule I live by, stemming from my French culinary training, is to appreciate the texture of fresh fruit. Freezing fresh strawberries, especially when cut, tends to make them mushy upon thawing, which would compromise the delicate balance of this dessert. So, while I advocate for make-ahead convenience, for these particular treats, prioritize refrigeration and enjoy them within the suggested timeframe for maximum freshness and enjoyment.

Variations & Easy Swaps

Part of the fun of cooking is playing with flavors and making a recipe truly your own. These cheesecake stuffed strawberries are a fantastic canvas for creativity. While the classic is simply perfect, here are a few ways to introduce delightful twists, inspired by global flavors and dietary needs.

VariationKey ChangeBest ForDifficulty Impact
Chocolate Lover’s DelightFold in mini chocolate chips; drizzle with chocolate.Those who adore chocolate and fruit combos.Minimal (easy).
Dairy-Free & VeganUse plant-based cream cheese and dairy-free whip.Guests with specific dietary restrictions.Moderate (ingredient sourcing).
Seasonal Fruit TwistSubstitute strawberries for other firm berries or small fruits.Adapting to seasonal availability or different flavor profiles.Minimal (easy).

Chocolate Lover’s Delight

For those who crave a richer experience, a touch of chocolate is simply divine. After beating the cream cheese mixture, gently fold in a tablespoon or two of very finely chopped dark chocolate or mini chocolate chips. Once your cheesecake stuffed strawberries are filled, you can drizzle them with a bit of melted dark chocolate for an extra layer of decadence. This evokes the fine chocolate work I learned in Paris, adding a sophisticated touch to a simple dessert.

Dairy-Free Cheesecake Strawberries

Adapting for dietary needs is something I often do for friends and clients in NYC. For a dairy-free version, simply swap the traditional cream cheese for a good quality plant-based cream cheese. Brands like Kite Hill or Miyoko’s Kitchen offer excellent alternatives that deliver on creaminess and tang. Ensure your chosen powdered sugar is vegan (some contain bone char). The texture will be similar, perhaps a touch lighter, but still wonderfully delicious and holds its shape well within the berry, maintaining the integrity of these easy strawberry dessert bites.

Seasonal Fruit Twist

While strawberries are iconic, many other fruits can play starring roles in this recipe. In late summer at the farmers market, I sometimes discover beautiful, firm figs or even tiny, sweet peaches that can be carefully hollowed out. For a truly Moroccan-inspired twist, try a blend of dried apricots (softened) mixed into the cream cheese, and then sprinkle with a hint of rosewater or orange blossom water. The concept of fruit as the vessel for creamy sweetness remains, no matter the season or the specific fruit, making this a truly versatile stuffed strawberries recipe.

How do you hollow out strawberries for cheesecake stuffed strawberries?

To hollow out strawberries for these delicious strawberry cheesecake bites, first, you need to prepare the “landing strip.” Cut the green leafy tops (stems) flat so the strawberries can sit stably on a platter. This creates a good base. Next, using a small, sharp paring knife, make a deep ‘X’ incision from the tip of the strawberry almost all the way down to the stem end, but be careful not to cut completely through. Gently pry open the segments of the ‘X’ to create a natural cavity or pocket inside the berry. This method is far better than trying to physically scoop out the center, which often results in tearing the delicate strawberry flesh and creating a messy opening. This technique ensures a neat, beautiful vessel for your no-bake cheesecake filling.

Can I use whipped cream instead of cream cheese in cheesecake stuffed strawberries?

While you certainly *can* use whipped cream, it will result in a very different dessert than true cheesecake stuffed strawberries. Whipped cream is much lighter and airier, and it doesn’t have the tang or the rich, dense texture that cream cheese provides. If you use it, I would recommend stabilizing the whipped cream with a little powdered sugar and perhaps some unflavored gelatin (a technique from my pastry days in Paris) to help it hold its shape longer, especially since it’s a no-bake dessert. However, the distinct “cheesecake” flavor profile will be absent. If you’re looking for a lighter option, consider a mix of half cream cheese and half whipped cream for a hybrid texture and taste.

How far in advance can you make cheesecake stuffed strawberries?

You can make these cheesecake stuffed strawberries about 24 hours in advance for the best taste and texture. The strawberries stay firm and fresh, and the cheesecake filling will have beautifully set in the refrigerator. Any longer than 24 hours, and the strawberries tend to soften and release more liquid, which can make the dessert watery and diminish its vibrant fresh flavor. If you want to get a head start, you can prepare the cheesecake filling up to 2-3 days in advance and keep it in an airtight container in the fridge, then assemble the strawberries a few hours before serving. This flexibility helps in busy New York kitchen schedules!

What can I use to top cheesecake stuffed strawberries besides graham cracker crumbs?

Beyond the classic blueberry as I’ve suggested, there are so many creative and delicious toppings for your cheesecake stuffed strawberries! For a textural contrast, consider finely chopped nuts like pistachios (a nod to Moroccan sweets) or candied pecans. A sprinkle of lemon zest adds a bright, zesty aroma and color, while a tiny sprig of fresh mint or basil elevates the freshness. For a touch of indulgence, a light drizzle of melted dark chocolate or white chocolate looks beautiful and adds richness. Or, for an unusual but delightful twist, try a pinch of flaky sea salt alongside a chocolate drizzle to really make the flavors pop, a trick I often employ in my NYC kitchen.

Why is my cream cheese filling too runny for stuffed strawberries?

A runny cream cheese filling is usually caused by a few common culprits. Firstly, ensure your cream cheese is block-style and softened, but not warm or melted. Over-softening can make it too loose. Secondly, overmixing the ingredients can incorporate too much air and cause the mixture to thin out, especially when combined with powdered sugar. Beat just until light and fluffy. Lastly, always use powdered sugar (confectioners’ sugar) as opposed to granulated sugar, as its fine texture helps to absorb moisture and create a firmer consistency. If your filling is still too soft, try chilling it for 30 minutes before piping; sometimes it just needs a little time to firm up.

Can I make this recipe with frozen strawberries?

I would strongly advise against using frozen strawberries for this particular recipe. When frozen strawberries thaw, they release a significant amount of water and become soft and mushy. This watery texture will not only make the stuffed strawberries unappealing but also dilute the flavor and potentially make your cheesecake filling soggy. The essence of these cheesecake stuffed strawberries lies in the fresh, firm texture of the berry contrasting with the creamy filling. Always opt for fresh, ripe, firm strawberries for the best results in this easy strawberry dessert.

Share Your Version!

I absolutely adore hearing from you, my wonderful readers! These Cheesecake Stuffed Strawberries are such a joy to make and share, and I’m always curious to see your creative twists. Did you add a sprinkle of spice from your own heritage, or perhaps a unique garnish you found at your local market?

Please leave a star rating and comment below to let me know how this easy strawberry dessert turned out for you! If you snap a photo of your beautiful strawberry cheesecake bites, make sure to share it on Instagram or Pinterest and tag @exorecipes – I love seeing your culinary creations. And tell me, what’s your favorite red, white, and blue dessert for summer celebrations?

From my NYC kitchen to yours — I hope this recipe brings as much warmth to your table as it does to mine. — mia 🧡

📌

Love This Recipe? Save It to Pinterest!

If you enjoyed this Cheesecake Stuffed Strawberries recipe, don’t let it get lost in your browser tabs! 😄 Pin it now so you can find it again anytime — and explore hundreds more tried-and-tested recipes waiting for you on my Pinterest boards.

👉 Follow mia on Pinterest @chefrecipes2

📌 Pin this recipe · 🔁 Re-pin your favorites · 💬 Tag me when you make it — I love seeing your creations!

Print

clock clock iconcutlery cutlery iconflag flag iconfolder folder iconinstagram instagram iconpinterest pinterest iconfacebook facebook iconprint print iconsquares squares iconheart heart iconheart solid heart solid icon

Cheesecake Stuffed Strawberries

  • Author: Chef Mia

Description

Try these easy red, white, and blue Cheesecake Stuffed Strawberries for a healthier patriotic dessert! A super easy to make, no-bake dessert that is light, fruity and delicious.


Ingredients

Scale
  • 24 large fresh strawberries (1.5 to 2 lbs of strawberries, depends on how much you fill them)
  • 8 oz block-style cream cheese (room temperature or softened slightly)
  • ½ cup powdered sugar
  • 1 teaspoon vanilla extract
  • ½ cup fresh blueberries

Instructions

  1. Cut the stems from the strawberries, so the strawberries can sit cut-side down.
  2. Cut a deep "X" from the tip down, being careful not to cut all the way through.
  3. Beat the cream cheese, powdered sugar, and vanilla in a bowl with a hand mixer until nice and fluffy.
  4. Gently open up each strawberry and pipe the filling inside using a pastry bag or zip-top bag with a star piping tip. Don't have a pastry bag or piping tip? Just cut off the corner of a zip-top bag and squeeze the cheesecake filling inside the strawberries that way.
  5. Top each filled strawberry with a blueberry. These are best served after the strawberries have been chilled for at least an hour. Store in an airtight container in the refrigerator for up to 3 days depending on how firm/soft the strawberries are.


Nutrition

  • Calories: 21 kcal
  • Sugar: 4 g
  • Carbohydrates: 4 g


Cheesecake Stuffed Strawberries

k">

Tried This Recipe? Leave a Comment!

Did you make this recipe? I’d love to hear how it turned out! Please leave a comment and a rating below. Your feedback helps other home cooks and supports cheerychop.com!

For more delicious inspiration, follow me on Pinterest!
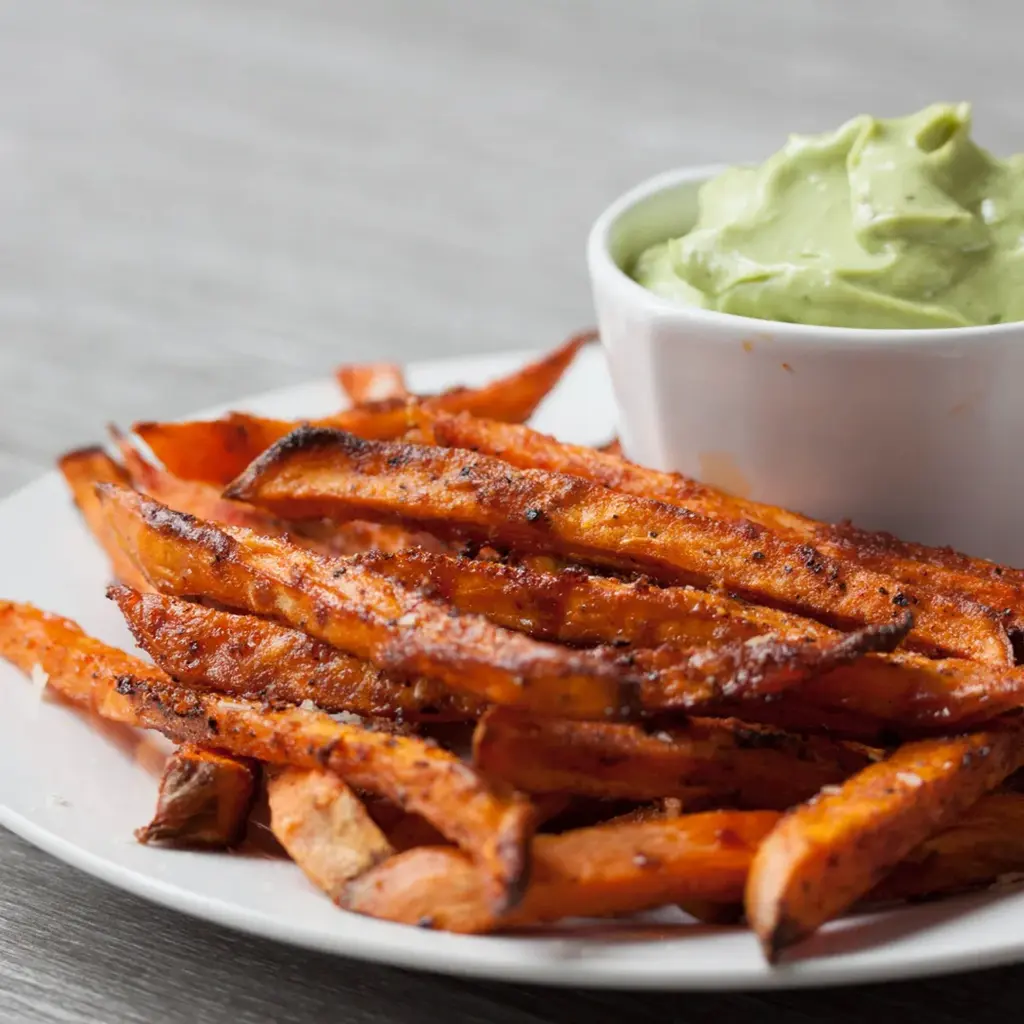
Easy Patriotic Fruit Kabobs for Tea Parties

Pin on Etsy Wyllie Tea Party Red, White and Blue Fruit Kabobs – A Whimsical, Patriotic Delight

⚖️
Difficulty
Easy
⏲️
Prep Time
15 mins
🕒
Cook Time
0 mins
⏱️
Total Time
15 mins
🍽️
Servings
6-8

Growing up in Morocco, tea time was an elaborate affair, steeped in tradition and rich flavors. But here in NYC, I’ve learned to appreciate the charm of a more whimsical gathering, like those delightful Etsy tea party aesthetics I constantly pin. These Red, White and Blue Fruit Kabobs capture that same spirit of elegant simplicity, offering a patriotic twist that’s perfect for any festive occasion. Imagine them gracing a table adorned with vintage tea party decor, adding a vibrant pop of color. This recipe isn’t just about food; it’s about creating an experience, making entertaining effortless and memorable, just like finding the perfect unique piece of tea party supplies on Etsy can transform your celebration.

The beauty of these fruit kabobs lies in their fresh, vibrant appeal and delightful textural contrast. Juicy strawberries and plump blueberries burst with natural sweetness, while the soft, pillowy mini marshmallows add a surprising, delicate chewiness. They’re visually stunning, creating an edible rainbow that brightens any spread – a true feast for the eyes before delighting the palate. Inspired by the colorful displays at the Union Square Greenmarket, I always seek out the freshest seasonal berries, ensuring that each skewer is packed with peak flavor. The simplicity of assembly belies the elegant presentation, making them a perfect complement to a sophisticated yet fun event, much like the curated collections of whimsical tea party decor I often admire.

What sets these Red, White and Blue Fruit Kabobs apart is their sheer elegance derived from minimal effort. Unlike elaborate French patisseries, which I adore mastering in my professional kitchen, this recipe focuses on showcasing natural ingredients with a touch of whimsy. It’s a quick, no-cook solution that lets the fresh flavors shine. I’ll show you exactly how to achieve that perfect visual appeal, ensuring your kabobs look as good as they taste. Plus, I’ll share a pro tip on keeping your fruit pristine and highlight a common mistake people make that can lead to soggy skewers – because even simple recipes deserve a chef’s touch for perfection.

Why This Red, White and Blue Fruit Kabobs Recipe Is the Best

The flavor secret here is really no secret at all—it’s simply using the freshest, ripest ingredients. My Moroccan upbringing taught me the value of quality produce, and in NYC, I’m lucky to have access to incredible fresh berries. Combining juicy strawberries, sweet blueberries, and soft marshmallows creates a delightful interplay of textures and natural sweetness, making these kabobs a refreshing treat that appeals to all ages. It’s a simple elegance, much like a perfectly brewed Moroccan mint tea, where the quality of the ingredients truly shines.

Achieving the perfected texture in these kabobs is about balance and careful selection. The strawberries provide a firm-yet-yielding bite, blueberries offer a small pop, and the mini marshmallows introduce a light, fluffy contrast. The key is ensuring each component is in its prime, creating a harmonious mouthfeel with every bite. It’s a technique in itself to allow each individual element to contribute to the overall experience without overpowering the others, much like balancing flavors in a classic French sauce.

This recipe is truly foolproof and fast, making it ideal for everything from spontaneous backyard get-togethers to a carefully curated Etsy tea party with vintage tea party decorations. With zero cook time and minimal prep, you can whip these up in minutes, leaving you more time to enjoy your guests (or browse more tea party supplies!). It’s perfect for beginners, requires no special equipment, and delivers impressive results every time, proving that delicious and beautiful food doesn’t have to be complicated.

Etsy Tea Party Ingredients

For these delightful kabobs, sourcing quality ingredients is key. I often head to my local NYC farmers market, especially during berry season, to ensure I get the sweetest, most vibrant fruits. My mother always said, “the best dish starts with the best ingredients,” and that wisdom holds true even for something as simple and charming as these. Look for berries that are firm, brightly colored, and free from blemishes. This recipe uses simple, accessible components, perfect for a quaint Etsy tea party spread.

Ingredients List

  • 1 pint strawberries
  • 1 pint blueberries
  • 1 cup mini marshmallows
  • 24 bamboo skewers

Ingredient Spotlight

Strawberries: These provide a sweet, slightly tart counterpoint and the essential red color. When selecting, look for a deep red color, glossy skin, and fresh-looking green caps. Avoid any with white patches or mold. If fresh aren’t available, thawed frozen strawberries can work in a pinch, but ensure they are fully drained to prevent excess moisture. The texture will be softer, more jam-like, which is fine for visual appeal but less firm on the skewer.

Blueberries: Delivering another pop of color and a burst of juicy sweetness, blueberries are crucial for the “blue” in our patriotic theme. Choose firm, plump berries with a dusty bloom, which indicates freshness. Soft or shriveled berries are past their prime. Fresh is always best here; frozen blueberries tend to bleed color and become too soft when thawed, making them difficult to skewer without mess.

Mini Marshmallows: These fluffy little clouds offer a delightful textural contrast and the “white” element. They’re sweet, soft, and easy to skewer, making them perfect for this recipe. While standard marshmallows are ideal, if you prefer a less sweet option, you could consider small pieces of fresh mozzarella or even a firm white cheese, though that would significantly change the flavor profile from a dessert to a savory snack.

Original IngredientBest SubstitutionFlavor / Texture Impact
StrawberriesRaspberries (for red) / Cubed WatermelonRaspberries are tarter and more delicate; watermelon provides a different texture, very refreshing.
BlueberriesBlackberries (for blue-ish) / Purple GrapesBlackberries are larger and have tiny seeds; grapes are sweeter and firmer.
Mini MarshmallowsCubed Monterey Jack cheese / Thick coconut flakesCheese offers a savory contrast, making it less of a dessert. Coconut flakes add chewy texture and tropical flavor.

Pin on Etsy Wyllie Tea Party

How to Make Red, White and Blue Fruit Kabobs — Step-by-Step

Making these delightful fruit kabobs is incredibly straightforward, a testament to how simple yet elegant food can be. Just follow these steps, and you’ll have a festive treat ready in no time!

Step 1: Prepare the Berries

Begin by gently washing your strawberries and blueberries under cool running water. It’s important to do this thoroughly but carefully, especially with strawberries, to avoid bruising. After washing, spread them out on a clean kitchen towel or paper towels to dry completely. Excess moisture can make the kabobs soggy and harder to handle. This step is crucial for maintaining the fresh integrity of the fruit and is a chef’s habit I picked up early on in Paris.

💡 mia’s Pro Tip: For perfectly dry berries, after washing, gently roll them in a clean kitchen towel. For blueberries especially, a salad spinner lined with paper towels works wonders to remove all surface moisture without damaging the delicate skins.

Step 2: Cut Strawberries

Hull the strawberries by carefully removing the green tops. Then, cut each strawberry into pieces that are roughly the same size as your mini marshmallows and blueberries. Uniformity in size is key for an aesthetically pleasing kabob and ensures an even bite. This precision is a habit from my culinary training, making simple dishes look exquisite for your Etsy tea party.

⚠️ Common Mistake to Avoid: Don’t cut the strawberries too small or too large compared to the other ingredients. If they’re too small, they’ll look lost; too large, and they’ll dominate the skewer, disrupting the visual balance and making them difficult to eat gracefully.

Step 3: Assemble Kabobs

Now, it’s time to assemble! Take a bamboo skewer and thread a piece of strawberry, followed by a mini marshmallow, and then a blueberry. Repeat this pattern, ensuring the “seed” side of the strawberry faces inward or to one side for the best visual presentation. This attention to detail makes all the difference, transforming simple ingredients into whimsical tea party decor. Continue until your skewer is full, usually about two or three repetitions of the pattern.

💡 mia’s Pro Tip: If using fresh, soft strawberries, consider chilling them slightly before cutting and skewering. This makes them firmer and easier to handle without squishing, especially when threading them onto the bamboo skewers for your elegant tea party decorations.

Step 4: Chill and Serve

Once all your kabobs are assembled, arrange them neatly on a serving platter. Cover the platter tightly with plastic wrap and store it in the refrigerator until you’re ready to serve. For the freshest taste and best texture, these fruit kabobs are best enjoyed within 24 hours of assembly. Chilling also ensures they are delightfully refreshing, especially on a warm day.

⚠️ Common Mistake to Avoid: Do not store fruit kabobs uncovered in the refrigerator. Open exposure will cause the fruit to dry out, lose its vibrant color, and absorb odors from other foods, diminishing their freshness and appeal for your special occasion.

StepActionDurationKey Visual Cue
1Wash and dry berries5 minutesBerries are clean and visibly dry, no droplets.
2Cut strawberries5 minutesStrawberry pieces are uniform, similar to marshmallows/blueberries.
3Assemble kabobs5 minutesSkewers have an even pattern of red, white, and blue.
4Chill and serveMinimum 30 minutesKabobs are firm and cool to the touch.

Serving & Presentation

Serving these Red, White and Blue Fruit Kabobs is where their simple charm truly shines. Arrange them fanned out on a clean, elegant white platter, allowing the vibrant colors to pop against the neutral background. For an extra touch of Parisian fête elegance, consider a light dusting of powdered sugar just before serving, or a tiny sprig of fresh mint on the platter for a burst of green. They’re perfect for a Fourth of July celebration, a whimsical bridal shower, or as a fresh addition to your Etsy tea party with tea party decorations.

If you’re hosting a more elaborate gathering, pair these kabobs with a light, creamy dip. A simple Greek yogurt sweetened with a touch of honey and vanilla, or a whipped cream cheese frosting, would complement the fruit beautifully. For a sophisticated touch, I sometimes infuse the yogurt with a hint of orange blossom water, a nod to my Moroccan heritage, which adds an unexpected aromatic depth. This also allows guests to customize their experience, adding another layer of fun to your vintage tea party.

These kabobs are incredibly versatile and can be part of many courses. As a light dessert, they’re unbeatable. For brunch, they’re a refreshing counterpoint to richer dishes. And as a colorful snack, they’re a healthy and appealing option that can perk up any table. Their ease of handling makes them ideal for mingling, ensuring your guests can enjoy delicious bites without any fuss, perfect for a chic NYC rooftop party or a casual backyard BBQ.

Pairing TypeSuggestionsWhy It Works
Side DishMini Quiches, Cucumber SandwichesOffers a savory balance to the sweet fruit, perfect for a full tea party spread.
Sauce / DipHoney-Vanilla Greek Yogurt Dip, Mascarpone CreamAdds a creamy texture and extra sweetness or tang, enhancing the fruit flavors.
BeverageIced Mint Tea, Sparkling Lemonade, RoséRefreshing drinks that complement the fruit’s sweetness without overpowering it.
GarnishFresh Mint Leaves, Powdered Sugar, Edible FlowersAdds aromatic freshness, elegance, and visual appeal, elevating the presentation.

Make-Ahead, Storage & Reheating

In my bustling NYC life, ‘make-ahead’ is a golden rule for entertaining, and these Red, White and Blue Fruit Kabobs perform beautifully in this regard. This recipe is fantastic for anyone looking to lighten their load on the day of their Etsy tea party or picnic, allowing you to focus on other details, like those charming tea party decorations. Preparing them in advance keeps the stress at bay and ensures you can enjoy your own event.

MethodContainerDurationReheating Tip
RefrigeratorAirtight container or platter with plastic wrapUp to 24 hoursNo reheating needed; serve chilled directly from the fridge for optimal freshness.
FreezerNot RecommendedN/AFreezing fruit kabobs causes fruit to become mushy and marshmallows to harden.
Make-AheadAirtight container, layer with paper towels to absorb excess moisture if desiredPrepare up to 8-12 hours in advanceAssemble fruits and marshmallows, cover tightly, and refrigerate. Serve as is.

While these fruit kabobs are best enjoyed fresh, I’ve found you can successfully assemble them up to 8-12 hours in advance without any significant loss of quality, provided they are stored properly. Just make sure your berries are as dry as possible after washing to prevent them from becoming watery. This little detail can make all the difference in maintaining their beautiful appearance and firm texture. I’ve often prepped them the morning of a busy event, freeing up my afternoon for other preparations, which is a life-saver in a small NYC kitchen.

It’s important to note that these kabobs are truly a ‘serve cold’ item. Attempting to freeze them or ‘reheat’ them in any way would diminish their appeal significantly. The fruit would become mushy, and the marshmallows would lose their soft, pillowy texture. So, embrace their fresh, chilled nature – that’s when they’re at their absolute best, offering a crisp, refreshing bite that perfectly complements any whimsical tea party decor.

Variations & Easy Swaps

VariationKey ChangeBest ForDifficulty Impact
Tropical Tea Party KabobsSwap berries for pineapple, kiwi, and mango cubes.Summer gatherings, luau themes, or a burst of exotic flavor.No change.
Dairy-Free DelightReplace marshmallows with firm banana slices dipped in lemon juice.Guests with specific dietary restrictions or a desire for natural sweetness.Slight increase (banana prep).
Autumn Harvest SkewersUse apple cubes, cheese cubes (e.g., cheddar, colby), and grapes.Fall parties, harvest festivals, or a more savory-sweet option.No change.

Tropical Tea Party Kabobs

For a taste of the exotic, swap out the patriotic berries for vibrant tropical fruits. Think golden pineapple chunks, bright green kiwi slices, and succulent mango cubes. This variation immediately transports you to a sunny beach party, even if you’re enjoying it at a sophisticated vintage tea party right here in NYC. A hint of lime zest perhaps, for that extra zing, reminiscent of the vibrant street food spices I miss from Morocco.

Dairy-Free Delight

If you’re catering to guests with dietary restrictions or simply prefer a lighter, naturally sweet option, you can easily make these kabobs dairy-free. Replace the marshmallows with firm banana slices (dipped quickly in lemon juice to prevent browning) or even small cubes of dairy-free “cheese” if you’re going for a savory twist. The key is to maintain a contrasting texture and a neutral color for that lovely visual balance, ensuring everyone can enjoy your thoughtful tea party supplies.

Autumn Harvest Skewers

Embrace the flavors of fall by transforming these into Autumn Harvest Skewers. Substitute the berries with crisp apple chunks (Granny Smith for a tart bite, honeycrisp for sweetness), cubes of sharp cheddar or colby cheese, and beautiful red or green grapes. This creates a more savory-sweet profile, perfect for a cozy gathering with whimsical tea party decor as the leaves change colors outside. Like a hearty French farm platter, it’s rustic yet elegant.

What is a Wyllie tea party and what are its traditional elements?

A “Wyllie tea party” typically refers to the whimsical, often vintage-inspired aesthetic popularized by artists like Ann Wyllie, whose quaint and charming illustrations have graced many designs. This type of tea party emphasizes delicate details, pastel colors, floral themes, and a sense of nostalgic elegance. Traditional elements often include mismatched china, lace tablecloths, petite sandwiches, miniature pastries, and of course, a variety of teas. The focus is on creating an enchanting, almost storybook-like atmosphere where guests can indulge in both delightful treats and conversation. It’s all about creating an experience that feels special and a little bit magical, much like stepping back in time to a simpler, more refined era.

How do you plan and set up a proper tea party like the ones on Etsy?

Planning a vintage tea party with an Etsy tea party vibe starts with a clear vision: think charming, detailed, and slightly rustic or whimsical. First, establish your color palette – pastels, muted florals, or even vibrant jewel tones. Next, focus on the table setting: layers of linen, a variety of vintage plates, teacups, and saucers (they don’t have to match perfectly, which adds to the charm!). Consider DIY tea party decorations like handmade banners or floral centerpieces. Food-wise, offer a mix of savory (finger sandwiches) and sweet (scones, petit fours, fruit tarts). Don’t forget the tea itself – a selection of black, green, and herbal options. Etsy is a treasure trove for unique tea party supplies like custom invitations, small favors, and even delicate serving pieces to perfectly complete the look.

What are some easy recipes to serve at a vintage-inspired tea party?

For a vintage tea party, you want recipes that are elegant, easy to eat, and can often be prepared in advance. My Red, White and Blue Fruit Kabobs are perfect – colorful, refreshing, and no-bake. Other favorites include classic cucumber sandwiches (crusts removed, of course!), mini quiches, and shortbread cookies. Scones with clotted cream and jam are a must, and while they sound fancy, they’re quite simple to make. Don’t forget small fruit tarts or lemon bars, which add a touch of sophistication without requiring complex techniques. These selections ensure a delightful spread while allowing you plenty of time to set up your whimsical tea party decor and enjoy your guests.

Where can I find printable tea party invitations and decorations similar to the Pin on Etsy?

Etsy itself is an incredible resource for tea party decorations and printables! Many independent artists and designers create stunning digital downloads for Etsy tea party themes. Search for “printable vintage tea party invitations,” “whimsical tea party decor download,” or “floral tea party kit.” You’ll find a vast array of designs, from delicate watercolor florals to charming antique-inspired patterns. Websites like Creative Market and even Pinterest (which often links directly to creative shops) are also great places to discover unique, downloadable graphic assets that can be customized for your event. This allows you to achieve a cohesive, beautiful aesthetic without breaking the bank, perfectly complementing your tea party supplies.

How much tea and food should I prepare for a tea party?

Planning quantities for a tea party depends on the time of day and whether it’s the main meal or a light snack. Generally, for a standard afternoon tea serving as a light meal, aim for about 3-4 finger sandwiches, 1 scone, and 2-3 small desserts (like my fruit kabobs or mini pastries) per person. For tea, anticipate 2-3 cups per person, offering a few different varieties. It’s always better to have a little more than not enough, especially since many tea party items can be scaled easily or prepped in advance. My Moroccan grandmother always over-prepared, believing abundance was a sign of hospitality, and I tend to follow suit, especially for events where guests will be lingering.

What kind of tea should I serve at a tea party?

A well-rounded tea party should offer a selection to suit different tastes. I always recommend a classic black tea, like Earl Grey or English Breakfast, as a foundation. For those who prefer something lighter, a green tea (perhaps a delicate Jasmine Green) or a robust oolong is a lovely choice. Then, for a touch of whimsy and variety, include a caffeine-free herbal infusion like peppermint, chamomile, or a fruit-infused blend. Offering both caffeinated and decaffeinated options ensures everyone can partake. Remember to have milk, sugar, and lemon slices readily available, as guests often have strong preferences. Proper tea preparation is like French sauce — it needs attention to detail for the best results.

What are some creative ways to display tea party food?

Creative display is key to a whimsical tea party decor! Think vertically with tiered serving stands for sandwiches, scones, and small desserts. This adds elegance and saves table space. Use pretty cake stands for larger items or bowls of my fruit kabobs. Don’t be afraid to mix and match platters of different sizes and materials – ceramic, wood, glass – to create visual interest. Small labels for each food item, perhaps handwritten or printed in a charming font, are a thoughtful touch. Fresh flowers or sprigs of herbs like mint or rosemary can be strategically placed between dishes to add color and aroma, making the spread look even more inviting. NYC’s diverse bakeries always inspire me to think creatively about presentation.

Are Red, White and Blue Fruit Kabobs healthy for a tea party?

Absolutely! My Red, White and Blue Fruit Kabobs are an excellent, healthy option for any tea party, especially compared to many traditional sugary desserts. They are packed with fresh fruit, providing essential vitamins, antioxidants, and natural sweetness. The mini marshmallows offer a touch of indulgence without being overly caloric. They provide a refreshing and light contrast to richer tea party fare. These kabobs are a smart way to offer something delicious and visually appealing while keeping health-conscious guests happy. I believe in balanced eating, and these kabobs perfectly fit into that philosophy, offering guilt-free enjoyment for any occasion.

Share Your Version!

I truly hope these Red, White and Blue Fruit Kabobs add a touch of simple joy and patriotic flair to your next gathering or Etsy tea party! There’s nothing I love more than seeing how you bring my recipes to life in your own kitchens.

Please leave a star rating and comment below to let me know how they turned out for you. Did you try a unique fruit combination? Did you use them as part of your vintage tea party setup? Share a photo of your beautiful creations on Instagram or Pinterest and tag @exorecipes – I’d be absolutely delighted to see your whimsical tea party decor alongside these yummy kabobs! What’s your favorite easy, no-bake dessert to serve at a gathering?

From my NYC kitchen to yours — I hope this recipe brings as much warmth to your table as it does to mine. — mia 🧡

📌

Love This Recipe? Save It to Pinterest!

If you enjoyed this Pin on Etsy Wyllie Tea Party recipe, don’t let it get lost in your browser tabs! 😄 Pin it now so you can find it again anytime — and explore hundreds more tried-and-tested recipes waiting for you on my Pinterest boards.

👉 Follow mia on Pinterest @chefrecipes2

📌 Pin this recipe · 🔁 Re-pin your favorites · 💬 Tag me when you make it — I love seeing your creations!

Print

clock clock iconcutlery cutlery iconflag flag iconfolder folder iconinstagram instagram iconpinterest pinterest iconfacebook facebook iconprint print iconsquares squares iconheart heart iconheart solid heart solid icon

Red, White and Blue Fruit Kabobs

  • Author: Chef Mia

Description

Easy, fun, patriotic dessert! These Red, White and Blue Fruit Kabobs are made with strawberries, blueberries and mini marshmallows for an easy dessert.


Ingredients

Scale
  • 1 pint strawberries
  • 1 pint blueberries
  • 1 cup mini marshmallows
  • 24 bamboo skewers

Instructions

  1. Wash and dry the berries.
  2. Cut strawberries into small pieces about the same size as the marshmallows and the blueberries.
  3. Take the skewer and thread a strawberry, marshmallow then a blueberry onto it. Make sure the seed side of the strawberry is facing one way for best presentation.
  4. Cover and store in the refrigerator until ready to serve. Fruit kabobs are best enjoyed within 24 hours.


Pin on Etsy Wyllie Tea Party

ph">For more delicious inspiration, follow me on Pinterest!