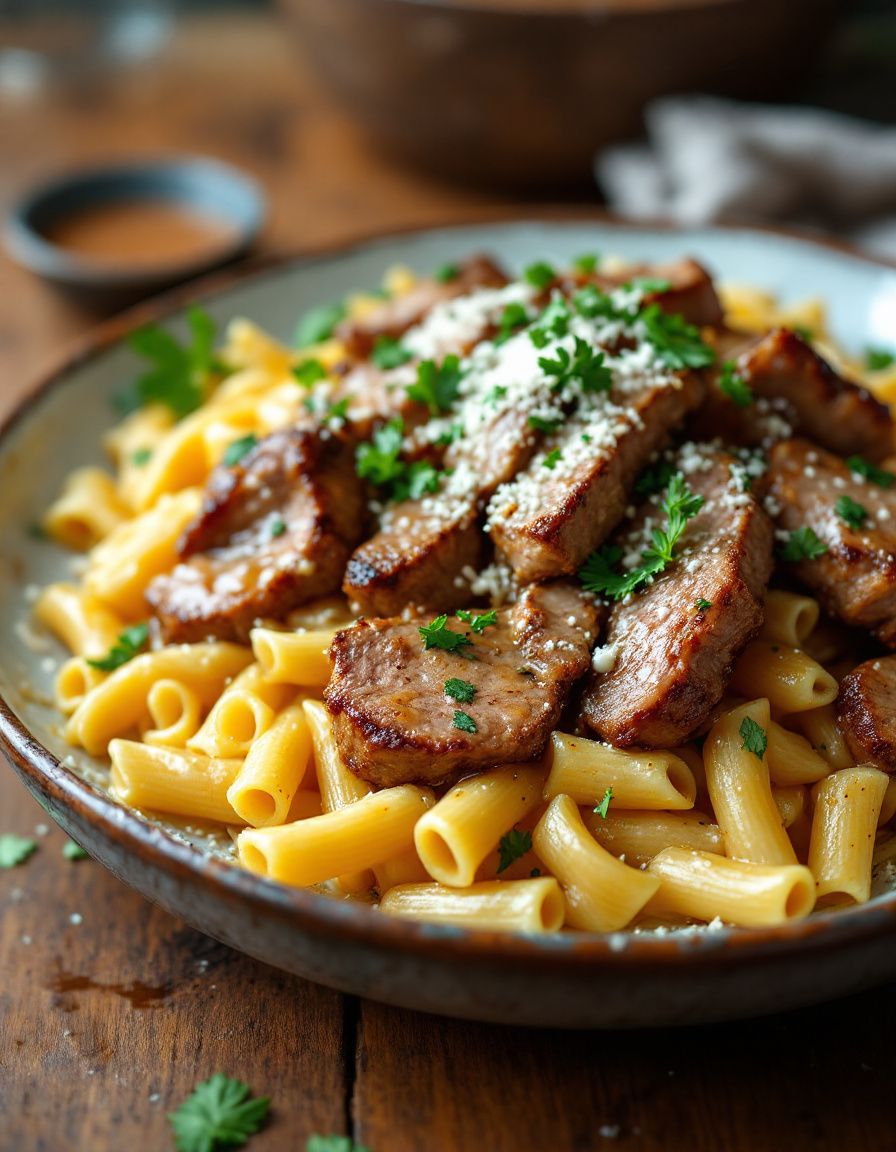
Cheesy Garlic Bread Spaghetti Sub Buns

Are you ready to elevate your sandwich game and become the talk of the town? Get ready to embark on a culinary adventure that will transform your kitchen into a gourmet sub shop! In this comprehensive guide, we’ll unveil the secrets to creating mouthwatering spaghetti sub buns that will have your friends and family begging for more. So, roll up your sleeves, sharpen your knives, and let’s dive into the art of crafting the perfect spaghetti sub bun!

Introduction:

Spaghetti sub buns are the ultimate comfort food mashup, combining the hearty goodness of pasta with the convenience of a sandwich. But let’s face it – not all spaghetti subs are created equal. The difference between a mediocre sub and a mind-blowing one lies in the details. That’s where we come in! We’ve consulted with top chefs, food scientists, and sandwich enthusiasts to bring you the ultimate step-by-step guide to mastering the art of spaghetti sub buns. Whether you’re a seasoned home cook or a kitchen newbie, this guide will help you create sub shop-worthy sandwiches in the comfort of your own home.

Step 1: Choose Your Bread Wisely

The foundation of any great sandwich is the bread, and spaghetti sub buns are no exception. Here’s what you need to know:

  1. Opt for a sturdy roll: Italian or French bread rolls work best, as they can hold up to the weight and moisture of the spaghetti without falling apart.
  2. Consider texture: Look for bread with a slightly crusty exterior and a soft, pillowy interior. This contrast in textures will elevate your sub-eating experience.
  3. Size matters: Choose rolls that are 6-8 inches long for individual portions, or go for a longer loaf if you’re making a party-sized sub.
  4. Freshness is key: Always use fresh bread for the best flavor and texture. If you’re using day-old bread, consider toasting it lightly to revive its texture.

Pro tip: If you’re feeling adventurous, try making your own sub rolls at home. Homemade bread can take your spaghetti sub to the next level!

Step 2: Perfect Your Pasta Game

The star of the show is, of course, the spaghetti. Here’s how to nail it:

  1. Choose the right pasta: While traditional spaghetti works well, consider using bucatini for an extra-sturdy noodle that can hold up to sauces and fillings.
  2. Master the al dente: Cook your pasta just until it’s al dente – firm to the bite. Overcooked pasta will turn mushy in your sub.
  3. Season the water: Don’t forget to salt your pasta water generously. This is your chance to infuse flavor into the noodles themselves.
  4. Save some pasta water: Reserve about 1/2 cup of pasta cooking water before draining. This starchy liquid can help bind your sauce to the noodles.

Step 3: Sauce It Up

A great sauce can make or break your spaghetti sub. Here are some tips for sauce success:

  1. Balance is key: Aim for a sauce that’s flavorful but not too runny. You want to avoid a soggy sub at all costs!
  2. Classic marinara: For a traditional spaghetti sub, you can’t go wrong with a well-made marinara sauce. Use San Marzano tomatoes for the best flavor.
  3. Get creative: Don’t be afraid to experiment with different sauces like creamy Alfredo, spicy arrabbiata, or even a tangy pesto.
  4. Make it from scratch: While store-bought sauces can work in a pinch, homemade sauces will take your sub to the next level.

Step 4: Load Up on Toppings

Now it’s time to add some extra flavor and texture to your spaghetti sub. Here are some crowd-pleasing topping ideas:

  1. Meatballs: Classic Italian meatballs are a match made in heaven for spaghetti subs.
  2. Grilled chicken: For a lighter option, try sliced grilled chicken breast.
  3. Sautéed veggies: Bell peppers, onions, and mushrooms add color and nutrition.
  4. Fresh herbs: Basil, parsley, or oregano can brighten up your sub.
  5. Cheese, please: Mozzarella, Parmesan, or provolone are all excellent choices.

Remember, less is often more when it comes to toppings. Don’t overload your sub, or you’ll risk losing the delicate balance of flavors.

Step 5: Assembly Is an Art Form

Now that you have all your components ready, it’s time to put it all together:

  1. Toast the bread: Lightly toasting your sub roll will help prevent sogginess and add a delightful crunch.
  2. Create a barrier: Spread a thin layer of olive oil or butter on the inside of the roll to create a moisture barrier.
  3. Layer strategically: Start with a bed of spaghetti, followed by your sauce and toppings. This order helps distribute flavors evenly.
  4. Don’t overstuff: It’s tempting to pile on the ingredients, but remember that you still need to be able to close and eat your sub!
  5. Secure it: Use toothpicks to hold your sub together if needed, especially if you’re making a larger, party-sized version.

Step 6: The Finishing Touches

These final steps can elevate your spaghetti sub from good to unforgettable:

  1. Garlic butter brush: Brush the outside of your sub with garlic-infused melted butter for extra flavor and a beautiful sheen.
  2. Cheese crust: Sprinkle some grated Parmesan on top of your sub and broil it for a minute or two to create a crispy, cheesy crust.
  3. Fresh garnish: A sprinkle of fresh herbs or a drizzle of high-quality olive oil just before serving can add a burst of freshness.

Step 7: Serve and Enjoy

Presentation is the final piece of the puzzle:

  1. Let it rest: Allow your spaghetti sub to rest for a few minutes before cutting. This helps the flavors meld and makes it easier to slice.
  2. Slice with care: Use a sharp, serrated knife to cut your sub without squishing it.
  3. Serve immediately: Spaghetti subs are best enjoyed fresh and warm.
  4. Don’t forget the sides: Pair your sub with a crisp salad, crunchy chips, or some tangy pickles to complete the meal.

Frequently Asked Questions:

Q: Can I make spaghetti sub buns ahead of time? A: While it’s best to assemble spaghetti subs just before serving, you can prepare the components in advance. Cook the pasta, make the sauce, and prep your toppings ahead of time. Store everything separately in the refrigerator, then assemble and heat when you’re ready to eat.

Q: How do I prevent my spaghetti sub from getting soggy? A: Toasting the bread, creating a moisture barrier with oil or butter, and not oversaucing are key to preventing sogginess. Also, consider serving the sauce on the side for dipping if you’re particularly concerned about soggy bread.

Q: What’s the best way to reheat leftover spaghetti sub buns? A: To reheat, wrap the sub in foil and warm it in a 350°F (175°C) oven for about 10-15 minutes. This method helps maintain the bread’s texture better than microwaving.

Q: Can I make a vegetarian or vegan version of spaghetti sub buns? A: Absolutely! Use plant-based meatballs or load up on grilled vegetables for a delicious vegetarian version. For a vegan option, skip the cheese or use a dairy-free alternative.

Q: How long can I store leftover spaghetti sub buns? A: Leftover spaghetti subs can be stored in the refrigerator for up to 2 days. However, the quality may decline, and the bread may become soggy over time.

Conclusion:

Congratulations! You’ve now unlocked the secrets to creating the ultimate spaghetti sub buns. By following these seven game-changing steps, you’ll be well on your way to impressing friends and family with your culinary skills. Remember, practice makes perfect, so don’t be afraid to experiment with different combinations of sauces, toppings, and breads to find your signature spaghetti sub style.

The beauty of spaghetti sub buns lies in their versatility and ability to bring people together. Whether you’re hosting a game day party, planning a casual family dinner, or just treating yourself to a comforting meal, these subs are sure to hit the spot. So, go ahead and give these techniques a try – your taste buds (and grateful dinner guests) will thank you!

As you embark on your spaghetti sub journey, keep in mind that the most important ingredient is love. Cook with passion, share with generosity, and most importantly, enjoy every delicious bite. Here’s to many mouthwatering spaghetti sub adventures in your future!

RECIPE :

🍝🥖 It’s Time to Spice Up Your Spaghetti Night! 🥖🍝

Try something new with this fun and delicious recipe for Spaghetti Sub Buns! It’s a fun twist on two classics—spaghetti and garlic bread. Your family and friends will surely love it! 🍅🧄

Cheesy Garlic Bread Spaghetti Sub Buns:

🍕 Ingredients:

  • Spaghetti
  • Marinara sauce (or your favorite pasta sauce)
  • Ground beef (optional)
  • Parmesan cheese, grated
  • Mozzarella cheese, shredded
  • Pizza dough (fresh or store-bought)
  • Butter, softened
  • Garlic powder
  • Italian seasoning

🍴 Instructions:

  1. 🍝 Cook spaghetti according to the package instructions. Drain and set aside.
  2. 🍳 If using ground beef, cook and brown it in a pan. Drain the excess grease.
  3. 🍅 In a bowl, combine the cooked spaghetti, ground beef (if using), marinara sauce, and Parmesan cheese. Mix well.
  4. 🥖 Unroll the pizza dough and cut it into rectangular pieces, about the size of a sub bun.
  5. 🧄 Spread softened butter on each piece of dough and sprinkle with garlic powder and Italian seasoning.
  6. 🍝 Spoon the spaghetti mixture onto one half of each dough rectangle, leaving a small border. Sprinkle mozzarella cheese on top of the spaghetti.
  7. 🥙 Fold the other half of the dough over the filling and press the edges together to seal.
  8. 🍕 Place the sub buns on a baking sheet and bake in a preheated oven at 375°F for about 15-20 minutes, or until the dough is golden brown and cooked through.
  9. 🍴 Let the sub buns cool slightly before serving.

🍷 Pair it with a side salad and enjoy a delicious, comforting meal! This recipe is perfect for a fun family dinner or a get-together with friends.

Share your creations and tag #SpaghettiSubBuns #GarlicBreadGoals #PastaLove for a chance to be featured! 🍝🥖

Happy cooking and bon appétit! 🍅🧄🍷

Homemade Corn Dogs: A Delightful Treat for All Ages

Imagine biting into a Homemade Corn Dog 🌭, where the crispy, golden crust meets the juicy, tender sausage in a symphony of flavors and textures. This recipe isn’t just about recreating a fairground classic at home; it’s about elevating it with a touch of gourmet flair. The secret? A pinch of smoked paprika in the batter, adding a subtle smokiness that complements the sweetness of the cornmeal and the savoriness of the sausage. This ingredient, though small, makes a world of difference, transforming a simple meal into an unforgettable experience. Whether you’re reliving childhood memories or making new ones, these corn dogs are more than just food; they’re a celebration of the simple joys in life. 🎉

Why You’ll Love These Homemade Corn Dogs

Nothing beats the classic taste of corn dogs, especially when made right at home. These Homemade Corn Dogs bring the nostalgic flavor of the fair straight to your kitchen. Crispy on the outside and perfectly juicy on the inside, they are a surefire hit for kids and adults alike. Whether you’re preparing for a family gathering, a fun dinner, or just craving something indulgent, this recipe is easy to follow and even easier to enjoy. Read on to discover how you can recreate this beloved treat at home.

Ingredients for Homemade Corn Dogs

To make these delicious Homemade Corn Dogs, you’ll need the following ingredients:

  • 1 egg, lightly beaten: Helps bind the batter and provides a rich texture.
  • ¾ cup yellow cornmeal: Gives the batter its classic cornbread flavor and texture.
  • 12 hot dogs: Choose your favorite brand of hot dogs for the filling.
  • ¾ cup all-purpose flour: Helps to thicken the batter and create a smooth coating.
  • 2 teaspoons vegetable oil: Keeps the batter moist and flavorful.
  • 1 tablespoon sugar: Adds a hint of sweetness to the batter, balancing the savory flavors.
  • ¾ cup buttermilk: Adds a tangy flavor and ensures a tender, moist batter.
  • ¼ teaspoon salt: Enhances all the other flavors in the batter.
  • 2 tablespoons honey: Adds a slight sweetness and helps the batter brown nicely.
  • 1 ½ teaspoons baking powder: Helps the batter rise and become fluffy.
  • 2 quarts oil, for frying: Use a high-smoke-point oil like vegetable oil for frying the corn dogs to perfection.
  • 12 wooden skewers: Used to hold the hot dogs, making them easy to dip and fry.

Instructions for Making Homemade Corn Dogs

Follow these detailed steps to create the perfect Homemade Corn Dogs. Each step is designed to ensure a crispy, golden-brown exterior with a juicy, flavorful hot dog inside.

Step 1: Heat the Oil

In a large pot, heat the oil on the stove until it reaches 350°F (175°C). Maintaining the correct oil temperature is crucial for achieving that perfect crispy texture. Use a kitchen thermometer to monitor the oil temperature, and adjust the heat as needed to keep it steady at 350°F.

Step 2: Prepare Dry Ingredients

In a large bowl, mix together the sugar, flour, salt, baking powder, and cornmeal. These dry ingredients form the base of your batter, providing the right balance of sweetness, saltiness, and texture. Stir well to ensure everything is evenly distributed.

Step 3: Combine Wet and Dry Ingredients

Blend the egg, buttermilk, honey, and vegetable oil into the dry ingredients. Mix until smooth and well-combined, forming a thick batter. Let the batter rest for 10 minutes. This rest period allows the ingredients to meld together and ensures a better consistency for coating the hot dogs.

Step 4: Skewer the Hot Dogs

Run a wooden skewer through each hot dog, pushing it in until the hot dog is securely on the skewer. The skewer makes it easy to dip the hot dogs into the batter and ensures they stay intact during frying.

Step 5: Coat the Hot Dogs

Dip each skewered hot dog into the batter, turning it to coat evenly. Make sure the hot dogs are fully covered with a thick layer of batter. Let any excess batter drip off before frying to avoid splattering and ensure even cooking.

Step 6: Fry the Corn Dogs

Carefully place the battered hot dogs into the heated oil. Fry them in batches to avoid overcrowding the pot. Cook for 2-3 minutes or until golden brown, turning occasionally to ensure even browning on all sides. Adjust the heat as needed to maintain the oil temperature.

Step 7: Drain and Serve

Remove the fried corn dogs from the oil using a slotted spoon, and place them on a paper towel-lined plate to drain any excess oil. This step helps keep the corn dogs crispy and removes any excess grease. Serve them hot with your favorite condiments like ketchup, mustard, or honey mustard.

Serving and Storage Tips for Homemade Corn Dogs

Once your Homemade Corn Dogs are perfectly fried to a golden brown, it’s time to think about the best ways to serve and store them. Here are some tips to ensure you get the most out of this delightful treat:

Serving Suggestions

  • Serve Hot: Corn dogs are best enjoyed hot and fresh out of the fryer. The crispy batter and juicy hot dog inside make for a satisfying bite.
  • Condiments: Pair your corn dogs with classic condiments like ketchup, mustard, and honey mustard. For a gourmet twist, try dipping them in spicy aioli, barbecue sauce, or a tangy cheese dip.
  • Side Dishes: Complement your corn dogs with sides like French fries, coleslaw, or a fresh green salad. These sides add variety to your meal and balance the richness of the corn dogs.

Storage Tips

  • Refrigeration: If you have leftover corn dogs, store them in an airtight container in the refrigerator. They will keep well for up to 3 days.
  • Reheating: To reheat, place the corn dogs in a preheated oven at 350°F (175°C) for about 10 minutes or until heated through. This method helps maintain their crispiness. Avoid using a microwave, as it can make the batter soggy.
  • Freezing: For longer storage, you can freeze the corn dogs. Place them on a baking sheet lined with parchment paper and freeze until solid. Transfer the frozen corn dogs to a resealable plastic bag and store in the freezer for up to 2 months. Reheat from frozen in a preheated oven for 15-20 minutes.

Helpful Notes and Recipe Variations

Here are some additional tips and variations to customize your Homemade Corn Dogs:

  • Spice it Up: Add a pinch of cayenne pepper or paprika to the batter for a spicy kick. You can also mix some finely chopped jalapeños into the batter for extra heat.
  • Cheese Lovers: Insert a slice of cheese alongside the hot dog on the skewer before dipping it into the batter. The melted cheese inside adds a delightful surprise.
  • Gluten-Free Option: Substitute the all-purpose flour with a gluten-free flour blend to make this recipe suitable for those with gluten sensitivities.
  • Vegetarian Version: Use vegetarian or vegan hot dogs to make this recipe vegetarian-friendly. Ensure the batter ingredients align with your dietary preferences.

Final Thoughts

According to renowned chef Jamie Oliver, “Street food is all about fun and flavor.” These Homemade Corn Dogs embody that spirit perfectly, bringing joy and deliciousness to any occasion. Whether you’re hosting a party, looking for a fun dinner idea, or simply craving a nostalgic treat, these corn dogs are sure to impress and satisfy.

We hope you enjoy making and devouring these Homemade Corn Dogs as much as we do! If you loved this recipe, please share it with your friends and family. Don’t forget to subscribe to our blog for more delicious recipes and cooking tips. Happy cooking!

Deep-Fried Oreos: A Simple Delight with a Crunchy Twist

Introduction

Deep-Fried Oreos have taken the world of sweet treats by storm, combining the beloved chocolate cookie with the indulgent pleasure of deep-frying. This recipe is celebrated for its rustic charm and the sheer simplicity of turning a pantry staple into a carnival-worthy snack. It’s a testament to the joy of cooking and the magic of transforming simple ingredients into something extraordinary.

Ingredients List

  • 10 Oreo cookies
  • 1 cup all-purpose flour
  • 1 tsp baking powder
  • 1/4 tsp salt
  • 3/4 cup milk
  • 1 egg
  • 1 tbsp sugar
  • 2 cups vegetable oil, for frying
  • Powdered sugar, for dusting

Preparation Guide

  1. Mix the Batter: In a bowl, whisk together the flour, baking powder, salt, and sugar. Add the milk and egg to the dry ingredients and mix until a smooth batter forms.
  2. Heat the Oil: In a deep pan, heat the oil to 375°F (190°C). Use a thermometer to ensure the temperature is accurate for the perfect fry.
  3. Dip and Fry: Dip each Oreo into the batter, ensuring it’s completely covered. Carefully place the coated Oreos into the hot oil. Fry for about 2 minutes or until golden brown, flipping once.
  4. Serve: Remove from oil, drain on paper towels, and dust with powdered sugar while still warm.

Tips for the Perfect Crust

  • Batter Thickness: The key to a flaky crust is the consistency of the batter. It should be thick enough to cling to the cookie without dripping but not so thick that it turns doughy.
  • Oil Temperature: Maintaining the correct oil temperature is crucial. Too hot, and the Oreos will burn; too cold, and they’ll absorb excess oil, becoming soggy.
  • Frying Time: Keep an eye on the frying time. A golden brown color is your cue that they’re done; overcooking will compromise the crust’s texture.

Nutrition Information Per Serving

  • Serving Size: 1 Oreo
  • Calories: Approximately 150-200
  • Fat: 10g
  • Carbohydrates: 15g
  • Protein: 2g

Note: Nutrition can vary based on cooking method and specific ingredients used.

Customization Options

  • Batter Variations: Incorporate cocoa powder for a chocolate batter or add a pinch of cinnamon for warmth.
  • Filling Variations: Experiment with different Oreo flavors or sandwich cookies for a unique twist.
  • Toppings: After dusting with powdered sugar, try drizzling with chocolate or caramel sauce for extra decadence.

Notes

  • For an extra crispy crust, let the batter-covered Oreos sit for a minute before frying.
  • Serving immediately is recommended for the best texture and taste.

FAQs

  • Can I bake them instead of frying? While deep-frying gives the best result, you can bake them at 400°F (200°C) for 10 minutes, though the texture will differ.
  • How long do they keep? Best enjoyed fresh, but you can store them at room temperature for up to 2 days in an airtight container. Reheat in an oven for best results.
  • Can I use a pancake mix? Yes, a pancake mix can be a quick alternative for the batter.

Conclusion

Deep-Fried Oreos are a celebration of simplicity and indulgence, proving that great joy can be found in the most straightforward recipes. Whether you’re reminiscing about carnival days or looking for a quick dessert to delight your guests, this recipe promises a deliciously crunchy exterior with a soft, gooey center that’s sure to satisfy your sweet tooth. Embrace the creativity this recipe allows and make each batch uniquely yours.

Print
clock clock iconcutlery cutlery iconflag flag iconfolder folder iconinstagram instagram iconpinterest pinterest iconfacebook facebook iconprint print iconsquares squares iconheart heart iconheart solid heart solid icon

Deep-Fried Oreos

  • Author: Chef Emy
  • Prep Time: 10
  • Cook Time: 15
  • Total Time: 25 minutes
  • Yield: 8 1x

Description

Deep-Fried Oreos have taken the world of sweet treats by storm, combining the beloved chocolate cookie with the indulgent pleasure of deep-frying. This recipe is celebrated for its rustic charm and the sheer simplicity of turning a pantry staple into a carnival-worthy snack. It’s a testament to the joy of cooking and the magic of transforming simple ingredients into something extraordinary.


Ingredients

Scale
  • 10 Oreo cookies
  • 1 cup all-purpose flour
  • 1 tsp baking powder
  • 1/4 tsp salt
  • 3/4 cup milk
  • 1 egg
  • 1 tbsp sugar
  • 2 cups vegetable oil, for frying
  • Powdered sugar, for dusting

Instructions

  1. Mix the Batter: In a bowl, whisk together the flour, baking powder, salt, and sugar. Add the milk and egg to the dry ingredients and mix until a smooth batter forms.
  2. Heat the Oil: In a deep pan, heat the oil to 375°F (190°C). Use a thermometer to ensure the temperature is accurate for the perfect fry.
  3. Dip and Fry: Dip each Oreo into the batter, ensuring it’s completely covered. Carefully place the coated Oreos into the hot oil. Fry for about 2 minutes or until golden brown, flipping once.
  4. Serve: Remove from oil, drain on paper towels, and dust with powdered sugar while still warm.

Notes

Tips for the Perfect Crust

  • Batter Thickness: The key to a flaky crust is the consistency of the batter. It should be thick enough to cling to the cookie without dripping but not so thick that it turns doughy.
  • Oil Temperature: Maintaining the correct oil temperature is crucial. Too hot, and the Oreos will burn; too cold, and they’ll absorb excess oil, becoming soggy.
  • Frying Time: Keep an eye on the frying time. A golden brown color is your cue that they’re done; overcooking will compromise the crust’s texture.

Sausage, Egg & Cream Cheese Hashbrown Casserole

Welcome to the delicious and comforting world of Sausage, Egg, and Cream Cheese Hashbrown Casserole! Whether you’re planning a brunch or looking for a satisfying meal, this casserole is sure to impress with its flavorful combination of sausage, eggs, and creamy cream cheese. But that’s not all – this dish is also incredibly easy to prepare, making it a go-to recipe for any occasion.

Key Takeaways:

  • Combine the classic flavors of sausage, eggs, and cream cheese in a satisfying casserole.
  • This recipe is perfect for brunch or any meal of the day.
  • Preparation is a breeze, making it an ideal choice for busy days.
  • Layer the ingredients and bake until golden brown and fully cooked.
  • Savor the deliciousness and enjoy every bite of this comforting dish.

Ingredients

To make the mouthwatering Sausage, Egg and Cream Cheese Hashbrown Casserole, you will need the following ingredients:

IngredientsQuantity
Large eggs8
Milk2 cups
Breakfast sausage (ground)2 lbs
Cream cheese8 oz
Frozen shredded hash browns4 cups
Shredded Cheddar cheese2 cups
Salt1 tsp
Black pepper1/2 tsp
Garlic powder1/2 tsp
Paprika1/2 tsp
Chives (optional)For garnish

Gather these ingredients to create a delicious casserole that combines the bold flavors of sausage, the creamy richness of cream cheese, and the comforting taste of hash browns.

Instructions

Prepare this delicious Sausage, Egg and Cream Cheese Hashbrown Casserole with these easy-to-follow instructions:

  1. Preheat your oven to 350 degrees.
  2. In a large skillet, sauté 2 pounds of ground breakfast sausage until fully cooked and browned. Remember to drain any excess grease.
  3. In a mixing bowl, combine the cooked sausage with 8 ounces of softened cream cheese. Stir until well blended and set aside.
  4. In the same skillet, sauté one package of frozen shredded hash browns until lightly browned. Remove from heat.
  5. Grease a 9×13 baking dish and layer the sautéed hash browns evenly at the bottom.
  6. Spread the sausage and cream cheese mixture over the hash browns, ensuring an even distribution of ingredients.
  7. Sprinkle shredded cheese over the meat layer.
  8. In a separate bowl, whisk together 8 large eggs, 2 cups of milk, and salt and pepper to taste.
  9. Pour the egg mixture over the cheese layer in the baking dish.
  10. Place the casserole dish in the preheated oven and bake for 40-50 minutes, or until the eggs are set and the top is golden brown.
  11. Remove from the oven and let it cool for a few minutes before serving.

With these simple instructions, you’ll have a savory and satisfying Sausage, Egg and Cream Cheese Hashbrown Casserole ready to enjoy with your loved ones.

Preheating the Oven and Sautéing the Sausage

One of the essential steps in making the delectable Sausage, Egg, and Cream Cheese Hashbrown Casserole is to preheat the oven to 350 degrees. Preheating the oven ensures that the casserole bakes evenly and cooks to perfection.

Next, it’s time to sauté the breakfast sausage. This step not only adds incredible flavor to the casserole but also ensures that the sausage is cooked through and nicely browned.

When sautéing the sausage, make sure to break it into small crumbles for even cooking. Cook it over medium heat until it is completely browned, stirring occasionally to prevent it from sticking to the pan.

After sautéing the sausage, it’s important to drain any excess grease. Excessive grease can make the casserole greasy and affect the texture. Using a slotted spoon or paper towels, remove the sausage from the pan, leaving behind the excess grease.

Once the sausage is cooked and drained, it’s ready to be combined with the cream cheese and other ingredients to create a mouthwatering filling for the casserole.

Combining Sausage with Cream Cheese and Sautéing Hashbrowns

Once the sausage is cooked and nicely browned, it’s time to take this casserole to the next level by combining it with cream cheese. This simple step adds a creamy and indulgent texture, complementing the savory flavors of the sausage. The combination of sausage and cream cheese creates a mouthwatering filling that will make every bite truly satisfying.

Next, let’s move on to the hashbrowns. Take the frozen shredded hash browns and sauté them in a hot skillet until they turn beautifully golden brown. This step adds a delightful crispiness and enhances the overall texture of the casserole. The hashbrowns provide a delicious base for the sausage and cream cheese mixture, creating a harmonious blend of flavors.

In summary, combining the cooked sausage with cream cheese adds a creamy element to the casserole, while sautéing the hashbrowns brings a crispy texture to the dish. These two steps elevate the overall taste and appeal of the Sausage, Egg, and Cream Cheese Hashbrown Casserole, creating a truly irresistible brunch or meal option.

Layering the Casserole

To create the perfect Sausage, Egg, and Cream Cheese Hashbrown Casserole, it’s important to master the art of layering. This step-by-step guide will ensure that every mouthful is a delicious combination of flavors.

Step 1: Prepare the Baking Dish

Start by greasing a 9×13 baking dish to prevent the casserole from sticking. This will make serving and cleaning up much easier.

Step 2: Layer the Hashbrowns

Now, layer the sautéed hashbrowns in the bottom of the greased baking dish. Make sure to spread them evenly, creating a solid base for the casserole.

Step 3: Top with the Meat Mixture

Next, it’s time to add the star of the show – the sausage and cream cheese mixture. Evenly spread this delicious combination on top of the hashbrowns, ensuring each bite is packed with flavor.

“Layering the hashbrowns and topping them with the meat mixture creates a perfect harmony of textures and tastes.” – Chef Joseph

By following these steps, you’ll achieve a beautifully layered Sausage, Egg, and Cream Cheese Hashbrown Casserole that will impress your family and friends!

Adding Cheese and Preparing the Egg Mixture

In this step, we take the Sausage, Egg, and Cream Cheese Hashbrown Casserole to the next level of deliciousness. Sprinkle a generous amount of shredded cheese over the meat layer, allowing it to melt and create a gooey sensation that will make your taste buds dance with joy. The cheese adds a savory richness that perfectly complements the other flavors in the casserole.

Next, let’s prepare the egg mixture. In a separate bowl, whisk together 8 large eggs and 2 cups of milk until well combined. This creamy and velvety mixture will bind everything together, ensuring each bite of the casserole is perfectly moist and flavorful. Feel free to add your favorite seasonings or spices to enhance the taste according to your preference.

Pouring and Baking

Once you’ve layered the casserole with the cheese and meat mixture, it’s time to pour the delicious egg mixture over everything. Carefully pour the egg mixture evenly over the top, ensuring that it covers all the ingredients in the dish.

Next, it’s time to bake your Sausage, Egg, and Cream Cheese Hashbrown Casserole to perfection. Place the casserole dish in a preheated oven at 350 degrees Fahrenheit and bake for 40-50 minutes. Keep an eye on it, as baking times may vary.

The casserole is ready when the eggs are set and the top is golden brown. To make sure it’s fully cooked through, you can perform the “knife test.” Insert a knife into the center of the casserole, and if it comes out clean, your casserole is ready to be enjoyed!

While the casserole is baking, your kitchen will be filled with the irresistible aroma of savory sausage, fluffy eggs, and creamy cheese. Trust us, the wait will be worth it!

Enjoy

Once the Sausage, Egg, and Cream Cheese Hashbrown Casserole is out of the oven, the aroma alone will make your mouth water. This comforting dish is bursting with flavors that will have your taste buds dancing with delight. The combination of savory sausage, creamy cream cheese, and golden hashbrowns create a symphony of deliciousness that is hard to resist.

To fully experience the magic of this casserole, gather your loved ones around the table and serve it up hot. The creamy and cheesy layers, complemented by the hearty textures of sausage and hashbrowns, will make every bite a moment of pure bliss.

Whether it’s a decadent brunch or a satisfying dinner, this Sausage, Egg, and Cream Cheese Hashbrown Casserole is sure to be a crowd-pleaser. So go ahead, dive in, and savor every forkful of this comforting dish. Enjoy!

Benefits of Enjoying Sausage, Egg & Cream Cheese Hashbrown Casserole
Delicious and comforting flavors
Perfect for brunch or any meal
Easy to prepare and enjoy with family and friends
A satisfying and hearty dish
Mouthwatering layers of sausage, cream cheese, and hashbrowns
An irresistible combination of flavors and textures

Conclusion

The Sausage, Egg, and Cream Cheese Hashbrown Casserole is a fantastic dish that combines the savory flavors of sausage, the creaminess of cream cheese, and the heartiness of hashbrowns. Its easy and straightforward preparation makes it a perfect option for brunch or any meal.

This casserole offers a delicious medley of ingredients that are layered and baked to perfection. By following the step-by-step instructions, you’ll be able to create a mouthwatering dish that will surely impress your family and friends.

Whether you’re hosting a brunch gathering or simply looking for a comforting meal, this casserole is sure to hit the spot. Treat yourself to the delightful combination of sausage, egg, and cream cheese hashbrown casserole and indulge in its rich and satisfying flavors.

FAQ

What are the ingredients required for making Sausage, Egg and Cream Cheese Hashbrown Casserole?

The ingredients needed for this delicious casserole include 8 large eggs, 2 cups of milk, 2 pounds of ground breakfast sausage, 32 ounces of frozen shredded hash brown potatoes, 16 ounces of cream cheese (softened), ¼ teaspoon of garlic powder, ¼ teaspoon of onion powder, 2 cups of shredded cheese, and salt and pepper to taste.

How do I prepare Sausage, Egg and Cream Cheese Hashbrown Casserole?

Follow these simple instructions to make this flavorful casserole. Preheat the oven to 350 degrees. Sauté the breakfast sausage over medium-high heat until completely browned, then drain any excess grease. In a bowl, combine the browned sausage with the softened cream cheese. Next, sauté the frozen shredded hash brown potatoes until lightly browned. Layer the sautéed hashbrowns in the bottom of a well-greased 9×13 baking dish. Top the hashbrowns with the sausage and cream cheese mixture, then sprinkle shredded cheese over the top. In a separate bowl, whisk together the eggs, milk, garlic powder, onion powder, salt, and pepper. Pour the egg mixture over the cheese in the baking dish. Bake for 40-50 minutes, or until the casserole is cooked through completely. Enjoy!

Why is it important to preheat the oven and sauté the sausage?

Preheating the oven to 350 degrees ensures that the casserole cooks evenly and at the correct temperature. Sautéing the breakfast sausage until completely browned not only enhances its flavor but also helps remove any excess grease, keeping the casserole lighter and more balanced in texture.

How do I combine the sausage with cream cheese and sauté the hashbrowns?

After sautéing the breakfast sausage, transfer it to a bowl and mix it with the softened cream cheese. The cream cheese adds a rich and creamy dimension to the sausage. In the same skillet, sauté the frozen shredded hash brown potatoes until they are lightly browned. This step helps to bring out their natural flavors and adds a crispiness to the final dish.

How do I layer the casserole?

Start by greasing a 9×13 baking dish. Then, layer the sautéed hashbrowns evenly on the bottom of the dish, creating a sturdy base for the casserole. Next, spread the sausage and cream cheese mixture over the hashbrowns, ensuring it is evenly distributed. This layering technique allows for a harmonious combination of flavors in each bite.

What should I do after layering the casserole?

Once you have layered the casserole with the hashbrowns and the sausage and cream cheese mixture, sprinkle shredded cheese over the top. This adds a cheesy, melty goodness to the casserole and enhances its overall taste and texture.

How do I prepare the egg mixture and what should I do with it?

In a separate bowl, whisk together 8 large eggs, 2 cups of milk, garlic powder, onion powder, salt, and pepper until well combined. After layering the casserole with the hashbrowns, sausage, cream cheese, and shredded cheese, pour the egg mixture evenly over the top. The egg mixture acts as a binding agent and adds a light and fluffy texture to the casserole when baked.

How long should I bake the casserole?

Bake the casserole in the preheated oven for 40-50 minutes, or until it is cooked through completely. This ensures that all the ingredients are fully cooked, and the flavors have melded together beautifully.

Can I enjoy leftovers of Sausage, Egg and Cream Cheese Hashbrown Casserole?

Absolutely! Leftovers of this casserole can be refrigerated and reheated for future meals. Simply cover the dish tightly with foil or transfer individual portions to a microwave-safe container and heat until warmed through. The flavors may even develop further, making the leftovers just as delicious as the first day.

Print
clock clock iconcutlery cutlery iconflag flag iconfolder folder iconinstagram instagram iconpinterest pinterest iconfacebook facebook iconprint print iconsquares squares iconheart heart iconheart solid heart solid icon

Sausage, Egg, and Cream Cheese Hashbrown Casserole

  • Author: Chef Emy

Description

When it comes to breakfast, nothing says “hearty and satisfying” quite like a casserole. This Sausage, Egg, and Cream Cheese Hashbrown Casserole combines all the beloved breakfast favorites into one delicious dish. Perfect for a weekend brunch, a special occasion, or even as a make-ahead breakfast for busy mornings, this casserole is sure to become a staple in your recipe collection. Let’s dive into how you can create this mouthwatering meal that will wake up your taste buds and start your day off right.


Ingredients

Scale
  • 8 Large eggs
  • 2 Cups Milk
  • 2 Pounds Breakfast sausage, ground
  • 32 Ounces Frozen shredded hash brown potatoes
  • 16 Ounces Cream cheese, softened
  • ¼ Teaspoon Garlic powder
  • ¼ Teaspoon Onion powder
  • 2 Cups Shredded cheese (your choice of variety)
  • Salt and pepper to taste

Instructions

  1. Preheat Your Oven: Begin by preheating your oven to 350 degrees Fahrenheit. This ensures that your oven is at the perfect temperature for baking your casserole to perfection.

  2. Cook the Sausage: In a large skillet over medium-high heat, sauté the ground breakfast sausage until it is completely browned. Be sure to break the sausage into small pieces as it cooks for even browning. Once done, drain any excess grease from the skillet.

  3. Combine Sausage and Cream Cheese: Transfer the browned sausage to a large bowl. Add the softened cream cheese to the sausage while it’s still warm. Mix the two together until they’re well combined. The warmth of the sausage will help soften the cream cheese, making it easier to mix.

  4. Brown the Hashbrowns: In the same skillet used for the sausage (no need to wash it), add the frozen shredded hash brown potatoes. Sauté them until they’re lightly browned, adding a bit of texture and flavor to the potatoes.

  5. Layer the Casserole: Grease a 9×13 inch baking dish well. Spread the browned hashbrowns in an even layer at the bottom of the dish. Next, layer the sausage and cream cheese mixture on top of the hashbrowns. Sprinkle the shredded cheese evenly over the sausage layer.

  6. Prepare the Egg Mixture: In a separate bowl, whisk together the eggs, milk, garlic powder, onion powder, salt, and pepper until well combined. This egg mixture will bind the casserole together as it bakes.

  7. Assemble and Bake: Pour the egg mixture over the cheese layer in the baking dish, ensuring it covers the casserole evenly. Place the dish in the preheated oven and bake for 40-50 minutes, or until the casserole is cooked through and the top is golden brown.

  8. Serving: Allow the casserole to cool slightly before cutting into it. This resting period helps the casserole set, making it easier to serve.


Notes

This Sausage, Egg, and Cream Cheese Hashbrown Casserole is more than just a meal; it’s a comforting embrace to start your day. With its creamy texture, savory flavors, and hearty ingredients, it’s guaranteed to please both family and friends. Whether you’re serving it at a brunch party or enjoying a slice on a quiet morning, this casserole is a delicious way to celebrate the morning. Enjoy ❤

Cool Whip Cookies – Don’t Lose This Recipe

Are you ready to dive into the world of irresistibly delicious cookies? Look no further than Cool Whip Cookies! This delightful treat, made with any flavor cake mix, whether it’s rich chocolate or tantalizing red velvet, is guaranteed to satisfy your sweet tooth. Get ready to indulge in a fluffy and delectable experience that you won’t be able to resist!

Key Takeaways:

  • Discover the joy of making Cool Whip Cookies using any flavor cake mix.
  • Experience the unique and fluffy texture that Cool Whip brings to these cookies.
  • Whip up a batch of Cool Whip Cookies with just a few simple ingredients.
  • Follow the easy steps to create these delightful treats in no time.
  • Get creative with different flavors of cake mix to customize your Cool Whip Cookies.

What are Cool Whip Cookies?

Discover the delightful twist of Cool Whip Cookies, a unique take on traditional cookies. Unlike the usual ingredients, these cookies are made using Cool Whip and cake mix, creating a one-of-a-kind treat that will leave you craving for more.

When it comes to texture, Cool Whip Cookies take the cake. The addition of Cool Whip adds a light and fluffy element to the cookies, making each bite incredibly soft and irresistible. With their heavenly texture and delicious flavor combinations, these cookies are a true delight for the senses.

Whether you’re a fan of classic chocolate or prefer the indulgent taste of red velvet, Cool Whip Cookies can be easily customized to suit your preferences. Choose any flavor of cake mix and get creative with your toppings and mix-ins to create your own signature cookies.

So why settle for ordinary cookies when you can enjoy the fluffy goodness of Cool Whip Cookies? Let’s dive into the world of these delectable treats and discover the secrets behind their irresistible appeal.

Ingredients for Cool Whip Cookies

To whip up a batch of these scrumptious Cool Whip Cookies, you will need just a few simple ingredients. Let’s take a look at what you’ll need:

  • Cool Whip: The star of the recipe, providing the cookies with their irresistible fluffy texture.
  • 1 box of any flavor cake mix: Choose from a variety of options like chocolatered velvet, or lemon to add a burst of flavor to your cookies.

These two main ingredients are all you need to create these delectable treats. It’s incredible how such simple ingredients come together to create such a delightful dessert!

IngredientQuantity
Cool Whip1 cup
Box of any flavor cake mix1

How to Make Cool Whip Cookies

Making Cool Whip Cookies is a breeze! Follow these simple steps to enjoy these delightful treats in no time.

  1. Step 1: Preheat your oven to 350°F (175°C) and prepare a baking sheet with parchment paper or a non-stick spray.
  2. Step 2: In a large mixing bowl, combine one box of any flavor cake mix and 2 cups of Cool Whip. Mix well until the ingredients are fully blended.
  3. Step 3: Shape the dough into small balls, about 1 inch in diameter, and place them on the prepared baking sheet. Leave enough space between the cookies to allow for spreading during baking.
  4. Step 4: Flatten each cookie slightly with the back of a spoon or your fingers.
  5. Step 5: Bake for 10-12 minutes, or until the edges of the cookies are golden brown. The centers may appear slightly undercooked, but they will firm up as the cookies cool.
  6. Step 6: Remove the baking sheet from the oven and let the cookies cool for a few minutes before transferring them to a wire rack to cool completely.

And just like that, your delicious Cool Whip Cookies are ready to be enjoyed! This easy recipe is perfect for beginners or anyone looking for a quick and tasty treat.

IngredientsQuantity
Cake mix (any flavor)1 box
Cool Whip2 cups

These cookies are great for bake sales, parties, or simply enjoying with a cup of coffee or a glass of milk. Get creative and experiment with different cake mix flavors to find your favorite combination!

Cool Whip Cookies Variations

Get creative with your Cool Whip Cookies by experimenting with different flavors of cake mix. Whether you prefer the rich indulgence of chocolate or the luxurious taste of red velvet, the possibilities are endless. Customize your cookies to suit your taste and cravings!

With Cool Whip Cookies, you have the freedom to explore a wide range of flavor combinations. The simple substitution of cake mix flavors offers a delightful twist on this classic treat. Let your imagination run wild and discover new favorites that will leave your taste buds begging for more.

Flavorful Options:

  • Classic Chocolate: Use a chocolate cake mix for a rich and decadent cookie that chocolate lovers will adore.
  • Velvety Red Velvet: Embrace the luxurious taste of red velvet by using a red velvet cake mix for your cookies.
  • Tropical Pineapple: Add a taste of the tropics by incorporating a pineapple cake mix into your recipe.
  • Refreshing Lemon: Brighten up your cookies with a burst of citrusy goodness by using a lemon cake mix.
  • Decadent Devil’s Food: Indulge in the irresistible flavor of devil’s food cake for a truly indulgent treat.

These are just a few examples of the endless flavor variations you can create with Cool Whip Cookies. Feel free to experiment with other cake mix flavors and even mix different flavors together to create your own unique combinations.

Cake Mix FlavorDescription
ChocolateA rich and indulgent flavor perfect for chocolate lovers.
Red VelvetA luxurious and velvety flavor that adds elegance to your cookies.
PineappleBrings a tropical twist to your cookies with a hint of sweetness.
LemonA refreshing and citrusy flavor that adds a zing to your cookies.
Devil’s FoodAn indulgent and decadent chocolate flavor that satisfies your sweet tooth.

So why stick to one flavor when you can explore a world of delicious possibilities? Let your taste buds guide you, and have fun experimenting with different Cool Whip Cookies variations. With every batch, you’ll discover a new flavor sensation that will keep you coming back for more!

Serving and Storing Cool Whip Cookies

Once your cookies are baked to perfection, it’s time to enjoy them! Serve these fluffy treats as a standalone dessert or pair them with your favorite ice cream for an extra special treat. The combination of the soft Cool Whip cookies and the creamy ice cream creates a heavenly dessert experience that will leave everyone craving for more.

Here are some serving suggestions for your Cool Whip Cookies:

  1. Dessert Platter: Arrange a variety of Cool Whip Cookies on a platter for a colorful and eye-catching dessert display.
  2. Cookie Sandwiches: Take two Cool Whip Cookies and sandwich them together with a scoop of ice cream or a dollop of whipped topping.
  3. Cool Whip Cookie Sundae: Place a few Cool Whip Cookies in a bowl, top with a scoop of ice cream, drizzle with chocolate sauce and sprinkle some chopped nuts or sprinkles for a delightful sundae.
  4. Cookie Tower: Stack Cool Whip Cookies in a tower formation to create an impressive centerpiece for special occasions.

Remember to store any leftover Cool Whip Cookies properly to ensure their freshness. Here are some storage tips:

  • Airtight Container: Transfer the cooled cookies to an airtight container to protect them from moisture and maintain their texture.
  • Room Temperature: If you plan to consume the cookies within a few days, you can keep them at room temperature.
  • Refrigerator: For longer shelf life, store the cookies in the refrigerator, especially during warmer months.
  • Freezer: Cool Whip Cookies can also be frozen for up to 3 months. Just make sure to wrap them tightly in plastic wrap or place them in a freezer-safe container.

Following these serving suggestions and storage tips will ensure that your Cool Whip Cookies remain fresh and delicious for as long as possible. Enjoy every bite of these irresistible treats!

Cool Whip Cookies – A Crowd-Pleasing Dessert

Cool Whip Cookies are a crowd-pleasing dessert that is sure to impress at any gathering. Whether you’re hosting a potluck, a birthday party, or just want to treat your loved ones, these cookies are a hit. Whip up a batch and watch them disappear in no time!

Tips and Tricks for Perfect Cool Whip Cookies

Take your Cool Whip Cookies to the next level with these helpful tips and tricks. Whether you’re a baking novice or an experienced pro, these simple hacks will elevate your cookies to new heights of deliciousness.

Adjust Baking Time

One of the keys to achieving perfect Cool Whip Cookies is to adjust the baking time. Since every oven is different, it’s important to keep an eye on your cookies while they’re in the oven. Start with the recommended baking time in the recipe, but be ready to add or subtract a few minutes based on your oven’s performance.

Add Mix-Ins

While Cool Whip Cookies are scrumptious on their own, you can take them to the next level by adding tasty mix-ins. Consider adding chocolate chips, nuts, or even dried fruit to the cookie dough. These additional ingredients will bring extra texture and flavor to your cookies, making them truly irresistible.

Experiment with Flavors

Don’t be afraid to experiment with different flavors of cake mix for your Cool Whip Cookies. While chocolate and red velvet are classic choices, there are plenty of other delicious options to try. From lemon to strawberry to caramel, the possibilities are endless. Let your taste buds guide you and discover your favorite flavor combination.

  • Chocolate cake mix + white chocolate chips
  • Red velvet cake mix + cream cheese filling
  • Lemon cake mix + lemon zest

Chill the Dough

If you want your Cool Whip Cookies to hold their shape better and have a chewier texture, try chilling the dough before baking. Simply cover the dough and refrigerate it for about 30 minutes to an hour. This will help prevent the cookies from spreading too much while baking and result in a more defined shape.

Get Creative with Shapes

Cool Whip Cookies are not limited to the traditional round shape. Have some fun and get creative with different cookie shapes. Use cookie cutters to make heart-shaped cookies for Valentine’s Day or star-shaped cookies for Fourth of July. Let your imagination run wild and make your cookies even more visually appealing.

Allow for Cooling Time

After baking your Cool Whip Cookies, resist the temptation to immediately bite into them. Allow the cookies to cool on a wire rack for a few minutes before indulging. This will prevent them from breaking apart and give them a chance to set, ensuring a perfect, melt-in-your-mouth texture.

With these tips and tricks, you can easily master the art of making perfect Cool Whip Cookies. Whether you’re baking for a special occasion or simply satisfying a sweet craving, these delightful cookies will always hit the spot.

Conclusion

Cool Whip Cookies are the ultimate indulgence for any cookie lover. The combination of the fluffy texture and the variety of flavors make these cookies a delightful treat that is sure to satisfy your sweet cravings. And the best part? They are incredibly easy to make!

So why not take a break from your usual cookie recipes and try something new? With just a box of cake mix and some Cool Whip, you can whip up a batch of these irresistible cookies in no time. Whether you choose chocolate, red velvet, or any other delicious flavor, you won’t be disappointed.

Whether you’re hosting a party or simply treating yourself to a tasty dessert, Cool Whip Cookies are a guaranteed crowd-pleaser. They will disappear from the plate in no time, leaving everyone asking for more. So don’t wait any longer, gather your ingredients and get ready to enjoy the fluffy, flavorful goodness of these incredible cookies!

FAQ

What are Cool Whip Cookies?

Cool Whip Cookies are a delightful twist on traditional cookies. Instead of using the usual ingredients, these cookies are made using Cool Whip and cake mix. The Cool Whip adds a light and fluffy texture, making them a unique and delicious treat.

What ingredients are needed for Cool Whip Cookies?

To whip up a batch of these scrumptious cookies, you will need just a few simple ingredients. The star of the recipe is the Cool Whip, which gives the cookies their fluffy texture. You will also need a box of any flavor cake mix, such as chocolate or red velvet.

How do I make Cool Whip Cookies?

Making Cool Whip Cookies is a breeze! Just mix the cake mix and Cool Whip together, shape the dough into cookies, and bake them until golden brown. It’s a foolproof recipe that anyone can master!

Can I customize the flavors of Cool Whip Cookies?

Absolutely! Get creative with your Cool Whip Cookies by experimenting with different flavors of cake mix. Whether you prefer the rich indulgence of chocolate or the luxurious taste of red velvet, the possibilities are endless. Customize your cookies to suit your taste and cravings!

How should I serve and store Cool Whip Cookies?

Once your cookies are baked to perfection, it’s time to enjoy them! Serve these fluffy treats as a standalone dessert or pair them with your favorite ice cream for an extra special treat. Remember to store any leftovers in an airtight container to keep them fresh for longer.

Are Cool Whip Cookies a good choice for parties?

Absolutely! Cool Whip Cookies are a crowd-pleasing dessert that is sure to impress at any gathering. Whether you’re hosting a potluck, a birthday party, or just want to treat your loved ones, these cookies are a hit. Whip up a batch and watch them disappear in no time!

Do you have any tips for making perfect Cool Whip Cookies?

Perfect your Cool Whip Cookies with these helpful tips and tricks. From adjusting baking time to adding extra mix-ins like chocolate chips or nuts, these little tweaks can take your cookies to the next level. Get ready to elevate your baking game!

Print
clock clock iconcutlery cutlery iconflag flag iconfolder folder iconinstagram instagram iconpinterest pinterest iconfacebook facebook iconprint print iconsquares squares iconheart heart iconheart solid heart solid icon

Cool Whip Cookies

  • Author: Chef Emy

Description

The beauty of Cool Whip cookies lies in their ease of preparation and the soft, cake-like texture that’s hard to achieve with traditional cookie doughs. The secret ingredient, Cool Whip, adds a unique lightness to the batter, creating cookies that are both rich in flavor and delightfully fluffy. This recipe is also incredibly adaptable; you can experiment with any flavor of cake mix to suit your craving or the occasion.


Ingredients

Scale
  • 1 box of cake mix (any flavor: chocolate, red velvet, lemon, etc.)
  • 1 8-ounce container of Cool Whip
  • 1 egg
  • Powdered sugar, for coating

Instructions

  1. Preheat your oven to 350 degrees Fahrenheit (175 degrees Celsius), ensuring it reaches the correct temperature for baking.

  2. Mix the ingredients in a large bowl. Start by combining your chosen cake mix with the Cool Whip and the egg. Stir until all components are fully integrated, and you have a uniform batter. The mixture might be sticky, but that’s exactly what you’re aiming for.

  3. Shape the cookies. Using a teaspoon, scoop out small portions of the batter. Drop each portion into a bowl of powdered sugar, rolling it around until it’s well-coated. This not only adds an extra layer of sweetness but also helps in handling the dough.

  4. Bake to perfection. Place the sugar-coated dough balls on a cookie sheet, leaving enough space between each to allow for spreading. Slide the tray into your preheated oven and bake for 12 to 15 minutes. You’ll know they’re done when the edges start to lightly brown, and the tops crackle, revealing a soft, cake-like interior.

  5. Cool before serving. Allow the cookies to cool on the cookie sheet for a few minutes before transferring them to a wire rack. This step is crucial, as it helps the cookies set and makes them easier to remove without breaking.


Notes

Serving and Storage Tips

Cool Whip cookies are best enjoyed fresh, but they can also be stored in an airtight container for a few days, making them a fantastic treat to have on hand for any sweet craving. For a festive touch, consider adding food coloring to the batter or sprinkling the finished cookies with holiday-themed decorations.

Conclusion

Cool Whip cookies are a testament to the joy of simple baking, proving that you don’t need a plethora of ingredients or time-consuming techniques to create something utterly delicious. Whether you opt for the richness of chocolate, the elegance of red velvet, or the bright zest of lemon, these cookies are bound to impress. So next time you’re looking for a quick, easy, and satisfying dessert, remember this recipe. It’s not just a treat for the taste buds but a delightful adventure in baking that you’ll want to experience again and again.