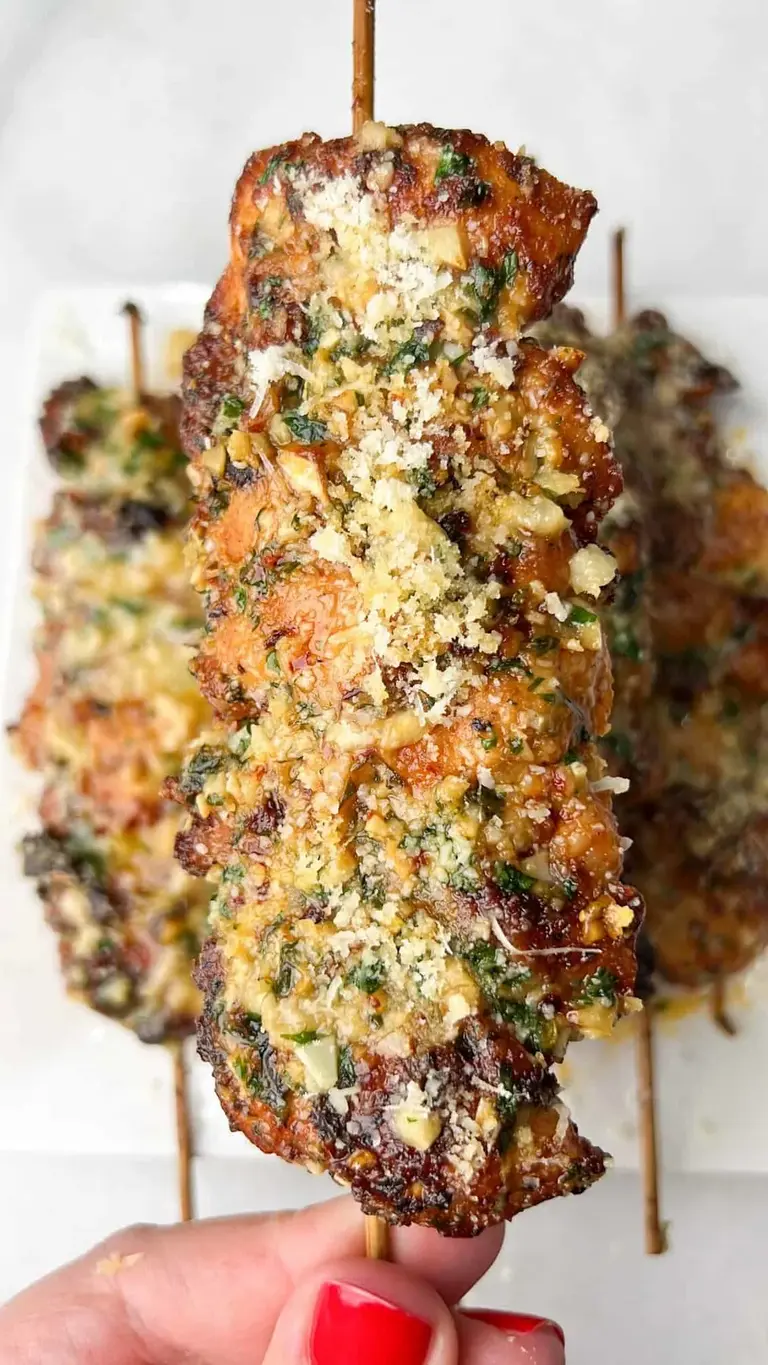
Garlic Parmesan Chicken Skewers – Juicy & Flavorful

Garlic Parmesan Chicken Skewers – The Ultimate Basted Air Fryer Recipe

⚖️
Difficulty
Easy
⏲️
Prep Time
15 mins
🕒
Cook Time
14 mins
⏱️
Total Time
29 mins (plus 30 min soak)
🍽️
Servings
4–6

Growing up in my mother’s kitchen in Morocco, I learned that the best skewers are never just thrown on the fire—they’re babied, basted, and coaxed into tenderness. These Garlic Parmesan Chicken Skewers are my love letter to that tradition, but with a French-trained twist and an air fryer shortcut that makes them weeknight-easy. The magic comes from a double-basting technique with a rich garlic parmesan butter sauce that keeps the chicken impossibly juicy, while the parmesan forms a golden, slightly crispy crust. Trust me, this chicken skewers recipe will ruin you for any other kabob.

When you bite into one, you get that first hit of nutty, salty parmesan, followed by the warmth of garlic and a subtle kick from red pepper flakes and hot sauce. The chicken is so tender it practically falls apart—because of the way we pack the pieces tightly on the skewers and baste them as they cook. The aroma of garlic and melting butter fills your kitchen, and by the time they’re done, the meat is glossy and speckled with fresh parsley. It’s the kind of appetizer that disappears before you can even plate it.

I’ve tested this parmesan chicken kabobs recipe every way imaginable—in a cast-iron skillet, on a gas grill, and in the air fryer—and I’m sharing my best tips so you get it right the first time. The secret is in the sauce emulsion, and I’ll show you how to keep it from separating. Plus, I’ll walk you through a common mistake that can dry out your skewers. Ready to make the best grilled chicken skewers of your life? Let’s go.

Why This Garlic Parmesan Chicken Skewers Recipe Is the Best

The Flavor Secret: Growing up in Morocco, I watched my mother build layers of flavor by basting—never just seasoning once and leaving it. That’s the heart of this recipe. The garlic parmesan butter sauce does double duty: it’s basted early to build a crust, then finished with a clean brush of reserved sauce for a final burst of flavor, no cross-contamination. My French training taught me how to emulsify the butter and cheese so the sauce stays creamy and clings to every piece of chicken.

Perfected Texture: The technique of packing the chicken tightly on the skewers is non-negotiable. When the pieces are snug, they steam each other from the inside, preventing the exterior from drying before the interior is cooked. The air fryer’s convection heat then crisps the outside while the basting keeps everything moist. It’s the best of both worlds: tender inside, golden outside.

Foolproof & Fast: This chicken skewers recipe takes less than 30 minutes of active time, and the air fryer does the heavy lifting. Even if you’ve never made kabobs before, the step-by-step instructions with visual cues mean zero guesswork. And because I’ve accounted for the most common mistakes—like not soaking the skewers or over-loading the air fryer—you’ll get restaurant-quality results at home. This is my go-to easy chicken appetizer for busy weeknights or game day.

Garlic Parmesan Chicken Skewers Ingredients

I buy my chicken at the Union Square Greenmarket when I can, but any good grocery store bird works. The key is to use tenders or thigh meat—they stay juicier than breast alone. And that garlic? I always use fresh cloves from the farmers market. There’s no substitute for that sharp, almost sweet flavor when it hits hot butter.

Ingredients List

  • 2 lbs chicken tenders, thighs or breast (tenders recommended for best texture)
  • 2 tbsp olive oil
  • 1 stick butter (salted or unsalted—adjust salt later)
  • 8–10 cloves garlic, minced
  • 1/2 cup parmesan, grated (freshly grated recommended)
  • 1 tbsp hot sauce (adjust to taste; Frank’s RedHot is great)
  • 2 teaspoons red pepper flakes
  • 1/3 cup fresh parsley, minced
  • 2 teaspoons paprika
  • 1 teaspoon garlic powder
  • 1 teaspoon onion powder
  • 1/2 teaspoon salt
  • 1/2 teaspoon pepper

Ingredient Spotlight

Chicken: Tenders are the goldilocks cut—lean enough to cook quickly but with enough fat to stay tender. If using breasts, pound them to an even 1/2-inch thickness before cutting. Thighs work too and are more forgiving—just cook 2–3 minutes longer.

Parmesan: Freshly grated from a block is non-negotiable for the best melt and flavor. Pre-shredded contains anti-caking agents that can make the sauce grainy. If you can’t find good parmesan, Pecorino Romano is a punchier substitute—but reduce salt by 1/4 teaspoon.

Butter: Use unsalted butter so you control the salt level from the parmesan and hot sauce. If you only have salted, skip the extra 1/2 teaspoon salt in the seasoning mix.

Hot sauce: This adds a gentle tang and heat without overwhelming the garlic parmesan flavor. You can omit it for a kid-friendly version, or double it for more kick. I love using a vinegar-based hot sauce like Tabasco or Cholula.

Original IngredientBest SubstitutionFlavor / Texture Impact
Chicken tendersChicken thighs (boneless, skinless)Slightly richer, more forgiving; cook 2–3 mins longer
Fresh parmesan (block)Pecorino RomanoSaltier, more pungent; reduce added salt by 1/4 tsp
Hot sauceSkip or use 1 tbsp lemon juice + 1/4 tsp cayenneLess tang; still a bit of heat if using cayenne
Butter (salted)Unsalted butter + extra 1/4 tsp salt in seasoningBetter salt control; same rich flavor

How to Make Garlic Parmesan Chicken Skewers — Step-by-Step

I’ve broken this down into foolproof steps. Each one builds on the last, so you’ll end up with succulent, golden skewers every time.

Step 1: Soak and Prep

Before you start, soak your wooden skewers in water for at least 30 minutes. This prevents them from burning in the air fryer. While they soak, combine paprika, garlic powder, onion powder, salt, and pepper in a small bowl. Cut your chicken into 3-inch pieces, then toss them in a large bowl with olive oil and the spice mixture until well coated.

💡 mia’s Pro Tip: Use metal skewers if you have them—they don’t need soaking and conduct heat better, leading to more even cooking. Either way, soak wooden ones twice as long if you can for extra insurance.

Step 2: Skewer Tightly

Pack the chicken onto each skewer, pressing the pieces firmly together with no gaps. This is the key to maximum juiciness—the tight packing creates steam pockets that keep the meat tender. If your air fryer is small, snip the top few inches of the skewers after the chicken is on them so they fit.

⚠️ Common Mistake to Avoid: Leaving spaces between chicken pieces on the skewer. This exposes more surface area to hot air, causing the outside to dry out before the inside is cooked. Pack them like they’re riding a crowded subway—shoulder to shoulder.

Step 3: Make the Garlic Parmesan Sauce

In a microwave-safe bowl, combine the butter and minced garlic. Heat in 20-second bursts until the butter is partially melted—you want some solid pieces left, not fully liquid. Add red pepper flakes, hot sauce, fresh parsley, and grated parmesan. Whisk vigorously until smooth. If the sauce separates (the butter and cheese separate), add 1–2 tablespoons of softened butter and stir to bring it back together.

💡 mia’s Pro Tip: Scoop out 1/3 of the finished sauce into a separate bowl. This is your “clean basting” batch for the final glaze. The remaining 2/3 is for basting during cooking. Never use the same sauce that touched raw chicken to baste the cooked food—that’s a food safety must.

Step 4: Cook in Batches

Place 2–3 skewers in the air fryer basket, ensuring they’re not touching. Cook at 400°F for 5 minutes. Remove the basket, flip the skewers, and baste with the cooking sauce. Return to cook for 2 more minutes. Flip again, baste once more, then cook another 5–6 minutes or until the internal temperature reaches 165°F. Total time: 12–14 minutes per batch. Let rest for 2 minutes before serving.

⚠️ Common Mistake to Avoid: Overcrowding the air fryer. If the skewers touch or overlap, they’ll steam instead of roast, and you’ll lose that beautiful golden crust. Cook in small batches even if it takes a little longer—it’s worth it.

Step 5: Final Glaze

Once the skewers are fully cooked, hit them with a final pass of the reserved clean sauce. Sprinkle with extra fresh parmesan and a pinch of parsley. Serve immediately while the cheese is still glossy and the chicken is piping hot.

StepActionDurationKey Visual Cue
1Soak skewers + season chicken30 mins + 5 minsSkewers fully submerged; chicken evenly coated in red seasoning
2Skewer chicken tightly5–7 minsNo gaps between pieces; skewer tips snipped
3Make sauce + portion 1/35 minsSauce smooth and creamy, not grainy
4Air fry in batches12–14 mins per batchInternal temp 165°F; golden-brown surface
5Final glaze with clean sauce1 minSauce glistens; parmesan speckles

Serving & Presentation

I love serving these Garlic Parmesan Chicken Skewers over a bed of fluffy jasmine rice with a crisp green salad on the side—the rice soaks up any extra garlic butter sauce that drips down. For a more substantial meal, tuck them into warm pita bread with tzatziki and sliced tomatoes. It reminds me of the street food stalls in Marrakech, where skewers are always served with a squeeze of lemon and fresh herbs.

As an easy chicken appetizer, arrange them on a platter with toothpicks, a bowl of extra garlic parmesan sauce for dipping, and a sprinkle of flaky sea salt. The contrast of the golden crust and bright green parsley is gorgeous on any table. I always make extra sauce—guests end up eating it with everything.

Pairing TypeSuggestionsWhy It Works
Side DishJasmine rice, roasted broccoli, or Greek saladRice soaks up sauce; broccoli adds char; salad cuts richness
Sauce / DipExtra garlic parmesan sauce, tzatziki, or spicy mayoEnhances the garlic flavor; tzatziki adds cooling contrast
BeverageCrisp white wine (Sauvignon Blanc), light lager, or lemonadeAcidity cuts through butter; beer’s carbonation refreshes
GarnishFresh parsley, lemon wedges, extra red pepper flakesFresh herbs brighten; lemon adds zest; pepper flakes add visual heat

Make-Ahead, Storage & Reheating

Between my busy NYC schedule and recipe testing, I’ve learned to always prep components ahead. You can season the chicken and make the sauce up to a day in advance—just keep them separate in the fridge. Assemble the skewers just before cooking for the freshest results.

Method
Garlic Parmesan Chicken Skewers

Easy Chicken Burrito Casserole: Best One-Dish Dinner
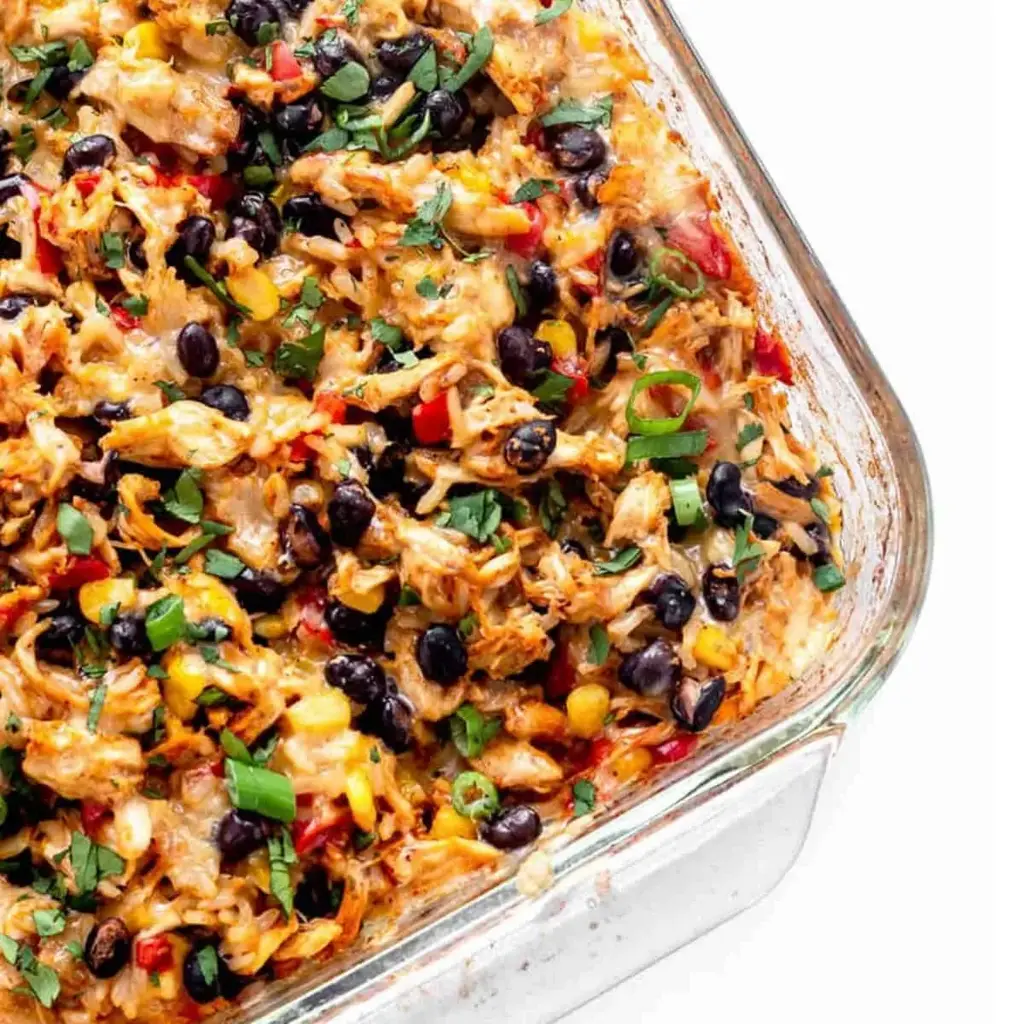
Easy Chicken Burrito Casserole with One-Dish Magic – A Family Favorite

⚖️
Difficulty
Easy
⏲️
Prep Time
15 mins
🕒
Cook Time
75 mins
⏱️
Total Time
90 mins
🍽️
Servings
8

I still remember the first time I made an easy chicken burrito casserole in my tiny New York City kitchen — it was a cold November evening, and the whole apartment filled with the scent of toasted cumin and roasted peppers. Growing up in Morocco, my mother would prepare tagines that simmered for hours, layering flavors slowly. But as a busy mom now in NYC, I needed that same deep, comforting taste without the hours of stirring. This chicken burrito casserole recipe is my answer: it brings together tender shredded chicken, rice, black beans, and a vibrant fajita seasoning into one dish that bakes all at once. It’s the kind of meal that feels like a hug, and it’s fast enough for a hectic weeknight.

When you pull this casserole from the oven, the aroma hits you first: smoky ancho chili, sweet bell pepper, and a hint of cayenne that warms the air. The rice soaks up the seasoned broth and green chiles, becoming plump and tender, while the black beans add a creamy bite. The shredded Monterey Jack cheese melts into a golden crust on top, with crispy edges that give way to a moist, savory interior. Each spoonful is a balance of textures — the soft rice, the juicy chicken, the slight pop of corn — all held together by a sauce that’s rich but not heavy. It’s the kind of dish that makes you close your eyes and sigh.

I’ve tested this easy chicken burrito casserole dozens of times, and my secret — honed during my Paris culinary training — is layering the seasonings directly into the uncooked rice before adding any liquid. That simple French technique of “blooming” the spices means every grain is infused with flavor from the very first bite. And let me tell you: it’s foolproof. Even if you’ve never made a casserole before, this recipe works perfectly every time. 💡 mia’s Pro Tip: The key is covering tightly with foil so the rice steams evenly — don’t peek too early! And one common mistake? Over-mixing the cheese into the casserole before baking — just sprinkle it on top for that beautiful crust.

Why This Easy Chicken Burrito Casserole Recipe Is the Best

The Flavor Secret. Most easy Mexican casseroles rely on canned soup or heavy sauces that mute the natural ingredients. I skip all that. Instead, I build flavor from the ground up with fajita seasoning (a blend of smoked paprika, cumin, garlic, and oregano), fresh green chiles, and a touch of tomato paste that caramelizes as it bakes. This technique — learned at Le Cordon Bleu in Paris — ensures every component tastes bright and layered, not one-dimensional. The result is a chicken and rice casserole that bursts with authentic burrito flavor, not just heat.

Perfected Texture. The hardest part of any baked rice dish is keeping the rice fluffy, not mushy. My trick? I use parboiled long-grain brown rice, which holds its shape beautifully during the long bake. The chicken broth is measured precisely (3 cups to 1 cup rice), and the foil cover creates a gentle steam environment. The rice absorbs the liquid without turning gummy, while the shredded chicken stays moist because it’s added raw to the dish — it cooks gently in the sauce. This Mexican chicken bake is never watery or dry; it’s consistently perfect.

Foolproof & Fast. Because this is a true one-dish meal, there’s very little cleanup — no separate pots for rice or sauce. You simply toss everything into a 9×13 baking dish, stir, cover, and bake. It’s an ideal recipe for beginner cooks, busy parents, and anyone who wants a hearty dinner on the table with minimal effort. The prep takes just 15 minutes, and then the oven does the rest. It’s the kind of easy burrito casserole that makes you look like a hero without breaking a sweat.

Easy Chicken Burrito Casserole Ingredients

One of the things I love most about this chicken burrito casserole recipe is that the ingredient list is short and built around pantry staples. I often grab my onions from the Union Square farmers market, the black beans from my local bodega, and the shredded chicken from a rotisserie bird I pick up on the way home. Every item here plays a specific role in creating that deep, burrito-bowl flavor.

Ingredients List

  • 1/2 cup finely diced onion
  • 1 red bell pepper (diced)
  • 1 cup uncooked parboiled long-grain brown rice (can also use long grain white rice)
  • 3 tablespoons fajita seasoning (homemade or store-bought)
  • 1/8 teaspoon cayenne pepper (optional)
  • 1 cup corn kernels (frozen)
  • 1 14 ounce can low sodium black beans (drained and rinsed)
  • 5 cups shredded chicken
  • 3 cups reduced sodium chicken broth
  • 1 4 ounce can mild green chilies
  • 1 tablespoon olive oil
  • 2 tablespoons tomato paste
  • 1 1/4 cups shredded Monterey Jack cheese

Ingredient Spotlight

Parboiled Long-Grain Brown Rice. This is my non-negotiable base. Parboiled rice has been partially cooked and then dried, which makes it extra forgiving in a casserole. It won’t turn into a sticky mess, even after 70 minutes. In a pinch, you can use long-grain white rice — but reduce the baking time by about 10 minutes and check for doneness earlier. The texture will be softer and less toothsome.

Fajita Seasoning. The heart of the flavor. I make my own with smoked paprika, cumin, garlic powder, onion powder, oregano, and a touch of chipotle powder. Store-bought blends work beautifully too — just check the salt content. If you’re using a high-sodium blend, you may want to switch to unsalted chicken broth. The seasoning is what gives this casserole its smoky, savory burrito character.

Shredded Chicken. Rotisserie chicken is my favorite shortcut — it’s already cooked, seasoned, and juicy. You can also use poached chicken breasts or thighs. The 5 cups measurement is important; if you use less, the casserole will be rice-heavy. For a vegetarian version, swap for a can of pinto beans and extra veggies.

Monterey Jack Cheese. This melts into a dreamy, creamy layer that protects the casserole from drying out. It’s mild enough to let the spices shine but rich enough to feel indulgent. For a sharper kick, use pepper Jack. For dairy-free, I recommend a plant-based cheddar style shred that melts well — just add it in the last 5 minutes to avoid burning.

Original IngredientBest SubstitutionFlavor / Texture Impact
Parboiled brown riceLong-grain white riceSofter, less chewy; reduce time by 10 min
Fajita seasoningTaco seasoning (same amount)Slightly more cumin-forward, still excellent
Shredded chickenShredded pork or jackfruit (for veg)Richer (pork) or lighter (jackfruit); adjust salt
Monterey Jack cheesePepper Jack or dairy-free shredsSpicier or dairy-free; melt times vary

How to Make Easy Chicken Burrito Casserole — Step-by-Step

This easy chicken burrito casserole recipe is so straightforward that even a beginner can make it with confidence. The oven does almost all the work — you just layer and bake. Follow these steps exactly for a perfect result every time.

Step 1: Prepare the Base

Preheat your oven to 400°F. In a 9×13 inch baking dish, combine the diced onion, red bell pepper, uncooked rice, fajita seasoning, and cayenne (if using). Stir everything together until the rice is coated with the spices and the vegetables are evenly distributed. This dry layering step, which I picked up from a Moroccan tagine technique, ensures the rice absorbs all the flavors as it bakes.

💡 mia’s Pro Tip: Use a sturdy metal or glass baking dish. Avoid flimsy pans — the rice needs stable heat to cook evenly. If using glass, reduce oven temperature by 25°F.

Step 2: Whisk the Broth Mixture

In a separate bowl or large measuring cup, whisk together the chicken broth, mild green chiles, tomato paste, and olive oil until the tomato paste is fully dissolved and the mixture is a uniform brick-red color. The oil helps the rice stay separate and adds a subtle richness.

⚠️ Common Mistake to Avoid: Don’t skip whisking the tomato paste completely. Undissolved clumps will create bitter pockets in the casserole. Take 20 seconds to make it smooth.

Step 3: Combine Wet and Dry

Pour the broth mixture into the baking dish with the rice mixture. Stir gently but thoroughly until the rice is evenly moistened and the vegetables are swimming in the liquid. The dish should look soupy — that’s perfect because the rice will absorb all that goodness.

Step 4: Add Protein and Vegetables

Add the shredded chicken, drained black beans, and frozen corn to the dish. Stir until everything is well combined — the chicken should be distributed so each serving gets some. The corn can stay frozen; it will thaw and sweeten the casserole as it bakes.

💡 mia’s Pro Tip: If you’re using rotisserie chicken, remove the skin before shredding. The skin will turn soggy in the casserole and add unwanted grease. Use only the meat.

Step 5: Cover and Bake

Cover the baking dish tightly with aluminum foil. Transfer to the preheated oven and bake for 65–70 minutes. The foil traps steam, which is essential for cooking the rice. Don’t peek! Every time you lift the foil, you release heat and steam, which can lead to undercooked rice.

⚠️ Common Mistake to Avoid: Lifting the foil to check on the casserole. Resist the urge! The rice needs steady steam for the full time. Trust the process.

Step 6: Add Cheese and Finish

After 65–70 minutes, remove the dish from the oven. Carefully take off the foil — watch out for the steam! Sprinkle the shredded Monterey Jack cheese evenly across the top. Return the dish to the oven, uncovered, for another 5–10 minutes, until the cheese is melted and bubbly with golden edges.

Step 7: Rest and Serve

Remove from the oven and let the casserole rest for 5–10 minutes. This allows the juices to settle and the rice to finish absorbing any remaining liquid. Serve warm with fresh cilantro, green onion, salsa, and avocado if desired. The first scoop should reveal a creamy, perfectly cooked interior.

💡 mia’s Pro Tip: For extra texture, broil the cheese for 1–2 minutes after baking. Watch it carefully — it can burn fast. The result is a crispy, golden crust that shatters beautifully.

StepActionDurationKey Visual Cue
1Prepare base5 minRice coated in spices
2Whisk broth2 minSmooth, brick-red liquid
3Combine3 minSoupy consistency
4Add chicken/beans5 minEvenly distributed mix
5Cover and bake65–70 minNo visible liquid when tilted
6Add cheese & bake5–10 minGolden, bubbly cheese
7Rest and serve5–10 minFirm, sliceable casserole

Serving & Presentation

This easy chicken burrito casserole is a showstopper all on its own, but the right accompaniments can elevate it even further. I love serving it family-style right from the baking dish, letting everyone scoop out their own portion. The contrast between the golden cheese crust and the soft rice underneath is so inviting — it always gets a “wow” from my dinner guests.

For a Moroccan twist, I sometimes add a sprinkle of harissa-spiced yogurt on top — a nod to my childhood. From Paris, I learned the importance of fresh herbs as a final touch: a generous shower of chopped cilantro and green onion brightens the whole dish. And because this is NYC, I always serve it with a side of creamy avocado or a dollop of sour cream for balance. The casserole is hearty enough to be a complete meal, but it pairs beautifully with a simple green salad dressed in lime vinaigrette.

Pairing TypeSuggestionsWhy It Works
Side DishLime-cilantro rice, black bean salad, crunchy slawAdds freshness and contrast
Sauce / DipSour cream, guacamole, salsa verde, chipotle cremaAdds creaminess and tang
BeverageAgua fresca, margarita, Mexican beer
Easy Chicken Burrito Casserole

Easy Crispy Oven Baked Chicken Parmesan Recipe

Oven Baked Chicken Parmesan – Healthy and Easy Recipe

⚖️
Difficulty
Easy
⏲️
Prep Time
15 mins
🕒
Cook Time
20 mins
⏱️
Total Time
35 mins
🍽️
Servings
4

I still remember the first time I made chicken Parmesan in my tiny NYC apartment, fresh out of culinary school in Paris. My Moroccan mother would have been amused—she never fried a thing in her life, relying on slow-cooked tagines and fragrant spices instead. This Oven Baked Chicken Parmesan is my tribute to that heritage: all the golden, cheesy comfort of the classic Italian-American dish, but baked instead of fried. It’s healthy, it’s quick, and it delivers that satisfying crunch without a drop of oil beyond a brush on the foil. If you’ve been searching for an easy chicken Parmesan that feels indulgent yet light, you’ve found it.

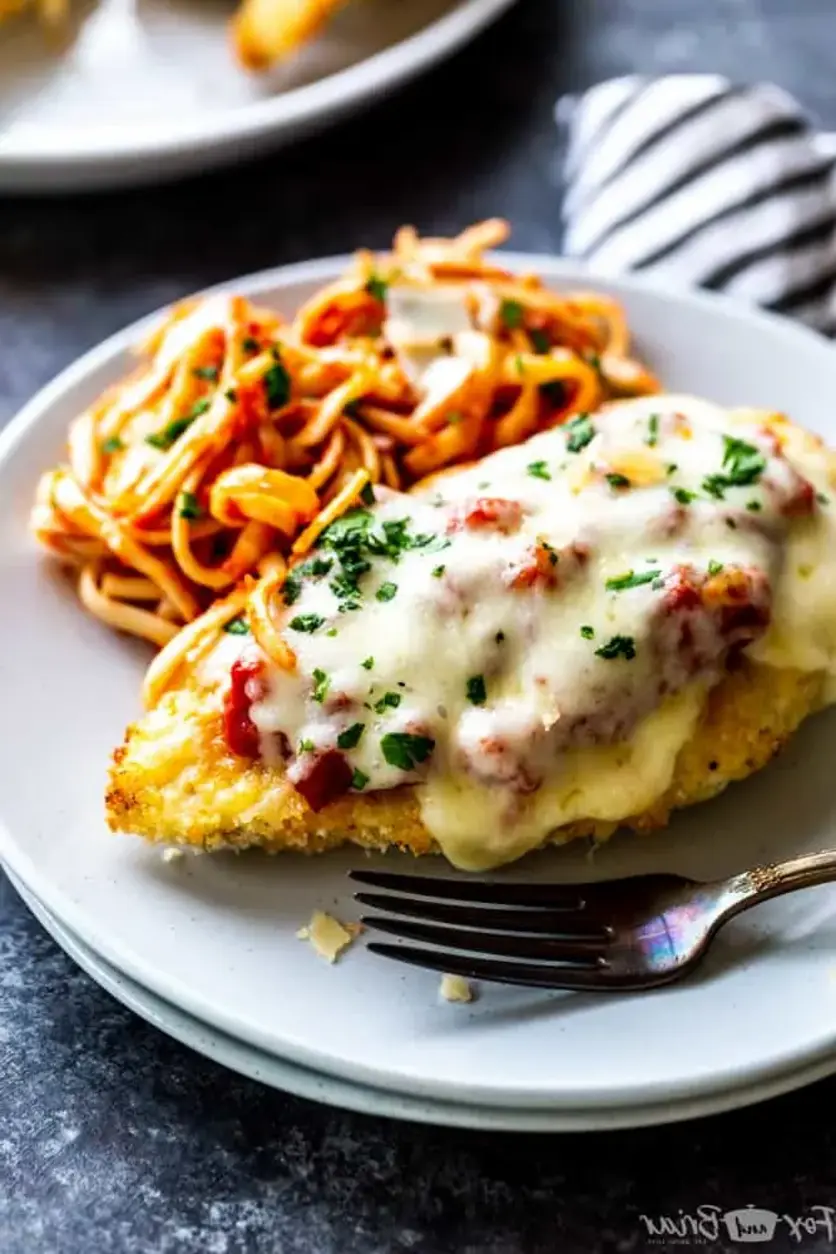
Imagine pulling a baking sheet from the oven where each piece of chicken breast is coated in a crisp, Parmesan-flecked crust, topped with a vibrant layer of marinara and a blanket of melted mozzarella that bubbles and browns under the broiler. The aroma of oregano and garlic fills your kitchen, a whisper of the spice souks I roamed as a girl in Marrakech. The first bite gives you that perfect contrast: a crunchy exterior that shatters slightly, then tender, juicy chicken, all tied together by the tangy sauce and stretchy cheese. It’s weeknight magic that feels like a Sunday dinner.

What makes my version different? I trained in Paris, so I know the power of a proper crust. Using panko—not plain breadcrumbs—and freshly grated Parmesan ensures every bite has texture and nutty flavor. The trick is baking at a high heat on the second-from-top rack, then a final broil to get that cheesy crust without drying out the meat. I’ve tested this dozens of times for my readers at exorecipes.com, and I’m sharing every hard-won tip. One common mistake? Skipping the pounding step—don’t! Even thickness guarantees even cooking. Let’s make this together.

Why This Oven Baked Chicken Parmesan Recipe Is the Best

The flavor secret here is layering: I season the panko with both oregano and garlic powder, plus a generous hit of kosher salt and black pepper. That single step, taught to me by a chef in Paris, ensures every crumb carries flavor deep into the crust. The Parmesan adds a savory umami that feels rich without being heavy, echoing the way my mother would finish a tagine with preserved lemons—a bright, salty punch.

For the texture, I use a technique I picked up in a patisserie kitchen: pounding the chicken to an even ½-inch thickness and pressing the coating firmly with my hand. This creates a thin, uniform piece that cooks quickly and stays juicy. The panko stays crispy because there’s no excess moisture—just a quick dip in egg and a light shake in the crumbs. No soggy bottoms here, I promise.

This recipe is foolproof and fast. From prep to table in about 35 minutes, it’s perfect for busy weeknights. Even if you’re new to cooking chicken, the visual cues (golden edges, bubbling cheese) make it easy to nail. Plus, it’s baked, not fried—so less mess, less oil, and fewer calories. That’s a win for any home cook.

Oven Baked Chicken Parmesan Ingredients

I pick up my chicken at the Union Square Greenmarket on Saturdays, where the farmers’ poultry is always pasture-raised. The marinara I often make from San Marzano tomatoes, but a good jarred brand works beautifully. My Moroccan roots remind me to never skimp on the Parmesan—buy a block and grate it yourself; the flavor is worlds apart from the pre-shredded stuff.

Ingredients List

  • 2 tablespoons olive oil
  • 2 chicken breasts (about 1 pound total)
  • 1 egg
  • 1 cup panko bread crumbs
  • ½ cup freshly grated Parmesan cheese
  • 1 teaspoon dried oregano
  • ½ teaspoon garlic powder
  • 1 teaspoon kosher salt
  • ½ teaspoon black pepper
  • 1 cup marinara sauce
  • 1 ½ cups shredded mozzarella
  • 2 tablespoons minced parsley (optional, for garnish)

Ingredient Spotlight

Panko bread crumbs are my go-to for that extra-crispy crust. They’re lighter and flakier than regular breadcrumbs, so they don’t soak up as much oil (or egg). Look for them in the Asian aisle of any US grocery store. No panko? Crushed cornflakes work in a pinch, but the texture will be denser.

Freshly grated Parmesan is non-negotiable. The pre-grated kind often contains cellulose and anti-caking agents that prevent melting. A 4-ounce block from the deli counter will give you the ½ cup you need. If you’re dairy-free, try a high-quality vegan Parmesan—the flavor won’t be as sharp, but it’ll still be good.

Marinara sauce should be a good-quality one with no added sugar. I love Rao’s or my own quick version. For spice lovers, add a pinch of red pepper flakes to the sauce. That little kick? It reminds me of the harissa my mother stirred into everything.

Original IngredientBest SubstitutionFlavor / Texture Impact
Panko bread crumbsCrushed cornflakesDenser, slightly sweeter crispness
Parmesan cheeseVegan Parmesan (cashew-based)Less sharp, still savory, melts differently
Marinara sauceCrushed tomatoes + 1 tsp Italian seasoningThicker sauce, more herby, less sweet
MozzarellaProvolone or low-moisture part-skimSlightly sharper, less stretch but still melts
Olive oilAvocado oil sprayNeutral flavor, similar non-stick property

How to Make Oven Baked Chicken Parmesan — Step-by-Step

Trust me, this is easier than you think. Follow these steps, and you’ll have a restaurant-quality dish without the mess of frying.

Step 1: Prepare the Baking Sheet and Oven

Line a rimmed baking sheet with foil and brush it lightly with the olive oil. Adjust your oven rack so it’s in the second position from the top (about 6 inches from the broiler element). Preheat the oven to 400°F. This high heat ensures the crust crisps up quickly while the chicken stays moist.

💡 mia’s Pro Tip: Don’t skip the foil! It makes cleanup a breeze. And that oil brush? It prevents the chicken from sticking—no need for a waterfall of oil.

Step 2: Cut and Pound the Chicken

Slice each chicken breast horizontally through the middle to create 4 thinner cutlets total. Place them in a gallon-sized zip-top bag in a single layer, seal, and pound to an even ½-inch thickness using a meat pounder or rolling pin. If you don’t have a bag, use cling wrap—just be careful not to tear it.

⚠️ Common Mistake to Avoid: Pounding unevenly. If one side is thicker, it’ll cook faster, leaving the thin side dry. Pound from the center outward with steady pressure.

Step 3: Season and Set Up Breading Station

Pat the chicken dry with paper towels—this is key for a crisp crust. Season both sides with salt and pepper (use that 1 teaspoon kosher salt and ½ teaspoon black pepper). In one shallow dish, mix the panko, grated Parmesan, oregano, garlic powder, and a pinch of salt. In another dish, whisk the egg until frothy.

💡 mia’s Pro Tip: I like to add a tablespoon of water to the egg for easier dipping. It thins it out just enough to coat evenly without getting gloppy.

Step 4: Coat the Chicken

Dip each piece into the egg, letting excess drip off, then press into the panko mixture. Use your hands to gently press the crumbs into the chicken—this ensures they stick and form a thick, crunchy crust. Place the coated pieces on the prepared baking sheet, leaving space between them.

⚠️ Common Mistake to Avoid: Overcrowding the pan. Steaming from crowded cutlets can soften the crust. Leave an inch of space for airflow.

Step 5: Bake the Chicken

Place the baking sheet on the second-from-top rack and bake for 15 minutes, or until the chicken is cooked through (internal temp of 165°F). You’ll see the edges turning golden. No need to flip during this first bake—the heat from the top rack crisps the top well.

💡 mia’s Pro Tip: If your chicken pieces are larger, add 2–3 minutes. The visual cue is a golden-brown crust that feels firm to the touch.

Step 6: Add Sauce and Cheese

Remove the baking sheet from the oven. Flip each piece of chicken (this helps re-crisp the bottom). Spoon about ¼ cup of marinara sauce over each cutlet, spreading it evenly. Top generously with the shredded mozzarella. Return the sheet to the oven and turn the broiler to high. Broil for 2–4 minutes, watching closely, until the cheese is melted, bubbly, and beginning to brown at the edges.

⚠️ Common Mistake to Avoid: Walking away during broiling. Cheese can burn in seconds. Stay near the oven and pull it out when it’s golden with a few dark spots.

💡 mia’s Pro Tip: If you like extra browning, use a kitchen torch to spot-broil the cheese—a trick I learned in Paris for crème brûlée.

StepActionDurationKey Visual Cue
1Prep sheet & preheat oven5 minsOven at 400°F, rack positioned
2Cut & pound chicken5 minsEven ½-inch thickness
3Mix crumbs & egg2 minsWell-combined, dry mixture
4Coat chicken3 minsFully covered, no wet spots
5Bake chicken15 minsGolden edges, internal temp 165°F
6Add sauce, cheese & broil2–4 minsCheese bubbly, browned edges

Serving & Presentation

Serve the Oven Baked Chicken Parmesan hot, straight from the baking sheet to the plate. I love to place each cutlet on a bed of spaghetti or angel hair pasta tossed in a little olive oil and garlic—it soaks up that extra sauce. Garnish with fresh minced parsley for a pop of green and a sprinkle of extra grated Parmesan. For a lighter option, pair with a crisp arugula salad dressed with lemon and olive oil; the peppery greens cut through the richness.

In my NYC kitchen, I sometimes add a dollop of harissa-spiked yogurt on the side—a nod to my Moroccan roots that adds a creamy, spicy contrast. You can also serve it on a crusty baguette for an incredible chicken Parmesan sandwich. Whatever you choose, make sure everyone gets a piece with plenty of melted cheese and a good crunch.

Pairing TypeSuggestionsWhy It Works
Side DishAngel hair pasta, arugula salad, roasted broccoliPasta catches sauce; salad adds freshness; broccoli adds texture
Sauce / DipExtra marinara, harissa yogurt, ranch dressingMoisture and flavor contrast
BeverageChianti, sparkling water with lemon, iced teaAcidity of Chianti cuts cheese; crisp water cleanses palate
GarnishFresh parsley, basil leaves, red pepper flakesColor and a hint of herbal or spicy finish

Make-Ahead, Storage & Reheating

I often double this recipe so I have leftovers for my busy NYC workdays. The key to make-ahead is to stop before adding the sauce and cheese: bake the crusted chicken, cool it completely, then

Print

clock clock iconcutlery cutlery iconflag flag iconfolder folder iconinstagram instagram iconpinterest pinterest iconfacebook facebook iconprint print iconsquares squares iconheart heart iconheart solid heart solid icon

Oven Baked Chicken Parmesan

  • Author: Chef Mia

Description

This delicious Oven Baked Chicken Parmesan recipe is easy and doesn’t require any frying. Because this chicken Parmesan is baked, it is healthy, quick and easy! Make this crispy baked Parmesan crusted chicken for dinner tonight in about thirty minutes!


Ingredients

Scale
  • 2 tablespoons olive oil
  • 2 chicken breasts (About 1 pound of chicken total)
  • 1 egg
  • 1 cup panko bread crumbs
  • 1/2 cup parmesan cheese (fresh grated)
  • 1 teaspoon dried oregano
  • 1/2 teaspoon garlic powder
  • 1 teaspoon kosher salt
  • 1/2 teaspoon black pepper
  • 1 cup marinara sauce
  • 1 ½ cups shredded mozzarella
  • 2 tablespoon minced parsley (optional, for garnish)

Instructions

  1. Line a baking sheet with foil, brush foil with olive oil. Adjust oven rack so that is in the second from the top space. Preheat the oven to 400°F.
  2. Cut the chicken breasts in half and pound to even thickness: Cut through the middle of the chicken breast as if you are going to butterfly it (cutting it open like a book), but cut all the way through to make two equal sized pieces.
  3. After cutting the chicken breasts in half, place them in a gallon sized zip top bag in an even layer, seal it, then pound them to an even thickness using a meat pounder or a rolling pin. You can also place the chicken breasts between two layers of cling wrap instead of a zip top bag if you prefer.
  4. Pat the chicken breasts dry with a paper towel, then season with salt and pepper.
  5. In one shallow dish, mix together panko bread crumbs, grated parmesan cheese, salt, pepper, garlic powder, oregano, and black pepper.
  6. In another shallow dish, whisk one egg.
  7. Dip one chicken breast into the egg, then into the bread crumb mixture. Ensure chicken breast is fully coated in the crumb mixture, and gently press with your hand do help the crumbs stick to the chicken. Place chicken breast on prepared baking sheet, repeat with remaining pieces of chicken.
  8. Place baking sheet in oven on the second from the top rack. Bake for 15 minutes, or until cooked through.
  9. Flip chicken, pour 1/4 cup of marinara sauce over each piece of chicken, then top with cheese. Place back in the oven. Turn on the broiler. Broil for 2-4 minutes, until cheese is melted and bubbly and edges of chicken are browning.


Nutrition

  • Calories: 459 kcal
  • Sugar: 4 g
  • Fat: 25 g
  • Carbohydrates: 16 g
  • Protein: 42 g


Oven Baked Chicken Parmesan

k">

Tried This Recipe? Leave a Comment!

Did you make this recipe? I’d love to hear how it turned out! Please leave a comment and a rating below. Your feedback helps other home cooks and supports cheerychop.com!

For more delicious inspiration, follow me on Pinterest!

Easy Sugar Free Keto Coconut Flan Recipe

Sugar Free Keto Coconut Flan – Creamy & Decadent

⚖️
Difficulty
Medium
⏲️
Prep Time
15 mins
🕒
Cook Time
60 mins
⏱️
Total Time
75 mins
🍽️
Servings
8

Every time I make this Sugar Free Keto Coconut Flan, I’m whisked back to my mother’s cozy kitchen in Marrakech, where the scent of caramelized sugar and warm vanilla filled our home. But this isn’t your grandmother’s traditional flan — it’s my modern, keto-friendly take that’s completely free of refined sugar and dairy, yet every bit as luxuriously creamy. I remember the first time I adapted it for a low-carb dinner party in my NYC apartment; my guests couldn’t believe it was sugar-free and grain-free. The secret? A velvety custard made from full-fat coconut milk, enriched with egg yolks, and sweetened only with monk fruit and stevia. This is the sugar free keto coconut flan you’ve been dreaming of — silky, rich, and surprisingly simple to make.

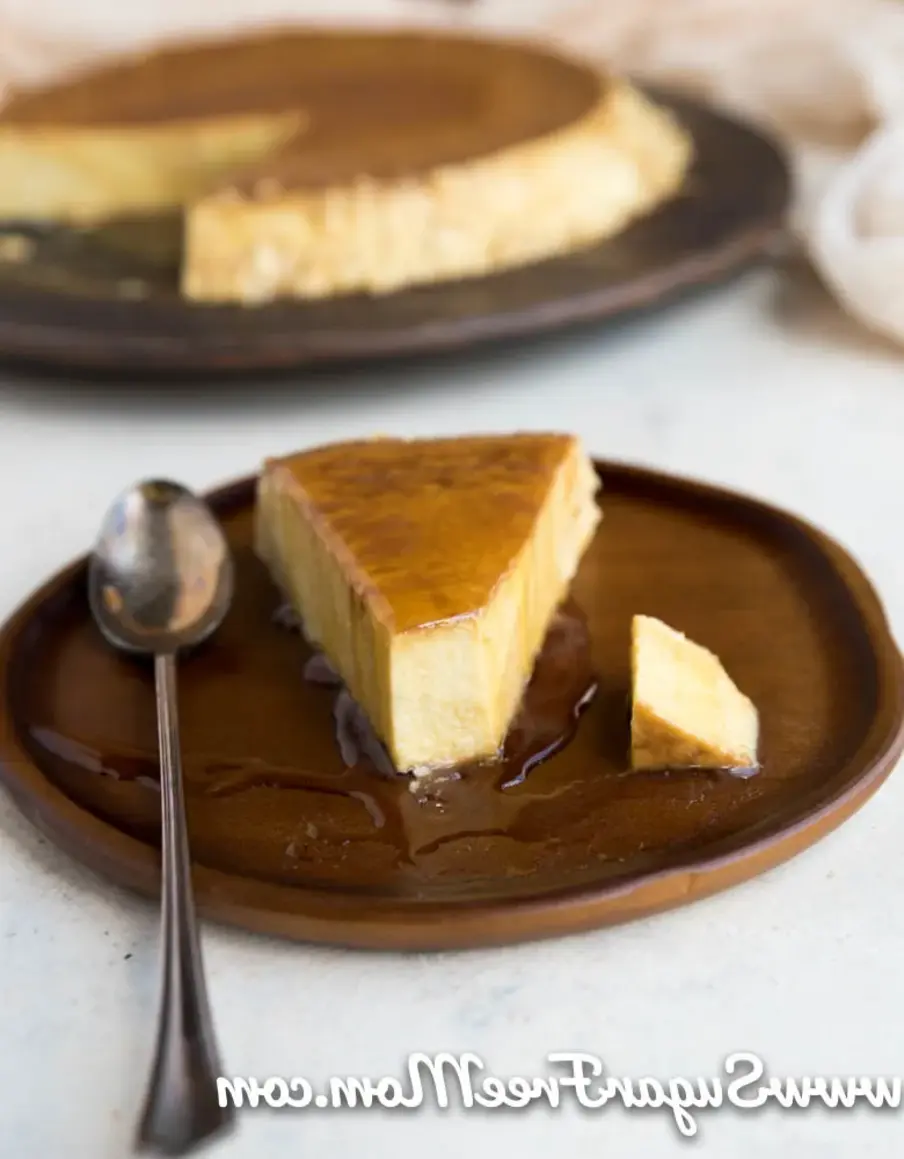
The texture is pure indulgence — each spoonful glides across your tongue like a cloud, with a gentle wobble that speaks to perfectly baked custard. The caramel sauce, made from a brown sugar-free sweetener, adds a deep, almost butterscotch-like depth that complements the tropical whisper of coconut. I love how the flan releases from the dish in one seamless, glossy dome, its golden syrup pooling around it like a halo. It’s a dessert that feels both elegant and comforting — the kind you’d serve at a holiday table or after a cozy weeknight dinner. In my Paris culinary school days, I learned that texture in custard is everything; too much heat and you get scrambled eggs, too little and it won’t set. That training is what makes this recipe foolproof.

After years of testing in my tiny NYC kitchen, I’ve perfected this version so that anyone — even a keto beginner — can achieve a flawless result. My twist? I use a combination of Monk Fruit Allulose Brown sweetener for the caramel and liquid stevia for the custard, which prevents that dreaded gritty texture that plagues so many sugar-free desserts. Plus, I’ll walk you through the crucial water bath technique that guarantees a silky finish. One common mistake I see is skipping the straining step — but trust me, it makes all the difference. From my Moroccan heritage to my French training, I bring every bit of that knowledge into this dish. Ready to make the best keto flan recipe of your life?

Why This Sugar Free Keto Coconut Flan Recipe Is the Best

The Flavor Secret: Most keto flans taste eggy or rely on artificial sweeteners that leave a chemical aftertaste. Mine is different. I use a duo of sweeteners — allulose-based brown sweetener for the caramel and coconut liquid stevia for the custard — that together create a rich, caramelized flavor without any bitterness. The coconut milk provides a natural creaminess and subtle sweetness that pairs beautifully with the vanilla. It’s a trick I picked up from French pastry chefs: balance your sweeteners to mimic real sugar’s complexity.

Perfected Texture: The hallmark of a great flan is its silky, custard-like consistency, and achieving that in a dairy-free, sugar-free version takes technique. I use a water bath (bain-marie) to ensure gentle, even cooking, and I never skip straining the custard mixture to remove any chalaza (those stringy egg bits) that can cause a grainy texture. The result is a low carb coconut flan that’s so smooth, it rivals the classic full-sugar versions.

Foolproof & Fast: This recipe is designed to be forgiving, even for a busy weeknight. The ingredients are easy to find at any US grocery store — I grab my canned coconut milk at Fairway in NYC every week. With clear visual cues (like “a knife inserted near the center comes out clean”) and a simple step-by-step method, you can’t go wrong. Plus, it’s make-ahead friendly, so you can prepare it the night before a gathering and chill it overnight. It’s the ultimate no-stress dessert.

Sugar Free Keto Coconut Flan Ingredients

When I shop for these ingredients at my local NYC farmers market or even the regular supermarket, I always look for the highest quality I can find — especially the eggs and coconut milk. Good ingredients make a world of difference in a simple custard. I remember my mother’s insistence on using farm-fresh eggs in Morocco; here in the city, I go for pasture-raised eggs, which give a richer yolk color and flavor. Let’s go through what you need.

Ingredients List

  • 6 large eggs
  • 2 egg yolks
  • 27 ounces canned coconut milk (or 2 [13.5 ounce each] cans)
  • 2 teaspoons vanilla extract
  • 2 teaspoons coconut liquid stevia (or vanilla stevia)
  • 1/2 cup Monk Fruit Allulose Brown sweetener (or another brown sugar free sweetener)
  • 2 tablespoons butter (or ghee/vegan butter for dairy-free)

Ingredient Spotlight

Canned Coconut Milk: This is the backbone of our dairy-free keto flan recipe. Always choose full-fat canned coconut milk — not light or carton varieties. The fat is essential for creaminess and preventing a watery texture. I prefer brands like Trader Joe’s or Native Forest for their rich consistency. Shake the can well before opening to incorporate any separated cream.

Eggs: Both whole eggs and egg yolks contribute to the custard’s structure and richness. Fresh, high-quality eggs are crucial. Look for eggs with bright orange yolks — they’ll give your flan a beautiful golden hue. If you’re worried about the eggs being too firm, you can add an extra yolk for more tenderness.

Sweeteners (Monk Fruit Allulose Brown & Liquid Stevia): This dynamic duo is key to a sugar-free flan that tastes like the real thing. Allulose brown sweetener mimics brown sugar’s molasses notes in the caramel, while liquid stevia provides sweetness without bulk or aftertaste. Don’t substitute a granular erythritol-based sweetener here — it can crystallize and become gritty. I learned this the hard way in my early testing!

Original IngredientBest SubstitutionFlavor/Texture Impact
Canned Coconut MilkCoconut Cream (canned)Richer, thicker custard; reduce eggs by 1
Monk Fruit Allulose Brown SweetenerLakanto Brown Sugar SubstituteSimilar caramel notes; may need 1 extra tbsp
ButterGhee or Vegan Butter (e.g., Miyoko’s)Same richness; vegan butter may add slight flavor
Coconut Liquid SteviaVanilla Liquid SteviaSlightly different flavor; still keto-friendly

How to Make Sugar Free Keto Coconut Flan — Step-by-Step

Don’t worry — this process is simpler than it looks. I’ll guide you through every step with clear visual cues so you can confidently make this at home.

Step 1: Prepare the Oven and Dish

Preheat your oven to 325°F. Have a 10-inch pie dish (or cake pan, or 10 individual ramekins) ready. You’ll also need a larger roasting pan that fits the dish comfortably. This will be your water bath setup.

💡 mia’s Pro Tip: Use a glass or ceramic pie dish for even heating. Metal pans can overheat the custard around the edges.

Step 2: Make the Custard

In a stand mixer fitted with the whisk attachment, combine 6 eggs, 2 egg yolks, 27 ounces of canned coconut milk, 2 teaspoons of vanilla extract, and 2 teaspoons of coconut liquid stevia. Mix on medium-low speed until completely smooth — about 1 to 2 minutes. Don’t overmix or you’ll incorporate too much air, which can cause bubbles and a spongy texture. Set this aside.

⚠️ Common Mistake to Avoid: Whisking too vigorously! You want a smooth emulsion, not a frothy mess. Air bubbles in the custard will create holes in the finished flan.

Step 3: Make the Sugar-Free Caramel

In a small saucepan, add 1/2 cup of Monk Fruit Allulose Brown sweetener and 2 tablespoons of butter (or ghee/vegan butter). Stir over medium-low heat until the sweetener dissolves and the mixture starts to bubble around the edges. Let it simmer for exactly one minute — it will thicken slightly and smell like toasted brown sugar. Immediately pour the hot caramel into the bottom of your pie dish, swirling to coat evenly. Let it cool for just 1-2 minutes before adding the custard.

💡 mia’s Pro Tip: Don’t let the caramel sit too long — if it cools completely, it will harden and be difficult to spread. A minute of cooling is enough.

Step 4: Assemble and Water Bath

Gently pour the custard mixture over the caramel in the pie dish. Place the dish into the larger roasting pan, then transfer to the oven. Carefully pour about 2 cups of hot water into the roasting pan until it reaches 1-2 inches up the sides of the pie dish. This gentle water bath ensures even cooking and prevents the flan from curdling.

⚠️ Common Mistake to Avoid: Pouring cold water into the pan! Always use hot water from the tap — cold water will shock the dish and slow down cooking, leading to uneven results.

Step 5: Bake and Cool

Bake for 1 hour, or until a knife inserted near the center comes out clean. The center should be just set — it will jiggle slightly but not be liquid. Remove from the oven and let the flan cool to room temperature in the water bath. Then cover with plastic wrap and refrigerate for at least 2 hours, or overnight. This chilling time is essential for the texture to firm up perfectly.

💡 mia’s Pro Tip: Overnight chilling is best! The flan develops deeper flavor and a creamier texture. I always make mine a day ahead for the best results.

StepActionDurationKey Visual Cue
1Preheat & prepare dish10 minsOven reaches 325°F
2Mix custard2 minsSmooth, no lumps
3Make caramel3 minsBubbles around edges
4Assemble & water bath5 minsWater 1-2 inches up dish
5Bake60 minsKnife comes out clean
6Cool & refrigerate2+ hoursFirm, set, cold

Serving & Presentation

When you’re ready to serve, run a thin knife around the edges of the flan to loosen it. Place a large serving plate (with a slight rim to catch the syrup) over the dish, then confidently invert it in one swift motion. You’ll hear a satisfying thud as the flan releases, followed by the gentle flow of caramel syrup pooling around it. It’s a moment of pure magic. I love serving this on a simple white plate to let the golden color shine. You can garnish with toasted coconut flakes — toast them in a dry pan until golden for extra crunch — or a few fresh berries like raspberries, which provide a bright tart contrast.

For a Moroccan touch that I adore, sprinkle a tiny pinch of saffron threads over the top before serving; it adds an elegant floral note and a beautiful golden hue. Alternatively, a dusting of cinnamon is lovely and pairs perfectly with the coconut. In the summer, I serve this with a side of fresh mango or passion fruit, which was a trick I learned from a street food vendor in Paris. It elevates the sweetness without adding sugar.

Pairing TypeSuggestionsWhy It Works
Side DishFresh berries, toasted coconut, sliced almondsAdds texture and tart freshness against creamy custard
Sauce/DipExtra caramel sauce, sugar-free chocolate drizzleEnhances richness; chocolate and caramel are classic
BeverageStrong black coffee, unsweetened almond milk latte, mint teaCoffee cuts sweetness; mint tea adds Moroccan touch
GarnishSaffron threads, cinnamon dust, edible flowersElevates visual appeal; saffron adds

Print
clock clock iconcutlery cutlery iconflag flag iconfolder folder iconinstagram instagram iconpinterest pinterest iconfacebook facebook iconprint print iconsquares squares iconheart heart iconheart solid heart solid icon

Sugar Free Keto Coconut Flan

  • Author: Chef Mia

Ingredients

Scale
  • 6 eggs
  • 2 egg yolks
  • 27 ounces canned coconut milk (or 2 (13.5 ounce each) cans)
  • 2 tsp vanilla extract
  • 2 tsp coconut liquid stevia (or vanilla stevia)
  • 1/2 cup Monk Fruit Allulose Brown sweetener (or another brown sugar free sweetener of choice)
  • 2 tbsp butter (or use ghee or vegan butter for dairy free)

Instructions

  1. Preheat oven to 325 degrees F.
  2. In a stand mixer, mix the eggs, yolks, coconut milk, vanilla extract, and stevia until well combined. Set aside.
  3. In a small saucepan add the Caramel sauce ingredients and stir until combined over medium low heat, until bubbles form around the edges. Simmer one minute, then pour into a 10 inch pie dish, cake pan or 10 individual ramekins. Swirl around to cover bottom of dish. Let sauce cool just 1-2 minutes before pouring the custard mixture over the caramel sauce.
  4. Place the pie dish into a larger roasting pan and place in the oven. Pour 2 cups of hot water on the bottom of the larger roasting pan so the hot water comes 1-2 inches up the sides of the pie dish.
  5. Bake 1 hour or until a knife inserted near the center comes out clean. Cool to room temperature then refrigerate for two hours or overnight. When ready to serve, loosen edges with a knife and invert onto a large plate. Sometimes erythritol can develop crystallization in the refrigerator. If that happens after you invert the flan onto a plate, simply remove can crystallized pieces from the caramel sauce. Enjoy or keep refrigerated until ready to serve.


Nutrition

  • Calories: 207 kcal
  • Sugar: 2 g
  • Fat: 20 g
  • Carbohydrates: 4 g
  • Protein: 5 g


Sugar Free Keto Coconut Flan

Classic Flan Recipe – Silky Caramel Custard Dessert

The Best Easy Flan Recipe — Silky Caramel Custard Made Simple

⚖️
Difficulty
Medium
⏲️
Prep Time
20 mins
🕒
Cook Time
70 mins
⏱️
Total Time
90 mins + chilling
🍽️
Servings
8

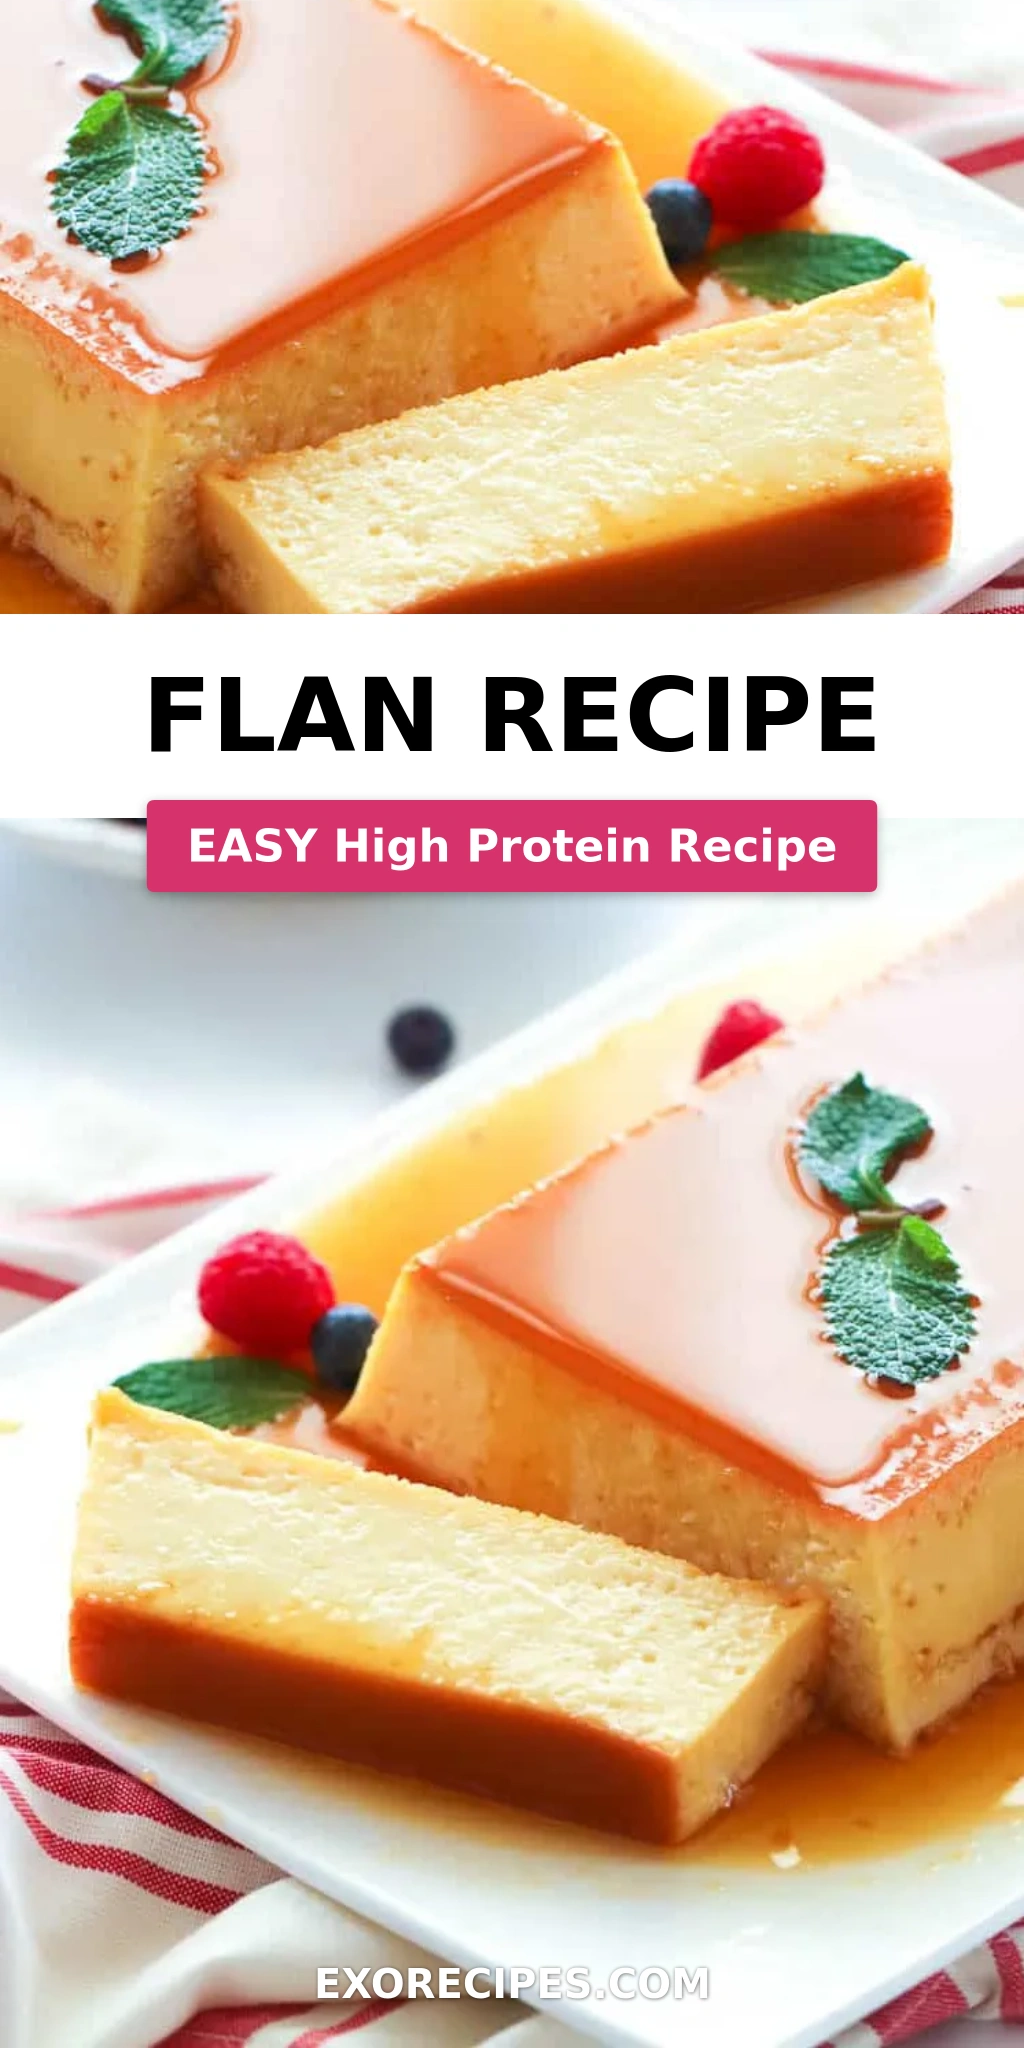
There are few desserts that bring me back to my childhood in Morocco quite like a perfect flan recipe. I remember my mother making it for special family gatherings – the way the caramel would pool on the plate, the silky custard that seemed to melt on my tongue. That memory stayed with me through culinary school in Paris, where I learned the French technique for crème caramel, and now, as a professional cook in New York City, I’ve perfected this easy flan recipe that combines the best of both worlds: the bold, comforting flavors of my heritage with the precision of French pastry. This is a flan with a dense yet sturdy creamy texture, topped with a made-from-scratch caramel sauce that’s simply divine.

The first bite is pure magic – a rich, caramelly sweetness that hits your tongue before the silky custard unfolds with notes of vanilla and a whisper of bourbon. The caramel is deeply amber, almost honey-like, providing a beautiful contrast to the creamy, eggy custard. It’s not too heavy, not too light, but just right – a custard that feels both indulgent and refined. The texture is what sets this traditional flan apart: dense enough to slice cleanly, yet so tender it quivers on the spoon. Every element – from the carefully made caramel to the perfectly baked egg custard – comes together in a dessert that is truly fancy yet simple to make.

I’ve tested this recipe countless times in my tiny NYC kitchen, adjusting temperatures, playing with milk ratios, and perfecting the water bath technique to ensure a flawless result every time. This caramel flan recipe is not just my favorite; it’s the one I confidently share with friends, family, and my readers. The unique angle here is the combination of whole milk, evaporated milk, and sweetened condensed milk, which creates an exceptionally creamy and stable custard without the need for heavy cream. From my kitchen to yours, let me show you how to make the best flan dessert – one that will transport you, bite after bite.

Why This Flan Recipe Is the Best

The Flavor Secret: The magic of this easy flan recipe lies in its triple-milk base. By combining whole milk with both evaporated and sweetened condensed milk, I’ve created a custard that’s incredibly rich, creamy, and perfectly sweet without being cloying. A touch of bourbon adds a sophisticated warmth that elevates the entire dish, a technique I learned in Paris.

Perfected Texture: Achieving that silky-smooth, dense yet tender texture is all about technique. Baking the flan in a water bath (bain-marie) at a low 300°F ensures gentle, even cooking, preventing the dreaded bubbles and holes. Straining the custard through a sieve removes any bits of egg, guaranteeing a flawlessly silky finish every time.

Foolproof & Fast: This recipe is designed for home cooks. I’ve broken down each step with clear visual cues and pro tips, so even a beginner can make a bakery-quality traditional flan. Make it ahead of time, and you have an incredible dessert ready to impress for any occasion – from a simple family dinner to a holiday feast.

Flan Recipe Ingredients

One of my favorite things about this flan recipe is how simple the ingredients are. I pick up most of them at my local bodega in NYC or the farmers market in Union Square. The key is using quality ingredients – especially the vanilla and eggs – as they shine in this straightforward dessert.

Ingredients List

  • ¼ cup or 2 fl oz water
  • ¾ cup or 150 g sugar
  • 3 large eggs, plus 4 egg yolks
  • 1 can or 14 oz sweetened condensed milk
  • 1 can or 12 oz evaporated milk
  • ½ cup or 4 fl oz whole milk (half-and-half or 2% milk may be substituted but do not use skim milk)
  • 1 tbsp bourbon (see note)
  • 1 tbsp vanilla extract
  • ½ tsp or 3 g salt

Ingredient Spotlight

Sweetened Condensed Milk: This is the secret to the custard’s dense, creamy texture and sweetness. It’s a non-negotiable ingredient for this traditional flan, creating a richer mouthfeel than using sugar alone. Look at your local grocery store for any brand.

Evaporated Milk: Unlike condensed milk, evaporated milk is unsweetened, but it adds an incredible creaminess and a slight caramelized flavor note that deepens as the flan bakes. It’s a classic ingredient in many Latin American flan recipes, and it’s a staple in my pantry.

Eggs & Yolks: The combination of whole eggs and extra yolks is what gives this flan its signature rich, silky texture. The yolks add fat and richness, while the whites provide structure. Using both ensures a custard that is both tender and firm enough to slice beautifully.

Bourbon: Just a tablespoon adds an incredible depth of flavor that you won’t be able to pinpoint but will definitely miss if it’s gone. It cuts the sweetness and adds a warm, sophisticated note. You can substitute with dark rum or even 1 teaspoon of vanilla bean paste for a non-alcoholic version.

Original IngredientBest SubstitutionFlavor / Texture Impact
Whole MilkHalf-and-halfRicher, slightly creamier texture
BourbonDark rum or 1 tsp vanilla bean pasteDifferent flavor profile; rum adds molasses notes, paste adds pure vanilla intensity
Evaporated Milk1 ½ cups heavy cream + ½ cup waterSignificantly richer, almost like a pot de crème

How to Make Flan — Step-by-Step

Making a perfect caramel flan is easier than you think. Just follow these steps, pay attention to the visual cues, and you’ll have a show-stopping dessert that will wow your family and friends.

Step 1: Make the Caramel

Mix together the ¼ cup water and ¾ cup sugar in a small heavy saucepan. Stir continuously over medium heat until the sugar is completely dissolved. Once it comes to a boil, reduce the heat to low and cook without stirring until the mixture starts to brown. Swirl the pan occasionally to ensure even browning. Watch carefully – it will turn from light gold to a beautiful amber, like honey. Once it reaches that golden-brown color, remove from the heat and swirl for another 15-20 seconds.

💡 mia’s Pro Tip: Be patient! Don’t stir the caramel once it starts boiling, or it may crystallize. Just let it do its thing and swirl the pan to distribute the heat. The darker the caramel (without burning), the more complex the flavor.

Step 2: Prepare the Custard

Quickly pour the hot caramel into an ungreased loaf pan, tilting it to evenly coat the bottom. Let it stand for about 10 minutes – it will firm up slightly, but that’s okay; it will loosen as it bakes. In a large bowl, whisk together the 3 eggs and 4 egg yolks until well combined. Then whisk in the entire can of sweetened condensed milk, the can of evaporated milk, and the ½ cup of whole milk. Finally, add the bourbon, vanilla extract, and salt. Whisk until the mixture is smooth and uniform.

⚠️ Common Mistake to Avoid: Over-whisking the eggs! Whisk just until the yolks and whites are combined. Over-whisking can incorporate too much air, leading to a bubbly, porous flan.

Step 3: Strain and Combine

Place a fine-mesh sieve over a large bowl or a large measuring cup with a spout. Pour the custard mixture through the sieve to catch any bits of egg or undissolved sugar. This is a crucial step for achieving that incredibly silky texture. Then, carefully pour the strained custard into the loaf pan over the hardened caramel layer. Do not stir, just let it sit on top.

💡 mia’s Pro Tip: Using a sieve isn’t just for texture – it also ensures the custard bakes evenly without any hidden lumps. It’s a simple step that makes a huge difference in the final result.

Step 4: Bake in a Water Bath

Cover the loaf pan tightly with aluminum foil. Place the loaf pan in the center of a larger roasting or baking dish (like a 9×13-inch pan). Pour boiling water into the larger pan until it reaches about 1 inch up the sides of the loaf pan. This is the water bath. Bake at 300°F (149°C) for 60-70 minutes. The center should be just set – it will still jiggle slightly when you shake the pan, but it should not be liquidy. Let it sit in the water bath for about an hour to cool down enough to handle.

⚠️ Common Mistake to Avoid: Baking at too high a temperature! A low oven (300°F) and a water bath are non-negotiable for a creamy, not scrambled, custard. High heat will cause the eggs to curdle, creating a grainy texture.

Step 5: Chill and Unmold

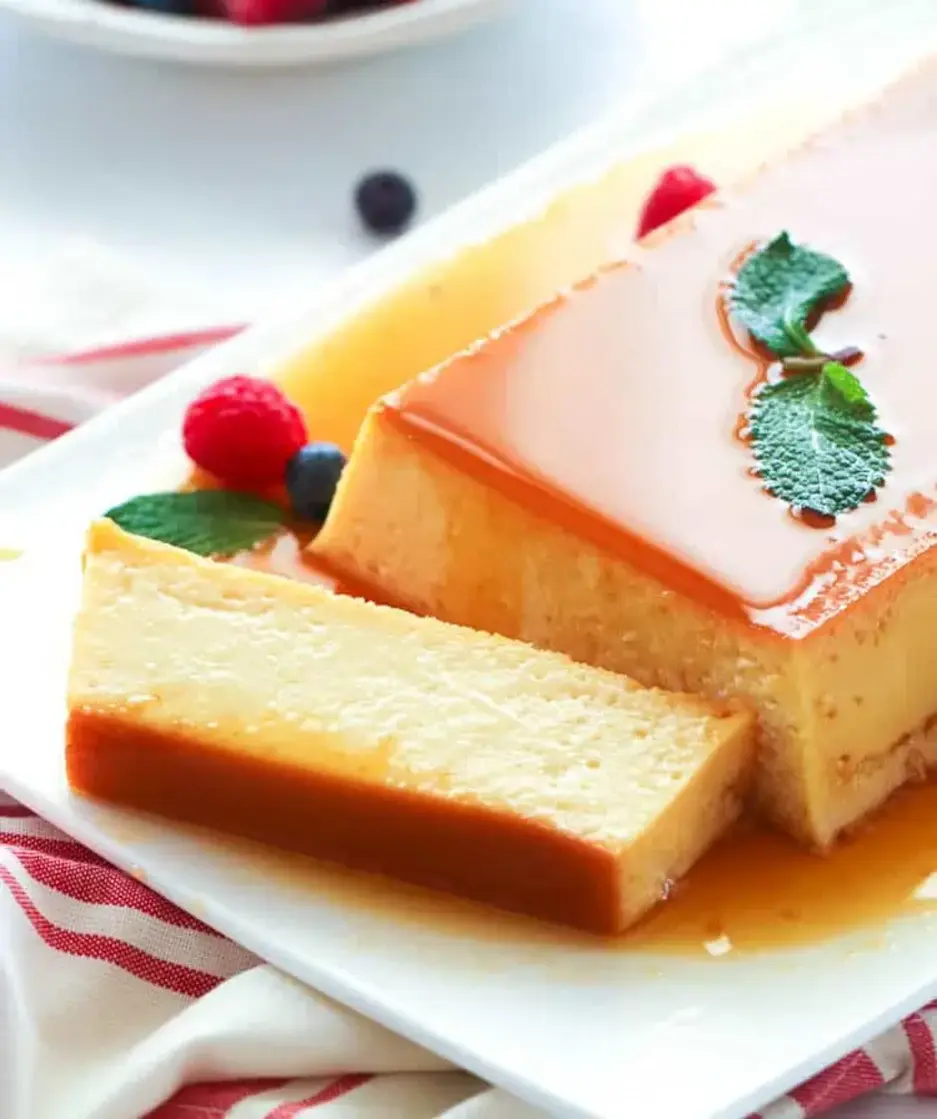
Remove the loaf pan from the water bath and let it cool completely on a wire rack for about an hour. Once cool, wrap the entire loaf pan tightly with plastic wrap. Place it in the refrigerator to chill for at least 2 hours, but ideally overnight – the flan will firm up beautifully and the flavors will meld. To unmold, carefully run a sharp knife around the edges of the pan to loosen the flan. Place a rimmed platter over the pan and flip it over. Let it sit for a minute or two. If it doesn’t come out easily, gently shake the pan. The caramel will pour out over the top.

💡 mia’s Pro Tip: Don’t be tempted to rush the chilling time! A fully chilled flan is firmer and easier to unmold cleanly. If you serve it too soon, the custard might break apart.

StepActionDurationKey Visual Cue
1Make caramel8-10 minutesGolden amber, like honey
2Prepare custard10 minutesSmooth, well-combined
3Strain and combine5 minutesNo bits in sieve
4Bake in water bath60-70 minutesCenter jiggles slightly
5Chill and unmold2+ hoursFirm, clean slice edges

Serving & Presentation

This flan is a star on its own, but I love to dress it up a bit for a truly special presentation. When you unmold the flan, the deep amber caramel sauce will pool beautifully around the base. Use a sharp, thin-bladed knife to slice the flan into clean, even pieces – run the knife under hot water and wipe it dry between cuts for the cleanest slices. For a touch of freshness that balances the rich sweetness, I love to top each slice with a delicate sprinkle of flaky sea salt and a few fresh berries – raspberries or sliced strawberries are my go-to. A small sprig of mint adds a lovely pop of color.

For a more decadent presentation, serve each slice with a dollop of lightly sweetened whipped cream or a scoop of vanilla bean ice cream. The combination of the warm, silky flan with the cold ice cream is absolutely divine. In my NYC kitchen, I sometimes serve it alongside a shot of strong espresso for a classic affogato-inspired twist – it perfectly cuts the sweetness. This flan is a fantastic dessert for dinner parties, holidays like Thanksgiving or Christmas, or any celebration that calls for a memorable, make-ahead treat.

Pairing TypeSuggestionsWhy It Works
Side DishFresh berries, a drizzle of honeyAdds brightness and acidity to cut the richness
Sauce / DipWhipped cream, chocolate sauceClassic indulgence, chocolate enhances caramel flavor
BeverageEspresso, late-harvest RieslingCoffee cuts sweetness; wine complements caramel notes
GarnishFlaky sea salt, mint sprig, crumbled pistachiosAdds texture and visual appeal, salt enhances sweetness

Make-Ahead, Storage & Reheating

One of the greatest things about this easy flan recipe is that it’s an incredible make-ahead dessert. In fact, it’s better when made a day or two in advance! As a busy New Yorker, I am always planning my meals in advance, and flan is my go-to for stress-free entertaining. The flavors have time to meld, and the texture becomes even silkier after a night in the fridge.

MethodContainerDuration
Flan Recipe