Easy Chicken Parmesan Casserole – Perfect Family Dinner
Table of Contents
Easy Chicken Parmesan Casserole With Pasta – A Weeknight Miracle
⚖️
Difficulty
Easy
⏲️
Prep Time
10 mins
🕒
Cook Time
25 mins
⏱️
Total Time
35 mins
🍽️
Servings
6
This easy chicken parmesan casserole is the kind of dinner I turn to after a long day of recipe testing in my tiny NYC kitchen. I still remember my mother’s hands kneading dough in Morocco, and how she’d always find a way to turn simple ingredients into something unforgettable. This baked chicken parmesan dish takes that same spirit—quick, cheap, and joyful—and wraps it in a warm, cheesy embrace. It’s a true Italian-inspired weeknight wonder.
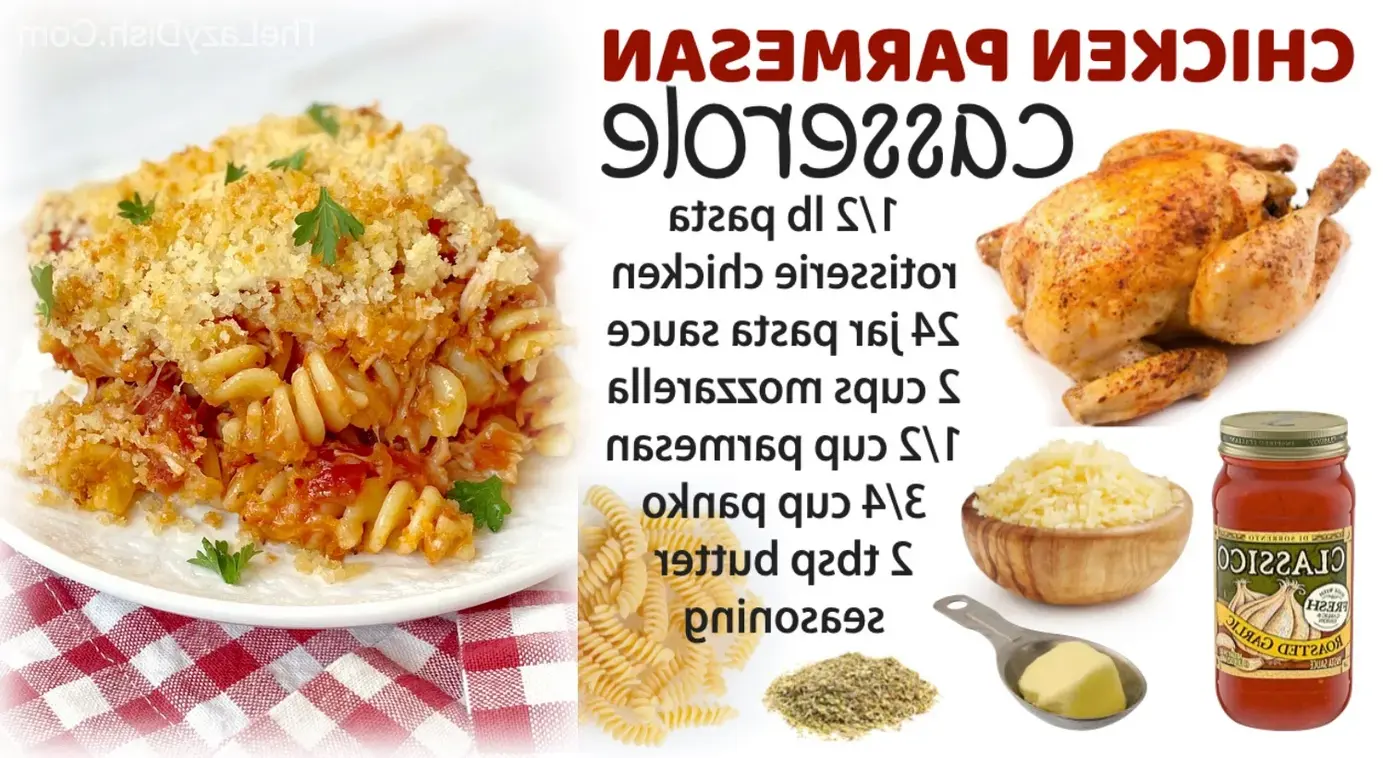
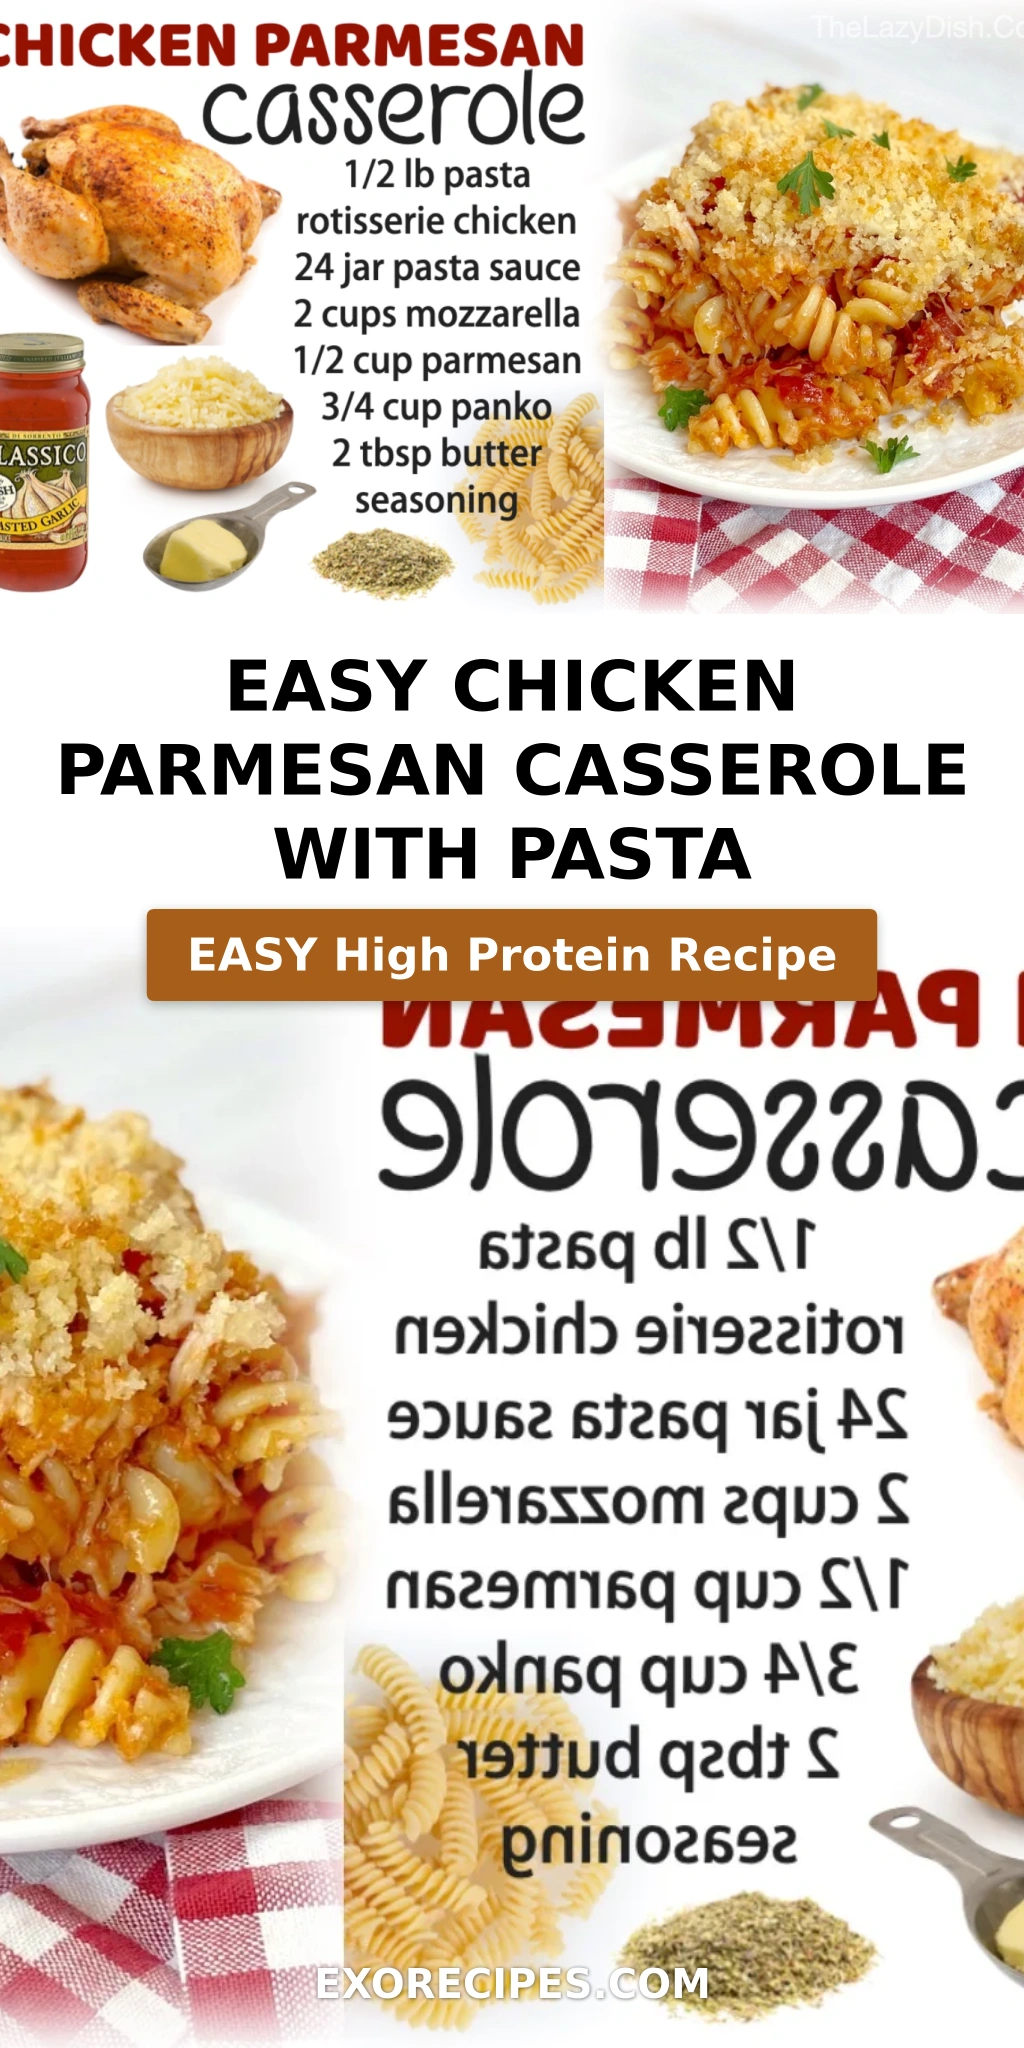
The aroma of garlic, marinara, and bubbling mozzarella fills your whole apartment. Each bite is tender shredded rotisserie chicken, perfectly cooked pasta, and that glorious golden panko crust that shatters when you dig in. A sprinkle of parmesan adds a nutty, salty finish. I learned the importance of texture in Paris—this casserole balances creamy, crunchy, and saucy beautifully.
I’ve tested this chicken parmesan with pasta more times than I can count, and the secret is in the panko topping plus the simmering step that melds the flavors before baking. One common mistake? Skipping the simmer—it makes all the difference. I’ll walk you through every step so your family dinner is nothing short of spectacular. 💡 mia’s Pro Tip: Always use rotisserie chicken from your grocery store deli—it’s already perfectly seasoned and saves you at least 20 minutes.
Why This Easy Chicken Parmesan Recipe Is the Best
The Flavor Secret: This chicken parmesan casserole shines because of a technique I picked up in Paris—layering flavors by simmering the sauce with the chicken and pasta before baking. The marinara absorbs all the savory goodness, while the cheese melts into gooey perfection. It’s the Italian-American comfort you crave, but with a chef’s shortcut that makes it foolproof.
Perfected Texture: Most casseroles turn out mushy, but not this one. By mixing the pasta with the sauce before baking and topping it with buttery panko, you get a crisp, golden crust that contrasts with the tender interior. I learned the importance of a breadcrumb topping at a pastry school in Paris—it’s all about that crunch.
Foolproof & Fast: This easy chicken parmesan recipe is perfect for beginners and busy parents. With just 10 minutes of prep and simple ingredients you can grab at any grocery store, it’s a guaranteed success. No fancy equipment needed—just a baking dish and a pot. Even my pickiest eater asks for seconds!
Chicken Parmesan Casserole Ingredients
I love how these ingredients come together so effortlessly. At my local NYC farmers market, I usually pick up fresh garlic and a jar of good-quality marinara—though a quick trip to any supermarket works wonders. It reminds me of the markets in Marrakech, where simple staples always made the best meals.
Ingredients List
1 small rotisserie chicken (pulled into small pieces)
½ lb pasta (about 3 cups dry; any short shape like penne, ziti, or farfalle)
1 (24 oz) jar marinara or spaghetti sauce
2 cups shredded mozzarella cheese
½ cup grated parmesan cheese
¾ cup panko bread crumbs
2 tbsp melted butter
1 tsp Italian seasoning
½ tsp garlic powder
Ingredient Spotlight
Rotisserie Chicken: This is the star shortcut—pre-cooked, juicy, and flavorful. Look for one with crispy skin (you can leave the skin on for extra flavor or remove it). Substitution: Use 3 cups of leftover cooked chicken or 1.5 lbs of diced chicken breast seared until golden. The texture will be slightly drier if using lean breast.
Panko Bread Crumbs: These Japanese-style breadcrumbs give the casserole its crunchy topping. I love using them because they stay crisp even after baking. Substitution: Regular breadcrumbs work but won’t be as crunchy. Add 1 tbsp of olive oil to regular breadcrumbs to compensate. In Morocco, my mother would use crushed crackers for a similar effect.
Marinara Sauce: Choose a jar with a bright, tangy flavor—avoid ones heavy in added sugar. Look for “no sugar added” or “San Marzano tomatoes.” Substitution: Use 24 oz of crushed tomatoes plus 1 tsp each of dried oregano, basil, and a pinch of sugar. This homemade version tastes amazing and is worth the extra minute.
Original Ingredient
Best Substitution
Flavor / Texture Impact
Rotisserie Chicken
3 cups cooked chicken breast (pan-seared)
Chicken is leaner; add 1 tbsp olive oil to keep moist
Panko Bread Crumbs
Regular breadcrumbs + 1 tbsp oil
Less crunchy; crust will be softer
Marinara Sauce
Crushed tomatoes + oregano, basil, sugar
Bright, homemade taste; slightly chunkier texture
Mozzarella Cheese
Provolone or low-moisture whole milk mozzarella
Creamier or more stretchy; still great melting
Parmesan Cheese
Pecorino Romano or Grana Padano
Saltier or nuttier; adjust salt accordingly
How to Make Easy Chicken Parmesan Casserole — Step-by-Step
This chicken casserole recipe comes together in just 35 minutes, and the steps are designed to be stress-free, even on the busiest weeknight.
Step 1: Preheat and Prep
Preheat your oven to 350°F. Grease a medium baking dish—I like a 7×9-inch dish, but a 9×13 works too. This step ensures nothing sticks and cleanup is a breeze.
⚠️ Common Mistake to Avoid: Using a cold dish straight from the fridge. Let it sit at room temperature for 5 minutes to prevent thermal shock that can crack glass bakeware.
Step 2: Cook the Pasta
Bring a large pot of salted water to a rolling boil. Cook the ½ pound of pasta according to package directions until al dente—about 8-10 minutes for most shapes. Drain well, but don’t rinse; the starch helps the sauce cling.
💡 mia’s Pro Tip: Salt that pasta water like the sea—1 tablespoon of salt per 4 cups of water. It seasons the pasta from the inside out for a more flavorful casserole.
Step 3: Combine the Casserole Filling
Place the drained pasta back into the same pot (off the heat). Add the jar of marinara sauce, pulled rotisserie chicken, half of the mozzarella, half of the parmesan, and 1-2 teaspoons of Italian seasoning. Stir until everything is evenly coated. Simmer over medium-low heat for 2-3 minutes, stirring gently. This step is crucial—it melds the flavors and slightly reduces the sauce.
⚠️ Common Mistake to Avoid: Skipping the simmer. If you don’t simmer, the sauce stays thin and the casserole can turn watery. The brief cooking thickens it perfectly.
Step 4: Layer and Sprinkle
Spread the chicken-pasta mixture evenly into your greased baking dish. Sprinkle the remaining mozzarella and parmesan cheese over the top. This double-cheese layer ensures a golden, bubbly crust.
💡 mia’s Pro Tip: For an extra indulgent finish, add a few small dollops of ricotta cheese between the mozzarella—it adds a creamy, tangy surprise in every bite.
Step 5: Make the Panko Topping
In a small bowl, mix together ¾ cup panko bread crumbs, 2 tablespoons melted butter, and ½ teaspoon garlic powder. Sprinkle this mixture evenly over the cheese layer. The butter ensures the panko turns golden and crispy, not pale.
⚠️ Common Mistake to Avoid: Using too much butter or adding it too early—if the butter is melted but hot, it can make the panko clump. Let it cool slightly before mixing.
Step 6: Bake to Perfection
Place the dish on the center rack of the preheated oven. Bake uncovered for about 15 minutes, or until the panko crust turns a beautiful golden brown and the cheese is bubbling around the edges. Oven times vary—if your crust browns too quickly, tent loosely with foil for the last 2-3 minutes.
💡 mia’s Pro Tip: Let the casserole rest for 5 minutes after baking. This allows the sauce to set slightly so your slices hold together beautifully.
Step 7: Serve and Enjoy
Serve your baked chicken parmesan hot, straight from the oven. I love pairing it with a simple green salad dressed in a lemon vinaigrette or a side of roasted broccoli. Enjoy every bite—this easy chicken parmesan recipe is made for sharing.
⚠️ Common Mistake to Avoid: Serving immediately while the casserole is still bubbling—it can burn your mouth. Those 5 minutes of resting time are essential for safety and texture.
Step
Action
Duration
Key Visual Cue
1
Preheat & grease dish
5 min
Oven at 350°F, dish lightly coated
2
Cook pasta al dente
8-10 min
Pasta tender but firm when bitten
3
Mix & simmer filling
3 min
Sauce thickens slightly, cheese begins to melt
4
Layer & sprinkle cheese
2 min
Even layer of mozzarella and parmesan
5
Make panko topping
2 min
Buttery crumbly mixture
6
Bake uncovered
15 min
Panko golden brown, cheese bubbling
7
Rest & serve
5 min
Slightly set, not runny
Serving & Presentation
This easy chicken parmesan casserole is a showstopper right out of the dish. I like to serve it family-style, placing the warm baking dish on a trivet so everyone can dig in. The contrast of the crispy panko crust against the tender pasta and chicken is absolutely gorgeous. Sprinkle a little fresh basil or parsley on top for a pop of color—it’s a trick I learned from my Moroccan mother, who always garnished with fresh herbs.
For a complete meal, I pair this casserole with a crisp arugula salad dressed in a simple lemon vinaigrette—the peppery greens cut through the richness beautifully. A side of roasted garlic bread or sautéed spinach also works wonderfully. On chilly NYC evenings, I sometimes serve it with a light minestrone soup to start. This chicken parmesan with pasta is versatile enough for any occasion.
Pairing Type
Suggestions
Why It Works
Side Dish
Arugula salad, roasted broccoli, garlic bread
Freshness and crunch balance the hearty casserole
Sauce / Dip
Tried This Recipe? Leave a Comment!
Did you make this recipe? I’d love to hear how it turned out! Please leave a comment and a rating below. Your feedback helps other home cooks and supports cheerychop.com!
For more delicious inspiration, follow me on Pinterest!
Easy Crock Pot Fiesta Chicken – Perfect for Tacos & Nachos
Table of Contents
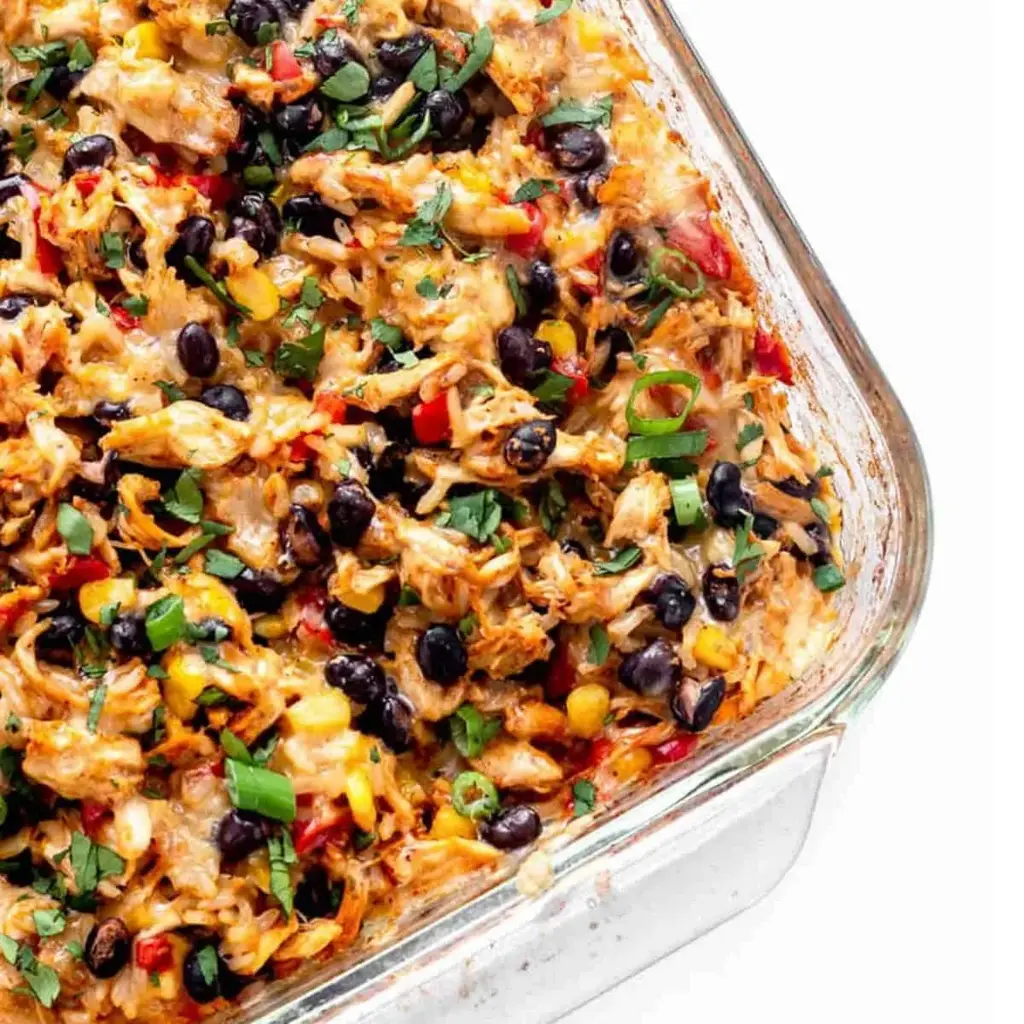
Crock Pot Fiesta Chicken – Creamy Ranch Rotel Version
⚖️
Difficulty
Easy
⏲️
Prep Time
10 mins
🕒
Cook Time
240 mins
⏱️
Total Time
250 mins
🍽️
Servings
6
You know those days when you need dinner to practically cook itself, but you still want something loaded with flavor? That is exactly why I created this Crock Pot Fiesta Chicken recipe. It is an incredibly easy slow cooker chicken recipe that brings all the vibrant, bold flavors of a fiesta straight to your dinner table with almost no effort. The magic here lies in the creamy combination of ranch seasoning and cream cheese, which I learned to perfect during my time in French pastry school — even savory sauces benefit from that silky, emulsified texture. This easy fiesta chicken is perfect for shredded chicken tacos, rice bowls, nachos, or even stuffed peppers, making it the most versatile Mexican chicken crock pot recipe I know.
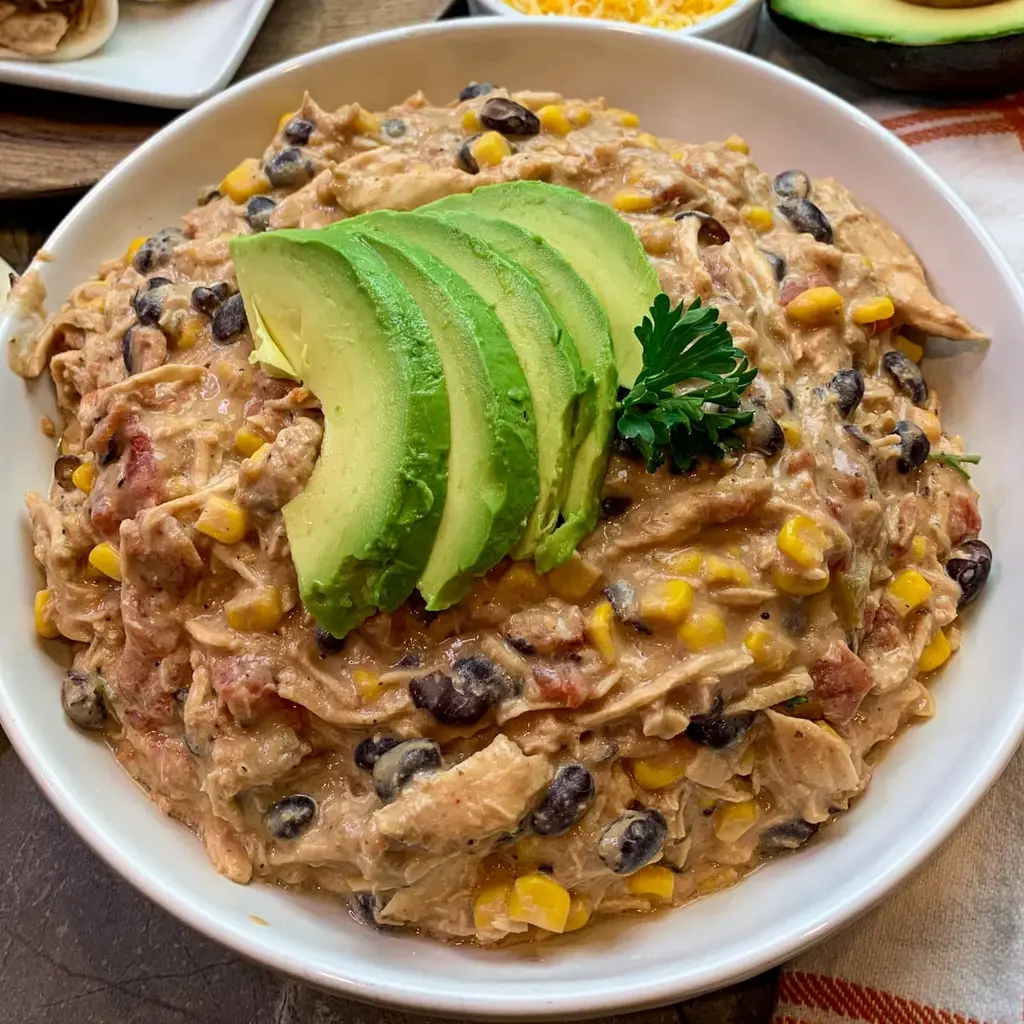
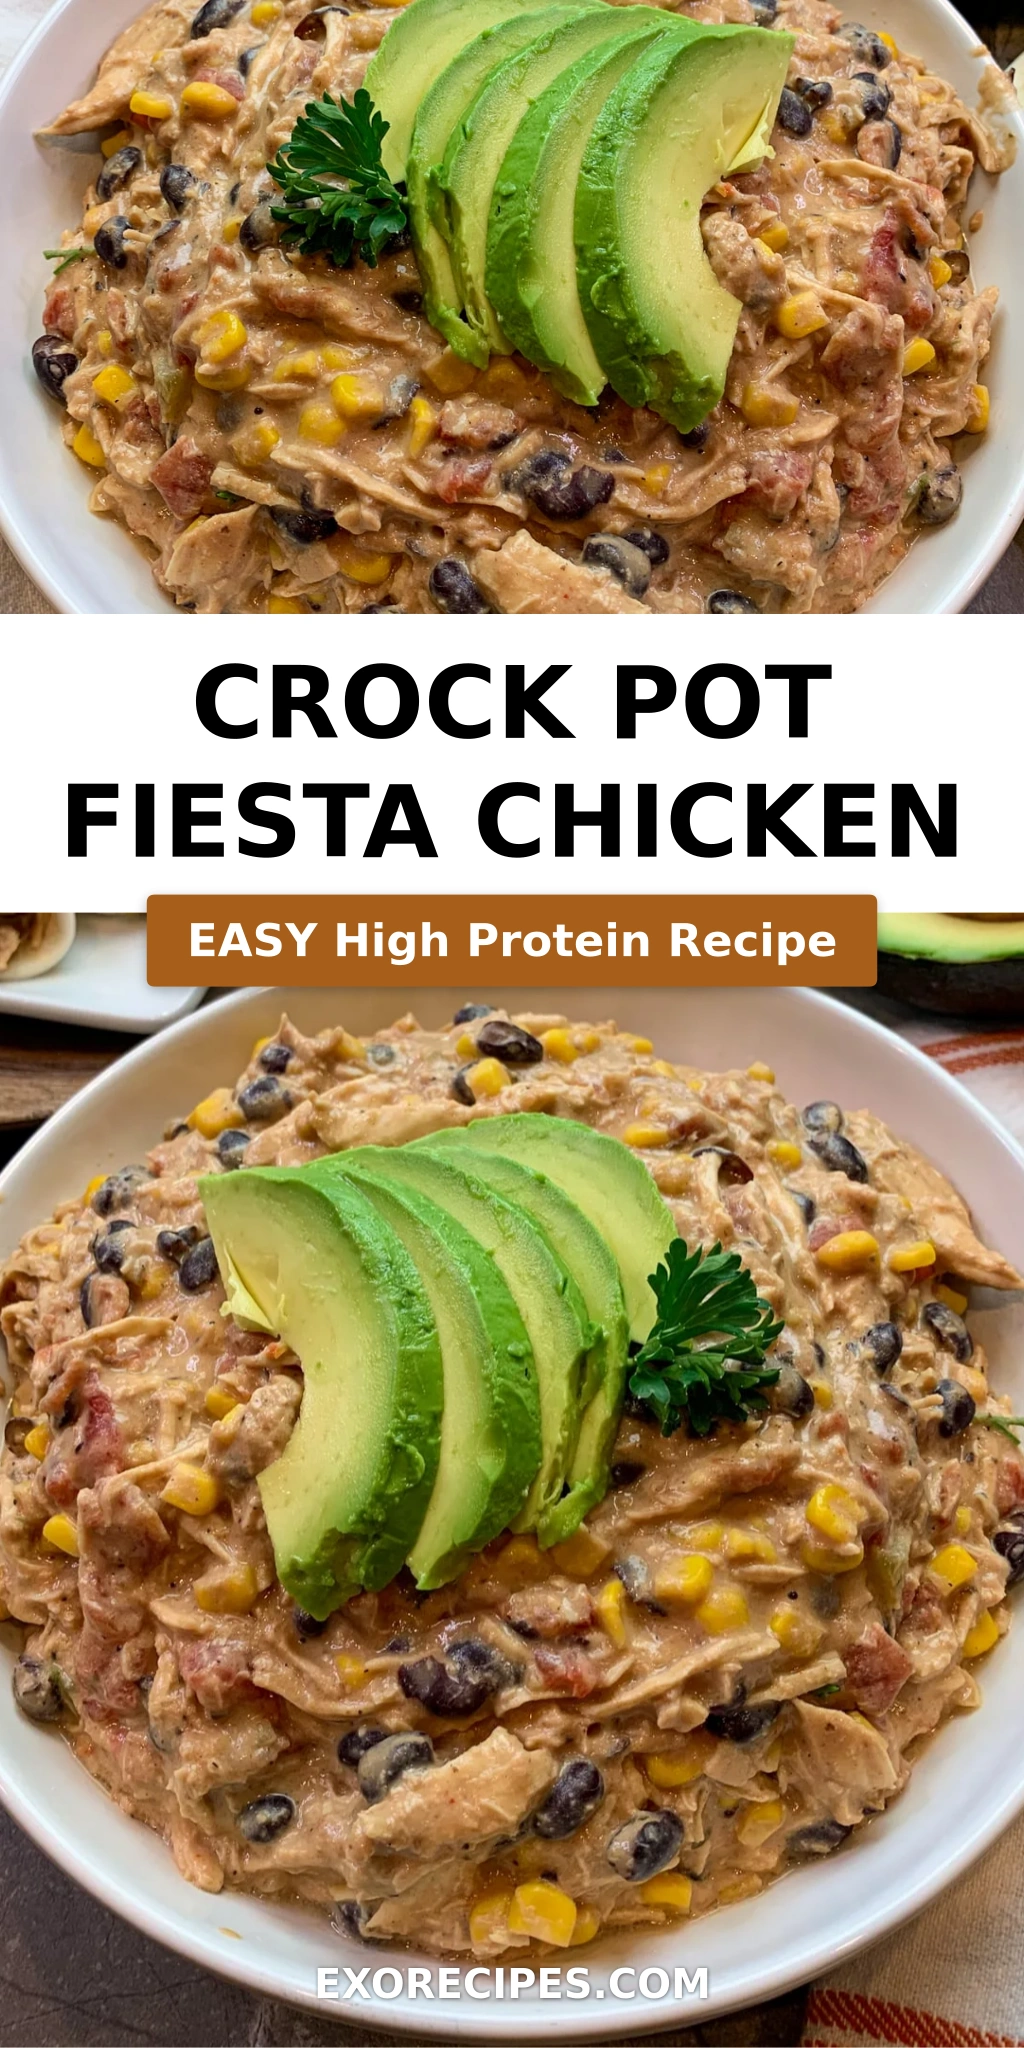
Imagine opening your slow cooker after a few hours to a kitchen filled with the warm, inviting aroma of roasted corn, smoky black beans, and tender chicken simmering in a creamy, tangy sauce. The chicken shreds effortlessly, each strand coated in a luscious, just-spicy-enough sauce that clings beautifully. There is a subtle heat from the Rotel tomatoes and green chilies, balanced perfectly by the rich, cooling cream cheese and the bright pop of fresh lime juice. Every spoonful has that perfect combination of creamy, savory, and slightly zesty flavors that makes you go back for more.
What sets my version apart is a small but impactful technique I brought from my Paris training: I add the cream cheese as a whole block on top of the other ingredients instead of stirring it in at the end. This slow melting method creates an incredibly smooth, cohesive sauce that doesn’t curdle or separate. I will share my best tip for perfectly shredded chicken every time, plus a common mistake to avoid so your Crock Pot Fiesta Chicken turns out restaurant-quality on the very first try.
Why This Crock Pot Fiesta Chicken Recipe Is the Best
The flavor secret here is the combination of a dry ranch dressing packet with Rotel tomatoes — this is not your average slow cooker chicken recipes! The ranch adds a tangy, herbaceous depth that perfectly complements the smoky chili flavor of the tomatoes. Growing up in Morocco, my mother always taught me that the best dishes balance acidity and richness, and this recipe does exactly that with the fresh lime juice cutting through the creamy cheese. This is what makes it more than just another easy fiesta chicken dish; it is a balanced, chef-crafted meal.
Texture is everything with shredded chicken tacos. The technique I use of placing the cream cheese block directly on top and letting it melt slowly ensures the sauce stays silky and doesn’t become grainy. Many slow cooker recipes end up with a watery or curdled sauce, but my French culinary training taught me the importance of gentle, even heat for emulsions. Cooking the chicken low and slow allows it to become incredibly tender without drying out, so it shreds into perfect, juicy strands every single time.
This is a foolproof recipe even for the busiest weekday. You simply toss everything into the Crock Pot and let it work its magic. There is no sautéing, no complicated layering, and no last-minute fussing. It is a set-it-and-forget-it meal that delivers consistently delicious results, which is exactly what I need when I am juggling recipe development, farmers market trips, and school pickups here in NYC. Plus, it makes amazing leftovers for lunch the next day.
Crock Pot Fiesta Chicken Ingredients
When I shop for these ingredients at my local NYC farmers market or even at a regular grocery store, I always look for the freshest produce and quality canned goods. For the limes, I always choose juicy ones that are heavy for their size. This recipe reminds me of the vibrant markets in Marrakech, where every stall is filled with colorful spices and fresh herbs. Let’s get into the specific ingredients you will need for the best easy fiesta chicken.
Ingredients List
4 boneless, skinless chicken breasts
1 dry ranch dressing packet
1 tsp onion powder
1 tsp ground black pepper
1 10 oz can Rotel diced tomatoes and green chilies (do not drain)
1 15 oz can whole kernel corn (drained)
1 15 oz can black beans (drained and rinsed)
1 8 oz block of plain cream cheese
2 fresh squeezed limes
½ cup chicken broth
Ingredient Spotlight
Cream cheese is the star of this dish — it provides the luxurious, creamy texture that makes this sauce so irresistible. Use a full-fat block, not a spreadable tub, for the best consistency. I have tested this with reduced-fat cream cheese, and while it works, the sauce is noticeably thinner. For a dairy-free version, a block of plain cashew-based cream cheese is a great substitute, though the flavor will be slightly nuttier.
Rotel diced tomatoes and green chilies bring the signature zesty heat. They are a pantry staple in my NYC kitchen because they add so much flavor with zero chopping. If you cannot find Rotel, substitute with one 10-ounce can of diced tomatoes plus one small can of diced green chilies for the same flavor profile. For a milder version, use mild Rotel or just regular diced tomatoes with a pinch of chili powder.
The dry ranch dressing packet is the secret flavor bomb. It is a blend of herbs, garlic, and buttermilk powder that adds an incredible savory depth. Do not skip it! If you are out, you can make a homemade mix using dried dill, parsley, garlic powder, onion powder, and a little salt, but the convenience of the packet is hard to beat. This is key to making this an easy slow cooker chicken recipe.
Fresh lime juice is non-negotiable for me. It brightens up the entire dish and cuts through the richness of the cream cheese. I always use freshly squeezed limes — the bottled stuff just does not provide the same vibrant acidity. This was a trick I picked up from a sauce master in Paris: always use fresh citrus for the final lift.
Original Ingredient
Best Substitution
Flavor / Texture Impact
Cream cheese (block)
Full-fat Greek yogurt (1 cup)
Tangier, thinner sauce, less rich
Rotel tomatoes
Diced tomatoes + 4 oz green chilies
Very similar, slightly less smoky
Ranch packet
Homemade: 1 tsp each dill, parsley, garlic powder, onion powder
More herb-forward, less salty
Chicken breasts
Boneless, skinless chicken thighs (6-8)
Richer flavor, more moist, slightly darker sauce
How to Make Crock Pot Fiesta Chicken — Step-by-Step
I promise this is one of the simplest slow cooker chicken recipes you will ever make. Just follow these steps, and you will have a delicious, crowd-pleasing meal ready in no time.
Step 1: Layer Ingredients
Place the four chicken breasts evenly in the bottom of your slow cooker. Add the drained and rinsed black beans, drained whole kernel corn, and the entire can of Rotel diced tomatoes with green chilies (juice and all). Sprinkle the dry ranch dressing packet, onion powder, and ground black pepper evenly over everything.
💡 mia’s Pro Tip: For the most even flavor distribution, toss the dry seasonings with the beans and corn in a bowl before adding them to the pot. This ensures every bite has that perfect ranch kick.
Step 2: Add Liquid and Cream Cheese
Squeeze the fresh lime juice over the top of the ingredients. Then, pour the chicken broth around the edge of the pot. Finally, place the block of cream cheese directly on top of the chicken and other ingredients — do not break it up. This is the trick to a smooth sauce.
⚠️ Common Mistake to Avoid: Do not stir the cream cheese into the pot at this stage. If you mix it in now, it can break and create a grainy texture. Letting it melt slowly on top ensures a silky, cohesive sauce later.
Step 3: Slow Cook
Place the lid securely on the slow cooker. Set it to cook on HIGH for 3-4 hours or on LOW for 5-6 hours. The chicken is done when it reaches an internal temperature of 165°F (74°C) and is tender enough to shred easily with a fork.
💡 mia’s Pro Tip: I always cook this on LOW for 5 ½ hours for the most tender chicken. Cooking on HIGH for too long can cause the chicken to become slightly dry and stringy instead of moist and shreddable.
Step 4: Shred Chicken
Carefully remove the chicken breasts from the slow cooker and place them on a cutting board. Use two forks to shred the chicken into bite-sized pieces. Return the shredded chicken back to the Crock Pot, making sure all the sauce ingredients have melted together by now.
⚠️ Common Mistake to Avoid: Do not shred the chicken directly in the pot while the cream cheese block is still solid. The cream cheese needs to be fully melted and incorporated first. Wait until the cream cheese is completely soft before stirring everything together.
Step 5: Stir and Serve
Stir all the ingredients together thoroughly until the melted cream cheese coats every piece of chicken, bean, and corn. The sauce should be thick, creamy, and vibrant. Serve immediately while it is hot and enjoy in your favorite way!
💡 mia’s Pro Tip: Taste the sauce before serving and adjust seasoning. Sometimes I add a pinch more salt or another squeeze of lime juice to brighten the flavors right at the end.
Step
Action
Duration
Key Visual Cue
1
Layer ingredients (not cream cheese)
5 minutes
Ingredients spread evenly in pot
2
Add liquid & cream cheese block
3 minutes
Cream cheese block sits on top
3
Slow cook (LOW)
5-6 hours
Chicken reaches 165°F internal temp
4
Remove & shred chicken
5 minutes
Chicken shreds easily with fork
5
Stir & serve
2 minutes
Sauce is thick and creamy
Serving & Presentation
The beauty of this Crock Pot Fiesta Chicken is how incredibly versatile it is for serving. My favorite way is to pile it high on warm corn tortillas with a sprinkle of fresh cilantro and a dollop of sour cream for shredded chicken tacos. It is a weeknight staple in my NYC apartment. For a heartier meal, serve it over a bowl of cilantro-lime rice, black beans, and avocado for a vibrant fiesta bowl.
You can also transform this into an amazing nacho platter — just layer tortilla chips with the chicken, cheese, jalapeños, and bake until bubbly. The creamy sauce is perfect for scooping. Growing up in Morocco, we often served stew-like dishes with warm bread; here, I love serving this with crusty rolls or even crispy tortilla chips for dipping. The presentation is always beautiful with the colorful corn, black beans, and green chilies shimmering through the creamy sauce.
For a touch of elegance, garnish with a swirl of crema, some crumbled queso fresco, and a few pickled red onions. This is a trick I picked up from a taqueria in Brooklyn. A final sprinkle of fresh lime zest adds incredible aroma and a pop of green.
Pairing Type
Suggestions
Why It Works
Side Dish
Cilantro-lime rice, Mexican street corn, or a simple green salad
Adds freshness and starch to balance the rich chicken
Sauce / Dip
Sour cream, guacamole, or a spicy chipotle crema
Cooling elements complement the mild heat
Beverage
Margarita, cold Mexican beer, or an agua fresca
Acidic and crisp drinks cut through the creaminess
Garnish
Fresh cilantro, pickled red onions, or sliced avocado
Adds freshness, texture, and bright color
Make-Ahead, Storage & Reheating
I often make a double batch of this Crock Pot Fiesta Chicken recipe on a Sunday afternoon to have during the busy week in NYC. It stores wonderfully and the flavors actually meld together even more beautifully overnight. Here is how I handle storage and reheating to keep it tasting fresh.
Method
Container
Duration
Reheating Tip
Refrigerator
Airtight glass container
Up to 5 days
Tried This Recipe? Leave a Comment!
Did you make this recipe? I’d love to hear how it turned out! Please leave a comment and a rating below. Your feedback helps other home cooks and supports cheerychop.com!
For more delicious inspiration, follow me on Pinterest!
Easy Chicken Burrito Casserole Recipe
Table of Contents
Easy Chicken Burrito Casserole – The One-Dish Mexican Bake
⚖️
Difficulty
Easy
⏲️
Prep Time
15 mins
🕒
Cook Time
75 mins
⏱️
Total Time
90 mins
🍽️
Servings
8
Growing up in Morocco, my mother would spend hours in the kitchen layering spices and slow-cooking tagines until the aromas filled every corner of our home. When I moved to New York City and trained at Le Cordon Bleu in Paris, I learned that the best comfort food doesn’t have to be complicated—it just needs love and the right technique. That’s exactly how this chicken burrito casserole recipe was born: a marriage of my French training in one-dish baking and the bold, smoky flavors of the Mexican burritos I fell in love with at a taqueria in Brooklyn. It’s an easy chicken casserole that delivers all the satisfaction of a stuffed burrito without any rolling, frying, or fuss.
The first time I pulled this chicken burrito bake out of the oven, the cheese was bubbling at the edges and the rice had absorbed every bit of spiced broth. The smell of roasted peppers, cumin from the fajita seasoning, and the slight warmth of cayenne reminded me of the souks in Marrakech—but the gooey Monterey Jack cheese was pure American comfort. Each spoonful is creamy, smoky, and a little bit spicy, with tender shredded chicken and black beans nestled among perfectly cooked rice. It’s hearty enough to satisfy a hungry family, yet light enough that you won’t feel sluggish afterward.
As a trained chef and busy NYC mom, I’ve tested this Mexican chicken casserole more times than I can count to ensure it’s foolproof. My secret? I cook the rice right in the casserole dish with the broth and aromatics, so every grain absorbs deep flavor and the texture stays perfect—never mushy, never dry. Burrito casseroles can sometimes turn out watery or bland, but mine has a simple trick that prevents sogginess and keeps the layers distinct. I’ll show you exactly how to layer the ingredients, why parboiled rice is your best friend here, and how to avoid the common mistake of overmixing. Trust me, this burrito casserole will become a regular on your dinner rotation.
Why This Easy Chicken Burrito Casserole Recipe Is the Best
The flavor secret here is all about building layers in the baking dish. Instead of dumping everything in at once, I sauté the onion and bell pepper with fajita seasoning and cayenne before adding the liquid. This step, straight from my Paris training in fond (the French base-building technique), ensures the spices bloom and the vegetables soften, releasing their natural sweetness. The result is a depth of flavor that tastes like you’ve been slow-cooking all day, but you’ve only spent 15 minutes prepping.
Texture is everything in a casserole, and I’ve perfected it through trial and error. The key is using parboiled brown rice, which holds its shape and doesn’t turn into a gummy mess. By covering the dish tightly with foil for the first hour, the rice steams evenly and absorbs the seasoned broth without drying out. Then, when you add the cheese at the end, it melts into a golden blanket that contrasts with the tender rice and beans. It’s a chef-level technique that makes this burrito casserole stand out from any other easy chicken casserole you’ve tried.
This recipe is foolproof for beginners because everything happens in one dish—no extra pots, no pre-cooking rice, and no complicated steps. I’ve also designed it to be forgiving: you can swap the chicken for rotisserie, use white rice if you’re short on time, or even go meatless. The detailed instructions and visual cues in the recipe will guide you to success every single time. Whether you’re a busy parent or a college student, this chicken burrito bake is your shortcut to a delicious, satisfying meal.
Chicken Burrito Casserole Recipe Ingredients
I love sourcing my ingredients at the Union Square Greenmarket in NYC—the peppers are always vibrant, and the corn is sweet and fresh. But I also remember the bustling spice markets in Marrakech, where every vendor would insist their cumin is the best. For this burrito casserole, you don’t need to hunt down specialty items; most of these are pantry staples. My pick for the fajita seasoning is either a high-quality store-bought blend or my homemade version with cumin, chili powder, garlic powder, and smoked paprika—it makes all the difference.
Ingredients List
1/2 cup finely diced onion
1 red bell pepper (diced)
1 cup uncooked parboiled long-grain brown rice (can also use long grain white rice)
3 tablespoons fajita seasoning (homemade or store-bought)
1/8 teaspoon cayenne pepper (optional)
1 cup corn kernels (frozen)
1 14 ounce can low sodium black beans (drained and rinsed)
5 cups shredded chicken
3 cups reduced sodium chicken broth
1 4 ounce can mild green chilies
1 tablespoon olive oil
2 tablespoons tomato paste
1 1/4 cups shredded Monterey Jack cheese
Ingredient Spotlight
Parboiled rice is the backbone of this casserole. Unlike regular brown rice, it’s been partially cooked and dried, which means it holds its shape beautifully and absorbs liquid without turning to mush. In the US, you can find it labeled as “converted” rice (Uncle Ben’s is a popular brand). If you’re in a pinch, long-grain white rice works—just reduce the baking time by 10 minutes and check for doneness early. The texture will be slightly softer but still delicious.
Shredded chicken is the protein star. I love using rotisserie chicken from the grocery store for convenience—just shred it while it’s warm. For a leaner option, poach chicken breasts in salted water with a bay leaf until tender, then shred. The 5 cups of shredded chicken is equivalent to about 1.5 pounds of cooked chicken, so plan accordingly. A common mistake is using chicken that’s too dry; make sure your shredded chicken has a bit of moisture, or add a splash of broth.
Monterey Jack cheese is my go-to for its mild, creamy meltability. It doesn’t overpower the spices and creates that irresistible golden crust. For a sharper flavor, try a mix of Monterey Jack and sharp cheddar—about half and half. If you’re lactose-intolerant, dairy-free shredded cheese blends work well, but look for one that melts (like Daiya or Violife). Avoid pre-shredded cheese with anti-caking agents, as it won’t melt as smoothly.
Original Ingredient
Best Substitution
Flavor / Texture Impact
Parboiled brown rice
Long-grain white rice
Softer texture; reduce bake time by 10 mins
Shredded chicken
Rotisserie chicken or poached chicken
Same flavor; rotisserie adds smoky depth
Monterey Jack cheese
Sharp cheddar or dairy-free shreds
Cheddar adds boldness; dairy-free melts less
Fajita seasoning
Taco seasoning or cumin + chili powder blend
Similar flavor; adjust salt if using store-bought
Black beans
Pinto beans or kidney beans
Similar texture; pinto beans are creamier
How to Make Easy Chicken Burrito Casserole — Step-by-Step
You’re going to love how straightforward this is. I’ve broken it down into 8 simple steps, each with a chef’s tip to ensure perfect results. Let’s get cooking!
Step 1: Prepare the Baking Dish
Preheat your oven to 400°F. In a 9×13 inch baking dish, combine the diced onion, diced red bell pepper, uncooked rice, fajita seasoning, and optional cayenne pepper. Stir everything together with a spoon or your hands until the rice and vegetables are evenly coated with the spices. This step is crucial because it builds the flavor base directly in the dish, saving you a pan and infusing every grain.
💡 mia’s Pro Tip: Don’t skip stirring the spices with the dry ingredients first. This blooming technique releases the essential oils in the fajita seasoning, giving the rice a deeper, more complex flavor. If you have time, let it sit for 5 minutes before adding liquids.
Step 2: Mix the Broth Mixture
In a separate bowl or large measuring cup, whisk together the chicken broth, mild green chilies, tomato paste, and olive oil until the tomato paste is fully dissolved and the liquid is smooth. The tomato paste adds a touch of sweetness and umami that balances the spices perfectly. I use a fork if the whisk isn’t handy—just make sure there are no lumps.
⚠️ Common Mistake to Avoid: Don’t pour the broth mixture directly onto the rice without stirring first. The tomato paste tends to sink, so give it a good whisk until you see a uniform reddish color. If you skip this, you’ll get bland spots in the casserole.
Step 3: Combine Broth and Rice
Pour the broth mixture over the rice and vegetables in the baking dish. Stir everything together until the rice is evenly distributed and submerged in the liquid. The rice should look like it’s settling at the bottom, surrounded by the seasoned broth—that’s exactly what you want.
💡 mia’s Pro Tip: Use a rubber spatula to scrape every last drop of the broth mixture from the bowl. Every bit of flavor counts, and the tomato paste likes to stick to the bottom.
Step 4: Add Chicken, Beans, and Corn
Add the shredded chicken, drained and rinsed black beans, and frozen corn kernels to the dish. Stir gently but thoroughly until everything is well combined and evenly distributed. The frozen corn will help cool the mixture slightly, which is fine—it will heat up perfectly in the oven.
⚠️ Common Mistake to Avoid: Overmixing can break up the chicken into tiny shreds. Use a gentle folding motion with a large spoon, and stop as soon as everything looks evenly distributed. You want nice chunks of chicken in every bite.
Step 5: Cover and Bake
Cover the baking dish tightly with aluminium foil. Make sure the foil is sealed around the edges—this traps steam and ensures the rice cooks evenly. Transfer the dish to the preheated oven and bake for 65–70 minutes, or until all the liquid is absorbed and the rice is tender. Do not peek during the first 50 minutes, as releasing steam can affect the cooking time.
💡 mia’s Pro Tip: To check for doneness, carefully lift a corner of the foil and press a grain of rice with a fork. It should be tender but still slightly firm at the center—think al dente pasta. If the rice is still crunchy, re-cover and bake for another 5–10 minutes.
Step 6: Add Cheese
Once the casserole is cooked, remove it from the oven and carefully peel off the foil. Sprinkle the shredded Monterey Jack cheese evenly over the top. Don’t worry if some cheese falls into the rice—it will melt beautifully. Return the dish to the oven, uncovered, for a final 5–10 minutes until the cheese is melted, bubbly, and slightly golden at the edges.
⚠️ Common Mistake to Avoid: Don’t add the cheese at the beginning, or it will burn and turn rubbery during the long bake. Adding it at the end ensures a perfect, gooey melt with a golden crust.
Step 7: Cool and Serve
Remove the dish from the oven and let it cool for 5–10 minutes. This resting time allows the casserole to set, making it easier to serve in neat portions. During this time, the residual heat finishes cooking the rice and the cheese settles into a beautiful layer. Serve warm with your favorite toppings.
💡 mia’s Pro Tip: If you’re in a rush, you can serve it immediately, but the portion might be a bit looser. For the best texture, patience is key—think of it as a French technique called “repos,” or resting.
Step 8: Garnish and Enjoy
Sprinkle fresh cilantro, sliced green onions, a dollop of salsa, and diced avocado on top of each serving. These fresh, bright toppings cut through the richness of the cheese and add a pop of color. A squeeze of lime juice is optional but highly recommended—it adds a citrusy zing that ties everything together.
⚠️ Common Mistake to Avoid: Don’t skip the garnishes—they’re not just for looks. The acidity and freshness balance the smoky, savory flavors of the casserole. Even a simple sprinkle of cilantro makes a difference.
Tried This Recipe? Leave a Comment!
Did you make this recipe? I’d love to hear how it turned out! Please leave a comment and a rating below. Your feedback helps other home cooks and supports cheerychop.com!
For more delicious inspiration, follow me on Pinterest!
Crispy Oven Baked Chicken Parmesan Recipe
Table of Contents
Oven Baked Chicken Parmesan – A Healthier Twist on a Classic
⚖️
Difficulty
Easy
⏲️
Prep Time
15 mins
🕒
Cook Time
20 mins
⏱️
Total Time
35 mins
🍽️
Servings
4
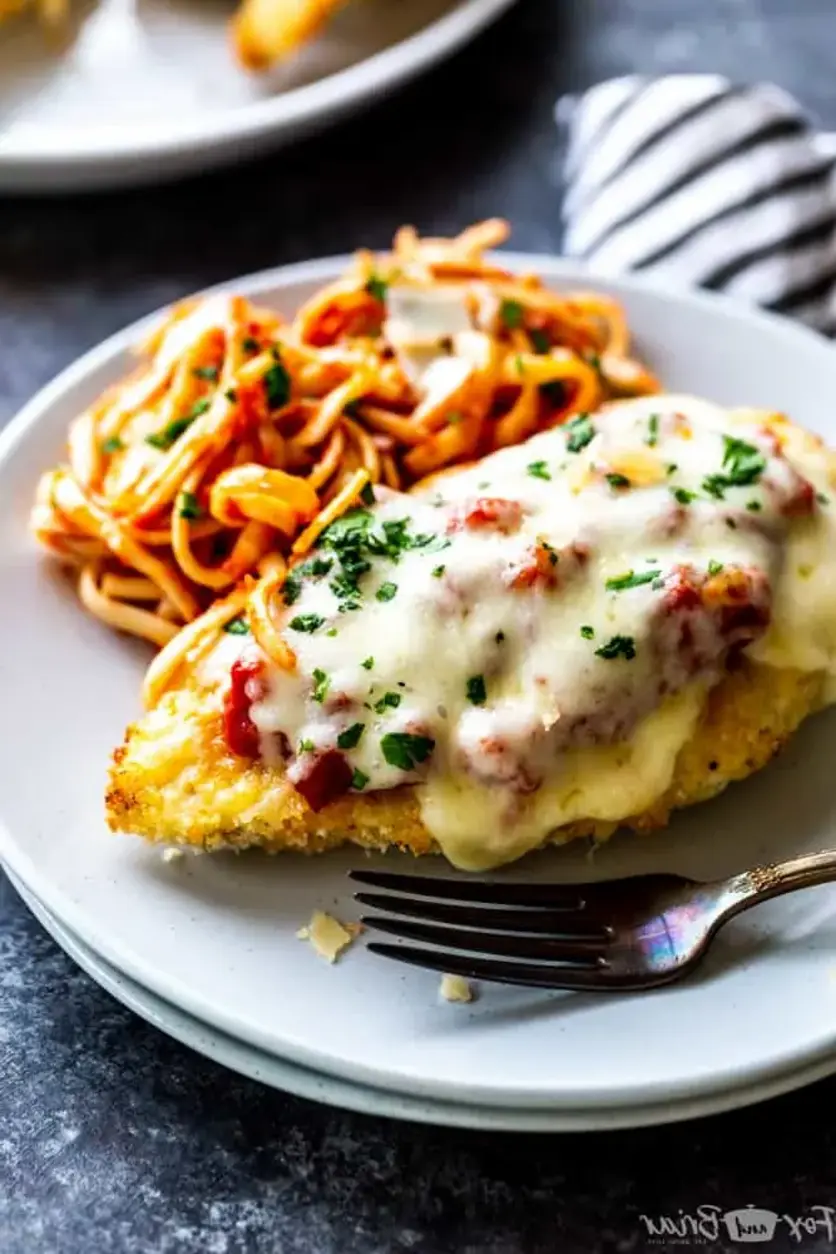
Growing up in my mother’s kitchen in Morocco, I learned that the best meals are born from patience and love — but here in New York City, I’ve also learned the value of a quick, weeknight dinner that doesn’t compromise flavor. That’s why this oven baked chicken parmesan recipe has become my go-to for busy evenings. It’s a healthier take on the classic Italian-American dish, skipping the messy frying and using the oven to get that golden, crispy coating. The result is a homemade chicken parmesan that’s juicy on the inside, crunchy on the outside, and ready in about 30 minutes.
Imagine pulling a baking sheet from the oven, the aroma of melted mozzarella and oregano filling your kitchen. The chicken breasts are tender and perfectly seasoned, with a panko-Parmesan crust that shatters with each bite. The marinara sauce bubbles into the cheese, creating that irresistible, gooey topping. It’s a dish that brings together the bright acidity of good tomatoes, the nutty depth of fresh Parmesan, and the satisfying crunch of a perfectly baked crust. This isn’t just easy chicken parmesan — it’s a symphony of textures and flavors.
With my training at Le Cordon Bleu in Paris and years of running a busy kitchen here in NYC, I’ve tested this recipe relentlessly to ensure it’s foolproof. The secret? Preheating your baking sheet and using a blend of panko and fresh Parmesan for that unmatched crispiness. I often tell my readers: avoid the common mistake of overcrowding the pan, which creates steam and destroys the crunch. Stick with me, and I’ll show you how to make the best crispy oven baked chicken parmesan that even your Nonna would approve of.
Why This Oven Baked Chicken Parmesan Recipe Is the Best
The Flavor Secret: The key to a truly unforgettable baked chicken parmesan is layering flavors. I use a blend of fresh grated Parmesan (never the pre-shredded stuff!) with panko breadcrumbs for a lighter, airier crust. The Parmesan melts into the breading, creating a savory, umami-packed shell. I also add a touch of dried oregano and garlic powder, but the real kick comes from broiling the cheese at the end — it gets browned and bubbly, just like the classic dish my French chef instructor always admired.
Perfected Texture: Texture is everything. With my Parisian-trained eye (and palate), I knew the challenge was to achieve a crust that was both crunchy and stable. The trick is to pat the chicken very dry before breading, and to use an egg wash that clings to the chicken. Baking on a wire rack set inside the sheet pan? Not necessary here. Instead, I line the pan with foil brushed with olive oil, which helps the bottom of the chicken get golden without sticking. The high heat of 400°F does the rest, crisping the panko without drying out the meat.
Foolproof & Fast: This recipe is designed for everyone — from the home cook who’s new to the kitchen to the seasoned chef looking for a quick weeknight miracle. The instructions are clear, the timing is built to work with a standard home oven, and the result is always consistent. You don’t need a deep fryer or even a heavy pot of oil. You just need a baking sheet and 35 minutes. For me, that’s the definition of a perfect dinner: high reward, low effort, and always delicious.
Baked Chicken Parmesan Recipe Ingredients
When I’m at the Union Square Greenmarket on a Saturday morning, I always pick up fresh chicken breasts from a local farm. There’s something about knowing exactly where your ingredients come from that makes a meal taste better. Back in Morocco, my mother would use the same kind of care, sourcing spices from the souk and cheese from the local fromagerie. For this easy chicken parmesan, I recommend using the best ingredients you can find — it really makes a difference.
Ingredients List
2 tablespoons olive oil
2 chicken breasts (About 1 pound of chicken total)
1 egg
1 cup panko bread crumbs
1/2 cup parmesan cheese (fresh grated)
1 teaspoon dried oregano
1/2 teaspoon garlic powder
1 teaspoon kosher salt
1/2 teaspoon black pepper
1 cup marinara sauce
1 ½ cups shredded mozzarella
2 tablespoon minced parsley (optional, for garnish)
Ingredient Spotlight
Chicken Breasts: For this recipe, choose boneless, skinless chicken breasts that are roughly the same size so they cook evenly. I like to cut them in half and pound them to an even thickness — this ensures that every piece of your homemade chicken parmesan cooks at the same rate. If you can, buy organic or air-chilled chicken for a cleaner taste.
Panko Bread Crumbs: Panko is the secret weapon for a crispy oven baked chicken. Unlike regular breadcrumbs, panko stays lighter and crunchier because it’s made from crustless bread. It’s a staple in my NYC kitchen, and it works perfectly for this baked chicken parmesan recipe without needing any oil for frying.
Parmesan Cheese: Please, I beg you — grate it fresh from a block. The pre-grated stuff in the green canister has added cellulose and doesn’t melt properly. Freshly grated Parmesan provides that intense, nutty flavor that makes this dish sing. It’s a small step that makes a huge difference in the final taste of your healthy oven baked chicken parmesan.
Step
Action
Duration
Key Visual Cue
1
Mix dry ingredients in dish
5 mins
Rice and veggies evenly coated in spices
2
Whisk broth mixture
3 mins
Smooth, uniform reddish liquid
3
Pour broth over rice
2 mins
Rice submerged in liquid
4
Add chicken, beans, corn
5 mins
Evenly distributed chunks
5
Cover and bake
65–70 mins
Liquid absorbed; rice tender
6
Add cheese and bake uncovered
5–10 mins
Cheese melted and golden
7
Cool and serve
5–10 mins
Casserole set and slightly firm
8
Garnish and enjoy
5 mins
Fresh toppings brighten the dish
Original Ingredient
Best Substitution
Flavor / Texture Impact
Panko bread crumbs
Gluten-free panko
Similar crunch, slightly denser crust
Parmesan cheese
Pecorino Romano
Saltier, sharper flavor
Mozzarella
Provolone
Smokier flavor, less stretchy
Marinara sauce
Crushed San Marzano tomatoes + basil
Brighter, more authentic tomato flavor
How to Make Oven Baked Chicken Parmesan — Step-by-Step
Ready to get cooking? I promise you’ll be amazed at how easy this is. Just follow these steps and you’ll have a crispy, cheesy masterpiece that’s healthier than the traditional version.
Step 1: Prepare the Pan and Oven
Line a baking sheet with foil and brush it with 2 tablespoons of olive oil. Adjust your oven rack so it’s in the second-from-the-top position — this gives the chicken a great golden-brown finish. Preheat the oven to 400°F.
💡 mia’s Pro Tip: Preheating the pan (after brushing with oil) for 5 minutes before adding the chicken helps create an even crispier crust on the bottom. Just be careful when placing the chicken on the hot pan!
Step 2: Cut and Pound the Chicken
Cut each chicken breast in half horizontally, as if you were butterflying them but cutting all the way through. Place them in a gallon-sized zip-top bag, seal it, and pound them to an even thickness (about 1/2-inch) using a rolling pin or meat pounder. Pat the chicken dry with paper towels and season with salt and pepper.
⚠️ Common Mistake to Avoid: Don’t skip the pounding! Uneven chicken breasts will cook at different rates — the thin parts will dry out while the thick parts remain undercooked. And always dry the chicken thoroughly to help the egg wash and breading stick.
Step 3: Set Up Breading Station
In one shallow dish, mix together the panko, grated Parmesan, oregano, garlic powder, salt, and black pepper. In a second shallow dish, whisk the egg until smooth. Working one piece at a time, dip a chicken breast into the egg, letting the excess drip off, then press into the bread crumb mixture on both sides. Place on the prepared baking sheet and repeat.
💡 mia’s Pro Tip: Use your hand to firmly press the breading into the chicken. This helps the crust adhere better and creates a more even, crispier coating. I like to let the breaded chicken rest on the baking sheet for 5 minutes before baking, giving the crumbs time to hydrate and stick even more.
Step 4: Bake the Chicken
Place the baking sheet on the second-from-the-top rack and bake for 15 minutes. The chicken should be cooked through and golden brown. Remove from the oven, carefully flip each piece over with a spatula.
⚠️ Common Mistake to Avoid: Don’t open the oven door during the first 12 minutes of baking. The temperature drop can cause the crust to steam instead of crisp. Let the heat do its magic uninterrupted.
Step 5: Add Sauce and Cheese, Then Broil
After flipping the chicken, spoon about 1/4 cup of marinara sauce over each piece, spreading it evenly. Sprinkle shredded mozzarella generously on top. Place the pan back in the oven, then turn on the broiler to high. Broil for 2–4 minutes, watching closely, until the cheese is melted, bubbly, and starting to brown at the edges.
💡 mia’s Pro Tip: Broiling times vary wildly by oven. I recommend checking at the 2-minute mark — you want the cheese golden and the edges of the chicken darkening, but not burning. If your broiler runs hot, move the pan to a lower rack for the broiling step.
Step
Action
Duration
Key Visual Cue
1
Prepare pan & preheat oven
5 mins
Oven at 400°F
2
Cut & pound chicken
5 mins
Even 1/2-inch thickness
3
Bread with panko & cheese
5 mins
Fully coated crust
4
Bake chicken
15 mins
Golden brown, cooked through
5
Flip, add sauce & cheese, broil
2-4 mins
Cheese bubbly & browned
Serving & Presentation
Once your crispy oven baked chicken parmesan emerges from the broiler, let it rest for 2 minutes — this allows the cheese to set slightly so it doesn’t all slide off when you serve it. I love plating each piece on a warm dinner plate, spooning a little extra marinara sauce around it for color, and finishing with a sprinkle of fresh parsley and a few gratings of Parmesan. The aroma alone will have everyone at the table excited.
For a truly memorable meal, serve this alongside a simple arugula salad dressed with lemon and olive oil — the peppery greens cut through the richness of the cheese. A side of garlic bread or a bed of al dente spaghetti is always welcome. My family loves it with roasted broccoli or a side of sautéed spinach, a trick I picked up from my training in Paris where vegetables are always treated with care. In the winter, I often pair it with a bowl of minestrone for a hearty Italian-inspired feast.
Pairing Type
Suggestions
Why It Works
Side Dish
Arugula salad, roasted broccoli, spaghetti
Balances richness with freshness or carbs
Sauce / Dip
Extra marinara, pesto, ranch dressing
Adds moisture and complementary flavors
Beverage
Chianti, Pinot Noir, sparkling water with lemon
Acidity cuts through fat; red wine matches tomato
Garnish
Fresh parsley, basil leaves, extra Parmesan
Adds color and a fresh herbal finish
Make-Ahead, Storage & Reheating
As a busy NYC food blogger and mom, I know the value of a meal that works for tomorrow’s lunch. This easy chicken parmesan recipe is perfect for meal prep. You can fully bake and assemble it, then store it in the fridge or freezer for later. I often make a double batch on Sunday so I have quick dinners ready to go during the week — it saves me so much time.
Method
Container
Duration
Reheating Tip
Tried This Recipe? Leave a Comment!
Did you make this recipe? I’d love to hear how it turned out! Please leave a comment and a rating below. Your feedback helps other home cooks and supports cheerychop.com!
For more delicious inspiration, follow me on Pinterest!
Stuffed Taco Peppers – Low Carb, High Protein Dinner
Table of Contents
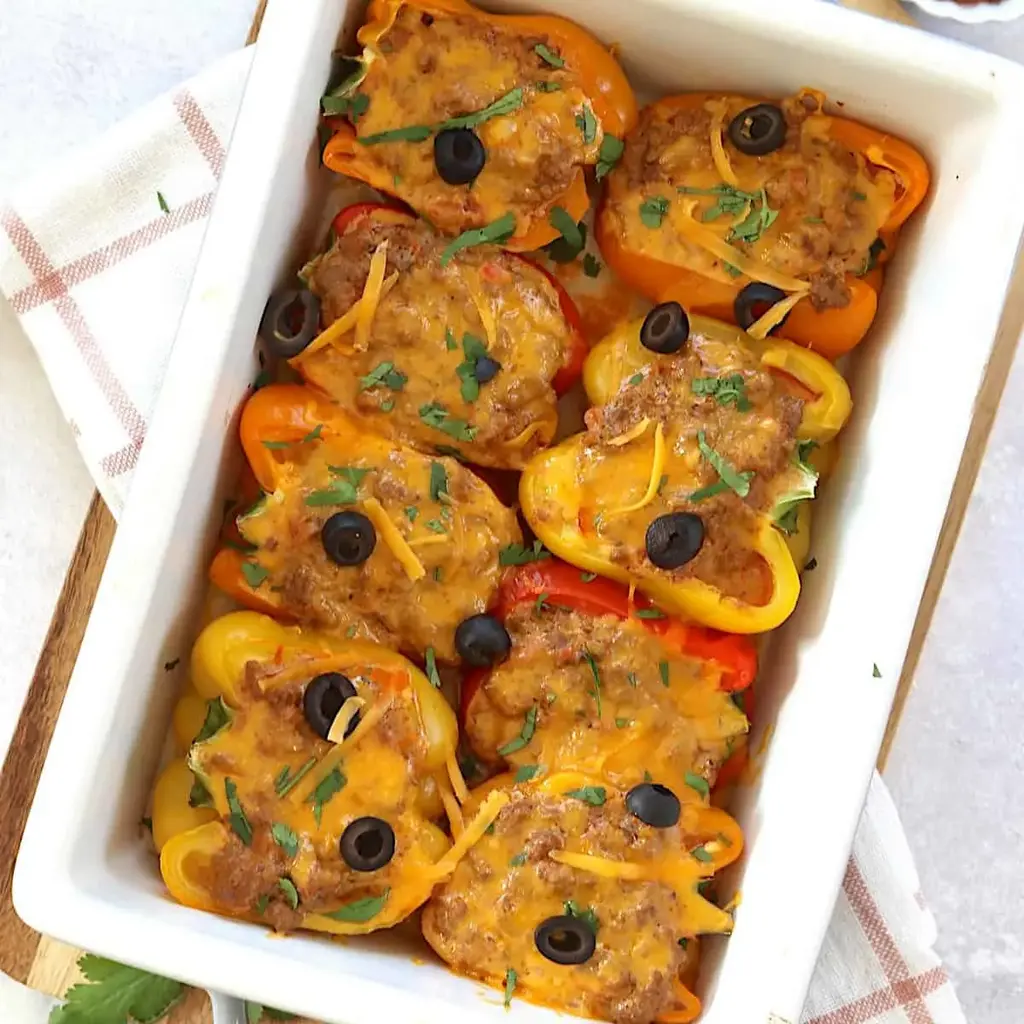
Stuffed Taco Peppers Low Carb – A Weeknight Dinner Game-Changer
⚖️
Difficulty
Easy
⏲️
Prep Time
15 mins
🕒
Cook Time
35 mins
⏱️
Total Time
50 mins
🍽️
Servings
8
Why This Stuffed Taco Peppers Recipe Is the Best
The flavor secret here is that I don’t just rely on taco seasoning — I build layers. After years training in Paris, I learned that depth comes from patience: browning the beef until it’s deeply caramelized, then blooming the spices in the rendered fat before adding liquid. It’s a small French technique that makes a huge difference in these stuffed taco peppers low carb.
Perfected texture is everything. The peppers are pre-cooked just until they began to soften, so they finish in the oven tender but never mushy. The filling is rich and creamy from sour cream and melted cheddar, creating a luxurious contrast to the pepper’s slight crunch. No dry, sad peppers here.
Foolproof and fast: this recipe works every time, even for beginners. The microwave step for the peppers is a game-changer — it cuts the bake time in half. No complicated techniques, just smart shortcuts from my NYC kitchen. It’s the kind of dinner I turn to after a long day at the farmers market or when I need something satisfying that the whole family will love.
Stuffed Taco Peppers Low Carb Ingredients
I love picking up bell peppers at the Union Square Greenmarket — they’re at their sweetest in late summer. In Morocco, my mother would stuff peppers with ground lamb and preserved lemon, so this recipe feels like a beautiful, modern cousin to that tradition. Here’s what you need for these high protein stuffed peppers.
Ingredients List
4 medium bell peppers, any color (seeded and halved)
1½ pounds lean ground beef
1 recipe or packet taco seasoning mix (use gluten free if needed)
¾ cup water
1½ cup cheddar cheese, shredded
1 cup sour cream
½ cup salsa
Ingredient Spotlight
Bell Peppers: Choose firm, glossy peppers with deep color — they’re sweeter and hold their shape better. Red and orange peppers are highest in vitamin C and have a natural sweetness that balances the savory beef. If you prefer a milder flavor, yellow or green work too; green peppers are slightly more bitter and firmer.
Ground Beef: Lean (85/15) is ideal — enough fat for flavor, but not so much that the filling becomes greasy. For a leaner option, use ground turkey (93/7) but add a tablespoon of olive oil to the pan to prevent dryness.
Cheddar Cheese: Sharp cheddar provides the most flavor punch per ounce, which is great for low carb eating. Pre-shredded cheese contains anti-caking agents that can affect melt — I recommend shredding a block yourself for the smoothest, creamiest results.
Sour Cream: Full-fat sour cream adds richness and tang. For a dairy-free version, use full-fat coconut cream or a plant-based sour cream alternative, but note that the consistency will be slightly thinner.
Making these keto stuffed peppers recipe is easier than you think. Just follow my steps, and you’ll have a gorgeous, satisfying dinner on the table.
Step 1: Prep the Peppers
Wash the bell peppers, slice them lengthwise in half, and carefully remove the seeds and white membranes. Place them cut-side up in a microwave-safe casserole dish with ¼ cup water. Cover and microwave for 5 to 6 minutes, until they’re just starting to soften. Drain any excess water carefully — this step ensures they bake up tender without turning mushy.
💡 mia’s Pro Tip: Don’t skip the microwave step — it’s my secret for perfectly cooked peppers every time. If you’re prepping ahead, you can do this step a day in advance and store the blanched peppers in the fridge.
Step 2: Brown the Beef
While the peppers cook, heat a large skillet over medium heat. Add the ground beef and cook, breaking it up with a wooden spoon, until it’s nicely browned and cooked through — about 6 to 8 minutes. Drain off any excess grease if needed, leaving about 1 tablespoon in the pan for flavor.
⚠️ Common Mistake to Avoid: Don’t crowd the pan — if you add too much beef at once, it will steam instead of brown. Work in batches if needed for a deep, caramelized crust.
Step 3: Season and Simmer
Add the taco seasoning and ¾ cup water to the skillet with the beef. Stir everything together, scraping up any browned bits from the bottom of the pan — that’s flavor! Let it simmer for 3 to 4 minutes, or until the mixture thickens slightly and looks glossy.
💡 mia’s Pro Tip: If you’re using a homemade taco seasoning, bloom the spices in the hot pan for 30 seconds before adding water. It wakes up the cumin, chili, and garlic — a trick I learned in Paris.
Step 4: Assemble the Filling
Remove the skillet from the heat. Stir in the sour cream, salsa, and 1 cup of the shredded cheddar cheese until everything is fully combined and creamy. The mixture will look rich and a little glossy — that’s exactly what you want.
⚠️ Common Mistake to Avoid: Don’t add the sour cream over high heat or it will curdle. Always take the pan off the stove first, then stir it in gently.
Step 5: Fill and Bake
Arrange the pre-cooked pepper halves in a 9×13-inch baking dish. Generously fill each half with the beef mixture, mounding it slightly. Sprinkle with the remaining ½ cup cheddar cheese. Bake at 350°F for 20 to 30 minutes, until the peppers are soft, the filling is hot and bubbly, and the cheese is melted and golden.
💡 mia’s Pro Tip: For a golden, bubbly top, switch the oven to broil for the last 2 minutes — watch it closely so the cheese doesn’t burn.
Step 6: Rest and Serve
Let the stuffed peppers rest in the dish for 5 minutes before serving. This helps the filling set slightly and makes them easier to handle. Serve warm with your favorite taco toppings like fresh cilantro, diced avocado, or a squeeze of lime.
Step
Action
Duration
Key Visual Cue
1
Microwave peppers
5–6 mins
Peppers just starting to soften
2
Brown ground beef
6–8 mins
No pink remaining, browned bits on pan
3
Season and simmer
3–4 mins
Thickened, glossy sauce
4
Assemble filling
2 mins
Creamy, fully combined
5
Fill and bake
20–30 mins
Cheese melted, peppers tender
6
Rest and serve
5 mins
Filling has set slightly
Serving & Presentation
I love serving these stuffed taco peppers low carb on a big platter, garnished with a sprinkle of fresh cilantro and a drizzle of crema or sour cream. The contrast of bright green herbs against the golden, bubbly cheese is beautiful — it’s the kind of presentation that works for a casual family dinner or a taco night with friends.
For a complete meal, I like to pair these peppers with a simple side salad of shredded romaine, avocado, and a lime vinaigrette. It adds crunch and freshness that cuts through the richness of the cheese and beef. Sometimes I’ll also serve warm black beans or cauliflower rice on the side for extra heartiness.
Pairing Type
Suggestions
Why It Works
Side Dish
Shredded romaine salad, cauliflower rice, black beans
These stuffed taco peppers low carb are a lifesaver for busy weeks. I often make a double batch on Sunday so I have ready-to-eat lunches or effortless dinners. Here’s how to store and reheat them properly so they taste as good as the first time.
Method
Container
Duration
Reheating Tip
Refrigerator
Airtight container
Up to 4 days
Reheat in oven at 350°F for 10-15 mins, or microwave 2 mins
Freezer
Freezer-safe container or bag
Up to 3 months
Thaw overnight in fridge, then bake at 350°F for 20 mins
Make-Ahead
Baking dish (covered)
Up to 2 days in advance
Tried This Recipe? Leave a Comment!
Did you make this recipe? I’d love to hear how it turned out! Please leave a comment and a rating below. Your feedback helps other home cooks and supports cheerychop.com!
For more delicious inspiration, follow me on Pinterest!