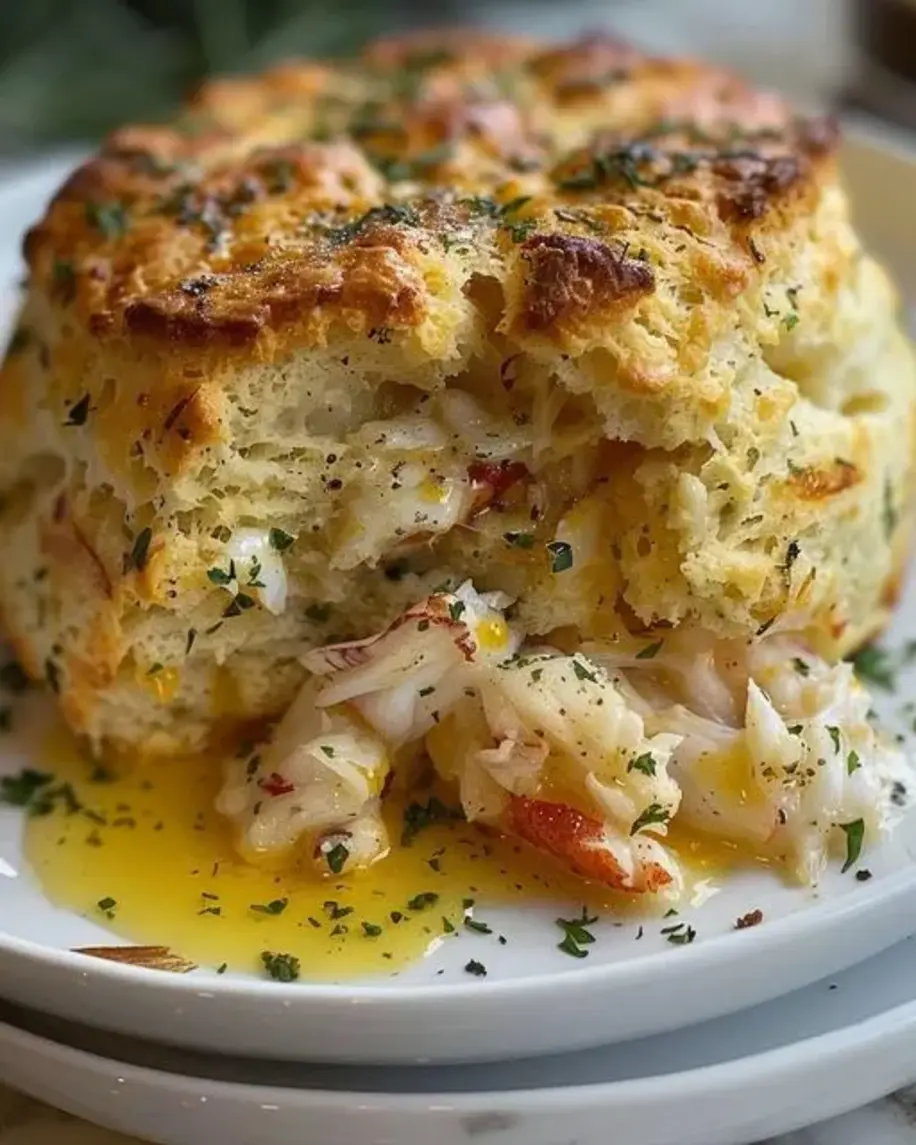
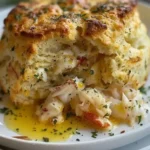
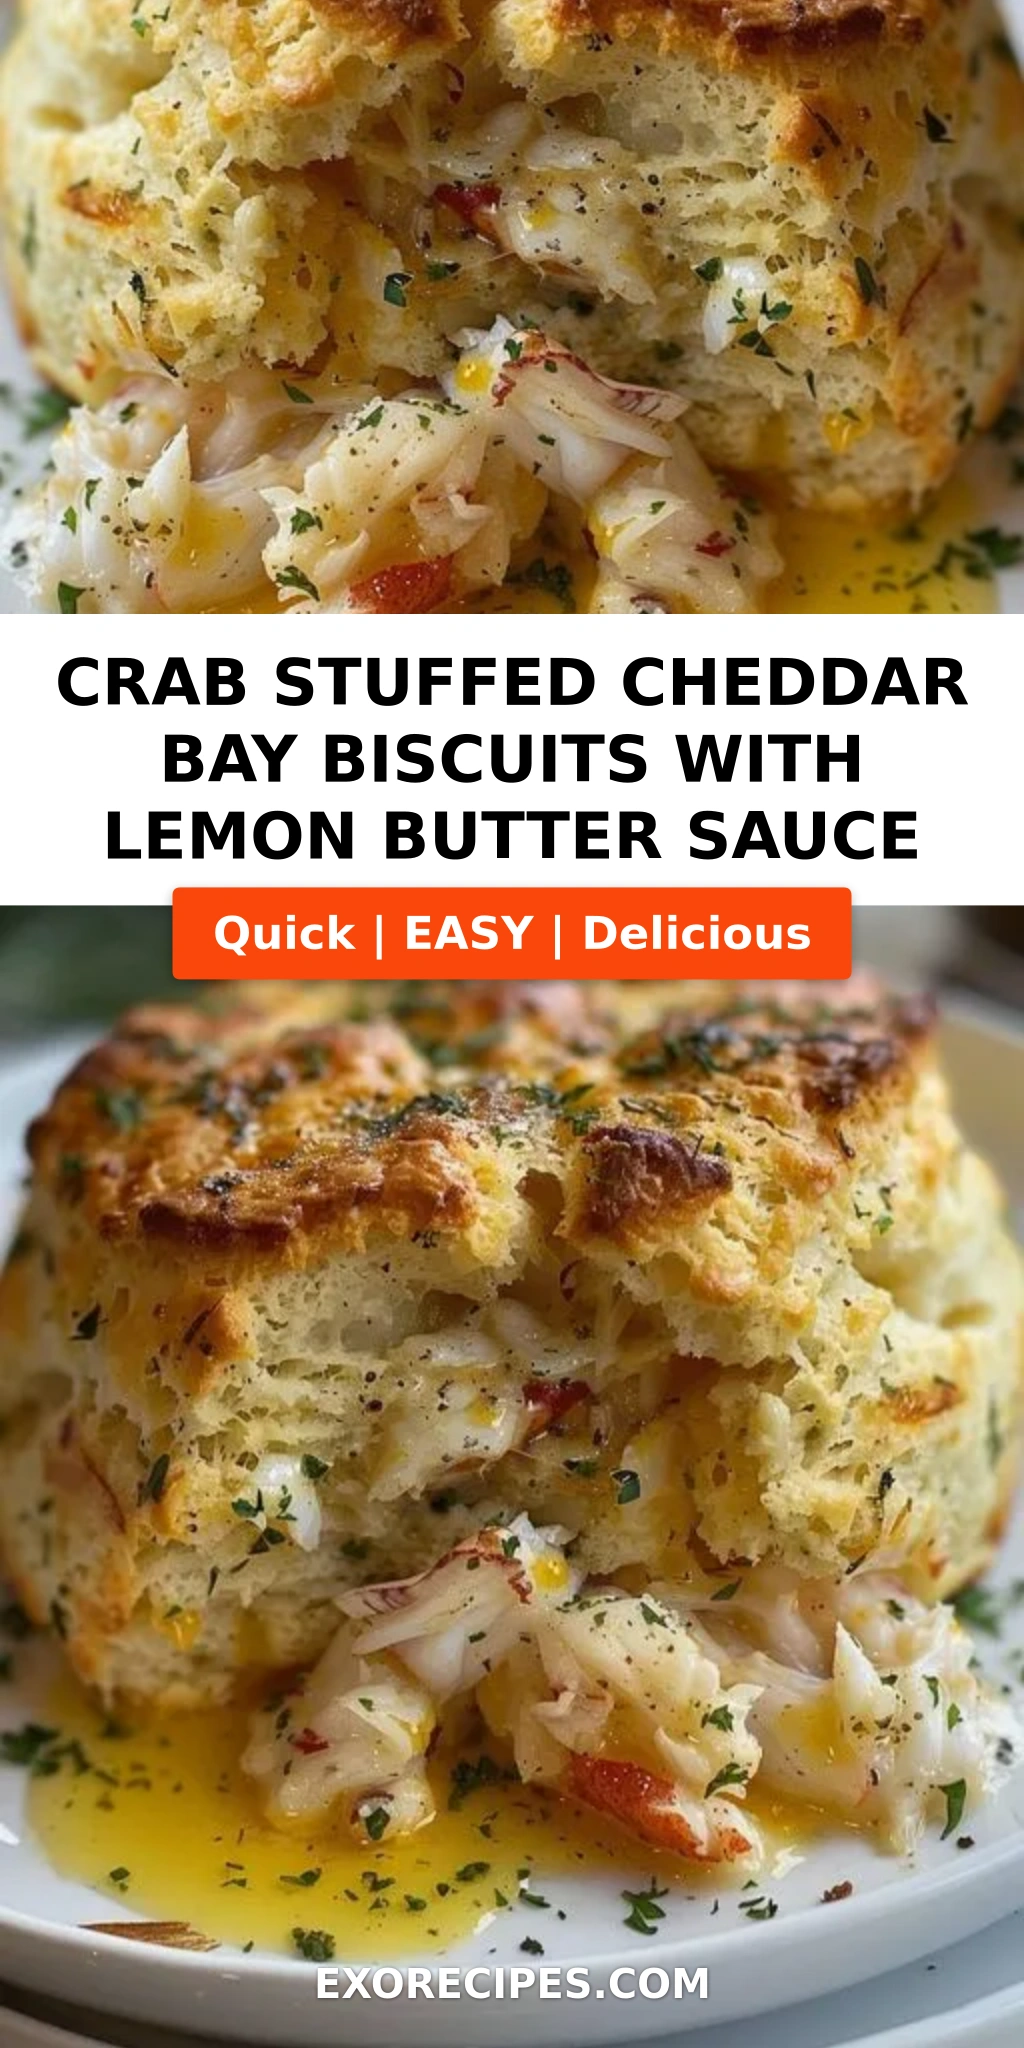
Cheesy Mushroom-Stuffed Chicken Breasts with Golden Gouda – A Rich, Savory Stuffed Chicken Breast Recipe

⚖️
Difficulty
Medium
⏲️
Prep Time
15 mins
🕒
Cook Time
30 mins
⏱️
Total Time
45 mins
🍽️
Servings
4

I still remember the first time I made this stuffed chicken breast recipe for a dinner party in my tiny Manhattan walk-up. The smell of mushrooms caramelizing in butter and garlic filled every corner of that apartment, and when I pulled the golden, Gouda-stuffed chicken breasts out of the oven, my guests actually applauded. That night, I knew this cheesy mushroom chicken was something special — a dish that feels impressive enough for a celebration yet simple enough for a Tuesday night. With its creamy, savory filling and a beautifully browned crust, this Gouda stuffed chicken has become one of my most-requested recipes, and I’m so excited to share it with you today.

Picture this: tender, juicy chicken breast with mushrooms that have been sautéed until deeply golden and fragrant, then blended with velvety cream cheese and nutty, melted Gouda. Every bite gives you that perfect contrast — a crisp, seared exterior giving way to a luscious, cheesy center. The aroma alone will have everyone gathered in your kitchen before you even call them to the table. I love how the thyme adds a subtle earthiness that ties the whole dish together, while the pan juices create a light, silky sauce that coats each slice beautifully. It’s the kind of baked chicken with Gouda that feels like a warm hug on a plate.

What sets this chicken breast with mushrooms apart from other stuffed chicken recipes is the technique I developed during my time at culinary school in Paris: searing the chicken first to lock in flavor and create that gorgeous golden crust, then finishing it in the oven with a splash of broth and a pat of butter. This two-step method ensures the chicken stays incredibly moist while the Gouda melts into a luscious, creamy pool. 💡 mia’s Pro Tip: Let the mushroom filling cool completely before stuffing — this prevents the cream cheese from thinning out and keeps the filling thick and luxurious. And one common mistake to avoid: don’t skip the toothpicks! They keep the filling securely inside while the chicken sears and bakes, so every bite is perfectly stuffed.

Why This Stuffed Chicken Breast Recipe Is the Best

The Flavor Secret — The magic here lies in the combination of Gouda and mushrooms. Gouda brings a wonderfully nutty, slightly sweet flavor that melts beautifully without becoming greasy, while the mushrooms add an earthy, umami depth that elevates this far beyond a simple chicken dinner. I learned the value of layering flavors in my mother’s kitchen in Morocco, where every dish had multiple dimensions. Here, I’ve applied that same principle: sautéing the mushrooms until all their moisture evaporates concentrates their flavor, then blending them with cream cheese for richness and fresh thyme for brightness. The result is a stuffing that’s deeply savory, luxuriously creamy, and utterly irresistible.

Perfected Texture — The dual cooking method — sear then bake — is something I honed during my pastry and sauce training in Paris. Searing the chicken at high heat creates a caramelized crust that locks in juices and adds incredible flavor, while the gentle oven heat finishes the cooking evenly without drying out the breast. The Gouda melts into a molten, velvety center while the exterior stays beautifully golden. This technique transforms an ordinary chicken breast into something truly restaurant-worthy, and it’s foolproof once you know a few key cues — like waiting for that deep amber color on the first side before flipping.

Foolproof & Fast — I know that weeknight cooking needs to be both doable and delicious, and this recipe delivers on both fronts. From start to finish, you’re looking at just 45 minutes, and most of that is hands-off oven time. The ingredients are straightforward — things you can find at any grocery store — and the steps are easy to follow, even for someone new to stuffing chicken. I’ve tested this recipe dozens of times to make sure it works every single time, whether you’re cooking for your family on a busy Wednesday or impressing guests on a Saturday night. It’s the kind of dish that makes you look like a hero with minimal fuss.

Stuffed Chicken Breast Recipe Ingredients

I picked up these ingredients at my favorite Union Square farmers market last weekend — the mushrooms were earthy and fragrant, the thyme was bright and perky, and the Gouda was aged just right. Whenever I shop for this chicken breast with mushrooms, I think about how my mother would send me to the souk in Marrakech with a woven basket, teaching me to choose the freshest ingredients by touch and smell. That same care goes into every ingredient here. Let’s look at what you’ll need and how to choose each component for the best results.

Ingredients List

  • 4 boneless, skinless chicken breasts (about 6 oz each)
  • 2 tablespoons olive oil, divided
  • 1 cup mushrooms, finely chopped (cremini or button work beautifully)
  • 2 cloves garlic, minced
  • 1 cup grated Gouda cheese (smoked or young — both are wonderful)
  • ¼ cup cream cheese, softened to room temperature
  • 1 tablespoon fresh thyme leaves (or 1 teaspoon dried)
  • Salt and pepper to taste
  • ½ cup chicken broth, low-sodium preferred
  • 1 tablespoon unsalted butter

Ingredient Spotlight

Gouda Cheese — This is the star of the show. Gouda melts into a wonderfully creamy, stretchy, and nutty filling. I recommend using a young or medium-aged Gouda for the creamiest melt. Smoked Gouda adds an extra layer of depth that’s lovely, but regular Gouda keeps the flavor clean and approachable. Look for blocks that feel firm but have a slight give — that’s a sign of good moisture content for melting. Pre-shredded cheese often contains anti-caking agents that can prevent smooth melting, so grate your own for the best texture.

Mushrooms — Cremini mushrooms are my go-to here because they have a deeper, earthier flavor than white button mushrooms, but both work perfectly. The key is chopping them very finely so they blend seamlessly into the cream cheese filling. When you sauté them, cook until all the released liquid has evaporated — this concentrates the mushroom flavor and prevents the stuffing from making the chicken soggy. I’ll share more on this in the pro tips below!

Chicken Breasts — Look for breasts that are roughly the same size and thickness for even cooking. If some are much thicker than others, you can place them between two sheets of plastic wrap and gently pound them to an even ½-inch thickness with a rolling pin or meat mallet. This ensures they cook in the same amount of time and roll up easily for stuffing. I prefer organic or free-range chicken for the best flavor and texture.

Original IngredientBest SubstitutionFlavor / Texture Impact
Gouda cheeseGruyère, fontina, or provoloneGruyère is nuttier; fontina is creamier — all melt beautifully
Cream cheeseMascarpone or ricotta (drained)Mascarpone is richer; ricotta gives a lighter, fluffier texture
Fresh thymeDried thyme or fresh rosemary (use half for dried)Rosemary is more piney — use sparingly
Chicken brothDry white wine or vegetable brothWine adds acidity and depth; broth keeps it mild
Mushrooms (cremini)White button, shiitake, or portobello (diced)Shiitake are earthier; portobello more meaty — all work well

How to Make Cheesy Mushroom-Stuffed Chicken Breasts — Step-by-Step

This baked chicken with Gouda comes together in a few simple steps. I’ll walk you through each one with the exact timing, visual cues, and my personal tips so you get a perfect result every time.

Step 1: Prepare the Mushroom Filling

Preheat your oven to 375°F (190°C). In a skillet, heat 1 tablespoon of olive oil over medium heat. Add the finely chopped mushrooms and minced garlic, and cook, stirring occasionally, until the mushrooms are soft and all the liquid they release has evaporated — about 5 minutes. You’ll know they’re ready when they start to sizzle in the oil rather than steam, and the pan looks dry. Remove from heat and let cool for 5 minutes. In a mixing bowl, combine the cooked mushrooms, grated Gouda, softened cream cheese, and fresh thyme. Mix until everything is evenly incorporated and you have a thick, spreadable paste.

💡 mia’s Pro Tip: Let the mushroom mixture cool completely before stuffing. If it’s warm, it will thin out the cream cheese and make the filling runny, which can leak out during cooking. Pop it in the fridge for 10 minutes if you’re short on time.

Step 2: Stuff the Chicken

Take each chicken breast and, using a sharp knife, cut a horizontal pocket into the thickest side, being careful not to cut all the way through. You want to create a deep pocket that can hold the filling without tearing. Season the chicken inside and out with salt and pepper. Divide the mushroom-cheese mixture evenly among the four breasts, spooning it into the pockets. If the pockets aren’t closing easily, secure the openings with toothpicks — insert them at an angle so they hold the edges together snugly.

⚠️ Common Mistake to Avoid: Don’t overstuff the chicken! If you pack too much filling in, it will burst out during searing. Use about 3 tablespoons of filling per breast — enough to be generous but not overflowing.

Step 3: Sear and Bake

In the same skillet you used for the mushrooms, heat the remaining 1 tablespoon of olive oil over medium-high heat until it shimmers. Place the stuffed chicken breasts in the skillet, being careful not to crowd them — work in batches if needed. Sear for 3-4 minutes per side, until deeply golden brown. The crust should look caramelized and crisp. Carefully pour the chicken broth into the skillet and add the tablespoon of butter, letting it melt into the broth. Transfer the entire skillet to the preheated oven and bake for 20-25 minutes, until the chicken is cooked through and the internal temperature reaches 165°F on an instant-read thermometer. Remove toothpicks, let rest 5 minutes, then slice and serve with the pan juices spooned over the top.

💡 mia’s Pro Tip: For an extra-golden crust, pat the chicken breasts dry with paper towels before seasoning and searing. Moisture is the enemy of browning — dry surfaces = gorgeous crust every time.

StepActionDurationKey Visual Cue
1Sauté mushrooms and garlic5 minutesLiquid evaporates, mushrooms begin to sizzle
2Mix filling and stuff chicken5 minutesThick, spreadable paste; pockets sealed with toothpicks
3Sear chicken in skillet3-4 minutes per sideDeep golden-brown crust forms
4Add broth and butter, then bake20-25 minutesInternal temp 165°F; juices run clear
5Rest and serve5 minutesPan juices thicken slightly; chicken rests before slicing

Serving & Presentation

When I serve this cheesy mushroom chicken, I like to bring the whole skillet to the table — it feels so warm and rustic, like something you’d find in a cozy Parisian bistro. Spoon the pan juices over each breast just before serving; they’re liquid gold, rich with mushroom and Gouda flavor. I love to garnish with a few extra fresh thyme sprigs and a light crack of black pepper. The golden crust against the creamy filling is gorgeous, and the aroma will have everyone reaching for their forks before you even sit down.

In my NYC kitchen, I often pair this with simple roasted asparagus or a crisp green salad with lemon vinaigrette to cut through the richness. Mashed potatoes or buttered egg noodles are also wonderful for soaking up every last drop of that pan sauce. And if you’re feeling like celebrating, pour a glass of Chardonnay or a light Pinot Noir — the wine’s acidity balances the creamy Gouda beautifully. Whether it’s a weeknight dinner or a special occasion, this baked chicken with Gouda always feels like an event.

Pairing TypeSuggestionsWhy It Works
Side DishRoasted asparagus, garlic green beans, or arugula saladBright, fresh flavors contrast the rich, creamy chicken
StarchMashed potatoes, buttered egg noodles, or crusty breadSoaks up the savory pan juices perfectly
BeverageChardonnay, Pinot Noir, or sparkling water with lemonAcidity cuts through the richness of Gouda and cream cheese
GarnishFresh thyme sprigs, flaky sea salt, cracked black pepperAdds color, freshness, and a final layer of flavor

Make-Ahead, Storage & Reheating

Between my busy recipe-testing schedule and life in New York City, I’m all about smart meal prep. This stuffed chicken breast recipe works beautifully for make-ahead dinners — you can assemble everything in advance and simply sear and bake when you’re ready. I often prep the mushroom filling a day ahead and stuff the chicken in the morning, so all I have to do is cook it after work. Here’s everything you need to know about storing and reheating this dish.

MethodContainerDurationReheating Tip
RefrigeratorAirtight container3-4 daysReheat in a 350°F oven for 10-12 minutes, covered with foil
FreezerFreezer-safe bag or containerUp to 3 monthsThaw overnight in fridge, then reheat in a covered skillet with a splash of broth
Make-AheadCovered dish in fridgeUp to 24 hours in advanceAssemble but don’t sear — sear and bake just before serving for best texture

When reheating, the key is to add a little moisture to prevent the chicken from drying out. I like to place leftover chicken in a baking dish with a splash of chicken broth or even just water, cover with foil, and warm in a 350°F oven until heated through — about 10-12 minutes. The foil traps steam and keeps the meat tender. For a quicker option, you can slice the chicken and reheat it in a covered skillet over medium-low heat with a tablespoon of broth, flipping once. Avoid the microwave if you can — it tends to make the chicken rubbery and can cause the cheese filling to separate.

Variations & Easy Swaps

One of the things I love most about this chicken breast with mushrooms is how adaptable it is. Over the years, I’ve played with different cheeses, herbs, and even added a little North African warmth with a pinch of cumin or paprika. Here are some of my favorite variations — each one tested and loved in my own kitchen.

VariationKey ChangeBest ForDifficulty Impact
Moroccan Spice TwistAdd ½ tsp cumin + ½ tsp paprika to fillingWarm, aromatic depth; unique flavor profileEasy
Dairy-Free / LightUse dairy-free cream cheese and vegan Gouda-style shredsLighter option without sacrificing creaminessEasy
Spinach & ArtichokeAdd ½ cup thawed chopped spinach + ¼ cup chopped artichoke hearts to fillingExtra vegetables and a tangy, creamy twistEasy

Moroccan Spice Twist

This variation is very close to my heart. When I add a pinch of cumin and a dash of smoked paprika to the mushroom filling, it transports me straight back to my mother’s kitchen in Marrakech. The cumin adds an earthy warmth that pairs beautifully with the nutty Gouda, while the paprika brings a subtle smokiness. I also like to stir in a tablespoon of chopped fresh cilantro at the end for brightness. Serve this version with couscous tossed with lemon and herbs — it’s a beautiful fusion of my North African heritage and this French-inspired technique that always gets rave reviews.

Dairy-Free / Light Version

For those who are dairy-conscious or looking for a lighter option, this swap works beautifully. Use a good-quality dairy-free cream cheese — I like the one from Kite Hill or Miyoko’s — and look for a vegan Gouda-style shred that melts well (Violife and Follow Your Heart both do excellent versions). The texture will be slightly less rich, but the flavor is still deeply savory and satisfying. I also add an extra tablespoon of nutritional yeast to the filling for a cheesy, umami boost without any dairy. This version is wonderful for anyone who wants all the comfort with fewer restrictions.

Spinach & Artichoke Stuffed Chicken

This is a fantastic way to sneak in extra vegetables while adding a tangy, creamy twist. I thaw frozen chopped spinach and squeeze it completely dry — this is crucial to avoid adding excess moisture to the filling — then mix it into the mushroom and cheese base along with finely chopped canned or jarred artichoke hearts. The artichokes add a lovely tang that cuts through the richness, and the spinach gives the filling a beautiful green fleck. I often pick up fresh baby spinach and artichoke hearts from the Union Square farmers market in spring, and this variation always feels like a fresh, seasonal celebration.

How do you prevent the mushroom stuffing from making the chicken breasts soggy?

The key to keeping the stuffing from making your chicken soggy is to cook the mushrooms thoroughly before mixing them into the filling. Sauté the chopped mushrooms over medium heat until all the moisture they release has completely evaporated — you’ll see the pan go from steamy to dry, and the mushrooms will start to sizzle in the oil. This usually takes about 5 minutes. Then, let the mushroom mixture cool completely before stuffing the chicken. Warm mushrooms will release steam inside the chicken as it bakes, creating excess moisture. I also recommend letting the stuffed chicken rest for 5 minutes after baking — this allows the juices to redistribute and the filling to set, so every slice is clean and not watery.

Can I use a different type of cheese instead of Gouda for stuffed chicken breasts?

Absolutely! Gouda is wonderful for its creamy melt and nutty flavor, but many other cheeses work beautifully in this stuffed chicken breast recipe. Gruyère is my top substitute — it has a similar nuttiness but with a slightly firmer texture and a more pronounced, earthy flavor. Fontina is another excellent choice; it’s incredibly creamy and melts into a velvety pool. Provolone (especially the smoked variety) adds a lovely savory depth, and mild cheddar brings a familiar, comforting taste. For a lighter option, try part-skim mozzarella — it will be stretchy and mild but less rich. Just avoid very hard cheeses like Parmesan (which won’t melt smoothly) or very soft cheeses like fresh goat cheese (which can become grainy). Whichever cheese you choose, grate it yourself for the best melt.

How long should you bake stuffed chicken breasts to ensure they are fully cooked?

For this recipe, you’ll bake the stuffed chicken breasts at 375°F (190°C) for 20-25 minutes after searing them on the stovetop. The exact time depends on the thickness of your chicken breasts — larger, thicker breasts may need closer to 25 minutes, while thinner ones might be done in 18-20 minutes. The most reliable way to check doneness is with an instant-read thermometer inserted into the thickest part of the breast (not into the stuffing). The chicken is fully cooked when it reaches an internal temperature of 165°F. If you don’t have a thermometer, you can check by cutting into the thickest part — the juices should run clear, and the meat should be opaque all the way through with no pinkness. Always let the chicken rest for 5 minutes after baking to allow the juices to settle.

What is the best way to get a golden crust on the outside of stuffed chicken breasts?

Getting that beautiful golden crust comes down to three things: dry chicken, hot oil, and patience. First, pat the chicken breasts completely dry with paper towels before seasoning — any surface moisture will create steam and prevent browning. Second, heat your olive oil in the skillet over medium-high heat until it shimmers and moves fluidly across the pan — this is the visual cue that it’s hot enough. Third, place the chicken in the pan and leave it alone for 3-4 minutes without moving it. Resist the urge to peek or shuffle the chicken around; a proper crust needs uninterrupted contact with the hot surface. You’ll know it’s ready to flip when the edges look golden and the chicken releases easily from the pan. If it sticks, it needs another minute. For an extra-deep color, add a pat of butter to the pan just before flipping — the milk solids in the butter accelerate browning beautifully.

Can I prepare stuffed chicken breasts ahead of time for a dinner party?

Yes, this is one of the best make-ahead dishes for entertaining! You can fully assemble the stuffed chicken breasts up to 24 hours in advance. Simply prepare the mushroom filling, stuff the chicken, secure with toothpicks, and place the stuffed breasts in a baking dish. Cover tightly with plastic wrap and refrigerate. When you’re ready to cook, sear the chicken directly from the fridge — you may need to add 1-2 minutes to the searing time since the chicken will be cold. Then bake as directed, adding 5 extra minutes to the oven time. The internal temperature should still reach 165°F. This make-ahead approach is a game-changer for dinner parties: all the messy work is done in advance, and you get to enjoy the evening while the chicken bakes. Just remember to let the chicken sit at room temperature for 15 minutes before searing to help it cook more evenly.

What type of mushrooms work best for stuffed chicken breasts?

Cremini mushrooms are my top choice for this stuffed chicken breast recipe because they have a deeper, earthier flavor than white button mushrooms but are still widely available and affordable. White button mushrooms work beautifully too and have a milder, more neutral taste that lets the Gouda shine. For a more robust, woodsy flavor, try shiitake mushrooms — just remove the tough stems before chopping. Portobello mushrooms are also excellent; they have a meaty texture that holds up well in the filling. Whichever type you choose, the key is to chop them very finely so they blend seamlessly into the cream cheese mixture, and to sauté them until all moisture evaporates. This concentrates their flavor and prevents a soggy filling. I often mix cremini with a few dried porcini mushrooms that I rehydrate and chop finely — it adds an incredible umami depth that’s truly special.

How do I keep the cheese filling from leaking out while cooking?

Keeping the filling inside while cooking is all about proper sealing and temperature. First, don’t overstuff — use about 3 tablespoons of filling per breast, which is enough to be generous but not so much that it bursts out. Second, secure the opening with toothpicks inserted at a slight angle, weaving them through the edges of the pocket so they hold snugly. I typically use 2-3 toothpicks per breast, spaced evenly. Third, make sure your filling is cool or at room temperature before stuffing — warm filling can thin out during cooking and leak. Fourth, when searing, use medium-high heat and don’t overcrowd the pan; if the chicken is too close together, it steams instead of searing, and the filling can bubble out. Finally, if any filling does escape into the pan, don’t worry — it will incorporate into the pan juices and create an even more delicious sauce.

Can I use this stuffed chicken breast recipe for meal prep?

Absolutely! This recipe is fantastic for meal prep. You can cook the full batch of stuffed chicken breasts on Sunday and enjoy them throughout the week. After baking, let the chicken cool completely, then store each breast in an airtight container in the refrigerator for up to 4 days. For the best texture when reheating, I recommend slicing the chicken and reheating it gently in a covered skillet with a splash of chicken broth over medium-low heat. This method keeps the meat moist and the filling creamy. You can also freeze the cooked chicken for up to 3 months — wrap each breast individually in plastic wrap, then place them in a freezer-safe bag. Thaw overnight in the refrigerator before reheating. For meal prep, I also love making the mushroom filling alone in advance and storing it in the fridge for up to 5 days, then stuffing fresh chicken the night before I plan to cook it.

What should I serve with cheesy mushroom-stuffed chicken breasts?

This dish is wonderfully versatile and pairs beautifully with a wide range of sides. For vegetables, I love roasted asparagus, garlic green beans, or a bright arugula salad with lemon vinaigrette — the freshness and acidity cut through the rich, creamy filling. For starches, creamy mashed potatoes are a classic choice that soaks up every drop of those delicious pan juices, while buttered egg noodles or a bed of fluffy couscous also work beautifully. Crusty bread is a must for wiping the plate clean! If you want to keep things light, serve the chicken alongside a simple steamed vegetable like broccoli or zucchini. For a special occasion, I like to pair it with roasted fingerling potatoes and a glass of Chardonnay — the wine’s acidity balances the Gouda’s richness, and the potatoes get crispy and golden alongside the chicken.

How do I know when the stuffed chicken breasts are done without a thermometer?

While an instant-read thermometer is the most reliable tool, there are visual cues you can use. First, check the juices — insert a knife or skewer into the thickest part of the breast and gently press; the juices should run clear, not pink or red. Second, the meat should feel firm to the touch but still have a slight spring — if it feels hard and tight, it may be overcooked. Third, cut into the thickest part of the breast at the thickest point; the meat should be opaque white all the way through with no translucent or pink areas. Keep in mind that the stuffing will be very hot and may still look slightly moist even when fully cooked, so focus on the chicken itself. When in doubt, cook a little longer — chicken that reaches 165°F is safe and juicy, but slightly over is safer than under. After 20-25 minutes of baking following a good sear, most standard-sized breasts will be perfectly done.

Share Your Version!

I absolutely love hearing how this stuffed chicken breast recipe turns out in your kitchen! Did you try the Moroccan spice twist? Or maybe you experimented with a different cheese blend? Drop a comment below and let me know how it went — your feedback helps other home cooks feel confident trying it too. And if you’re feeling proud of your golden, Gouda-stuffed creation, snap a photo and share it on Instagram or Pinterest. Tag @exorecipes so I can see your beautiful dish and maybe even feature it in my stories!

I’d especially love to know: what side dish did you serve alongside this cheesy mushroom chicken? I’m always looking for new pairing ideas, and your creativity inspires me every single day. Leave a star rating and a comment — it means the world to me and helps this recipe reach more hungry folks who need a little comfort on their table.

From my NYC kitchen to yours — I hope this recipe brings as much warmth to your table as it does to mine. — mia 🧡

📌

Love This Recipe? Save It to Pinterest!

If you enjoyed this Cheesy Mushroom-Stuffed Chicken Breasts with Golden Gouda recipe, don’t let it get lost in your browser tabs! 😄 Pin it now so you can find it again anytime — and explore hundreds more tried-and-tested recipes waiting for you on my Pinterest boards.

👉 Follow mia on Pinterest @exorecipe

📌 Pin this recipe · 🔁 Re-pin your favorites · 💬 Tag me when you make it — I love seeing your creations!

Print

clock clock iconcutlery cutlery iconflag flag iconfolder folder iconinstagram instagram iconpinterest pinterest iconfacebook facebook iconprint print iconsquares squares iconheart heart iconheart solid heart solid icon

Cheesy Mushroom-Stuffed Chicken Breasts with Golden Gouda

  • Author: Chef Mia
  • Prep Time: 15 minutes
  • Cook Time: 30 minutes
  • Total Time: 45 minutes
  • Yield: 4 servings 1x
  • Method: Main Course
  • Cuisine: American

Description

Juicy chicken breasts stuffed with a savory mushroom and Gouda cheese filling, pan-seared to golden perfection.


Ingredients

Scale
  • 4 boneless, skinless chicken breasts
  • 2 tablespoons olive oil
  • 1 cup mushrooms, finely chopped
  • 2 cloves garlic, minced
  • 1 cup grated Gouda cheese
  • 1/4 cup cream cheese, softened
  • 1 tablespoon fresh thyme leaves
  • Salt and pepper to taste
  • 1/2 cup chicken broth
  • 1 tablespoon butter

Instructions

  1. Preheat oven to 375°F (190°C).
  2. In a skillet, heat 1 tablespoon olive oil over medium heat. Add mushrooms and garlic, cook until mushrooms are soft and liquid evaporates, about 5 minutes.
  3. Remove from heat and let cool slightly. In a bowl, combine cooked mushrooms, Gouda cheese, cream cheese, and thyme. Mix well.
  4. Cut a pocket into each chicken breast horizontally, being careful not to cut all the way through. Season chicken inside and out with salt and pepper.
  5. Stuff each breast with the mushroom-cheese mixture, securing with toothpicks if needed.
  6. In the same skillet, heat remaining 1 tablespoon olive oil over medium-high heat. Sear chicken breasts until golden, about 3-4 minutes per side.
  7. Add chicken broth and butter to the skillet. Transfer to oven and bake for 20-25 minutes, or until chicken is cooked through (internal temperature reaches 165°F).
  8. Remove toothpicks, let rest 5 minutes, then serve with pan juices.

Notes

For extra richness, sprinkle additional Gouda on top before baking. Serve with steamed vegetables or rice.


Nutrition

  • Calories: 420 kcal
  • Sugar: 2 g
  • Fat: 28 g
  • Carbohydrates: 4 g
  • Protein: 38 g


Cheesy Mushroom-Stuffed Chicken Breasts with Golden Gouda

Cheesy Mushroom-Stuffed Chicken Breasts with Golden Gouda – A Comforting One-Pan Dinner

⚖️
Difficulty
Easy
⏲️
Prep Time
20 mins
🕒
Cook Time
35 mins
⏱️
Total Time
55 mins
🍽️
Servings
4

Growing up in Morocco, my mother’s kitchen was a haven of slow-cooked tagines and fragrant spices. But one of her secrets was how she’d take simple ingredients like chicken and mushrooms and turn them into something spectacular. This stuffed chicken breast recipe is my love letter to that memory — but with a twist that comes from my years in Paris and now in New York City. The cheesy mushroom chicken filling, anchored by creamy Gouda, gives every bite a golden, nutty richness that melts in your mouth. I still remember the first time I made this for my NYC dinner guests; the silence at the table was the highest compliment — everyone was too busy savoring to talk.

When you cut into one of these Gouda stuffed chicken breasts, the aroma hits you first: earthy cremini mushrooms, sweet sautéed garlic, and that unmistakable scent of toasted cheese. The filling is luxuriously creamy thanks to a touch of cream cheese, while the breadcrumbs add a delicate texture that keeps everything from becoming too heavy. As the chicken bakes in a little broth, it stays incredibly moist, and the pan juices turn into a light, savory sauce that begs to be sopped up with crusty bread. Every forkful delivers tender chicken, a creamy mushroom center, and a hint of thyme that ties it all together — a true cozy dinner dream.

What I love most about this creamy mushroom chicken bake is how foolproof it is, even for beginners. The key is in the sear: giving those chicken breasts a beautiful golden crust before they go into the oven locks in all the juices and adds a layer of smoky depth. I’ve tested this recipe dozens of times — at my cooking classes in Brooklyn and for friends’ dinner parties — and I’ve learned a few tricks along the way. In that spirit, I’ll share my 💡 mia’s Pro Tip for keeping the cheese from oozing out (spoiler: it’s all in the pocket size and a quick chill), plus the most common mistake that dries out stuffed chicken. Whether you’re looking for new chicken breast dinner ideas or a showstopper for a weeknight meal, this one is going to become a favorite.

Why This Stuffed Chicken Breast Recipe Is the Best

The Flavor Secret: The star of this filling is Gouda — a semi-hard cheese with a buttery, slightly nutty flavor that deepens when baked. I discovered Gouda’s magic while working in a Parisian bistro; its low moisture content means it melts beautifully without turning greasy. Combined with earthy cremini mushrooms and a whisper of thyme, it creates a filling that tastes far more elegant than it is simple. This is cheesy mushroom chicken that actually lets the mushrooms and cheese shine side by side.

Perfected Texture: Have you ever had stuffed chicken that turned out dry? The French technique of pan-searing before oven-finishing — what chefs call “marcottage” — creates a protective crust that seals in moisture. Then a splash of chicken broth added to the pan creates steam as it bakes, keeping the chicken tender and juicy. The mushrooms release their own liquid as they cook, which blends with the broth into a light, luscious sauce. Every bite stays succulent without being watery.

Foolproof & Fast: Despite the impressive result, this recipe takes only 20 minutes of active prep. The rest is hands-off oven time. I’ve designed the steps so even a first-timer can feel like a chef. With a simple substitution table later, you can tailor it to what you have in the fridge. That’s why I call it my go-to chicken breast dinner ideas for busy NYC weeknights — it never disappoints.

Stuffed Chicken Breast Recipe Ingredients

Whenever I’m at the Union Square Greenmarket, I grab these staples — fresh cremini mushrooms from a local farm and, often, a wedge of aged Gouda from a cheesemonger who remembers my order. The simplicity of this list is part of its genius. Each ingredient has a job, and finding the right ones makes the dish sing.

Ingredients List

  • 4 boneless, skinless chicken breasts (about 6 oz each)
  • 2 tablespoons olive oil
  • 8 ounces cremini mushrooms, finely chopped
  • 2 cloves garlic, minced
  • ½ cup shredded Gouda cheese
  • 2 tablespoons cream cheese, softened
  • ¼ cup breadcrumbs (panko or plain)
  • 1 teaspoon dried thyme
  • Salt and pepper to taste
  • ¼ cup chicken broth (low-sodium)

Ingredient Spotlight

Gouda: This is the star. Young Gouda (mild, creamy) works well, but aged Gouda (6–12 months) adds a richer, caramelized flavor. I prefer aged for its firmness — it shreds beautifully and holds its shape in the filling. You can substitute Monterey Jack or Fontina for a milder, stretchier melt, but Gouda gives that distinct golden crust when baked.

Cremini Mushrooms: Also called baby bellas, they are meatier than white mushrooms and hold up to sautéing without turning slimy. For the best flavor, chop them finely — a food processor works great in 2-second pulses. If you use white mushrooms, double the quantity (they shrink more). Wild mushrooms like shiitake add an earthy twist; just remove the stems.

Breadcrumbs: A vital binder that absorbs excess moisture from the mushrooms and cream cheese, keeping the filling dense rather than soupy. Panko gives a lighter texture; plain fine breadcrumbs create a tighter filling. Gluten-free panko works perfectly for a gluten-free version — I’ve tested it and the texture stays intact.

Original IngredientBest SubstitutionFlavor / Texture Impact
Gouda (shredded)Monterey Jack or FontinaMilder, more stretchy, less nutty
Cremini mushroomsWhite mushrooms (increase to 12 oz)Milder, higher moisture – cook longer to evaporate liquid
Breadcrumbs (panko)Gluten-free breadcrumbs or crushed crackersSlightly denser if fine crumbs; still works
Chicken brothDry white wine or vegetable brothWine adds acidity that cuts richness; broth keeps it neutral

How to Make Cheesy Mushroom-Stuffed Chicken Breasts — Step-by-Step

I promise, this is easier than it looks. Once you master the pocket-slicing technique (just use your hand to feel the depth), you’ll be stuffing chicken like a pro. Let’s dive in.

Step 1: Prepare the Mushroom Filling

Heat 1 tablespoon olive oil in a skillet over medium heat. Add the finely chopped cremini mushrooms and minced garlic. Cook, stirring often, until the mushrooms release their liquid and it evaporates — about 5–7 minutes. You want them deeply browned and fragrant. Transfer to a bowl and let cool for 5 minutes. Then stir in the shredded Gouda, softened cream cheese, breadcrumbs, thyme, salt, and pepper.

💡 mia’s Pro Tip: Finely chopped mushrooms mimic the texture of ground meat and blend seamlessly with the cheese. Use a food processor with 2-second pulses to save time — just don’t puree them.

Step 2: Stuff the Chicken

Place a chicken breast flat on a cutting board. With a sharp knife, cut a horizontal pocket into the thickest side, going about two-thirds of the way through — be careful not to cut all the way. Divide the mushroom-cheese mixture evenly among the four breasts (about ¼ cup each). Secure the opening with two toothpicks or kitchen twine. Season the outside generously with salt and pepper.

⚠️ Common Mistake to Avoid: Cutting too deep and making a hole on the other side. Place your non-dominant hand flat on top of the breast and feel the blade’s tip — stop about ½ inch from the opposite edge.

Step 3: Sear the Chicken

In the same oven-safe skillet, heat the remaining 1 tablespoon olive oil over medium-high heat until shimmering. Place the stuffed chicken breasts in the skillet (seam side down first, if possible — it helps seal the filling). Sear for 3–4 minutes per side, until deep golden brown. This step builds the crust and locks in moisture.

💡 mia’s Pro Tip: Don’t crowd the pan — sear in two batches if needed. Overcrowding lowers the temperature and steams the chicken instead of browning it.

Step 4: Bake to Perfection

Pour the chicken broth carefully around the seared chicken (not over the top, to keep the crust crisp). Transfer the skillet to the preheated 375°F (190°C) oven. Bake for 20–25 minutes, or until the internal temperature reaches 165°F on an instant-read thermometer. For an extra golden top, sprinkle additional shredded Gouda on each breast during the last 5 minutes of baking — this is my Recipe Note trick that makes it look restaurant-worthy.

⚠️ Common Mistake to Avoid: Overbaking. Even if the internal temp hits 165°F, the carryover cooking will raise it a few degrees. Remove from oven at 160°F if you can, then let rest. Dry chicken is the #1 stuffed chicken mistake.

Step 5: Rest and Serve

Let the chicken rest in the skillet for 5 minutes before slicing. This allows juices to redistribute. Remove the toothpicks. Spoon the pan juices over the top — they’re packed with flavor. Slice and serve warm.

💡 mia’s Pro Tip: For clean slices, use a sharp chef’s knife and cut on a bias (diagonal). The angle shows off the beautiful filling.

StepActionDurationKey Visual Cue
1Sauté mushrooms & garlic5–7 minLiquid evaporates; mushrooms become fragrant and lightly browned
2Mix filling & stuff chicken5 minFilling holds together; chicken pocket intact
3Sear chicken6–8 minDeep golden crust on both sides
4Bake with broth20–25 minInternal temp 165°F; top is golden (if extra cheese added)
5Rest & serve5 minJuices rest; chicken is tender to the touch

Serving & Presentation

I love serving these Gouda stuffed chicken breasts with a side of creamy mashed potatoes or a simple lemony arugula salad — the peppery greens cut through the richness beautifully. The pan juices, which have reduced slightly in the oven, make a natural sauce; spoon them over the chicken just before bringing to the table. A sprinkle of fresh parsley or chives adds a pop of green that makes the golden cheese even more inviting.

For a cozy Moroccan-French twist, I often serve this with couscous tossed with toasted almonds and dried apricots — it’s how my mother would have done it back in Marrakech. And on busy NYC nights, I pair it with a quick sauté of spinach and garlic. The versatility of this dish is one of the reasons it’s my go-to chicken breast dinner ideas for guests who are just as happy with a casual meal as a dressed-up affair.

Pairing TypeSuggestionsWhy It Works
Side DishMashed potatoes, roasted asparagus, or couscous with herbsStarches absorb pan sauces; veggies add freshness
Sauce / DipPan juices, garlic aioli, or a light lemon-herb vinaigretteEnhances the savory and creamy notes without overpowering
BeverageChardonnay (unoaked), Sauvignon Blanc, or a crisp ciderAcidity cuts through the richness; fruit notes complement Gouda
GarnishChopped parsley, chives, or a few microgreensAdds color and a fresh, herbal lift

Make-Ahead, Storage & Reheating

Between running my cooking workshops and exploring the city, I rely on meals I can prep ahead. This creamy mushroom chicken bake is perfect for that. You can assemble the stuffed chicken (up to step 2) a day in advance, then sear and bake when you’re ready. Or bake the whole dish, cool it, and store it for effortless weeknight dinners.

MethodContainerDurationReheating Tip
RefrigeratorAirtight containerUp to 3 daysOven at 350°F for 10–12 min (cover with foil to retain moisture)
FreezerFreezer-safe bag or container (removing as much air as possible)Up to 3 monthsThaw overnight in fridge; reheat covered at 350°F for 20 min
Make-Ahead (uncooked)Wrap each stuffed breast tightly in plastic wrap, then in foilUp to 24 hours in advanceSear and bake directly from fridge – add 5 min to bake time

I often freeze these individually for quick dinners. The key to reheating without drying out is low, even heat and a little moisture — a splash of extra broth or water in the baking dish helps. Microwaving is possible but will soften the crust; if you’re in a rush, use 50% power in 30-second bursts. And never forget: letting the chicken rest after reheating is just as important as after the initial bake.

Variations & Easy Swaps

This stuffed chicken breast recipe is a canvas for creativity. Over the years I’ve adapted it for different diets and cravings. Here are my favorite variations, each tested right in my NYC kitchen.

VariationKey ChangeBest ForDifficulty Impact
Spinach & ArtichokeAdd ¼ cup thawed chopped spinach and ¼ cup finely chopped artichoke hearts to the fillingExtra veggie boost, Mediterranean flairNo change – easy
Dairy-Free/LighterUse dairy-free cream cheese and substitute Gouda with ¼ cup nutritional yeast for “cheesy” flavorLactose intolerance, lower fatEasy – adjust salt to compensate
Herb & LemonReplace thyme with 1 tsp dried oregano + zest of 1 lemon in the filling; add lemon slices on top before bakingBrighter, springtime flavorNo change – easy

Spinach & Artichoke Variation

I fell in love with the classic spinach-artichoke dip while working at a bistro in Paris. Adding these two ingredients transforms the filling into a Mediterranean dream. Make sure to squeeze the thawed spinach dry (it removes bitterness and prevents a watery stuffing). The artichoke hearts add a tender, slightly tangy bite that pairs beautifully with Gouda. This version is perfect for serving at spring gatherings.

Dairy-Free / Lighter Version

For my friends who avoid dairy, I’ve found that a blend of dairy-free cream cheese and nutritional yeast (1–2 tablespoons) mimics the umami of cheese surprisingly well. The texture stays creamy, though it won’t get that golden crust — instead, sprinkle a little smoked paprika on top before baking for a beautiful color. This lighter cream cheese swap lets the mushroom flavor shine even more.

Herb & Lemon Variation

On a trip to the Union Square farmers market, I grabbed fresh oregano and lemons, and this variation was born. The lemon zest cuts through the richness of the cheese, while oregano adds an earthy, aromatic note. I always finish this version with a squeeze of fresh lemon juice over the chicken right before serving — it wakes up all the flavors. It’s my go-to for a quick weeknight dinner that feels like spring.

Frequently Asked Questions

What is the best way to prevent the cheese from leaking out of the stuffed chicken breasts during baking?

Great question! The secret is twofold. First, don’t overfill the pocket — about ¼ cup of filling per 6-ounce breast is perfect. Second, make sure the pocket is sealed well: after stuffing, use 2–3 toothpicks to pin the opening shut, spacing them evenly. Some cooks also like to dust the outside of the chicken lightly with flour before searing; the flour helps create a barrier that locks in the cheese. And here’s an extra tip from my Paris training: after stuffing, pop the chicken in the fridge for 10 minutes before searing. The cold firms up the filling (cream cheese works especially well for this), so it stays put during the initial sear.

Can I use a different type of cheese instead of Gouda for this mushroom-stuffed chicken recipe?

Absolutely. Gouda gives a nutty, buttery finish, but you can swap in many other cheeses. For a melty, stretchier result, try Monterey Jack, Fontina, or even a good-quality mozzarella (though mozzarella will be milder). If you want a sharper, more intense flavor, aged cheddar or Gruyère work beautifully — just note they can be saltier, so adjust your seasoning accordingly. For a blue cheese twist, crumbled Gorgonzola adds a tangy punch; pair it with walnuts in the filling for a restaurant-level dish. For a dairy-free option, use a plant-based shredded cheese designed for melting, but know that the texture will be less rich. In all cases, the cooking times remain the same — just keep the total amount of cheese about ½ cup.

How long should I bake cheesy mushroom-stuffed chicken breasts to ensure they are cooked through but still moist?

At 375°F (190°C), the typical bake time is 20–25 minutes after searing. The most reliable test is an instant-read thermometer inserted into the thickest part of the chicken (avoid the filling). You’re looking for 165°F (75°C). But to keep the meat extra moist, I remove the chicken when it hits 160°F and let it rest for 5 minutes — carryover cooking will bring it to the safe zone. The searing step already cooks the outside, so the oven finish gently cooks the inside without drying it out. If your chicken breasts are on the smaller side (4–5 oz), check at 18 minutes; for larger ones (8 oz), it may take 28 minutes. Always use a thermometer rather than relying solely on time — it’s the best way to guarantee juicy, perfectly cooked chicken every time.

What sides go well with cheesy mushroom-stuffed chicken breasts for a complete dinner?

This dish is rich and creamy, so I love sides that contrast in texture and acidity. A simple arugula salad with lemon vinaigrette cuts through the cheese and mushrooms beautifully. Roasted green beans or asparagus with a squeeze of lemon are also fantastic — the bright, vegetable flavors balance the dish. For a starch, creamy mashed potatoes (or even a lighter cauliflower mash) soak up the golden pan juices. If you want a grain, fluffy couscous or quinoa tossed with fresh herbs works wonders. And don’t forget crusty bread to mop up every drop of the sauce. For a Moroccan touch, serve with a side of roasted carrots with cumin — it’s how my mother would have done it.

Can I prepare the stuffed chicken ahead of time and cook it later?

Yes, and it’s one of my favorite meal-prep tricks. You can fully assemble the stuffed chicken (steps 1 and 2) up to 24 hours in advance. Once stuffed and secured with toothpicks, wrap each breast tightly in plastic wrap and refrigerate. When you’re ready to cook, just sear and bake as directed — you may need to add 3–5 minutes to the bake time since the chicken is starting cold. I often do this on a Sunday for a busy Monday dinner. The flavors actually meld even more overnight! If you want to bake the whole dish ahead, cool it completely, refrigerate, then reheat at 350°F for 10–12 minutes covered with foil. Avoid freezing after cooking because the cheese texture softens, but freezing uncooked stuffed chicken works well (up to 3 months).

How do I know when the mushrooms are cooked enough for the filling?

The mushrooms should be cooked until they have released all their liquid and it has evaporated — this usually takes 5–7 minutes over medium heat. You’ll see the pan go from watery to nearly dry, and the mushrooms will shrink and start to brown. This step is crucial because excess moisture in the filling can make the chicken soggy and cause the cheese to separate. I also like to add a pinch of salt while the mushrooms cook; it helps draw out the liquid faster. Once they are dry and fragrant, transfer them to a bowl and let them cool for 5 minutes before mixing with the cheese and breadcrumbs. This ensures the filling stays thick and luscious, not watery.

Can I use chicken thighs instead of chicken breasts for this stuffed chicken recipe?

Yes, you can absolutely use boneless, skinless chicken thighs. Thighs are juicier and more forgiving — they stay moist even if you bake them a little longer. However, they are smaller and irregularly shaped, so the stuffing pocket is trickier. I recommend butterflying the thighs open flat (cutting horizontally through the thickest part, leaving one side attached), then laying the filling on one half and folding the other half over. Secure with toothpicks. Bake time will be similar (20–25 minutes at 375°F) but check internal temperature: thighs are safe at 175°F (they actually taste best at that higher temp because the fat renders). You’ll get a slightly richer, juicier result — perfect if you’re not worried about a low-fat option.

What should I do if my stuffing mixture seems too wet?

If the filling feels too loose or watery before stuffing, there are two quick fixes. First, you can add an extra tablespoon of breadcrumbs — they absorb excess moisture and help bind the mixture. Second, make sure the cream cheese is softened but not melted; if it’s too warm, the filling can become runny. If the mushrooms still have liquid in the pan, cook them another minute or two. If you’ve already mixed and it’s still wet, refrigerate the filling for 15–20 minutes — the cream cheese will firm up and make it easier to handle. A good filling should hold its shape when spooned; if it slides off the spoon, it’s too wet. Don’t worry, this is an easy fix and won’t affect the final flavor.

Can I make this recipe gluten-free?

Absolutely. The only source of gluten in this recipe is the breadcrumbs. Simply swap them with gluten-free breadcrumbs (I prefer the panko-style ones from Ian’s or Aleia’s — they keep the same light texture) or use almond flour (though the filling will be denser and slightly nuttier). If using almond flour, reduce the amount to 3 tablespoons because it absorbs less liquid. Also, double-check that your chicken broth is certified gluten-free — most are, but some brands add flavorings that contain gluten. The rest of the ingredients (cheese, mushrooms, cream cheese, olive oil, spices) are naturally gluten-free. The recipe works beautifully without any compromise in flavor or texture.

How do I get a deeper golden color on the chicken without burning the cheese?

You can achieve a gorgeous golden crust two ways. First, during the sear, make sure the pan is hot enough — the oil should shimmer before you add the chicken. Sear for a full 3–4 minutes per side without moving it, letting the crust develop. Second, after baking, you can finish under the broiler for 1–2 minutes (watch closely!). But if you’ve added extra cheese on top (as my Recipe Note suggests), the broiler will brown it nicely in about 1 minute. Just be careful not to let the cheese burn — the natural sugars in Gouda caramelize quickly. Another trick: brush the outside of the chicken with a little melted butter before searing — it browns beautifully and adds a rich flavor. The key is controlling the heat: moderate-high for searing, then gentle oven heat for even cooking.

Share Your Version!

I’d love to hear how this cheesy mushroom chicken turned out in your kitchen. Did you try one of the variations? Did you add a secret spice from your own heritage? Drop a star rating and a comment below — your feedback helps me keep creating recipes that truly work for real home cooks. And if you snap a photo, tag @exorecipes on Instagram or Pinterest — I adore seeing your beautiful creations. You can also ask me a specific question about this dish; I read every comment and will do my best to help, whether it’s about the stuffing consistency or a swap you’re not sure about.

From my NYC kitchen to yours — I hope this recipe brings as much warmth to your table as it does to mine. — mia 🧡

📌

Love This Recipe? Save It to Pinterest!

If you enjoyed this Cheesy Mushroom-Stuffed Chicken Breasts with Golden Gouda recipe, don’t let it get lost in your browser tabs! 😄 Pin it now so you can find it again anytime — and explore hundreds more tried-and-tested recipes waiting for you on my Pinterest boards.

👉 Follow mia on Pinterest @chefrecipes2

📌 Pin this recipe · 🔁 Re-pin your favorites · 💬 Tag me when you make it — I love seeing your creations!

Print

clock clock iconcutlery cutlery iconflag flag iconfolder folder iconinstagram instagram iconpinterest pinterest iconfacebook facebook iconprint print iconsquares squares iconheart heart iconheart solid heart solid icon

Cheesy Mushroom-Stuffed Chicken Breasts with Golden Gouda

  • Author: Chef Mia
  • Prep Time: 20 minutes
  • Cook Time: 35 minutes
  • Total Time: 55 minutes
  • Yield: 4 1x
  • Method: Main Course
  • Cuisine: American

Description

Juicy chicken breasts stuffed with a savory mushroom and Gouda cheese filling, pan-seared to golden perfection.


Ingredients

Scale
  • 4 boneless, skinless chicken breasts
  • 2 tablespoons olive oil
  • 8 ounces cremini mushrooms, finely chopped
  • 2 cloves garlic, minced
  • 1/2 cup shredded Gouda cheese
  • 2 tablespoons cream cheese, softened
  • 1/4 cup breadcrumbs
  • 1 teaspoon dried thyme
  • Salt and pepper to taste
  • 1/4 cup chicken broth

Instructions

  1. Preheat oven to 375°F (190°C).
  2. In a skillet, heat 1 tablespoon olive oil over medium heat. Add mushrooms and garlic; cook until mushrooms are tender and liquid has evaporated, about 5-7 minutes. Transfer to a bowl and let cool slightly.
  3. In the bowl, mix the cooked mushrooms with Gouda, cream cheese, breadcrumbs, thyme, salt, and pepper.
  4. Slice a pocket horizontally into each chicken breast without cutting through the other side. Stuff each breast with the mushroom-cheese mixture; secure with toothpicks if needed.
  5. Season the outside of the chicken with salt and pepper.
  6. In an oven-safe skillet, heat remaining 1 tablespoon olive oil over medium-high heat. Sear the chicken breasts for 3-4 minutes per side until golden brown.
  7. Add chicken broth to the skillet. Transfer the skillet to the oven and bake for 20-25 minutes, or until chicken is cooked through (internal temperature reaches 165°F).
  8. Let rest for 5 minutes before serving.

Notes

For extra golden color, you can sprinkle additional shredded Gouda on top of the chicken during the last 5 minutes of baking.


Nutrition

  • Calories: 420
  • Sugar: 2
  • Fat: 22
  • Carbohydrates: 8
  • Protein: 45


Cheesy Mushroom-Stuffed Chicken Breasts with Golden Gouda

Cheesy Mushroom Chicken Skillet Bake: Your New Weeknight Favorite (One-Pan, 40-Minute Meal)

⚖️
Difficulty
Easy
⏲️
Prep Time
10 mins
🕒
Cook Time
30 mins
⏱️
Total Time
40 mins
🍽️
Servings
4 servings

There are some dinners that just feel like a hug in a bowl, and this Cheesy Mushroom Chicken Skillet Bake is exactly that. It’s the meal I turn to after a long day of recipe testing here in my New York City kitchen — when I want something deeply satisfying, incredibly creamy, and downright easy to clean up. This isn’t just another dinner; it’s a one-pan wonder that brings together everything I love about cooking: the sizzle of a perfect sear, the earthy aroma of sautéed cremini mushrooms, and that glorious blanket of melted mozzarella and Parmesan. Growing up in Morocco, my mother’s tagines taught me the magic of layering flavors. Training in Paris, I learned the power of a properly deglazed pan. This recipe is the best of both worlds — a weeknight-friendly, crowd-pleasing meal that tastes like you spent hours in the kitchen. Let me show you how it’s done.

Imagine tender, juicy chicken breasts nestled in a velvety, herb-flecked cream sauce, studded with earthy cremini mushrooms, and crowned with a golden, bubbly crust of mozzarella and Parmesan. The aroma alone — garlic, thyme, and sizzling butter — will have everyone racing to the table. It’s comfort food elevated, the kind of dish that makes any Tuesday night feel special. The sauce is rich yet perfectly balanced, clinging to every inch of the chicken and begging to be sopped up with a crusty piece of bread.

I developed this recipe with the home cook in mind. It’s designed to be foolproof and forgiving. My Parisian chef instructor always said, “The secret to a great dish is in the fond,” the browned bits left in the pan after searing. We’ll deglaze that fond to create an instant, deeply flavorful sauce. 💡 mia’s Pro Tip: Never rush the sear. A golden-brown crust is the foundation of flavor. And for a touch of my Moroccan heritage, feel free to add a pinch of smoked paprika or cumin to the mushrooms — it adds an incredible warmth.

Why This Cheesy Mushroom Chicken Recipe Is the Best

The Flavor Secret: We don’t just sauté the mushrooms and call it a day. We sear the chicken first to build that deep, savory crust, then deglaze the pan with chicken broth, lifting all those delicious browned bits into the sauce. This French technique, called déglacage, infuses the entire dish with incredible umami. A splash of white wine (optional but recommended!) takes it over the top.

Perfected Texture: The combination of heavy cream and two types of cheese creates a sauce that is luxuriously creamy without being gluey or overly heavy. The low-moisture mozzarella provides that iconic, stretchy pull, while the Parmesan adds a nutty, salty depth that sharpens all the flavors. Every bite is a perfect balance of silky sauce, tender chicken, and earthy mushrooms.

Foolproof & Fast: From start to finish, this meal comes together in just 40 minutes, and almost all of it happens in a single skillet. That means minimal cleanup and maximum flavor. Whether you’re a seasoned pro or cooking for a busy family, this recipe is designed to succeed. No fancy equipment, no complicated steps — just honest, delicious food that brings everyone together.

Cheesy Mushroom Chicken Skillet Bake Ingredients

The beauty of this recipe lies in its simple yet high-impact ingredients. I usually grab everything from my local market in the West Village — good-quality chicken, fresh cremini mushrooms, and a block of real Parmesan cheese make all the difference.

Ingredients List

  • 4 boneless skinless chicken breasts
  • Salt and pepper to taste
  • 2 tablespoons olive oil
  • 8 oz cremini mushrooms sliced
  • 3 cloves garlic minced
  • 1 cup heavy cream
  • 1/2 cup chicken broth
  • 1 teaspoon dried thyme
  • 1 cup shredded mozzarella cheese
  • 1/4 cup grated Parmesan cheese
  • fresh parsley for garnish

Ingredient Spotlight

Cremini Mushrooms: These are just baby portobellos, offering a deeper, earthier flavor than standard white mushrooms. Choose firm, dry mushrooms with a smooth cap. Substitute with baby bellas or sliced portobellos.

Heavy Cream: The foundation of our velvety sauce. It provides unmatched richness and body. For a lighter version, half-and-half works, but the sauce will be less thick.

Mozzarella & Parmesan: This dynamic duo is non-negotiable. Low-moisture, part-skim mozzarella melts beautifully without making the sauce watery. Freshly grated Parmesan adds a salty, nutty punch that pre-shredded blends can’t replicate.

Original IngredientBest SubstitutionFlavor / Texture Impact
Chicken BreastsChicken ThighsMore forgiving, juicier, slightly richer flavor.
Heavy CreamHalf-and-Half + 1 tbsp FlourLighter, slightly thinner sauce. Flour helps thicken.
Cremini MushroomsBaby Bellas or White MushroomsSimilar texture. White mushrooms have a milder flavor.
MozzarellaProvolone or FontinaEqually melty. Provolone is tangier, Fontina is nuttier.

How to Make Cheesy Mushroom Chicken Skillet Bake — Step-by-Step

Follow these simple steps for a perfect, restaurant-quality meal right from your own stovetop.

Step 1: Season the Chicken

Pat the chicken breasts dry with paper towels. This is crucial for a good sear. Season generously on both sides with salt and pepper.

⚠️ Common Mistake to Avoid: Underseasoning! Chicken breasts are thick, so be bold with your salt and pepper. This is your primary chance to season the meat itself.

Step 2: Sear the Chicken

Heat olive oil in a large skillet over medium-high heat. Carefully place the chicken in the hot pan. Cook for 5-6 minutes per side, until deeply golden brown. Remove the chicken and set it aside on a plate.

💡 mia’s Pro Tip: Don’t move the chicken around once it’s in the pan! Let it sit undisturbed to form a beautiful golden crust. It will release easily from the pan when it’s ready.

Step 3: Cook the Mushrooms

In the same skillet, add the sliced mushrooms. Cook over medium heat for about 5 minutes, until they are softened, browned, and have released their liquid. Add the minced garlic and cook for one minute more until fragrant.

⚠️ Common Mistake to Avoid: Overcrowding the mushrooms. Give them room to brown in a single layer. If they are piled too high, they will steam instead of sear.

Step 4: Create the Sauce

Pour the heavy cream and chicken broth into the skillet with the mushrooms. Stir vigorously with a wooden spoon, scraping up all the browned bits (the “fond”) from the bottom of the pan. Add the dried thyme and bring the sauce to a gentle simmer.

💡 mia’s Pro Tip: This deglazing step is where the magic happens! Those browned bits are packed with flavor from the chicken and mushrooms, and they will dissolve into the sauce, making it incredibly rich.

Step 5: Return the Chicken

Nestle the seared chicken breasts back into the skillet, spooning some of the mushroom sauce over the top of each piece.

⚠️ Common Mistake to Avoid: Boiling the cream. Once you return the chicken, keep the heat at a low simmer. High heat can cause the cream to curdle or separate.

Step 6: Add the Cheese

Sprinkle the shredded mozzarella and grated Parmesan evenly over the chicken and sauce.

💡 mia’s Pro Tip: For an extra creamy and well-integrated sauce, stir half of the Parmesan directly into the cream sauce before topping the chicken with the remaining mozzarella and Parmesan.

Step 7: Cover and Melt

Cover the skillet, reduce the heat to low, and let it cook for 10-15 minutes. The chicken will cook through, and the cheese will melt into a glorious, bubbly blanket.

⚠️ Common Mistake to Avoid: Using high heat. Low heat is essential here to gently cook the chicken through without scorching the cheese or breaking the cream sauce.

Step 8: Garnish and Serve

Remove the skillet from the heat. Garnish generously with fresh chopped parsley for a pop of color and freshness. Let it rest for a couple of minutes before serving.

💡 mia’s Pro Tip: A final sprinkle of flaky sea salt, like Maldon, right at the end adds a wonderful textural crunch and a last hit of savory flavor that perfectly balances the rich cream and cheese.

StepActionDurationKey Visual Cue
1Pat & Season Chicken2 minsChicken is dry and evenly coated
2Sear Chicken10-12 minsDeep golden-brown crust
3Cook Mushrooms5 minsSoftened, browned, liquid evaporated
4Make Sauce3 minsSauce is smooth and simmering
5Return Chicken1 minChicken nestled in sauce
6Top with Cheese1 minEven layer covering chicken
7Cover & Cook10-15 minsCheese is melted and bubbly
8Garnish & Serve2 minsBright green parsley on top

Serving & Presentation

This dish is incredibly versatile. I love serving it over a bed of creamy mashed potatoes or alongside some crusty sourdough to soak up every last drop of that luscious sauce. A simple green salad with a lemon vinaigrette provides a bright, acidic contrast that cuts through the richness beautifully.

For a truly stunning presentation, garnish the skillet with a generous sprinkle of fresh parsley and a few cracks of black pepper just before serving. If I’m feeling fancy, I’ll add a sprinkle of flaky sea salt right at the end. It brings a lovely pop of texture and flavor that elevates the whole dish.

Pairing TypeSuggestionsWhy It Works
Side DishMashed potatoes, egg noodles, crusty breadAbsorbs the creamy sauce perfectly
Sauce / DipSpoon extra sauce over the topMaximizes the mushroom cream experience
BeverageSauvignon Blanc, Chardonnay, sparkling waterAcidity cuts through richness
GarnishFresh parsley, flaky sea salt, black pepperAdds freshness and textural contrast

Make-Ahead, Storage & Reheating

This recipe is fantastic for meal prep! Here’s how to keep it tasting fresh. I often make a double batch on Sunday so I have easy lunches ready for my busy NYC week.

MethodContainerDurationReheating Tip
RefrigeratorAirtight containerUp to 3 daysAdd a splash of milk, reheat gently on stovetop
FreezerFreezer-safe containerUp to 3 monthsThaw overnight in fridge, then reheat gently
Make-AheadAssemble in skillet1 day in advanceAdd cheese just before baking/reheating

The best way to reheat is gently on the stovetop over low heat, adding a splash of broth or milk to loosen the sauce if it has thickened. You can also reheat individual portions in the microwave, but the stovetop method best preserves the texture of the chicken and cheese.

Variations & Easy Swaps

VariationKey ChangeBest ForDifficulty Impact
Cajun StyleAdd andouille sausage, Cajun seasoningSpice lovers, game dayEasy
Italian StyleAdd sun-dried tomatoes, use provoloneMediterranean flavor cravingsEasy
Lighter VersionUse half-and-half, reduce cheeseHealth-conscious weeknightsEasy

Cajun Style Variation

Add a teaspoon of Cajun seasoning to the flour you dust the chicken in. Sauté sliced andouille sausage with the mushrooms for an extra layer of smoky, spicy flavor. This version is a huge hit in my house!

Italian Style Variation

Add 1/2 cup of sun-dried tomatoes (drained and chopped) to the skillet along with the mushrooms. Swap the dried thyme for dried oregano and use provolone or fontina cheese instead of mozzarella for a wonderfully nutty and savory twist.

Lighter Version

To lighten things up without sacrificing flavor, substitute the heavy cream with half-and-half or a mixture of whole milk and a tablespoon of flour. Use reduced-fat cheese and increase the chicken broth by 1/4 cup to maintain a saucier consistency.

What type of cheese melts best for a cheesy mushroom chicken skillet bake?

For the absolute best melt, I recommend using low-moisture, part-skim mozzarella. It has a high fat content and low moisture, which means it melts into a silky, gooey layer without making your sauce watery. Pairing it with freshly grated Parmesan from a block is essential — pre-shredded cheese contains starches that prevent it from melting smoothly. Other great melting options include provolone, fontina, or smoked gouda for a deeper flavor.

Can I use chicken thighs instead of chicken breasts in this recipe?

Absolutely! Chicken thighs are incredibly forgiving and actually yield even juicier results than breasts due to their higher fat content. You can use boneless, skinless thighs and follow the exact same cooking instructions. If you are using bone-in thighs, you will need to increase the covered cooking time in Step 7 by about 5 to 10 minutes. They are a fantastic substitute and many people actually prefer them for this type of creamy skillet dish.

How long should I bake a chicken and mushroom skillet dish in the oven?

This particular stove-top version is designed for ease, but you can absolutely finish it in the oven. If you prefer to bake it, sear the chicken and prepare the sauce in an oven-safe skillet. Once you top it with cheese, transfer the skillet to a preheated 375°F (190°C) oven and bake for 15-20 minutes, or until the chicken reaches an internal temperature of 165°F and the cheese is bubbly and golden brown. This is great for hands-off cooking.

What can I serve with cheesy mushroom chicken skillet bake for a complete meal?

This dish is wonderfully versatile when it comes to pairings! For a hearty, comforting meal, I love serving it over creamy mashed potatoes or soft polenta to soak up all that delicious sauce. A side of crusty sourdough bread is perfect for dipping. For a lighter option, try it with steamed green beans, roasted broccoli, or a simple arugula salad with a lemon vinaigrette. The acidity of the salad beautifully balances the richness of the cream and cheese.

Can I make this creamy mushroom chicken skillet bake dairy-free?

Yes, with a few thoughtful substitutions! Replace the heavy cream with full-fat canned coconut milk for a rich, dairy-free sauce. Use a dairy-free mozzarella shred and nutritional yeast in place of the Parmesan for that cheesy, umami flavor. Make sure to use a good quality olive oil or plant-based butter to sauté the mushrooms. The coconut milk will add a subtle sweetness that pairs beautifully with the thyme and garlic.

How do I prevent the cream sauce from curdling?

Curdling usually happens when the cream is exposed to high heat or a sudden temperature change. To prevent this, always bring your cream sauce to a gentle simmer over medium-low heat, rather than a rolling boil. Make sure to return the chicken to the pan over low heat. Using full-fat heavy cream is also key, as the higher fat content makes it much more stable and resistant to separating than half-and-half or whole milk.

Can I add spinach or other vegetables to this dish?

Definitely! Adding vegetables is a great way to boost the nutrition and flavor of this meal. A few handfuls of fresh spinach stirred in right before you add the cheese will wilt perfectly into the sauce. You can also sauté sliced bell peppers, zucchini, or asparagus along with the mushrooms in Step 3. Just make sure not to overcrowd the pan; cook them in batches if needed so they brown nicely instead of steaming.

What is the best pan to use for this one pan chicken mushroom bake?

I highly recommend using a heavy-bottomed, oven-safe skillet for the best results. A 12-inch cast iron skillet is my absolute favorite for this recipe — it retains heat beautifully, gives the chicken an incredible sear, and can go straight from the stovetop to the oven (if you choose to bake it). A stainless steel skillet is another excellent choice. Avoid using non-stick pans if possible, as they don’t create the same deep, flavorful fond that is the base of our sauce.

Share Your Version!

I absolutely love seeing your creations! If you made this Cheesy Mushroom Chicken Skillet Bake, please leave a star rating and a comment below telling me how it went. Did you add any personal twists? A touch of harissa? Some extra garlic? Share your photos on Instagram or Pinterest and tag me @exorecipes so I can feature you!

From my NYC kitchen to yours — I hope this recipe brings as much warmth to your table as it does to mine. — mia 🧡

📌

Love This Recipe? Save It to Pinterest!

If you enjoyed this Cheesy Mushroom Chicken Skillet Bake recipe, don’t let it get lost in your browser tabs! 😄 Pin it now so you can find it again anytime — and explore hundreds more tried-and-tested recipes waiting for you on my Pinterest boards.

👉 Follow mia on Pinterest @exorecipe

📌 Pin this recipe · 🔁 Re-pin your favorites · 💬 Tag me when you make it — I love seeing your creations!

Print

clock clock iconcutlery cutlery iconflag flag iconfolder folder iconinstagram instagram iconpinterest pinterest iconfacebook facebook iconprint print iconsquares squares iconheart heart iconheart solid heart solid icon

Cheesy Mushroom Chicken Skillet Your New Weeknight Favorite

  • Author: Chef Mia
  • Prep Time: 10 minutes
  • Cook Time: 30 minutes
  • Total Time: 40 minutes
  • Yield: 4 servings 1x
  • Method: Main Course
  • Cuisine: American

Description

This cheesy mushroom chicken skillet is a creamy, comforting one-pan meal that’s perfect for busy weeknights. Tender chicken breasts are smothered in a rich mushroom sauce and topped with melted cheese.


Ingredients

Scale
  • 4 boneless skinless chicken breasts
  • salt and pepper to taste
  • 2 tablespoons olive oil
  • 8 oz cremini mushrooms sliced
  • 3 cloves garlic minced
  • 1 cup heavy cream
  • 1/2 cup chicken broth
  • 1 teaspoon dried thyme
  • 1 cup shredded mozzarella cheese
  • 1/4 cup grated Parmesan cheese
  • fresh parsley for garnish

Instructions

  1. Season chicken breasts with salt and pepper on both sides.
  2. Heat olive oil in a large skillet over medium-high heat. Add chicken and cook until golden brown, about 5-6 minutes per side. Remove chicken and set aside.
  3. In the same skillet, add sliced mushrooms and cook until softened and browned, about 5 minutes. Add garlic and cook for 1 minute more.
  4. Pour in heavy cream and chicken broth, stirring to scrape up any browned bits from the bottom of the pan. Add dried thyme and bring to a simmer.
  5. Return chicken to the skillet. Spoon the mushroom sauce over the chicken.
  6. Sprinkle mozzarella and Parmesan cheeses evenly over the top.
  7. Cover the skillet and reduce heat to low. Cook for 10-15 minutes until chicken is cooked through and cheese is melted.
  8. Garnish with fresh parsley and serve hot.

Notes

For a lighter version, you can substitute half-and-half for the heavy cream. Add a splash of white wine for extra flavor.


Nutrition

  • Calories: 520
  • Sugar: 2g
  • Fat: 34g
  • Carbohydrates: 6g
  • Protein: 45g


Cheesy Mushroom Chicken Skillet Bake Your New Weeknight Favorite

Cheesy Meatball Chili Spaghetti – A Flavorful One-Pot Meal

⚖️
Difficulty
Easy
⏲️
Prep Time
15 mins
🕒
Cook Time
25 mins
⏱️
Total Time
40 mins
🍽️
Servings
6

When the first chill of a New York fall hits the streets, I find myself craving something deeply comforting—a dish that wraps you in warmth like a favorite sweater. That’s how this cheesy meatball chili spaghetti was born. I grew up in Morocco watching my mother simmer fragrant tagines on a low flame, and later in Paris I learned the precision of French sauce-making at Le Cordon Bleu. Now in my NYC kitchen, I marry those influences into one-pot meals that don’t skimp on flavor. This recipe brings together juicy meatballs, a rich chili base, tender spaghetti, and a blanket of melted cheese—all in a single pot. It’s the ultimate one-pot spaghetti recipe for busy weeknights when you need dinner to feel like a hug.

Picture this: plump, perfectly seasoned meatballs nestled in a smoky, tomatoey chili sauce that’s just a little spicy from cumin and cayenne. The spaghetti soaks up all that goodness as it simmers, becoming perfectly al dente without ever turning mushy. And then the crowning glory—a generous layer of sharp cheddar and creamy mozzarella that melts into golden, gooey perfection. The aroma that fills your kitchen is pure magic: garlic, chili powder, and a hint of paprika mingling with the scent of sizzling beef. Every spoonful is a balance of tender pasta, hearty beans, and that irresistible cheese pull.

I’ve tested this recipe more times than I can count to make sure it works flawlessly for home cooks. What sets my version apart is the technique of browning the meatballs first to lock in moisture, then simmering everything together so the pasta cooks in the chili broth—no extra pot needed. My secret? A touch of cayenne for warmth (optional, but I always add it) and a combination of cheddar and mozzarella for the perfect melt. 💡 mia’s Pro Tip: Don’t skip the egg and breadcrumbs in the meatballs—they’re the key to keeping them tender, not dense. And avoid the common mistake of cooking the pasta too long; the residual heat from the cheese step will finish it perfectly.

Why This Cheesy Meatball Chili Spaghetti Recipe Is the Best

The Flavor Secret: This one-pot meal is built on layers. I start with a classic chili base—diced tomatoes, tomato sauce, kidney beans, and a trio of chili powder, cumin, and paprika—then add seared meatballs that release their savory juices into the sauce. The spaghetti absorbs all that flavor as it cooks, so every strand is infused with chili goodness. Growing up, my mother taught me that the best sauces come from patience and a good sear—that’s why I always take the extra five minutes to brown the meatballs well.

Perfected Texture: The meatballs are tender because we use a panade (breadcrumbs + egg) and mix gently—overworking leads to toughness. The spaghetti is cooked directly in the broth, which means it absorbs starch naturally and the sauce thickens slightly without any extra steps. I insist on breaking the spaghetti in half so it fits comfortably in the pot and cooks evenly. The final step of covering the pot off-heat with cheese creates a steam bath that finishes cooking the pasta to al dente perfection while the cheese melts into a dreamy layer.

Foolproof & Fast: Even if you’re new to making meatballs or chili from scratch, this recipe is forgiving. The total time is just 40 minutes, and most of that is hands-off simmering. All you need is one pot and a wooden spoon. I’ve taught this to friends in my tiny NYC apartment and they always leave amazed at how easy it is. It’s the definition of an easy chili spaghetti dinner that delivers restaurant-quality comfort.

Cheesy Meatball Chili Spaghetti Ingredients

Every time I make this meatball chili pasta, I feel like I’m bringing together the best of my food worlds. The ground beef comes from the Union Square Greenmarket, the beans from my pantry stash, and the cheese from a little Italian shop in Arthur Avenue. But honestly, you can find everything at your regular grocery store—no special trips needed. Let’s break down what you’ll need.

Ingredients List

  • 1 lb ground beef (80/20 for juiciness)
  • 1/2 cup breadcrumbs (plain or panko)
  • 1 large egg
  • 2 cloves garlic, minced
  • 1 tsp salt
  • 1/2 tsp black pepper
  • 2 tbsp olive oil
  • 1 large onion, diced
  • 1 green bell pepper, diced
  • 2 cans (14.5 oz each) diced tomatoes (fire-roasted if available)
  • 1 can (15 oz) tomato sauce
  • 1 can (15 oz) kidney beans, drained and rinsed
  • 2 tbsp chili powder
  • 1 tsp cumin
  • 1/2 tsp paprika
  • 1/4 tsp cayenne pepper (optional, but I say yes!)
  • 8 oz spaghetti, broken in half
  • 2 cups beef broth (low-sodium)
  • 1 cup shredded cheddar cheese
  • 1/2 cup shredded mozzarella cheese
  • Fresh parsley for garnish

Ingredient Spotlight

Ground Beef (80/20): The fat content is crucial for moist meatballs and a rich sauce. If you use leaner beef (like 93/7), add a tablespoon of olive oil to the meatball mix. Alternatively, ground pork or a 50/50 blend of beef and pork gives even more flavor—a trick I learned from a Parisian butcher.

Spaghetti: Any brand works, but I prefer De Cecco or Barilla for their texture. Breaking the spaghetti in half ensures it fits in the pot and cooks evenly. Gluten-free pasta works if you cook it separately and add it at the end, because GF pasta can become gummy when simmered too long.

Cheese (Cheddar & Mozzarella): Sharp cheddar provides bold flavor, while mozzarella gives that stretchy, gooey pull. Pre-shredded cheese contains anti-caking agents that can affect melting—shred your own from a block for the best results. For a dairy-free version, use plant-based cheddar-style shreds and a splash of nutritional yeast.

Kidney Beans: They add heartiness and fiber. You can swap for black beans, pinto beans, or even canned chickpeas. If you’re not a bean fan, double the ground beef to 1½ lbs and skip the beans—just add a small bell pepper for bulk.

Original IngredientBest SubstitutionFlavor / Texture Impact
Ground beef (80/20)Ground turkey (93/7) + 1 tbsp olive oilLeaner, slightly drier; add extra broth if needed
SpaghettiGluten-free spaghetti (cook separately)Al dente but not as robust; must be added at end
Cheddar cheeseMonterey Jack or Pepper JackMilder or spicier; melt is similar
Kidney beansPinto beans or extra ground beefSimilar texture; omit beans double meat richness
Beef brothChicken broth + 1 tsp soy sauceLess rich; soy adds depth

How to Make Cheesy Meatball Chili Spaghetti – Step-by-Step

Follow these steps and you’ll have a bubbling, cheesy one-pot dinner on the table in 40 minutes. I’ve included my best pro tips and common mistakes so you can nail it on your first try.

Step 1: Make the Meatballs

In a large bowl, combine 1 lb ground beef, 1/2 cup breadcrumbs, 1 large egg, 2 minced garlic cloves, 1 tsp salt, and 1/2 tsp black pepper. Mix gently with your hands—do not overwork, or the meatballs will be tough. Form into small meatballs, about 1 inch in diameter. You should get around 16–18.

💡 mia’s Pro Tip: Wet your hands slightly with cold water before rolling—it prevents sticking and gives you smooth, even meatballs.

Step 2: Brown the Meatballs

Heat 2 tbsp olive oil in a large pot or Dutch oven over medium-high heat. Add the meatballs in a single layer (work in batches if needed) and cook until browned on all sides, about 5 minutes total. Don’t worry about cooking them through—they will finish simmering in the sauce. Remove meatballs with a slotted spoon and set aside.

⚠️ Common Mistake to Avoid: Cramming too many meatballs in the pot at once. They will steam instead of sear, losing that deep brown crust. Leave space between them.

Step 3: Sauté the Vegetables

In the same pot, add the diced onion and green bell pepper. Sauté over medium heat for about 3 minutes, scraping up any browned bits from the bottom—that’s flavor! The onion should turn translucent.

💡 mia’s Pro Tip: If the pot looks dry after removing meatballs, add a splash of broth or olive oil before adding vegetables.

Step 4: Build the Chili Sauce

Add 2 cans diced tomatoes (with their juices), 1 can tomato sauce, drained kidney beans, 2 tbsp chili powder, 1 tsp cumin, 1/2 tsp paprika, and 1/4 tsp cayenne (if using). Stir everything together and bring to a simmer.

Step 5: Combine and Simmer

Return the browned meatballs to the pot. Pour in 2 cups beef broth and stir gently. Bring to a boil. Add the broken spaghetti, pushing it down into the liquid to ensure it’s mostly submerged. Reduce heat to medium-low, cover, and simmer for 12–15 minutes, stirring once or twice halfway through to prevent sticking. The spaghetti should be tender but still have a slight bite (al dente).

⚠️ Common Mistake to Avoid: Do not stir too vigorously after adding spaghetti—it can break the meatballs. Use a gentle folding motion.

Step 6: Add Cheese and Rest

Remove the pot from heat. Sprinkle 1 cup shredded cheddar and 1/2 cup shredded mozzarella evenly over the top. Cover the pot and let it sit for 2–3 minutes—the residual heat will melt the cheese into a glorious blanket. Garnish with fresh parsley and serve hot.

💡 mia’s Pro Tip: For a crispier cheese top, transfer the pot to a 400°F oven for 5 minutes uncovered before serving. Watch it closely so it doesn’t burn!

StepActionDurationKey Visual Cue
1Make meatballs5 minMixture holds together when pressed
2Brown meatballs5 minGolden-brown crust on all sides
3Sauté veggies3 minOnion translucent, pepper softened
4Build sauce2 minSauce is uniform and bubbling
5Simmer spaghetti12–15 minPasta is tender, liquid mostly absorbed
6Cheese & rest2–3 minCheese fully melted, slightly golden

Serving & Presentation

This cheesy spaghetti meal is a showstopper straight from the pot. Ladle generous portions into wide shallow bowls so the cheese stretches beautifully as you serve. Sprinkle a little extra fresh parsley on top for a pop of green, and if you’re feeling fancy, a pinch of red pepper flakes for extra heat. I like to serve it with a simple side salad—anything with a bright vinaigrette cuts through the richness. My Moroccan roots also love a dollop of harissa-spiked yogurt on the side for a creamy, spicy contrast.

In colder months, I pair this with crusty garlic bread or warm cornbread to soak up every bit of sauce. A crisp lager or a medium-bodied red wine (like a Zinfandel) works beautifully with the chili flavors. For a full family-style meal, set out bowls of shredded cheese, sliced jalapeños, and fresh cilantro so everyone can customize their bowl.

I often make this for Sunday supper with friends in my Brooklyn apartment—it’s the kind of dish that invites seconds and lingering at the table. The aroma alone will draw everyone into the kitchen.

Pairing TypeSuggestionsWhy It Works
Side DishSimple green salad, roasted broccoli, crusty breadBalances richness, adds freshness or crunch
Sauce / DipHarissa yogurt, sriracha mayo, sour creamCooling, tangy, or spicy contrast
BeverageLight lager, Zinfandel, iced tea with lemonCuts through fat, complements chili spices
GarnishFresh parsley, red pepper flakes, pickled jalapeñosAdds color, heat, or acidity

Make-Ahead, Storage & Reheating

Living in NYC means a busy schedule, so I often prep this one-pot spaghetti recipe on a Sunday and enjoy it throughout the week. The flavors actually deepen overnight—it’s one of those dishes that tastes even better the next day. Here’s how to store and reheat like a pro.

MethodContainerDurationReheating Tip
RefrigeratorAirtight container3–4 daysReheat in a covered pot on low, adding a splash of broth or water to loosen sauce
FreezerFreezer-safe container or zip-top bag2 monthsThaw overnight in fridge, then reheat slowly on stovetop. Add extra cheese before serving
Make-AheadSame pot, covered1 day in advanceComplete all steps except cheese. When ready to serve, reheat, add cheese, and bake or cover to melt

My favorite trick for reheating leftovers: spoon a portion into a small skillet, add a splash of beef broth, cover, and warm over medium heat until bubbling. The pasta loosens up perfectly and the cheese gets gooey again. If you’re meal-prepping, I recommend storing the spaghetti and sauce separately from the cheese—then add fresh cheese when you reheat so it stays melty and delicious.

Variations & Easy Swaps

One of the things I love about this easy chili spaghetti recipe is how adaptable it is. Whether you’re cooking for dietary needs or just want to mix it up, here are three tried-and-tested variations I’ve made in my own kitchen.

VariationKey ChangeBest ForDifficulty Impact
Spicy SouthwesternAdd 1/2 tsp chipotle in adobo (minced) and 1/4 cup corn kernelsHeat lovers, smoky flavorEasy
VegetarianSubstitute plant-based meatballs (store-bought or homemade) and use vegetable brothMeatless Monday, vegan with dairy-free cheeseEasy to medium (if making meatballs from scratch)
Dairy-Free / Keto-ishUse dairy-free shreds for cheese; for keto, replace spaghetti with zucchini noodles (add raw at end)Dairy sensitivity, low-carbEasy

Spicy Southwestern Variation

This is my nod to the bold flavors of the American Southwest. I add a minced chipotle pepper in adobo sauce (about 1/2 teaspoon) along with the chili powder—it brings a smoky heat that pairs gorgeously with the cumin. Toss in a handful of frozen corn kernels when you add the beans. Top with sliced avocado instead of parsley for a creamy finish. The chipotle adds a depth that reminds me of a Parisian chili I once had at a tiny bistro—unexpected but unforgettable.

Vegetarian Version

For a meatless Monday that still feels hearty, swap the beef meatballs for your favorite plant-based meatballs (I like the ones from Trader Joe’s or Whole Foods brand). Use vegetable broth instead of beef broth. If you want to make your own plant-based meatballs, I use a mixture of cooked lentils, breadcrumbs, egg, and mushrooms—a trick from a vegetarian chef friend in Paris. Follow the same cooking steps; just be gentle when browning because veggie meatballs are more delicate.

Dairy-Free / Keto-ish Twist

If you’re avoiding dairy, use your favorite plant-based cheddar and mozzarella shreds—many melt beautifully now. For a lower-carb option, replace the spaghetti with spiralized zucchini noodles (zoodles). Add them raw after you remove the pot from heat in Step 6, stirring until they just wilt. The zucchini soaks up the chili sauce without becoming mushy. This version is lighter but still packed with flavor—I make it often after a week of indulgent eating.

How do you prevent the meatballs from falling apart in the chili spaghetti?

The secret is the panade: the mixture of breadcrumbs and egg acts as a binder that keeps the meatballs intact during simmering. Mix the ingredients gently until just combined—overmixing can make them dense and prone to breaking. Also, browning the meatballs first creates a crust that helps them hold their shape. When you add them to the chili, avoid stirring too vigorously. Gently nudge the meatballs into the sauce and let the simmer do the work. If you’re worried, you can also sauté the meatballs in a separate pan and add them carefully at the end to finish cooking.

What type of cheese melts best for a cheesy meatball chili spaghetti?

I recommend a combination of sharp cheddar and low-moisture mozzarella. Cheddar delivers a bold, tangy flavor that stands up to the chili spices, while mozzarella provides that wonderful stretchy, gooey texture. For the best melt, shred the cheese from a block rather than using pre-shredded bags—those often contain anti-caking agents that can make the cheese grainy. Other great melting cheeses include Monterey Jack, Pepper Jack (for extra heat), or even a good melting Colby. Avoid hard cheeses like Parmesan for the top layer, though you can sprinkle a little on top after melting.

Can I substitute ground beef with ground turkey for this one-pot meal?

Absolutely! Ground turkey works well, especially if you use 93% lean or a blend. Since turkey is leaner than beef, I recommend adding a tablespoon of olive oil to the meatball mixture to keep them moist. You might also want to increase the salt slightly to compensate for the milder flavor. The cooking time remains the same. If you use extra-lean ground turkey (99% fat-free), the meatballs can turn out a bit dry, so I suggest adding a tablespoon of grated Parmesan or a splash of milk to the panade. Otherwise, follow the recipe exactly—the chili sauce is robust enough to carry the flavor.

How long should you simmer the chili spaghetti for the best flavor?

Simmer the spaghetti for 12–15 minutes once you add it to the chili. That’s the sweet spot where the pasta becomes tender (al dente) while absorbing the spicy, tomatoey broth. If you simmer too long, the pasta can become mushy and the sauce will get overly thick. I recommend setting a timer for 12 minutes and then checking: the spaghetti should be slightly firm in the center, as it will continue cooking slightly after you remove the pot from heat and add the cheese. The 2–3 minute resting time under the lid is just enough to finish it perfectly.

Can I make this cheesy meatball chili spaghetti in a slow cooker?

Yes, with a few adjustments. Brown the meatballs and sauté the vegetables in a skillet first for maximum flavor, then transfer everything except the cheese to a slow cooker. Cook on low for 4–5 hours or high for 2–3 hours. Add the broken spaghetti about 30 minutes before serving—stir it in and make sure it’s submerged. The pasta will cook in the slow cooker, but keep an eye on the liquid level; you may need to add a little extra broth. Sprinkle the cheese on top, cover, and let it melt for 5 minutes before serving. The result is just as comforting, though the texture of the meatballs will be softer.

What can I serve with this one-pot spaghetti to make a complete meal?

This dish is hearty enough to be a meal on its own, but I love pairing it with a crisp green salad dressed with lemon vinaigrette to cut through the richness. Garlic bread or roasted vegetables (like broccoli or zucchini) also make excellent sides. For a truly cozy spread, serve with a side of cornbread or crusty sourdough to soak up any leftover sauce. And don’t forget a cold beer or a glass of red wine—a Zinfandel or Malbec stands up beautifully to the chili spices.

Is this recipe gluten-free? How can I adapt it?

As written, this recipe contains gluten from the breadcrumbs and spaghetti. To make it gluten-free, use gluten-free breadcrumbs (or ground oats) in the meatballs, and substitute the spaghetti with a gluten-free pasta variety (like rice or corn pasta). Important: gluten-free pasta can get mushy if cooked too long in the sauce. I recommend cooking it separately according to package directions until al dente, then stirring it into the chili just before serving. Also, check that your beef broth and canned tomatoes are certified gluten-free, as some brands may contain additives.

Can I use a different type of pasta instead of spaghetti?

Definitely! This one-pot method works well with other pasta shapes, especially short ones like penne, rotini, or rigatoni. The key is to choose a pasta that has a similar cooking time (around 10–12 minutes) and can hold the chunky sauce. If you use fresh pasta, add it in the last few minutes. For whole wheat pasta, increase the simmering time by 2–3 minutes and add a little extra broth if needed. Just remember: the skillet or pot should be wide enough to hold the pasta in an even layer.

How can I make this spicy meatball chili spaghetti less spicy for kids?

To tame the heat for little ones, simply omit the cayenne pepper entirely. The chili powder and paprika are quite mild and won’t make it spicy. You can also serve it with a dollop of sour cream or plain yogurt on the side—the creaminess helps cool the palate. If you’re using fire-roasted tomatoes, they add a subtle smokiness without heat, so they’re fine. My own kids love this dish when I keep it mild, and they even enjoy the kidney beans. If your family prefers no beans, you can skip them and add an extra half pound of ground meat or some diced carrots for bulk.

What’s the best way to reheat leftovers without drying them out?

The best method is to reheat in a skillet or small pot on the stove. Add a splash of beef broth (or water) to loosen the sauce, cover, and warm over medium-low heat for 5–7 minutes, stirring occasionally. The moisture from the broth will rehydrate the pasta and melt the cheese again. If you use a microwave, cover the bowl with a damp paper towel and heat in 30-second bursts, stirring between each. For frozen leftovers, thaw overnight in the fridge first, then follow the stovetop method. Always add fresh cheese if the top looks dry—I keep a bag of shredded cheddar in the fridge just for this!

Share Your Version!

I’d love to see how this cheesy meatball chili spaghetti turns out in your kitchen! Did you add extra spice? Swap the meat? Serve it with a side your family loved? Drop a comment below and let me know—your feedback helps other readers and inspires me to create more recipes. If you snap a photo, tag me on Instagram or Pinterest @exorecipes—I read every tag and feature my favorites.

And here’s a question for you: What’s the one comfort food you could eat every week without getting tired of it? For me, this one-pot spaghetti is definitely on that list.

From my NYC kitchen to yours — I hope this recipe brings as much warmth to your table as it does to mine. — mia 🧡

📌

Love This Recipe? Save It to Pinterest!

If you enjoyed this Cheesy Meatball Chili Spaghetti recipe, don’t let it get lost in your browser tabs! 😄 Pin it now so you can find it again anytime — and explore hundreds more tried-and-tested recipes waiting for you on my Pinterest boards.

👉 Follow mia on Pinterest @exorecipe

📌 Pin this recipe · 🔁 Re-pin your favorites · 💬 Tag me when you make it — I love seeing your creations!

Print

clock clock iconcutlery cutlery iconflag flag iconfolder folder iconinstagram instagram iconpinterest pinterest iconfacebook facebook iconprint print iconsquares squares iconheart heart iconheart solid heart solid icon

Cheesy Meatball Chili Spaghetti A Flavorful One-Pot Meal

  • Author: Chef Mia
  • Prep Time: 15 minutes
  • Cook Time: 25 minutes
  • Total Time: 40 minutes
  • Yield: 6 servings 1x
  • Method: Main Course
  • Cuisine: American

Description

This hearty one-pot meal combines juicy meatballs, rich chili flavors, and tender spaghetti, all topped with melted cheese for a comforting dinner.


Ingredients

Scale
  • 1 lb ground beef
  • 1/2 cup breadcrumbs
  • 1 large egg
  • 2 cloves garlic, minced
  • 1 tsp salt
  • 1/2 tsp black pepper
  • 2 tbsp olive oil
  • 1 large onion, diced
  • 1 green bell pepper, diced
  • 2 cans (14.5 oz each) diced tomatoes
  • 1 can (15 oz) tomato sauce
  • 1 can (15 oz) kidney beans, drained and rinsed
  • 2 tbsp chili powder
  • 1 tsp cumin
  • 1/2 tsp paprika
  • 1/4 tsp cayenne pepper (optional)
  • 8 oz spaghetti, broken in half
  • 2 cups beef broth
  • 1 cup shredded cheddar cheese
  • 1/2 cup shredded mozzarella cheese
  • Fresh parsley for garnish

Instructions

  1. In a large bowl, combine ground beef, breadcrumbs, egg, minced garlic, salt, and black pepper. Mix gently and form into small meatballs (about 1 inch).
  2. Heat olive oil in a large pot or Dutch oven over medium-high heat. Add meatballs and cook until browned on all sides, about 5 minutes. Remove meatballs and set aside.
  3. In the same pot, add onion and green bell pepper. Sauté until softened, about 3 minutes.
  4. Add diced tomatoes, tomato sauce, kidney beans, chili powder, cumin, paprika, and cayenne pepper. Stir to combine.
  5. Return meatballs to the pot. Add beef broth and bring to a boil.
  6. Add broken spaghetti, stirring to ensure pasta is submerged. Reduce heat to medium-low, cover, and simmer for 12-15 minutes, stirring occasionally, until spaghetti is tender.
  7. Remove from heat. Sprinkle cheddar and mozzarella cheese over the top. Cover and let sit for 2-3 minutes until cheese melts.
  8. Garnish with fresh parsley and serve hot.

Notes

For a spicier kick, increase cayenne pepper to 1/2 teaspoon. You can substitute ground turkey for beef if desired.


Nutrition

  • Calories: 520 kcal
  • Sugar: 9 g
  • Fat: 22 g
  • Carbohydrates: 55 g
  • Protein: 28 g


Cheesy Meatball Chili Spaghetti A Flavorful One-Pot Meal

Cheesy Meatball Chili Bake – The Ultimate One-Pot Comfort Food

⚖️
Difficulty
Easy
⏲️
Prep Time
15 mins
🕒
Cook Time
30 mins
⏱️
Total Time
45 mins
🍽️
Servings
6

Growing up in Morocco, my mother’s kitchen was a whirlwind of cumin, coriander, and simmering tomato sauces. I’d watch her shape lamb meatballs by hand, then nestle them into a spicy, bean-free stew that we’d eat with crusty bread. Years later, after training in Paris and cooking my way through New York City’s bustling food scene, I found myself craving that same warm, one-pot comfort—but with a cheesy, American twist. That’s how my Cheesy Meatball Chili Bake was born: a one-pot meal that brings together juicy homemade meatballs, a smoky, hearty chili, and a bubbly blanket of melted cheddar and mozzarella. It’s the kind of dish that fills your kitchen with the smell of home and makes everyone gather around the table.

Picture this: a golden, slightly crisp cheese crust hiding tender meatballs and a rich, beefy chili loaded with kidney and black beans. Each spoonful offers a contrast of textures—the soft, savory meatball, the creamy beans, and that irresistible pull of melted cheese. I like to add a touch of smoked paprika and a whisper of cumin, notes that echo my North African roots while staying true to the American chili tradition. The meatballs are seasoned with garlic and onion powder, pan-seared until deeply browned, then simmered right in the chili. That final bake in the oven coaxes the flavors together and creates that picture-perfect cheesy top.

I’ve tested this recipe countless times in my tiny NYC apartment kitchen, tweaking the spice balance and cooking time so that even a beginner can pull it off. The secret? Browning the meatballs first—it locks in flavor and keeps them from drying out. And please, don’t skip the milk-soaked breadcrumbs; they’re what make the meatballs light and tender. Below I’ll share my Parisian trick for perfectly juicy meatballs and a common mistake that can turn your bake into a greasy mess (hint: it’s about the cheese). Ready to dive in? Let’s make the ultimate comfort food.

Why This Cheesy Meatball Chili Bake Recipe Is the Best

The Flavor Secret: My Moroccan-French training taught me that layering spices is everything. Here, I use chili powder, cumin, and smoked paprika as the base, but I also add a pinch of cinnamon—just like my mother did—to deepen the warmth without making it sweet. The meatballs, soaked in milk and breadcrumbs, become incredibly moist, while the combination of cheddar and mozzarella gives both tangy sharpness and gooey stretch.

Perfected Texture: The key is the two-step cooking method. First, pan-sear the meatballs until they’re crusty on the outside; this creates a flavorful fond on the bottom of the pot. Then, build the chili around that fond, scraping up all the browned bits. Finally, bake everything together—the chili thickens, the cheese melts, and the meatballs finish cooking gently in the sauce, staying tender and juicy.

Foolproof & Fast: This is a true one-pot dinner: you use the same oven-safe skillet from stovetop to oven. No extra dishes, no complicated steps. The recipe is forgiving—if you’re short on time, you can even use frozen meatballs (see my FAQ below). Plus, it’s a fantastic make-ahead meal; the flavors only get better overnight. As a busy NYC food blogger, I rely on this dish for busy weeknights and casual dinner parties alike.

Cheesy Meatball Chili Bake Ingredients

I source my ingredients from the Union Square Greenmarket and my local Italian deli in Brooklyn. The key is using good-quality ground beef (80/20 is ideal—enough fat for flavor, not too much grease) and freshly shredded cheese (pre-shredded bags often contain anti-caking agents that can make the sauce gritty). These simple choices make a difference.

Ingredients List

  • 1 lb ground beef (80/20)
  • 1/2 cup breadcrumbs (plain or panko)
  • 1/4 cup milk (whole or 2%)
  • 1 large egg
  • 1 tsp garlic powder
  • 1 tsp onion powder
  • 1/2 tsp salt
  • 1/4 tsp black pepper
  • 1 tbsp olive oil
  • 1 medium onion, diced
  • 2 cloves garlic, minced
  • 1 can (15 oz) kidney beans, drained and rinsed
  • 1 can (15 oz) black beans, drained and rinsed
  • 1 can (14.5 oz) diced tomatoes (fire-roasted for extra flavor)
  • 1 can (8 oz) tomato sauce
  • 2 tbsp chili powder
  • 1 tsp ground cumin
  • 1/2 tsp smoked paprika
  • 1 cup shredded cheddar cheese (sharp or medium)
  • 1/2 cup shredded mozzarella cheese
  • Optional: 1/2 tsp cayenne pepper or 1 diced jalapeño for heat

Ingredient Spotlight

Ground Beef (80/20): The fat content keeps meatballs moist during baking. If you use lean beef (90/10), add 1 tablespoon of olive oil to the meatball mix to compensate. I prefer grass-fed beef from the market—it has a cleaner taste.

Breadcrumbs + Milk: This combination, called a panade, is a French technique that traps moisture. Use plain breadcrumbs (not seasoned) so you control the seasoning. Gluten-free breadcrumbs work perfectly.

Cheeses: Sharp cheddar brings the tang, mozzarella brings the stretch. For the best melt, shred from a block. Avoid pre-shredded blends—they contain cellulose and won’t melt as smoothly. If you want a smoky twist, swap half the cheddar for smoked gouda.

Original IngredientBest SubstitutionFlavor / Texture Impact
Ground beefGround turkey or chickenLighter flavor; add 1 tbsp oil to meatball mix
Cheddar cheeseSmoked gouda or pepper jackSmoky or spicy note; pepper jack adds mild heat
Kidney beansPinto or cannellini beansCreamier texture; still hearty
Diced tomatoes (fire-roasted)Regular diced + 1 tsp smoked paprikaLess smoky, but still rich

How to Make Cheesy Meatball Chili Bake — Step-by-Step

Follow these simple steps, and you’ll have a bubbling, golden one-pot dinner that tastes like it simmered all day.

Step 1: Prepare the Meatballs

In a large bowl, combine ground beef, breadcrumbs, milk, egg, garlic powder, onion powder, salt, and pepper. Mix gently with your hands until just combined—overmixing makes tough meatballs. Shape into 1-inch balls (about 18–20).

💡 mia’s Pro Tip: Wet your hands lightly with cold water before shaping to prevent sticking. For evenly sized meatballs, use a small cookie scoop.

Step 2: Brown the Meatballs

Heat olive oil in a large oven-safe skillet or Dutch oven over medium heat. Add meatballs in a single layer (work in batches if needed). Cook, turning occasionally, until browned on all sides—about 5–6 minutes total. Remove and set aside.

⚠️ Common Mistake to Avoid: Don’t crowd the pan. If you add too many meatballs at once, they’ll steam instead of brown, and you’ll lose that deep flavor.

Step 3: Sauté the Aromatics

In the same pot, add diced onion and cook over medium heat for 3 minutes, stirring occasionally, until softened. Add minced garlic and cook for 30 seconds more, until fragrant.

Step 4: Build the Chili

Add kidney beans, black beans, diced tomatoes (with their juices), tomato sauce, chili powder, cumin, and smoked paprika. Stir to combine, scraping up any browned bits from the bottom of the pot—that’s pure flavor.

💡 mia’s Pro Tip: For a deeper chili flavor, toast the chili powder and cumin in the empty pot for 30 seconds after sautéing the aromatics, just before adding the liquids. This releases their essential oils.

Step 5: Combine and Top with Cheese

Return the meatballs to the pot, nestling them gently into the chili mixture. Sprinkle the shredded cheddar and mozzarella evenly over the top.

Step 6: Bake

Transfer the skillet to a preheated 375°F (190°C) oven. Bake for 20–25 minutes, until the cheese is bubbly and golden brown. Let cool for 5 minutes before serving—this allows the chili to thicken slightly and the cheese to set.

⚠️ Common Mistake to Avoid: Avoid broiling unless you watch carefully—the cheese can burn quickly. Baking at 375°F gives you that perfect even melt every time.

StepActionDurationKey Visual Cue
1Shape meatballs5 minUniform 1-inch rounds
2Brown meatballs5–6 minDeep brown crust on all sides
3Sauté onion & garlic3.5 minOnion translucent, garlic fragrant
4Build chili5 minAll ingredients combined, bubbling
5Top & bake20–25 minCheese melted, golden, edges bubbly

Serving & Presentation

I love serving this Cheesy Meatball Chili Bake straight from the skillet—it’s rustic and inviting. Scatter fresh cilantro or parsley on top for a pop of color, and add a dollop of sour cream or Greek yogurt to balance the richness. A squeeze of lime juice brightens everything up. For a side, I often make a simple avocado salad or serve it with warm cornbread—my husband’s Southern favorite.

When I’m feeling nostalgic for my mother’s table, I’ll pair it with a side of Moroccan-style couscous with dried apricots. But most weeknights, we just grab a crusty baguette (from a bakery in Brooklyn, of course) to mop up every last bit of chili. If you’re hosting, serve this with an ice-cold beer like a pale ale or a crisp lager—the maltiness complements the smoky chili notes.

Pairing TypeSuggestionsWhy It Works
Side DishCornbread, crusty bread, steamed rice, or avocado saladNeutral starch soaks up chili; avocado adds creaminess
Sauce / DipSour cream, Greek yogurt, hot sauce, salsa verdeCoolness contrasts spice; acidity cuts richness
BeveragePale ale, lager, iced tea, or a bold red (Zinfandel)Malt complements smoky spices; tannins stand up to beans
GarnishFresh cilantro, parsley, sliced jalapeño, lime wedgesBrightness and freshness balance the rich cheese

Make-Ahead, Storage & Reheating

Life in NYC is fast, so I often prep this Cheesy Meatball Chili Bake on a Sunday for busy weeknights. You can assemble the entire dish (without the cheese topping), cover, and refrigerate up to 2 days ahead. When you’re ready, simply sprinkle on the cheese and bake—add 5–10 minutes to the baking time since you’re starting from cold.

MethodContainerDurationReheating Tip
RefrigeratorAirtight container or covered skilletUp to 3 daysReheat in a 350°F oven (uncovered) for 15–20 min; or microwave in 30-sec bursts
FreezerFreezer-safe container or resealable bag (remove as much air as possible)Up to 3 monthsThaw overnight in fridge, then reheat in oven at 350°F for 25–30 min
Make-Ahead (unbaked)Covered skillet (no cheese) in fridgeUp to 2 days in advanceAdd cheese and bake at 375°F for 25–30 min (add 5–10 min if starting cold)

If you’re reheating leftovers, I prefer the oven over the microwave because it revives the cheese crust. If you’re in a hurry, the microwave works fine—just cover loosely to avoid splatters. And here’s a trick from my Paris days: splash a tablespoon of water or beer into the dish before reheating to restore moisture.

Variations & Easy Swaps

VariationKey ChangeBest ForDifficulty Impact
Spicy Moroccan TwistAdd 1 tsp harissa paste + 1/2 tsp cinnamonAdventurous palatesNo change
Gluten-Free VersionUse gluten-free breadcrumbs (or crushed gf crackers); check labels on canned goodsGluten-free dietSame
Turkey & White Bean BakeSub ground turkey + cannellini beans; add 2 tsp dried oreganoLighter mealSame

Spicy Moroccan Twist

Growing up in Morocco, my mother often added a spoonful of homemade harissa to her stews. For this variation, stir 1 teaspoon of harissa paste into the chili along with a pinch of cinnamon. The harissa brings a smoky, fruity heat that pairs beautifully with the cumin and paprika. Serve with a dollop of yogurt to cool things down.

Gluten-Free Version

To make this dish gluten-free, swap the breadcrumbs for gluten-free panko or crushed gluten-free crackers. I’ve tested this with Schär brand breadcrumbs and they work perfectly. Also, double-check your diced tomatoes and tomato sauce labels—some contain wheat starch. The texture of the meatballs remains lovely and tender.

Turkey & White Bean Bake

For a leaner option, replace the ground beef with ground turkey (93/7) and use cannellini beans instead of kidney and black beans. Add 2 teaspoons of dried oregano to boost the flavor. The bake will be a little lighter in color and flavor, but still deeply comforting—perfect for a post-workout dinner.

Can I use frozen meatballs instead of making them from scratch for this recipe?

Absolutely! Frozen meatballs are a great shortcut for busy weeknights. I recommend using fully cooked, pre-made frozen meatballs—either beef or turkey. You’ll need to thaw them first (overnight in the fridge or a quick defrost in the microwave) so they brown properly. If you add them frozen to the chili, they may release excess water and make the chili watery. Brown them in the skillet just until the outside is seared (about 3–4 minutes), then proceed with the recipe. The baking time remains the same since they’re already cooked. Keep in mind that homemade meatballs have a softer, more tender texture, but frozen ones are still delicious and save you 15 minutes of prep.

What is the best type of cheese to use for the top of a cheesy meatball chili bake?

I strongly recommend a blend of sharp cheddar and mozzarella. Sharp cheddar provides a tangy, bold flavor that stands up to the chili’s spices, while mozzarella adds that beautiful stretchy, gooey texture. If you want a smokier profile, swap half the cheddar for smoked gouda. For a spicy kick, use pepper jack cheese instead of mozzarella. Avoid using pre-shredded cheese from bags—those contain anti-caking agents that can make the sauce gritty and prevent a perfect melt. Always shred your cheese from a block right before using. Freshly shredded cheese melts more smoothly and gives that irresistible golden crust.

How long should I bake this dish to ensure the meatballs are fully cooked and the cheese is melted?

Bake the Cheesy Meatball Chili Bake at 375°F (190°C) for 20–25 minutes. This timing is optimal for 1-inch meatballs (made from raw ground beef) and ensures the chili is hot and bubbly while the cheese melts to a golden brown. If you’re using frozen meatballs that are already cooked, the same baking time works because you’re essentially just heating everything through. If you’ve assembled the dish ahead and stored it in the fridge, add 5–10 minutes to the baking time (start checking at 25 minutes). The cheese should be bubbling at the edges and lightly browned in spots. If you want a deeper golden crust, you can switch to broil for the last 1–2 minutes, but watch carefully to prevent burning.

Can I make this cheesy meatball chili bake ahead of time and reheat it later?

Yes, this dish is perfect for making ahead! You have two options: 1) Assemble the entire dish without the cheese topping, cover, and refrigerate for up to 2 days. When ready to bake, add the cheese and bake at 375°F for 25–30 minutes (add 5–10 minutes if starting cold). 2) Bake it fully, then cool and refrigerate for up to 3 days or freeze for up to 3 months. To reheat baked leftovers, I prefer the oven—place in a 350°F oven uncovered for 15–20 minutes (or 25–30 from frozen after thawing). The microwave works for a quick fix, but the cheese won’t be as crisp. One pro tip: add a splash of water or beer before reheating to restore moisture to the chili.

What can I serve with this chili bake to make it a complete meal?

This one-pot dish is hearty on its own, but I love rounding it out with a few simple sides. Cornbread is a classic choice—its slight sweetness balances the spicy chili. A crisp green salad with a tangy vinaigrette (I use lime juice and olive oil) adds freshness. If you’re in the mood for carbs, serve it over steamed rice or with crusty bread for sopping up the sauce. For a low-carb option, try cauliflower rice or a side of roasted vegetables like zucchini or bell peppers. My Moroccan-inspired twist: serve with a side of couscous tossed with dried apricots and mint—it’s how my mother would have served it!

How do I prevent the meatballs from becoming dry in the bake?

The secret to moist meatballs lies in the panade—a mixture of breadcrumbs and milk that binds and retains moisture. The recipe uses 1/2 cup breadcrumbs and 1/4 cup milk, which is the right ratio for 1 lb of meat. Don’t skip the egg either; it adds structure and moisture. Also, avoid overmixing the meat mixture; combine just until the ingredients are evenly distributed. Overworking makes the proteins tighten and results in tough meatballs. Finally, browning the meatballs before baking creates a crust that seals in juices, and baking them in the chili (rather than separately) lets them cook gently in the sauce, keeping them tender.

Can I add extra vegetables to this one-pot meatball chili recipe?

Definitely! This recipe is very adaptable. I often add a diced bell pepper (red or green) when sautéing the onion—it adds sweetness and color. You can also stir in a cup of frozen corn kernels or a can of drained diced green chiles for extra heat and texture. If you want more fiber, toss in a handful of chopped spinach or kale during the last 5 minutes of baking. Just keep in mind that watery vegetables (like zucchini) may thin the chili slightly; if you add them, consider reducing the tomato sauce by a few tablespoons. The beauty of this one-pot bake is that you can customize it with whatever vegetables you have on hand—just adjust the seasoning accordingly.

Is it possible to make this dish dairy-free?

Yes, you can easily make this Cheesy Meatball Chili Bake dairy-free. For the cheese topping, use a high-quality dairy-free shredded cheese blend—look for ones with a base of coconut oil or cashew that melt well. Brands like Violife or Follow Your Heart work nicely. The meatballs use milk and egg; you can substitute the milk with unsweetened almond or oat milk (full-fat works best). The egg can be replaced with a flax egg (1 tbsp ground flaxseed + 2.5 tbsp water, let sit for 5 minutes). The texture will be slightly less tender but still very enjoyable. Also check that your breadcrumbs are dairy-free (most are, but avoid “butter-flavored” varieties).

What if I don’t have an oven-safe skillet? Can I still make this?

Absolutely no problem! If you don’t have an oven-safe skillet or Dutch oven, you can use a regular skillet for the stovetop steps, then transfer the chili mixture (with meatballs) to a greased 9×13-inch baking dish or a 3-quart casserole dish. Sprinkle the cheese on top and bake as directed. The baking time remains the same. Just make sure your baking dish is oven-safe up to 375°F. If you’re using a glass dish, note that it retains heat longer, so check at 20 minutes. You could also finish the dish entirely on the stovetop: after adding the cheese, cover the skillet and simmer on low for 10 minutes until the cheese melts—but you won’t get that golden crust. For the best results, transfer to an oven-safe dish.

How can I make this recipe spicier or milder?

This Cheesy Meatball Chili Bake is designed to be mild enough for the whole family, but it’s easy to adjust the heat level. For a spicier version, add 1/2 teaspoon cayenne pepper with the other spices, or stir in a diced jalapeño (seeds and ribs included) when you sauté the onion. You can also use hot chili powder instead of mild. For a smoky heat, include a chipotle pepper in adobo sauce (minced) along with a teaspoon of the adobo sauce. To make it milder, omit the paprika and use only 1 tablespoon chili powder (or use ancho chili powder, which is milder). Serve with sour cream or yogurt to cool the palate if needed.

Share Your Version!

I hope you love this Cheesy Meatball Chili Bake as much as I do! There’s something so satisfying about pulling that golden, bubbly skillet out of the oven and seeing everyone’s eyes light up. If you try it, I’d love to hear how it turned out—please leave a star rating and a comment below. Did you add a twist? Did you use frozen meatballs? Tell me all about it!

Snap a photo of your creation and share it on Instagram or Pinterest. Tag me @exorecipes so I can see your beautiful bake—I always smile at my readers’ versions. And if you have a question about any step, drop it in the comments; I read every single one. From my NYC kitchen to yours — I hope this recipe brings as much warmth to your table as it does to mine. — mia 🧡

📌

Love This Recipe? Save It to Pinterest!

If you enjoyed this Cheesy Meatball Chili Bake recipe, don’t let it get lost in your browser tabs! 😄 Pin it now so you can find it again anytime — and explore hundreds more tried-and-tested recipes waiting for you on my Pinterest boards.

👉 Follow mia on Pinterest @exorecipe

📌 Pin this recipe · 🔁 Re-pin your favorites · 💬 Tag me when you make it — I love seeing your creations!

Print

clock clock iconcutlery cutlery iconflag flag iconfolder folder iconinstagram instagram iconpinterest pinterest iconfacebook facebook iconprint print iconsquares squares iconheart heart iconheart solid heart solid icon

Cheesy Meatball Chili Bake The Ultimate One-Pot Comfort Food

  • Author: Chef Mia
  • Prep Time: 15 mins
  • Cook Time: 30 mins
  • Total Time: 45 mins
  • Yield: 6 1x
  • Method: Main Course
  • Cuisine: American

Description

This cheesy meatball chili bake is the ultimate one-pot comfort food, combining juicy meatballs, hearty chili, and melted cheese for a satisfying meal.


Ingredients

Scale
  • 1 lb ground beef
  • 1/2 cup breadcrumbs
  • 1/4 cup milk
  • 1 egg
  • 1 tsp garlic powder
  • 1 tsp onion powder
  • 1/2 tsp salt
  • 1/4 tsp black pepper
  • 1 tbsp olive oil
  • 1 onion, diced
  • 2 cloves garlic, minced
  • 1 can (15 oz) kidney beans, drained and rinsed
  • 1 can (15 oz) black beans, drained and rinsed
  • 1 can (14.5 oz) diced tomatoes
  • 1 can (8 oz) tomato sauce
  • 2 tbsp chili powder
  • 1 tsp cumin
  • 1/2 tsp paprika
  • 1 cup shredded cheddar cheese
  • 1/2 cup shredded mozzarella cheese

Instructions

  1. Preheat oven to 375°F (190°C).
  2. In a large bowl, combine ground beef, breadcrumbs, milk, egg, garlic powder, onion powder, salt, and pepper. Mix well and form into 1-inch meatballs.
  3. Heat olive oil in a large oven-safe skillet or pot over medium heat. Brown meatballs on all sides, then remove and set aside.
  4. In the same pot, sauté onion and garlic until softened, about 3 minutes.
  5. Add kidney beans, black beans, diced tomatoes, tomato sauce, chili powder, cumin, and paprika. Stir to combine.
  6. Return meatballs to the pot, nestling them into the chili mixture.
  7. Top with shredded cheddar and mozzarella cheeses.
  8. Transfer the pot to the oven and bake for 20-25 minutes, until cheese is bubbly and golden.
  9. Let cool for 5 minutes before serving.

Notes

For a spicier version, add 1/2 teaspoon cayenne pepper or a diced jalapeño with the onion and garlic. Leftovers can be refrigerated for up to 3 days.


Nutrition

  • Calories: 520
  • Sugar: 8g
  • Fat: 28g
  • Carbohydrates: 35g
  • Protein: 32g


Cheesy Meatball Chili Bake The Ultimate One-Pot Comfort Food

k">

Tried This Recipe? Leave a Comment!

Did you make this recipe? I’d love to hear how it turned out! Please leave a comment and a rating below. Your feedback helps other home cooks and supports cheerychop.com!

For more delicious inspiration, follow me on Pinterest!