Table of Contents
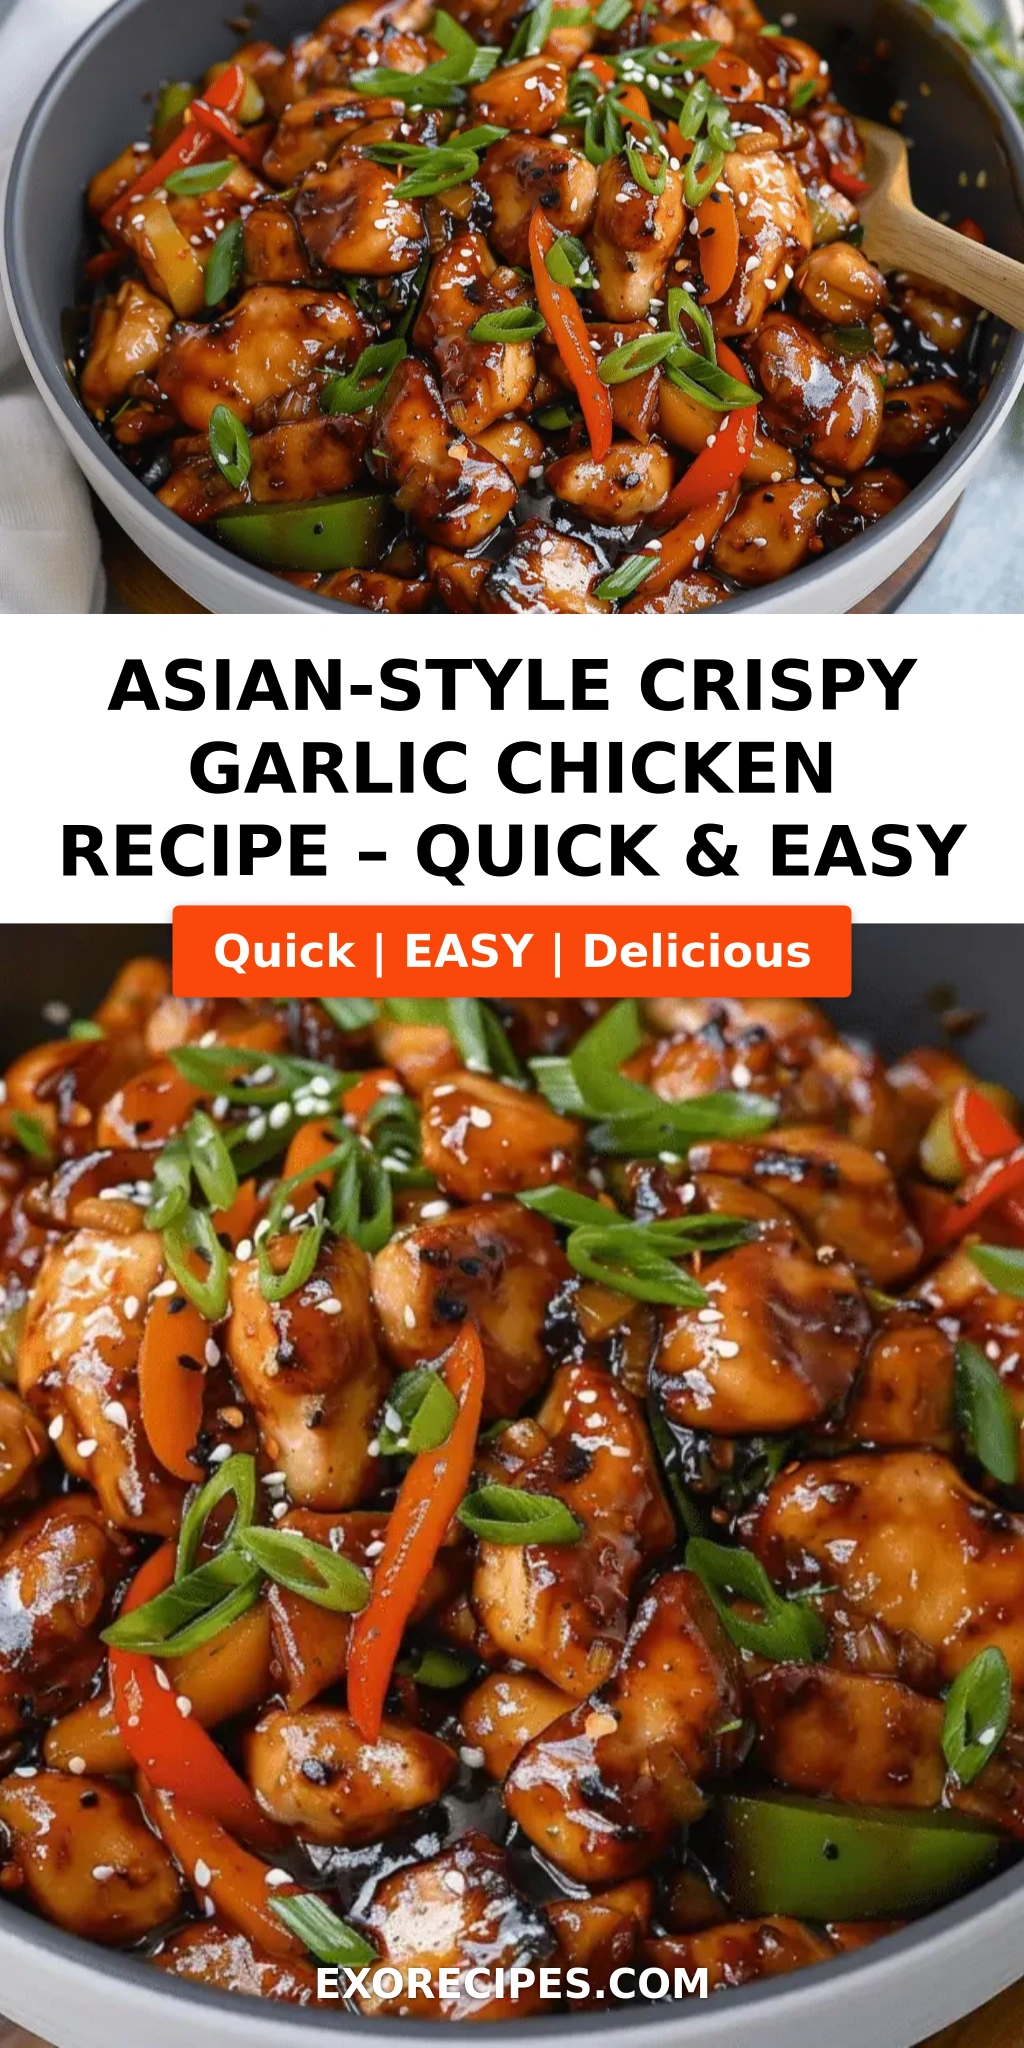
Asian-Style Crispy Garlic Chicken – Double-Coated Crunch in 35 Minutes
Growing up in Morocco, my mother’s kitchen was a symphony of garlic, cumin, and coriander. When I moved to Paris for culinary school, I learned how a simple pan sauce could transform humble ingredients into something elegant. Now, in my New York City apartment, I find myself craving that same bold, comforting energy—and this Asian-Style Crispy Garlic Chicken delivers it every time. The secret? A double-coating of cornstarch and panko that locks in moisture and shatters with every bite, all wrapped in a glossy garlic-soy sauce that’s sweet, savory, and just a little bit spicy. This isn’t just another crispy chicken recipe; it’s the one I turn to after a long day when I need dinner on the table fast, but refuse to compromise on flavor. And today, I’m thrilled to share my tested, foolproof version with you.
Imagine this: golden nuggets of chicken, each one encased in a crackling shell that gives way to tender, juicy meat. The aroma of garlic sizzling in sesame oil fills your kitchen, mingling with the deep umami of soy sauce and the floral sweetness of honey. As you toss the crispy pieces in that sticky, glossy sauce, every piece gets perfectly coated—not soggy, but glistening. The first bite is a crunch, followed by a burst of savory-sweet flavor, with a gentle heat from red pepper flakes that lingers just enough to keep you reaching for more. It’s the kind of dish that makes you close your eyes and smile, the kind that turns a Tuesday night into something special.
I’ve tested this recipe countless times to strike the perfect balance between crunch and tenderness, garlic punch and balanced sweetness. My approach combines French technique (a proper three-step breading station) with Moroccan love for bold aromatics and New York practicality (one skillet, minimal cleanup). The result is an Asian garlic chicken that’s weeknight-friendly but impressive enough for guests. In the instructions ahead, I’ll show you my favorite trick for keeping the garlic from burning, plus a common mistake that can ruin your crust. Follow these steps, and you’ll have a plate of crispy chicken that rivals any takeout—fresher, crunchier, and made with love.
Why This Asian-Style Crispy Garlic Chicken Recipe Is the Best
The Flavor Secret – My version leans on a double hit of garlic: minced fresh cloves sizzled briefly in the pan, plus a touch of garlic powder in the breading (optional, but I add it). The sauce combines soy sauce, honey, and rice vinegar for that classic Asian sweet-and-savory balance, finished with toasted sesame oil. Growing up, my mother taught me that garlic should be fragrant, not bitter—so I always cook it just 30 seconds before adding liquid. This technique comes straight from my Paris training: respect your aromatics, and they’ll reward you.
Perfected Texture – The triple-coating method—cornstarch mixture, egg, then panko—creates a crust that stays shatter-crisp for hours. I add a pinch of salt and pepper to the cornstarch-flour blend, which seasons the chicken from the inside out. Frying in batches at medium-high heat ensures the oil temperature stays consistent (around 350°F), so the breading browns evenly without absorbing grease. No rubbery coatings here. I’ve even tested an air-fryer version for a lighter take—details in the variations section.
Foolproof & Fast – With just 20 minutes of prep and 15 minutes of cooking, this recipe fits seamlessly into a busy weeknight. The instructions are straightforward enough for a beginner cook, yet the technique will impress seasoned home chefs. I’ve included visual cues at every step—when the chicken is golden, when the sauce thickens—so you know exactly what to look for. No fancy equipment required: one skillet, a few bowls, and you’re on your way to a restaurant-quality meal.
Asian-Style Crispy Garlic Chicken Ingredients
I shop for my ingredients at the Union Square Greenmarket and my local Asian grocery in Chinatown. The quality of soy sauce and sesame oil makes a big difference here—I always go for a naturally brewed soy sauce (like Kikkoman or a small-batch one) and toasted sesame oil for that nutty depth. One sniff of the garlic at the market reminds me of my mother’s hands mincing cloves for her famous chermoula. Let’s gather everything you need.
Ingredients List
- 1 lb boneless skinless chicken thighs, cut into bite-sized pieces
- 1/2 cup cornstarch
- 2 large eggs, beaten
- 1 cup panko breadcrumbs
- 1/2 cup all-purpose flour
- 1 teaspoon salt
- 1/2 teaspoon black pepper
- 1/4 cup vegetable oil, for frying
- 6 cloves garlic, minced
- 1/4 cup soy sauce
- 2 tablespoons honey
- 1 tablespoon rice vinegar
- 1 tablespoon sesame oil
- 1/2 teaspoon red pepper flakes (optional)
- 2 green onions, sliced (for garnish)
- 1 tablespoon sesame seeds (for garnish)
Ingredient Spotlight
Chicken Thighs – I always prefer thighs over breasts for this crispy garlic chicken recipe. They’re more forgiving, stay juicy even if you cook them a minute too long, and have a richer flavor that stands up to the bold sauce.
Panko Breadcrumbs – These Japanese-style breadcrumbs are larger and flakier than regular ones, yielding a lighter, crunchier crust. You’ll find them in the Asian aisle of most grocery stores. No panko? Crush some cornflakes or use regular breadcrumbs, but the texture won’t be as airy.
Garlic – Fresh garlic is non-negotiable. Pre-minced jarred garlic has a dull, slightly sour flavor. Buy firm, plump heads and mince them yourself. For a mellower garlic taste, you can roast the cloves before mincing, but I love the sharpness of raw garlic quickly cooked.
Soy Sauce & Honey – These create the sticky, savory-sweet glaze. Low-sodium soy sauce works fine; if using regular, you may want to reduce the added salt in the breading. For a deeper flavor, try dark soy sauce (thicker, less salty) or add a splash of hoisin.
| Original Ingredient | Best Substitution | Flavor / Texture Impact |
|---|---|---|
| Panko breadcrumbs | Crushed cornflakes | Less airy but still crunchy; slightly sweeter |
| Chicken thighs | Chicken breast, cubed | Leaner; can dry out if overcooked – reduce frying time by 1 min/side |
| Soy sauce | Tamari (gluten-free) or coconut aminos | Tamari is similar; coconut aminos are sweeter and less salty |
| Honey | Brown sugar or maple syrup | Brown sugar gives deeper molasses flavor; maple syrup is thinner, less sticky |
| Sesame oil | Toasted sesame oil (same) or omit | Essential for authentic flavor; omitting loses nutty aroma |
How to Make Asian-Style Crispy Garlic Chicken — Step-by-Step
Trust me, this process is easier than it looks. I’ll walk you through every step, with my best tips to ensure golden, crispy perfection.
Step 1: Set Up Breading Station
In a shallow dish, combine 1/2 cup cornstarch, 1/2 cup flour, 1 teaspoon salt, and 1/2 teaspoon black pepper. In a second shallow dish, beat 2 eggs. In a third, add 1 cup panko. This three-station setup is classic French “panure à l’anglaise” — it ensures an even, thick coating.
💡 mia’s Pro Tip: Line your dishes in order—dry, egg, panko—and keep one hand dry and one hand wet. Use your “dry hand” for the flour mixture and panko, and your “wet hand” for the egg. This keeps the coating from clumping on your fingers.
Step 2: Dredge Chicken
Working with a few pieces at a time, coat each chicken piece in the cornstarch mixture, shaking off excess. Dip into beaten egg, letting any extra drip off, then press into panko until fully coated. Place breaded pieces on a plate or baking sheet.
⚠️ Common Mistake to Avoid: Don’t skip shaking off the excess cornstarch mixture. Too much will create a pasty coating that doesn’t crisp. The egg should be a thin, even layer—if it’s too thick, the panko will slide off during frying.
Step 3: Fry Chicken
Heat 1/4 cup vegetable oil in a large skillet over medium-high heat. The oil is ready when a breadcrumb sizzles immediately. Fry chicken pieces in a single layer, in batches, without crowding. Cook about 4–5 minutes per side, until deep golden brown and cooked through (internal temperature 165°F). Transfer to a paper towel-lined plate.
💡 mia’s Pro Tip: Use a thermometer to keep oil around 350°F. If the oil is too cool, the chicken absorbs grease; too hot, the crust burns before the inside cooks. Let the oil reheat between batches.
Step 4: Make the Garlic Sauce
In a small bowl, whisk together 1/4 cup soy sauce, 2 tablespoons honey, 1 tablespoon rice vinegar, 1 tablespoon sesame oil, and 1/2 teaspoon red pepper flakes (if using). Set aside. Carefully wipe out the skillet with a paper towel (be careful, it’s hot!) to remove any breading bits.
⚠️ Common Mistake to Avoid: Don’t forget to wipe the skillet. Leftover breading will burn and smoke when you add the garlic. This 10-second step keeps your sauce clean and prevents bitterness.
Step 5: Sauté Garlic and Finish
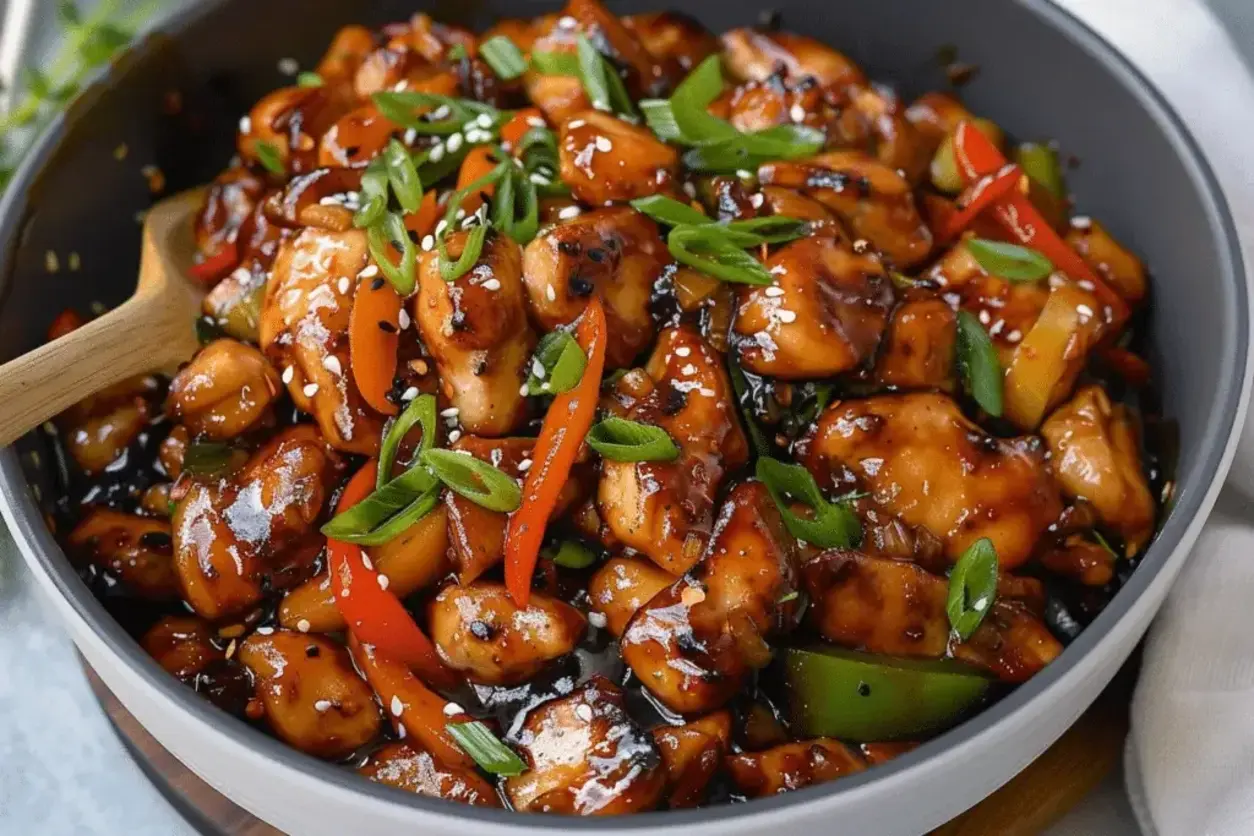
Return the skillet to medium heat. Add the 6 minced garlic cloves and cook, stirring constantly, for 30 seconds until fragrant. Pour in the sauce mixture and let it simmer for 1–2 minutes, stirring occasionally, until it thickens slightly and becomes glossy. Add the fried chicken pieces and toss gently to coat. Transfer to a serving plate and garnish with sliced green onions and sesame seeds. Serve immediately.
💡 mia’s Pro Tip: To keep the chicken extra crispy, don’t let it sit in the sauce too long. Toss just until coated, then serve right away. If you’re making a large batch, keep the sauce separate and toss individual servings as needed.
| Step | Action | Duration | Key Visual Cue |
|---|---|---|---|
| 1 | Set up breading station | 5 min | Three dishes in order |
| 2 | Dredge chicken | 10 min | Even coating, no bare spots |
| 3 | Fry chicken | 8–10 min | Deep golden brown, sizzling stops |
| 4 | Make sauce | 2 min | Sauce slightly thickened, glossy |
| 5 | Sauté garlic & toss chicken | 2 min | Garlic fragrant, chicken coated |
Serving & Presentation
I love serving this crispy garlic chicken family-style on a large platter, with the green onions and sesame seeds scattered over the top. The contrast of the dark, glossy sauce against the white sesame and bright green scallions is gorgeous. For a complete meal, I pair it with steamed jasmine rice and a simple cucumber salad (thinly sliced cucumbers, rice vinegar, a pinch of sugar, and chili flakes). The cool, crunchy salad balances the warm, savory chicken beautifully.
In my NYC apartment, I often set the table with a bowl of steamed edamame on the side and a bottle of cold sake or a crisp lager. For a non-alcoholic option, try iced green tea with a squeeze of lemon. And don’t forget the extra napkins—this dish is meant to be eaten with your hands, fingers licked clean. It reminds me of the Friday night dinners my mother would make, where we’d all gather around and eat with our hands, tearing off pieces of bread to scoop up the last bits of sauce. That same communal joy is what I hope you feel.
| Pairing Type | Suggestions | Why It Works |
|---|---|---|
| Side Dish | Steamed jasmine rice, cucumber salad, stir-fried bok choy | Rice soaks up sauce; salad adds crunch and freshness; bok choy complements garlic |
| Sauce / Dip | Extra garlic sauce (reserve some before tossing), sweet chili sauce, sriracha mayo | Adds extra moisture and heat; sriracha mayo is creamy and cool |
| Beverage | Cold sake, crisp lager (like Sapporo), iced green tea | Sake and lager cut through richness; green tea refreshes palate |
| Garnish | Sliced green onions, toasted sesame seeds, fresh cilantro, lime wedges | Adds color, texture, and bright acidity; cilantro and lime balance sweetness |
Make-Ahead, Storage & Reheating
As a busy cook in New York City, I rely on make-ahead tricks. You can bread the chicken up to 4 hours in advance and keep it covered in the fridge. For meal prep, I fry the chicken, let it cool completely, then store it separately from the sauce. This way the coating stays crisp until you’re ready to reheat.
| Method | Container | Duration | Reheating Tip |
|---|---|---|---|
| Refrigerator | Airtight container, separate from sauce | Up to 3 days | Oven at 375°F for 8–10 min, then toss with reheated sauce |
| Freezer | Freezer-safe bag or container (breaded, uncooked chicken pieces) | Up to 2 months | Fry from frozen, adding 1–2 extra minutes per side |
| Make-Ahead | Breaded chicken on a tray, covered | Up to 4 hours in fridge | Fry directly from fridge – no need to come to room temp |
My favorite way to reheat leftovers (if there are any!) is in the air fryer at 375°F for 4–5 minutes. The hot air restores the crunch beautifully. If you don’t have an air fryer, the oven works well too—just spread the chicken in a single layer on a baking sheet. I don’t recommend microwaving; it makes the crust chewy. And always reheat the sauce separately in a small pan or microwave, then toss just before eating.
Variations & Easy Swaps
I love how adaptable this recipe is. Whether you need a gluten-free version or want to play with flavors, here are my favorite twists.
| Variation | Key Change | Best For | Difficulty Impact |
|---|---|---|---|
| Air-Fryer Version | Cook breaded chicken in air fryer at 375°F for 10–12 min, flipping halfway | Less oil, healthier, still crispy | Easy (watch closely) |
| Spicy Korean Gochujang | Swap honey for 2 tbsp gochujang + 1 tbsp honey; add 1 tsp grated ginger | Spicy, bold, Korean-inspired | Easy (sauce change) |
| Gluten-Free | Use cornstarch (no flour) and gluten-free panko; tamari instead of soy sauce | Celiac or GF diet | Easy (use certified GF ingredients) |
Air-Fryer Version
This is my go-to when I want lighter crispy garlic chicken. Follow the same breading steps, then place the coated pieces in a single layer in the air fryer basket. Spritz lightly with cooking spray. Air fry at 375°F for 10-12 minutes, flipping halfway, until golden and cooked through. While the chicken cooks, make the sauce on the stovetop. Toss and serve. The texture isn’t quite as shatter-crisp as deep frying, but it’s 90% there with way less oil. I tested this version while developing recipes for a client who wanted a healthier weeknight meal – it’s now a staple in my own kitchen.
Spicy Korean Gochujang Variation
For a bolder, spicier take, replace the honey with 2 tablespoons gochujang (Korean chili paste) and add 1 teaspoon freshly grated ginger. Reduce the soy sauce to 2 tablespoons and add 1 tablespoon water to thin. The gochujang brings a complex, fermented heat that pairs beautifully with the garlic. This variation reminds me of the vibrant food stalls in Seoul – a flavor journey without leaving home. I love serving it with quick-pickled radishes and steamed sticky rice.
Gluten-Free Version
To make this Asian garlic chicken gluten-free, simply replace all-purpose flour with extra cornstarch (use 1 cup total cornstarch) and use certified gluten-free panko breadcrumbs. Swap soy sauce for tamari or coconut aminos. The cornstarch-only coating yields an even lighter, crunchier crust – a technique I picked up from a gluten-free baking class in Paris. Be careful not to overbrown, as cornstarch can burn faster. Otherwise, the recipe works perfectly. My gluten-free friends rave about this version, and honestly, I sometimes prefer the cornstarch-only crunch.
What is the secret to getting the chicken extra crispy without frying it?
For oven-baked or air-fryer crispy garlic chicken, the secret lies in the breading and a light oil spray. Use a combination of cornstarch and panko, and make sure the chicken is patted very dry before breading. For the oven, bake at 425°F on a wire rack set over a baking sheet – the air circulation keeps the bottom crisp. For the air fryer, spritz the breaded pieces generously with cooking spray. Also, don’t skip the double-coating (cornstarch mixture, egg, panko). While you won’t get the same deep-fried crunch, these methods deliver a satisfyingly crispy result that’s much lighter. I’ve tested both extensively, and the air fryer wins for speed and texture.
Can I use chicken thighs instead of chicken breast for Asian-style crispy garlic chicken?
Absolutely! In fact, I strongly recommend boneless, skinless chicken thighs over breasts. Thighs have higher fat content, which means they stay juicy and tender even after frying – crucial for a crispy coating. Breasts can easily dry out, especially if you double-coat and fry them. Thighs also have a richer, more savory flavor that stands up to the bold garlic-soy sauce. If you do use breasts, cut them into slightly larger pieces (to prevent overcooking) and reduce the frying time by about 1 minute per side. Either way, this recipe is delicious – but thighs are the true star in my kitchen.
How do I prevent the garlic from burning when making crispy garlic chicken?
Garlic burns in seconds if you’re not careful. The key is to use medium heat (not high) and only cook the minced garlic for 30 seconds, stirring constantly, until it becomes fragrant. The residual heat from the pan will continue to cook it after you add the liquid. I also recommend wiping out the skillet after frying the chicken – any leftover breading bits will burn and taint the garlic. If your skillet is very hot, reduce the heat before adding the garlic. And always add the garlic to the pan before the sauce, so the sauce itself acts as a buffer and prevents the garlic from scorching. Trust me, burnt garlic is bitter – this method keeps it sweet and pungent.
What is the best sauce to serve with Asian-style crispy garlic chicken?
The sauce in this recipe is designed to be the perfect accompaniment: a balance of soy sauce, honey, rice vinegar, sesame oil, and garlic. However, if you want options, I love serving this chicken with a side of sweet chili sauce for dipping, or a creamy sriracha mayo (mix 1/4 cup mayonnaise with 1 tablespoon sriracha and a squeeze of lime). For a tangier twist, try a ponzu-style sauce (soy sauce, citrus juice, mirin). The key is to keep the sauce separate and dip as you eat, which preserves the chicken’s crunch. But honestly, the garlic sauce from this recipe is my non-negotiable favorite – it’s sticky, savory, and absolutely addictive.
How do I keep the breading from falling off during frying?
This is one of the most common frustrations, and I’ve nailed down three fixes. First, make sure the chicken pieces are dry before breading – pat them with paper towels. Any moisture will create steam and cause the coating to separate. Second, press the panko firmly onto the chicken; don’t just sprinkle it. Use your hands to really push it in. Third, let the breaded chicken rest on a plate for 5 minutes before frying – this allows the coating to set. When frying, handle the chicken gently and don’t overcrowd the pan. If you follow these steps, your coating will stay put. This technique comes straight from my French training, where a perfect “panure” is essential.
Can I make this recipe dairy-free?
Yes, this recipe is naturally dairy-free! There is no milk, butter, or cheese in any component. The breading uses cornstarch, flour, eggs, and panko – all dairy-free. The sauce is soy-based with honey and sesame oil. So if you’re avoiding dairy for any reason, you can follow the recipe exactly as written. Just double-check your panko brand (some may contain dairy, though most are dairy-free). For a vegan version, you can try substituting the eggs with a flax egg (1 tablespoon ground flaxseed + 3 tablespoons water per egg, let sit for 5 minutes) – the coating will be less crispy but still good. I’ve made this for dairy-free friends and they always give it two thumbs up.
How do I make the sauce thicker?
If you prefer a thicker, stickier sauce that really clings to the chicken, there are two easy methods. First, you can add a cornstarch slurry: mix 1 teaspoon cornstarch with 2 teaspoons cold water, then stir it into the simmering sauce and cook for another 30 seconds until thickened. Second, you can simply simmer the sauce a little longer – 2 to 3 minutes instead of 1 – to reduce and concentrate it. I usually go with the second method because I like how the natural sugars in the honey caramelize slightly. Just watch it carefully; if it reduces too much, it can become too salty. Remember, the sauce will thicken slightly as it cools, so don’t over-reduce it.
Can I double this recipe for a crowd?
Absolutely, this recipe doubles beautifully. Just keep a few things in mind: Don’t overcrowd the skillet when frying. Fry in batches, allowing the oil to return to temperature between batches (about 1 minute). Use a large skillet or two skillets side by side to speed things up. For the sauce, you can double the ingredients and simmer in a larger pan. I often make a double batch for potlucks or game days. One pro tip: toss the chicken with the sauce in batches right before serving to maintain maximum crunch. If you’re serving a large crowd, set up a sauce station and let people toss their own portions. It’s interactive and ensures the crispiest result.
What can I serve with crispy garlic chicken to make it a complete meal?
To turn this crispy garlic chicken into a balanced dinner, I always include a starch, a vegetable, and a refreshing element. My go-to is steamed jasmine rice (or brown rice for more fiber) to soak up the extra sauce. For veggies, I love a quick stir-fry of bok choy, snow peas, or broccoli with a splash of soy sauce and garlic. A simple cucumber salad – sliced cucumbers, rice vinegar, sugar, and chili flakes – adds a cool, tangy contrast. If I’m feeling indulgent, I’ll also serve crispy spring rolls or edamame as appetizers. This combination echoes the kind of family-style meals I grew up with in Morocco, where multiple small dishes create a feast.
Why is my chicken not crispy after adding the sauce?
This is the most common issue with saucy crispy chicken, and it’s all about timing and technique. The number one rule: toss the chicken with the sauce right before serving, not in advance. If you let it sit, the moisture from the sauce will soften the crust. Also, make sure the sauce is not too watery – it should be slightly thickened and glossy. If your sauce is thin, it will soak into the breading. Another tip: serve the chicken on a wire rack or a plate lined with paper towels to prevent steam from accumulating underneath. And finally, double-check that your oil was hot enough during frying (around 350°F). Properly fried chicken has a robust crust that can handle a quick toss without getting soggy. Follow these tips, and you’ll get that perfect shatter every time.
Share Your Version!
I absolutely love seeing how you bring this recipe to life. Did you make the air-fryer version? Add extra chili? Serve it with something unexpected? Drop a comment below and let me know – your twist might inspire someone else. If you share a photo on Instagram or Pinterest, please tag @exorecipes so I can cheer you on. And if you’re feeling generous, leave a star rating for this recipe – it helps other home cooks find it, and it means the world to me. I read every single comment, and your stories make my day. What’s your favorite part of this crispy garlic chicken? I’d love to know in the comments.
From my NYC kitchen to yours — I hope this recipe brings as much warmth to your table as it does to mine. — mia 🧡
Love This Recipe? Save It to Pinterest!
If you enjoyed this Asian-Style Crispy Garlic Chicken recipe, don’t let it get lost in your browser tabs! 😄 Pin it now so you can find it again anytime — and explore hundreds more tried-and-tested recipes waiting for you on my Pinterest boards.
👉 Follow mia on Pinterest @exorecipe
📌 Pin this recipe · 🔁 Re-pin your favorites · 💬 Tag me when you make it — I love seeing your creations!
Asian-Style Crispy Garlic Chicken
- Prep Time: 20 minutes
- Cook Time: 15 minutes
- Total Time: 35 minutes
- Yield: 4 1x
- Method: Main Course
- Cuisine: Asian
Description
Crispy chicken pieces tossed in a savory garlic sauce with Asian flavors. Perfect for a quick weeknight dinner.
Ingredients
- 1 lb boneless skinless chicken thighs, cut into bite-sized pieces
- 1/2 cup cornstarch
- 2 large eggs, beaten
- 1 cup panko breadcrumbs
- 1/2 cup all-purpose flour
- 1 teaspoon salt
- 1/2 teaspoon black pepper
- 1/4 cup vegetable oil, for frying
- 6 cloves garlic, minced
- 1/4 cup soy sauce
- 2 tablespoons honey
- 1 tablespoon rice vinegar
- 1 tablespoon sesame oil
- 1/2 teaspoon red pepper flakes (optional)
- 2 green onions, sliced (for garnish)
- 1 tablespoon sesame seeds (for garnish)
Instructions
- In a shallow dish, mix cornstarch, flour, salt, and pepper.
- Place beaten eggs in another shallow dish, and panko in a third.
- Dredge each chicken piece first in the cornstarch mixture, then dip in egg, then coat with panko.
- Heat vegetable oil in a large skillet over medium-high heat.
- Fry chicken pieces in batches until golden and crispy, about 4-5 minutes per side. Drain on paper towels.
- In a small bowl, whisk together soy sauce, honey, rice vinegar, sesame oil, and red pepper flakes.
- In the same skillet (wipe out excess oil), cook minced garlic over medium heat for 30 seconds until fragrant.
- Pour the sauce mixture into the skillet and let it simmer for 1-2 minutes until slightly thickened.
- Add the fried chicken pieces and toss to coat evenly with the sauce.
- Transfer to a serving plate. Garnish with green onions and sesame seeds. Serve immediately.
Notes
For extra crunch, double-coat the chicken by repeating the breading process. Adjust honey to taste for sweetness.
Nutrition
- Calories: 480
- Sugar: 12g
- Fat: 22g
- Carbohydrates: 38g
- Protein: 30g
k">
Tried This Recipe? Leave a Comment!
Did you make this recipe? I’d love to hear how it turned out! Please leave a comment and a rating below. Your feedback helps other home cooks and supports cheerychop.com!
For more delicious inspiration, follow me on Pinterest!
