Table of Contents
Artisan Pizza Dough: Crispy, Chewy, Bubbly Crust – The Secret to Perfect Neapolitan-Style at Home
There’s a moment every time I pull a tray of this artisan pizza dough from the oven — the sound of the crackling crust, the sight of dark blistered bubbles, the smell of toasted flour and olive oil — that takes me right back to my mother’s kitchen in Marrakech. She’d bake round breads on a hot stone, and though we never called it pizza, the same principle sang: patience, hands, and a good fire. That’s what this artisan pizza dough recipe is built on. A high hydration dough that ferments slowly, giving you a crispy chewy pizza crust with an airy, open crumb and a bottom that shatters when you bite. No stand mixer needed — just your hands and a bit of time.
When I moved to New York City after my culinary training in Paris, I spent countless weekends chasing that perfect slice. The Neapolitan-style pies from places like Roberta’s or Lucali inspired me, but I knew I could recreate that bubbly pizza crust in my own tiny apartment kitchen. This dough is the result of years of tweaking: a precise balance of 75% hydration (that’s 375g water to 500g flour) and a long, cool fermentation that develops deep flavor without any sourdough starter. The dough comes together in minutes — no kneading — and the oven does the magic. You’ll get a crust that’s simultaneously crisp and pillowy, with dramatic charred spots that taste like a wood-fired oven.
My secret weapon? A simple pinch-and-fold technique I learned at Le Cordon Bleu — it builds gluten gently without overworking the dough. That, plus a very hot oven (500°F or higher) and a pizza steel or stone, gives you that restaurant-quality homemade pizza dough that will make your Friday pizza nights legendary. One common mistake I see home bakers make is skipping the initial 20-minute rest after mixing the flour and water. That autolyse step is non-negotiable; it relaxes the gluten and makes the dough easier to handle later. Trust me — every extra minute of patience pays off in a gorgeous, bubbly crust. Let’s get started!
Why This Artisan Pizza Dough Recipe Is the Best
The flavor secret here is time. This is an easy artisan pizza dough that uses just 1/4 teaspoon of yeast — that tiny amount, combined with a 5- to 6-hour bulk fermentation, produces a tangy, complex flavor reminiscent of naturally leavened bread. No sugar, no oil in the dough itself — just flour, water, salt, and a whisper of yeast. The long rise allows enzymes to break down starches into sugars that caramelize beautifully in the oven. It’s the same principle my mother used when she’d let her bread dough rest overnight in the cool Moroccan air. That patience gives you a depth you can’t rush.
Perfected texture comes from the high hydration and the pinch-and-fold technique. Unlike typical homemade pizza dough recipes that knead for ten minutes, this method uses a series of gentle stretches and folds over the first hour. This develops the gluten evenly without tearing, trapping air that forms those beautiful irregular bubbles. The result is a crumb that’s light and airy inside, with a crust that’s sturdy enough to hold generous toppings but still crispy chewy pizza crust beyond compare. Every bite has that satisfying snap followed by a soft, billowy chew.
Finally, this artisan pizza dough recipe is foolproof and fast — not in total time, but in active work. You only spend about 15 minutes actually handling the dough; the rest is hands-off fermentation. Even if you’ve never made pizza dough before, the step-by-step visuals make it easy. And because we use all-purpose flour (readily available in any U.S. grocery store), there’s no hunting for specialty ingredients. From my NYC apartment to your kitchen, this dough consistently produces that blistered, bubbly, crispy chewy pizza crust you dream of.
Artisan Pizza Dough Ingredients
Every Wednesday morning, before the crowds hit the Union Square Greenmarket, I walk the aisles and pick up my flour and sea salt. For this dough, simplicity is everything — four ingredients, each playing a critical role. In Morocco, my mother used a coarse local flour and water from the well; here I use quality all-purpose flour and filtered tap water. The magic happens when these few elements come together with time.
Ingredients List
- 500g (3 3/4 cups plus 2 tbsp) all-purpose flour
- 375g (1 1/2 cups water plus 2 tbsp) warm water, divided
- 1g (1/4 tsp) active dry yeast
- 10g (1 1/2 tsp) fine salt
Ingredient Spotlight
All-Purpose Flour – This is the workhorse. All-purpose flour has a moderate protein content (10-12%) that gives enough structure for a chewy crust without being too tough. I recommend King Arthur or Gold Medal. For an even airier crumb, you can substitute up to 200g of bread flour (higher protein) — expect a slightly denser but still lovely chew.
Warm Water – The water temperature matters: around 100°F (body temperature) wakes up the yeast without killing it. Use filtered water if you have it; chlorinated tap water can inhibit fermentation. The dough’s hydration level (75%) is what creates those big bubbles. Don’t be tempted to reduce the water — the dough will feel very wet at first, but it comes together beautifully.
Active Dry Yeast – Just 1/4 teaspoon! That’s about 1 gram. This tiny amount forces a long, slow fermentation, which develops flavor and bubbles. If you only have instant yeast, use the same amount and skip the dissolving step — just mix it with the flour. The rise time will be roughly the same (5-6 hours), but the flavor will be slightly less developed.
Fine Salt – Salt controls fermentation and strengthens the gluten. Use fine sea salt or table salt. Avoid coarse kosher unless you weigh it, because volume measures differ. Dissolve it after the autolyse so it doesn’t attack the yeast directly.
| Original Ingredient | Best Substitution | Flavor / Texture Impact |
|---|---|---|
| All-purpose flour | Bread flour (up to half) | More chew, slightly denser crumb |
| Active dry yeast | Instant yeast (same weight) | Milder flavor, similar rise |
| Fine salt | Sea salt flakes (weigh to match) | Minimal difference if by weight |
How to Make Artisan Pizza Dough — Step-by-Step
I promise, this is the easiest and most rewarding homemade pizza dough you’ll ever make. The key is to trust the process — the dough will feel alarmingly sticky at first, but the folds will build structure. Use slightly wet hands to prevent sticking, and don’t add extra flour unless absolutely necessary. Here we go.
Step 1: Autolyse
Mix the flour with all but 1 tablespoon of the warm water in a large bowl until just combined — no dry spots. Cover and let rest for 20 minutes. This autolyse step hydrates the flour and starts gluten development without kneading.
💡 mia’s Pro Tip: Use a bowl that’s big enough for folding — the dough will quadruple in volume eventually.
Step 2: Dissolve Yeast & Add Salt
Sprinkle the yeast over the reserved 1 tablespoon warm water and let sit for 5 minutes until creamy. Sprinkle the salt over the dough surface, then pour the yeast mixture on top. Now wet one hand and perform the pinch-and-fold: reach under a section of dough, stretch it up, and fold it over the center. Repeat until the center is covered. Then, using your thumb and fingers as pincers, pinch off 5-6 chunks of dough, then fold the dough over itself a few times. Repeat pinching and folding until the yeast and salt are fully incorporated — about 2-3 minutes. Cover and let rest 1 hour.
⚠️ Common Mistake to Avoid: Adding all the water at once. Reserve that 1 tablespoon for the yeast so it dissolves properly.
Step 3: First Fold
After the 1-hour rest, the dough will look shaggy and sticky. Wet your hand again, reach under the dough, lift a section, and fold it over the center. Rotate the bowl and repeat 4-5 more times — the dough will tighten into a ball. Invert it into a lightly greased bowl, seam-side down, smooth side up. Cover and let rise at room temperature until doubled, about 5-6 hours. (If your kitchen is cool, it may take up to 8 hours.)
💡 mia’s Pro Tip: Mark the bowl’s starting level with a piece of tape so you can accurately see when the dough has doubled.
Step 4: Shape into Balls
Turn the risen dough onto a lightly floured surface and cut into two equal pieces. Working with one piece at a time, stretch a quarter of the dough until you feel resistance, then fold it over the center. Repeat with the remaining three edges. Flip the ball seam-side down, then cup your hands around it and gently drag it toward you along the counter to create surface tension. Rotate 90° and drag again until a tight, smooth ball forms. Place on a greased plate. Repeat with second piece. Lightly oil the tops, cover, and let rest at room temperature for 1 hour (or refrigerate for up to 2 days).
⚠️ Common Mistake to Avoid: Using too much flour when shaping — it will make the dough dry and prevent proper browning.
Step 5: Preheat Oven
While the dough rests, place a pizza steel, stone, or inverted baking sheet on the middle rack of the oven. Preheat to 500°F (or your oven’s highest setting) for at least 45 minutes. The intense heat is crucial for that bubbly pizza crust.
💡 mia’s Pro Tip: If you don’t have a steel or stone, a heavy cast-iron skillet works beautifully — preheat it on the stovetop for 5 minutes, then transfer to the hot oven.
Step 6: Stretch & Top
Lightly flour a pizza peel. Place one dough ball on a floured surface and press from the center outward, leaving a 1-inch rim. Pick up the disk and, holding the thick edge, let gravity gently stretch it into a 12-inch circle. Lay it on the peel and adjust the shape. Add sauce and toppings, leaving the rim bare. Jiggle the peel to ensure the dough isn’t sticking.
⚠️ Common Mistake to Avoid: Overloading with toppings — a light hand lets the crust shine and bake through.
Step 7: Bake
Slide the pizza onto the hot steel (or carefully transfer cast-iron pan). Bake for 5 minutes, then turn on the broiler and broil for 2-4 minutes until the cheese is melted and the crust is golden with blistered black spots. For cast iron, bake 15-20 minutes then broil briefly. Repeat with remaining dough.
💡 mia’s Pro Tip: Rotate the pizza halfway through baking with a peel for even charring.
| Step | Action | Duration | Key Visual Cue |
|---|---|---|---|
| 1 | Autolyse | 20 min | No dry flour visible, dough slightly sticky |
| 2 | Incorporate yeast & salt | 5-7 min active | Shaggy, cohesive mass |
| 3 | First fold | 2 min active | Dough tightens into a ball |
| 4 | Bulk rise | 5-6 hrs | Doubled in volume, domed top |
| 5 | Shape balls | 10 min active | Smooth, tight balls |
| 6 | Final rest & preheat | 1 hr (or refrigerate up to 2 days) | Balls relaxed, easily stretchable |
| 7 | Bake | 5-8 min (steel) / 15-20 min (cast iron) | Golden brown with black blisters, cheese bubbling |
Serving & Presentation
The beauty of this crispy chewy pizza crust is that it needs very little adornment. In Paris, at my first job in a tiny bistro, the chef would dress a margherita with just San Marzano tomatoes, fresh mozzarella, basil, and a drizzle of olive oil — the dough was the star. I follow the same philosophy: less is more. A classic tomato sauce (crushed tomatoes, garlic, salt, oregano) and good-quality mozzarella (low-moisture, or fresh buffalo if you’re feeling fancy) let the crust shine.
For a Moroccan twist, I sometimes drizzle a little harissa oil (harissa paste mixed with olive oil) over the finished pizza — it adds a warmth that pairs beautifully with the charred crust. Or keep it pure: serve with a side of arugula salad dressed with lemon and parmesan, and maybe a glass of light red wine or a crisp beer. The pizza should be eaten immediately, sliced from the center to the edges, steam still rising.
Presentation-wise, I place the pizza on a wooden board or simple pewter tray — something that catches the heat. Sprinkle fresh herbs like basil or oregano right after baking, and a pinch of flaky sea salt to finish. In NYC, we fold our slices; in Italy, they eat with knife and fork. I say follow your heart!
| Pairing Type | Suggestions | Why It Works |
|---|---|---|
| Side Dish | Simple arugula salad, roasted vegetables, olives | Light, bright flavors balance rich crust |
| Sauce / Dip | Harissa oil, garlic butter, marinara | Adds moisture and spice contrast |
| Beverage | Chianti, craft IPA, sparkling water with lemon | Acidity cuts richness, bubbles refresh palate |
| Garnish | Fresh basil, red pepper flakes, flaky salt, microgreens | Adds color, texture, and finishing kick |
Make-Ahead, Storage & Reheating
One of the best things about this homemade pizza dough is how well it stores. In my busy NYC life, I often make a double batch on Sunday, shape the balls, and keep them in the fridge until Wednesday — the flavor actually improves. The cold fermentation slows the yeast, developing more complex, nutty notes. Just bring the balls to room temperature for 1 hour before stretching.
| Method | Container | Duration | Reheating Tip |
|---|---|---|---|
| Refrigerator | Oil-coated bowl, tightly covered with plastic | Up to 2 days (in ball form) | Let rest at room temp 1 hour before shaping |
| Freezer | Individually wrapped balls in plastic wrap, then ziplock bag | Up to 3 months | Thaw overnight in fridge, then room temp 1 hour |
| Make-Ahead (baked crust) | Par-baked on a sheet pan, cooled, then sealed | Up to 2 days in fridge | Reheat directly on oven rack at 450°F for 5-6 minutes until crisp |
If you’re reheating leftover pizza (lucky you!), the best method is a hot skillet: place the slice in a dry non-stick pan over medium heat, cover with a lid, and cook for 2 minutes until the bottom is crispy and the cheese remelts. No microwave — it will turn the crust to rubber. For frozen dough balls, thaw overnight in the fridge, then let sit at room temperature for an hour before shaping. The dough may be slightly more relaxed, but still produces a wonderful bubbly pizza crust.
Variations & Easy Swaps
| Variation | Key Change | Best For | Difficulty Impact |
|---|---|---|---|
| Whole Wheat | Replace 200g all-purpose with whole wheat flour | Nutritious, rustic flavor | Medium (dough needs extra water + 30 min rest) |
| Gluten-Free Blend | Use 500g gluten-free pizza flour blend (e.g., Cup4Cup) | Celiac-friendly | Advanced (different hydration, more fragile) |
| Herb-Infused | Add 2 tsp dried oregano or za’atar to flour | Extra fragrance, Mediterranean twist | Easy |
Whole Wheat Artisan Pizza Crust
This version swaps 200g of all-purpose flour for whole wheat flour. The bran absorbs more water, so increase the total water by about 20-30g (2-3 tablespoons) and let the autolyse rest for 30 minutes instead of 20. The crust will be denser and nuttier, with a more rustic chew. It reminds me of the whole-grain bread my mother would bake in the courtyard — earthy and satisfying. Perfect with roasted vegetables and feta.
Gluten-Free Artisan Pizza Dough
For gluten-free, use a high-quality 1-to-1 gluten-free flour blend that contains xanthan gum (like Bob’s Red Mill or Cup4Cup). The dough will be more like a batter — wetter and stickier. You’ll need to press it into the pan with damp hands instead of stretching. It won’t bubble as dramatically, but you’ll still get a crispy bottom and a tender crumb. Reduce the yeast to 1/8 tsp (0.5g) and bulk rise time to 3-4 hours. This variation came from testing with a close friend who has celiac; she said it was the best gluten-free pizza crust she’d ever had.
Za’atar and Herb Crust
This is my personal favorite when I’m craving something that bridges my Moroccan roots with Italian tradition. Add 2 tablespoons of za’atar (a Middle Eastern blend of thyme, sumac, sesame) or dried oregano to the flour before mixing. The herbs infuse the dough during fermentation, giving the finished crust a floral, tangy flavor that pairs beautifully with a simple olive oil and cheese topping. I often make this version when I’m hosting a pizza night with friends — it’s unexpected and always gets rave reviews. The technique stays exactly the same.
FAQ
Can I make artisan pizza dough without a stand mixer?
Absolutely! In fact, I prefer making it by hand. This recipe uses a simple pinch-and-fold technique instead of kneading. You only need a large bowl and your hands. The high hydration dough is too wet to knead traditionally anyway. The folds develop gluten gently, giving you an airy, bubbly crust. No stand mixer required — and that means less cleanup, too.
What is the best flour to use for a crispy and chewy pizza crust?
For the ideal balance of crispiness and chew, I recommend all-purpose flour (10-12% protein). It’s readily available in any U.S. grocery store and gives a tender crumb with a crisp exterior. If you want extra chewiness, replace up to half the all-purpose with bread flour (higher protein). Stay away from cake flour (too low in protein) or high-gluten flour (too tough). King Arthur or Gold Medal work beautifully.
How long should I let artisan pizza dough ferment for the best bubbles?
For maximum bubbles and flavor, bulk ferment at room temperature for 5-6 hours, until the dough has doubled in size. A longer, cooler fermentation (like 2 days in the fridge after shaping) will develop even more flavor and larger irregular bubbles. The key is patience: don’t rush the rise. If your kitchen is warm (75°F+), check at 4 hours. Cold? It may take 7-8 hours.
Can I freeze artisan pizza dough for later use?
Yes, absolutely. After shaping the dough into balls and letting them rest at room temperature for an hour, wrap each ball tightly in plastic wrap, then place in a ziplock bag. Freeze for up to 3 months. To use, thaw overnight in the refrigerator, then let sit at room temperature for 1 hour before stretching. The dough may be slightly more relaxed, but it still bakes up with a wonderful bubbly crust.
Why is my pizza dough not bubbling?
Several factors can prevent bubbles. First, make sure your oven is screaming hot — at least 500°F, preheated for 45 minutes. Second, check your yeast: if it’s old, it may not be active. Third, the dough might be under-fermented — let it rise until fully doubled. Fourth, avoid overworking the dough when shaping; rough handling deflates bubbles. Lastly, high hydration (75% as in this recipe) is essential for big bubbles; don’t reduce the water.
Can I use instant yeast instead of active dry yeast?
Yes, you can substitute with instant yeast (also called rapid-rise) in the same amount — 1 gram (about 1/4 teaspoon). No need to dissolve it in water; just mix it directly with the flour. The rise time will be similar, but the flavor may be slightly less complex because instant yeast is more vigorous. For best results, use active dry as written — it rewards patience with deeper flavor.
What hydration percentage is best for a crispy chewy crust?
The ideal hydration range for a Neapolitan-style pizza crust is between 65% and 75%. This recipe uses 75% (375g water to 500g flour), which is on the higher end. Higher hydration means a more open, bubbly crumb and a very crispy exterior when baked at high heat. If you’re a beginner, start at 70% (350g water) and increase as you get comfortable handling wet dough.
How do I get the bottom of my pizza crust crispy?
The secret to a crispy bottom is a very hot cooking surface and adequate preheating. Use a pizza steel, stone, or inverted baking sheet preheated at 500°F for at least 45 minutes. The surface should be screaming hot so that when the pizza hits it, the bottom cooks instantly. Also, make sure your dough balls are not too thick in the center. A light hand with sauce and toppings helps the crust stay crisp.
Can I use bread flour for a chewier crust?
Yes! Bread flour has a higher protein content (12-14%), which gives the crust more chew and structure. You can replace up to half of the all-purpose flour with bread flour. The dough will be slightly stiffer, so you may need to add an extra tablespoon of water to maintain 75% hydration. The result will be a more substantial, satisfying chew — perfect for those who love a New York-style fold.
Is it necessary to let the dough rest before stretching?
Absolutely essential. After shaping the dough balls, they need at least 1 hour of rest at room temperature (or up to 2 days in the fridge). This relaxes the gluten, making the dough easier to stretch without snapping back. If you try to stretch cold or under-rested dough, it will tear or shrink. Patience here pays off in a thin, even crust with those beautiful blistered bubbles.
Share Your Version!
I’d love to see how your artisan pizza dough turns out! Did you get those blistered bubbles? Did you try a topping combination that made you feel like a pizzaiolo? Whether you’re a first-time dough maker or a seasoned pro, your version matters. Drop a comment below with a star rating, and if you’re on social media, snap a photo of your pizza and tag @exorecipes on Instagram or Pinterest. I personally read every comment and love hearing about what you created in your kitchen.
One question I often get: What’s your favorite topping combo with this crust? For me, it’s always a classic margherita — crushed tomatoes, fresh mozzarella, basil, and a drizzle of extra-virgin olive oil after baking. But I also adore a white pizza with caramelized onions, ricotta, and a sprinkle of za’atar. Tell me yours in the comments — I might just feature it on my Instagram stories!
From my NYC kitchen to yours — I hope this recipe brings as much warmth to your table as it does to mine. — mia 🧡
Love This Recipe? Save It to Pinterest!
If you enjoyed this artisan pizza dough recipe, don’t let it get lost in your browser tabs! 😄 Pin it now so you can find it again anytime — and explore hundreds more tried-and-tested recipes waiting for you on my Pinterest boards.
👉 Follow mia on Pinterest @exorecipe
📌 Pin this recipe · 🔁 Re-pin your favorites · 💬 Tag me when you make it — I love seeing your creations!

artisan pizza dough- crispy, chewy, bubbly crust
Description
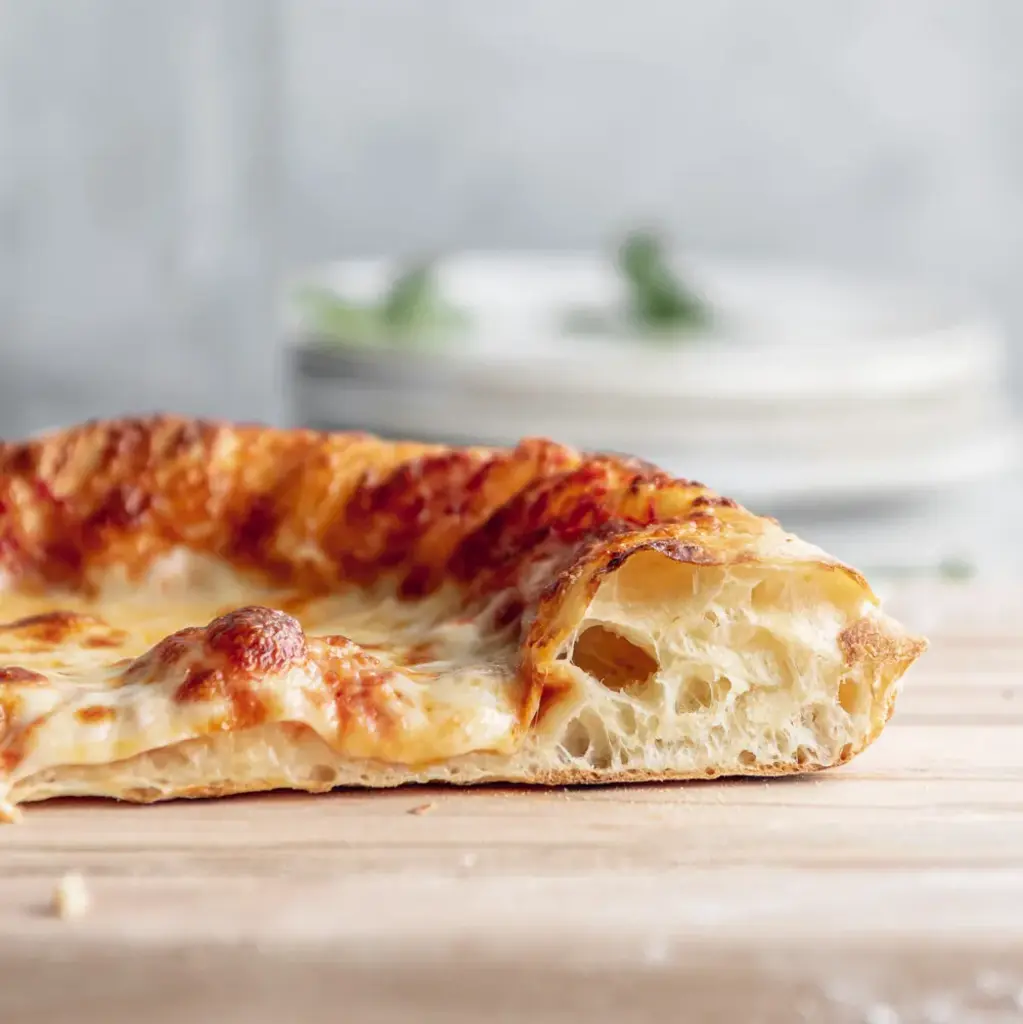
This artisan pizza dough will give you a billowy soft and chewy crust, blistered bubbles and a crispy bottom. It uses a high hydration and long fermentation time for maximum flavor.
Ingredients
- 500g (3 3/4 cups plus 2 tbsp) all-purpose flour
- 375g (1 1/2 cups water plus 2 tbsp) warm water, divided
- 1g (1/4 tsp) active dry yeast
- 10g (1 1/2 tsp) fine salt
Instructions
- Mix flour and all but 1 tablespoon of the water in a large bowl until just combined, then cover and set aside for 20 minutes to rest. Sprinkle yeast over remaining warm water and set aside to dissolve.
- Sprinkle salt over the surface of the dough. Stir yeast mixture and pour over dough. Fold the dough: lightly wet your hand, reach under the dough, and stretch a section of it over the top. Repeat until the center of the dough is covered. Then, using your thumb and fingers as pincers, squeeze and pinch off 5- 6 chunks of dough. Wet your hand to minimize sticking. Fold the dough over itself a few times. Repeat pinching and folding until the yeast and salt are fully mixed and a shaggy dough is formed. Cover the bowl and lest rest about an hour.
- Fold the dough one time to develop the gluten: lightly wet your hand, reach underneath the dough and stretch up a section of the dough, then fold it over the center. Rotate the bowl and fold four to five more times, or until the dough has tightened into a ball. Take the entire ball of dough and invert it into a clean, lightly greased bowl, so the seam is down and the top is smooth. Cover and let rise until doubled in volume, 5- 6 hours.
- Turn the dough out onto a floured work surface and cut in half. Working with one piece of dough at a time, shape into a ball as follows. Stretch out a quarter of the dough just until you feel resistance, then fold it back over the center. Repeat stretching and folding the remaining three edges until the center is covered and a loose ball is formed. Turn the ball over so the seam is down and place it on an un-floured area. Cup your hands around the dough and gently pull it towards you, dragging the bottom along the counter to create a bit of tension. Rotate the ball 90 degrees and drag it a few inches towards you again. Repeat rotating and gently dragging until the top of the dough tightens up and the ball is round.
- Transfer to a greased plate and repeat with remaining dough. Lightly oil the tops, cover and let rest at room temperature for about an hour. Preheat oven at this time. If not using right away, cover tightly with plastic wrap and refrigerate until ready (for up to 2 days).
- Place pizza steel, stone, or inverted baking sheet on the middle rack of the oven and preheat to 500°F (or as high as it will go). Let oven heat up for at least 45 minutes. Generously flour a pizza peel and set aside. Alternatively, lightly grease a cast iron pan with olive oil and set aside.
- Place one dough ball on a floured surface and flatten the middle into a large disk, leaving a thick 1-inch lip. Pick up the disk, and holding the thick edge, use gravity to gently shape the dough into a 12-inch circle. Lay on prepared pizza peel and adjust shape into a circle. Jiggle the peel to make sure the dough isnt sticking, and add more flour if it is. Alternatively, shape the dough to the size of your prepared cast iron pan, then place it inside.
- Add sauce and toppings to pizza dough, leaving the 1-inch perimeter empty. Slide pizza onto the hot steel and bake for 5 minutes. Turn on the broiler and broil for 2- 4 minutes, or until cheese is melted and crust is golden and blistered. If using the cast iron pan, bake for 15- 20 minutes and broil for the last few minutes to get spots of char. Repeat with remaining pizza dough and toppings.
Nutrition
- Calories: 228 calories
- Sugar: 0.2g
- Fat: 0.6g
- Carbohydrates: 48g
- Protein: 6.5g

Tried This Recipe? Leave a Comment!
Did you make this recipe? I’d love to hear how it turned out! Please leave a comment and a rating below. Your feedback helps other home cooks and supports cheerychop.com!
For more delicious inspiration, follow me on Pinterest!
