
Table of Contents
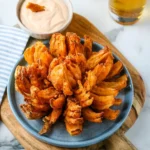
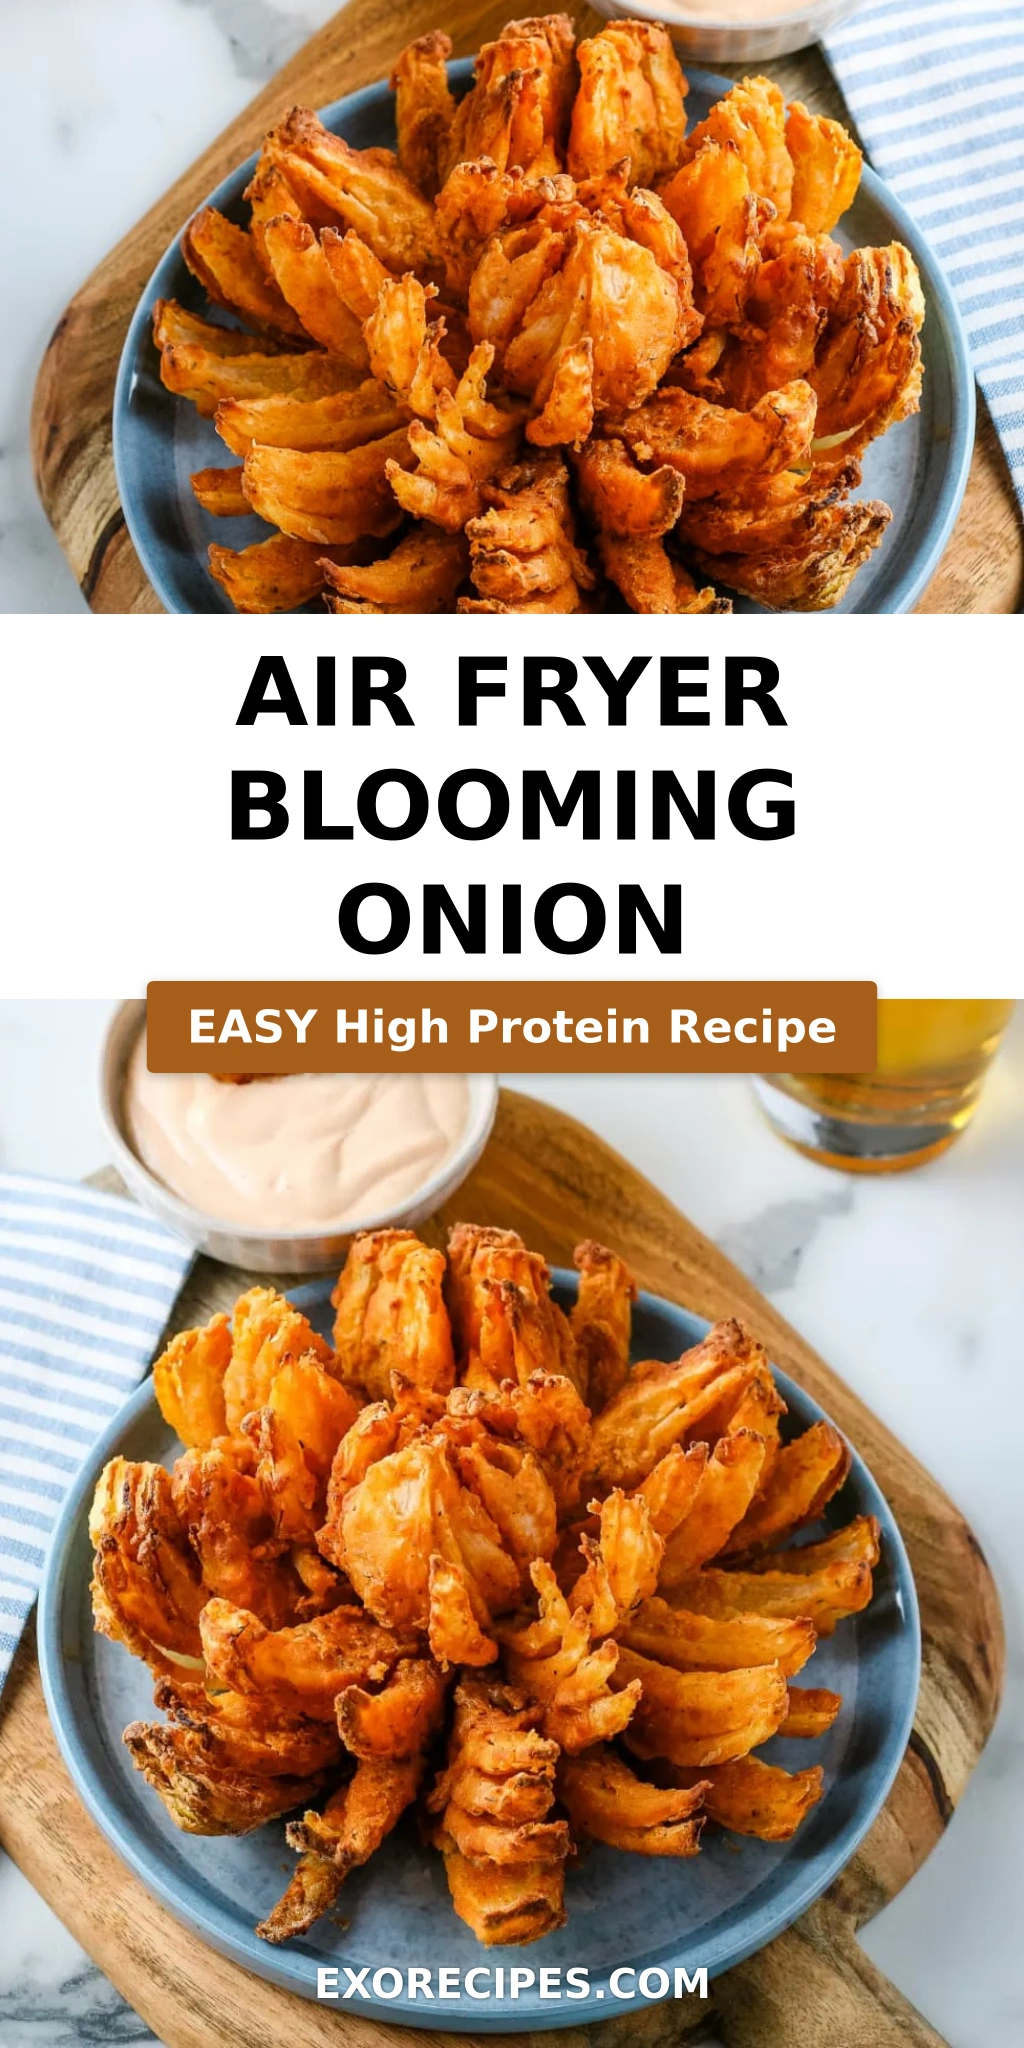
Air Fryer Blooming Onion – Crispy, Golden & Better Than Outback!
Growing up in Morocco, my mother would fry onions until they were caramelized and sweet, then serve them with warm bread and olives. I never imagined I’d one day turn that humble onion into a show-stopping Air Fryer Blooming Onion — a dish that feels both nostalgic and completely new. After training in Paris and now cooking in my tiny New York City kitchen, I’ve learned that the best recipes honor tradition while embracing modern tools. This Air Fryer Blooming Onion does exactly that: it’s restaurant-quality, crispy on the outside, tender and sweet inside, and made with far less oil than the classic deep-fried version. The first time I made this for a game-day gathering, my friends couldn’t believe it came from an air fryer. That’s the moment I knew this recipe had to be shared.
Imagine pulling apart a perfectly golden petal — the crust shatters with the lightest pressure, giving way to a soft, sweet onion interior that practically melts on your tongue. The seasoning blend of paprika, cayenne, cumin, thyme, and oregano creates a warm, aromatic bite that lingers just long enough to make you reach for another piece. There’s a hint of heat, a whisper of earthiness, and a brightness that cuts through the richness. As the onion bakes in the circulating hot air, the kitchen fills with a savory, spiced fragrance that reminds me of the souks in Marrakech — layers of cumin and paprika mingling with the sweet steam of cooking onion. It’s the kind of aroma that draws people into the kitchen before you even call them to the table.
What sets my version apart is the double-breading technique I learned at Le Cordon Bleu in Paris — a light flour coating, a dip in egg wash, then a second dusting that creates an extra-craggly, crunchy crust without being heavy. That, combined with the controlled heat of the air fryer, gives you a blooming onion that’s golden, crisp, and never greasy. I’ve tested this recipe more times than I can count, adjusting the spice levels and timing to get it just right. 💡 mia’s Pro Tip: letting the cut onion rest for five minutes before breading allows the petals to open naturally, giving every nook and cranny room for that seasoned flour. And the one common mistake I see? Not spraying the onion with oil halfway through cooking — that extra spritz is what gives you that deep, even golden color. Trust me, this Air Fryer Blooming Onion will be the star of your next gathering.
Why This Air Fryer Blooming Onion Recipe Is the Best
The flavor secret lies in the spice blend — a nod to my North African roots. I combine paprika, cayenne, cumin, thyme, and oregano in a ratio that gives warmth without overwhelming the onion’s natural sweetness. The cumin adds an earthy depth that most blooming onion recipes miss, and a touch of cayenne provides just enough heat to keep you coming back. My French culinary training taught me the importance of balance: every spice has a role, and together they create a crust that’s savory, slightly smoky, and utterly addictive. This isn’t just a seasoned flour — it’s a homage to the spice markets of my childhood, reimagined for an American appetizer classic.
Perfect texture comes from the double-breading technique and the air fryer’s convection heat. The first flour layer adheres to the onion’s natural moisture, the egg wash creates a tacky surface, and the second flour coating forms those signature craggy petals that crisp up beautifully. The air fryer circulates hot air at 350°F, cooking the onion evenly while the exterior turns deep golden and shatter-crisp. Unlike deep-frying, there’s no greasy residue — just pure, crunchy satisfaction. I’ve tested every temperature from 325°F to 400°F, and 350°F for 25 minutes is the sweet spot: the onion becomes tender without turning mushy, and the crust stays crisp without burning.
This recipe is foolproof and fast, making it perfect for busy weeknights or last-minute entertaining. The hands-on prep takes about 20 minutes, and the air fryer does the rest. I’ve simplified the cutting technique so even a first-timer can achieve that iconic bloom. The key is making evenly spaced cuts about ½ inch from the root — that little stem holds everything together while the petals open like a flower. And because the air fryer uses a fraction of the oil, this is a healthier blooming onion that doesn’t sacrifice flavor or texture. Whether you’re hosting a Super Bowl party or just craving a fun snack, this recipe delivers every single time.
Air Fryer Blooming Onion Ingredients
I pick up my sweet onions at the Union Square Greenmarket in Manhattan — they’re always firm, heavy, and smell faintly of fresh earth. When I close my eyes, the scent takes me back to the spice souk in Marrakech, where onions were piled high alongside mounds of paprika and cumin. For this blooming onion recipe, every ingredient matters, from the flour to the cayenne. Here’s what you’ll need:
Ingredients List
- 1 large sweet onion (such as Vidalia or Walla Walla)
- 2 ½ cups all-purpose flour
- 1 tablespoon paprika
- 1 teaspoon cayenne pepper
- ½ teaspoon ground cumin
- ½ teaspoon dried thyme
- ½ teaspoon dried oregano
- 2 large eggs
- 1 cup milk (whole or 2%)
- 1 cup water
- Salt and pepper to taste
- Oil in a spray bottle (avocado or vegetable oil works best)
Ingredient Spotlight
Sweet Onion: The foundation of the dish. Sweet onions like Vidalia or Walla Walla have a higher sugar content and lower sulfur content, which means they caramelize beautifully and taste mild even when raw. Look for onions that are firm with tight, papery skin and no soft spots. If you can’t find sweet onions, a standard yellow onion works — just expect a slightly sharper flavor.
Paprika: This spice adds color and a subtle sweetness. I use Hungarian sweet paprika for its rich, deep red hue and gentle warmth. Avoid smoked paprika here — it can overpower the delicate onion flavor. If you only have smoked, use half the amount and balance with a pinch of sugar.
Cayenne Pepper: This is where the heat comes from. A full teaspoon gives a noticeable kick, but if you’re sensitive to spice, reduce it to ½ teaspoon. For a milder version, substitute with ancho chili powder for a smoky, fruity warmth without the burn.
Cumin: My Moroccan touch. Cumin adds an earthy, slightly nutty note that pairs beautifully with sweet onion. It’s a spice I use daily — in my mother’s tagines, in my French-inspired rubs, and now in this blooming onion. Make sure your cumin is fresh; stale cumin can taste flat and musty.
All-Purpose Flour: The base of the breading. All-purpose flour gives the right structure — not too dense, not too delicate. For a gluten-free version, use a 1:1 gluten-free baking flour blend. Do not use almond or coconut flour; they lack the starch needed for a crispy crust.
| Original Ingredient | Best Substitution | Flavor / Texture Impact |
|---|---|---|
| Sweet Onion | Yellow Onion + 1 tsp sugar | Slightly sharper, sugar helps caramelization |
| All-Purpose Flour | 1:1 Gluten-Free Baking Flour | Slightly less crispy, still very good |
| Cayenne Pepper | Ancho Chili Powder | Milder, smoky, fruity warmth |
| Milk (dairy) | Unsweetened Almond Milk | Slightly thinner batter, still works well |
How to Make Air Fryer Blooming Onion — Step-by-Step
Making this blooming onion is easier than it looks. I’ll walk you through each step with the exact techniques I use in my own kitchen. Follow these instructions, and you’ll have a show-stopping appetizer that tastes like it came from a steakhouse.
Step 1: Cut the Onion to Bloom
Slice off about ½ inch from the top of the onion (the pointy end opposite the root). Peel away the outer papery skin completely, leaving the root end intact. Place the onion cut-side down on your cutting board. Starting about ½ inch from the root, make a downward cut all the way through to the board. Repeat to make four evenly spaced cuts around the onion. Then make three additional cuts between each section until you have 16 evenly spaced cuts. Turn the onion over and let it rest for 5 minutes — the petals will naturally begin to open.
💡 mia’s Pro Tip: Use a sharp chef’s knife and cut with confidence. If you hesitate, the cuts may be uneven. The root is your anchor — never cut through it, or the onion won’t hold its shape.
Step 2: Prepare the Breading Stations
In a large bowl, whisk together the flour, paprika, cayenne, cumin, thyme, oregano, 1 teaspoon salt, and ½ teaspoon black pepper. In a separate medium deep bowl, whisk the eggs, milk, and water until smooth. Set both bowls near your work area. Before breading, use your fingers to gently separate the outer petals of the onion — this helps the flour and egg reach every layer.
⚠️ Common Mistake to Avoid: Don’t skip separating the petals before breading. If you leave them stuck together, the flour and egg won’t penetrate, and you’ll end up with bare spots after cooking.
Step 3: First Flour Coating
Place the onion in a clean bowl, cut-side up. Pour the flour mixture on top, using a large spoon to coat the onion thoroughly. Work the flour between every petal — this is where the magic happens. Turn the onion over and pat off the excess flour. Reserve this bowl of flour for the second coating.
💡 mia’s Pro Tip: Use a spoon to gently lift each petal and sprinkle flour into the gaps. Think of it like seasoning a bird — you want every surface covered.
Step 4: Egg Wash and Second Flour
Submerge the floured onion in the egg mixture, turning to coat evenly. Let the excess drip off for a few seconds. Then return the onion to the reserved flour mixture and repeat the flouring process, making sure to coat every petal again. Gently tap off any excess flour — you want a thin, even layer, not a thick paste.
⚠️ Common Mistake to Avoid: Don’t press the flour into the onion. A gentle coating creates a lighter, crispier crust. Pressing the flour on will make it dense and doughy.
Step 5: Chill and Preheat
Place the breaded onion on a plate and refrigerate for at least 10 minutes while you preheat the air fryer to 350°F for 10 minutes. Chilling helps the breading adhere and prevents it from sliding off during cooking.
💡 mia’s Pro Tip: If you’re short on time, 10 minutes in the fridge is enough. But 20 minutes is even better — the coating sets firmly, and the onion stays extra crisp.
Step 6: Spray and Cook
Remove the onion from the refrigerator and spray generously with vegetable oil from a spray bottle — every visible surface should glisten. Make a sling from a sheet of aluminum foil (fold it into a long strip and shape it into a U-shape) to lower the onion into the air fryer basket cut-side up. Set the timer for 25 minutes at 350°F. Halfway through, carefully lift the basket and spray the onion again with oil, focusing on any spots that still look dry or floury. Repeat once more with 5 minutes left.
⚠️ Common Mistake to Avoid: Forgetting to spray the onion during cooking is the #1 reason for uneven browning. The oil spray is what gives you that deep golden color and crispy crust. Don’t skip it!
Step 7: Season and Serve
After 25 minutes, carefully remove the onion using the aluminum foil sling. Transfer to a serving plate and season immediately with a pinch of salt and pepper while it’s still hot. Serve with your favorite blooming onion dip — I’ll share my go-to options below.
💡 mia’s Pro Tip: The onion is done when the petals are deep golden brown and the center is tender when pierced with a knife. If you prefer extra-dark spots, add 2-3 more minutes — but watch closely so the spices don’t burn.
| Step | Action | Duration | Key Visual Cue |
|---|---|---|---|
| 1 | Cut onion into 16 petals | 5 min | Petals open like a flower after resting |
| 2 | First flour coating | 3 min | Onion fully dusted, no bare spots |
| 3 | Egg wash + second flour | 3 min | Craggly, textured coating |
| 4 | Chill in refrigerator | 10–20 min | Coating feels dry and set |
| 5 | Air fry at 350°F | 25 min | Deep golden brown, petals are crisp |
| 6 | Season and serve | 1 min | Salt and pepper on hot crust |
Serving & Presentation
This Air Fryer Blooming Onion is a showstopper, and I love serving it the way we do in New York — as the centerpiece of a sharing platter. Place the onion on a large wooden board or a round white platter, with a small bowl of dipping sauce in the center where the onion’s petals naturally cradle it. I like to scatter a few fresh herbs like parsley or cilantro around the base for a pop of green, and a light dusting of extra paprika adds a beautiful red accent. The contrast of the golden petals against the dark sauce is pure visual drama.
For dipping, my top choice is a classic comeback sauce — mayonnaise, ketchup, horseradish, Worcestershire, and a squeeze of lemon. It’s tangy, creamy, and cuts through the richness of the fried coating. Sometimes I’ll also offer a harissa yogurt dip (a nod to my Moroccan roots) for those who want a spicy, tangy alternative. And for a truly NYC-inspired spread, serve it alongside a cold beer or a crisp white wine like Sauvignon Blanc — the acidity balances the savory notes perfectly.
This blooming onion is best enjoyed fresh out of the air fryer, while the petals are still warm and shatter-crisp. I always serve it as a starter before a main course like grilled steak or a hearty salad. It’s also the ultimate game-day snack — just set it on the coffee table and watch it disappear.
| Pairing Type | Suggestions | Why It Works |
|---|---|---|
| Side Dish | Grilled steak, roasted chicken, hearty salad | The crispiness contrasts with tender proteins |
| Sauce / Dip | Comeback sauce, harissa yogurt, ranch, sriracha mayo | Tangy and creamy dips balance the savory crust |
| Beverage | Cold beer (IPA or lager), Sauvignon Blanc, sparkling water with lime | Acidity and carbonation cut through the richness |
| Garnish | Fresh parsley, cilantro, extra paprika dusting, lemon wedges | Fresh herbs add color and a bright note |
Make-Ahead, Storage & Reheating
I know life in New York is busy — between work, errands, and social plans, sometimes you need to prep ahead. Here’s how I handle make-ahead and storage for this Air Fryer Blooming Onion. The good news is that with the right techniques, you can still enjoy that just-cooked crispiness even on a hectic weeknight.
| Method | Container | Duration | Reheating Tip |
|---|---|---|---|
| Refrigerator | Airtight container lined with paper towels | Up to 2 days | Air fry at 350°F for 5–7 minutes until hot and crisp |
| Freezer | Freezer-safe bag or container, parchment between layers | Up to 2 months | Air fry from frozen at 350°F for 10–12 minutes |
| Make-Ahead | Breaded and chilled on a baking sheet | Up to 8 hours in advance | Spray with oil just before air frying; add 2–3 minutes to cook time |
For the crispiest reheated results, always use the air fryer — never the microwave. The microwave will turn the crust soft and chewy. If you’re reheating from the refrigerator, a quick 5-7 minute blast at 350°F brings back that just-cooked crunch. From frozen, give it 10–12 minutes and spray with a little oil halfway through. I often make two blooming onions at once and freeze one for later — it’s a lifesaver when unexpected guests show up.
If you’re prepping the onion ahead but haven’t breaded it yet, you can cut the onion into petals and store it in a bowl of cold water in the refrigerator for up to 24 hours. Just pat it very dry before breading. This trick keeps the onion fresh and prevents it from oxidizing.
Variations & Easy Swaps
One of the things I love most about this recipe is how adaptable it is. Whether you’re catering to dietary needs or just want to switch up the flavors, these variations have all been tested and approved in my NYC kitchen.
| Variation | Key Change | Best For | Difficulty Impact |
|---|---|---|---|
| Harissa-Spiced Blooming Onion | Add 2 tbsp harissa paste to egg wash | North African flavor lovers | Easy |
| Gluten-Free Blooming Onion | Use 1:1 gluten-free flour blend | Gluten-sensitive guests | Easy |
| Everything Bagel Blooming Onion | Add 2 tbsp everything bagel seasoning to flour | NYC bagel fans | Easy |
Harissa-Spiced Blooming Onion
This variation is a love letter to my Moroccan heritage. Stir 2 tablespoons of harissa paste into the egg wash before dipping the onion. The harissa adds a smoky, spicy complexity that deepens as it air-fries. Reduce the cayenne to ½ teaspoon to keep the heat balanced. Serve with a cool yogurt-mint dip to contrast the warmth. The aroma of harissa mingling with paprika takes me straight back to my mother’s kitchen in Marrakech — it’s pure comfort.
Gluten-Free Blooming Onion
For a gluten-free version, swap the all-purpose flour with a 1:1 gluten-free baking flour blend that contains xanthan gum. I’ve tested this with Bob’s Red Mill 1-to-1 and Cup4Cup, and both work beautifully. The texture is slightly less craggly but still wonderfully crisp. Make sure your paprika, cayenne, and other spices are certified gluten-free if needed. This version has been a hit at every party I’ve brought it to — no one can tell the difference.
Everything Bagel Blooming Onion
This is my NYC tribute. Add 2 tablespoons of everything bagel seasoning (poppy seeds, sesame seeds, garlic flakes, onion flakes, and salt) to the flour mixture. The seeds toast in the air fryer and create an incredible crunchy crust with that iconic bagel-shop flavor. I love serving this with a dill cream cheese dip — it’s like a bagel and cream cheese, reimagined as a crispy onion. It’s become my most requested variation for game days.
How do you cut an onion to make a blooming onion for an air fryer?
Start by slicing off about ½ inch from the top of the onion (the pointy end), leaving the root end intact. Peel the outer skin completely. Place the onion cut-side down on a cutting board. Make your first downward cut about ½ inch from the root, cutting all the way through to the board. Repeat to create four evenly spaced cuts around the onion. Then make three additional cuts between each section — you’ll have 16 evenly spaced cuts total. Turn the onion over and let it rest for 5 minutes; the petals will naturally begin to open. The key is never cutting through the root, which holds everything together like an anchor.
What is the best batter or breading for an air fryer blooming onion?
The best breading for an air fryer blooming onion is a seasoned flour coating with a double-breading technique. Start with all-purpose flour mixed with paprika, cayenne, cumin, thyme, oregano, salt, and pepper. First coat the onion in the seasoned flour, then dip it in an egg wash (eggs, milk, and water), then coat it again in the flour. This double layer creates a craggly, textured crust that crisps up beautifully in the air fryer. Unlike a wet batter, which can become soggy, this dry breading allows the hot air to circulate and create that signature crunchy exterior.
How long do you cook a blooming onion in an air fryer and at what temperature?
Cook a blooming onion in the air fryer at 350°F for 25 minutes. Preheat the air fryer for 10 minutes before adding the onion. Halfway through cooking, spray the onion with oil to ensure even browning and maximum crispiness. The onion is done when the petals are deep golden brown and the center is tender when pierced with a knife. Every air fryer is slightly different, so start checking at 22 minutes if your model runs hot. For extra-crispy results, add 2-3 more minutes, watching closely so the spices don’t burn.
What dipping sauce goes best with an air fryer blooming onion?
A comeback sauce is my top recommendation — it’s a Southern classic made with mayonnaise, ketchup, horseradish, Worcestershire sauce, and a squeeze of lemon. The tangy, creamy flavor perfectly complements the savory, spiced crust. For a Moroccan twist, try a harissa yogurt dip: mix plain Greek yogurt with harissa paste, lemon juice, and a pinch of salt. Other excellent options include ranch dressing, sriracha mayo, blue cheese dip, or a simple aioli with garlic and smoked paprika. I often serve two or three sauces so guests can mix and match.
Can I make an air fryer blooming onion without eggs?
Yes, you can make this blooming onion without eggs by using a buttermilk or flaxseed wash. For a buttermilk version, combine 1 cup buttermilk (or 1 cup milk mixed with 1 tablespoon lemon juice) with 2 tablespoons melted butter or oil — this creates a similar tacky surface for the flour to adhere to. For a vegan option, mix 2 tablespoons ground flaxseed with 6 tablespoons warm water and let it sit for 5 minutes until gel-like. Both alternatives work well, though the crust may be slightly less craggly. I’ve tested both and they’re delicious — just make sure to spray generously with oil during cooking.
Why is my air fryer blooming onion not crispy?
The most common reason for a soft blooming onion is insufficient oil spray. The air fryer needs a fine mist of oil to create that golden, crispy crust — don’t be shy with the spray bottle. Another culprit is overcrowding the basket; the onion needs room for hot air to circulate. If your air fryer is small, cook one onion at a time. Also, check that you preheated the air fryer for the full 10 minutes. Finally, make sure you let the breaded onion chill in the refrigerator for at least 10 minutes before cooking — this helps the coating set and prevents it from sliding off.
Can I use a different type of onion for blooming onion?
Sweet onions like Vidalia, Walla Walla, or Maui are the best choice for a blooming onion because of their high sugar content and mild flavor. They caramelize beautifully and taste sweet even when raw. If you can’t find sweet onions, a standard yellow onion will work — just expect a slightly sharper, more pungent flavor. Red onions can also be used, but they tend to be less sweet and may turn slightly purple during cooking. I don’t recommend white onions; they’re too sharp and lack the natural sweetness needed to balance the savory breading.
How do I reheat a leftover blooming onion in the air fryer?
To reheat a leftover blooming onion and bring back its crispy texture, preheat your air fryer to 350°F. Place the leftover onion in the basket and cook for 5-7 minutes, spraying lightly with oil halfway through. The key is to not overcrowd — if the onion is large, reheat in batches. The air fryer will restore the crunch far better than a microwave, which will make the coating soft and chewy. If the onion was frozen, reheat directly from frozen at 350°F for 10-12 minutes. I always make extra just so I have leftovers to reheat — they’re almost as good as fresh.
Can I make a blooming onion in a basket-style air fryer?
Yes, a basket-style air fryer works perfectly for a blooming onion, but you need to use an aluminum foil sling for easy removal. Fold a long sheet of foil into a 2-inch wide strip and shape it into a U-shape. Place the onion in the center of the sling, then lower it into the basket. The sling allows you to lift the onion out without breaking the petals. Make sure your basket is at least 5-6 inches wide to accommodate the onion. If your air fryer is smaller, use a smaller onion or cook in batches. I use a 6-quart basket model and it fits a large sweet onion perfectly.
What can I use instead of cayenne pepper in blooming onion seasoning?
If you want to reduce the heat or don’t have cayenne pepper, several substitutes work beautifully. Ancho chili powder is my favorite alternative — it adds a smoky, fruity warmth with very little heat. Smoked paprika is another excellent option, though it will change the flavor profile to something more barbecue-like. For a completely mild version, simply omit the cayenne and increase the paprika to 1½ tablespoons. If you still want a tiny kick, add a pinch of black pepper or a dash of hot sauce to the egg wash. I’ve made all these versions and each one has its own charm.
Share Your Version!
I absolutely love hearing how this Air Fryer Blooming Onion turns out in your kitchen! Did you try the harissa-spiced variation? Or maybe you invented a dipping sauce that’s even better than mine? Leave a star rating and a comment below — your feedback helps other readers know what to expect, and it genuinely makes my day to read about your cooking adventures. If you share a photo on Instagram or Pinterest, please tag @exorecipes so I can see your beautiful creation and feature it on my page.
One thing I’m especially curious about: did the double-breading technique give you that extra-craggly crust you were hoping for? Let me know in the comments — I read every single one and I’m always here to help troubleshoot if something didn’t go quite as planned. From my NYC kitchen to yours — I hope this recipe brings as much warmth to your table as it does to mine. — mia 🧡
Love This Recipe? Save It to Pinterest!
If you enjoyed this Air Fryer Blooming Onion recipe, don’t let it get lost in your browser tabs! 😄 Pin it now so you can find it again anytime — and explore hundreds more tried-and-tested recipes waiting for you on my Pinterest boards.
👉 Follow mia on Pinterest @chefrecipes2
📌 Pin this recipe · 🔁 Re-pin your favorites · 💬 Tag me when you make it — I love seeing your creations!
🌟 Made this recipe? Share your thoughts! 🌟
Did the petals bloom perfectly? Did you try a fun variation? I’d love to hear about it — drop a comment below or tag me on social media!
#exorecipes #airfryerbloomingonion #bloomingonionrecipe
Air Fryer Blooming Onion
Description
Learn how to make this restaurant quality appetizer at home for a fun game day snack that your family and friends will love!
Ingredients
- 1 large sweet onion
- 2 ½ cups all-purpose flour
- 1 tablespoon paprika
- 1 teaspoon cayenne pepper
- ½ teaspoon ground cumin
- ½ teaspoon dried thyme
- ½ teaspoon dried oregano
- 2 large eggs
- 1 cup milk
- 1 cup water
- Salt and pepper to taste
- Oil in a spray bottle
Instructions
- Slice the onion to make it bloom. Start by cutting off 1/2 inch from the top of the onion, then peel the outer skin from the onion.
- Place the onion cut-side down. Starting about 1/2 inch from the root, make a downward cut all the way through to the cutting board.
- Repeat to make four evenly spaced cuts around the onion. Make 3 additional cuts between each section until you have 16 evenly spaced cuts.
- Turn the onion over and set aside for 5 minutes to allow the petals to relax.
- Prior to breading use your fingers to gently separate the outer pieces.
- Whisk the flour, paprika, cayenne, cumin, thyme, oregano, salt and pepper in a large bowl. In a medium deep bowl, whisk the eggs, milk, and water.
- Place the onion in a clean bowl, cut-side up, and pour the flour mixture on top. Using a large spoon to coat the onion with the flour mixture, especially between the onion petals. Turn the onion over and pat off the excess flour. Reserve the bowl of flour.
- Put the onion in the egg mixture and coat evenly. Remove and let the excess drip off.
- Then transfer the onion back into the reserved flour mixture and repeat the flouring process. Be sure you gently tap off extra flour. There will be leftover flour in the bowl when you are done.
- Place the onion in the refrigerator.
- Preheat the air fryer for 10 minutes to 350ºF.
- Remove the onion from the refrigerator and spray generously with vegetable oil from a spray bottle.
- After making a sling from a sheet of aluminum foil transfer the onion cut side up into the fryer basket.
- Set the timer for 25 minutes and cook. Spray the onion with the cooking oil 2-3 times as you cook it. If any spots still have visible flour spray them with the oil.
- After 25 minutes remove onion using the aluminum foil sling and season with salt and pepper.
- Serve with the blooming onion dip.
Nutrition
- Calories: 278 kcal
- Sugar: 3 g
- Fat: 6 g
- Carbohydrates: 47 g
- Protein: 10 g
k">
Tried This Recipe? Leave a Comment!
Did you make this recipe? I’d love to hear how it turned out! Please leave a comment and a rating below. Your feedback helps other home cooks and supports cheerychop.com!
For more delicious inspiration, follow me on Pinterest!
