“`html
Table of Contents
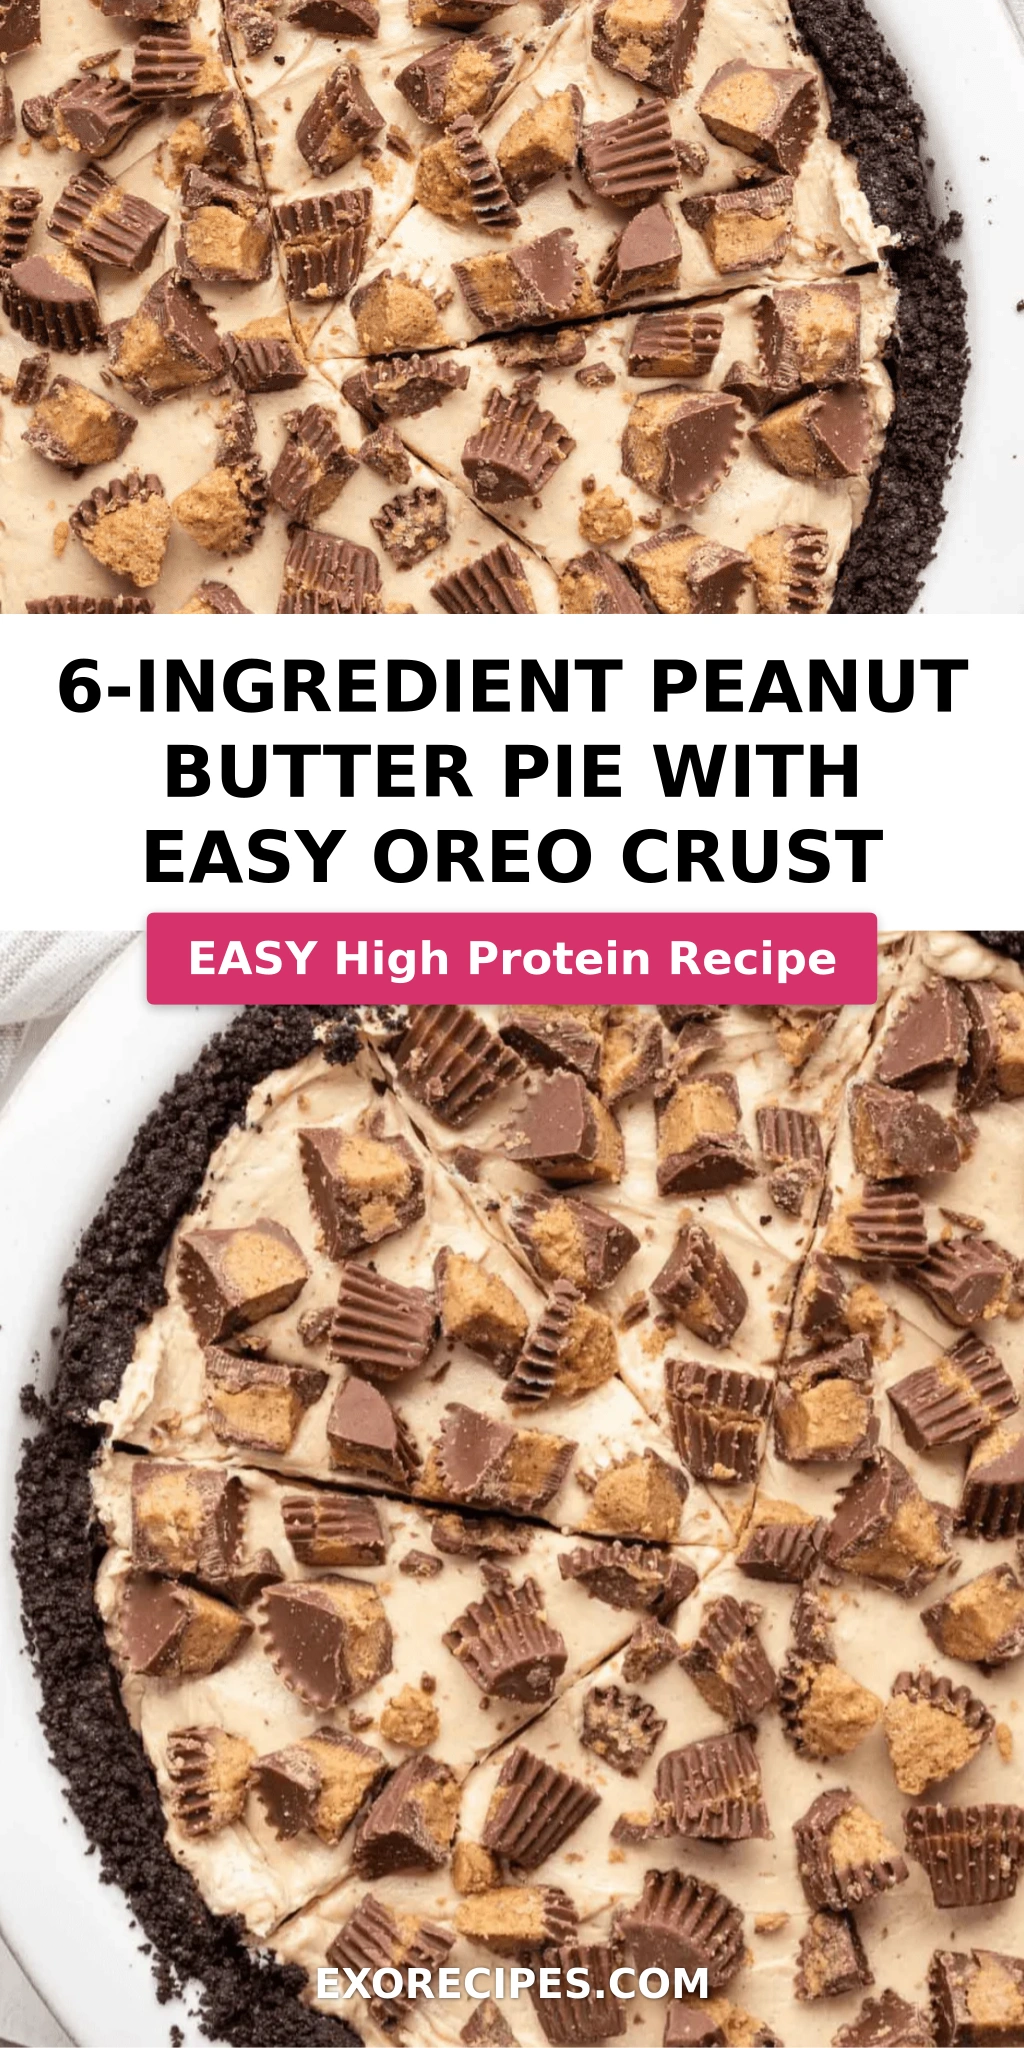
6-Ingredient Peanut Butter Pie with Easy Oreo Crust – A No-Bake Dessert That Steals the Show
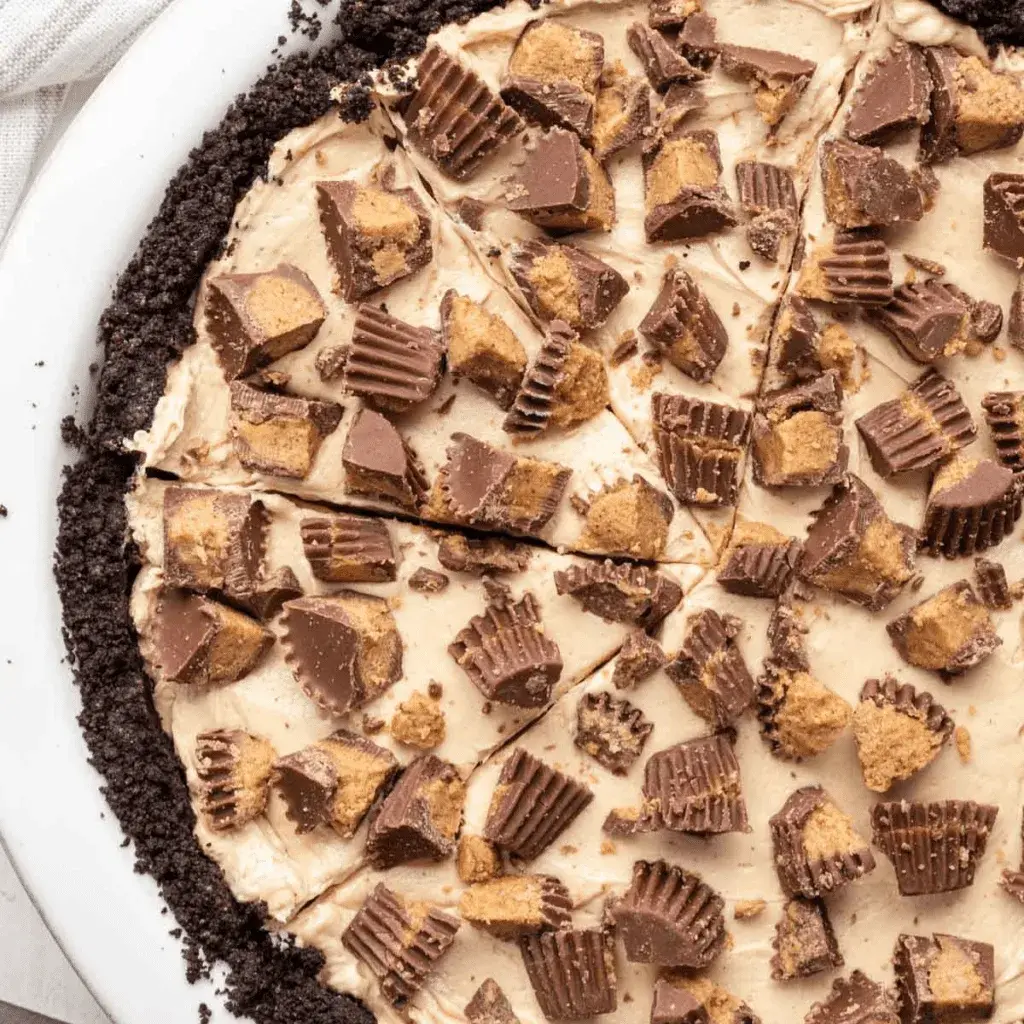
I still remember the first time I made a peanut butter pie that truly felt like mine. It was a rainy Sunday in my little NYC apartment, and I was missing my mother’s kitchen in Morocco — where peanut butter was a rare, treasured import we’d spread on warm khobz and drizzle with honey. That day, I wanted something that bridged my two worlds: the bold, comforting richness of American peanut butter desserts and the simple, soulful elegance of French pastry. This 6-ingredient peanut butter pie with easy Oreo crust is exactly that — a no-bake masterpiece that comes together in about 30 minutes and delivers pure, unapologetic joy. With over 40 five-star votes from my readers, it’s become the most requested dessert at every gathering I host. And honestly? I get it. The buttery Oreo crust, the silky peanut butter filling, the crunch of chopped peanut butter cups on top — it’s everything you want in a quick peanut butter dessert.
Let me paint you a picture: the crust is made from crushed Oreos and melted butter, baked just long enough to become firm and deeply chocolatey. The filling is a luscious blend of cream cheese, creamy peanut butter, powdered sugar, and Cool Whip — whipped together until it’s light as a cloud but still packs that intense, salty-sweet peanut butter punch. When you slice into this pie, the knife glides through the smooth filling and meets the crisp, crumbly crust with just a little resistance. Each bite is a study in contrasts: cold and creamy against crunchy Oreo bits, rich peanut butter against dark chocolate, sweet filling against a whisper of salt. I always tell my readers — this isn’t just a pie. It’s a conversation starter, a crowd-pleaser, and the kind of dessert that makes people close their eyes and sigh.
What sets my version apart is the technique I learned during my pastry training in Paris: I let the cream cheese come fully to room temperature before beating it with the peanut butter. This one step ensures a perfectly smooth, lump-free filling that sets up beautifully. And here’s a pro tip I share with every home cook — don’t skip the freezer chill. Three hours in the freezer gives you clean, restaurant-quality slices every time. The common mistake I see? Not packing the Oreo crust firmly enough into the pie plate. If the crust is too loose, it will crumble when you cut. Press it in with the bottom of a measuring cup, and you’ll get a sturdy, sliceable base every single time. This easy Oreo crust peanut butter pie is truly foolproof — and I cannot wait for you to try it.
Why This 6-Ingredient Peanut Butter Pie Recipe Is the Best
The Flavor Secret. The magic of this no-bake peanut butter pie lies in the balance. I use creamy peanut butter — not the natural kind that separates — because it emulsifies perfectly with the cream cheese and powdered sugar, creating a filling that’s both rich and airy. The Oreo crust adds a dark, slightly bitter chocolate note that cuts through the sweetness of the filling. It’s the same principle I learned in Paris: a great dessert is about contrast. The salty edge of the peanut butter, the sweetness of the sugar, the bitterness of the chocolate — every element has a job to do, and they work together like a well-trained kitchen brigade.
Perfected Texture. Texture is everything in a no-bake dessert, and this pie delivers on every level. The crust is crunchy but not hard, the filling is creamy but firm enough to hold its shape, and the toppings add little bursts of crunch and chew. The key technique? Letting the cream cheese soften completely — about 30 minutes on the counter — so it blends seamlessly with the peanut butter. In my Paris training, I learned that cold cream cheese is the enemy of smooth pastry cream. The same rule applies here. Room-temperature ingredients give you a silky, homogeneous filling that sets up beautifully without any graininess.
Foolproof & Fast. This is the kind of recipe that works for beginners and seasoned cooks alike. With just six core ingredients — Oreos, butter, cream cheese, peanut butter, powdered sugar, and Cool Whip — you can have a stunning dessert on the table in under an hour (plus chill time). There’s no water bath, no tempering eggs, no complicated steps. It’s the recipe I turn to when I need to bring something to a last-minute dinner party or when I just want a slice of something amazing after a long day in my NYC kitchen. And because it’s so simple, it’s endlessly customizable — you can swap in different cookies for the crust, add a layer of chocolate ganache, or top it with whatever candy you have on hand.
6-Ingredient Peanut Butter Pie Ingredients
Every time I make this pie, I think about how the ingredients tell a story. The Oreos remind me of my early days in NYC, discovering American grocery stores with my French classmates. The peanut butter takes me back to my mother’s kitchen in Morocco, where she’d stir it into sauces and spread it on bread for our after-school snacks. And the Cool Whip? That’s pure American convenience at its best — and I’ve come to love how it makes this filling impossibly light. Here’s everything you’ll need:
Ingredients List
- 30 Oreos (crushed) — about 3 cups of crumbs
- 5 tbsp butter (melted)
- 8 oz cream cheese (softened to room temperature)
- 1 cup creamy peanut butter (not natural-style)
- ¾ cup powdered sugar
- 8 oz Cool Whip (thawed)
- Reese’s cups (chopped, for topping — optional)
- Reese’s pieces (for topping — optional)
- Crushed Oreos (for topping — optional)
- Chocolate, caramel, or peanut butter drizzle (for serving — optional)
Ingredient Spotlight
Oreos: The foundation of our crust. Regular Oreos work perfectly here — the chocolate cookie and cream filling combine with butter to create a crust that’s both sturdy and flavorful. I’ve tested this with gluten-free chocolate sandwich cookies, and the results are excellent. Look for a 14-ounce package of regular Oreos; that’s exactly the right amount.
Cream Cheese: This is the backbone of the filling, providing structure and a subtle tang that balances the sweetness of the peanut butter and sugar. Always use block-style cream cheese (not whipped or spreadable) and let it soften for 30 minutes before mixing. I’ve tested this with dairy-free cream cheese, and while the texture is slightly softer, it still works beautifully.
Peanut Butter: For the best results, use standard creamy peanut butter like Jif or Skippy. Natural peanut butter (the kind that separates) can cause the filling to be grainy or oily because the oil doesn’t emulsify as well with the other ingredients. If you only have natural peanut butter, stir it very thoroughly and expect a slightly softer set. The peanut butter is the star of this quick peanut butter dessert, so use one you love eating straight from the jar.
Cool Whip: This is what gives the filling its light, mousse-like texture. You can substitute homemade whipped cream (1 cup heavy cream + 2 tbsp powdered sugar, whipped to stiff peaks), but Cool Whip is more stable and holds up better over several days. If you use homemade whipped cream, the pie will be a bit more delicate and is best eaten within 24 hours.
| Original Ingredient | Best Substitution | Flavor / Texture Impact |
|---|---|---|
| Oreos | Gluten-free chocolate sandwich cookies | Slightly less sweet, same crunch; perfect for GF diets |
| Cream cheese | Dairy-free cream cheese (e.g., Kite Hill or Tofutti) | Slightly softer set, still creamy; mild tang |
| Creamy peanut butter | Almond butter or sunflower seed butter | Less rich, more earthy; sunflower butter turns green when baked — fine here since crust is baked alone |
| Cool Whip | Homemade whipped cream (1 cup heavy cream + 2 tbsp powdered sugar) | Lighter, less stable; best eaten within 24 hours |
How to Make 6-Ingredient Peanut Butter Pie — Step-by-Step
I’ve broken this down into three simple steps so you can follow along easily. Trust me — if you can crush cookies and stir, you can make this pie. Let’s get started!
Step 1: Prepare the Oreo Crust
Preheat your oven to 350°F. Coat a 9-inch pie pan with non-stick spray and set aside. Pulse the Oreos in a food processor until they become fine crumbs — you should have about 3 cups. (If you don’t have a food processor, place the cookies in a sealed zip-top bag and crush them with a rolling pin.) Pour the melted butter into the cookie crumbs and stir with a fork until every crumb is coated. The mixture should look like wet sand and hold together when squeezed. Press the crumbs evenly into the bottom and up the sides of the pie plate — use the bottom of a measuring cup to pack it firmly. Bake for 8–10 minutes, just until the crust is set and fragrant. Place on a wire rack to cool completely.
💡 mia’s Pro Tip: For the most even crust, use a ¼-cup measuring cup to press the crumbs into the bottom first, then use your fingers or a small glass to press them up the sides. A firmly packed crust is the secret to clean slices!
Step 2: Make the Peanut Butter Filling
In a large mixing bowl, beat the softened cream cheese and peanut butter together with an electric mixer on medium speed until smooth and completely combined — about 2 minutes. The mixture will be thick, so scrape down the sides of the bowl halfway through. Add the powdered sugar and mix on low speed until incorporated, then increase to medium and beat for another 30 seconds. Finally, fold in the Cool Whip gently with a spatula until no white streaks remain. The filling should be light, fluffy, and a uniform pale tan color.
⚠️ Common Mistake to Avoid: Don’t overmix the filling once the Cool Whip is added! Overmixing can deflate the air and make the filling dense instead of light and mousse-like. Fold just until combined.
Step 3: Assemble and Chill
Make sure your crust is completely cool — if it’s even slightly warm, the filling will melt and slide off. Spoon the peanut butter filling into the crust and spread it into an even layer with an offset spatula or the back of a spoon. Top with chopped Reese’s cups, Reese’s pieces, crushed Oreos, or any other toppings you like. Place the pie in the freezer for at least 3 hours, or in the refrigerator for at least 5 hours. The pie is best served cold — straight from the freezer or fridge. For the cleanest slices, dip your knife in hot water and wipe it dry before each cut.
💡 mia’s Pro Tip: If you’re short on time, place the pie in the freezer for 2 hours, then transfer it to the fridge for 1 hour before serving. This gives you a firm but not rock-hard texture that slices beautifully.
| Step | Action | Duration | Key Visual Cue |
|---|---|---|---|
| 1 | Make and bake the Oreo crust | 15 min prep + 8–10 min bake | Crust is fragrant, firm to the touch, and slightly darker at the edges |
| 2 | Beat cream cheese, peanut butter, sugar; fold in Cool Whip | 5–7 min | Smooth, uniform pale tan; no streaks of white or lumps of cream cheese |
| 3 | Fill crust, top, and chill | 5 min prep + 3 hr freeze / 5 hr fridge | Filling is firm to the touch, doesn’t jiggle when gently shaken |
Serving & Presentation
This pie is a showstopper on any dessert table, and how you serve it can elevate it from simple to spectacular. I like to run my knife under hot water, wipe it dry, and make clean, confident cuts — this gives you perfect slices every time. Serve each slice on a chilled plate with a dollop of extra whipped cream and a drizzle of warm chocolate or caramel sauce. The contrast of the cold, creamy pie against the warm sauce is simply divine. For a touch of Moroccan flair, I sometimes sprinkle a tiny pinch of flaky sea salt and a whisper of cinnamon over the top — it echoes the sweet-and-savory flavors my mother used in her kitchen in Marrakech.
When I’m hosting friends in my NYC apartment, I garnish the pie with a generous pile of chopped Reese’s cups, a few Reese’s pieces, and a drizzle of melted peanut butter. The colors are gorgeous — deep chocolate, golden peanut butter, and creamy tan — and the textures are irresistible. This pie pairs beautifully with a strong cup of coffee or a cold glass of milk. For a grown-up twist, serve it alongside an espresso or a small pour of bourbon — the richness of the pie stands up beautifully to bold flavors.
One of my favorite ways to serve this is at potlucks and holiday gatherings. I make it the night before, chill it in the freezer, and transport it in a insulated cooler bag. When I arrive, I let it sit at room temperature for about 10 minutes before slicing — this softens the filling just enough to make slicing easy without losing the structure. Every time I bring this easy Oreo crust peanut butter pie to a gathering, it disappears within minutes.
| Pairing Type | Suggestions | Why It Works |
|---|---|---|
| Side Dish | Fresh berries, sliced bananas, or a simple fruit salad | Bright acidity cuts through the richness of the pie |
| Sauce / Dip | Warm chocolate sauce, caramel sauce, or melted peanut butter | Adds decadence and a warm-cold contrast |
| Beverage | Cold milk, hot coffee, espresso, or bourbon | The pie’s richness is balanced by bitter or cleansing drinks |
| Garnish | Flaky sea salt, cinnamon, chopped peanuts, or shaved chocolate | Adds texture, visual appeal, and flavor contrast |
Make-Ahead, Storage & Reheating
As a busy NYC food blogger and cook, I live by make-ahead recipes — and this pie is one of the best. You can prepare the entire pie (except the toppings) up to 2 days in advance. The crust can be baked and stored at room temperature for up to 3 days before filling. The assembled pie (with toppings) keeps beautifully in the freezer for up to 2 months. Here’s my complete storage guide:
| Method | Container | Duration | Reheating Tip |
|---|---|---|---|
| Refrigerator | Covered with plastic wrap or foil | Up to 5 days | Serve straight from the fridge; let sit 5 min at room temp for softer texture |
| Freezer | Tightly wrapped in plastic wrap, then foil | Up to 2 months | Thaw in fridge overnight; do not microwave |
| Make-Ahead | Baked crust stored at room temp; filling stored separately in fridge | Crust: 3 days; Filling: 2 days | Assemble and chill at least 5 hours before serving |
A quick note on freezing: this pie freezes like a dream. I often make two at once — one for now and one for later. To freeze, assemble the pie completely (including toppings) and place it in the freezer uncovered for 1 hour until the surface is firm. Then wrap the entire pie pan tightly in plastic wrap, followed by a layer of aluminum foil. When you’re ready to serve, thaw it in the refrigerator overnight. The texture remains creamy and smooth — I’ve tested this multiple times and it never disappoints. And here’s a little secret from my NYC kitchen: I keep a frozen peanut butter pie on hand for unexpected guests. It’s the ultimate quick peanut butter dessert that always feels homemade.
Variations & Easy Swaps
One of the things I love most about this pie is how adaptable it is. Over the years, I’ve tested dozens of variations — some inspired by my Moroccan roots, others by requests from my readers. Here are three of my favorites:
| Variation | Key Change | Best For | Difficulty Impact |
|---|---|---|---|
| Chocolate Peanut Butter Twist | Add ¼ cup cocoa powder to filling | Chocolate lovers, special occasions | Easy — no extra steps |
| Gluten-Free Version | Use gluten-free chocolate sandwich cookies for crust | Gluten-free diets, celiac-friendly | Easy — simple swap |
| Spiced Moroccan Peanut Butter Pie | Add ½ tsp cinnamon + ¼ tsp cardamom to filling | Adventurous eaters, holiday tables | Easy — just stir in spices |
Chocolate Peanut Butter Twist
For all the chocolate obsessives out there — this one’s for you. Sift ¼ cup of unsweetened cocoa powder into the peanut butter filling along with the powdered sugar. The cocoa adds a deep, fudgy richness that pairs beautifully with the peanut butter. I like to top this version with chocolate shavings and a drizzle of warm chocolate sauce. It’s like a peanut butter cup in pie form — and it always gets rave reviews. This variation reminds me of the chocolate-peanut butter confections I discovered at a little patisserie near the Eiffel Tower during my Paris years.
Gluten-Free Version
Making this pie gluten-free is as simple as swapping the Oreos for your favorite gluten-free chocolate sandwich cookies. I’ve tested this with several brands, and they all work beautifully — just make sure to use the same quantity (about 30 cookies or 3 cups of crumbs). The flavor and texture are nearly identical to the original, and no one will guess it’s gluten-free. This version has become a favorite at my NYC dinner parties where multiple dietary needs are at the table. The filling is naturally gluten-free, so the only swap is in the crust.
Spiced Moroccan Peanut Butter Pie
This is my personal favorite — a nod to my Moroccan heritage. Stir ½ teaspoon of ground cinnamon and ¼ teaspoon of ground cardamom into the peanut butter filling along with the powdered sugar. The warm, floral spices elevate the peanut butter in a way that feels both exotic and familiar. I discovered this combination by accident one afternoon when I was testing recipes in my NYC kitchen, missing the spice markets of Marrakech. The cinnamon adds warmth, while the cardamom brings a subtle citrusy, floral note that cuts through the richness. Top with a sprinkle of cinnamon and a drizzle of honey for a truly unforgettable dessert.
Share Your Version!
I absolutely love hearing from you — there’s nothing quite like the joy of knowing one of my recipes has found a place in your kitchen. If you make this 6-ingredient peanut butter pie with easy Oreo crust, will you do me a favor? Leave a star rating and a comment below to let me know how it turned out. Did you try one of the variations? Did you invent your own twist? I read every single comment, and your feedback helps me create even better recipes for you.
And if you share a photo on Instagram or Pinterest, be sure to tag @exorecipes — I love seeing your beautiful creations! My favorite question to ask: what topping did you choose, and why? For me, it’s always a pile of chopped Reese’s cups with a drizzle of warm peanut butter. But I want to know what makes this pie yours. From my NYC kitchen to yours — I hope this recipe brings as much warmth to your table as it does to mine. — mia 🧡
Love This Recipe? Save It to Pinterest!
If you enjoyed this 6-Ingredient Peanut Butter Pie with Easy Oreo Crust recipe, don’t let it get lost in your browser tabs! 😄 Pin it now so you can find it again anytime — and explore hundreds more tried-and-tested recipes waiting for you on my Pinterest boards.
👉 Follow mia on Pinterest @exorecipe
📌 Pin this recipe · 🔁 Re-pin your favorites · 💬 Tag me when you make it — I love seeing your creations!
Can I use a different type of crust for this 6-ingredient peanut butter pie?
Absolutely! While the Oreo crust is what makes this recipe so special — it’s buttery, chocolatey, and sturdy enough to hold the filling — you can certainly swap it out. A graham cracker crust works beautifully and adds a honeyed sweetness that contrasts nicely with the peanut butter. You can also use a traditional pastry crust, shortbread cookie crust, or even a crust made from crushed pretzels for a salty-sweet twist. If you’re going gluten-free, use gluten-free chocolate sandwich cookies or gluten-free graham crackers. Just keep the ratio the same: about 3 cups of crumbs to 5 tablespoons of melted butter. Bake the crust at 350°F for 8–10 minutes regardless of which cookie you use. The key is to let the crust cool completely before adding the filling — a warm crust will cause the filling to melt and slide off.
How long does this peanut butter pie need to chill before serving?
For the best texture and cleanest slices, I recommend chilling this pie for at least 3 hours in the freezer or 5 hours in the refrigerator. The filling needs time to firm up so it holds its shape when you cut into it. If you’re in a hurry, you can place it in the freezer for 2 hours, then transfer it to the fridge for 1 hour before serving — this gives you a firm but not rock-hard texture. The pie is best served cold, so don’t let it sit at room temperature for more than 10–15 minutes before slicing. If you’re making it for a party, I suggest making it the night before and letting it chill in the fridge overnight. This gives the flavors time to meld and ensures perfect slices every time. Remember, patience is a virtue — especially when peanut butter pie is involved!
What can I substitute for cream cheese in this easy peanut butter pie recipe?
If you don’t have cream cheese or need a dairy-free option, you have a few good substitutes. Mascarpone cheese is the closest swap — it’s creamier and slightly sweeter than cream cheese, and it works beautifully in this filling. Use the same amount (8 ounces) and soften it to room temperature before mixing. For a dairy-free option, use a vegan cream cheese like Kite Hill or Tofutti. I’ve tested both, and they work well — the texture is slightly softer but still delicious. Another option is to use full-fat Greek yogurt, but this will give you a tangier, less rich filling that sets up a bit softer. If you go the yogurt route, drain it in a cheesecloth for an hour first to remove excess moisture. Keep in mind that any substitution will change the flavor and texture slightly, but the pie will still be absolutely delicious.
Can I use natural peanut butter instead of processed peanut butter for this pie?
You can, but I recommend using standard creamy peanut butter like Jif or Skippy for the best results. Natural peanut butter (the kind with oil that separates) can cause the filling to be grainy or slightly oily because the oil doesn’t emulsify as well with the cream cheese and Cool Whip. If you only have natural peanut butter on hand, here’s how to make it work: stir it very thoroughly until the oil is completely incorporated, and expect a slightly softer set. You may also want to reduce the amount by 2 tablespoons to compensate for the extra oil. I’ve tested this both ways, and while natural peanut butter makes a perfectly tasty pie, the texture is noticeably less smooth and the filling doesn’t hold its shape as well. For a flawless, sliceable pie every time, reach for the creamy, processed peanut butter.
Can I make this peanut butter pie ahead of time for a party?
Yes, this is one of the best make-ahead desserts I know! You have two great options. Option 1: Make the crust and filling separately — the baked crust can sit at room temperature for up to 3 days, and the filling can be made 2 days ahead and stored in the fridge. Assemble and chill at least 5 hours before serving. Option 2: Assemble the entire pie (including toppings) and freeze it for up to 2 months. I love this method because you can make the pie weeks in advance and simply thaw it in the fridge overnight when you’re ready to serve. The texture remains creamy and smooth — I’ve tested this multiple times. If you’re serving it within a few days, just keep it covered in the fridge. This make-ahead flexibility is one of the reasons this pie is so popular for holidays, potlucks, and busy weeknights.
Is this peanut butter pie gluten-free?
As written, this recipe uses regular Oreos, which contain wheat flour and are not gluten-free. However, making it gluten-free is incredibly simple — just swap the Oreos for your favorite gluten-free chocolate sandwich cookies. Brands like Goodie Girl, Kinnikinnick, and Glutino make excellent gluten-free versions. Use the same quantity (about 30 cookies) and the same method. The rest of the ingredients — peanut butter, cream cheese, powdered sugar, and Cool Whip — are naturally gluten-free, so no other changes are needed. The flavor and texture are nearly identical to the original. I’ve served this gluten-free version to many friends, and no one has ever guessed it’s gluten-free. Just double-check that all your toppings are also gluten-free if that’s a concern for your guests.
Can I use homemade whipped cream instead of Cool Whip?
Absolutely, you can substitute homemade whipped cream for Cool Whip — and the flavor will be even richer and more natural. To make it, whip 1 cup of heavy cream with 2 tablespoons of powdered sugar until stiff peaks form. Gently fold it into the peanut butter mixture just as you would with Cool Whip. There are two things to keep in mind. First, homemade whipped cream is less stable than Cool Whip, so the pie will be slightly softer and more delicate. It’s best eaten within 24 hours and should be stored in the fridge, not the freezer (freezing can cause homemade whipped cream to separate). Second, because homemade whipped cream has a higher fat content, the filling will taste even more decadent. I love using homemade whipped cream when I want a more artisanal, French-patisserie-style pie. Both versions are wonderful — it just depends on your preference.
What are the best toppings for this peanut butter pie?
This is my favorite part! The toppings are where you can really make this pie your own. My classic go-to is a generous pile of chopped Reese’s cups, a handful of Reese’s pieces, and a drizzle of melted peanut butter. It’s indulgent, colorful, and always a crowd-pleaser. For a more elegant presentation, try shaved dark chocolate, a sprinkle of flaky sea salt, and a drizzle of warm caramel sauce. If you’re feeling adventurous, add a pinch of cinnamon or cayenne to the chocolate shavings for a little heat. Fresh berries — especially raspberries or sliced strawberries — add a bright, tart contrast to the rich filling. For a nutty crunch, toasted chopped peanuts or pecans are wonderful. And for a touch of Moroccan flair (my personal favorite), drizzle with honey and sprinkle with cinnamon and toasted sesame seeds. The possibilities are endless!
Can I double this recipe for a larger crowd?
Yes, you can easily double this recipe to serve a larger crowd. Use a 10-inch deep-dish pie pan or a 9×13-inch baking dish instead of a standard 9-inch pie plate. If using a 9×13-inch dish, the pie will be thinner, so reduce the baking time for the crust to 7–8 minutes and check it early. The chilling time remains the same — at least 3 hours in the freezer or 5 hours in the fridge. For a 10-inch deep-dish pan, keep the baking time the same. I’ve made this for large parties by using two 9-inch pie plates and serving them side by side — they look beautiful on a dessert table. If you’re making it for a potluck or holiday gathering, this pie travels exceptionally well. Just chill it thoroughly, wrap it carefully, and bring it in a cooler bag for longer trips.
Why did my peanut butter pie turn out grainy?
A grainy texture in peanut butter pie is usually caused by one of two things. First, if your cream cheese was too cold when you mixed it, it won’t blend smoothly with the peanut butter, leaving small lumps. Always let your cream cheese soften at room temperature for at least 30 minutes before mixing. Second, if you used natural peanut butter that had separated, the oil can cause the filling to be grainy rather than silky smooth. Stick with standard creamy peanut butter for the best results. Another possible culprit is overmixing the Cool Whip — if you beat it too vigorously, the air can escape and the texture can become dense and slightly grainy. Fold the Cool Whip in gently by hand with a spatula, just until no white streaks remain. If your pie does turn out grainy, don’t worry — it will still taste delicious! Just make sure to chill it well, and serve it with plenty of toppings to distract from the texture.
Did you make this 6-Ingredient Peanut Butter Pie with Easy Oreo Crust?
I’d love to hear from you! ⭐ Leave a star rating below, 📝 share your thoughts in the comments, and 📸 tag me on Instagram @exorecipes when you bake it. Your feedback helps me create even better recipes — plus, I read every single comment and reply to as many as I can. Tell me: which topping did you choose, and what made this pie yours?
— mia 🧡
“`
Print
6-Ingredient Peanut Butter Pie with Easy Oreo Crust
Description
With over 40 5-star votes, this homemade peanut butter pie will be the star of your next gathering! It’s made with a thick, buttery oreo crust, a rich and decadent peanut butter filling, and topped with chopped peanut butter cups. This pie only takes about 30 minutes to prep and you need 6 simple ingredients to make it!
Ingredients
- 30 oreos (crushed )
- 5 tbsp butter (melted )
- 8 oz cream cheese (softened to room temperature)
- 1 cup creamy peanut butter
- ¾ cup powdered sugar
- 8 oz cool whip
- Reese's cups
- Reese's pieces
- crushed oreos
- chocolate, caramel, or peanut butter drizzle
Instructions
- Preheat oven to 350°. Coat a pie pan with non-stick spray and set aside.
- Pulse cookies in a food processor (other options include using a blender or crushing cookies by hand in a plastic bag). Pour melted butter into the cookie crumbs and stir until coated.
- Press crumbs evenly into the bottom and up the sides of the pie plate, making sure to pack it tightly. Bake for 8-10 minutes. Set on a wire rack to cool completely.
- With an electric mixer, beat the peanut butter and cream cheese until smooth (this mixture will be thick). Add in the powdered sugar and mix, followed by the cool whip.
- When your crust is completely cooled, fill it with the peanut butter mixture and spread into an even layer. Then finish it with peanut butter cups on top (or other toppings).
- Chill in the freezer for at least 3 hours or fridge for 5 hours before serving. This pie is best served cold.
Nutrition
- Calories: 694 kcal
- Sugar: 39 g
- Fat: 47 g
- Carbohydrates: 59 g
- Protein: 15 g
k">
Tried This Recipe? Leave a Comment!
Did you make this recipe? I’d love to hear how it turned out! Please leave a comment and a rating below. Your feedback helps other home cooks and supports cheerychop.com!
For more delicious inspiration, follow me on Pinterest!
