“`html
Table of Contents
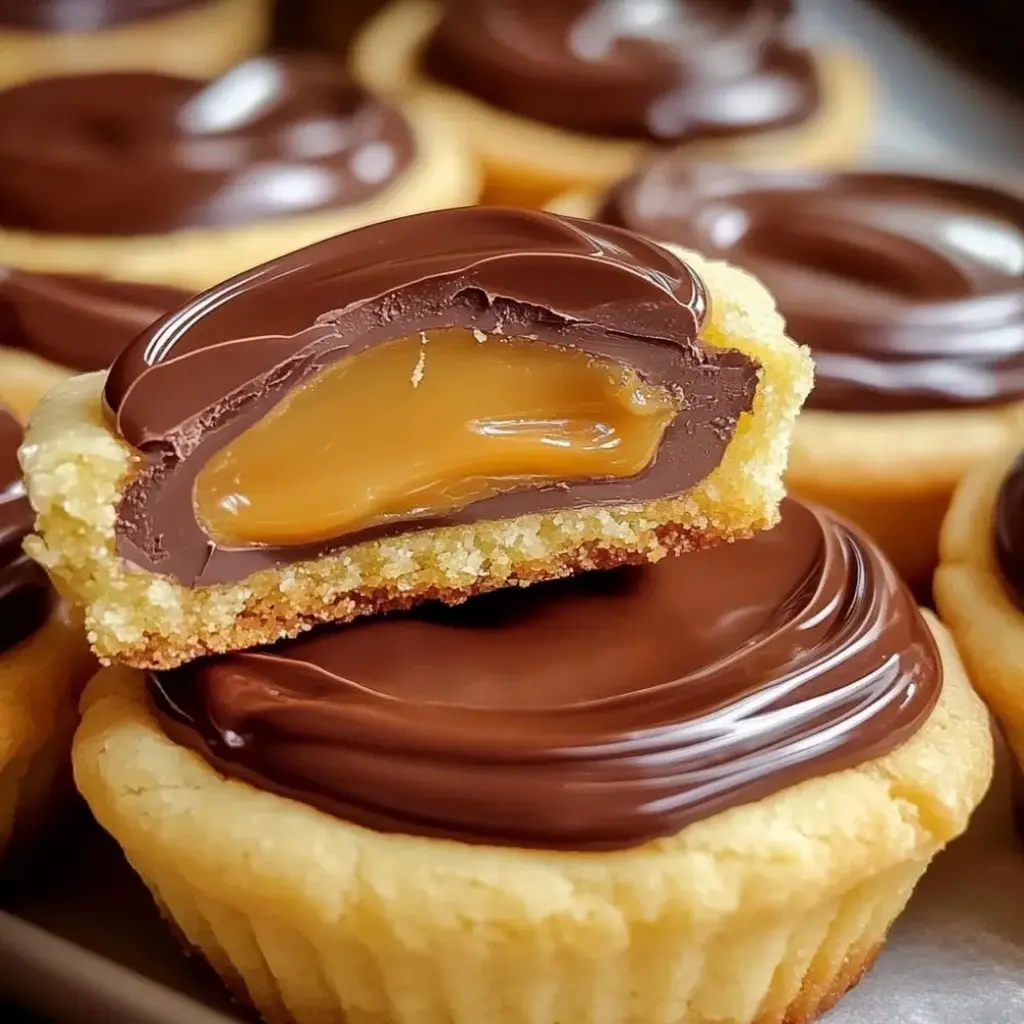
Twix Cookie Cups
Do you find yourself constantly reaching for that iconic chocolate, caramel, and biscuit candy bar? If the thought of a Twix bar makes your taste buds tingle, you’re not alone! Millions of people worldwide adore the unique combination of textures and flavors that Twix offers. But what if you could capture that beloved essence in a bite-sized, homemade treat? Enter Twix Cookie Cups. These delightful morsels are a symphony of a soft, buttery cookie base, a luscious, gooey caramel center, and a decadent, glossy chocolate topping. They are the perfect portable indulgence, ideal for parties, thoughtful gifts, or simply as a personal reward for navigating a busy week. Get ready to impress your friends and family (and yourself!) with these incredibly easy-to-make yet utterly irresistible Twix Cookie Cups.
Ingredients
Gathering your ingredients is the first step to creating these delightful Twix Cookie Cups. We’ve aimed for common pantry staples, but I’ll offer some easy swaps to make this recipe even more accessible.
- 1 cup (2 sticks) unsalted butter, softened (for a rich, creamy foundation)
- ¾ cup granulated sugar
- ½ cup packed light brown sugar (adds a hint of molasses for depth)
- 1 large egg
- 1 teaspoon vanilla extract (enhances sweetness and aroma)
- 2 ¼ cups all-purpose flour
- ½ teaspoon baking soda
- ¼ teaspoon salt
- 1 can (14 ounces) sweetened condensed milk (creates that signature chewy, sweet caramel)
- 1 cup light corn syrup (for smooth, pourable caramel)
- ½ cup unsalted butter
- 1 teaspoon vanilla extract (optional, but brings out the caramel’s sweetness)
- Pinch of salt
- 1 ½ cups semi-sweet chocolate chips (or milk chocolate for a sweeter profile)
- 2 tablespoons unsalted butter or coconut oil (for a smooth, glossy finish)
Timing
Let’s talk time. Baking is a delightful way to spend an afternoon, and with these Twix Cookie Cups, it’s surprisingly efficient!
Preparation Time
approx. 30 minutes
Cook Time
approx. 8-10 minutes per batch
Total Time
approx. 1 hour 30 minutes (including chilling and setting)
Compared to many elaborate dessert recipes, Twix Cookie Cups are quite achievable within a single afternoon. While the total time includes cooling and setting, the active prep and bake time is relatively short!

Instructions
Alright, let’s get baking! Follow these steps to create your very own batch of Twix Cookie Cups. I’ll guide you through each part with a friendly touch.
Step 1: Preheat and Prepare
First things first, let’s get our oven and baking vessels ready. Preheat your oven to 350°F (175°C). Lightly grease a 24-cup mini muffin tin or a regular muffin tin if you want larger cups. You can use baking spray or a bit of butter and flour. If you’re using a regular muffin tin, you might need to double the cookie dough portion per cup.
Step 2: Cookie Base
In a large bowl, cream together the softened unsalted butter, granulated sugar, and light brown sugar until light and fluffy. This aeration is key for a tender cookie! Beat in the large egg until well combined, then stir in the vanilla extract. In a separate medium bowl, whisk together the all-purpose flour, baking soda, and salt to ensure they are evenly distributed. Gradually add the dry ingredients to the wet ingredients, mixing on low speed or by hand until just combined. Be careful not to overmix, as this can lead to tough cookies. You’ll want a dough that’s soft but not sticky.
Step 3: Caramel Layer
Now for the luscious caramel! In a medium saucepan, combine the sweetened condensed milk, light corn syrup, butter, and salt (if using). Cook over medium heat, stirring constantly, until the mixture comes to a boil and thickens, about 5-8 minutes. It should reach a beautiful caramel color. Remove from heat and stir in the vanilla extract, if desired. Let the caramel cool slightly, but keep it warm enough to be pourable. If you have a candy thermometer, you’re aiming for around 240°F (115°C) for a chewy, not too liquidy caramel.
Step 4: Bake
Take small portions of the cookie dough (about 1 tablespoon for mini muffin tins) and press them into the bottom and up the sides of your prepared muffin cups, forming a cup-like shape. Don’t fill them too high, as the dough will spread. Bake for 8-10 minutes for mini cups, or 12-15 minutes for regular cups, until the edges are lightly golden brown. Immediately after removing from the oven, gently press the center of each cookie cup down further with the back of a small spoon or your thumb to create a deeper well for the caramel. Let them cool in the tin for a few minutes before transferring them to a wire rack to cool completely. This step is crucial; warm cookie cups can break.
Step 5: Chocolate Topping
While the cookie cups are cooling, prepare your chocolate topping. In a microwave-safe bowl, combine the semi-sweet chocolate chips and the butter or coconut oil. Microwave in 30-second intervals, stirring in between, until the chocolate is melted and smooth. Alternatively, you can melt this mixture gently in a double boiler. The butter or coconut oil helps achieve that wonderful gloss and smooth texture, mirroring the Twix bar’s coating.
Step 6: Assemble
Once the cookie cups are completely cool and the caramel has thickened slightly but is still pourable, it’s time for assembly! Spoon about 1-2 teaspoons of the slightly cooled caramel into the center of each cookie cup. Don’t overfill, or it will spill out. Then, generously drizzle or spoon the melted chocolate over the caramel layer, ensuring it covers the caramel completely and creates a lovely topping. You can smooth it out with a small offset spatula or the back of a spoon.
Step 7: Chill
Place the assembled Twix Cookie Cups in the refrigerator for at least 30 minutes, or until the chocolate topping is firm and set. This chilling step allows all the layers to meld together and gives you that satisfying “snap” when you bite into them. Once firm, they are ready to be enjoyed!
Nutritional Information
While these Twix Cookie Cups are a decadent treat, here’s a general estimate of their nutritional value per mini cookie cup. Please note that actual values may vary based on ingredient brands and exact serving sizes.
- Calories: Approximately 150-200 kcal
- Carbohydrates: Approximately 20-25g
- Fat: Approximately 8-12g
- Sugar: Approximately 15-20g
- Protein: Approximately 2-3g
Healthier Alternatives
Looking to make these a little lighter without sacrificing too much flavor? Here are a few ideas:
- Cookie Base: Use whole wheat pastry flour for a slightly less refined base. You could also reduce the sugar slightly in the cookie dough.
- Caramel Center: Experiment with date-based caramel for a natural sweetener. Blend soaked dates with a touch of nut butter and a splash of water until smooth. It won’t be exactly the same, but it offers a lovely caramel-like sweetness.
- Chocolate Topping: Opt for dark chocolate chips (70% cocoa or higher) which contain less sugar and more antioxidants. You can also use a dairy-free chocolate.
- Portion Control: Making them in mini muffin tins is already a great way to manage portion sizes!
Serving Suggestions
These Twix Cookie Cups are fantastic on their own, but they also pair wonderfully with a cup of coffee or tea. For an extra special treat, you can serve them slightly warmed (just a few seconds in the microwave) so the caramel is extra gooey. They make a charming addition to any dessert platter or cookie exchange.
Common Mistakes
To ensure your Twix Cookie Cups turn out perfectly, watch out for these common pitfalls:
- Overmixing the Dough: This develops gluten too much, resulting in tough cookies. Mix until just combined.
- Not Pressing the Cookie Base Deeply Enough: This can lead to the caramel spilling out during baking or cooling. Ensure you create a good “well.”
- Caramel Too Hot or Too Cold: If the caramel is too hot when filling, it may leak. If it’s too cold and stiff, it will be hard to work with. Aim for warm and pourable.
- Chocolate Not Setting: Ensure the cookie cups are fully cooled before adding caramel and chocolate, and let them chill sufficiently to set.
Storing Tips
Store your cooled Twix Cookie Cups in an airtight container at room temperature for up to 2-3 days. If your kitchen is particularly warm, or if you prefer them firmer, they can be stored in the refrigerator for up to a week. They also freeze beautifully! Place them in a single layer on a baking sheet to freeze, then transfer to a freezer-safe bag or container. Thaw at room temperature before enjoying.
Conclusion
There you have it – your very own Twix Cookie Cups, bursting with all the flavors and textures you love from the classic candy bar! These are more than just cookies; they are a little piece of joy, crafted in your own kitchen. Whether you’re a seasoned baker or just starting, these cups are incredibly rewarding to make and even more so to eat. So, gather your ingredients, put on your favorite apron, and dive into this delightful baking adventure. Don’t forget to share your creations – though I wouldn’t blame you if you kept them all to yourself!
FAQs
***Can I use store-bought cookie dough?***
While the recipe provides a delicious homemade base, you can use store-bought sugar cookie dough in a pinch. You’ll need to adapt the shaping to fit the muffin tin cups.
***What kind of caramel works best?***
The recipe uses a homemade caramel made from sweetened condensed milk. While you could try using pre-made soft caramels, they might not have the same smooth, pourable consistency. The homemade version ensures the perfect chewy texture.
***Can I make these gluten-free or dairy-free?***
Yes, with some ingredient swaps! Use a gluten-free flour blend for the cookie base. For dairy-free, use vegan butter, a dairy-free milk alternative for the caramel (though the consistency might change), and dairy-free chocolate chips.
***How do I get the chocolate to look smooth and glossy like a Twix bar?***
Adding a little bit of butter or coconut oil to your melted chocolate, as suggested in the recipe, is key. This helps create a smooth, flowing consistency that sets with a nice shine.
***My caramel is too runny. What did I do wrong?***
This usually happens if the caramel wasn’t cooked long enough to thicken. You can try cooking it a bit longer over low heat, or if it’s already cooled significantly, slightly reheating it may help it bind better. Ensure you’re using sweetened condensed milk, not evaporated milk.
Loved this recipe? Share your Twix Cookie Cup creations with us using #TwixCookieCups and tag us @[YourSocialHandle]!

Twix Cookie Cups
Description
Twix Cookie Cups are the ultimate treat for anyone who loves the iconic candy bar. These bite-sized delights feature a soft and buttery cookie base, a gooey caramel center, and a smooth, glossy chocolate topping. Perfect for parties, gifting, or simply satisfying your sweet tooth, these cookie cups are easy to make and absolutely irresistible!
Ingredients
- 1/2 cupunsalted butter, softened
- 1/4 cupgranulated sugar
- 1/4 cupbrown sugar, packed
- 1 tspvanilla extract
- 1 cupall-purpose flour
- 1/4 tspbaking soda
- 1/8 tspsalt
- 20soft caramels (or1/2 cupcaramel sauce)
- 2 tbspheavy cream (optional, for melting caramels)
- 1/2 cupmilk or dark chocolate, melted
Instructions
- Preheat your oven to 350°F (175°C). Lightly grease a mini muffin tin or line it with paper liners.
- In a large mixing bowl, cream together the softened butter, granulated sugar, and brown sugar until light and fluffy. Add the vanilla extract and mix until combined.
- Gradually add the flour, baking soda, and salt to the butter mixture. Stir until a soft dough forms.
- Scoop about a tablespoon of dough into each mini muffin cup. Press the dough into the bottom and slightly up the sides to create a cup shape.
- Bake for 10-12 minutes, or until the edges are lightly golden. Remove from the oven and immediately press down the centers using the back of a spoon or a small cup. Let cool completely in the tin.
- Melt the caramels with heavy cream (if using) in a microwave-safe bowl or over low heat on the stovetop. Stir until smooth. Fill each cookie cup with caramel, leaving a little space at the top.
- Melt the chocolate in a microwave-safe bowl in 20-second intervals, stirring after each. Spoon melted chocolate over the caramel layer, spreading it to cover the top completely.
- Allow the chocolate to set at room temperature or in the refrigerator. Once firm, gently remove the cookie cups from the tin and serve.
Notes
Storage:Keep at room temperature for up to 3 days, refrigerate for up to a week, or freeze for up to 2 months.
Variations:Add a sprinkle of sea salt for a sweet and salty twist, or substitute dark chocolate for a more intense flavor.
Caramel Tip:If using store-bought caramels, melt them with heavy cream for a smoother consistency.
“`
