Salted Caramel Rice Krispie Treats: Easy & Delicious

Salted Caramel Rice Krispie Treats

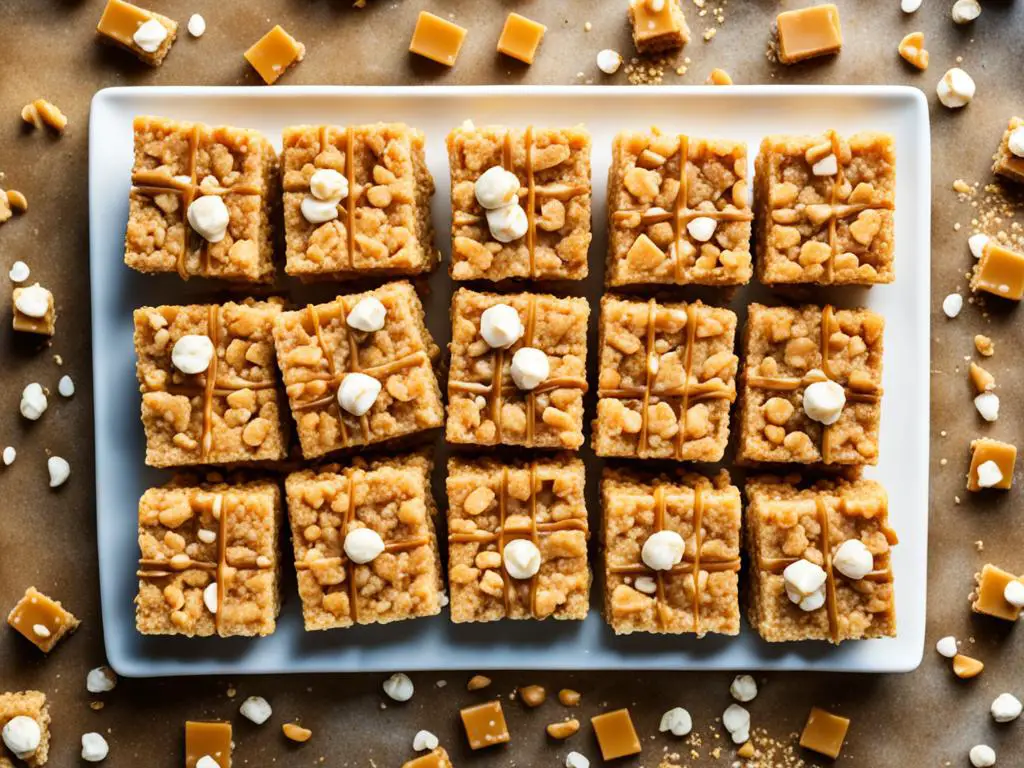
Salted Caramel Rice Krispie Treats mix sweet and salty tastes, making them a hit with dessert lovers. These simple recipes are great for both new and skilled bakers. They’re perfect for parties, gatherings, or as a special lunchbox treat. This guide will walk you through making these tasty treats, including ingredients, steps, and creative ways to serve them.

Key Takeaways

  • Salted Caramel Rice Krispie Treats are a delightful blend of sweet and salty flavors.
  • These treats are classified as easy dessert recipes suitable for all skill levels.
  • The no-bake nature of the recipe makes it a convenient option for quick preparation.
  • They are perfect for various occasions, including parties and snacks for kids.
  • Ingredients and preparation methods will be explored in detail in subsequent sections.

Introduction to Salted Caramel Rice Krispie Treats

Salted Caramel Rice Krispie Treats mix flavors in a perfect way. They are loved by many who enjoy desserts. The mix of salted caramel and the crunchy Rice Krispies is a hit. These treats have a long history, starting in 1939 with Mildred Day’s cookbook.

Over time, adding salted caramel made these treats even better. This change made them more appealing to those who like sweet and salty snacks. The caramel’s creaminess and a touch of sea salt take these treats to a new level.

These treats are both nostalgic and modern. They’re great for any occasion, whether at home, with friends, or at parties. They’re an easy and tasty choice for anyone with a sweet tooth.

Ingredients for Salted Caramel Rice Krispie Treats

Starting with the right ingredients is key to making delicious Salted Caramel Rice Krispie Treats. Using top-quality products boosts the flavor and texture. This part covers the must-have ingredients and some optional add-ins for unique tastes.

Essential Ingredients

  • Rice Krispies cereal
  • Large marshmallows (or 5-6 cups of mini marshmallows)
  • Salted caramel sauce
  • Unsalted butter

The main ingredients for these treats are simple yet effective. Choose a premium butter for a richer flavor. Fresh marshmallows make the treats soft and chewy.

Optional Add-ins for Flavor Variation

  • Chocolate chips (dark or milk chocolate)
  • Nuts (walnuts, pecans, or almonds)
  • Rainbow or chocolate sprinkles
  • Dried fruit (cranberries or raisins)

For a twist, try adding chocolate chips or nuts. These add new textures and tastes. Get creative and add your favorite sweets to make them your own.

Salted Caramel Rice Krispie Treats ingredients

Step-by-Step Recipe for Rice Krispie Treats

Making Salted Caramel Rice Krispie Treats is easy and fun. This Rice Krispie Treats recipe guide will walk you through each step. It’s a great way to spend time in the kitchen and enjoy delicious results.

Preparation Steps

First, collect all the ingredients you need for the Rice Krispie Treats. You’ll need:

  • 3 tablespoons of unsalted butter
  • 1 package (10 oz) of mini marshmallows
  • 6 cups of Rice Krispies cereal

Before you start, grease a 9×13 inch pan with butter or non-stick spray. This makes it easy to take the treats out later without them breaking.

Melting Process & Temperature Tips

Now, it’s time to melt the butter and marshmallows. Put them in a big pot over low heat and stir constantly. This should take about 5 minutes.

When the mix is smooth and well combined, take it off the heat. Slowly add the Rice Krispies cereal, stirring until everything is coated. This step turns simple ingredients into a treat everyone loves!

By following these preparation tips, you’ll get Rice Krispie Treats that are perfect. Be patient while melting, and you’ll end up with a dessert that’s irresistible.

Perfecting the Salted Caramel Flavor

Getting the perfect salted caramel can make Rice Krispie Treats taste amazing. It’s all about understanding how caramel forms, knowing the right temperatures, and picking the right sea salt.

Making Homemade Salted Caramel

To make homemade salted caramel, you need sugar, butter, and cream. Begin by mixing sugar and a bit of water in a saucepan over medium heat. Keep stirring until the sugar melts, then let it boil without stirring.

Watch as the sugar turns into a golden color. Take it off the heat before it gets too dark. This means it’s overcooked. After removing it from the heat, add butter and heavy cream, mixing well. For the best taste, add a bit of sea salt to your liking.

Choosing the Right Sea Salt

Choosing the right sea salt is crucial for great flavor in salted caramel. Flaky salts like Maldon or Fleur de Sel add a nice texture and flavor. Kosher salt, on the other hand, gives a subtle saltiness without being too sweet. Each type changes the taste, so think about what you want your treat to taste like.

homemade salted caramel

Serving Suggestions and Presentation Ideas

When it comes to Salted Caramel Rice Krispie Treats, getting creative with serving and presentation can make them stand out. These tasty snacks can become a feast for the eyes with a little creativity. Here are some ideas to wow your guests.

Creative Ways to Serve Treats

Here are some ways to make these treats look great:

  • Cut the treats into fun shapes using cookie cutters for special occasions.
  • Drizzle extra caramel sauce or melted chocolate on top for an indulgent touch.
  • Sprinkle some sea salt lightly over the caramel drizzle for a gourmet appearance.
  • Pair them with fresh fruit such as strawberries or bananas for added freshness.
  • Arrange the treats on a decorative platter for a beautiful display at parties.

Packaging for Gifts and Parties

For gifting or showing off these treats at events, how you package them matters a lot. Here are some ideas:

  • Use clear cellophane bags tied with colorful ribbons for a homemade touch.
  • Decorative boxes with themed labels can enhance the presentation at special events.
  • Consider small mason jars to present individually wrapped treats, creating a charming gift option.
  • Label the packages with a personal message or the occasion to add a heartfelt element.

Storage Tips for Optimal Freshness

Storing Rice Krispie Treats right keeps them tasting great and feeling soft for longer. Use airtight containers to keep air and moisture out. Wrap them in plastic wrap first for extra protection against drying out.

Room temperature is best for storing desserts like these. Keep them in a cool, dry spot out of the sun. If you need to keep them longer, freezing is a good choice. Just make sure they’re well-wrapped in freezer-safe bags or containers.

Following these tips will make enjoying Salted Caramel Rice Krispie Treats even better. You can enjoy them anytime, days after making them!

Conclusion

Salted Caramel Rice Krispie Treats are a mix of tasty flavors that are easy to make at home. They show how simple it is to whip up a homemade dessert. You can also get creative with flavors and how you present them.

These treats are perfect for any event or just a quick snack. They bring happiness to any moment.

Playing with different flavors can make these treats even better. You can add sprinkles or try out various chocolates. This lets you make your own special version of Salted Caramel Rice Krispie Treats. It’s a fun way to get creative in the kitchen.

Baking these treats is all about joy, laughter, and making something sweet. It’s a great way to add something special to any dessert table. So, why not give it a try? You’ll likely make these a favorite in your household.

FAQ

What are Salted Caramel Rice Krispie Treats?

Salted Caramel Rice Krispie Treats are a simple dessert. They mix the classic Rice Krispie Treat flavors with sweet and salty caramel. These treats are perfect for parties, gatherings, or as a snack for lunchboxes.

Can I customize the ingredients in Salted Caramel Rice Krispie Treats?

Yes, you can! The basic ingredients are Rice Krispies, marshmallows, butter, and salted caramel sauce. You can add chocolate chips, nuts, or sprinkles for more taste and texture. This lets you get creative with your treats!

How do I store Salted Caramel Rice Krispie Treats to keep them fresh?

Store them in an airtight container or wrap them in plastic wrap. It’s best to keep them at room temperature. Refrigerating them might change their texture.

What’s the best way to serve Salted Caramel Rice Krispie Treats?

You can cut them into fun shapes, add more caramel on top, or coat them in chocolate. For special events, try themed presentations to make them look even better.

Can I make my own salted caramel for the treats?

Absolutely! Making your own salted caramel is easy. You’ll need sugar, butter, cream, and sea salt. Just follow a good recipe to get the caramel right for the best taste.

What should I consider when choosing sea salt for my treats?

The type of sea salt matters a lot. Flaky sea salt can make the caramel taste even better. Kosher salt gives a different texture and flavor. Pick what you like best!

Easy Apple Cheesecake Tacos Recipe | Sweet Treats

Are you ready to take your dessert game to the next level with a fun twist? Introducing Apple Cheesecake Tacos, a delightful fusion that combines the creamy goodness of cheesecake with the juicy sweetness of apples, all wrapped up in a playful taco shell. This recipe offers a fantastic solution for anyone searching for easy dessert recipes that don’t skimp on flavor or excitement. Perfect for both novice bakers and seasoned pros, these no-bake dessert tacos promise to be a hit at any gathering or as a cozy treat at home!

Key Takeaways

  • Apple Cheesecake Tacos are a fun and innovative dessert.
  • Easy to make, perfect for novice and experienced bakers alike.
  • Combines creamy cheesecake and sweet apple flavors.
  • No baking required, making it a convenient option.
  • Great for parties and casual gatherings.
  • Can be customized with various fruits and cheesecake flavors.

Introduction to Apple Cheesecake Tacos

The delightful Apple Cheesecake Tacos represent an exciting evolution in the world of dessert tacos. This unique dish combines the creamy richness of cheesecake with the sweet and tart flavors of apple pie, creating a tempting experience for dessert lovers. Rooted in the concept of fusion desserts, this recipe offers a wonderful twist on classic flavors, appealing to both traditional and adventurous palates.

Not only does this taco recipe cater to those with a sweet tooth, but it also serves as a playful alternative for various occasions. Whether hosting a casual family dinner or a festive gathering, these dessert tacos invite creativity and personalization. Guests will appreciate the novelty of this dish while savoring the familiar comfort of familiar flavors combined in an unexpected format.

With Apple Cheesecake Tacos, the possibilities are endless. This versatile dessert can be adapted for different gatherings, making it an ideal choice for anyone looking to surprise friends and family with a unique and delightful treat.

Why You’ll Love This Recipe

Apple Cheesecake Tacos offer a delightful twist on traditional desserts, making them a standout choice for any occasion. The benefits of Apple Cheesecake Tacos include their perfect blend of sweet and tangy flavors, making them an appetizing treat for both kids and adults. This easy dessert recipe simplifies the cheesecake-making process while enhancing the fun factor by putting the filling into a taco shell.

Incorporating various flavor combinations, these tacos can be easily customized to suit individual tastes. Want something extra? Try adding caramel or nuts to elevate your dessert’s profile. This versatility makes Apple Cheesecake Tacos an excellent choice for family-friendly desserts, catering to diverse preferences and dietary needs.

“Every bite is a perfect balance of creamy cheesecake, crunchy shell, and fruity delight.”

Creating this dish becomes a fun family activity, allowing everyone to participate in the cooking process. Serve them at a birthday party, a holiday gathering, or simply as a treat to enjoy at home. Once you try Apple Cheesecake Tacos, they will likely become a staple in your dessert rotation.

Ingredients for Apple Cheesecake Tacos

Crafting the perfect Apple Cheesecake Tacos starts with selecting the right ingredients. Understanding the Essential Ingredients and Optional Enhancements can help elevate this delightful dessert, making it a true crowd-pleaser. Here’s what you’ll need:

Essential Ingredients

The Apple Cheesecake Ingredients are crucial for achieving a creamy filling and a balanced flavor in your dessert tacos. Below is a list of the required components:

  • Cream Cheese – provides the rich base for the cheesecake filling.
  • Sugar – sweetens the mixture to perfection.
  • Apples – the star ingredient, adds freshness and flavor.
  • Taco Shells – the foundation for your dessert tacos.
  • Cinnamon – enhances the flavor profile with warm notes.

Optional Enhancements

Taking your dessert to the next level can be achieved with some creative Enhancements for Dessert Tacos. Consider adding:

  • Chopped Nuts – walnuts or pecans add a delightful crunch.
  • Caramel Sauce – drizzling this on top can intensify the sweetness.
  • Whipped Cream – for a light, fluffy texture.
  • Various Spices – nutmeg or ginger for an extra flavor boost.
Ingredient TypeDescriptionPurpose
Required IngredientsCream cheese, sugar, apples, taco shells, cinnamonForm the base and flavor of the cheesecake tacos.
Optional IngredientsChopped nuts, caramel sauce, whipped cream, various spicesAdd texture and create a personal touch.

Feel free to experiment with different Flavor Boosters to make this recipe your own, ensuring that your Apple Cheesecake Tacos delight every palate at your gathering.

Step-by-Step Instructions

Creating delicious Apple Cheesecake Tacos involves several straightforward steps that ensure delightful flavors in every bite. Follow these detailed instructions to achieve the perfect dessert.

Preparing the Cheesecake Filling

To learn how to make cheesecake filling, start by gathering your essential ingredients: cream cheese, sugar, vanilla extract, and heavy cream. Using a hand mixer, blend the cream cheese and sugar until completely smooth. Pay attention to the mixture’s consistency, as the goal is to achieve a light and fluffy texture.

Incorporate the vanilla extract and heavy cream, mixing thoroughly to combine. These cheesecake preparation steps are key to getting a light, creamy feel suitable for any simple cheesecake recipe.

Making the Apple Topping

To prepare a delightful apple topping, select your preferred cooking apples for optimal flavor. Begin by peeling, coring, and slicing the apples. In a skillet, add the apple slices along with sugar and cinnamon. This apple topping recipe is perfect for creating a warm, sweet blend.

Sauté the apples over medium heat, stirring occasionally until they soften and caramelize. This process not only draws out their natural sweetness but also allows you to create a rich apple dessert sauce that pairs beautifully with the cheesecake filling.

Assembling the Tacos

Now that the filling and topping are ready, it’s time to assemble the tacos. First, take your taco shells and fill them generously with the cheesecake mixture. Use the taco assembly instructions to evenly distribute the filling in each shell, ensuring each bite is packed with flavor.

Top each taco with the warm apple mixture and drizzle the apple dessert sauce for added flair. For an appealing presentation, consider garnishing with a sprinkle of cinnamon or a dollop of whipped cream. These steps ensure your Apple Cheesecake Tacos look as delightful as they taste!

Tips and Tricks for Perfect Tacos

Crafting delicious Apple Cheesecake Tacos requires some finesse. Here are essential Dessert Taco Tips that will enhance your Cheesecake Taco Success.

  • Selecting the Right Taco Shells: Consider using soft tortillas for a more traditional flair or hard shells for added crunch. Soft shells better absorb flavors, while hard shells offer a delightful texture.
  • Layering Flavors: For a more balanced taste, layer the cheesecake filling first, followed by the apple topping. This method allows the sweetness of the apples to complement the creamy filling.
  • Storage Precautions: Keep your taco shells and filling separated until ready to serve. This approach ensures that the shells remain crisp and do not become soggy.
  • Common Pitfalls: Avoid overstuffing your tacos. Too much filling can lead to messy results and an unbalanced taste. Stick to a moderate amount for optimal enjoyment.

Implementing these Cooking Tips can elevate your Apple Cheesecake Tacos from good to great. Enjoy the journey of creating this unique dessert!

TipsDetails
Selecting the Right Taco ShellsChoose soft or hard based on texture preference
Layering FlavorsFill with cheesecake first, add apple topping
Storage PrecautionsStore shells and fillings separately to maintain crispness
Common PitfallsAvoid overstuffing for better balance

Variations of Apple Cheesecake Tacos

Exploring different variations can elevate the experience of Apple Cheesecake Tacos while allowing for personal preferences and seasonal ingredients. Readers can experiment with various fruit choices and cheesecakes to create Customized Cheesecake Tacos that delight the senses.

Different Fruit Options

Several fruit variations for tacos offer unique flavor profiles. Consider these delectable alternatives:

  • Berry Cheesecake Tacos: Fresh strawberries, blueberries, or raspberries bring a tartness that pairs beautifully with creamy cheesecake.
  • Peach: Sweet, juicy peaches can replace apples for a summertime treat.
  • Pear: The subtle sweetness of pears introduces a delicate flavor, perfect alongside rich cheesecake.

Alternative Cheesecake Flavors

Who says cheesecake must always be traditional? Discovering cheesecake flavor variations can make a simple recipe extraordinary. Here are some unique cheesecake options:

  1. Chocolate: Rich chocolate cheesecake adds depth and decadence.
  2. Pumpkin: A seasonal favorite, pumpkin cheesecake gives a warm, spiced flavor.
  3. Strawberry: Fruity and fresh, strawberry cheesecake offers a refreshing twist.

These flavor mixes enhance the versatility of cheesecake tacos, ensuring exciting and memorable desserts each time they are made.

Serving Suggestions

When it comes to how to serve Apple Cheesecake Tacos, presentation plays a crucial role in impressing your guests. Begin by considering portion sizes; serving one or two tacos per plate is ideal, as it allows room for creative garnishes.

Enhance the visual appeal with the following presentation ideas:

  • Drizzle warm caramel or chocolate sauce over the tacos for an indulgent touch.
  • Add a dollop of whipped cream on top, paired with fresh mint leaves for a pop of color.
  • Sprinkle some crushed graham crackers or nuts around the plate to add texture.

To round out the experience, pair these delicious tacos with a suitable beverage. Consider serving:

BeverageDescription
CiderA crisp apple cider complements the flavors of the cheesecake and apples.
Sweet TeaClassic sweet tea can provide a refreshing contrast to the richness of the dish.
Chocolate MilkA fun option, especially for kids, combining sweetness with nostalgia.

Using these dessert serving tips will not only elevate your Apple Cheesecake Tacos but also provide an unforgettable dining experience for all your guests.

Storing and Reheating Your Tacos

Properly storing dessert tacos is crucial to preserving their delectable taste and texture. After enjoying your Apple Cheesecake Tacos, consider these food storage guidelines to keep them fresh for later enjoyment.

  • Allow the tacos to cool completely before storing them.
  • Use an airtight container to prevent moisture loss and maintain flavor.
  • For best results, separate the taco shells from the filling if possible.
  • Store in the refrigerator for up to three days.
  • For long-term storage, consider freezing the individual components.

If you have frozen your tacos or want to enjoy leftovers, follow these reheating tips:

  1. For tacos stored in the refrigerator, reheat them in the microwave for about 30 seconds to 1 minute, checking periodically.
  2. If using a frozen taco, thaw it in the refrigerator overnight before reheating.
  3. Reheat in an oven at 350°F (175°C) for about 10-15 minutes for equally crispy results.
  4. Avoid overheating, as this may lead to a soggy texture.

By following these tips, enjoying your Apple Cheesecake Tacos days or weeks later will be just as delightful as the day they were made. Keeping in mind the right food storage guidelines can enhance your dessert experience considerably.

Storage MethodDurationTemperature
RefrigeratorUp to 3 daysBelow 40°F (4°C)
Freezer (components separated)Up to 3 monthsBeneath 0°F (-18°C)
Reheat in Microwave1 minuteMedium heat
Reheat in Oven10-15 minutes350°F (175°C)

Conclusion

In summary, Apple Cheesecake Tacos offer a delightful combination of flavors and textures that make them a standout dessert option. This dessert recipe recap emphasizes the simplicity of preparation, requiring minimal effort while providing maximum satisfaction. With creamy cheesecake filling paired with a sweet apple topping, these tacos are sure to impress at any gathering.

One of the best aspects of this recipe is its versatility. You can easily adapt it to suit your preferences, whether through different fruit options or alternative cheesecake flavors. Final thoughts on Apple Cheesecake Tacos highlight how they cater to various tastes, making them an excellent choice for both casual and special occasions.

So, why not give this creative twist on a classic dessert a try? Enjoying Dessert Tacos can become a cherished part of your dessert repertoire. We encourage you to experiment with the recipe and share your experiences or any unique variations you come up with, building a community of dessert enthusiasts around these delicious tacos!

FAQ

What are Apple Cheesecake Tacos?

Apple Cheesecake Tacos are a unique dessert that combines the classic flavors of apple pie and creamy cheesecake, all wrapped in a taco shell. They make for a fun and delicious twist on traditional desserts!

Are Apple Cheesecake Tacos easy to make?

Absolutely! This recipe is designed to be simple, making it perfect for both beginner and experienced bakers. It requires minimal preparation time and ingredients, allowing you to create a delightful dessert with ease.

Can I customize the fillings for my Apple Cheesecake Tacos?

Yes! One of the best features of Apple Cheesecake Tacos is their versatility. You can easily customize them by using different fruits, flavored cheesecake fillings, or additional toppings like caramel or nuts.

How should I store leftover Apple Cheesecake Tacos?

To keep your Apple Cheesecake Tacos fresh, store them in an airtight container in the refrigerator. For optimal taste and texture, consume them within a few days. If you have leftover apple topping, store that separately.

Can I use other types of fruit in this recipe?

Definitely! You can substitute apples with other fruits like berries, peaches, or pears. Feel free to experiment with different fruit options to create your own unique flavor combinations!

What are some serving suggestions for Apple Cheesecake Tacos?

Serve these delightful tacos with a dollop of whipped cream, a sprinkle of cinnamon, or fresh mint leaves for added flair. Pair them with a warm beverage for the perfect dessert experience!

Do I need any special equipment to make Apple Cheesecake Tacos?

No special equipment is required! Standard kitchen tools like mixing bowls, a whisk, and measuring cups will be enough to create this delicious dessert.

Mini Pineapple Coconut Milk Cheesecakes Recipe

Welcome to the tropical paradise of dessert with our Mini Pineapple Coconut Milk Cheesecakes! These delightful little treats combine the luscious flavors of pineapple and the creamy goodness of coconut milk, creating a truly unforgettable experience. Perfect for any gathering or simply as a sweet indulgence, this easy cheesecake recipe is sure to impress. Whether you’re a fan of pineapple desserts or just looking to try something new, this recipe is designed to be simple and enjoyable for everyone. Get ready to explore a tropical twist on classic cheesecakes that will leave your taste buds dancing!

Key Takeaways

  • Mini Pineapple Coconut Milk Cheesecakes offer a tropical flavor sensation.
  • An easy cheesecake recipe suitable for any occasion.
  • Coconut milk enhances the creaminess while keeping it dairy-free.
  • Versatile enough to accommodate various toppings and flavors.
  • A perfect addition to pineapple desserts lovers’ repertoire.

Introduction to Mini Pineapple Coconut Milk Cheesecakes

Mini cheesecakes offer a delightful twist on the classic dessert, making them ideal for both casual gatherings and elegant events. In this dessert introduction, we explore the vibrant world of tropical cheesecake, shining a spotlight on the refreshing combination of pineapple and coconut flavor. These mini versions are not only visually appealing but also provide a perfect portion for anyone craving something sweet.

The origins of cheesecake date back to ancient Greece, where it was enjoyed as a special treat. Over the years, this beloved dessert has evolved into numerous styles, with mini cheesecakes gaining popularity for their convenience. Each little bite of a mini cheesecake bursts with flavor, creating a memorable experience for dessert lovers.

This recipe highlights the richness of coconut flavor combined with the zesty essence of pineapple dessert, capturing the essence of a tropical paradise. Perfect for picnics, birthdays, or a cozy family dinner, these mini pineapple coconut milk cheesecakes will surely become a favorite in your dessert repertoire.

Ingredients for the Cheesecakes

To create delightful mini cheesecakes, knowing the right cheesecake ingredients is essential. This section outlines the key components that will bring freshness and flavor to your dessert. Each ingredient plays a crucial role in achieving a creamy texture and a vibrant tropical flavor.

Essential Ingredients

  • Cream Cheese: Provides the rich, creamy base for the cheesecake.
  • Coconut Milk: Adds a subtle tropical flair and enhances the creamy texture.
  • Pineapple Chunks: Offers sweetness and a refreshing taste.
  • Sugar: Balances the flavors for that perfect sweetness.
  • Graham Cracker Crust: Forms a delicious base that complements the cheesecake filling.

These five basic ingredients come together beautifully in this mini cheesecake recipe, making it a perfect treat for any occasion.

Optional Toppings for Extra Flavor

To elevate these mini cheesecakes, consider adding some optional toppings. These toppings not only enhance the taste but also make the dessert visually appealing.

  • Toasted Coconut Flakes: Adds texture and an extra coconut flavor.
  • Fresh Pineapple Slices: Provides a burst of freshness on top.
  • Whipped Cream: A classic topping that adds lightness and creaminess.
  • Drizzle of Caramel: Introduces a sweet richness to each bite.

Experimenting with these toppings allows for personalized creations, making each mini cheesecake unique and tasty.

Step-by-Step Instructions for Preparation

Creating delightful mini pineapple coconut milk cheesecakes involves precise steps for both crust and filling. Follow along for the essential cheesecake crust recipe and filling creation to ensure a scrumptious dessert that everyone will love.

Preparing the Crust

The base of your cheesecake relies on a well-made graham cracker crust. Start by gathering your ingredients: graham crackers, sugar, and melted butter. Here’s how to get the perfect crust:

  1. Preheat your oven to 350°F (175°C).
  2. Crush the graham crackers into fine crumbs using a food processor or a zip-top bag and rolling pin.
  3. In a large bowl, combine the graham cracker crumbs with sugar and melted butter until the mixture resembles wet sand.
  4. Press the mixture firmly into the bottom of your mini cheesecake pans to create a sturdy base.
  5. Bake the crust for 5 to 7 minutes, ensuring it holds together well.

Making the Cheesecake Filling

Next, focus on your creamy cheesecake filling. This step is crucial to achieve that rich texture. Follow this cheesecake filling recipe:

  1. In a mixing bowl, beat together softened cream cheese and sugar until smooth.
  2. Add in coconut milk and diced pineapple, mixing until fully incorporated.
  3. Make sure to beat until the filling is creamy, with no lumps.
  4. Once ready, spoon the filling over the cooled graham cracker crust.

Assembly and Baking Instructions

Now comes the final part of dessert preparation. Assemble your mini cheesecakes for baking:

  1. Carefully pour the cheesecake filling over the prepped graham cracker crust, ensuring it fills to the top of each pan.
  2. Bake in your preheated oven at 325°F (160°C) for about 15 to 20 minutes, or until the filling sets but still has a slight jiggle in the center.
  3. After baking, allow the cheesecakes to cool at room temperature before refrigerating for at least 4 hours, or overnight for best results.

With these steps, your mini pineapples coconut milk cheesecakes will turn out perfectly every time!

Mini Pineapple Condensed Coconut Milk Cheesecakes

Transform your dessert offerings with mini cheesecakes variation that features condensed coconut milk. This ingredient not only adds a delightful sweetness but also enhances the creaminess of the cheesecake filling, creating a truly rich tropical dessert.

To make this luscious variation, simply replace some of the cream cheese with an equal amount of condensed coconut milk. This addition will bring a velvety texture that pairs beautifully with the tangy pineapple. For a balanced flavor, consider adding a touch of vanilla extract to complement the tropical notes.

When preparing your mini cheesecakes, ensure to mix the plus ingredients thoroughly until smooth. This helps achieve that desired creamy consistency. Bake them just as you would the original recipe, allowing the flavors to meld while they set. Trust that this mini cheesecakes variation will leave your guests craving more.

Tropical Flavor Variations

Exploring tropical flavor variations can add excitement to the well-loved mini cheesecake recipe. Utilizing different fruits offers a chance to enhance cheesecake flavors. Try integrating distinct fruit variations for a unique twist on this delectable dessert.

Using Different Fruits

Substituting pineapple with other fruits can transform the overall flavor profile. Consider these flavorful options:

  • Mango: Offers a sweet and creamy consistency that complements the coconut milk.
  • Kiwi: Brings a tangy zest, creating a refreshing contrast to the sweetness.
  • Berries: Such as strawberries, blueberries, or raspberries, which create a vibrant visual appeal and tangy flavor.

Experimenting with these tropical dessert ideas allows for creativity in the kitchen. Each fruit introduces its unique characteristics, enhancing the cheesecakes with fresh flavors.

Incorporating Spices

Adding spices to the cheesecake mixture can elevate the dessert experience. Simple spices can introduce an unexpected layer of flavor:

  • Cinnamon: Infuses warmth and a hint of sweetness, perfect for a cozy touch.
  • Nutmeg: Offers a fragrant, earthy note that pairs beautifully with tropical ingredients.

By introducing these spice variations, the filling reaches a new dimension, captivating the taste buds while complementing the fruity essence. Explore these flavor enhancements to discover the perfect combination for your tropical cheesecakes.

Fruit VariationFlavor ProfilePairing Suggestions
MangoSweet, creamyCoconut, lime
KiwiTangy, refreshingMint, passionfruit
BerriesTart, sweetVanilla, chocolate
CinnamonWarm, sweetApples, oats
NutmegEarthy, fragrantGinger, cloves

Health Benefits of Coconut Milk

Coconut milk offers a range of health benefits, making it an excellent choice for various recipes, including desserts like mini pineapple cheesecakes. One notable advantage is its content of healthy fats, particularly medium-chain triglycerides (MCTs). These fats can provide a quick source of energy and may aid in weight management.

The nutritional value of coconut milk is another reason for its popularity. Unlike traditional dairy products, coconut milk contains lower levels of lactose, which provides a suitable alternative for those who are lactose-sensitive. This quality makes it a versatile ingredient for many culinary creations without sacrificing taste.

Furthermore, coconut milk uses go beyond desserts. It can enhance smoothies, soups, and sauces, providing a creamy texture and rich flavor. By incorporating it into your diet, you may reap the multiple health benefits of coconut milk, enjoying both its taste and nutritional profile.

Storage Tips for Leftover Cheesecakes

Knowing the best methods for cheesecakes storage ensures that your mini pineapple coconut milk cheesecakes maintain their delicious flavor and texture even after a day or two. Utilize these leftover dessert tips to extend the life of your delectable treats and minimize waste. Proper food storage is essential for maintaining the creamy goodness that these cheesecakes offer.

  • Refrigeration: Store your cheesecakes in an airtight container or wrap them tightly with plastic wrap. This will prevent them from absorbing odors from other foods in the fridge. They can last up to five days when properly stored.
  • Freezing: If you want to keep your cheesecakes for a longer period, consider freezing them. Wrap each cheesecake individually in plastic wrap, then place them in a freezer-safe container or a resealable freezer bag. They can remain frozen for up to two months.
  • Thawing: For the best texture, thaw frozen cheesecakes in the refrigerator overnight rather than at room temperature. This method preserves the natural creaminess.
  • Labeling: Use labels to note the date of storage on your containers. This will help you keep track of freshness and avoid eating cheesecakes that have been stored for too long.
  • Avoiding Moisture: Always ensure your leftovers are completely cooled before sealing them. Moisture can create ice crystals during freezing, which affects the cheesecake’s texture when thawed.

With these effective leftover dessert tips, you can enjoy your cheesecakes without fear of spoilage. Remember that a little care goes a long way in ensuring each bite is as delightful as the first.

Storage MethodDurationBest Practices
RefrigerationUp to 5 daysAirtight container or wrapped tightly
FreezingUp to 2 monthsWrap individually, use freezer-safe containers
ThawingOvernight in fridgePrevent texture loss

Serving Suggestions and Pairings

When it comes to enhancing your mini pineapple coconut milk cheesecakes, the right serving suggestions can elevate your dessert experience to new heights. These delightful treats are not just a feast for the taste buds but also for the eyes. Consider serving them on a vibrant platter adorned with fresh tropical fruits like mangoes, strawberries, or kiwis. This not only adds a splash of color but also complements the cheesecakes’ flavor profile beautifully.

Best Accompaniments for Mini Cheesecakes

For an extra touch of indulgence, pairing your cheesecakes with a scoop of tropical sorbet can create a refreshing contrast. The creamy texture of the cheesecake against the fruity chill of the sorbet enhances the overall dessert experience. Additionally, a light dessert wine, such as a late-harvest Moscato or a sparkling Riesling, makes for an exquisite pairing, perfectly balancing the sweetness of the cheesecake while adding a touch of elegance to your serving suggestions.

Moreover, consider using creative garnishes like toasted coconut flakes or a drizzle of passion fruit puree. These dessert accompaniments not only enhance the flavors but also make the presentation visually appealing. With these innovative cheesecake pairings and garnishes, your mini pineapples coconut milk cheesecakes will surely impress your guests and become a memorable meal finale.

FAQ

What do I need to make Mini Pineapple Coconut Milk Cheesecakes?

To make Mini Pineapple Coconut Milk Cheesecakes, you’ll need cream cheese, coconut milk, pineapple chunks, sugar, graham crackers for the crust, and optional toppings like toasted coconut or whipped cream. This tropical dessert is easy to prepare and perfect for any occasion!

How do I store leftover Mini Cheesecakes?

Store your leftover Mini Pineapple Coconut Milk Cheesecakes in an airtight container in the refrigerator for up to five days. For longer storage, you can freeze them, just ensure they are well wrapped to prevent freezer burn. Proper food storage keeps your dessert fresh and delicious!

Can I use different fruits in this recipe?

Absolutely! You can experiment with other fruits like mango, kiwi, or berries to create new flavors. Just remember to adjust the sweetness depending on the fruit’s natural sugar content. This will enhance your tropical dessert experience!

What are the health benefits of coconut milk in desserts?

Coconut milk offers several health benefits, including healthy fats, lower lactose levels, and a creamy texture that makes it a great dairy alternative. It’s suitable for those who are lactose-sensitive and adds a delightful flavor to your mini cheesecakes.

How can I enhance the flavor of my Mini Cheesecakes?

You can enhance the flavor by incorporating spices like cinnamon or nutmeg into the filling. Additionally, experimenting with topping options, such as fresh pineapple slices or a drizzle of caramel, can elevate the overall taste and presentation of your cupcakes.

Can I make these cheesecakes dairy-free?

Yes! By using dairy-free cream cheese and coconut milk, you can create a delicious and creamy dairy-free version of Mini Pineapple Coconut Milk Cheesecakes. It’s a fantastic option for those following a vegan or lactose-free diet!

How long do I bake the Mini Pineapple Coconut Milk Cheesecakes?

Generally, you should bake the cheesecakes at 325°F (165°C) for about 20-25 minutes. Keep an eye on them to ensure they are set but still slightly jiggly in the center; they will continue to firm up as they cool.

Are there any variations of this cheesecake recipe?

Yes! You can create variations by using condensed coconut milk for added richness or by trying different fruits and spices to create unique flavor profiles. Shake things up and have fun experimenting with your tropical desserts!